

Page 1

ICS Regent
®
PD-6042
Historian Package for W
Sequence of Events and Process Historian
The Historian package for WINTERPRET
package which allows the user to create Sequence of Events
and Process Historian function blocks for Regent application
programs. When installed on the PC, the historian package is
seamlessly integrated with the base WINTERPRET
Sequence of Events function blocks are used to record time
stamped process events which can be any discrete input or
output point or any shared or system control relay of a Regent
system. Proces
the values of analog inputs or other word type data at defined
sampling intervals.
s Historian function blocks are used to record
INTERPRET
Function Blocks
(T3832)
Issue 1,
is an add-in software
March, 06
software.
For both types of function blocks the recorded information is
saved in the Regent’s memory and retrieved by using
W
INTERPRET to monitor and collect the recorded information.
The retrieved information is saved to the disk in the form of
ASCII log files which can be printed for detailed analysis of
critical process operations.
Software Installation
The Historian package is installed on the PC running the
W
INTERPRET
package provides the necessary installation software to install
this add-in historian package. The historian package should
be installed at the same time or after you have installed the
W
INTERPRET
Industrial Control Services
1
application software. The W
base package.
INTERPRET
base
Page 2

Historian Package for W
Important!
INTERPRET
(T3832)
Installation Procedure
The files on the Historian package diskette are in compressed
form. You cannot simply copy the files to your hard drive —
they must be decompressed before they will run. You must
have the WINTERPRET base package distribution disk in order
to run the setup procedure to install the Historian package.
To install the Historian package, use the following sequence:
1. Insert the WINTERPRET base package distribution disk into
drive A: or B:
2. Start Windows (if it isn’t already running).
3. Choose Run from the Program Manager’s File menu.
4. Type a:\
W
INTERPRET base package disk in drive B: type
b:\setup.exe
5. In the WINTERPRET Setup dialog box enter the name of the
directory in which you have installed the WINTERPRET
base package (This assumes that you have already
installed WINTERPRET). Choose Continue.
setup.exe
.) Choose OK or press ENTER.
in the text box. (if you inserted the
6. In the WINTERPRET Installation dialog box check the
Historian package box.
7. Choose OK to have the setup program install the Historian
package software.
When the installation is completed, you can run the
W
INTERPRET application and create Sequence of Events and
Process Historian function blocks in you application
programs.
Working with Historical Function Blocks
The Sequence of Events and Process Historian function blocks
are created as part of an application program which may also
contain other types of function blocks. A single application
program is made up of as many as 50 function blocks of any
type or combination.
When you installed the Historian package, additional
software was added to W
INTERPRET
to allow you to work with
2
Industrial Control Services
Page 3

Historian Package for
W
INTERPRET
(T3832)
Sequence of Events and Process Historian function blocks.
With this
additional software you can create historian
function blocks by opening a project, opening a program and
opening (or creating) a function block.
For an overview about Regent application programs and
function blocks and how to create them using WINTERPRET
,
refer to Section 5, Working with Programs and Function
Blocks in the Regent User’s Guide.
Sequence of Events Function Blocks
Sequence of events function blocks let you record changes of
state in discrete I/O points and shared control relays. Using
thes
e function blocks you can define a set of I/O points and
shared variables for which changes are to be monitored and
recorded. The points that you configure for SOE recording are
called Event Entries. The record of these events is stored in
the Regent's memory. After events are recorded, WINTERPRET
can read them from the Regent, save them, and print them.
Each sequence of events function block has a Start contact to
define when event recording is to begin and end, a Clear
contact to define when the event
buffer is to be cleared, and a
size value to define the size of the event buffer. There is also a
Count register for monitoring the amount of the event buffer
currently filled.
The event entries for a sequence of events function block must
be discrete I/O points or shared control relays (including
system control relays).
PD-6042
March, 06
When an application program containing a Sequence of
Events function block is loaded and running, and the SOE
Start contact is on, the events configured are monitored for
state changes. When an event changes state, an entry is
made in the SOE buffer which records the time stamp, and the
status (on/off) of the event. As subsequent events occur,
additional entries are stored in the SOE buffer. When the
SOE buffer is full, new events overwrite the oldest events in
the SOE buffer.
3
Page 4

Historian Package for W
INTERPRET
(T3832)
Process Historian Function Blocks
Process historian function blocks let the Regent record and
time stamp the values of selected process variables. In a
typical application, the process historian begins recordi
when a start signal occurs. At periodic intervals, it records
time stamps and values into a historical buffer in the Regent.
When this historical buffer is full, recording continues by
overwriting the oldest time stamps and values in the list.
Because the recording mode of the process historian is
controlled by a start bit within the Regent, process historian
can be used to capture selected process variable information
during critical process control, alarm or interlock conditions.
This historical recording can be performed at high speed
(maximum once per scan) within the Regent. The data can be
retrieved by monitoring the process historian function block
using W
historical data is saved to a Log file which can be viewed,
printed, or analyzed using database, spreadsheet or other
third party analysis software.
INTERPRET. When retrieved from the Regent the
ng
Process historian function blocks can be included in programs
containing other types of function blocks (such as ladder logic,
continuous control, floating point math, analog scaling, ASCII
output, and sequence of events).
Users of the process historian function blocks discover
operating details of their processes that they had never before
observed or recorded. Their analysis of this data leads to more
accurate definition of the process safety interlocks which can
result in fewer nuisance trips.
Monitoring and Collecting Historical Data From the Regent
The Regent is capable of buffering historical data in its
memory without requiring any external communications
equipment connected (like a PC running WINTERPRET
function stores the information in the allocated historian
buffers for each function block. To retrieve the information
from the internal memory buffers, you can use WINTERPRET
monitor and collect the historical buffers and save the
information as Log files in ASCII text file form on the PC.
). This
to
4
Industrial Control Services
Page 5
Historian Package for
W
INTERPRET can print these log files so you can obtain a hard
copy of the historical data. Printouts include time stamps,
event tag names, event status and description.
Using WINTERPRET version 3.2 or later, the monitor and
collect function can be configured to echo the collected
historical data to a device (such as a comm port or printer
port) while the historical collection occurs. This provides
automatic printing of the historical data in real-time.
W
INTERPRET
(T3832)
Using the Sequence of Events Editor
The Sequence of Events Editor lets you create and edit
sequence of events function blocks. When you create an SOE
function block you will define a list of event entries and the
control parameters that govern the recording operations for
the function block. Each sequence of events function block
can have a maximum of 6500 event entries.
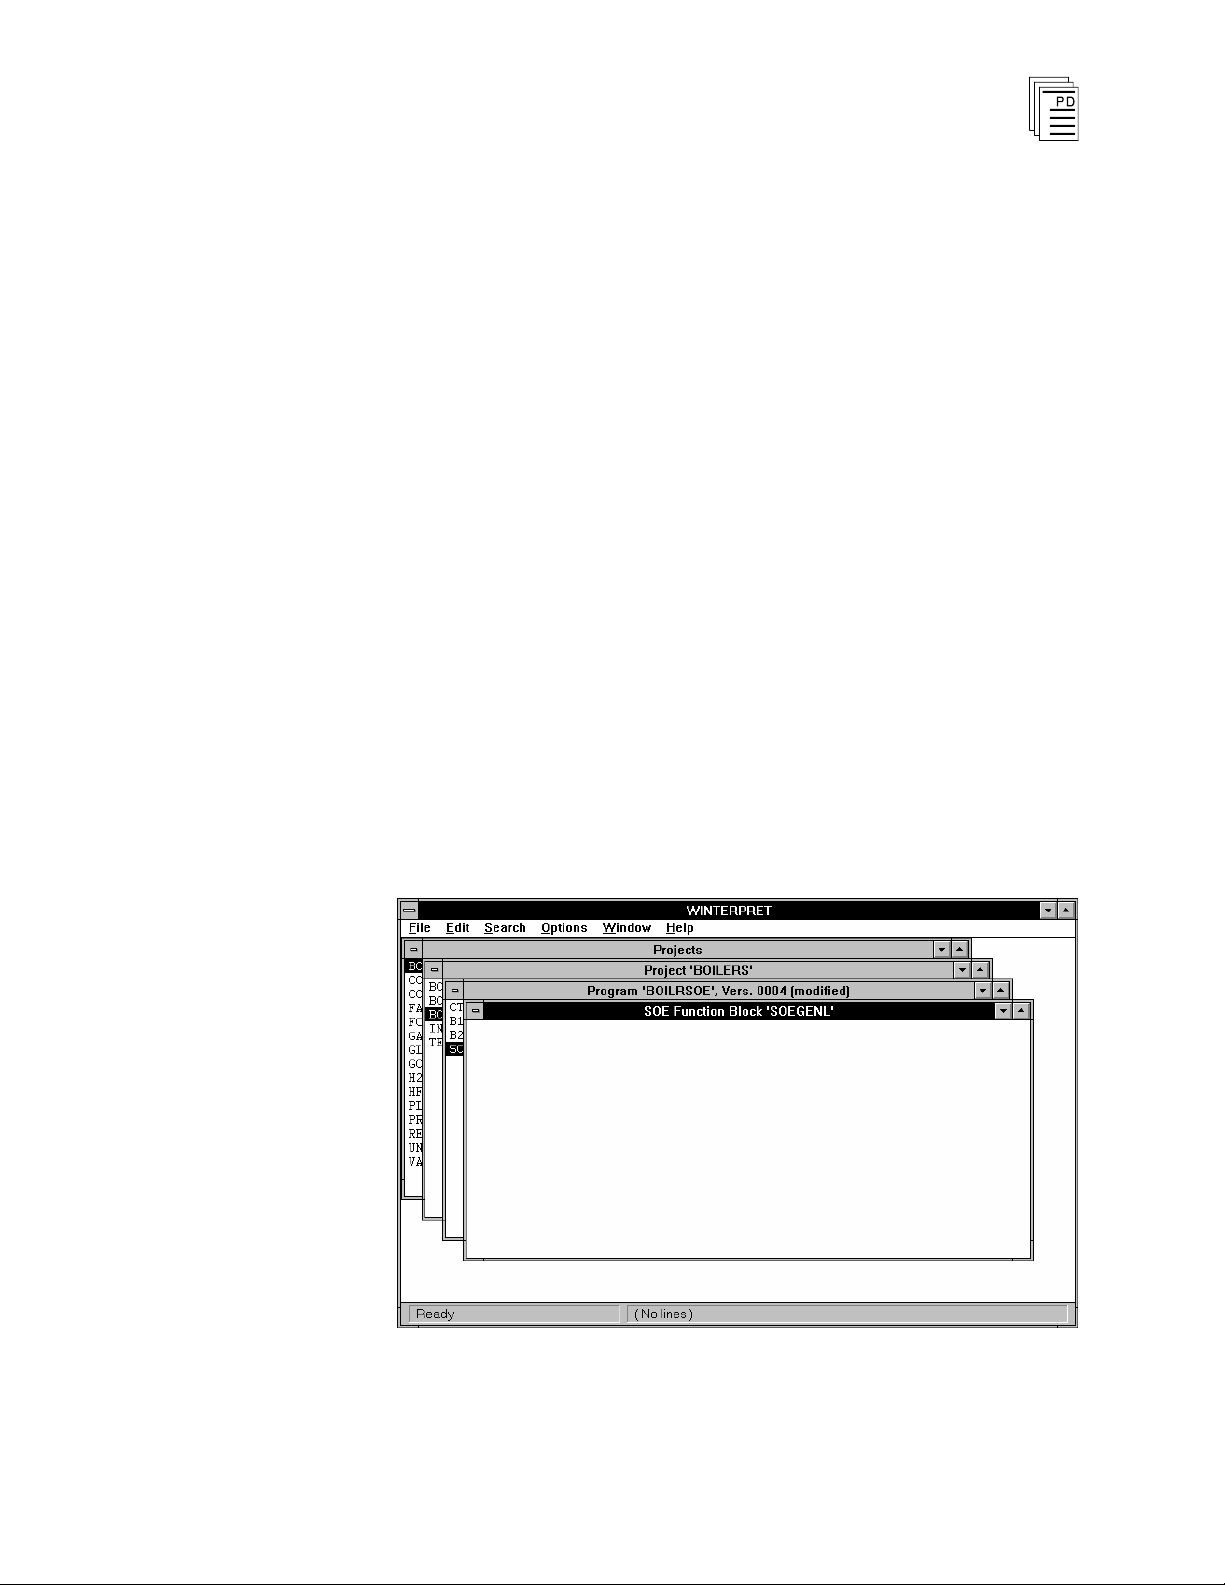
Sequence of Events function blocks are created using the Add
Function Block or Insert Function Block from the Program
Editor. After you have created a new sequence of events
function block the Sequence of Events Editor window is
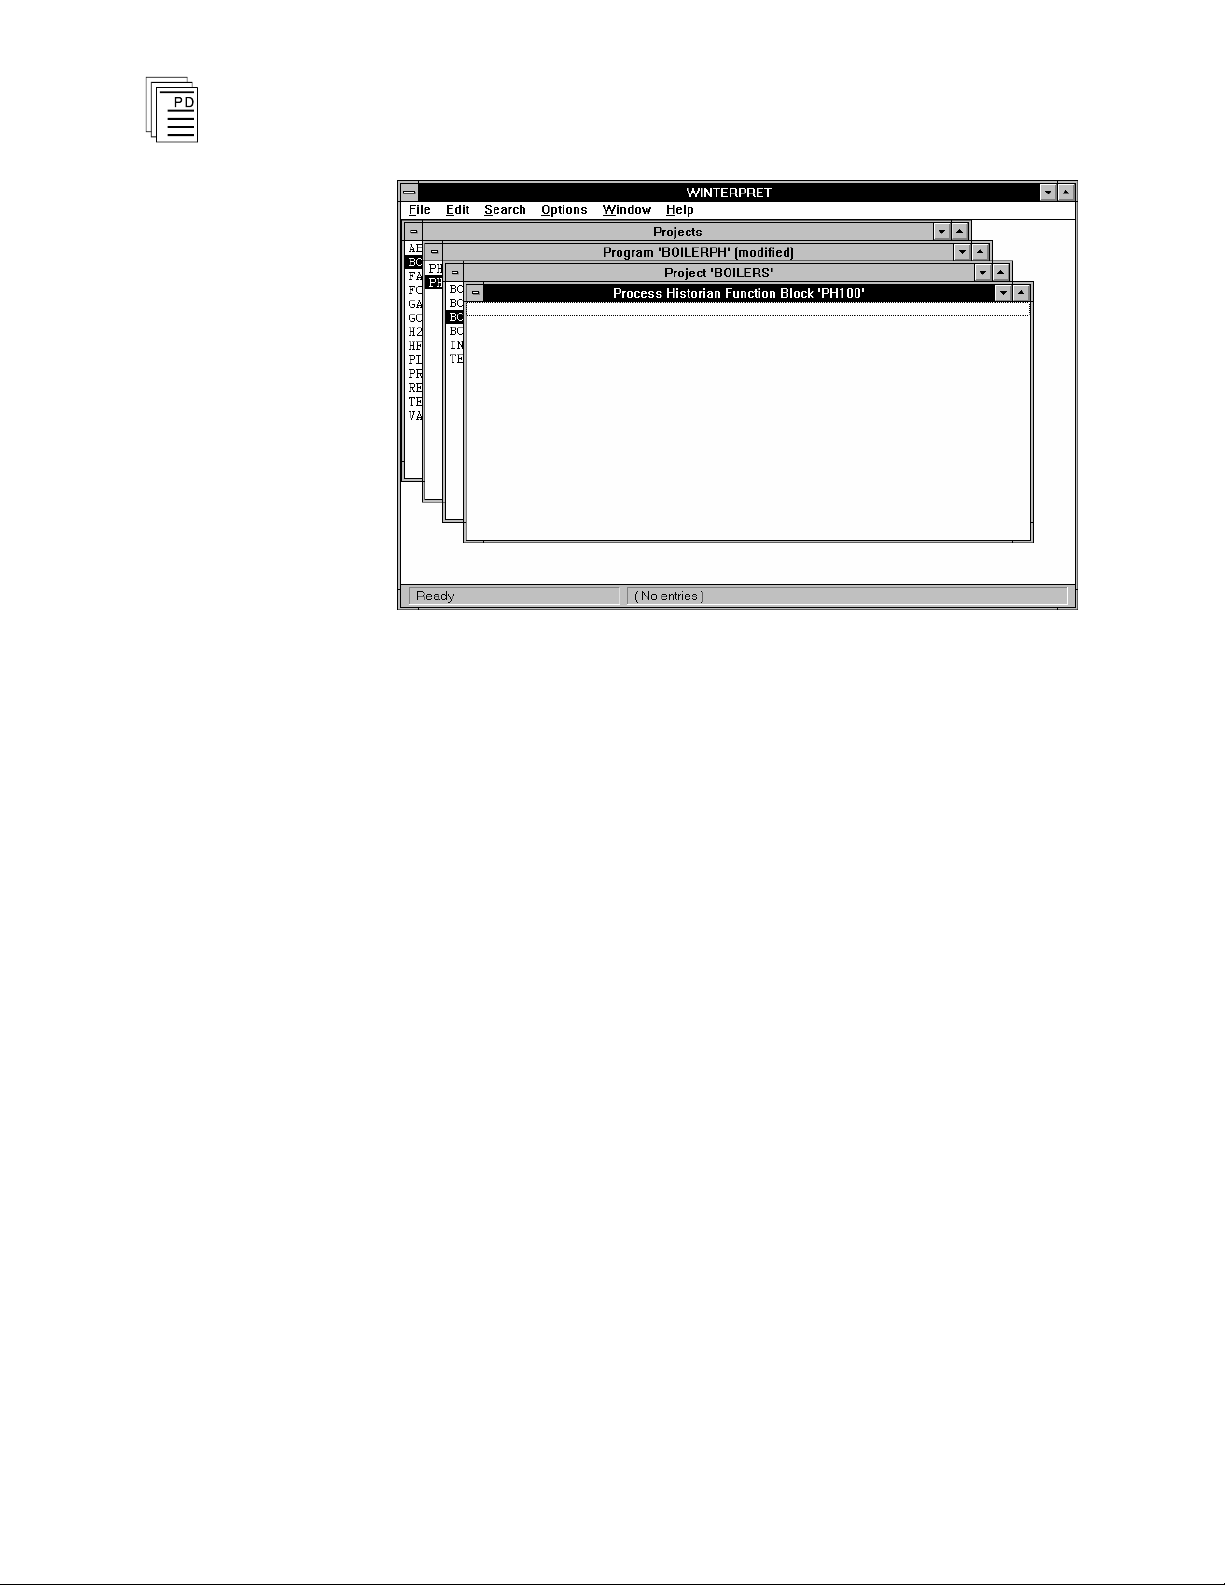
opened as shown in Figure 1.
PD-6042
March, 06
Figure 1. The Sequence of Events Editor Window.
5
Page 6
Historian Package for W
Using the drop-down menus you can select commands to
configure the sequence of events function block event entries,
control parameters, print the function block and a host of
other configuration operations.
INTERPRET
(T3832)
File Menu
The File Menu gives you access to the standard function block
file commands which include: Save Function Block, Revert to
Last Saved, Compile, View Error Messages, Edit Function
Block Description, Edit Function Block Details, Print
Function Block, Print Setup, Log Off
information on all of these commands refer to Commands
Common to all Function Blocks in Section 5 of the Regent
User’s Guide.
Edit Menu
Add Entry and Insert Entry
Choose Add Entry to create a new event entry at the end of
the list of existing entries. Choose Insert Entry to insert a
new event entry at the current cursor position. Normally the
order of the event entries is not important because they
simply represent the list of discrete events that are to be
monitored and recorded as they change state.
and Exit. For more
6
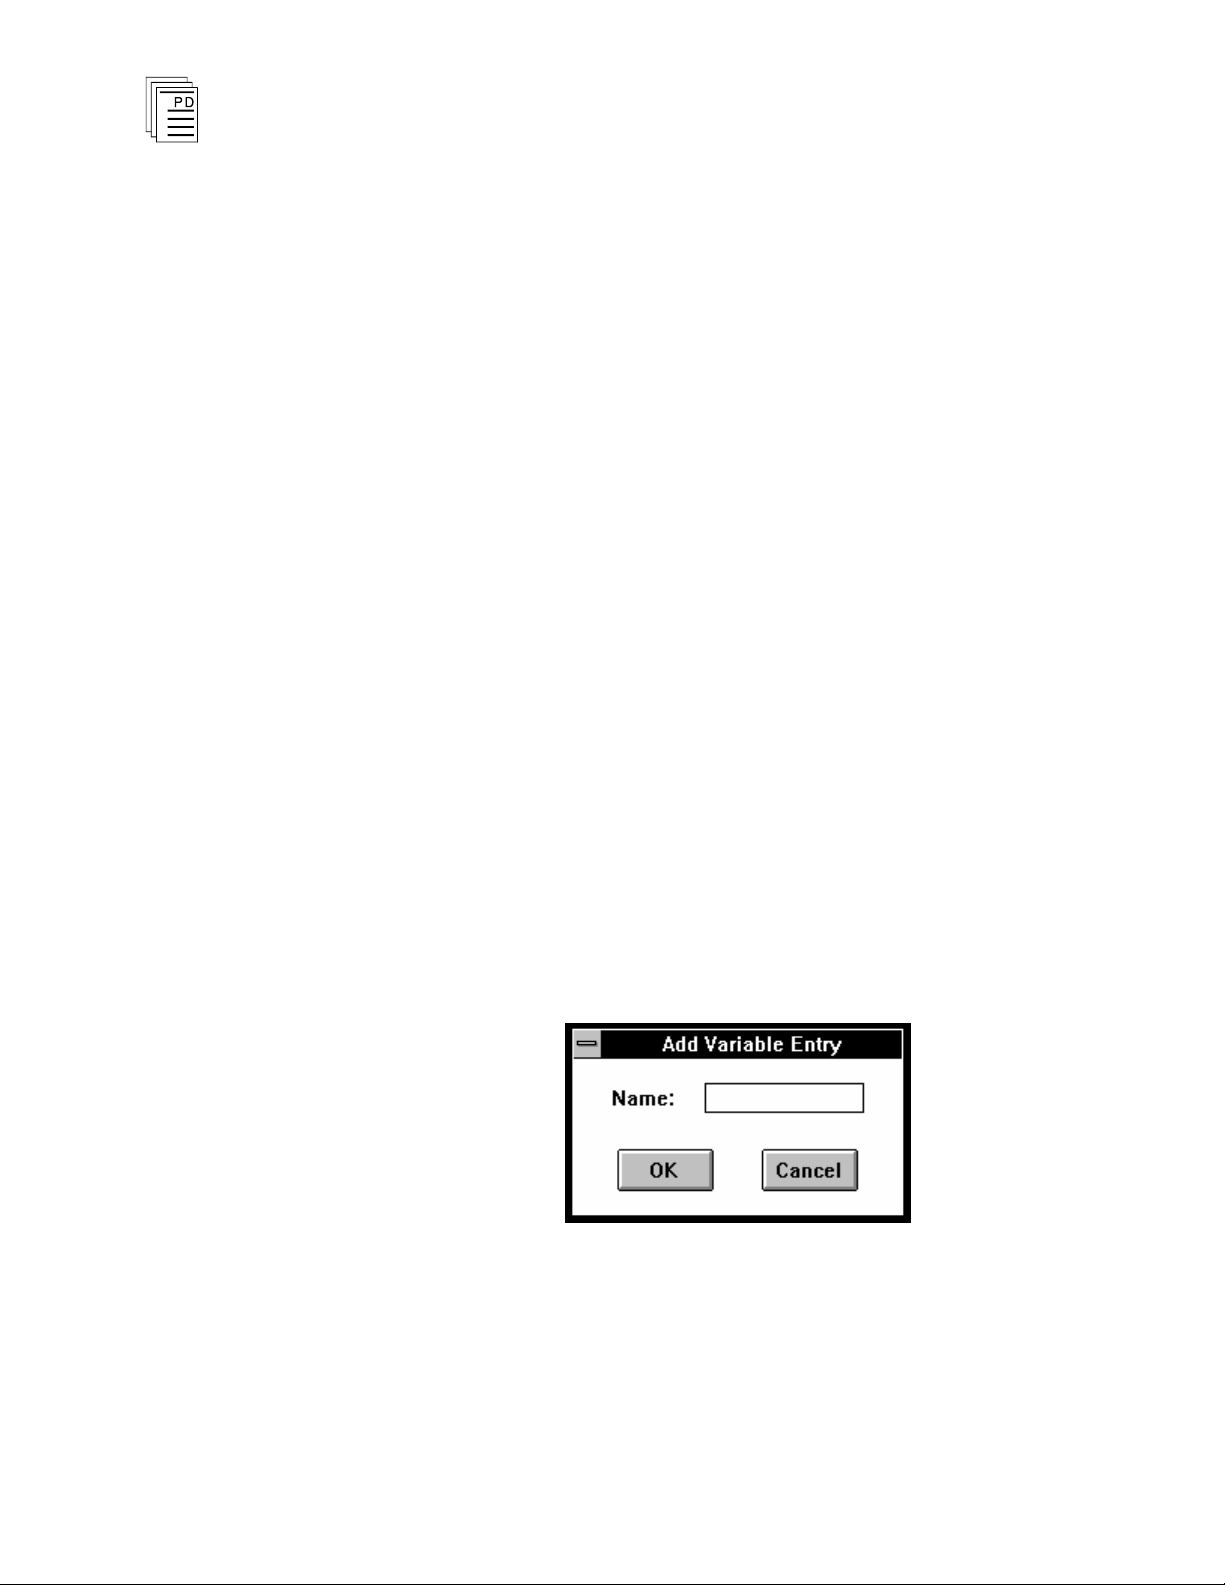
After choosing Add or Insert Entry a dialog box will open
where you can define the variable name for the event entry.
The Add Entry dialog is shown in Figure 2.
Figure 2. Sequence of Events: Add Entry Dialog.
You only need to enter the name of the variable for each
entry. The description of the variable will automatically be
imported by the editor from the I/O, shared variable or system
variable definitions.
Industrial Control Services
Page 7
Historian Package for
W
INTERPRET
(T3832)
An event variable must be defined as an I/O point, a shared
control relay or system control relay. If you enter the name of
a local control relay for an event entry, you will get an error
when you compile the function block.
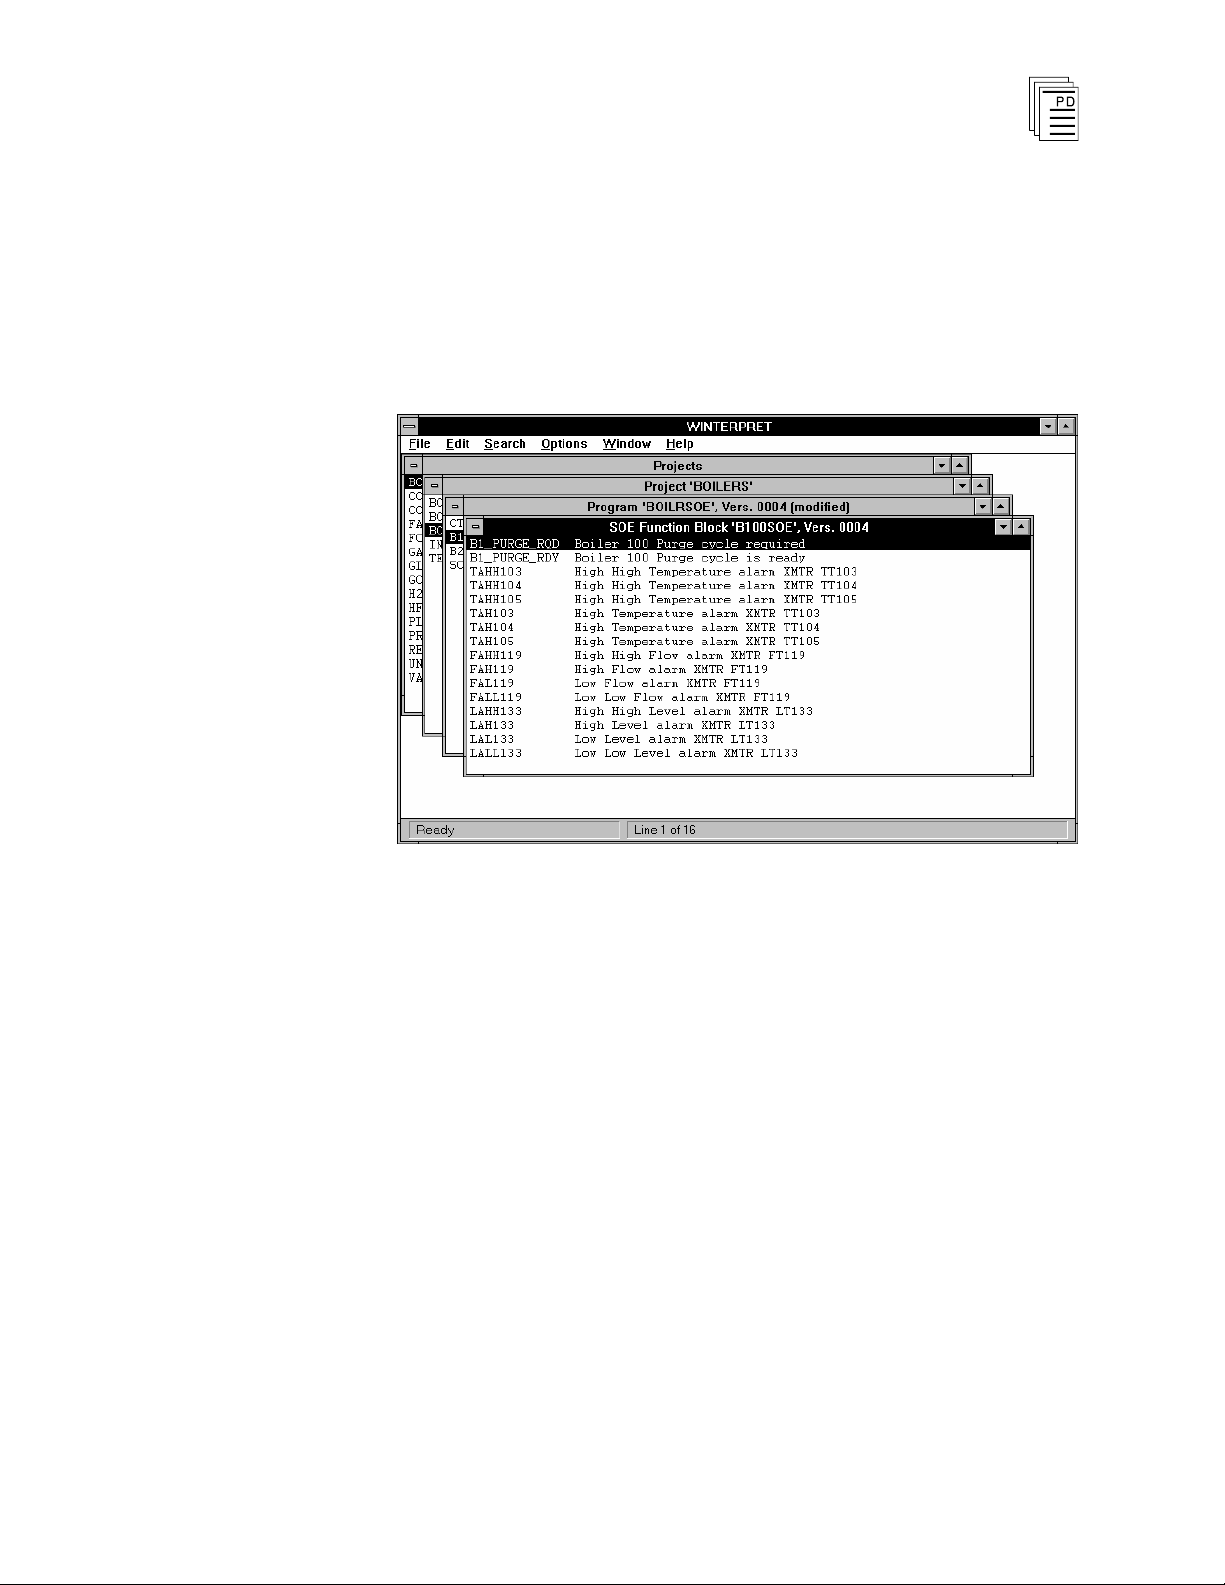
After you have used the Add Entry and Insert Entry
commands, your event entries will be listed in the Sequence of
Events Editor Window like those shown in Figure 3.
Figure 3. Example of Event Entries in the Sequence of
Events Editor Window.
Edit Entry
Use the Edit E
ntry command to edit and modify the
configuration for a specific event entry.
Delete Entry
Use the Delete Entry command to delete an event entry from
the list. Select the entry you wish to delete and choose Delete
Entry from the Edit menu.
Control Parameters
Use the Control Parameters command to define the execution
parameters for the sequence of events function block. The
control parameters you define apply to all of the event entries,
not individual entries.
When you select the Control Parameters c
Edit menu the following dialog box is opened:
ommand from the
PD-6042
March, 06
7
Page 8

Historian Package for W
INTERPRET
(T3832)
Figure 4. Sequence of Events Control Parameters.
Start Contact
The Start contact is a discrete variable name that an
application program may turn on to enable the sequence of
events to begin recording events. When the Start contact is
turned off, the sequence of events stops recording. Typically,
ladder logic is used to turn on the Start contact, based upon
process events or time conditions such as alarms det
timer timed out, etc.
ected,
The Start contact is automatically recorded by the sequence of
events when it changes state. It does not have to be included
in the event entries list.
Clear Contact
The Clear contact is a discrete variable name that an
application program may turn on to clear all the events
currently in the sequence of events buffer.
The Clear contact is automatically recorded by the sequence
of events when it changes state. It does not have to be
included in the event entries list.
8
Coun
t Register
The Count register is a shared variable register name that
may be used by an application program to monitor the use of
the events buffer. Typically, ladder logic is used to monitor
the Count register and turn off the Start contact before the
events buffer is full to ensure no events are overwritten. You
may also configure your operators console to monitor the
Industrial Control Services
Page 9

Historian Package for
W
INTERPRET
(T3832)
Count register for changes to detect when there are new
events that have been recorded and direct appropriate plant
personnel to monitor and collect the SOE buffer using
W
INTERPRET
.
Size Field
A constant must be entered into the Size field to indicate the
size of the events buffer. The larger the buffer, the more
events can be recorded without old events being overwritten,
and the more space the function block utilizes in the Regent.
The maximum value for the events buffer is 32,727. This
represents 32,727 words of space (or 65,454 bytes of Regent
memory) in which to store events. The maximum buffer space
required to store the change-of-state of one variable is six
words (three words for the entry and three words for the time
stamp).
Therefore, the amount of Regent memory required to store the
change-of-state of 1,000 variables of this type is:
1,000 events x (3 words per event + 3 words per timestamp) =
6,000 words (or 12,000 bytes of Regent memory)
Variables that change state within the same scan require only
one time stamp to be recorded. Therefore, the buffer space
used by two events that occur within the same scan can be as
much as:
PD-6042
March, 06
(2 events * 3 words per event) + 3 words per timestamp =
9 words (or 18 bytes of Regent memory)
9
Page 10
Historian Package for W
INTERPRET
(T3832)
Search Menu
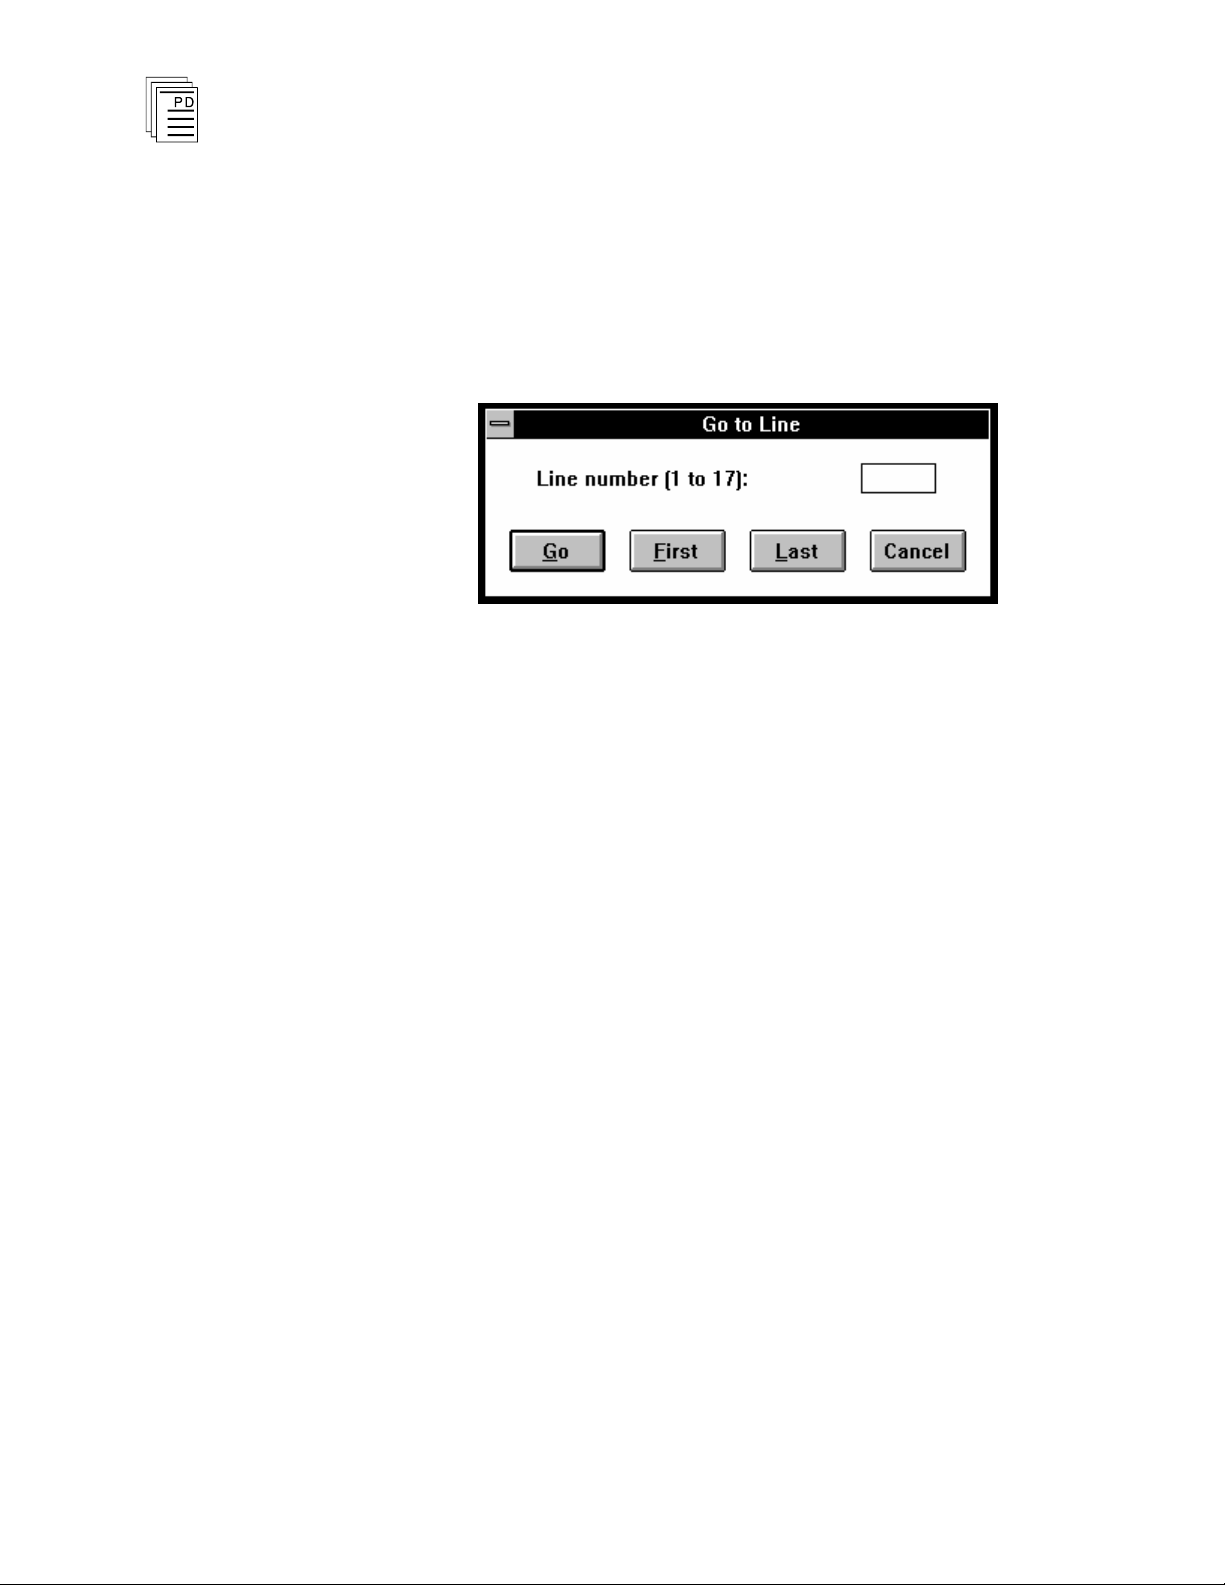
Go to Entry
The Go to Entry command lets you quickly move to different
entries in the sequence of events entries list. From the
Sequence of Events Editor's Search menu choose Go to Entry
(
ALT,S,G
For your convenience, the dialog displays the number of event
entries (indicated as line numbers) currently defined on the
func
tion block.
).
Figure 5. Sequence of Events: Go to Entry.
Entry (Line) Number
Enter the entry number that you want to go to.
Go
Choose Go to move to the entry number that you entered in
the Entry Number text box.
First
Go to the first event entry in the list.
Last
Go to the last event entry in the list.
Options Menu
The Options Menu allows you to enable and disable the
Prompt for Delete option common to all delete operations used
in WINTERPRET.
Window Menu
The Window menu commands are standard throughout all
W
INTERPRET
Window menu commands see Commands Common to all
windows. For more in
formation on using the
10
Industrial Control Services
Page 11

Historian Package for
W
INTERPRET Windows in Section 3, Installing the
W
INTERPRET Application of the Regent User’s Guide.
W
INTERPRET
(T3832)
Help Menu
The Help menu commands are standard throughout all
W
INTERPRET windows. For more information on using the
Help menu commands see Commands Common to all
W
INTERPRET Windows in Section 3, Installing the
W
INTERPRET Application of the Regent User’s Guide.
Using the Process Historian Editor
The Process Historian Editor lets you crea
historian function blocks. When you create a process
historian function block you will define a list of variable
entries and the control parameters that govern the recording
operations for the function block. Each process historian
function block can have a maximum of 6500 variable entries
(although a practical limit of about 500 entries is suggested).
All variables entered are recorded at the interval specified by
Sample Time. If you wish to record variables at different
intervals, you must define them in function blocks with a
Sample Time of the desired interval.
te and edit process
PD-6042
March, 06
Process Historian function blocks are created using the Add
Function Block or Insert Function Block from the Program
Editor. After you have created a new process historian
function block the Process Historian Editor window is opened
as shown in Figure 6.
11
Page 12
Historian Package for W
INTERPRET
(T3832)
Figure 6. The Process Historian Editor Window.
Using the drop-down menus you can select commands to
configure the process historian function block variable entries,
control parameters, print the function block and a host of
other configuration operations.
File Menu
The File Menu gives you access to the standard function block
file commands which include: Save Function Block, Revert to
Last Saved, Compile, View Error Messages, Edit Function
Block Description, Edit Function Block Details, Print
Function Block, Print Setup, Log Off and Exit. For more
information on all of these commands refer to Commands
Common to all Function Blocks in Section 5 of the Regent
User’s Guide.
Edit Menu
Add Entry and Insert Entry
12
Choose Add Entry to create a new variable entry at the end of
the list of existing entries. Choose Insert Entry to insert a
new variable entry at the current cursor position. The order
of the variable entries is the order that the variables will
appear in the historical log.
Industrial Control Services
Page 13
Historian Package for
W
INTERPRET
(T3832)
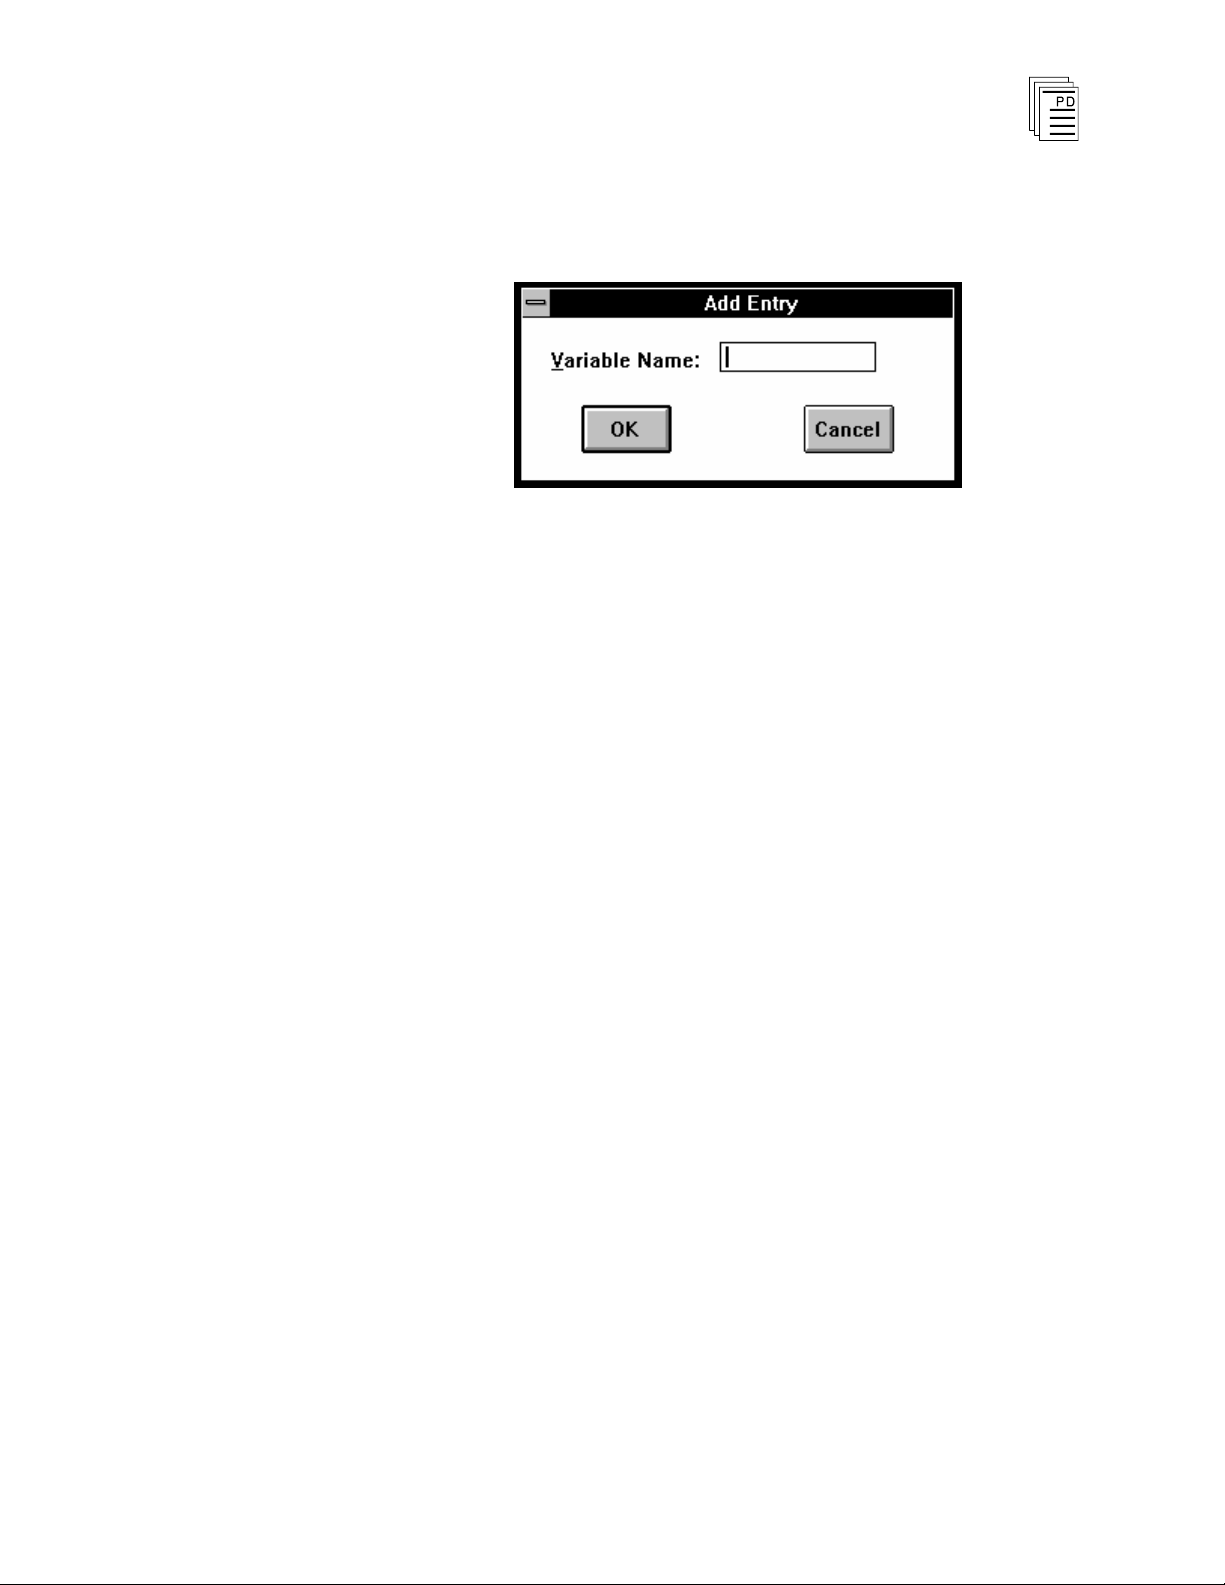
After choosing Add or Insert Entry a dialog box will open
where you can define the variable name for the entry. The
Add Entry dialog is shown in Figure 7.
Figure 7. Process Historian: Add Entry Dialog.
You only need to enter the name of the variable for each
entry. The description of the variable will automatically be
imported by the editor from the I/O, shared variable or system
variable definitions.
A variable entry must be defined as an I/O word variable (AI,
AO, TI, DIW or DOW), a shared register, a shared floating
point register, or a system register. If you enter the name of a
local variable or a discrete variable for a variable entry, you
will get an error when you compile the function block.
After you have used the Add Entry and Insert Entry
commands, your variable entries will be listed in the Process
Historian Window like those shown in Figure 8.
PD-6042
March, 06
13
Page 14

Historian Package for W
Figure 8. Example of Variable Entries in the Process
INTERPRET
Historian Editor Window.
(T3832)
Edit Entry
Use the Edit Entry command to edit and modify the
configuration for a specific variable entry.
Delete Entry
Use the Del
ete Entry command to delete a variable entry from
the list. Select the entry you wish to delete and choose Delete
Entry from the Edit menu.
Control Parameters
Use the Control Parameters command to define the execution
parameters for the process historian function block. The
control parameters you define apply to all of the variable
entries, not individual entries.
When you select the Control Parameters command from the
Edit menu the following dialog box is opened:
14
Industrial Control Services
Page 15

Historian Package for
W
INTERPRET
(T3832)
Figure 9. Process Historian Control Parameters.
Start Contact
The Start contact is a discrete variable name that an
application program may turn on to enable the process
historian to begin recording variable entries. When the Start
contact is turned off, the process historian stops recording.
Typically, ladder logic is used to control the on/off status of the
Start contact to coordinate the recording mode of the process
historian to capture vital process information. Two scenarios
are often used.
1. The Start contact is normally on, placing the process
historian in the record mode. The function block
continuously records a time stamp and values of all
variable entries at the Sample Time defined. As recording
continues the historical buffer becomes full and continues
to rollover, but always remains full with the most recent
data over the duration defined by Period.
When ladder logic detects a critical interlock, it turns off
the Start contact immediately or after a timer delay.
When the Start contact t
urns off, the process historian
function block stops recording and the historical buffer has
"captured" vital process information before, during and
after the critical interlock.
PD-6042
March, 06
2. The Start contact is normally off, making the process
historian function block idle and no recording takes place.
Ladder logic turns on the Start contact when a critical
interlock or process condition occurs. This places the
process historian in the record mode and samples are
15
Page 16

Historian Package for W
INTERPRET
(T3832)
recorded each Sample Time. Ladder logic turns of
f the
Start contact after a time delay less than or equal to the
Period of the process historian.
This method is used to routinely capture vital process
information during equipment start-up or shutdown
periods. This information can be retrieved and analyzed
be plant personnel for monitoring efficiencies and
operating characteristics of plant equipment. This
information can be useful for scheduling preventive
maintenance of major process equipment.
Clear Contact
The Clear contact is a discrete variable
name that an
application program may turn on to clear the recorded
variable entries currently in the process historian buffer. The
Clear contact should normally be off. The Clear contact may
be turned on then off after the historian buffer has been
retrieved and saved using the monitor and collect functions of
W
INTERPRET
.
While the Clear contact is on the process historian function
block is idle and does not record values, regardless of the
status of the Start contact.
Sample Time
The Sample Time determines the recording interval of the
process historian function block. Sample Time can be
expressed as an integer number of scans or in time units.
When expressed in time units, the actual recording interval
will be equal to or slightly larger than the Sample Time
defined. For example, if sample time is 200 milliseconds
(Sample Time = 2, Units = 0.1 seconds) and the Regent scan
time is 31 milliseconds, the actual recording interval will be
211 milliseconds (7 scans at 31 ms each = 211 ms). If the
Regent
scan time varies during execution of the application
program, the effective Sample Time of the process historian
will range from:
Sample Time <= Actual Sample Time <= Sample Time + one scan cycle
If the Start contact is on, each Sample Time a time stamp and
values for the selected variables are recorded in the historical
buffer. One Sample Time recording is called a frame.
16
Industrial Control Services
Page 17

Units
Historian Package for
W
INTERPRET
(T3832)
The Units is the time base units that apply to both the sample
time and period for the process historian control paramet
ers.
You can select scans, .01 seconds, .1 seconds, seconds, minutes
or hours in the drop-down select box for Units.
Period
The Period is an integer constant that defines the length of
the historical buffer. Period is represented in the same units
as Sample Time. For example, if Sample Time is entered as
200 milliseconds (Sample Time = 2, Units = 0.1 sec) and
Period is entered as 1000, the historical buffer length is 100.0
seconds.
Planning the Size for the Process Historian Buffer
Period is used ind
irectly to size the historical buffer by
determining the amount of memory required to store the
number of frames that Period represents. For example, with
the control parameters for Units set to 0.1 seconds, Sample
Time set to 15 and Period set to 3000, the process historian
buffer would be sized to store 200 frames or recording
intervals.
The maximum size of a historical buffer in the Regent is
65534 bytes. Two things affect the size of the historical buffer:
1. The number of variable entries.
PD-6042
March, 06
2. The
number of frames (Period / Sample Time).
The size, in bytes, of the historical buffer can be calculated
using the equation below:
Buffer Size = (# frames) * [6 + 2*(QtyIO + Qty
) + 4* (Qty
SVR
SVFP
)]
17
Page 18

Historian Package for W
INTERPRET
(T3832)
Where:
# frames
Qty
=
IO
=
Period / Sample Time
Number of digital input modules, digital
output modules, analog I/O points, and
thermocouple inputs defined in function
block
Qty
Qty
SVR
SVFP
=
=
Number of shared variable registers
defined in function block
Number of shared variable floating point
registers def
ined in function block
If this calculation produces a number greater than 65534 you
must do one of the following:
1. Increase the Sample Time, thus reducing the number of
frames.
2. Decrease the Period, thus reducing the number of frames.
3. Reduce the number of variable entries defined in the
function block. You may need to split up your variable
entries into more than one function block to keep the size
of each historical buffer less than 65534 bytes while
maintaining the same Period and Sample Time.
18
To help gauge the limits on the historical buffer the chart in
Figure 10 graphs number of variable entries vs. number of
frames for the maximum size historical buffer. In this chart
the variable entries are assumed to be digital input modules,
digital output modules, analog I/O points, thermocouple
inputs or shared variable registers (they all require 2 bytes
per frame). If you plan on using floating point registers, count
them as two variable entries (they require 4 bytes pe
before referring to the chart.
Industrial Control Services
r frame)
Page 19

Historian Package for
W
INTERPRET
(T3832)
Figure 10. Limits on Number of Variable Entries and Frames.
Size of the Process Historian Function Block
The Process Historian function block is slightly larger than
the size of the historical buffer calculated above. The
equation below is used to calculate the overall size of the
function block.
FB Size = 36 + (4 * Qty
Where:
FB Size
Qty
=
=
TOTAL
TOTAL
) + Buffer Size
Size of Process Historian
function block
Number of process variables
defined in function block regardless
Buffer Size
=
of data type
Size of Historical Buffer calculated
above
PD-6042
March, 06
19
Page 20

Historian Package for W
INTERPRET
(T3832)
Search Menu
Go to Entry
The Go to Entry command lets you quickly move to different
entries in the process historian variable entries list. From the
Process Historian Editor's Search menu choose Go to Entry
(
ALT,S,G
).
Figure 11. Process Historian: Go to Entry.
For your convenience, the dialog displays the number of
variable entries currently defined in the function block.
Entry Number
Enter the entry number that you want to go to.
Go
Choose Go to move to the entry number that you entered in
the Entry Number text box.
First
Go to the first variable entry in the list.
Last
Go to the last variable entry in the list.
Find
The Find command can be used to locate variables in the
process historian entry list. From the Process Historian
Editor's Search menu choose Find (
ALT,S,F
).
20
Industrial Control Services
Page 21

Historian Package for
W
INTERPRET
(T3832)
Figure 12. Process Historian: Find Dialog.
Find What
Type in the name of the variable or character string you want
to search for. The Find What text box retains the name of the
last scaling entry or character string that was searched for.
Use the Find Next command button or press F3 to repeat the
search.
Match
Lets you to match character strings as they occur anywhere in
a word, only at the beginning of a word, or as a whole word.
Direction
Determines whether the search will move upward or
downward from the current selected variable entry. The
searc
h will stop when it reaches either the top or the bottom of
the entry list.
Options
The Options check boxes let you decide whether to search for
the character string in the entries' comments and descriptions
and whether the search should be case-sensitive.
PD-6042
March, 06
21
Page 22

Historian Package for W
6
Shortcut:
INTERPRET
(T3832)
Find Next
The Find Next command searches for the next occurrence of
whatever name (or character string) was previously searched
for using the Find command.
From the Process Historian Editor's Search menu choose Find
Next (
Press F3.
Options Menu
The Options Menu allows you to enable and disable the
Prompt for Delete option common to all delete operations used
in WINTERPRET.
Window Menu
The Window menu commands are standard throughout all
W
INTERPRET windows. For more information on using the
Window menu commands see Commands Common to all
W
INTERPRET Windows in Section 3, Installing the
W
INTERPRET Application of the Regent User’s Guide.
ALT,S,N
).
Help Menu
The Help menu commands are standard throughout all
W
INTERPRET windows. For more information on using the
Help menu commands see Commands Common to all
W
INTERPRET Windows in Section 3, Installing the
W
INTERPRET Application of the Regent User’s Guide.
Monitoring and Collecting Historical Data
When historian function blocks are executing in the Regent,
they record the historical data in internal buffers in the
Regent memory. Because the historical data is recorded in
the memory of the triplicated Regent processors it is secure
from any single points of failure. When it becomes necessary
to examine the historical data recorded by the historian
function blocks, the buffered data in the Regent must be
retrieved and presented to plant personnel. When you
installed the Historian package, additional features were
22
Industrial Control Services
Page 23

Historian Package for
W
INTERPRET
(T3832)
added to W
historian data from the Regent controller.
INTERPRET to perform the necessary retrieval of
These features allow you to monitor sequence of events and
process historian function blocks while they execute in the
Regent. From the monitor windows you can perform the
following activities:
1)
Monitor the Control Parameters for the function block
2)
Open a Log file into which you can save collected
historical data.
3)
Collect any historical data from the historical buffers of
the function blocks in the Regent and save the data to the
opened log file on the PC.
4)
Set an Echo to Device option to echo any collected
historical data retrieved from the Regent to a PC device such
as the Comm ports (COMM1 through 4) or printer ports
(LPT1, 2 or 3).
5)
P
rint the Log files that were created by monitoring and
collecting the historian data from the Regent.
All of the on-line retrieval of historical data are performed by
opening a project, opening the Execution Controller window,
opening the program monitor and opening the historian
function block monitor. Fore more details about these steps
using W
INTERPRET, refer to Section 7, Loading Monitoring
and Testing Application Programs in the Regent User’s
Guide.
Using the Sequence of Events Monitor
When you hav
in the Program Monitor window and choose the Monitor
command from the Control Menu, the Sequence of Events
Monitor window is opened as shown in Figure 13.
e selected a Sequence of Events function block
PD-6042
March, 06
23
Page 24

Historian Package for W
INTERPRET
(T3832)
Figure 13. Sequence of Events Monitor Window.
Normally you will use the Sequence of Events Monitor
Window to retrieve any events that have been recorded by the
SOE function block in the Regent. The steps that you must
follow to accomplish this are described in Table 1. Specific
details about the commands used to perform these steps are
explained in detailed paragraphs in the following menu
command descriptions.
24
Industrial Control Services
Page 25

Historian Package for
Step
Operation
Remarks
1 Monitor the application program
From the Execution Controller window, select the desired
application program and choose Monitor from the Control
menu.
2 Monitor the function block
From the Program Monitor wind
ow, select the desired
function block and choose Monitor from the Control menu.
3 Check the recording status of the
historian function block
From the SOE function block monitor window, choose
Monitor Contacts from the Control menu. The Start Contact
should be On and the Clear Contact should be Off during
normal SOE operations in the Regent. Close the dialog
when finished observing the control parameters
4 Open a Log file
Choose Open Log File from the File Menu. In the Open Log
dialog specify the desired path and file name for the log file.
Choose OK when completed.
5 Decide whether you want
W
INTERPRET
to automatically print
any new events that it may collect
from the Regent
No: Skip to step 6
Yes: Choose Echo to Device from the Options menu and
select the PC device (e.g. LPT1) to which you want to echo
any new collected data.
6 Collect the SOE data from the
Regent
Choose Monitor and Collect from the Control Menu.
W
INTERPRET
is now retrieving the historical buffer for the
selected function block. If any new events have occurred
that were not previously retrieved, they will be scrolled down
the monitor window. When you are through, choose Cancel
from the Monitor and Collect dialog.
7 Save the collected Data
Choose Close Log File from the File Menu.
8 Exit the monitor window when
through.
Close the SOE monitor window by Double clicking on the
SOE monitor window’s Control Menu Box.
W
INTERPRET
(T3832)
Table 1. Steps to Monitor and Collect SOE data from the Regent.
File Menu
The File Menu provides access to several commands common
to all function block monitors. These include Print Setup,
View Function Block Details, View Function Block
Description, Log Off and Exit. For descriptions of these
commands see Commands Common to all Function Block
Monitors in Section 7, Loading Monitoring and Testing
Application Programs in the Regent User’s Guide.
The File Menu commands specific to the sequence of events
monitor are described below.
PD-6042
March, 06
25
Page 26

Historian Package for W
INTERPRET
(T3832)
Open Log File
Before you can monitor and collect the historical buffer for a
sequence of events function block you must first
open a log
file. Choosing Open Log File from the File Menu opens the
dialog box shown in Figure 14.
Figure 14. Sequence of Events: Open Log File.
In the Open Log File dialog, select the Drive, Directory, and
File Name that you want to open. When you are through
choose OK to close the dialog and return to the Sequence of
Events monitor window.
If the file that you specified is a new log file, you will be
prompted to create it. Choose YES in the prompt dialog
continue and create the new log file.
to
After you have opened a log file, a line will appear at the top of
the Sequence of Events Monitor window. If the log file is a
new file the line will show an entry:
[Log File]
If the file you opened already exists, then the line will show an
entry similar to:
[Last entry before closing: 21:45:18.315 on 03/15/1994]
This indicates the time stamp of the last recorded event stored
in the opened log file.
After opening a log file, you can subsequently choose Monito
r
and Collect from the Control Menu to begin retrieving the
SOE data from the Regent.
26
Industrial Control Services
Page 27

Historian Package for
Important!
W
INTERPRET
(T3832)
Close Log File
This command will close the opened log file and save it to disk.
You must have a log file open to use this command. After
closing the log file you must use the Open Log File Command
before you can again retrieve SOE data from the Regent.
Clear Log File
This command will clear the contents of the log file that is
currently open, removing any previously recorded and saved
SOE data from the log file on the PC. You must have a log file
open before you can use this command.
This command does not clear the historical buffer of the
function block in the Regent. The historical buffer in the
Regent is only cleared when the Clear Contact for the
function block is on.
Print Log File
Use this command to print the entire contents of the currently
opened log file. You must have a Log File open to use this
command.
View Function Block Source
Use this command to open a dialog to display the list of e
vent
entries configured for the sequence of events function block.
Figure 15. Sequence of Events: View Source.
In the dialog you can scroll through the list to see the names
and descriptions of the variables defined as event entries.
PD-6042
March, 06
27
Page 28

Historian Package for W
When you are through viewing the list of entries, choose OK
to close the View Source dialog box.
INTERPRET
(T3832)
Control Menu
The Control Menu provides certain command that are
common to all function block monitors. These include Run,
Stop and Scan commands to control th
e execution status of
the entire application program. For descriptions of these
commands see Commands Common to all Function Block
Monitors in Section 7, Loading Monitoring and Testing
Application Programs in the Regent User’s Guide.
Additionally the Control Menu provides the following
commands that are used specifically for monitoring and
retrieving SOE data from the Regent.
Monitor Contacts
This command displays a dialog box which displays the status
of the control parameters for the SOE function bloc
k. The
status of the Start Contact, Clear Contact, Count Variable
and Size are shown.
28
Figure 16. Sequence of Events: Monitoring Contacts
Monitor and Collect
Dialog.
This command is used to perform the collection of the SOE
historical buffer from the Regent. When you choose this
command the Monitoring Contacts dialog is opened and
W
INTERPRET is communicating to the Regent, retrieving the
contents of the SOE historical buffer. As events are retrieved,
they are scrolled through the monit
or window.
Industrial Control Services
Page 29

Historian Package for
W
INTERPRET
(T3832)
If the dialog box obstructs your view of the events in the
window you can click-and-drag on the dialog title bar to move
the dialog elsewhere on the screen.
When you are through monitoring and collecting, choose
Cancel. If SOE events were retrieved from the Regent during
monitoring, they will appear in the monitor window as shown
in Figure 17.
Figure 17. Events displayed in the Sequence of Events
Options Menu
Echo to Device
This com
mand is used to echo any collected SOE data to a
Monitor.
COMM or LPT port of the PC during monitoring and
collecting. You must select this option before you choose
Monitor and Collect to begin the retrieval process.
When you choose this command the Echo to Device dialog box
is displayed.
PD-6042
March, 06
29
Page 30

Historian Package for W
INTERPRET
(T3832)
Figure 18. Sequence of Events: Echo to Device Dialog.
Device
Choose the serial communications port (COMM1 through 4)
or parallel port (LPT1 through 3) of the PC to which you want
to echo any new SOE data that may be retrieved from the
Regent when you perform the Monitor and Collect command.
Echo
Choose ON to turn the echo mode on, or OFF to turn the echo
mode off.
When you are through with your selections, choose OK.
Window Menu
The Window menu commands are standard throughout all
W
INTERPRET windows. For more information on using the
Window menu commands see Commands Common to all
W
INTERPRET Windows in Section 3, Installing the
W
INTERPRET Application of the Regent User’s Guide.
30
Help Menu
The Help menu commands are standard throughout all
W
INTERPRET windows. For more information on using the
Help menu commands see Commands Common to all
W
INTERPRET Windows in Section 3, Installing the
W
INTERPRET Application of the Regent User’s Guide.
Industrial Control Services
Page 31

Historian Package for
W
INTERPRET
(T3832)
Using the Process Historian Monitor
When you have selected a Process Historian function block in
the Program Monitor window and choose the Monitor
command from the Control Menu, the Process Historian
Monitor window is opened as shown in Figure 19.
Figure 19. Process Historian Monitor Window.
Normally you will use the Process Historian Monitor Window
to retrieve any historical data that have been recorded by the
Process Historian function block in the Regent. The steps
that you must follow to accomplish this are described in Table
2
. Specific details about the commands used to perform these
steps are explained in detailed paragraphs in the following
menu command descriptions.
PD-6042
March, 06
31
Page 32

Historian Package for W
Step
Operation
Remarks
1 Monitor the application program
From the Execution Controller window, select the desired
application program and choose Monitor from the Control
menu.
2 Monitor the function block
From the Program Monitor window, select the desired
function block and choose Monitor from the Control menu.
3 Check the recording status of the
historian function block
From the process historian function block monitor
window,
choose Monitor Contacts from the Control menu. The Start
Contact should be On and the Clear Contact should be Off
during normal process historian operations in the Regent.
Close the dialog when finished observing the control
parameters
4 Open a Log file
Choose Open Log File from the File Menu. In the Open Log
dialog specify the desired path and file name for the log file.
Choose OK when completed.
5 Decide whether you want
W
INTERPRET
to automatically print
any new events that it may col
lect
from the Regent
No: Skip to step 6
Yes: Choose Echo to Device from the Options menu and
select the PC device (e.g. LPT1) to which you want to echo
any new collected data.
6 Collect the historical data from the
Regent
Choose Monitor and Collect from the Control Menu.
W
INTERPRET
is now retrieving the historical buffer for the
selected function block. If there is new historical data that
were not previously retrieved, they will scroll through the
monitor window. When you are through, choose Canc
el
from the Monitor and Collect dialog.
7 Save the collected Data
Choose Close Log File from the File Menu.
8 Exit the monitor window when
through.
Close the process historian monitor window by Double
clicking on the process historian monitor window’s Control
Menu Box.
INTERPRET
(T3832)
Table 2.
Steps to Monitor and Collect Process Historian data from the Regent.
File Menu
The File Menu provides access to several commands common
to all function block monitors. These include Print Setup,
View Function Block Details, View Function Block
Description, Log Off and Exit. For descriptions o
commands see Commands Common to all Function Block
Monitors in Section 7, Loading Monitoring and Testing
Application Programs in the Regent User’s Guide.
f these
32
Industrial Control Services
Page 33

Historian Package for
W
INTERPRET
(T3832)
The File Menu commands specific to the process historian
monitor are described below.
Open Log File
Before you can monitor and collect the historical buffer for a
process historian function block you must first open a log file.
Choosing Open Log File from the File Menu opens the dialog
box shown in Figure 20.
Figure 20
. Process Historian: Open Log File.
In the Open Log File dialog, select the Drive, Directory, and
File Name that you want to open. When you are through
choose OK to close the dialog and return to the Process
Historian monitor window.
If the file that you specified is a new log file, you will be
prompted to create it. Choose YES in the prompt dialog to
continue and create the new log file.
After you have opened a log file, a line will appear at the top of
the Process Historian Monitor w
file the line will show an entry:
[Log File]
indow. If the log file is a new
If the file you opened already exists, then the line will show an
entry similar to:
[Last entry before closing: 21:45:18.315 on 03/15/1994]
This indicates the time stamp of the last recorded variable
entries stored in the opened log file.
PD-6042
March, 06
33
Page 34

Historian Package for W
Important!
After opening a log file, you can subsequently choose Monitor
and Collect from the Control Menu to begin retrieving the
historian data from the Regent.
INTERPRET
(T3832)
Close Log File
This command will clo
se the opened log file and save it to disk.
You must have a log file open to use this command. After
closing the log file you must use the Open Log File Command
before you can again retrieve historian data from the Regent.
Clear Log File
This command will clear the contents of the log file that is
currently open, removing any previously recorded and saved
historian data from the log file on the PC. You must have a
log file open before you can use this command.
This command does not clear the historical buffer of the
function block in the Regent. The historical buffer in the
Regent is only cleared when the Clear Contact for the
function block is on.
Print Log File
Use this command to print the entire contents of the currently
opened log file. You must have a Log File open to use this
command.
34
View Function Block Source
Use this command to open a dialog to display the list of
variables configured for the process historian function block.
Industrial Control Services
Page 35

Historian Package for
W
INTERPRET
(T3832)
Figure 21. Process Historian: Vi
ew Source.
In the dialog you can scroll through the list to see the names
and descriptions of the variables defined as variable entries.
When you are through viewing the list of entries, choose OK
to close the View Source dialog box.
Control Menu
The Control Menu provides certain command that are
common to all function block monitors. These include Run,
Stop and Scan commands to control the execution status of
the entire application program. For descriptions of these
commands see Commands Common to all Function Block
Monitors in Section 7, Loading Monitoring and Testing
Application Programs in the Regent User’s Guide.
Additionally the Control Menu provides the following
commands that are used specifically for monitoring and
retrieving historical data from the Regent.
Monitor Contacts
PD-6042
March, 06
This command displays a dialog box which displays the status
of the control parameters for the process historian function
block. The Monitoring Contacts dialog shows the status of the
Start Contact and Clear Contact, and the values configured
for Sample Time, Units and Period.
35
Page 36

Historian Package for W
INTERPRET
(T3832)
Figure 22. Process Historian: Monitoring Contacts Dialog.
Monitor and Collect
This command is used to perform the collection of the process
historian historical buffer from the Regent. When you choose
this command the Monitoring Contacts dialog is opened and
W
INTERPRET is communicating to the Regent, retrieving the
contents of the historical buffer. As the historical data is
retrieved, it is scrolled through the monitor window.
If the dialog box obstructs your view of the events in the
window you can click-and-drag on the dialog title bar to move
the dialog elsewhere on the screen.
When you are through monitoring and collecting, choose
Cancel. If historical data were retrieved from the Regent
during monitoring, they will appear in the monitor window as
shown in Figure 23.
36
Industrial Control Services
Page 37

Historian Package for
W
INTERPRET
(T3832)
Figure 23. Historian data displayed in the Process Historian
Monitor.
Options Menu
Echo to Device
This comm
and is used to echo any collected historian data to a
COMM or LPT port of the PC during monitoring and
collecting. You must select this option before you choose
Monitor and Collect to begin the retrieval process.
When you choose this command the Echo to Device dialog box
is displayed.
Figure 24. Process Historian: Echo to Device Dialog.
PD-6042
March, 06
Device
Choose the serial communications port (COMM1 through 4)
or parallel port (LPT1 through 3) of the PC to which you want
37
Page 38

Historian Package for W
to echo any new historian data that may be retrieved from the
Regent when you perform the Monitor and Collect command.
Echo
Choose ON to turn the echo mode on, or OFF to turn the echo
mode off.
INTERPRET
(T3832)
When you are through with your selections, choose OK.
Window Menu
The Window menu commands are standard throughout all
W
INTERPRET windows. For more information on using the
Window menu commands see Commands Common to all
W
INTERPRET Windows in Section 3, Installing the
W
INTERPRET Application of the Regent User’s Guide.
Help Menu
The Help menu commands are standard throughout all
W
INTERPRET windows. For more information on using the
Help menu commands see Commands Common to all
W
INTERPRET Windows in Section 3, Installing the
W
INTERPRET Application of the Regent User’s Guide.
38
Industrial Control Services
Page 39

Historian Package for
W
INTERPRET
(T3832)
Theory of Operation
Each historian function block is part of an application
program and is executed when the application program is
loaded and running in the Regent. Each time the application
program is scanned, the function block is executed. When the
Regent ex
are determined by the status of the control parameters
defined for the function block. For Sequence of Events
function blocks, the control parameters include a Start
Contact, Clear Contact, a Size Value and a Count Register.
For Process Historian function blocks, the control parameters
include a Start Contact, a Clear Contact, a Sample Time and
a Period.
When the function block is executed, the normal historical
recording operations occur when the Start
the Clear Contact is Off. Specific operations for each type of
historian function block are explained below.
Sequence of Events Function Block
ecutes the function block, the operations performed
Contact is on and
Execution
The Regent executes a sequence of events function block
using the sequence described below.
Start Contact Is On
If the start contact has switched from off to on, the following
occurs:
1. The “Start Contact” event is added to the events buffer.
2. The current state of all event entries are recorded in a last
3. No furt
If the start contact was on in the previous scan, the following
occurs:
1. If the clear contact has switched from on to off, the “Clear
2. The present state of each event entry is compared to the
state table.
Contact” event is added to the event buffer.
state written in the last-state table. If a change of state is
her processing occurs during the scan.
-
PD-6042
March, 06
39
Page 40

Historian Package for W
detected, an event is recorded in the events buffer for the
entry.
INTERPRET
(T3832)
3. No further processing occurs during the scan.
Start Contact Is Off
If the start contact was
on during the previous scan, The
“Start Contact” event is added to the event buffer. No further
processing occurs during the scan
Clear Contact Is On
If the clear contact was on during the previous scan, no
further processing occurs.
If the clear contact has switched from off to on, the following
occurs:
1. The count is set to zero.
2. All events are deleted from the events buffer.
3. The “Clear Contact” event is added to the events buffer.
4. No further processing occurs during the scan.
Buffer Us
age
The sequence of events are stored in a circular buffer in the
Regent, the size of which is determined by the user. As events
are stored in the buffer, the Count register reports the amount
of space in use. Therefore, to determine the amount of space
available in the buffer, subtract the value in the Count
register from the constant in the Size field.
Once the buffer is full, new events will begin to overwrite the
oldest events in the buffer. The Count register value will
remain at its maximum value
(Size - 3) as this occurs. Only
when the Clear contact is energized will the Count value be
reset to zero.
Execution Speed
The execution speed of a sequence of events function block can
be measured in three modes:
1. Function block is in the run mode, but no events have
occurred.
2. Events are being recorded.
40
Industrial Control Services
Page 41

Historian Package for
MODE
SCAN TIME (msec)
Running but no events recorded
Negligible
100 events per scan recorded
1
2000 word buffer uploaded
1
W
INTERPRET
(T3832)
3. The sequence of events event buffer is being uploaded to
the PC running
W
INTERPRET
.
Using a sequence of events function block containing 100
entries, the scan times shown in Table 3 were observed.
Table 3. Sequence of Events: Characteristic Scan Times.
Process Historian Function Block Execution
The Regent executes a process historian function block using
the sequence described below.
Start Contact Is On
If the start contact is on and the clear contact is off, the
following occurs:
1. The process historian time accumulate is incremented.
2. If the time accumulate has reached or exceeded the sample
time, the current time stamp and state of all variable
entries are recorded in the process historian buffer and the
time accumulate is reset.
PD-6042
March, 06
3. If the time accumulate has not reached the sample time,
no recording occurs on this scan.
Clear Contact Is On
If the Clear Contact is on (regardless of the state of the start
contact and time accumulate), the following occurs:
1. The process historian buffer is cleared (by
internal buffer pointers).
2. The time accumulate is reset to zero.
resetting
3. No variable entries are recorded this scan.
Execution Speed
The execution speed of a process historian function block can
be measured in three modes:
41
Page 42

Historian Package for W
MODE
SCAN TIME (msec)
Running but no variable entries recorded
Negligible
100 variable entries recorded
1
2000 word buffer uploaded
1
1. Function block is in the run mode, but no variable entries
are recorded (Clear contact is on, or start is off, or start
contact is on but time accumulate has not reached the
sample time).
INTERPRET
(T3832)
Safety Considerations
2. Variable entries are being recorded.
3. The process historian buffer is being uploaded to the PC
running
W
INTERPRET
.
Using a process historian function block containing 100
variable entries, the scan times shown in Table 4 were
observed.
Table 4. Process Historian: Characteristic Scan Times.
The sequence of events and process historian fu
are TÜV certified for Risk Class 5 as non-interfering. These
function blocks are non-interfering because they do not
perform any control actions. They can be used to monitor and
record Regent I/O and other variables that are used for safety
critical functions.
nction blocks
42
Industrial Control Services
 Loading...