

Page 1
Ford Raptor/F-150 Slider Installation
SL-F150-4DR, SL-F150-4DRA
SL-F150-2DR-EX, SL-F150-2DR-EXA
Installation Instruction RSEI 137
Page 2
PARTS LIST
DESCRIPTION
1
Drivers Side Slider Assembly
1
Passenger Side Slider Assembly
2
Top Brackets
2
Back brackets
24
7/16” Washers
24
Aluminum Nutserts
14
5/16” SS Button Head Bolts
14
5/16” Stainless Steel Washers
*If any parts listed are missing or damaged please call Rock-Slide Engineering @ 435-752-4580 prior
to installation
SLIDER INSTALLATION
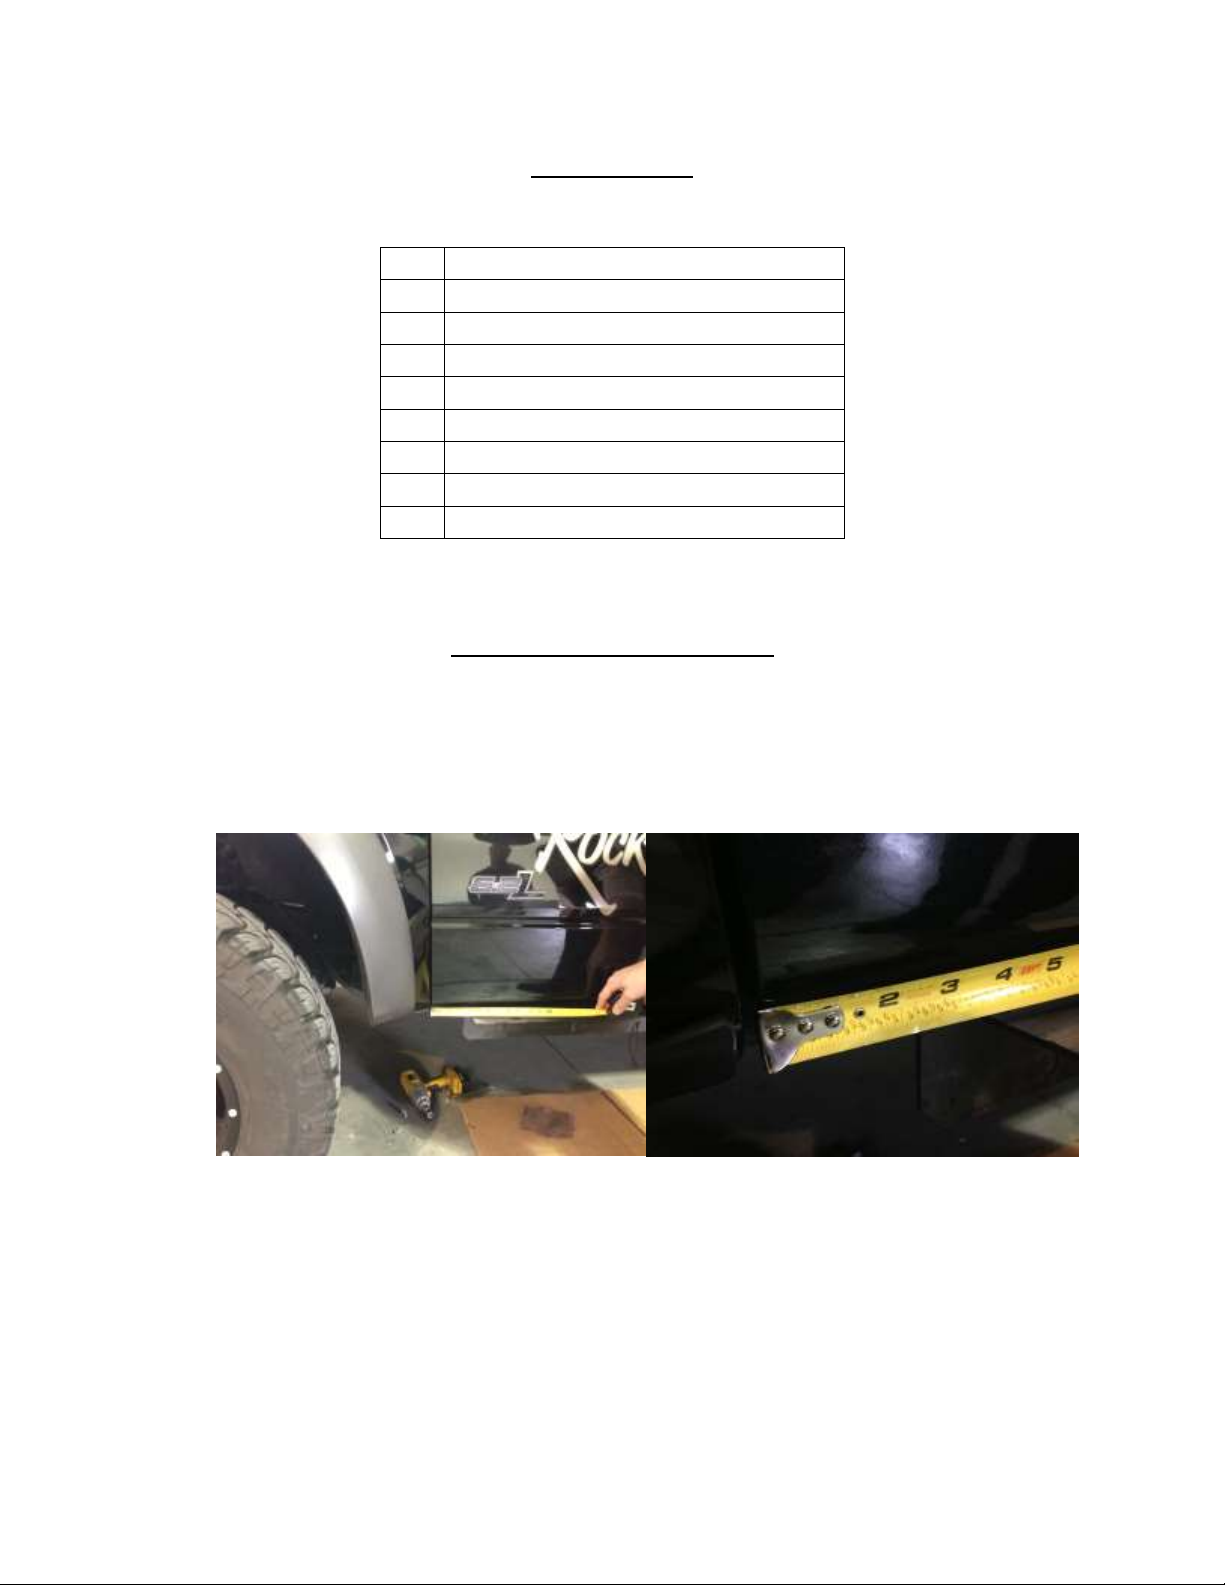
1. Remove the stock rocker panel guards
2. The top bracket will be installed first (If the brackets are not symmetrical make sure
you install the correct bracket on the correct side)
3. The bracket start point is approximately 4 3/8 inches back from the front door seam.
4. Find your starting point and hold the bracket up against the truck. Hold the bracket up
against the truck panel matching the body angles. Position the bracket so that the back
of the bracket is up against the panel seam. This should leave the top of the bracket in
approximately a level position when installed on the truck. Providing a level bracket for
the slider to sit on in the next step:
Installation Instruction RSEI 137
Page 3
Make sure to get the front of the bracket positioned as described in step 3.
a. This works best with two people holding the bracket and a third person marking
the holes
b. With bracket in the correct location, mark the location of the holes with a
marker on the panel of the truck. These will be the locations for the nutserts to
be installed in the body.
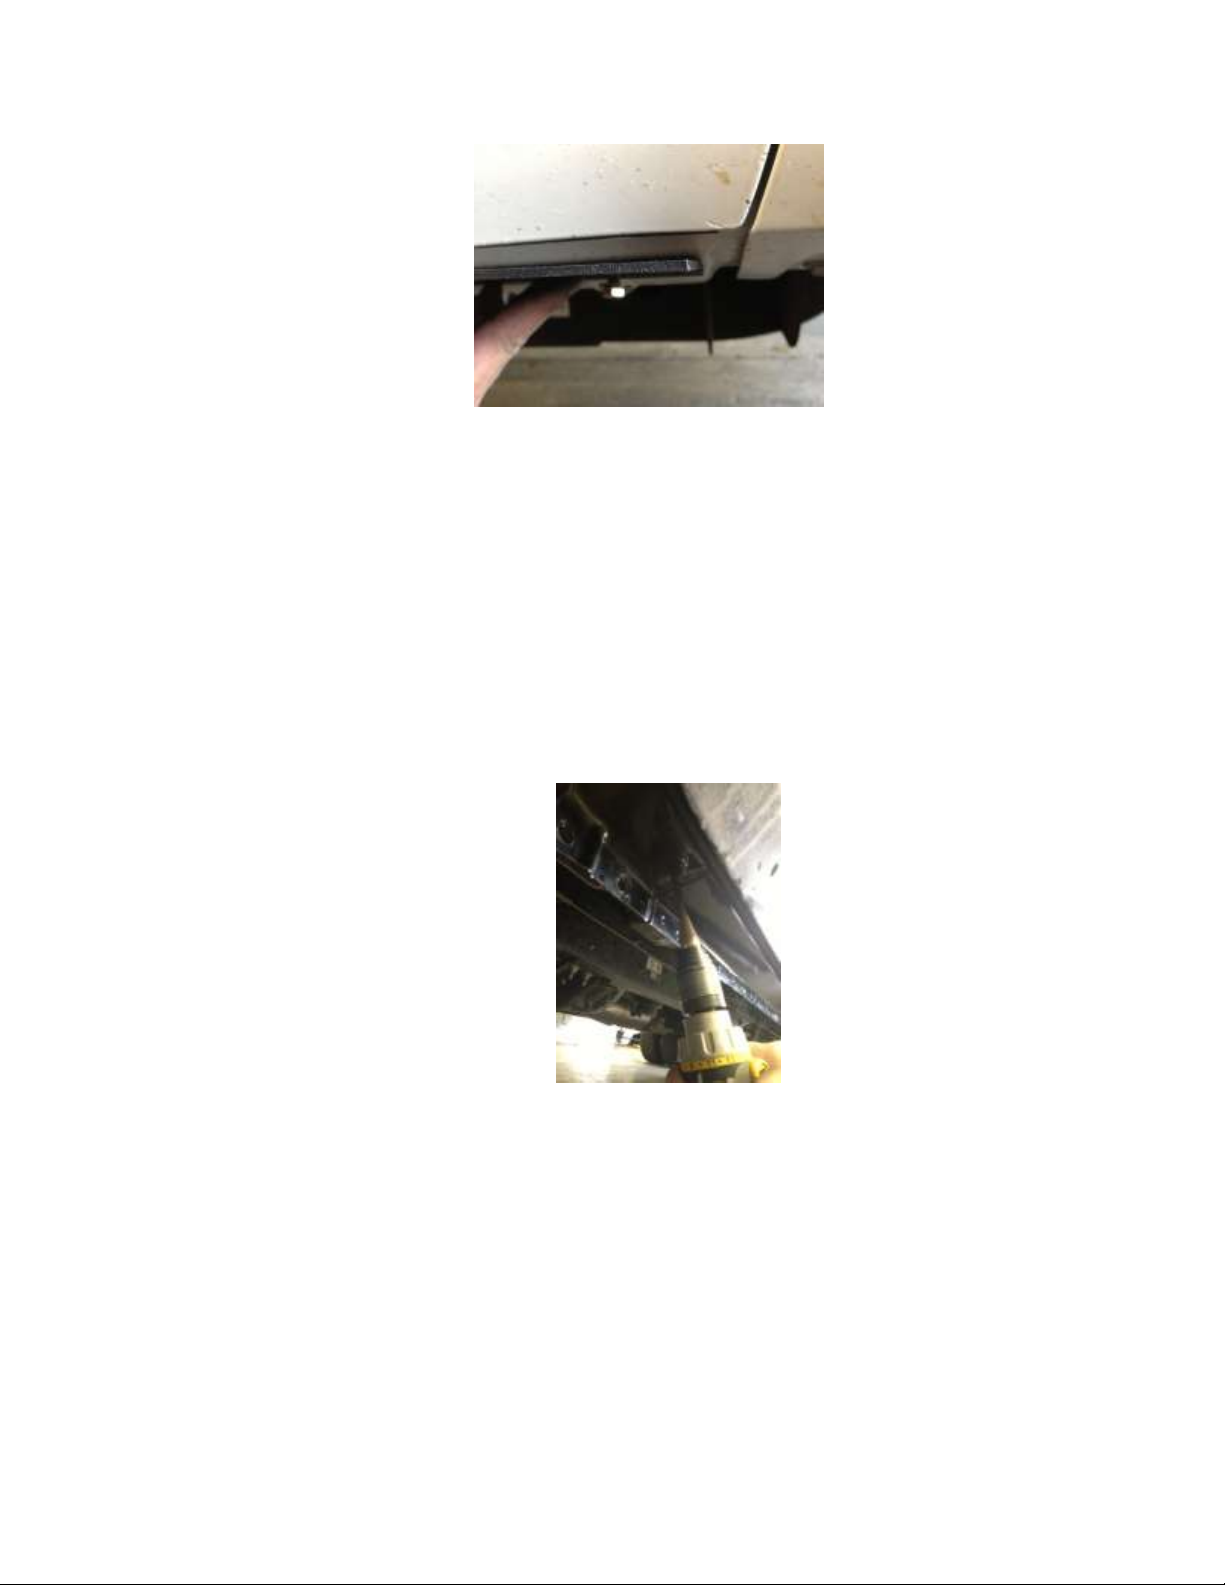
5. Carefully drill a 7/32’’ pilot hole into the center of the marked points into the truck’s
rocker side
a. **It is extremely important these holes are drilled precisely to insure the
slider will fit properly once the nutserts have been installed
6. From the center of the pilot hole, step up the hole size using a ½” bit to create a finish
hole that will be used to install the nutserts
7. Install nutserts in the holes that were just drilled into the body of the truck
a. We suggest using a crimping tool to optimize the integrity of the nutserts to
support the slider
b. If no crimping tool is available, follow these instructions
i. Install by using a 5/16’’x1.125’’ minimum length bolt with a 3/8’’ nut
ii. Put a small amount of grease on the bolt to reduce friction
iii. Hold the nut steady with an end wrench so the flange of the insert is flush
against the body panel
iv. Tighten the bolt against the nut to crimp the nutsert into place
v. If the nutsert is rotating, place a star-lock washer between the 3/8’’ nut
and nutsert
vi. Once the nutsert is crimped into place completely back out the bolt
Installation Instruction RSEI 137
Page 4

vii. If the nutsert ever breaks loose and spins, repeat the process and crimp it
tighter to prevent spinning
Nutserts properly installed
8. Attach the top bracket to the truck
a. Hang bracket on truck and bolt through bracket into the nutserts. Leave bolts
loose until all bolts are installed. Go back and tighten bolts until the bracket is
firm against side of truck
9. Set slider onto installed top bracket
10. Place slider in place and put two countersunk bolts in the matching holes to hold the
slider in place. BE SURE TO TIGHTEN THESE BOLTS. DO NOT OPEN THE DOOR WITH
THESE PARTICALLY INSTALLED IT WILL SCREWUP YOUR DOOR.
a. Make sure you put included anti-seize on bolt, since it is stainless steel and when
stainless steel is bolted into steel it can be hard to remove
11. Attach the back bracket to step slider body with two or three bolts and position it in
place as to where to secure it to the truck. Tighten the bolts to hold it in the desired location.
12. Mark location of holes from back bracket into body of truck
13. Drill 5/16” holes into the pinch seam of the body
14. Remove the slider to enable you to bolt the back bracket onto the truck
15. Bolt back bracket onto truck with provided bolts, nuts and washers. Bolt through the
bracket and pinch seam and put the nuts on the back side of the pinch seam
Installation Instruction RSEI 137
Page 5

16. Tighten all the bolts on the back bracket
17. Attach the slider to the top bracket using the stainless steel bolts. Don’t forget to use
the anti-sieze on each stainless steel bolt
18. Tighten the bolts from the back bracket to the slider body
19. These holes are elongated to allow for any adjustments that need to me made.
20. When the slider is mounted make sure that you have not twisted or manipulated the
shape of the slider with you tightening sequence. THIS WILL CAUSE THE STEP TO NOT
WORK PROPERLY.
21. Double check all bolts to verify components and hardware are installed correctly and
securely to the truck
***Please note: Expect some variance in parts that may require you to adjust the
tension of bolts to make parts fit correctly and properly. Once all parts are installed,
we suggest then fully tightening all bolts again to fit securely***
Thank you for choosing Rock-Slide Engineering products. We value your business and
welcome your feedback/suggestions. If you have any concerns please contact us directly @
435-752-4580. We are here to help you!
Installation Instruction RSEI 137
 Loading...