

Page 1
JK4 SLIDER INSTALLATION
SL-4D-100-JK
SLIDER INSTALLATION
1. Remove the stock rocker guards if equipped
2. Remove the front body bolts on the driver and passenger side (under the front
door)
3. Loosen the rear body bolts (under rear passenger doors)
a. DO NOT REMOVE THESE BOLTS! You will need these bolts to support the
slider you are about to put into place on the Jeep
REAR FRONT
Installation Instruction RSEI 109
Page 2

4. Replace the front body bolts on the driver and passenger sides with the 130mm
bolt, aluminum spacer, and large washer in same sequence as the picture below
indicates
a. DO NOT completely tighten the bolts, but leave them loose to reflect the
same looseness of the 2 rear bolts so you can fit the slider forks into
these slots
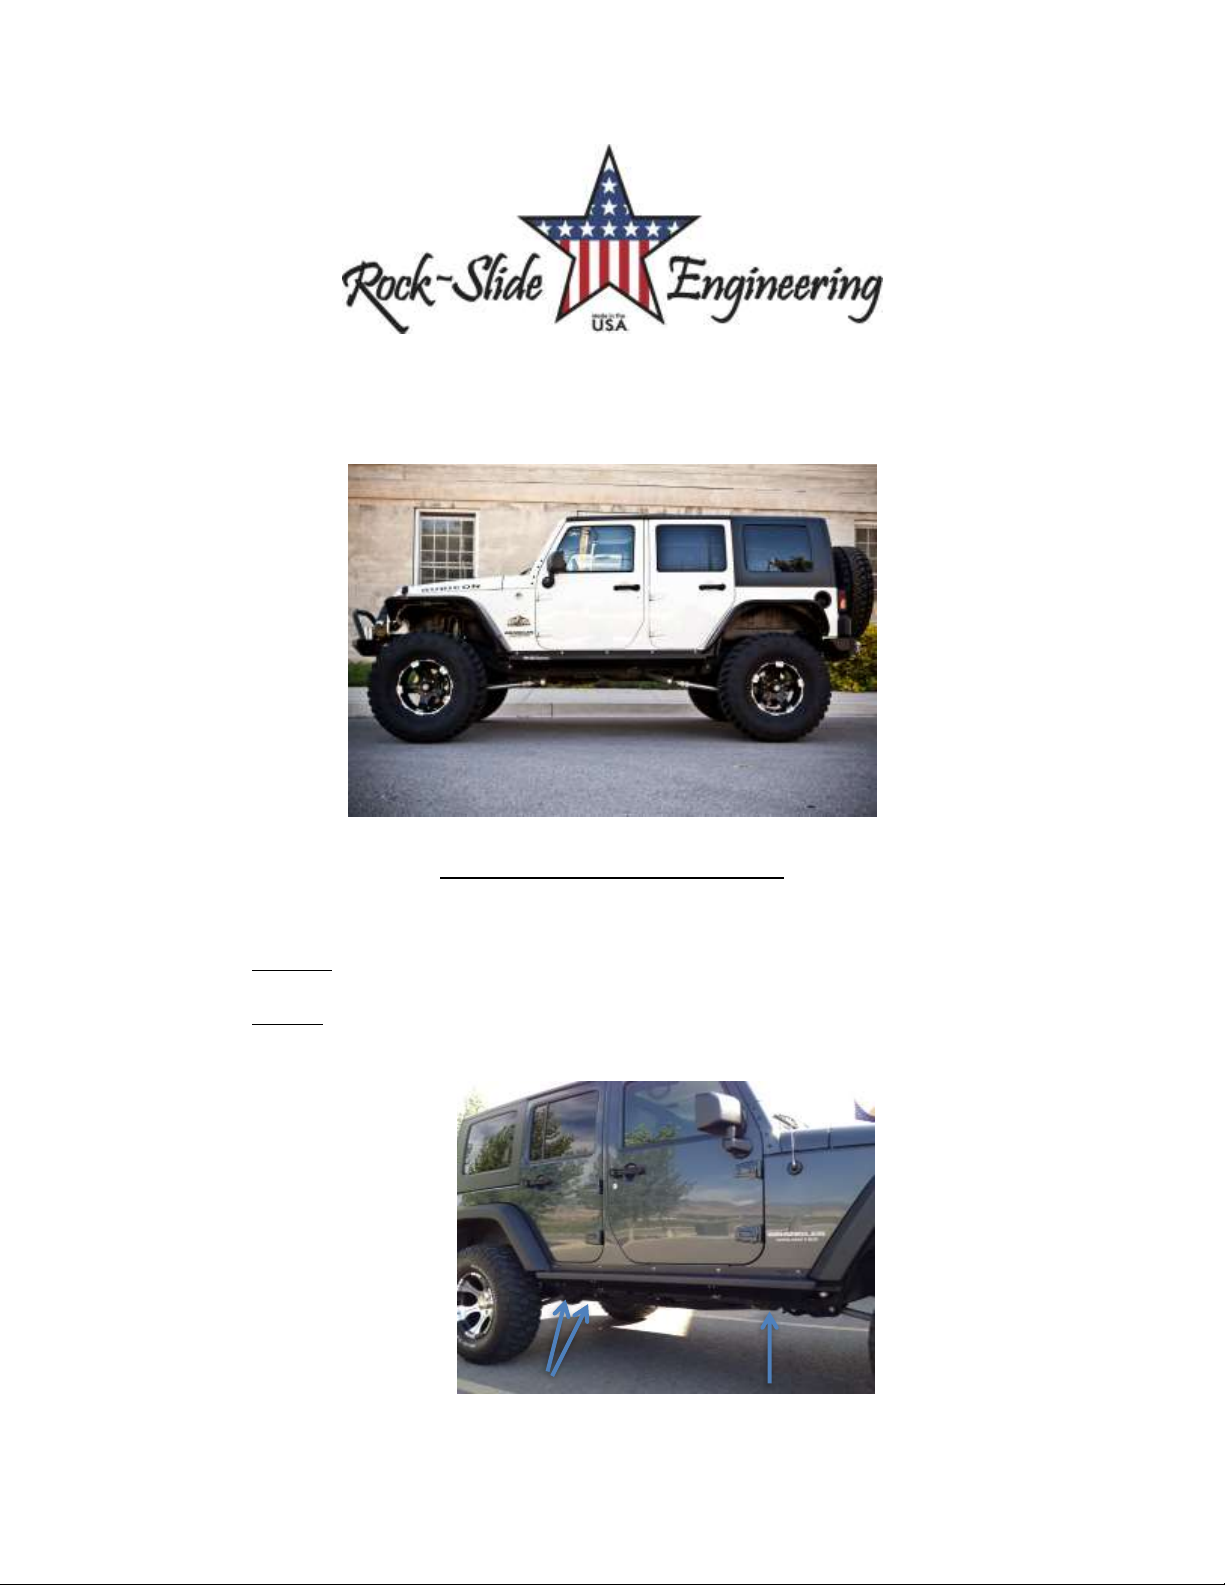
5. Move the slider into it’s position on the Jeep
a. You may want some help so that you can support the weight of the slider
b. Take extra care when positioning the slider on the Jeep to prevent any
scratching or marring of the painted surface
c. Insert the 3 slider forks into the 3 body mount bolt slots
d. The slider should fit tight to the Jeep’s rocker side
e. The top side of the slider should be at a flat 90 degree angle even with
the front and rear wheel wells of the Jeep
6. Tighten all body mount bolts to help bring the slider into position on the Jeep
a. This will be the final position of the slider so verify it’s straight, level,
even on both sides and you are satisfied with the slider’s layout
7. Carefully drill a 7/32’’ pilot hole into the center of the 5 indicated points on the
slider into the Jeep’s rocker side
a. **It is extremely important these holes are drilled precisely to insure
the slider will fit properly once the nutserts have been installed
b. The body sides are very thin metal so let the drill bit do the work. Don’t
push too hard on the drill or possible sheet metal damages may occur
8. Loosen the body mount bolts and remove the slider from the Jeep
a. You may want some help so that you can support the weight of the slider
9. From the center of the pilot hole, step up the hole size using a 17/32” bit to
create a finish hole that will be used to install the nutserts
10. Install 5 nutserts per side in the holes that were just drilled into the body of the
Jeep
a. We suggest using a crimping tool to optimize the integrity of the nutserts
to support the slider
Installation Instruction RSEI 109
Page 3

b. If no crimping tool is available, follow these instructions
i. Install by using a 5/16’’x1.125’’ minimum length bolt with a 3/8’’
nut
ii. Put a small amount of grease on the bolt to reduce friction
iii. Hold the nut steady with an end wrench so the flange of the insert
is flush against the body panel
iv. Tighten the bolt against the nut to crimp the nutsert into place
v. If the nutsert is rotating, place a star-lock washer between the
3/8’’ nut and nutsert
vi. Once the nutsert is crimped into place completely back out the
bolt
vii. If the nutsert ever breaks loose and spins, repeat the process and
crimp it tighter to prevent spinning
(Nutserts that have been installed correctly)
11. Lift the slider into its final position by inserting the 3 forks on the slider onto the
3 body mount bolts and aligning it against the Jeep rocker face
a. Attach the slider to the rocker face using the 5/16” button head bolts &
washers
i. Start from the center of the slider and work out towards the ends
ii. Apply a small amount of anti-seize to the threads of each bolt
iii. You will be using 5 bolts/washers per side
iv. We recommend tightening the button heads by hand to prevent
any damage to the head of the bolt
b. Tighten the body mount bolts beneath the Jeep to fully secure the slider
i. Make sure the spacer is in between the body and the slider on the
front body mount
ii. The body mount bolts need to be SNUG to the Jeep frame but DO
NOT OVER TIGHTEN the body mount bolts.
Installation Instruction RSEI 109
Page 4

12. Double check all bolts to verify components and hardware are installed correctly
and securely to the Jeep
***Please note: Expect some variance in parts that may require you to adjust the
tension of bolts to make parts fit correctly and properly. Once all parts are
installed, we suggest then fully tightening all bolts again to fit securely***
If you have any questions please contact Rock-Slide Engineering @ 435-752-4580
Thank you for choosing Rock-Slide Engineering products. We value your business and
welcome your feedback/suggestions. If you have any concerns please contact us
directly @ 435-752-4580. We are here to help you!
Installation Instruction RSEI 109
 Loading...