

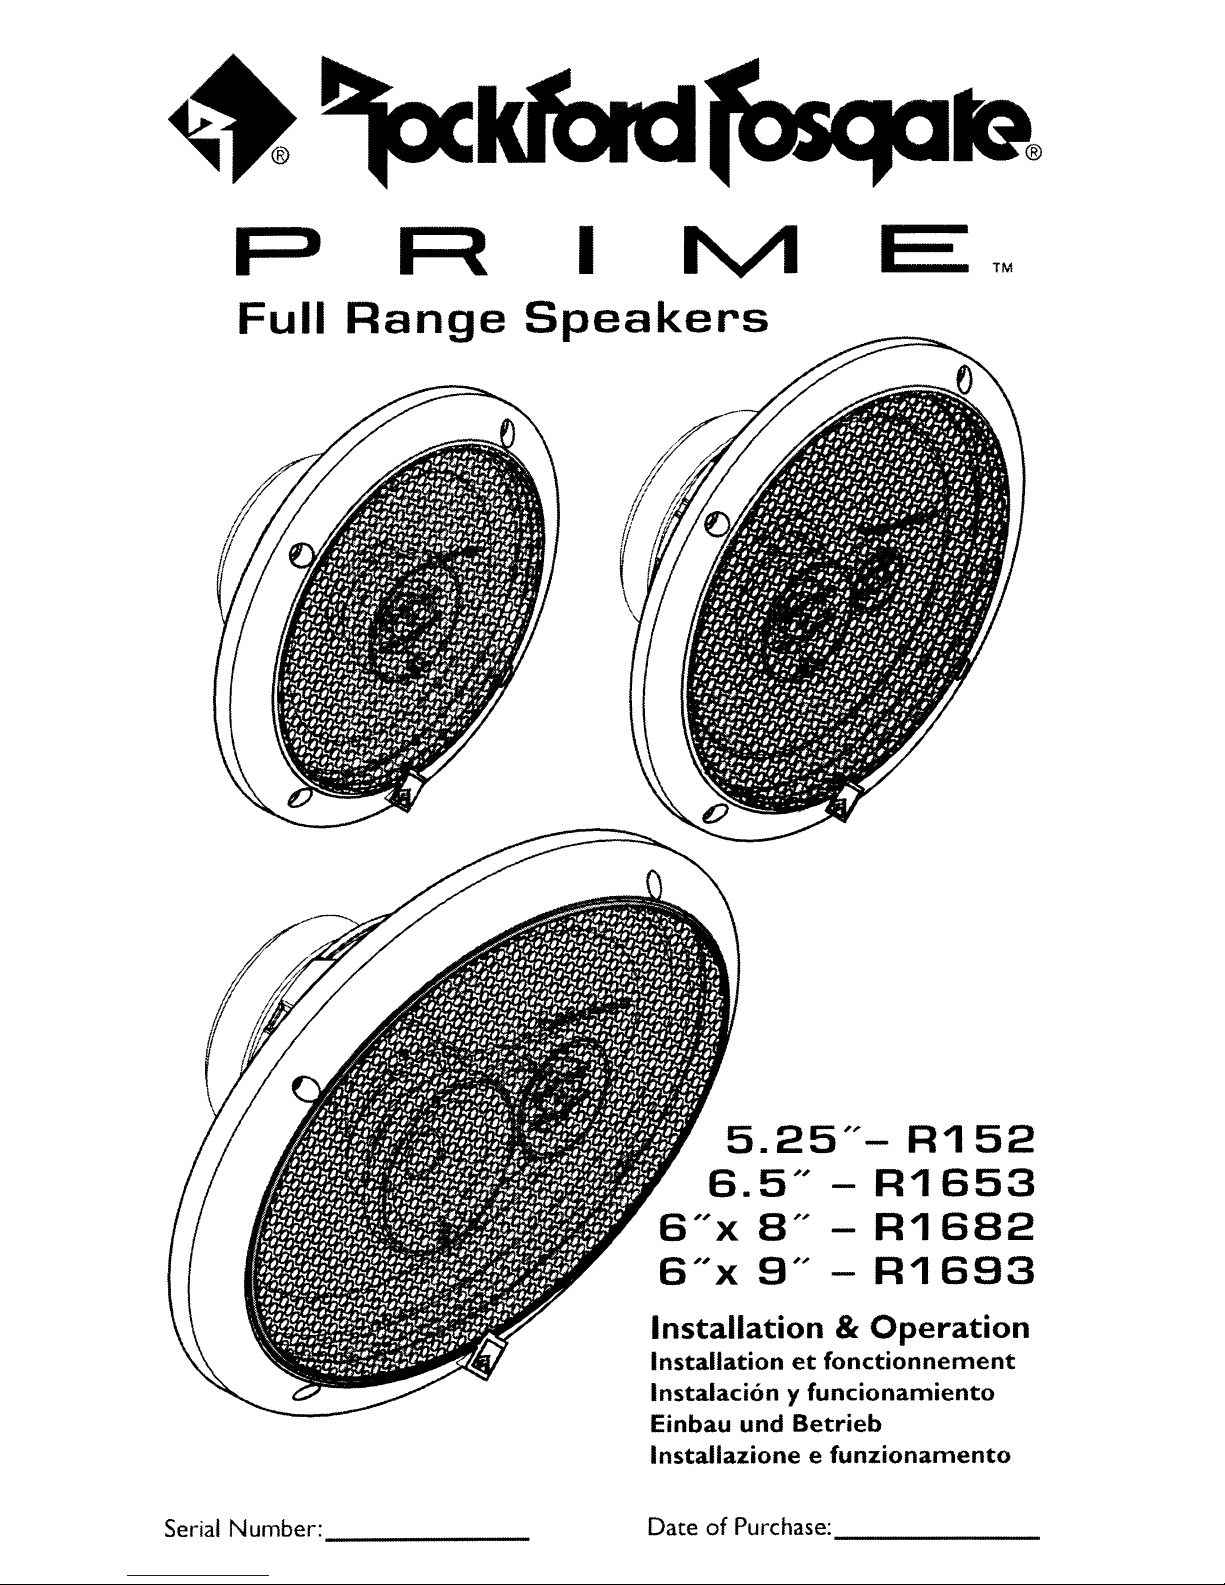
Rockford Fosgate PRIME R152, PRIME R1653, PRIME R1682, PRIME R1693 Installation & Operation Manual
p
I
Full
Range
speakers
Serial
Number:_-----
5.25
6.5"
6"x
6"x
Installation
Installation
Instalacion
Einbau
Installazione e
Date of Purchase:
8"
9"
und
et
y
funcionarniento
Betrieb
"-
-
-
R1
52
R1653
R1682
R1693
&
Operation
fonctionnernent
funzionarnento
------
SAFETY
6CAUT'ON:
Continuous exposuretosound pressure levels over
cause permanent hearing loss.
may
produce sound pressure
(I)
Set Prime Series
•
(I)
Setofdecorative speaker grilles
•
Mounting Hardware
•
Before installation. disconnect
negative (-) terminaltoprevent damage
to
the
unit. fire
PRACTICE SAFE
and/or
SOUNDTM
High
powered auto sound systems
levels
well over
sense and practice safe sound.
CARTON
Full
CONTENTS
Range Speakers
(R
152, R1653, R1693)
the
battery
possible injury.
IOOda
130dB.
Use common
may
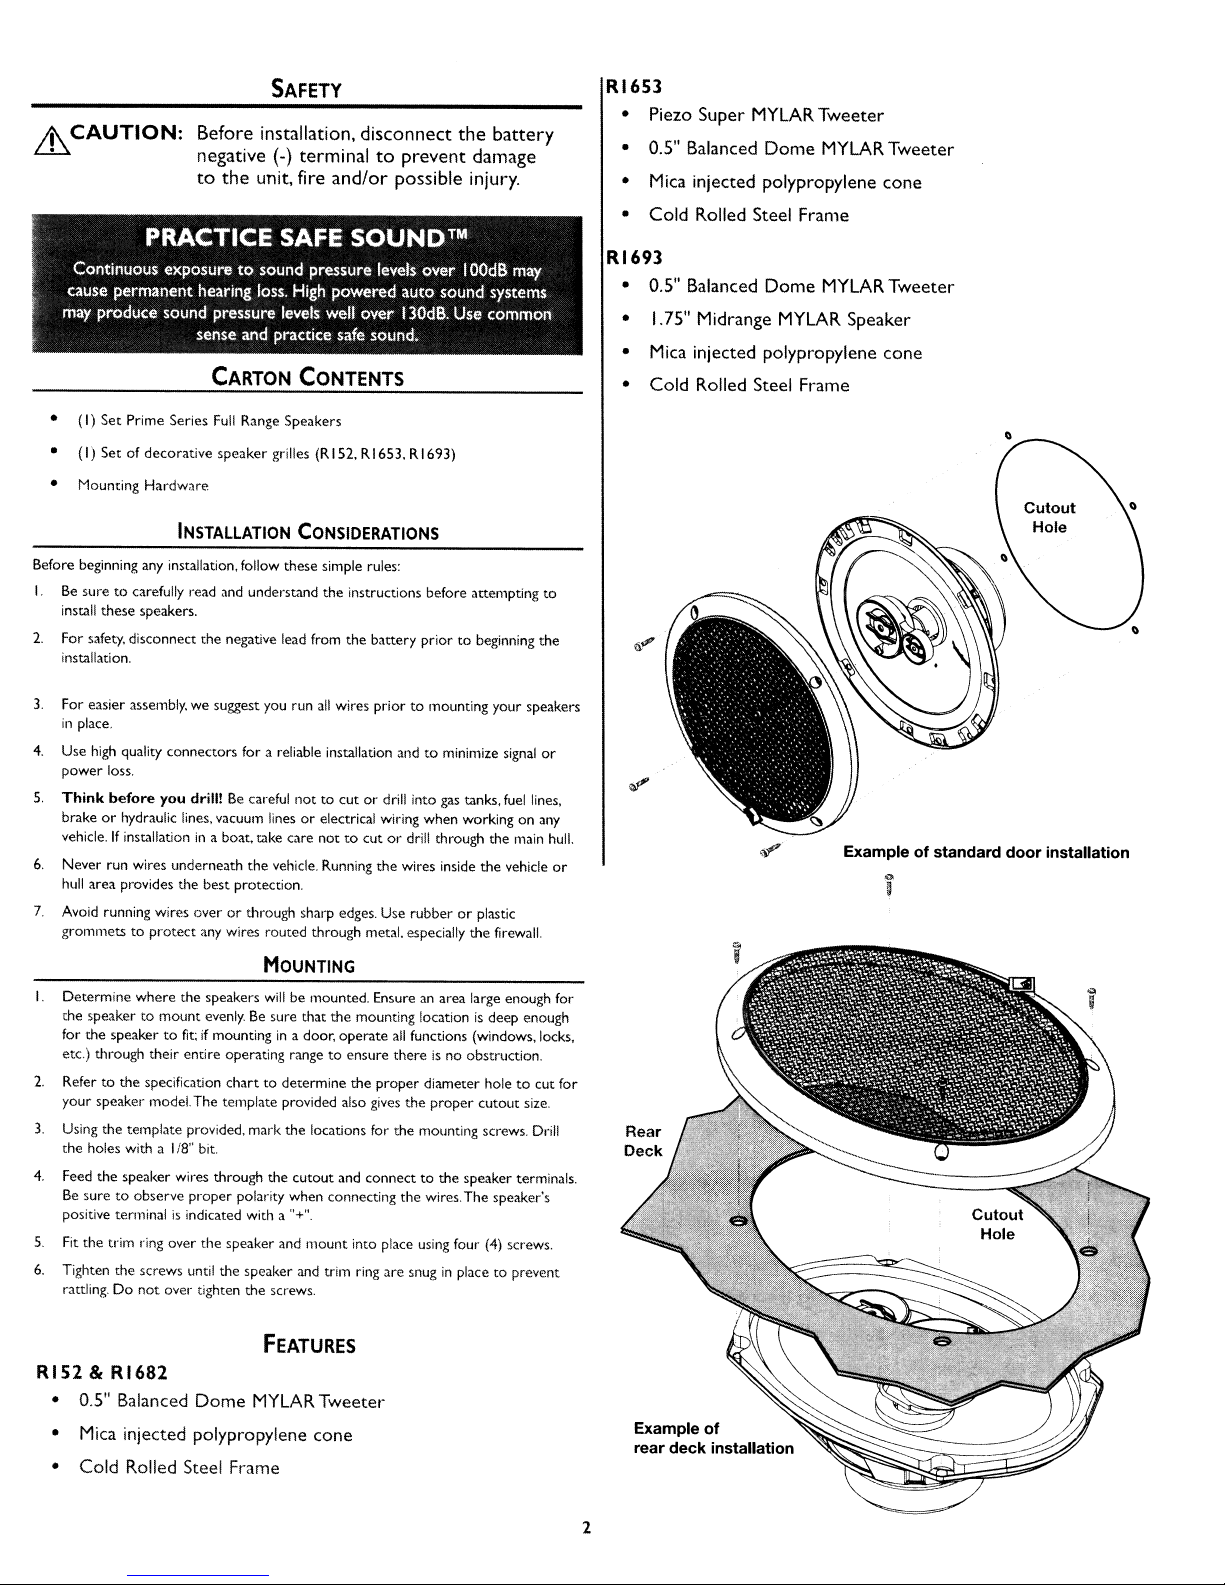
RI653
Piezo Super MYLARTweeter
•
OS' Balanced Dome MYLARTweeter
•
Mica injected polypropylene cone
•
Steel
Cold Rolled
•
Frame
RI693
• OS' Balanced
• 1.75" Midrange MYLAR Speaker
• Mica injected polypropylene cone
• Cold Rolled Steel Frame
Dome
MYLAR Tweeter
INSTALLATION
Before beginning
I.
Be
install these speakers.
2.
For safety, disconnect the negative lead from the battery priortobeginning the
installation.
3.
For easier assembly. we suggest you run
in
place.
4.
Use
power loss.
5.
Think
brakeorhydraulic lines, vacuum linesorelectrical wiring when working on
vehicle.Ifinstallationina boat, take care
6.
Never run wires underneath the vehicle. Running the wires inside the vehicle
hull
7.
Avoid running wires overorthrough sharp edges. Use rubberorplastic
grommetstoprotect any wires routed through metal. especially the firewall.
any
installation, follow these simple rules:
suretocarefully read and underst.1nd the instructions before attempting
high
quality connectors for a reliable installation andtominimize
before
you
drill!Becareful
area provides the best protection.
CONSIDERATIONS
all
wires priortomounting your speakers
nottocutordrill
nottocutordrill
into
gas
tanks,
through the main
MOUNTING
I.
Determine where the speakers
che
speakertomount
for the speakertofit;ifmountingina door, operate
etc.) through their entire operating rangetoensure thereisno obstruction.
2.
Refertothe specification charttodetermine the proper diameter holetocut for
your speaker model.The template provided also
3.
Using the template provided, mark the locations for the mounting screws.
the holes with a
4.
Feed the speaker wires through the cutout and connecttothe speaker terminals.
Be
suretoobserve proper polarity when connecting the wires. The speaker's
positive terminalisindicated with a "+".
5.
Fit
the trim ring over the speaker and mount into place
6.
Tighten the screws until the speaker and trim
rattling.Donot
1/8"
bit.
over tighten the screws.
will
evenly.Besure that the mounting locationisdeep enough
be mounted. Ensureanarea large enough for
all
functions (windows, locks,
gives
the proper cutout size.
using
four
(4)
ring
are snuginplacetoprevent
signal
fuel
screws.
to
or
lines,
any
Drill
hull.
or
Exampleofstandard
door
installation
FEATURES
RI52 & RI682
• OS' Balanced
•
Mica injected polypropylene cone
Cold Rolled Steel Frame
•
Dome
MYLARTweeter
Example
rear
deck
of
installation
2
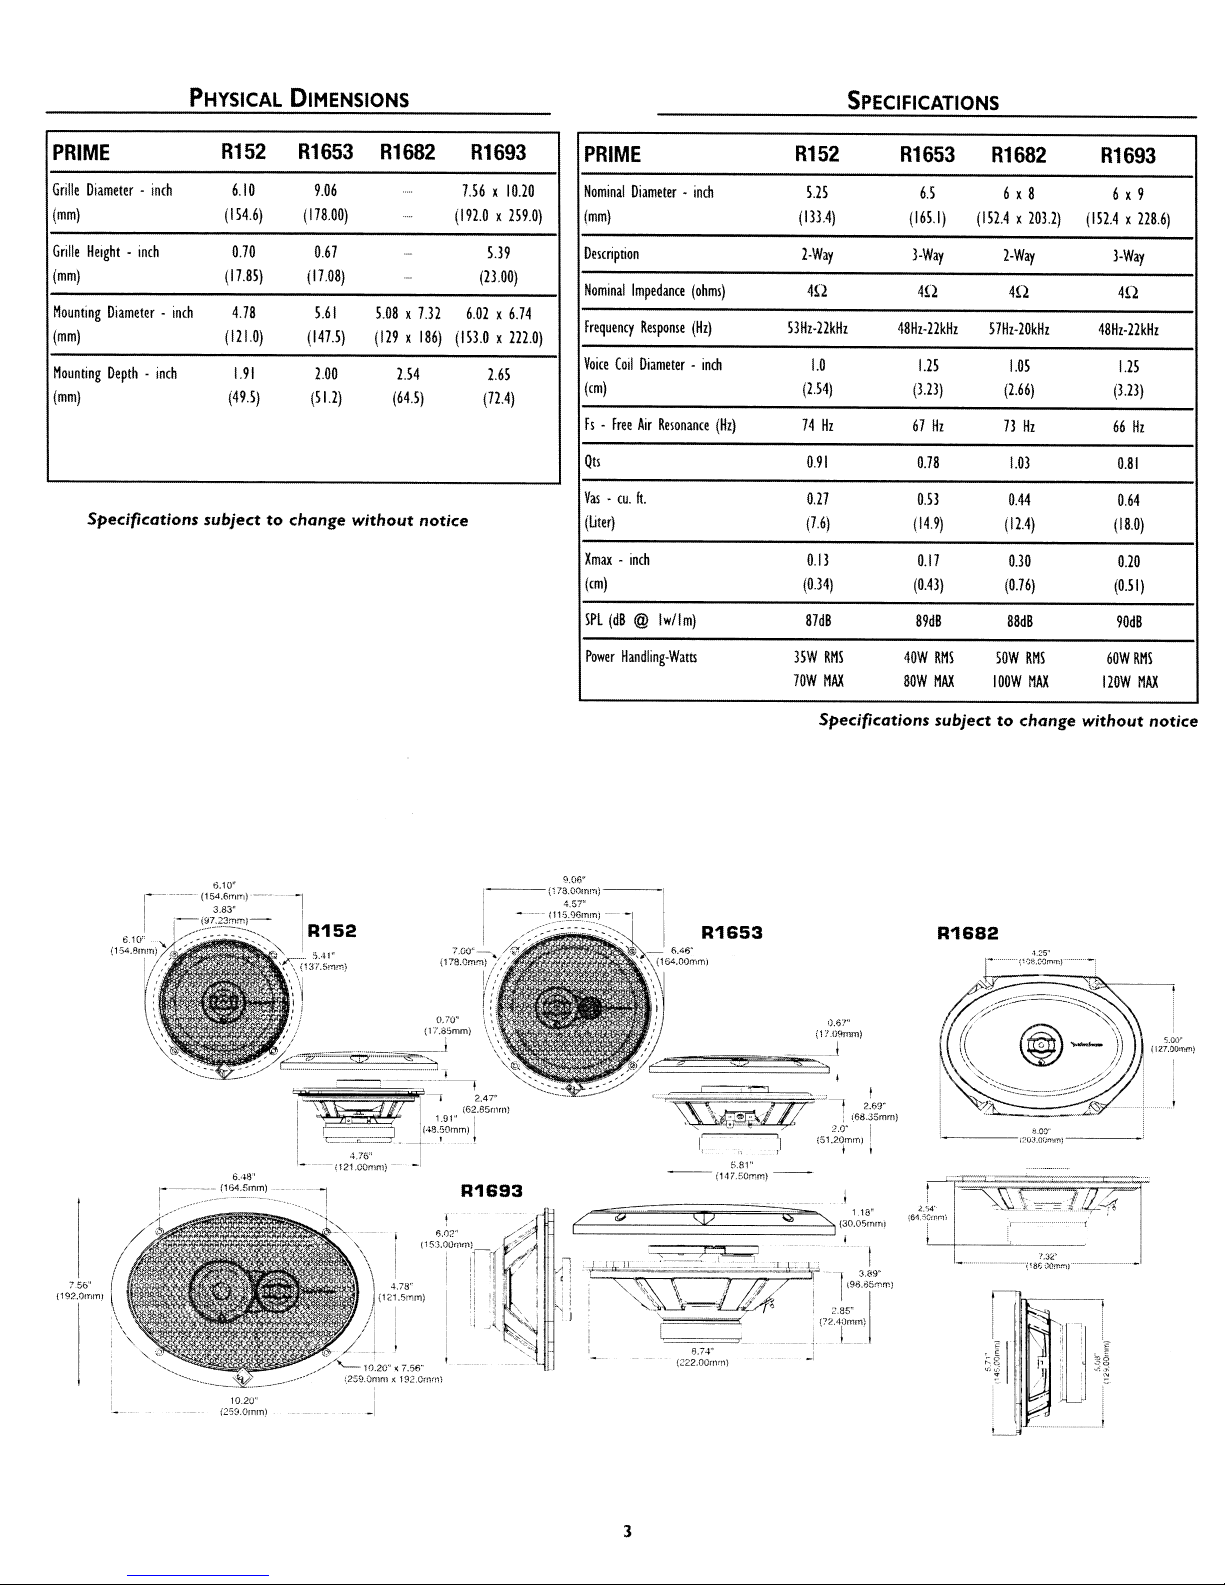
PHYSICAL
DIMENSIONS
SPECIFICATIONS
PRIME
Grille
Diameter.inch
(mm)
Grille
Height.inch
(mm)
Mounting
Diameter·
(mm)
Mounting
Depth.inch
(mill)
Specifications
R152
6.10
(154.6)
0.70
(
17.85)
4.78
inch
(1210)
1.91
(49.5) (51.2) (64.5)
R1653
subjecttochange
9.06
(178.00)
067
(1708)
5.61
(147.5)
2.00
R1682
508x7.32
(129x186)
without
254
7.56x10.20
(192.0x159.0)
(153.0x222.0)
notice
R1693
5.39
(23.00)
6.02x6.74
2.65
(72.4)
PRIME
Nominal
Diameter·
(mm)
Description
Nominal
Impedance
Frequency
Response
Voice
Coil
Diameter.inch
(cm)
Fs
•
Free
Air
Qts
Vas·
cu.
ft.
(uter)
Xmax.inch
(em)
SPL
(dB
@
Power
Handling-WaItS
inch
(ohms)
(Hz)
Resonance
1",/lm)
(Hz)
R152
525
(
133.4)
2-Way
4n
53Hz-22kHz
10
(254)
74
Hz
0.91
0.27
(7.6)
Oil
(0.34) (0.43) (0.76)
87dB
35W
RMS
70W
MAX
Specifications
R1653 R1682
6.5
(
165.1)
3-Way
(152.4x203.2)
m m
48Hz·
22kHz
1.25
(3.23)
67
0.78
0.53
(14.9) (12.4)
0.17 0.30
89dB
40W
80W
57Hz-20kHz
Hz
RMS
MAX
100W
subjecttochange
6 x 8
2-Way
105
(2.66)
13
103
0.44
88d8
SOW
Hz
RMS
MAX
R1693
6 x 9
(152.4x228.6)
3-Way
4n
48Hz-22kHz
1.25
(3.23)
66
Hz
0.81
064
(18.0)
0.20
(0.51)
90dB
60W
RMS
120W
MAX
without
notice
10.20"
f2S9.0mm)
t
.a.'>4'
(61..5Crnnli
I
R1682
•...._~....
~
\I27.00,
\\t·m·········,77~
~~.,\~~
...
~
,.:t!.JI,.~-(l
···············1
:ir~j
l
i_JA
,
~.OO'"
nm
.J
l
3
 Loading...