

Page 1
CONGRATULATIONS!
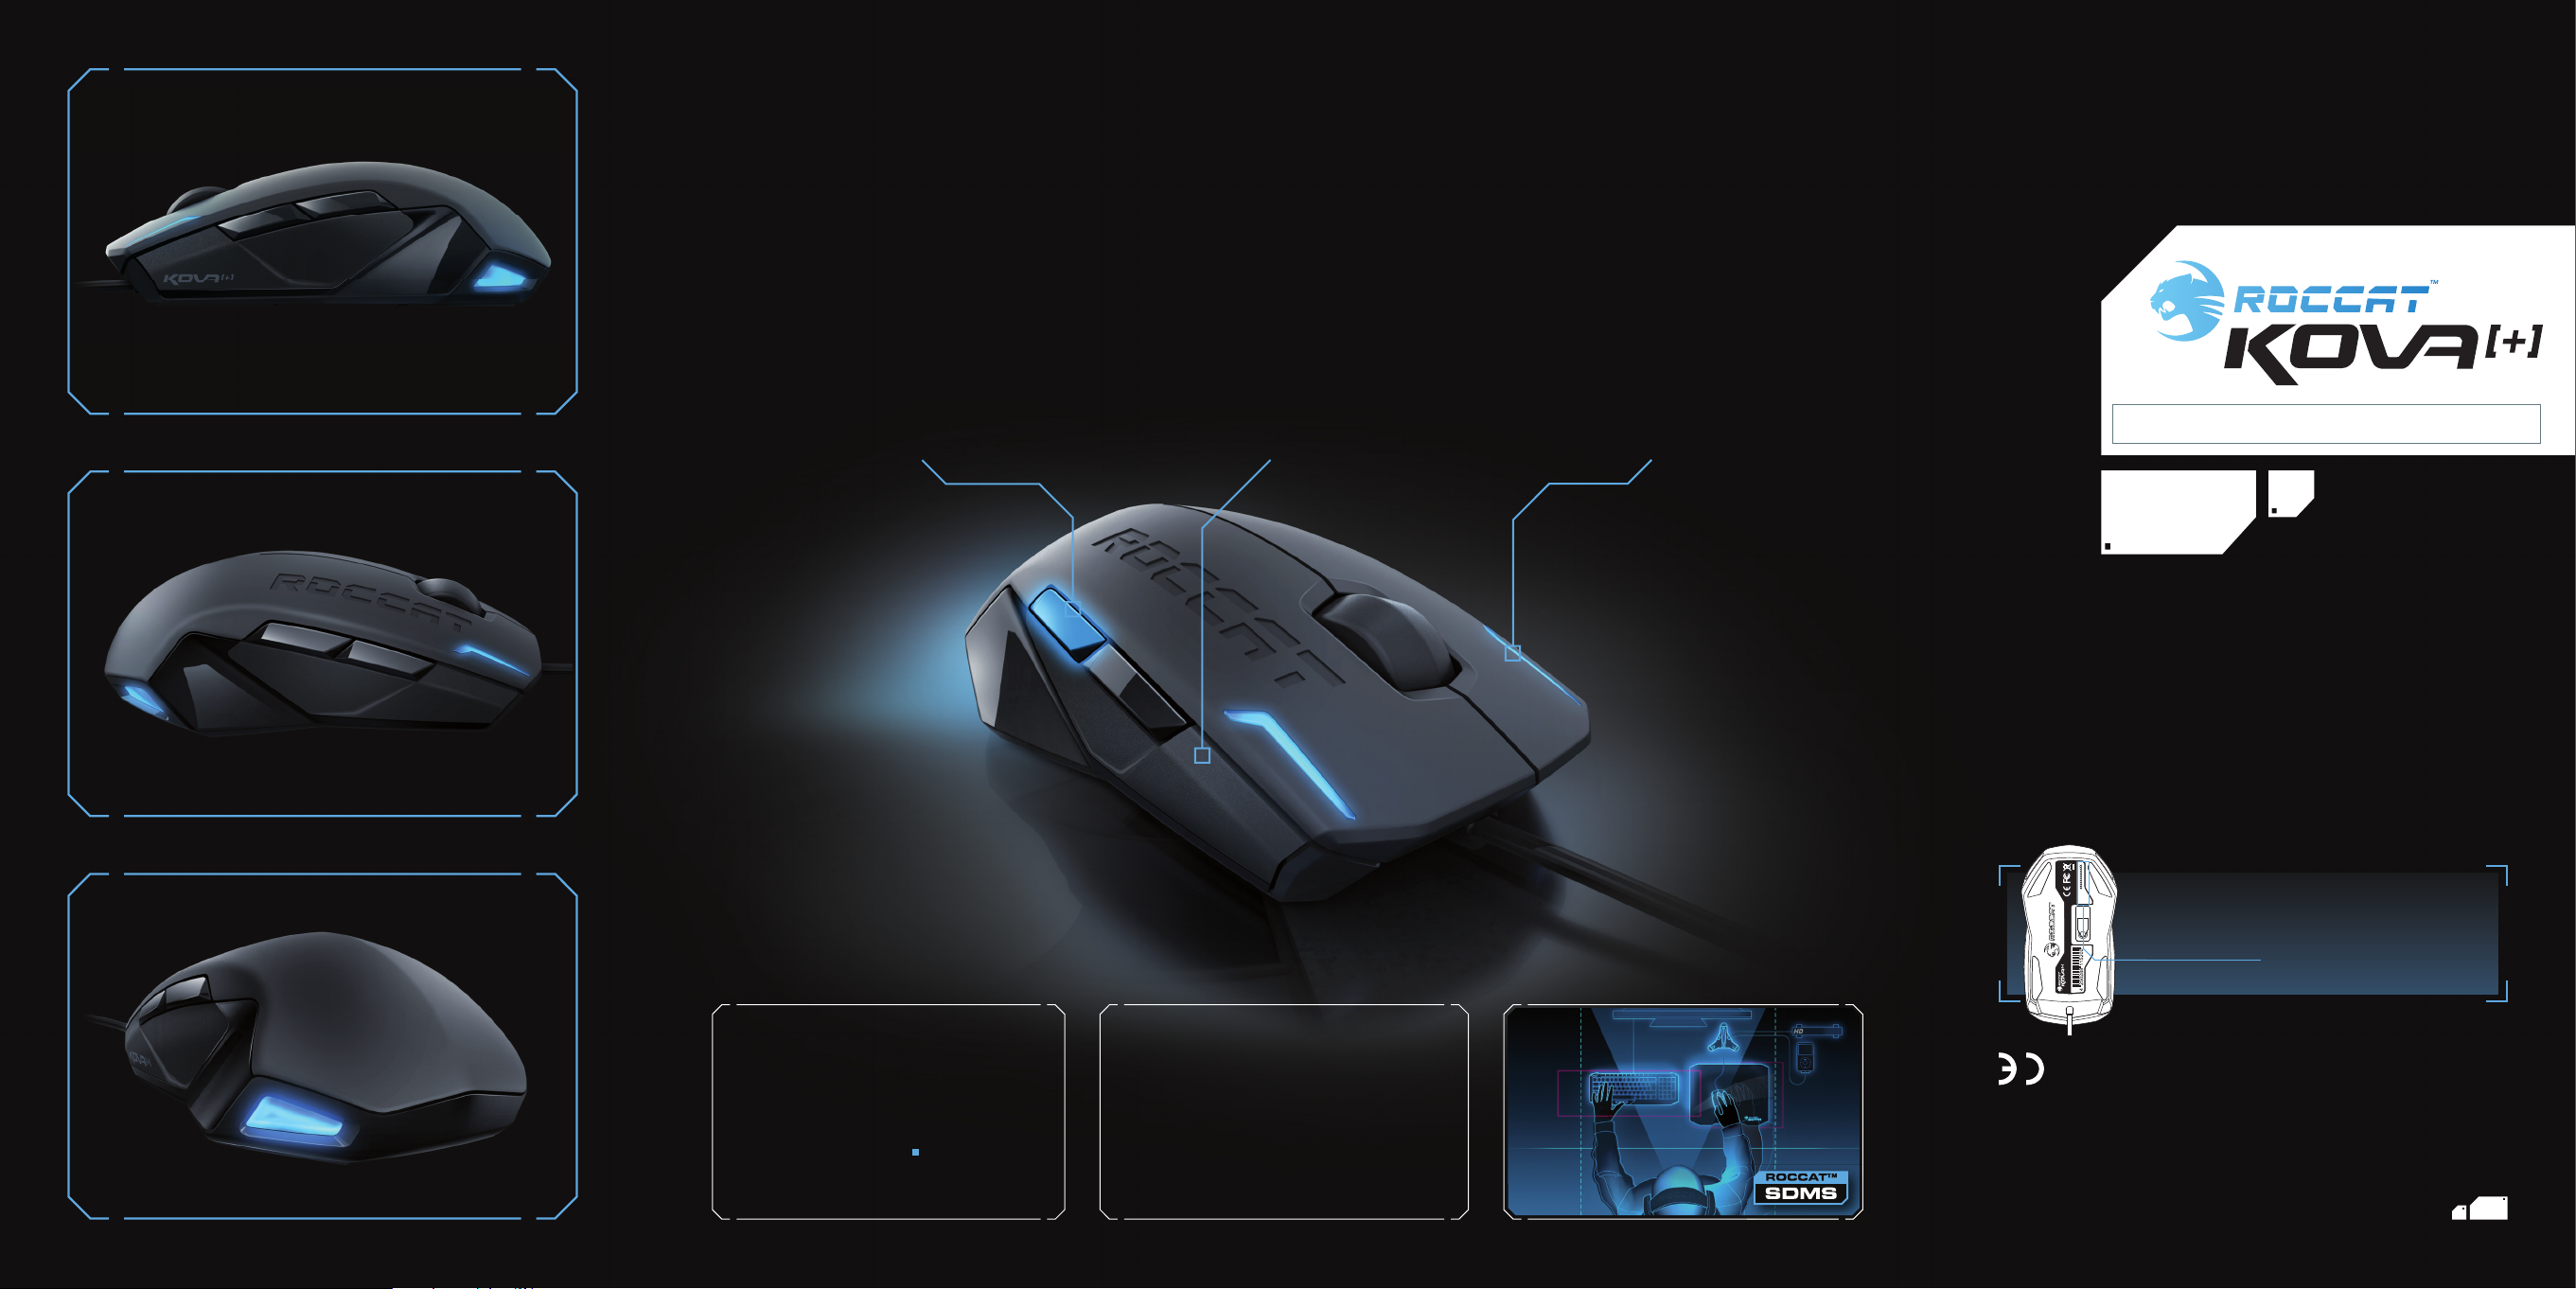
You’re holding the ROCCAT™ Kova[+] Max Performance Gaming Mouse – the tuned-up successor to the famous Kova Gaming Mouse. Whether you’re left- or right-handed, the Ergo-Stealth design of the Kova[+] fi ts the way you play. The Kova[+] also features an extensive driver
package that includes the world-famous Macro Manager software, macro presets and revolutionary Easy-Shift[+]™ technology.
ROCCAT™ Driver & Easy-Shift[+]™
The Kova[+] is enhanced by a feature-rich
driver system. Along with award-winning
Macro Manager software – which includes
macro presets for gaming, multimedia and
offi ce apps – the Kova [+] also features the
innovative Easy-Shift[+]™ button that lets you
double the number of mouse functions.
ROCCAT™ GripTech Side Areas
The ROCCAT™ Kova[+] features enlarged
GripTech side areas for left- and right-handers
alike. These stabilize mouse
boost grip effectiveness.
side areas, the mouse's upper body surface
also features an advanced, non-slip coating.
handling and
Along with the
Customizable Lighting System
Use the driver to change colors or the light
effects quickly and easily. Get your Kova[+]
to light up in a variety of attractive colors.
The discreetly integrated LEDs on the sides
of the mouse cast an atmospheric aura over
the desktop, particularly when you activate
the “breathing” function.
QUICK-INSTALLATION GUIDE
I M P O R TA N T
DOCUMENT
manual. This publication or parts of it may not be reproduced without the express consent of the publisher.
subject to change without notice. ROCCAT GmbH shall not be made liable for any errors that may appear in this
or registered trademarks and are the property of their respective owners. Information contained herein is
© 2012 ROCCAT GmbH. All rights reserved. Any product names mentioned in this manual may be trademarks
Otto von Bahrenpark, Paul-Dessau-Str. 3G, 22761 Hamburg, Germany
ROCCAT GmbH
SPECIFICATIONS
PACKAGE CONTAINS
ROCCAT™ Kova[+]
Max Performance Gaming Mouse
Quick-Installation Guide
SYSTEM REQUIREMENTS
Windows® XP, Windows Vist a® 32/64 bit,
Windows® 7 32/64 bit
Internet connection (for driver installation)
USB 2.0 Port
TECH SPECS
3200dpi optical gaming sensor
130 inches per second maximum speed
30G acceleration
1000Hz polling rate
16-bit data channel
2m USB cable
ORGANIZE YOUR DESKTOP WITH ROCCAT™ SDMS
MORE INFO ON ROCCAT.ORG/SDMS
ROC-11-520
(SN)
ROCCAT.ORG/REGISTER
REGISTRATION. SIGN IN AT:
LOCATED ON THE BOTTOM LABEL
Designed at ROCCAT Studios, Germany
China
Made in
Max Performance Gaming Mouse
) FOR
(
PLEASE USE YOUR PRODUCT’S SERIAL NUMBER
ROCCAT.ORG/SUPPORT
Just send an e-mail to [email protected]. Or visit our website at:
Our support team is ready to help with any technical questions.
Should you need assistance …
Page 2
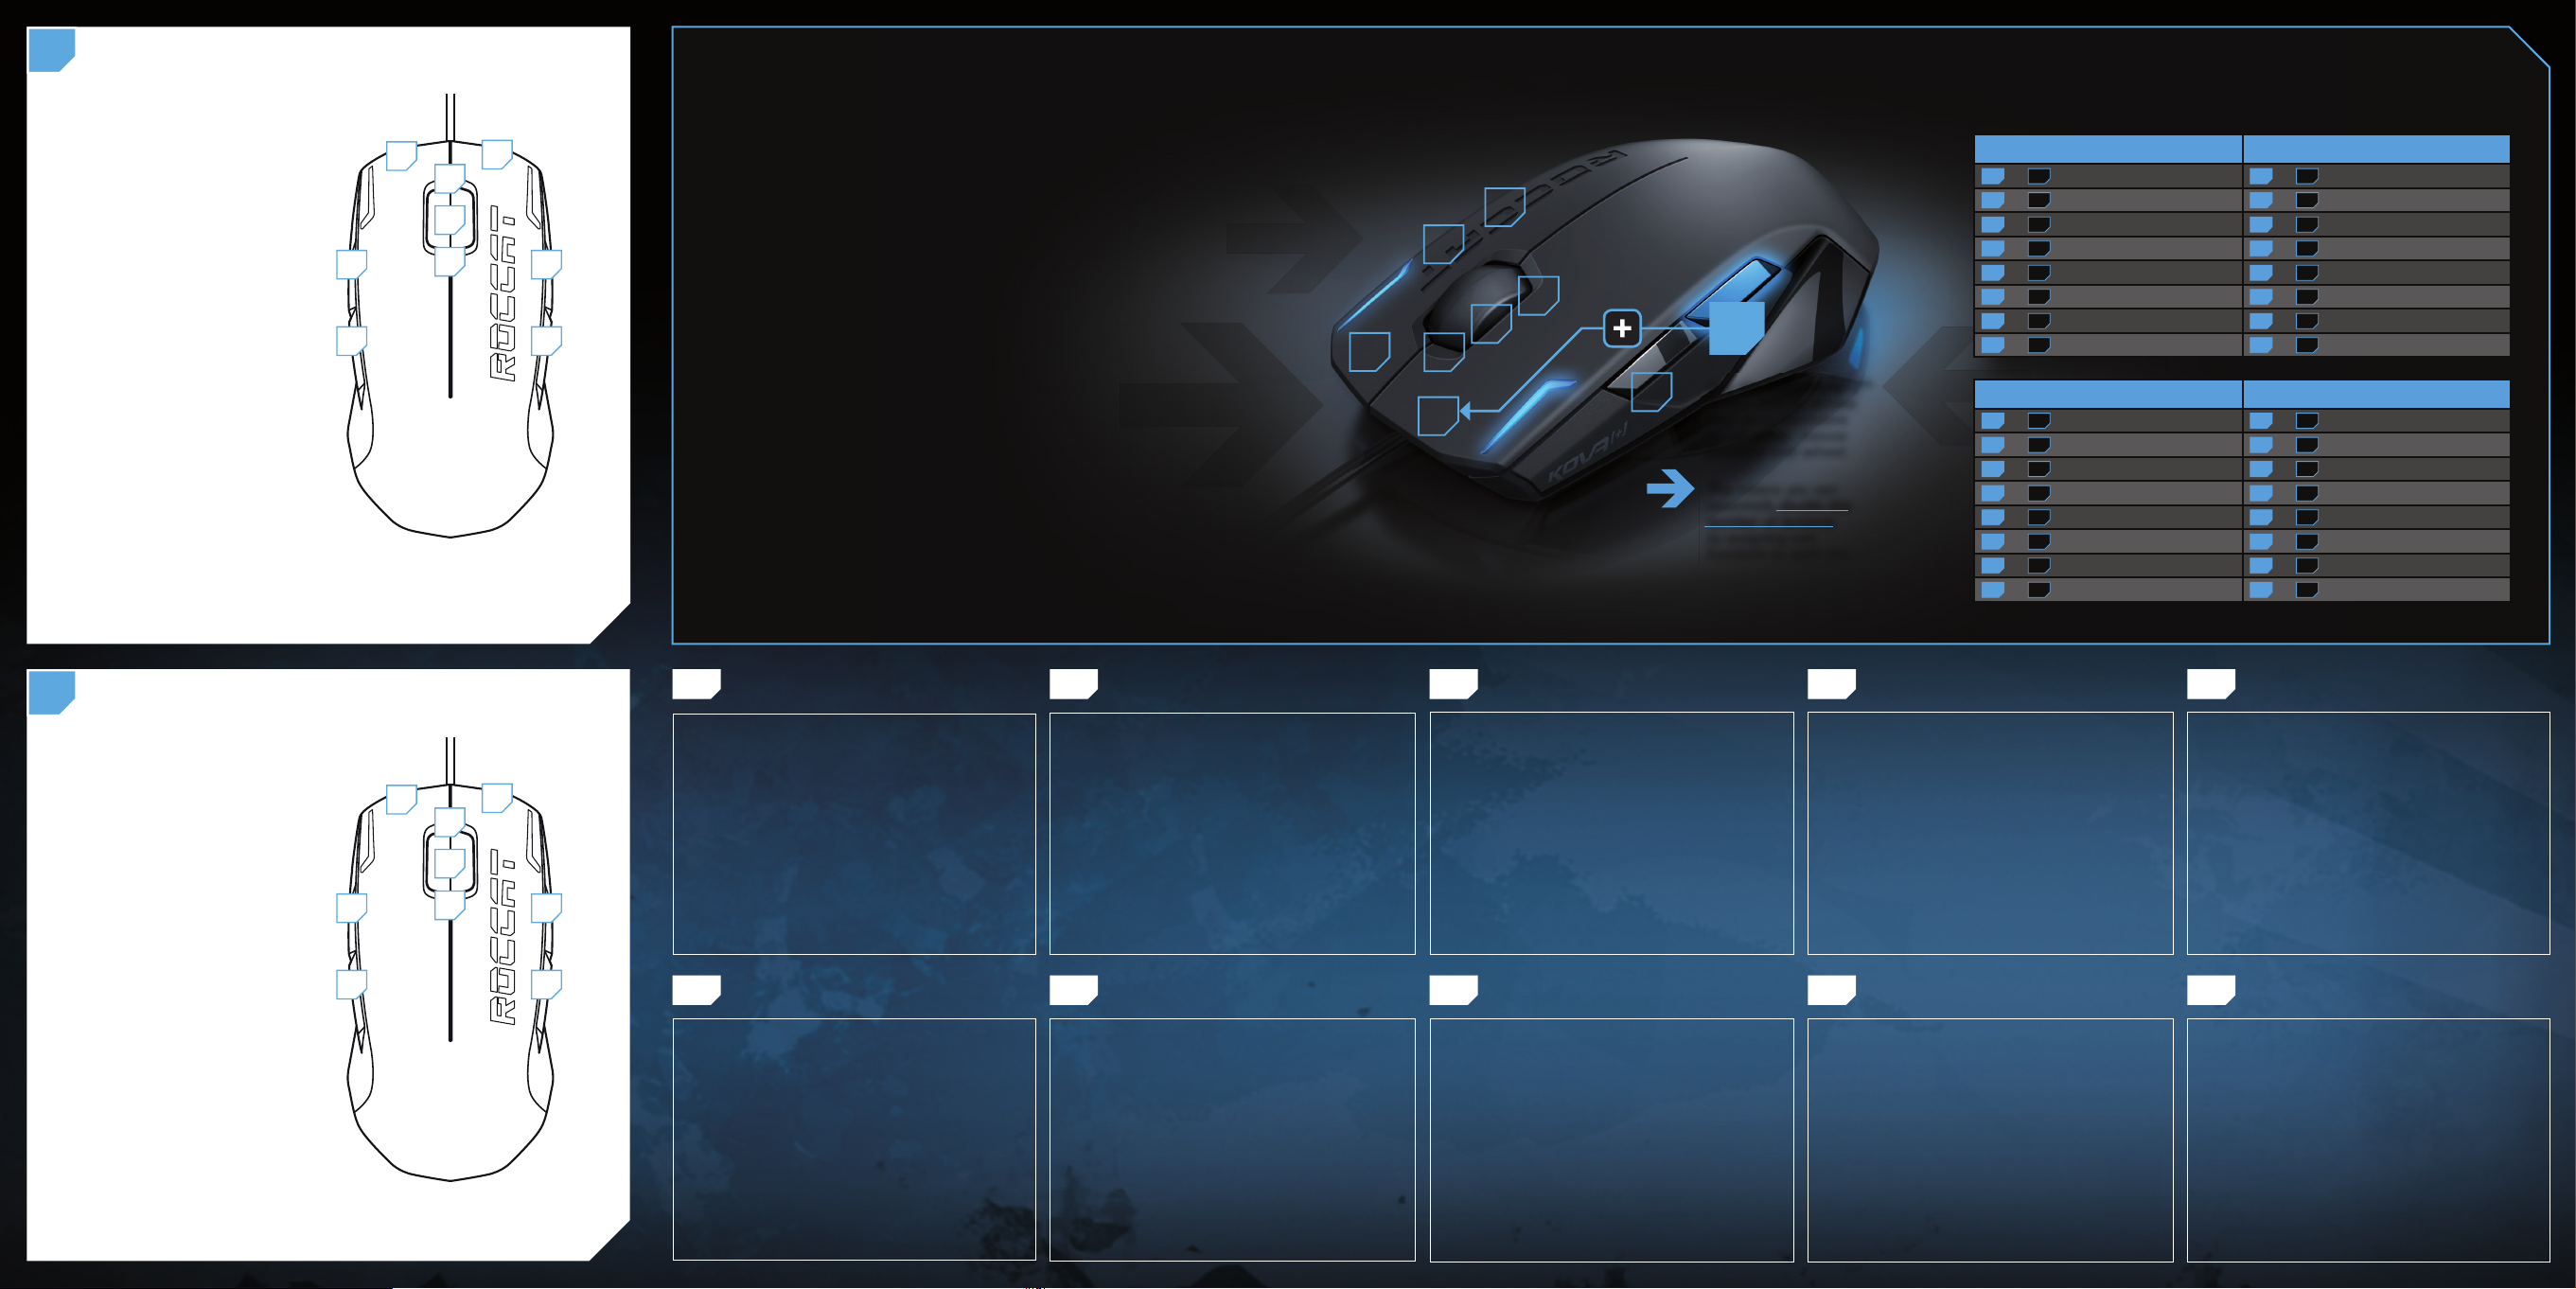
DEFAULT BUTTON ASSIGNMENT
A
(no driver installed)
ROCCAT™ EASY-SHIFT
[+]™
THE DUAL ASSIGNMENT FUNCTION FOR MOUSE BUTTONS
EASY-SHIFT[+]™ EXAMPLES :
1 = Left mouse button
1
2 = Right mouse button
3 = Middle mouse button &
universal scroll
4
4 = Page forward (browser)
5 = Easy-Shift[+]™ button
6 = Disabled by default
(Install the driver to
assign a function.)
7 = Disabled by default
(Install the driver to
assign a function.)
5
8 = Mouse wheel up
9 = Mouse wheel down
DEFAULT BUTTON ASSIGNMENT: EASY-SHIFT
B
(no driver installed)
5 + 1 = Page back (browser)
1
5 + 2 = Page forward (browser)
5 + 3 = Mute volume
5 + 4 = Disabled by default
(Install the driver to
assign a function.)
4
2
8
3
9
6
7
[+] ™
2
8
3
9
6
EASY-SHIFT[+]™ : ASSIGN DUAL FUNCTIONS TO THE MOUSE BUTTONS
Easy-Shift[+]™ lets you assign an ex tra function to your mouse buttons and
scroll-wheel (including mouse wheel dir ections: up, down, depressed) – which
effectively doubles the amount of functions you can peform.
The Easy-Shif t [+]™ but ton works just like the shift key on a keyboard:
6
7
Hold it down while pressing one of the other standard mouse buttons and
you execut e a second function.
PRACTICAL MACRO CONTROLS
The advant age of using the Easy-Shif t [+]™ secondary but ton assignment feature
is evident, for example, when using the driver’s macro controls. Here you’ll fi nd
functions that let you launch and control your media player using just the mouse.
For ins tance, the mouse wheel, in conjunc tion with the Easy-Shift[+]™ button,
can be used to control volume level. You can also assign Previous track/Next
track functions to the left and right mouse but tons in combination with the
Easy-Shif t[+]™ button.
In fact, shor tcuts like these became so valuable to our beta test ers, that aft er
only a short while they t old us they couldn’t live without the Easy-Shif t [+]™
button! Top ergonomics and max imum f unctionalit y have fi nally found a home in
the Kova[+].
2
8
1
9
3
4
5
Use the Easy-Shift[+]™
button (#5) to access
2nd level functions
on all other mouse
buttons and wheel.
This means you can
essentially double the
number of buttons
by assigning two
functions to each one.
DE DK EN ES FI
ANLEITUNG INSTRUKTIONER INSTRUCTIONS INSTRUCCIONES OHJEET
1. Verbinde den USB-Stecker der ROCCAT™ Kova[+] mit
einer freien USB-Schnittstelle.
2. Starte deinen Computer und stelle eine Verbindung mit
dem Internet her.
3. Gebe in die Adresszeile deines Webbrowsers die folgende
URL ein „roccat.org/support“ und drücke Enter.
4. Klicke in der linken Navigationsleiste auf den Punkt
„ROCCAT Kova[+]“. Lade dir auf der sich öffnenden Seite
die neueste Treiber-Software herunter.
5. Starte die Treiber-Installation und folge bitte den weiteren
Anweisungen auf dem Bildschirm.
1. Forbind ROCCAT™ Kova[+] ‚s USB-stik med et ledigt
USB-interface.
2. Start din computer og forbind den med Internettet.
3. Indtast følgende URL i adresselinjen af din webbrowser
„roccat.org/support“ og tryk så Enter.
4. Klik i venstre navigantionslinje på punkt „ROCCAT
Kova[+]“. Frau den åbnede side overfører du den nyeste
driversoftware.
5. Start driver-installationen og følg anvisningerne på
billedskærmen.
1. Plug the ROCCAT™ Kova[+]’s USB connector into any
free USB port.
2. Boot your computer and connect to the internet.
3. Enter ‘roccat.org/support’ in your browser and
hit the return key.
4. In the navigation bar on the left, go to ‘ROCCAT Kova[+]’.
Download the latest driver from the webpage that opens.
5. Start the driver installation process and follow the
on-screen instructions.
1. Enchufa el conector USB del ROCCAT™ Kova[+] a un
puerto libre USB.
2. Inicia tu ordenador y establece la conexión de Internet.
3. Escribe en tu navegador Web la siguiente URL:
roccat.org/support y pulsa Enter.
4. En la barra izquierda de navegación haz clic en el
punto “ROCCAT Kova[+]”. En la página que se abre a
continuación descárga el software de controlador más
actualizado.
5. Inicia la instalación del controlador y sigue las instrucciones que aparecen en pantalla.
Easy-Shift[+]™ WoW: Easy-Shift[+]™ CS:
5 + 1 = Mount up 5 + 1 = Throw HE
5 + 2 = Dismount 5 + 2 = Throw fl ash
5 + 3 = Autorun 5 + 3 = Throw smoke
5 + 4 = Use trinket 5 + 4 = Show scores
5 + 6 = Your macro #1 5 + 6 = Buy CT equipment
5 + 7 = Your macro #2 5 + 7 = Buy T equipment
5 + 8 = Pet attack 5 + 8 = Primary weapon
5 + 9 = Pet follow 5 + 9 = Secondary weapon
Easy-Shift[+]™ Multimedia: Easy-Shift[+]™ Browser:
5 + 1 = Previous track 5 + 1 = Page back
5 + 2 = Next track 5 + 2 = Page forward
5 + 3 = Mute volume 5 + 3 = New tab
5 + 4 = Switch to full screen 5 + 4 = Add bookmark
5 + 6 = Play or pause 5 + 6 = New window
5 + 7 = Stop playback 5 + 7 = Print page
5 + 8 = Volume up 5 + 8 = Switch to next tab
5 + 9 = Volume down 5 + 9 = Switch to previous tab
1. Liitä ROCCAT™ Kova[+]:n USB-pistoke vapaaseen
USB-liitäntään.
2. Käynnistä tietokoneesi ja luo Internet-yhteys.
3. Kirjoita verkkoselaimesi osoiteriville seuraava URL-osoite
„roccat.org/support“ ja paina Enter.
4. Napsauta vasemmassa navigaatiopalkissa kohtaa
„ROCCAT Kova[+]“. Lataa avautuvalta sivulta uusin
ajuriohjelmisto.
5. Käynnistä ajurin asennus ja noudata näytöllä näkyviä
lisäohjeita.
5 + 6 = Disabled by default
5 + 7 = Disabled by default
(Install the driver to
assign a function.)
(Install the driver to
assign a function.)
5 + 8 = Volume up
5 + 9 = Volume down
5
7
FR PL RU SE
INSTRUCTIONS INSTRUKCJA
1. Relie la fi che USB de la souris ROCCAT™ Kova[+] à une
prise USB libre.
2. Démarre ton ordinateur et connecte-toi à Internet.
3. Entre dans la barre d’adresse de ton navigateur l’URL
« roccat.org/support » et appuie sur Enter.
4. Clique dans le menu de navigation de gauche sur
« ROCCAT Kova[+] ». Télécharge la dernière version du
pilote sur la page qui s’ouvre alors.
5. Lance l’installation du pilote et suis les instructions qui
s’affi chent à l’écran.
1. Podłącz wtyk USB ROCCAT™ Kova[+] do wolnego
złącza USB.
2. Uruchom komputer i nawiąż połączenie z Internetem.
3. W wierszu adresowym przeglądarki wpisz adres URL
„roccat.org/support“ i naciśnij Enter.
4. W lewym pasku nawigacji kliknij punkt „ROCCAT Kova[+]“.
Z nowo otwartej strony pobierz najnowsze sterowniki.
5. Rozpocznij instalację sterowników i postępuj zgodnie z
instrukcjami na ekranie.
ИНСТРУКЦИИ
1. Соедини USB-штекер ROCCAT™ Kova[+] со свободным
USB-портом.
2. Запусти компьютер и выйди в интернет.
3. Введи в адресной строке браузера адрес
„roccat.org/support“ и нажми Enter.
4. Нажми на левой навигационной панели пункт
„ROCCAT Kova[+]“. Загрузи с открывшейся страницы
самые последние драйвера.
5. Запусти инсталляцию драйвера и следуй дальнейшим
указаниям на экране.
INSTRUKTIONER TALIMATLAR
1. Sätt ROCCAT™ Kova[+] USB-kontakt i en ledig USB-port.
2. Starta datorn och koppla upp dig på Internet.
3. Skriv in följande URL i adressfältet på din webbläsare:
4. Klicka på ROCCAT Kova[+] i det vänstra navigationsfältet.
5. Starta installationen av drivrutin och följ anvisningarna
roccat.org/support. Tryck på Enter.
Ladda ner den senaste programvaran med drivrutin på
den sida som öppnas.
på skärmen.
TR
1. ROCCAT™ Kova[+] USB fi şini boş bir USB girişine tak.
2. Bilgisayarı başlat ve internete bağlan.
3. Web tarayıcının adres satırına “roccat.org/support”
URL adresini gir ve Enter tuşuna bas.
4. Sol navigasyon çubuğundaki “ROCCAT Kova[+]” üzerine
tıkla. Açılan sayfadan en yeni sürücü yazılımını indir.
5. Sürücü kurulumunu başlat ve ekrandaki diğer talimatları
takip et.
 Loading...