

Page 1

TA0262
ARDUINO ROBOT ARM
4DOF MECHANICAL
CLAW KIT
I
Page 2

Chapter 1
Overview – TA0262
Contents
Chapter 1. Overview – TA0262 ..................................................................................................... 1-1
Chapter 2. Getting started: Arduino Robot Arm 4dof Mechanical Claw Kit ................................ 1-1
2.1. What is Arduino? ................................................................................................................. 1-1
2.2. What is IDUINO UNO? ....................................................................................................... 1-1
Chapter 3. Software installation .................................................................................................... 2-2
3.1. Arduino Software/IDE ......................................................................................................... 2-2
3.2. Play with your first “Hello World” LED example ............................................................... 2-3
Chapter 4. Hardware installation ................................................................................................... 3-5
4.1. Unboxing and Component list ............................................................................................. 5-5
4.2. Circuit soldering ................................................................................................................... 5-6
Chapter 5. Software debugging ..................................................................................................... 6-8
5.1. Arduino UNO Code Uploading ........................................................................................... 8-8
5.2. Servo debugging .................................................................................................................. 8-9
5.3. Power supply ...................................................................................................................... 9-11
Chapter 6. System Debugging ................................................................................................... 11-12
6.1. Rack mounting ................................................................................................................. 12-12
6.2. Rack debugging ............................................................................................................... 12-33
6.3. Overall system debugging ................................................................................................ 33-34
7. Have fun with your arm robot .................................................................................................. 34-35
7.1. Manually control .............................................................................................................. 35-35
7.2. PC control interface ......................................................................................................... 35-35
II
Page 3

Chapter 1
Overview – TA0262
Chapter 1. Overview – TA0262
In this instruction, we will introduce you through the fun project of the Arduino Robot Arm 4DOF
Mechanical Claw Kit. This DIY Arduino UNO based Bluetooth robot kit is based on Arduino Uno
development board. This very simple and easy to build kit is the perfect Arduino Project for
Beginners and is a great learning platform to get into Robotics and Engineering.
The Robot Arm comes flat pack for assembly and requires very minimal soldering to get it up and
running. Integrates 4 SG90 servos that allows 4 Degree of motion and can pick up light items with the
claw. Arm control can be performed by the 4 potentiometers. Let’s get started!
Chapter 2. Getting started: Arduino Robot Arm 4dof
Mechanical Claw Kit
2.1. What is Arduino?
Arduino is an open-source electronics platform based on easy-to-use hardware and software. Arduino
boards can read inputs - light on a sensor, a finger on a button, or a Twitter message - and turn it into
an output - activating a motor, turning on an LED, publishing something online. You can tell your
board what to do by sending a set of instructions to the microcontroller on the board. To do so you use
the Arduino programming language (based on Wiring), and the Arduino Software (IDE), based on
Processing.
2.2. What is IDUINO UNO?
The iDuino Uno is on the ATmega328. It has 14 digital input/output pins (of which 6 can be used as
PWM outputs), 6 analogue inputs, a 16 MHz ceramic resonator, a USB connection, a power jack, an
ICSP header, and a reset button.
It contains everything needed to support the microcontroller; simply connect it to a computer with a
USB cable or power it with a AC-to-DC adapter or battery to get started.
1
Page 4
Chapter 3
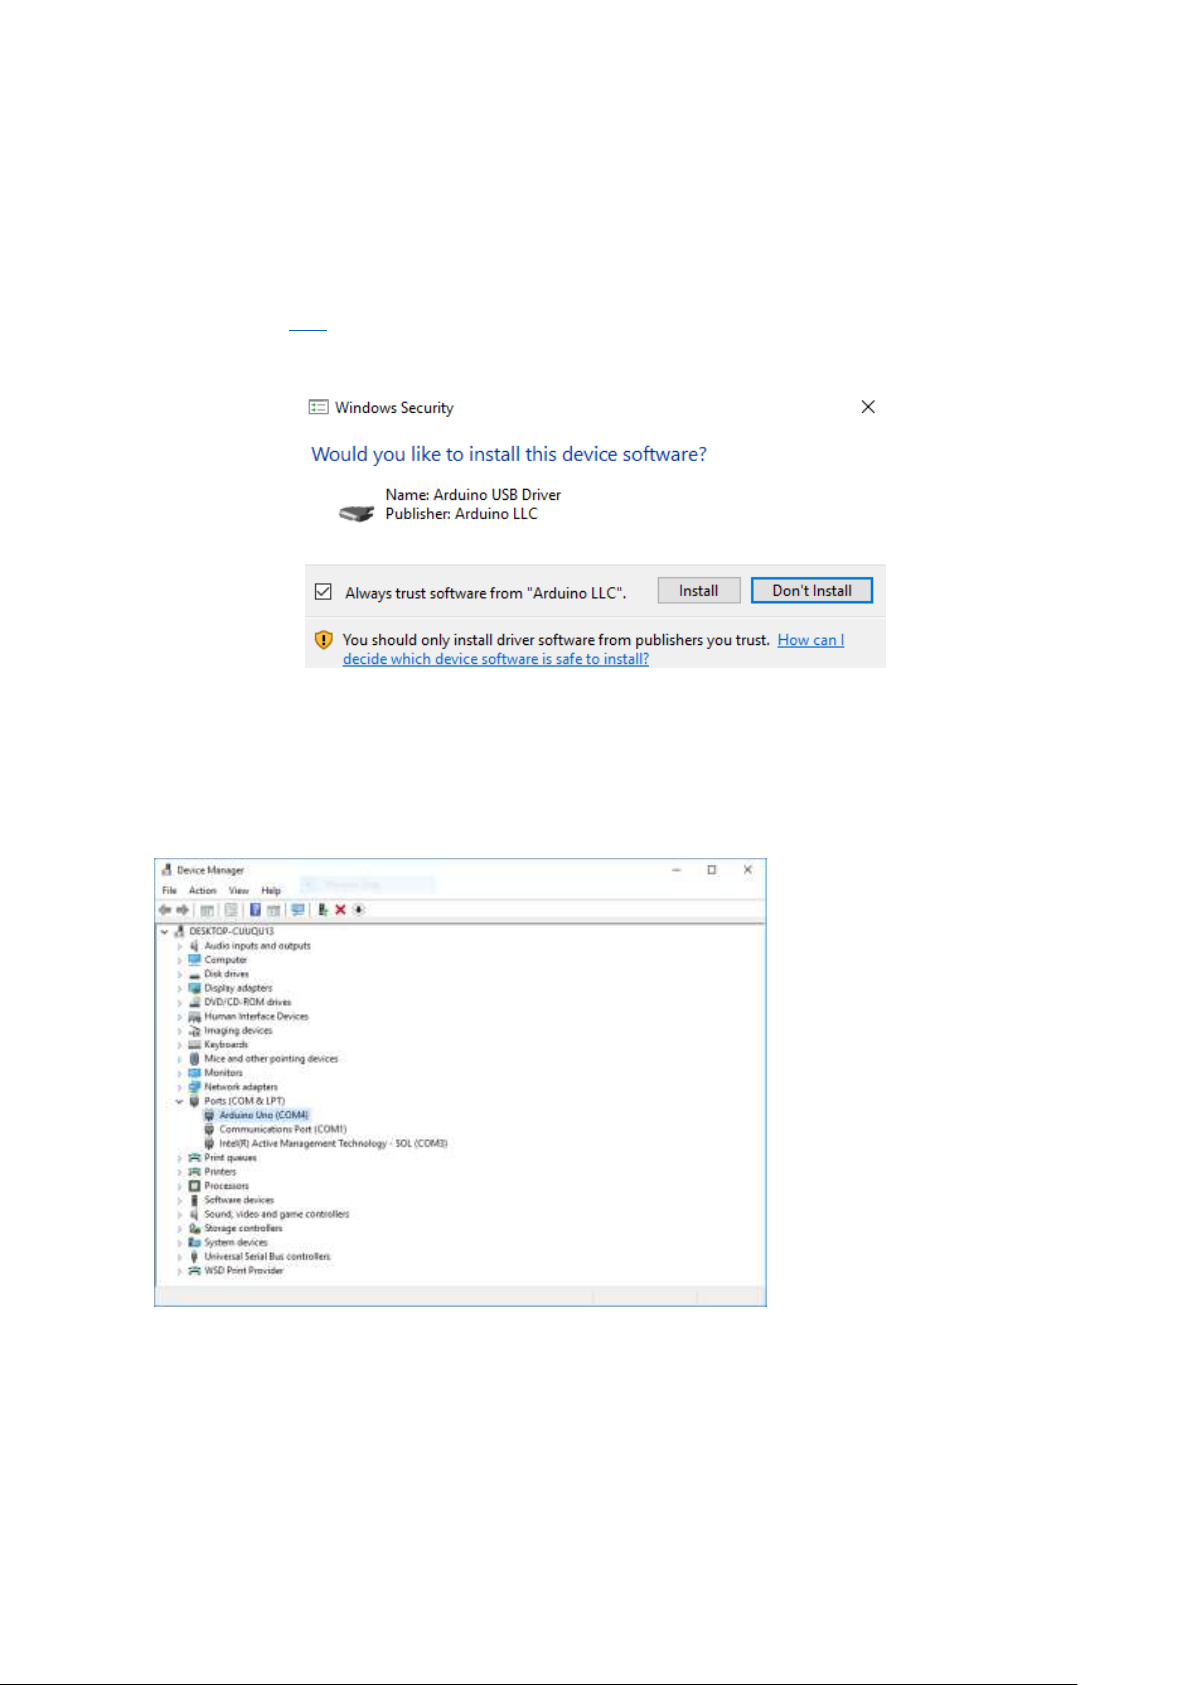
Figure 1 Installation of drivers
Figure 2 Check Your special COM and note it down the number
Find your Serial COM
number and note it down.
Software installation
Chapter 3. Software installation
In this section, we will introduce you the development platform where you translate creative mind
into codes and let it fly.
3.1. Arduino Software/IDE
Download from here. Open Windows-based app by double clicking it and follow the instruction to
complete (Remember to install everything driver for Arduino). Easy!
Connecting your UNO board with your computer
Connecting UNO and your PC by a blue USB cable, and if connected correctly you will see the green
power LED light up and another orange LED is blinking.
We need to figure out which channel COM is currently communicating between PC and UNO.
Following the path: Control panel | Hardware and Sound | Devices and Printers | Device Manager |
Ports (COM & LPT) | Arduino UNO (COMx)
2
Page 5
Chapter 3
Software installation
3
Note down the COM number as we require this later. As the COM port may vary from time to time,
this step is vital. In this case for demonstration purpose, we are using the COM 4.
3.2. Play with your first “Hello World” LED example
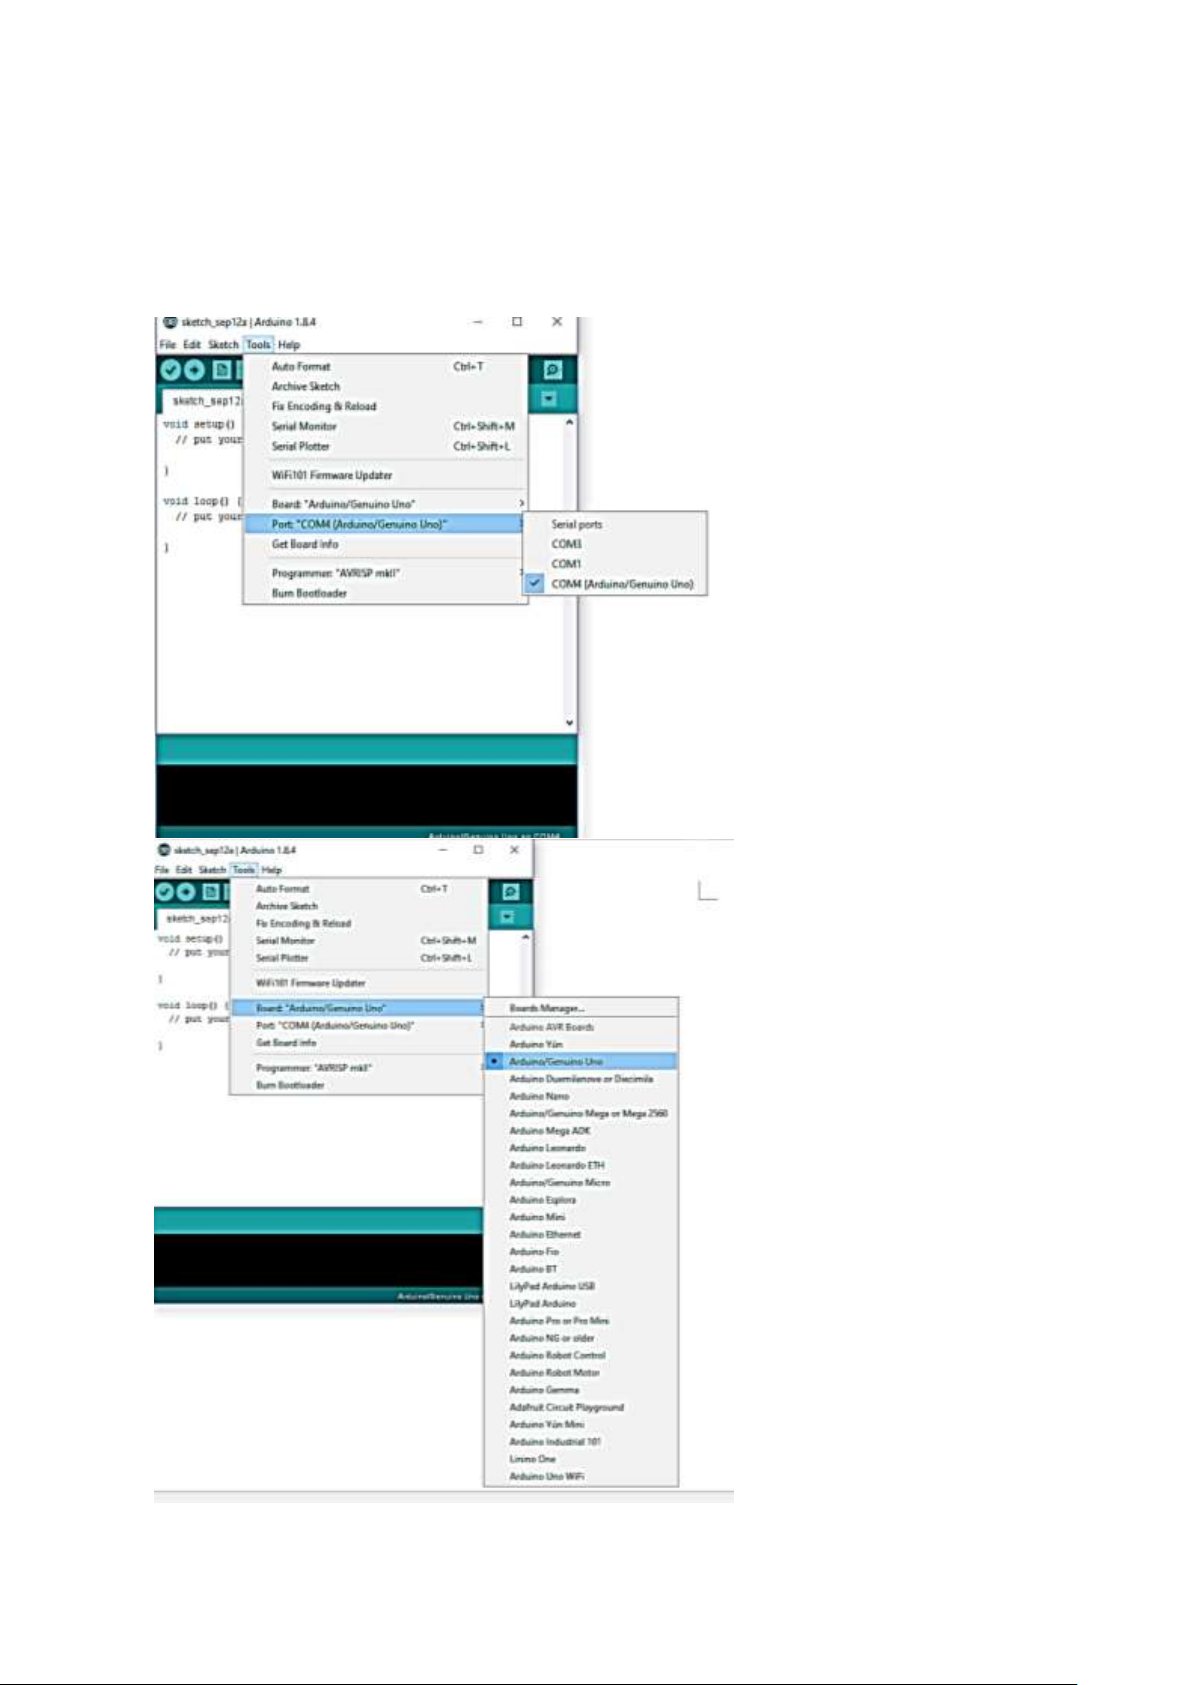
Firstly, let’s tell IDE where to find our Arduino port and which board you are currently using: The
following instruction (Figure 3 and 4) shows the details:
Configuration of Ports
Configuration of the Board
Page 6

Chapter 3
Software installation
It’s time to play with you first simple example. Following the path by File | Examples | 01. Basics |
Blink. A new code window would pop up, press the arrow symbol to upload. You will notice the
orange LED is blinking almost every second.
4
Page 7
Chapter 4
Hardware installation
5
Chapter 4. Hardware installation
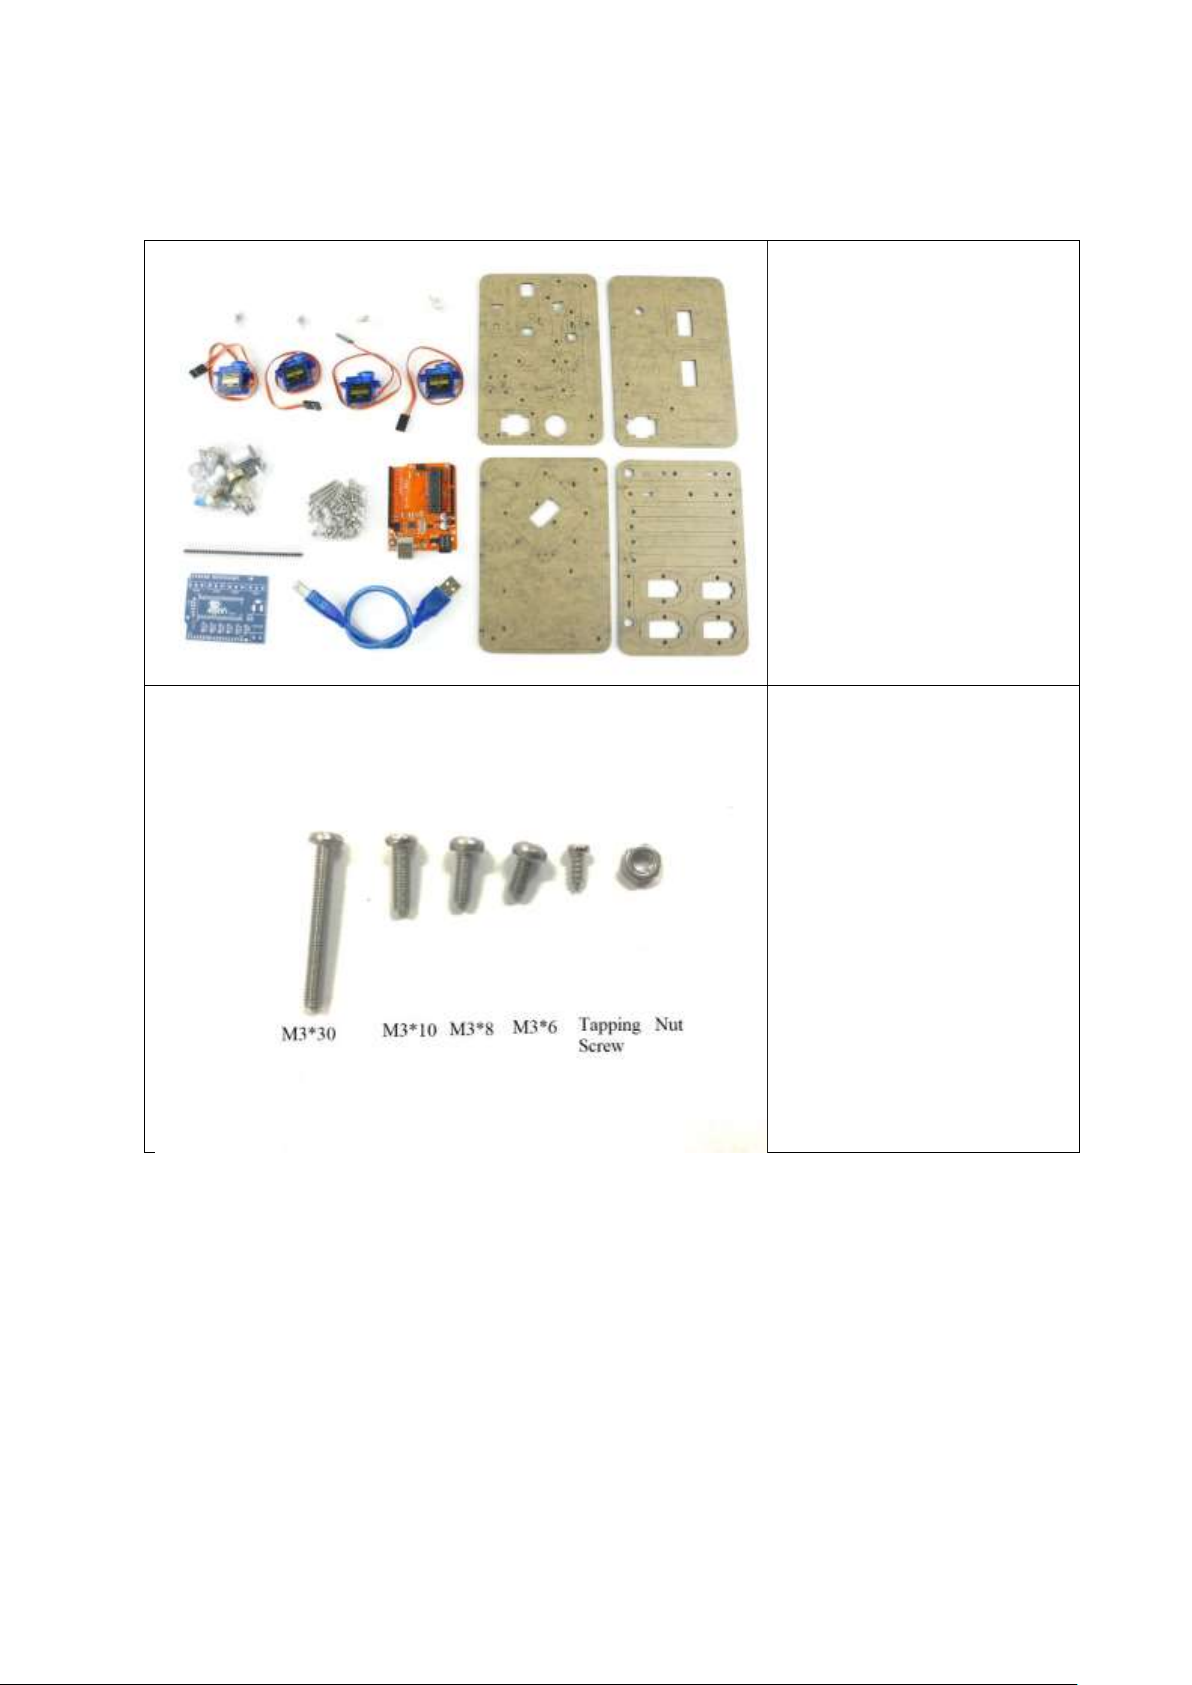
4.1. Unboxing and Component list
1. 4 x Servo SG90 with
servo package (screw
and nuts included)
2. 4 x Base racks with
protection cover (easy to
remove) and screw
package
3. Robot Arm extension
board with separate
power jack (Please see
power solution)
4. USB cable
5. Iduino UNO Board
In the rack package, from the
left to right:
1. M3 * 30mm
2. M3 * 10mm
3. M3 * 8mm
4. M3 * 6mm
5. Tapping skew
6. M3 nut
Page 8
Chapter 4
Hardware installation
6
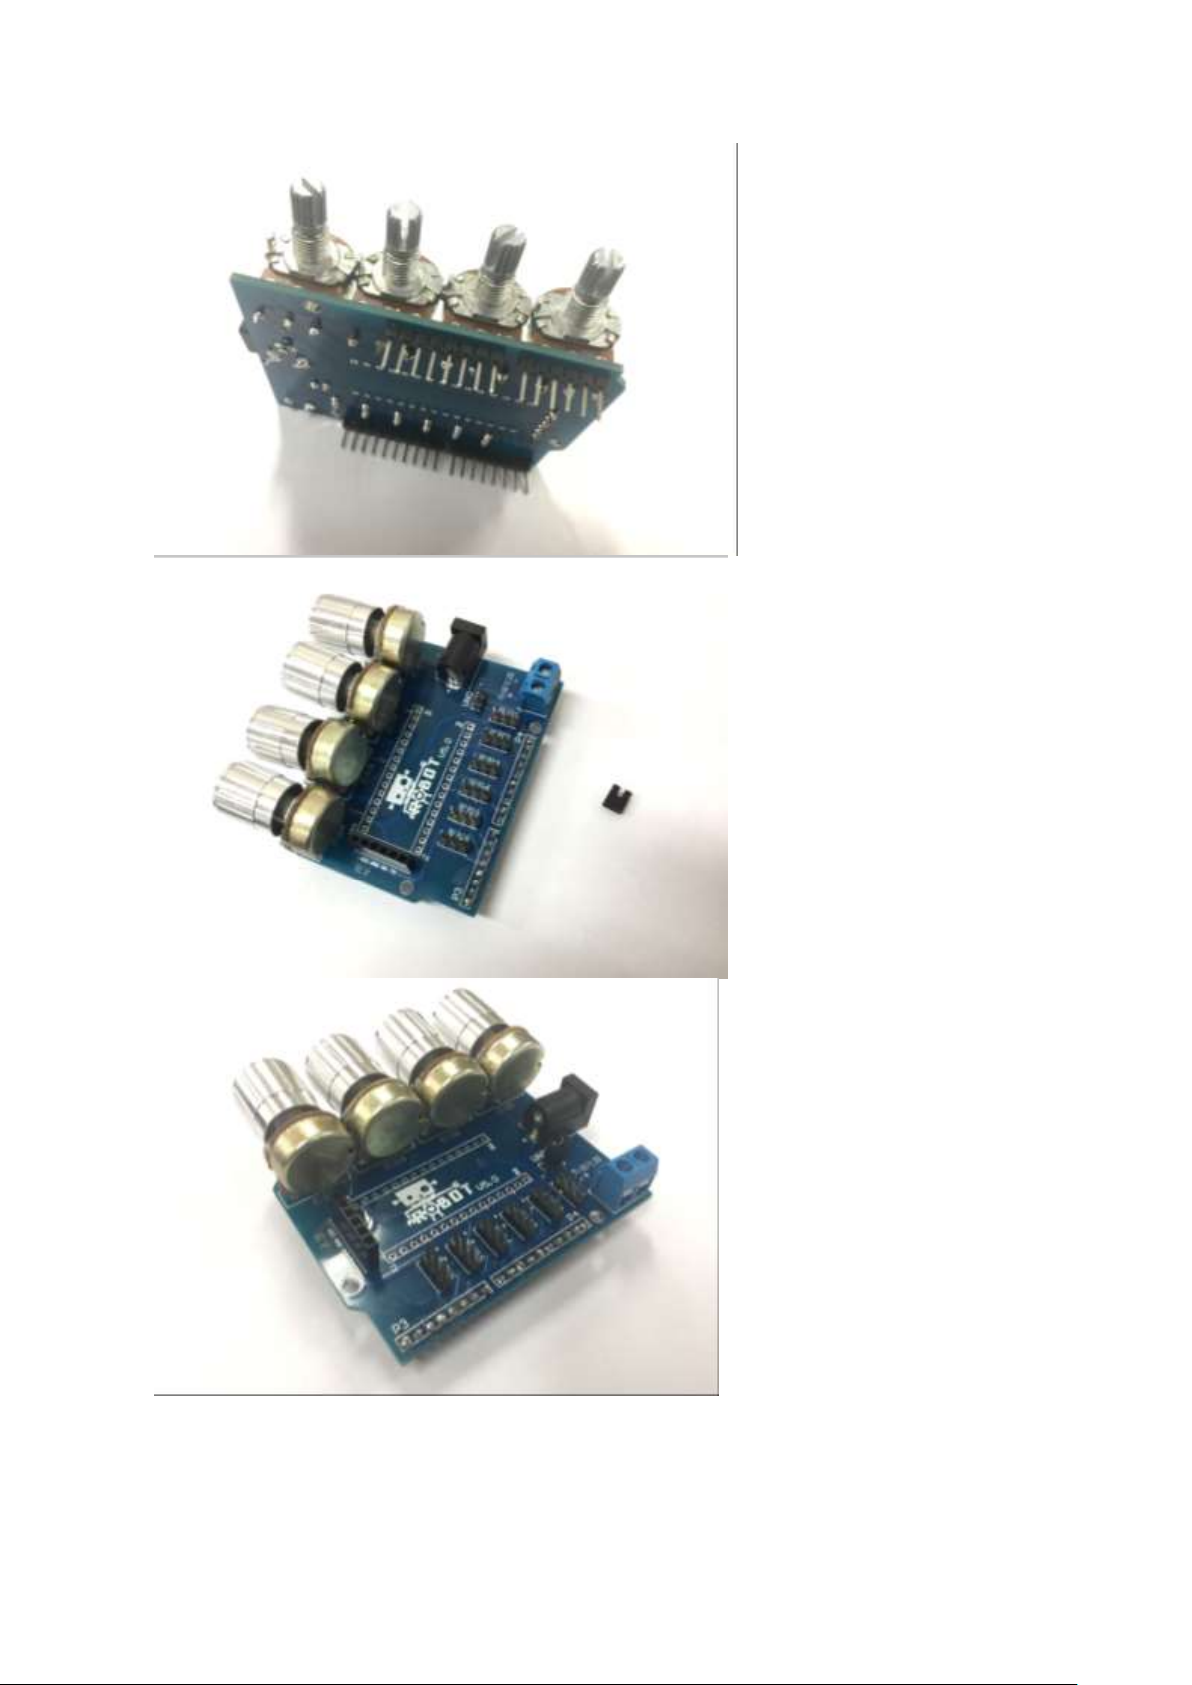
4.2. Circuit soldering
This Robot Arm Kit requires very minimal soldering to get everything working and running. The
Robot Arm Extension Board is used to connect interface between controller, in this project, the four
potentiometers and Iduino UNO Board.
Caution: Please be careful when using hot Soldering Iron.
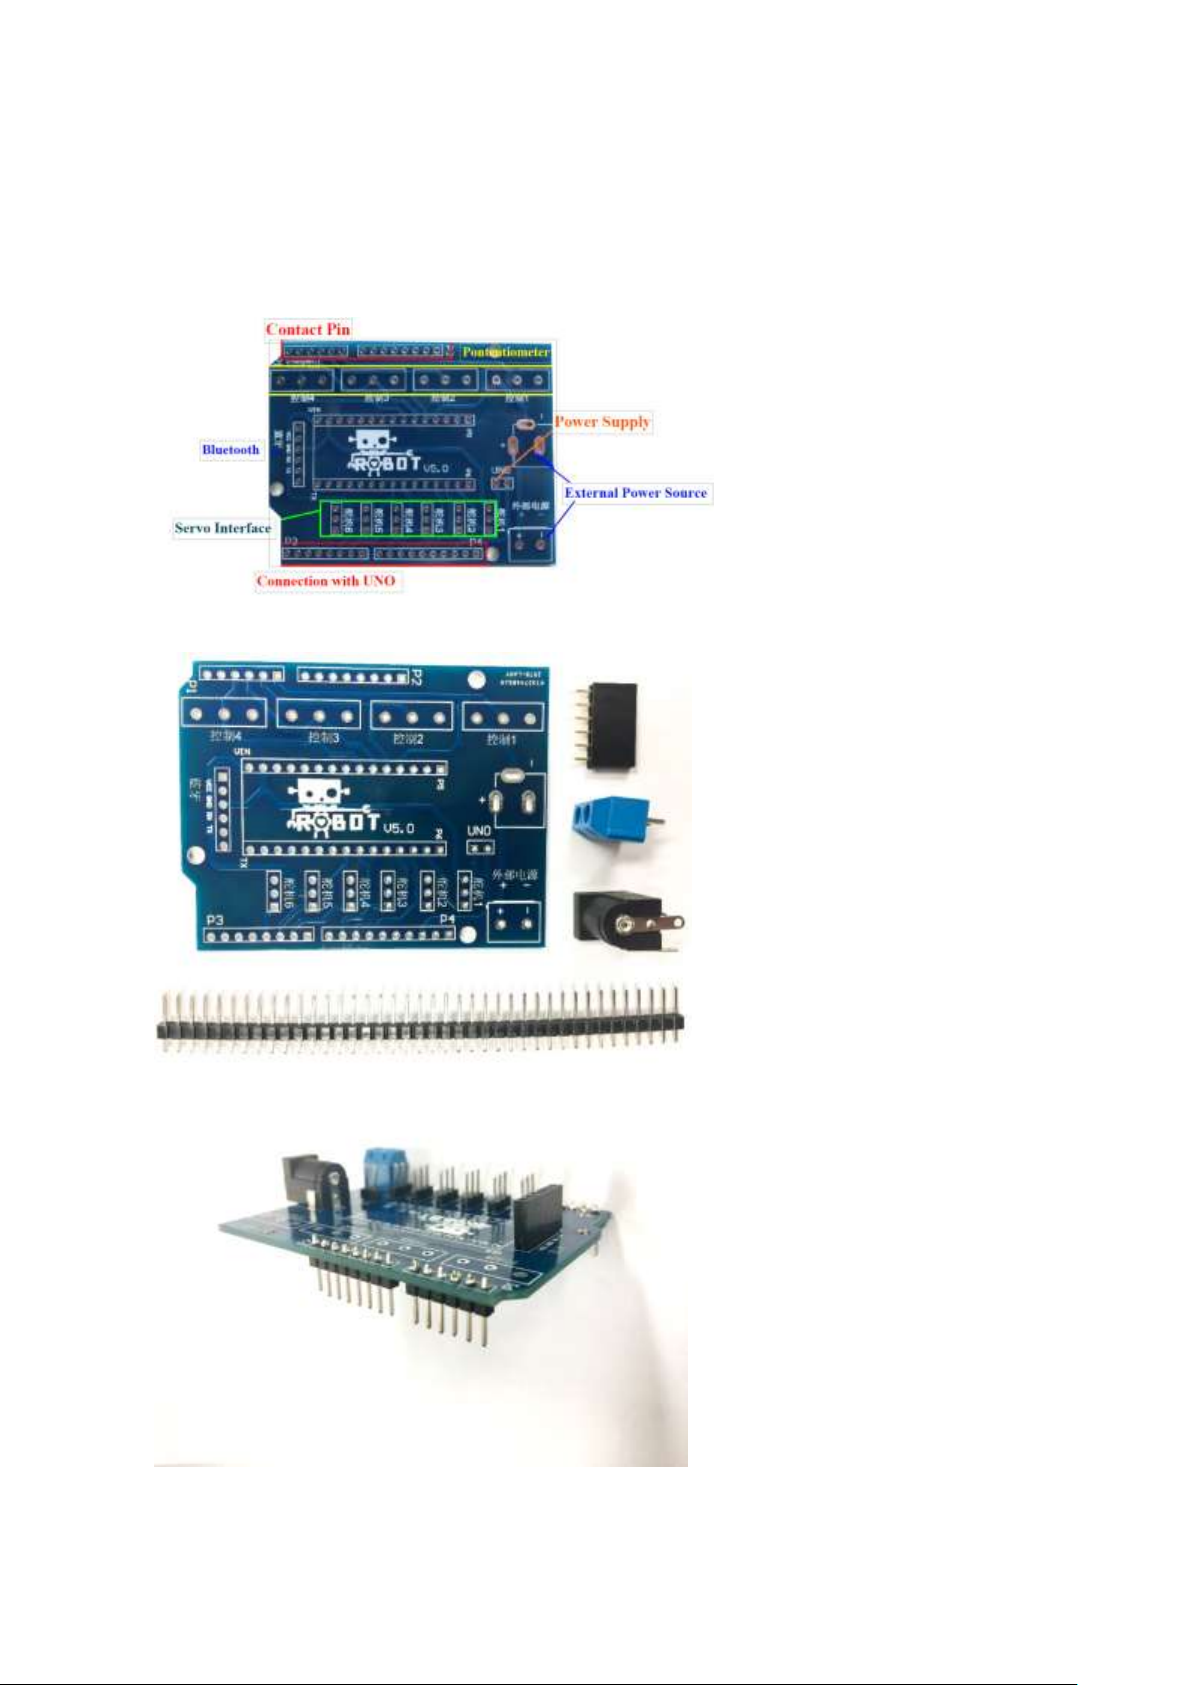
Figure 3 Basic illustration of Robot ARM board
Prepare:
1. One Robot Arm
Extension Board
2. One 12V Black Power
jack
3. 52P Pin headers
4. One blue External Power
supply interface
5. One Black Bluetooth
Interface
Then solder Pins for the servos
and Power jack.
Please be aware that the Pins for
servo interface are facing
upwards, for Iduino interface
downwards.
Page 9
Chapter 4
Hardware installation
7
Then solder the four
potentiometers
The jumper cap is used for
shortcut Robot Arm Extension
Board and Iduino UNO Board,
which means you do not have to
power the Iduino UNO board
separately.
Insert in the jumper cap as we are
using one external power supply,
12V battery Box.
Then put four silver covers on the
naked potentiometers.
Now you have completed the
soldering part!
Page 10
Chapter 5
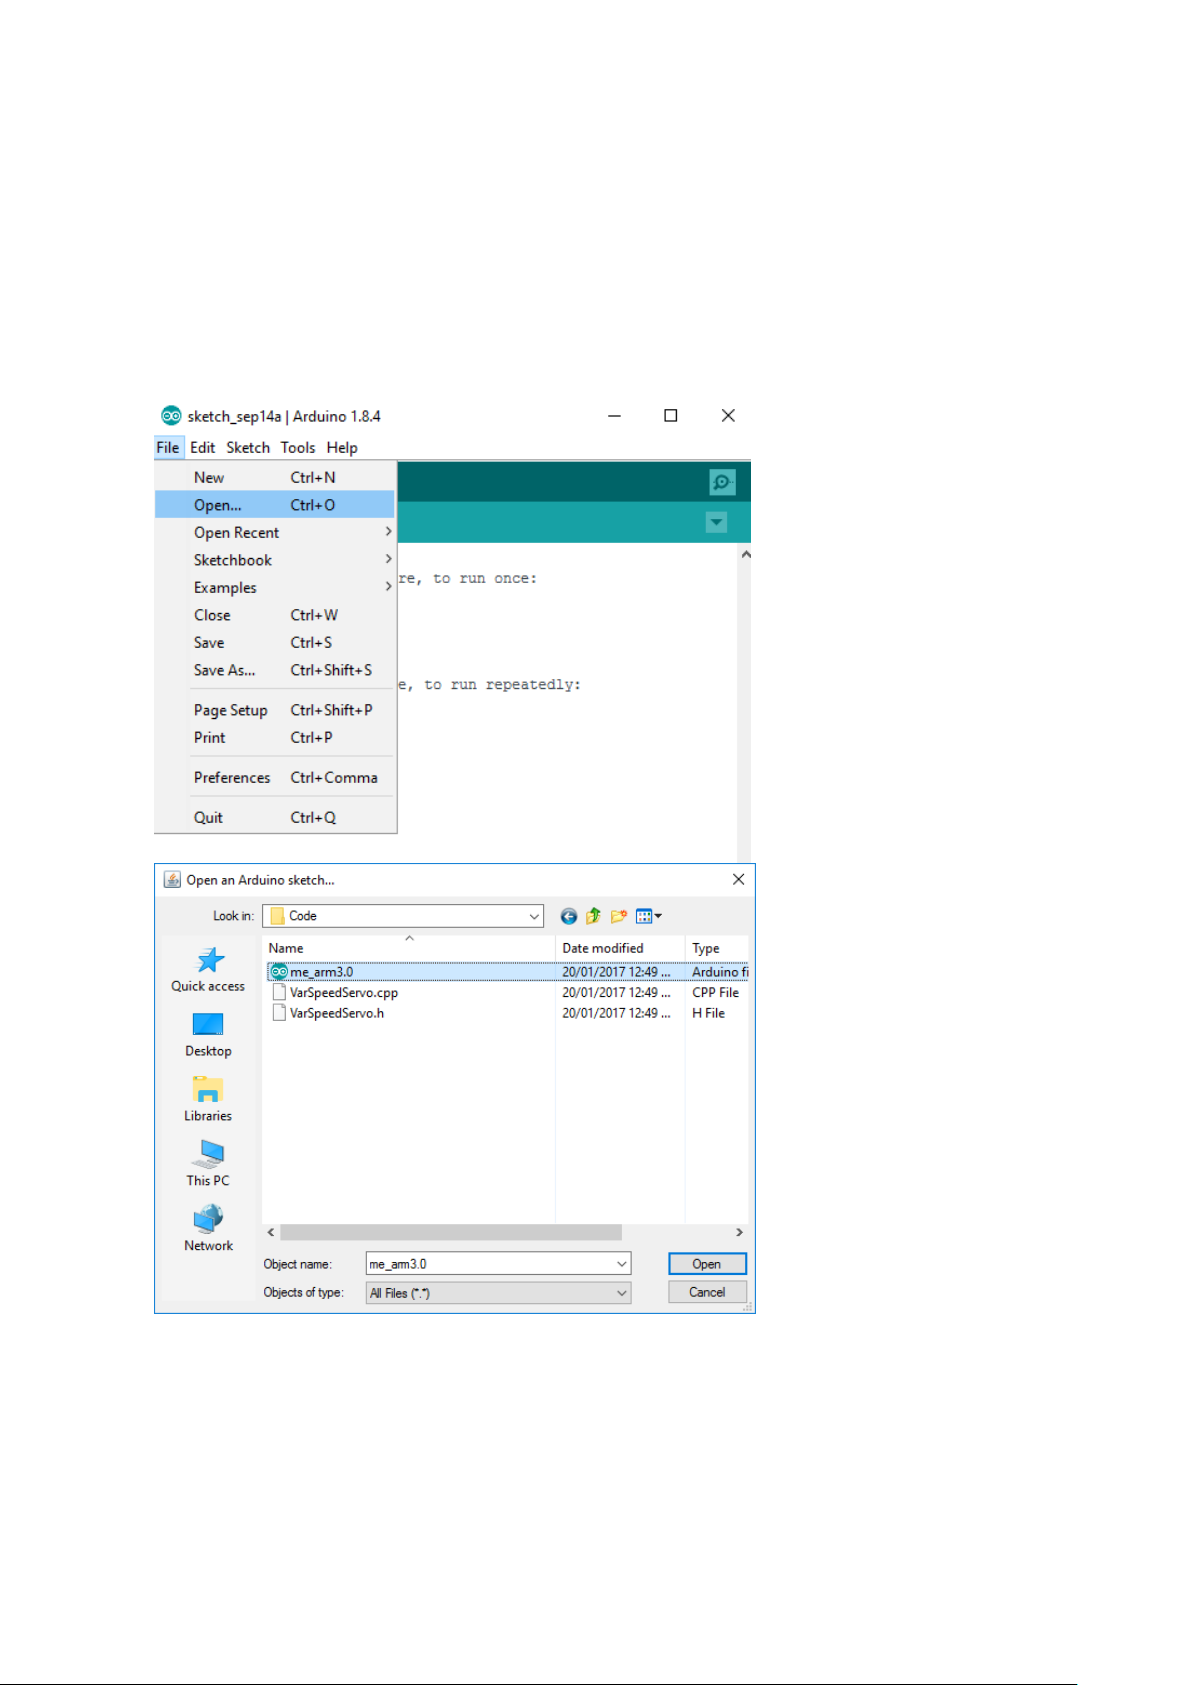
Double click the icon to open
the program and open the file in
the path: File | Open
Open the me_arm3.0 Arduino
file
Software debugging
Chapter 5. Software debugging
5.1. Arduino UNO Code Uploading
The Robot will perform on how it is programmed. Understanding and absorbing what is inside of
Iduino UNO board, i.e. the programming code is a critical part of learning process. In this section, our
end goal is to make sure servos and potentiometers are functioning well.
If this is your first Arduino project, please follow the instruction carefully. Firstly, download the
related codes from our website.
8
Page 11
Chapter 5
Software debugging
9
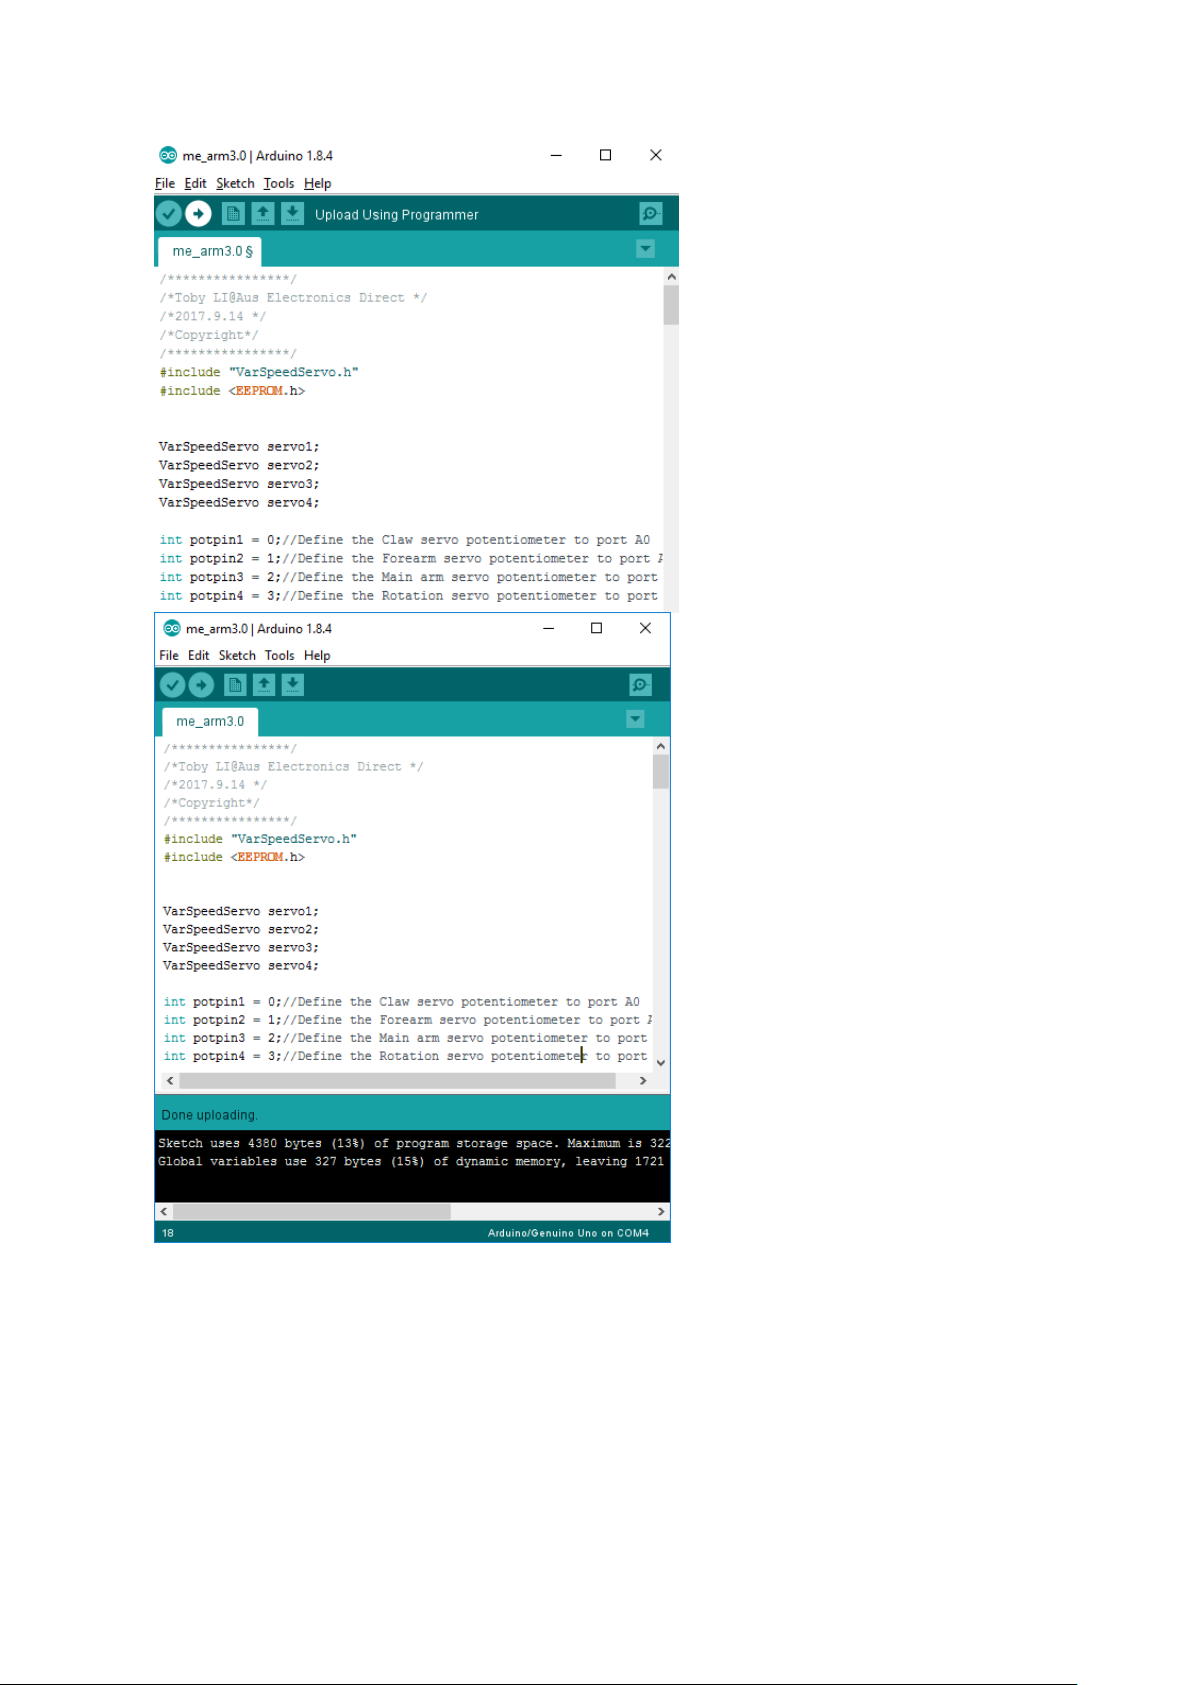
Click the upload button with
right arrow on the Tool Bar to
upload your file to UNO
Done uploading status, if not,
check the Board and Ports in the
3.2 section to make sure you’re
connecting your UNO correctly
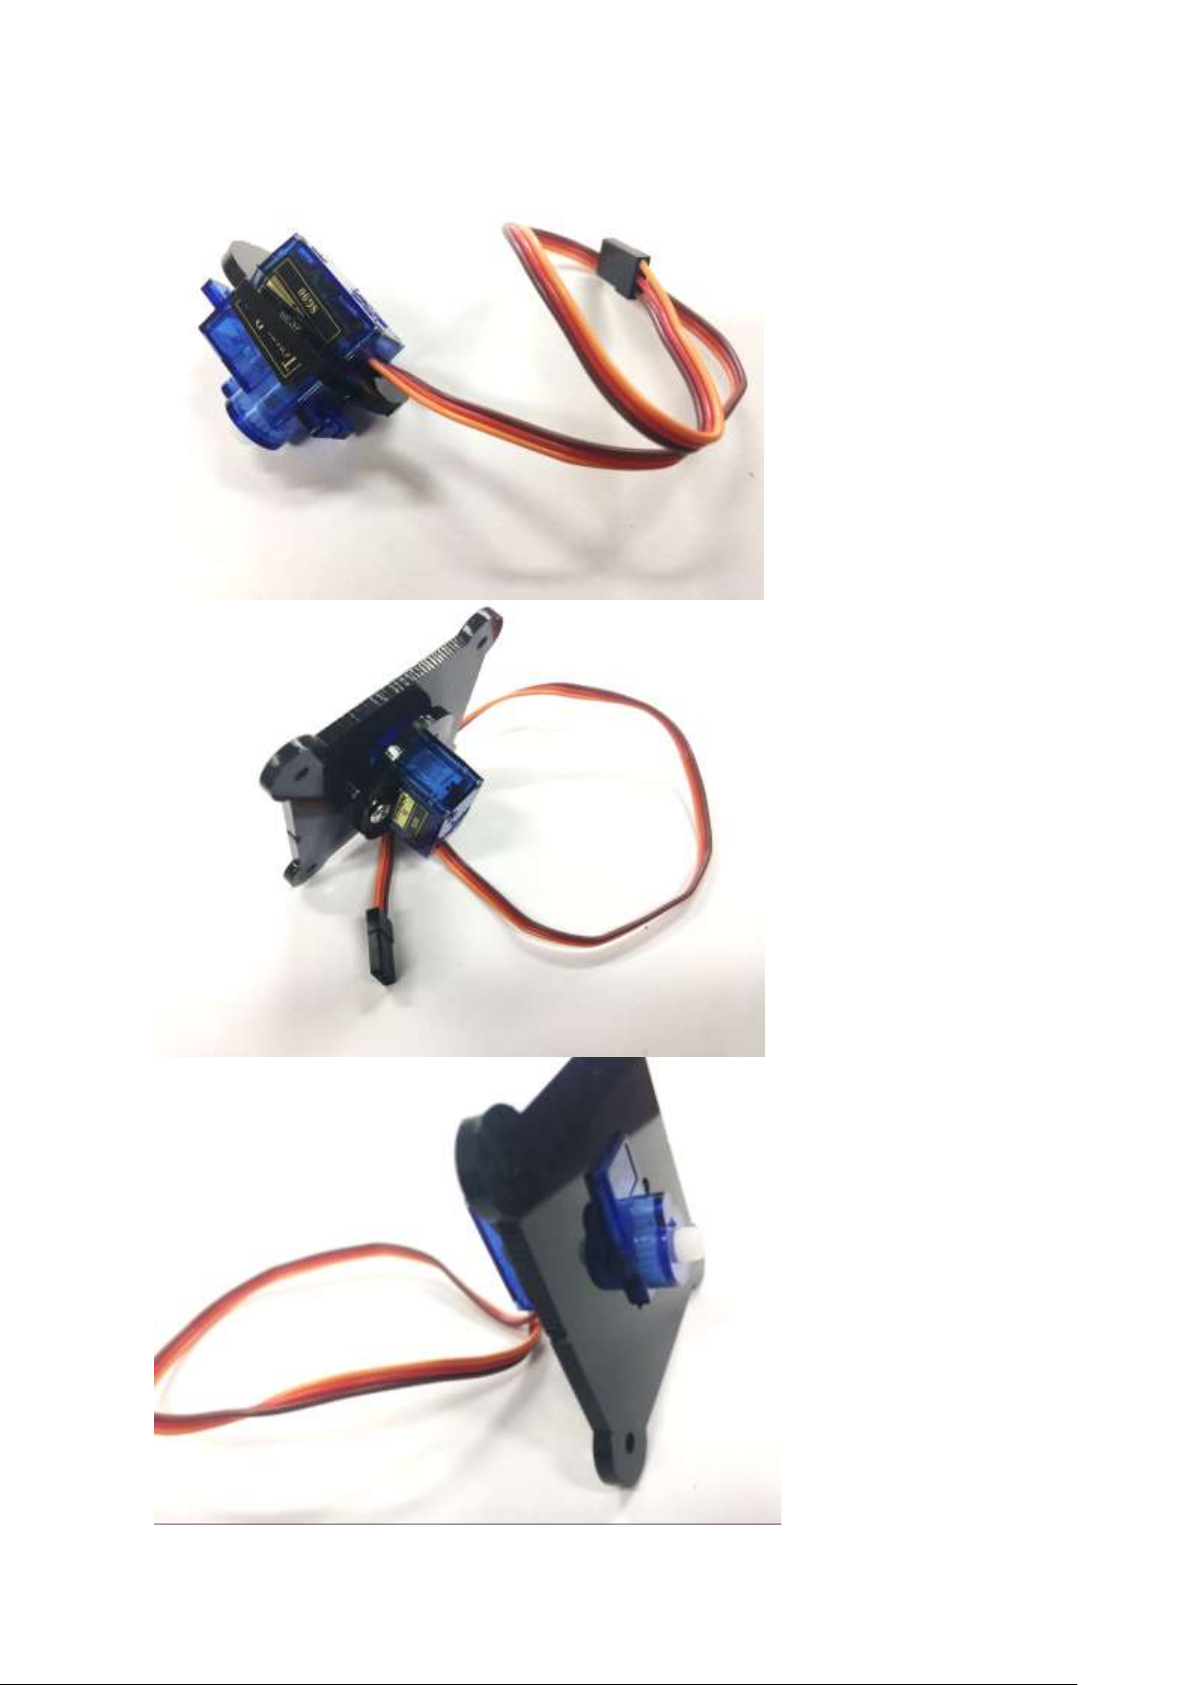
5.2. Servo debugging
Then let’s test out our servos to see whether they’re running smoothly. The servos should rotate
smoothly as you play round with corresponding potentiometers. If not, make sure you have uploaded
your code correctly with “Done upload” sign described above and insert the servo board firmly onto
the UNO board with each of the pins correctly lined up. Most importantly, plug in the reliable power
supply correctly where power supply instructions will be illustrated in the next part. Carefully read it
otherwise you may burn out your Arduino core microcontroller.
Page 12
Chapter 5
Software debugging
10
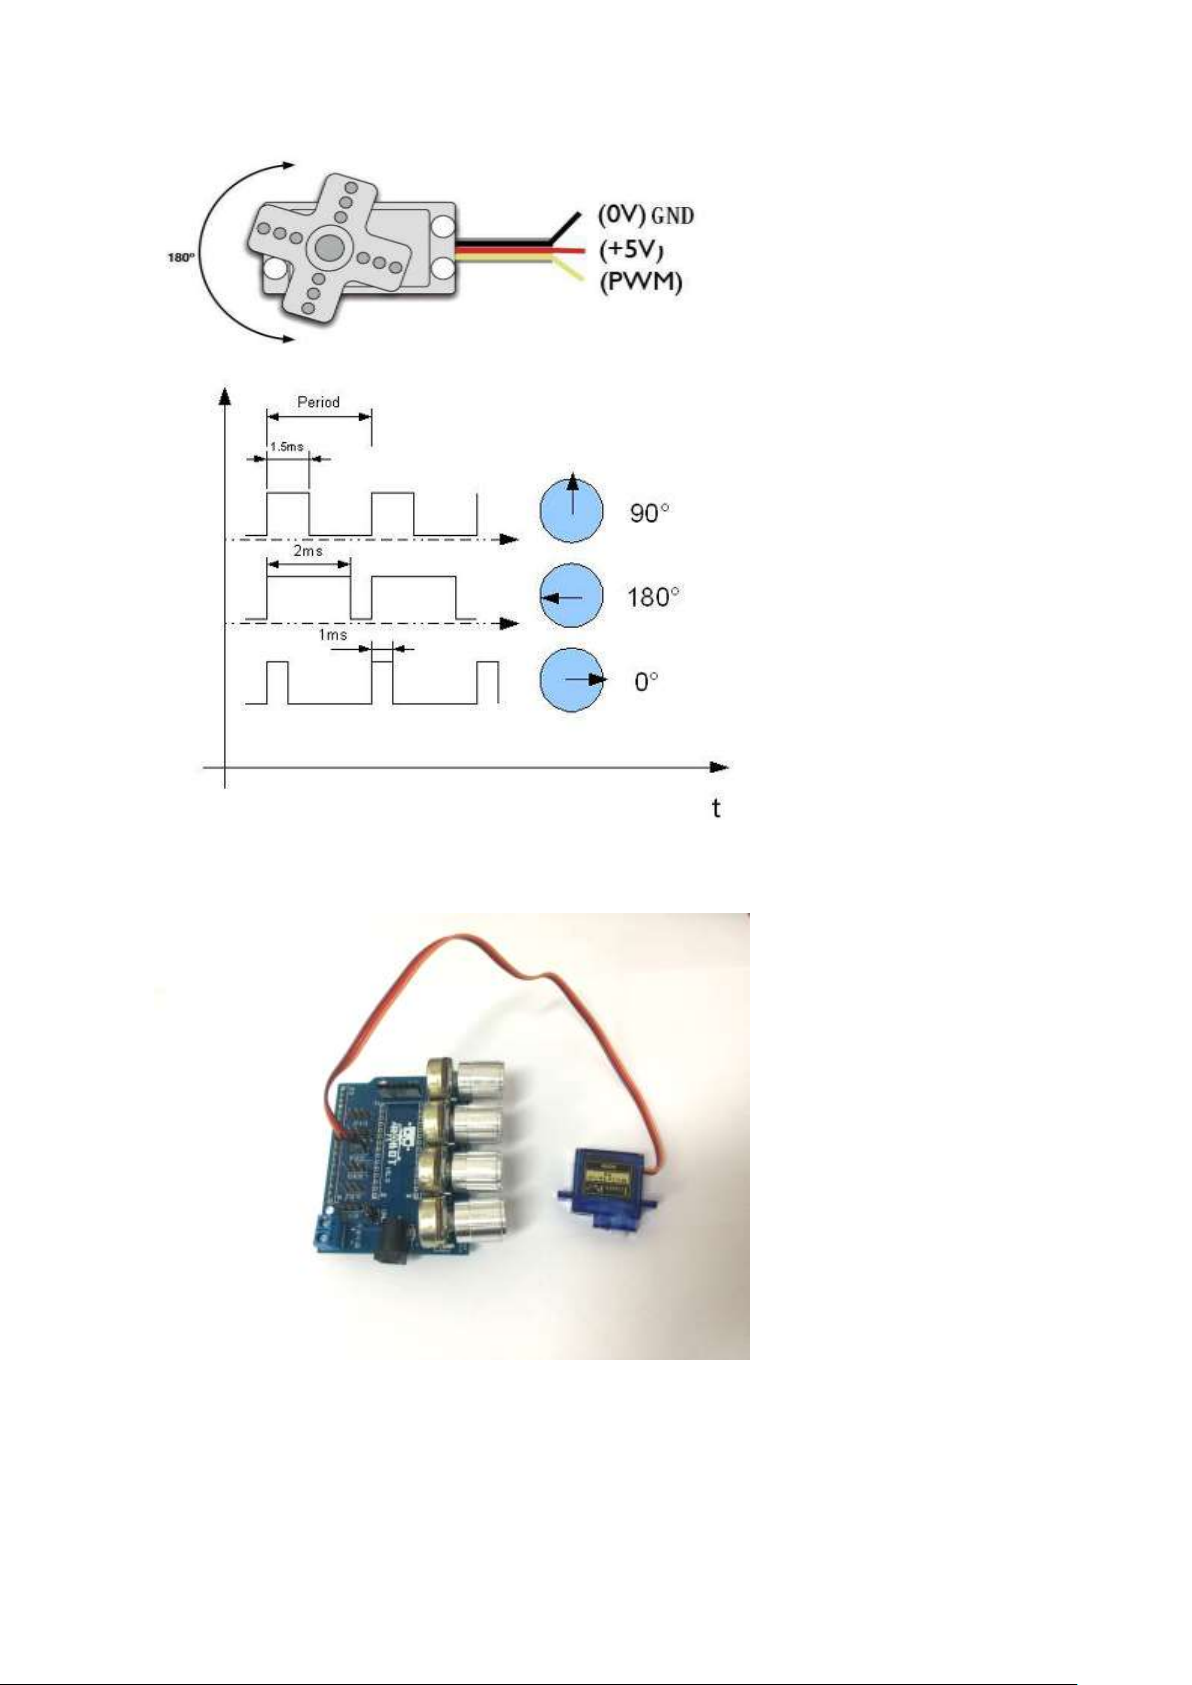
Servo has three pins:
- Signal
- GND
- VCC
The rotation angle is
regulated by PWM (pulse
width modulation) signal
duty cycle.
The frequency of PWM
usually is in range from
30 to 60Hz – this is so
called refresh rate. If this
refresh rate is too small
then then accuracy of
servo reduces as it starts
losing its position
periodically if rate is too
high, then servo can start
to chatter. It is important
to select optimal rate, that
servo motor could lock
its position.
Please ensure each servo works well as they are hard to remove.
Connect the servo
interface to the UNO
servo slot one-by-one,
from slot 4 to slot 1 which
are controlled by the
corresponding
potentiometer
Page 13

Chapter 5
Software debugging
11
Plug the 9-12v 2A power
supply in the Arduino
power jack with jumper cap
(the Servo board) on
5.3. Power supply
Power plays a vital role in running the Robot Arm system as power supply deficiency can lead to
servo steering gear jitter and program would run abnormally. Two independent power supplies will be
required, one to drive the Uno development board and another to drive the potentiometer servo
controllers. In this section, we introduce you several power supply alternatives for your convenience:
a) (Recommended) Use a 5V 2A power adaptor and plug into the 2.1mm DC socket on the
potentiometer board.
b) (Alternatively) Use a 5V 2A power supply and terminate into the blue terminal block on the
potentiometer board.
c) (Recommended) Use a 9v to 12v power adaptor for the Arduino UNO development board via
the 2.1mm DC socket on the Uno board.
d) (Alternatively) Use a USB A to B (printer cable) supplied to provide a steady 5V power input
into the Uno board from a UB charger, PC or laptop.
NOTE: When making modifications to the code on the Uno Board, please ensure to remove the
Robot Arm Servo Controller board from the Uno development board and disconnect the Uno
Board Power supply. Otherwise, it may cause irreparable damage to your Robot and PC as it may
drive a large current through your USB port.
Page 14

Chapter 6
System Debugging
12
Chapter 6. System Debugging
6.1. Rack mounting
In this section we are guiding you through the Robot Arm Base and rack installation.
Peer off the protection paper of
the rack base
Prepare the items:
- Base
- 4 x M3 nuts
- 4 x M3 * 30 mm screws
Assemble the parts as shown on
the left
Page 15

Chapter 6
Prepare the items:
- 4 x M3 nuts
- 4 x M3 *10mm
screws
Fasten the screws and nuts as
shown on the left, which are
used to secure our Iduino UNO
Board
Then prepare the items:
- 2x M3 *8mm screws
- Black Servo holder
- Black Servo rack
System Debugging
13
Page 16
Chapter 6
System Debugging
14
Pull the cable thread through the
servo bracket hole as required to
connect to Iduino UNO Board in
the following steps
Then insert the Servo bracket
holder on the top of servo
holder. Now you can see Servo
is secured and sandwiched
between holder and bracket.
It should look like this
Page 17

Chapter 6
System Debugging
15
Then secure it as shown on the
left
It should look like this
Then prepare items to build
Forearm of the Robot
1. 2 x M3 *8mm screws
2. One Servo Bracket
3. One Servo SG90
4. One Black Main Arm
Base
Page 18

Chapter 6
System Debugging
16
Secure the Servo with Bracket
and Base in the same way as
instructed in the last Servo
Prepare the items:
1. 1 x M2.5 tapping screw
2. One Servo Horn
Secure the Horn on the black
Main arm acrylic with M2.5
tapping screw
Page 19

Chapter 6
System Debugging
17
Insert Main Arm onto the Servo
and rotate it clockwise until it
stops rotating as it is
programmed to rotate
anticlockwise.
Pull out the Main Arm and put it
back horizontally, this step is to
ensure Servo will turn
anticlockwise from this very
point (0 degree) and not break
the arm when power turns on to
rotate
Gather a self-tapping screw
from the rack package and
secure it shown on the left
Page 20

Chapter 6
System Debugging
18
Gather the items:
1. M2.5 Tapping screw
2. Servo horn
3. Black Acrylic Arm Joint
Then secure the horn to the
Acrylic arm
Then let’s build the forearm,
1. 2 x M3 * 8
2. Self-Tapper Screw
(From the servo
package)
Page 21

Chapter 6
System Debugging
19
Assemble the servo on the black
rack base in the same way as
shown in the previous
instruction.
Prepare the items:
1. 2 x tapping screws from
the servo package
2. one M3 * 8
3. One Servo Horn
Secure the Servo Horn on the
Rack Base
Page 22

Chapter 6
System Debugging
20
Connect two active joints by
screw, remember do not over
tighten the screws as they are
required to rotate freely
Prepare the items:
1. 2 x M3*10mm
2. M3 nuts
3. Two black Clapboard
Acrylic
Place the two Clapboard Acrylic
in the corresponding wing slot
Page 23

Chapter 6
Firstly, insert the Clapboard in
the corresponding slots and in
the following steps it will be
secured with one screw and nut
on each side
Then insert the rack base in the
corresponding slot between two
clapboards
It should look like this
System Debugging
21
Page 24

Chapter 6
System Debugging
22
Secure the Clapboard on the
Main Arm base with one pair of
screw and nut.
Tip: Hold the nut in the slot and
then screw the M3 in.
Secure the Clapboard on both
side as shown on the left
Page 25

Chapter 6
System Debugging
23
Secure the backbone acrylic
between forearm and main arm
by:
1. 2 x M3 * 10mm
2. two nuts
Tip: Hold the nut in the slot and
then screw the M3 in.
Fix the other side as well
Then prepare M3*6mm screw
and one long arm acrylic
Page 26

Chapter 6
System Debugging
24
Secure it on the bottom right
side
It should look like this
Then use another black long arm
with three active joints to
connect two forearm joints
Page 27

Chapter 6
System Debugging
25
Please secure the screws in the
right sequence. Backbone
acrylic in the bottom forearm in
the middle and the other one lies
on the top
Prepare the items to build right
side support arm:
1. Two M3 * 8
2. One black circular
spacer
3. One black Support arm
4. One black triangle
support connector
Top
Middle
Bottom
Page 28

Chapter 6
System Debugging
26
Fix the first screw as shown on
the left. The circular spacer lies
in the between.
Please do not over tighten the
screws as there are active joints
as they need to rotate freely
without rubbing the adjacent
acrylics
Fix the other end with black
support arm.
It should look like this. Now the
forearm still has three free
dangling ends which are
eventually connected to secure
the claw part.
Page 29

Chapter 6
System Debugging
27
Prepare the Claw servo parts:
1. Two square servo
brackets
2. 4 x M3* 8mm screws
3. One servo
4. Two connector
accessories
Place the square bracket in the
bottom and pull the cables out as
required to connect to Robot
Extension Board
It should look like this
Page 30

Chapter 6
Place the rectangle bracket on
the top of the Servo and secure
the Servo with four M3*8mm
screws
Fix the two claws on the
rectangle servo bracket with two
M3*6mm screws.
Remember to put one black
circular spacer in between to
reduce friction.
System Debugging
28
Page 31

Chapter 6
System Debugging
29
Then gather:
1. 4 x M3 *8 mm screws
2. One short connector
3. One circular spacer
Secure it on the left-hand side of
the claw as shown on the left.
Remember to put the spacer in
between
Prepare the following to connect
Claw and Triangle support
connector:
1. Two M3*8mm screws
2. One spacer
3. One support arm
Page 32

Chapter 6
System Debugging
30
Secure the Support arm onto the
Triangle connector
Then the entire Claw part can be
secured with the three free
dangling Forearm ends.
Please do not tighten the screws
for active joints.
Prepare the tapping screw in the
Servo package and servo horn.
Page 33

Chapter 6
System Debugging
31
Secure the horn with tapping
screw as shown on the left
Pull the claws widely open and
then insert the short arm we
created in the last step and screw
it firmly.
Secure the Iduino UNO Board
on the Base
Page 34

Chapter 6
System Debugging
32
Place the Robot Arm Extension
Board on the top of the Iduino
UNO board.
Please make sure pins are
connected properly.
Then place the Robot Arm
System on the Base servo rack
and fasten it onto the base servo
with a tapping screw.
Now you have finished all the
installation!
Page 35

Chapter 6
System Debugging
33
6.2. Rack debugging
Now it’s time to connect your servos to your Arduino UNO.
Servo 1
Claw servo
Servo 2
Main servo
Servo 3
Forearm servo
Servo 4
Rotation servo
Take your time and do the proper wiring following the above instruction.
Servo has three pins:
- Signal
- GND
- VCC
GND
5V
Signal
Page 36

Chapter 6
System Debugging
34
6.3. Overall system debugging
Before we turn on the power, there are several things we still need to be check:
a) Make sure each joint can rotate smoothly otherwise it would drive a large amount of current
in the servo which leads to “Blocked” situation and the servos could be easily burnt out
b) Adjust the potentiometer to suit the comfortable servo working range. The servo can work the
angle: 0 ~ 180 degree without any restriction, but for this particular project the servo cannot
due to the mechanical structure. Thus, it is critical to alter the potentiometer to proper
position. Otherwise, if any one of the four servo gets stuck, the servo would drain a large
current in which may cause irreparable damage to the servos.
c) Change the potentiometer smoothly and slowly as servos require time to turn
d) Power supply options: provide consistent and stable power supply for servos operations
Page 37

Chapter 7
Have fun with your arm robot
35
Chapter 7. Have fun with your arm robot
7.1. Manually control
For manual control; with the jumper cap inserted on the Robot Arm Extension Board, you can control
your Robot Arm by adjusting the four potentiometers.
7.2. PC control interface
In this section, you can control your Robot Arm by connecting USB port to Iduino UNO Board. With
Serial Communication via USB cable, the command is sent from the Upper Computer Software which
is only available for Windows users for the moment.
Firstly, copy the new upper computer software control code to your Arduino UNO Board.
Double click the
“Upper_Computer_Softwa
re_Control.ino”.
Then hit the upload button.
Download the software
application from here:
http://microbotlabs.com/so
ftware.html, credit to
microbotlab.com.
Page 38

Chapter 7
Open the app and press OK
to continue
Please plug in Arduino
USB before starting Mecon
software for auto port
detection or use the “Scan
for Ports” button to refresh
available ports.
Choose the USB port.
In this case to demonstrate,
we are using COM6.
This COM number may
vary case by case. Please
check the Device Manger
for correct COM port
number.
Have fun with your arm robot
36
Page 39

Chapter 7
Control Robot Arm by
sliding the servo 1/2/3/4
Bars
Have fun with your arm robot
Now it’s time to have fun! Turn the power on, and see how your DIY Arduino Robot Arm goes! After
final assembly and activation, the Robot arm may require adjustments and debugging. The Robot will
perform on how it is programmed. Figuring out what the code is doing is part of the learning process.
Reopen your Arduino IDE and we assure you will learn a lot once you gain a deep understanding of
the code.
Please unplug the Sensor board from the Arduino UNO board and disconnect 18650 power box
supply to modify your code. Otherwise, it may cause irreparable harm to your Robot and PC as it
may drive a large current through your USB port.
This kit is just a starting point and can be expanded to incorporate other sensors and modules. You are
limited by your imagination.
37
 Loading...