


RoboSHOOT
+
©
X Series
USER
MANUAL
Revision Sheet
RoboSHOOT
+
©
User Manual Page 1
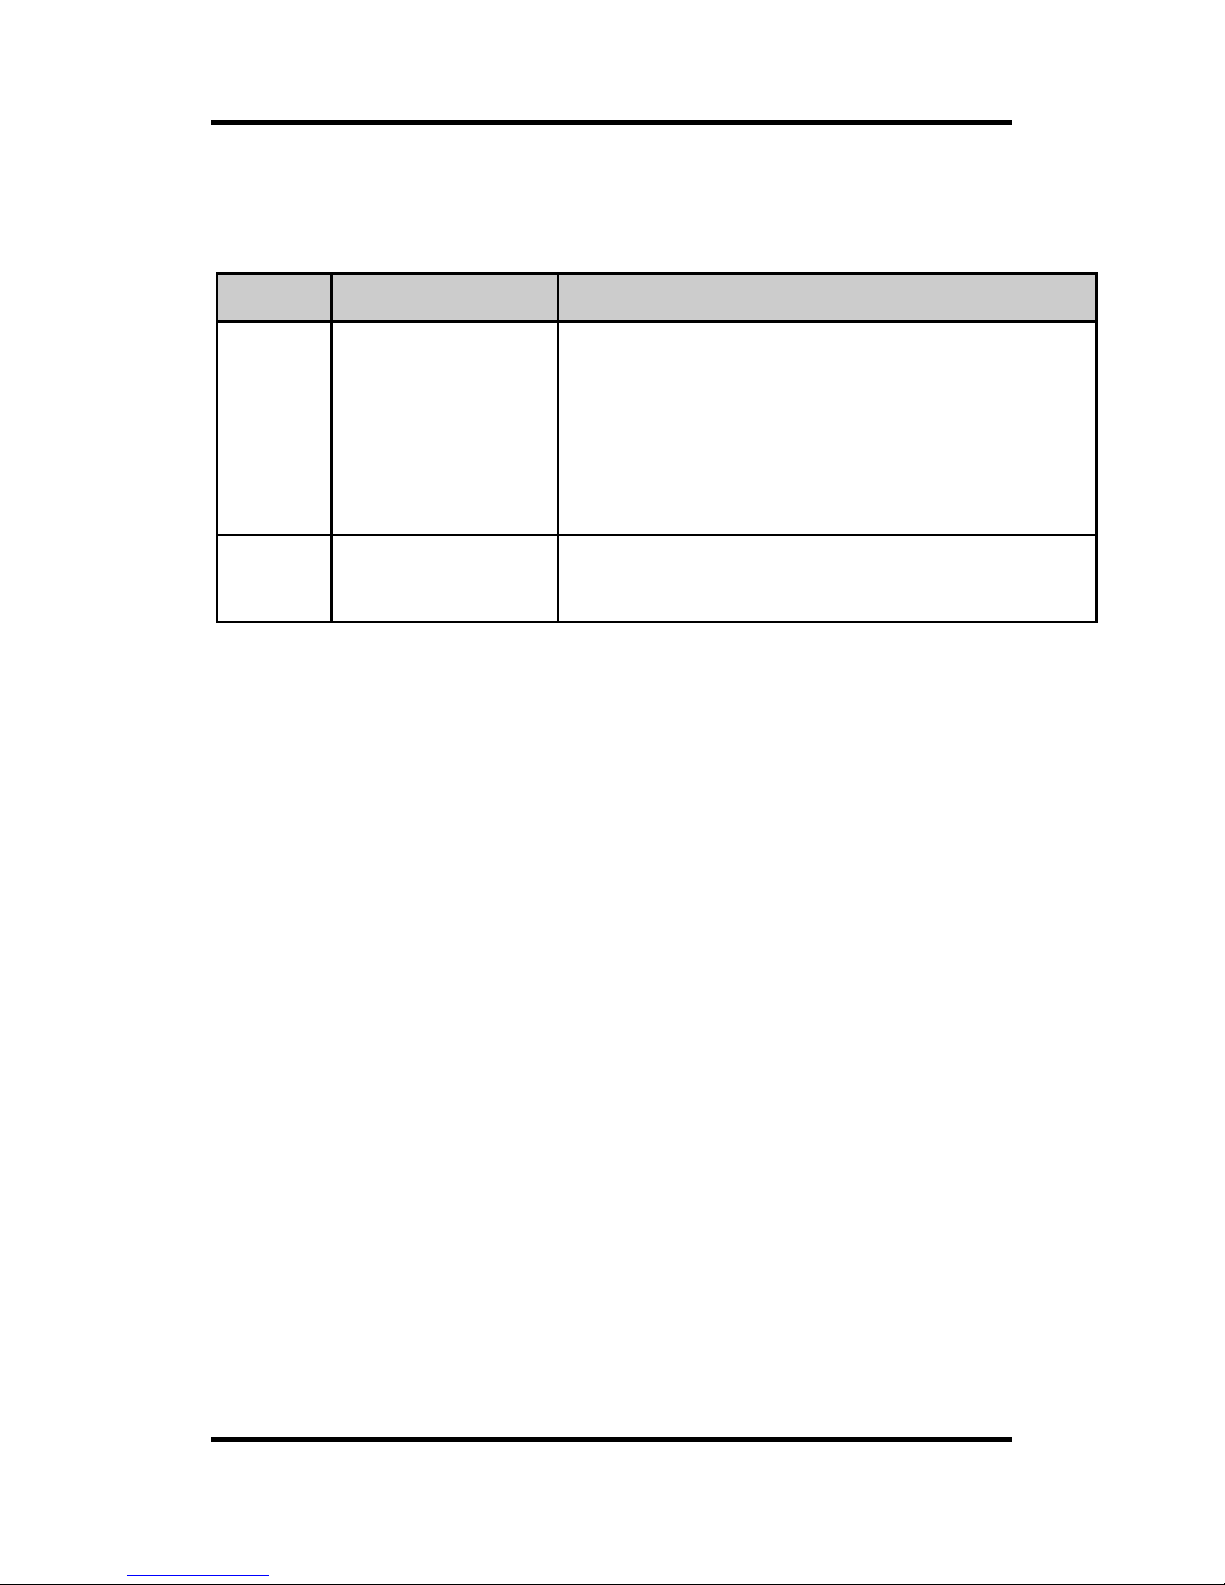
Revision Sheet
Rev
Date
Revision Description
2.0.1
2/18/2017
Initial Production Release
For Version 2.0.x firmware and
App. Feature addition: RX
Remote Shutter Release. Various
MX-15+ and other corrections.
2.1.0
4/21/17
Version 2.1 firmware update.
Nikon supported on all units

Basic Operation
RoboSHOOT
+
©
User Manual Page 2
TABLE OF CONTENTS
Before You Begin .................................................... 4
FCC Compliance ................................................ 5
EC Declaration ................................................... 6
Industry Canada (ISED) Declaration .................. 6
Disposal recommendations .............................. 6
RoHS Declaration .............................................. 7
System Overview ................................................... 8
Features ............................................................ 9
Master (MX) Devices ....................................... 11
Slave (RX) Devices ........................................... 12
Getting Started .................................................... 13
Connecting the modules ................................. 13
Camera Settings .............................................. 14
Speedlight Settings ......................................... 15
Tips .................................................................. 16
Main Indicators ............................................... 17
Group Indicators ............................................. 18
External Ports .................................................. 19
Stand Alone Operation ........................................ 21
Group Assignment on Slaves .......................... 22
Customization (MX-20+ Only).......................... 22
Clear ................................................................ 22
Flash Test / Modeling Light ............................. 23

Basic Operation
RoboSHOOT
+
©
User Manual Page 3
Enabling or Disabling Flashes quickly .............. 23
Flash Exposure Lock ........................................ 24
Button Lockout ................................................ 24
Selecting a Profile............................................ 25
Profile Bracketing ............................................ 27
Mult-Angle Photography ................................. 27
Multi-Master Mode ........................................ 28
In-Camera Control ............................................... 29
Basic Menu Mode ........................................... 30
Commander Menu Mode ............................... 32
In-Camera Control Considerations .................. 34
Focus Beam / Catch Light ................................ 35
App Control ......................................................... 36
App Start-up .................................................... 37
Overview ......................................................... 38
Flash Groups ................................................... 40
Timer ............................................................... 42
Intervalometer ................................................ 43
High Speed Capture ........................................ 44
External Trigger ............................................... 46
Special Power-up Button Functions..................... 47
Troubleshooting .................................................. 53

Basic Operation
RoboSHOOT
+
©
User Manual Page 4
BEFORE YOU BEGIN
- SAFETY -
Follow the Safety Guidelines provided as a separate document
carefully. The guidelines are provided for your safety, safety of
those around you, and for maximum enjoyment of your product.
If you cannot find the Safety Guidelines document, don’t
understand it, or otherwise decide not to read it do NOT use the
RoboSHOOT© devices. The guidelines may be available on the
Serene Automation website ‘www.sereneautomation.com’ or
may be e-mailed to you by contacting Serene Automation. For
your safety and proper care, review them periodically.
- EQUIPMENT CARE AND FUNCTION -
Be sure speedlights and RoboSHOOT© units are secured with
alignment pin engaged. Failure to do so may result in misfires,
intermittent operation, and/or drop damage.
Never pick up a camera or speedlight by the attached
RoboSHOOT© or other device. It could break free and cause
significant damage to your equipment.
- LEGAL -
We limit our liability for the purpose of keeping product costs to
a minimum and thus providing a cost effective product to you.
Use of RoboSHOOT© is at your own risk. By using or allowing
others to use this equipment you accept all responsibility and
absolve and indemnify Serene Automation from any liability
related to its use or misuse. If you do not accept this as a legally
binding agreement, do not use the equipment in any way.

Basic Operation
RoboSHOOT
+
©
User Manual Page 5
FCC Compliance
The RoboSHOOT© units including MX-20, MX-15, RX-20, ad RX-15 comply
with FCC standards for Home and Office use.
This device complies with part 15 of the FCC Rules. Operation is subject to
the following two conditions:
1. This device may not cause harmful interference, and
2. This device must accept any interference received, including interference
that may cause undesired operation.
FCC WARNING
This equipment has been tested and found to comply with the limits for a
Class B digital device, pursuant to Part 15 of the FCC Rules. These limits are
designed to provide reasonable protection against harmful interference in a
residential installation. This equipment generates, uses and can radiate
radio frequency energy and, if not installed and used in accordance with
the instructions, may cause harmful interference to radio communications.
However, there is no guarantee that interference will not occur in a
particular installation. If this equipment does cause harmful interference to
radio or television reception, which can be determined by turning the
equipment off and on, the user is encouraged to try to correct the
interference by one or more of the following measures:
Reorient or relocate the receiving antenna.
Increase the separation between the equipment and the
receiver.
Connect the equipment into an outlet different from that to
which the receiver is connected.
Consult the dealer or an experienced radio/TV technician for
help.
You are cautioned that any modification, misuse, or use of
untested cable may void the user’s authority to use this
equipment.

Basic Operation
RoboSHOOT
+
©
User Manual Page 6
EC Declaration
We,
Name: Serene Automation LLC
Address: 100 Whelan Ct
Folsom, California
95630
USA
Declare that the products: RoboSHOOT© X-series Flash triggers (MX-20, MX15, RX-20, and RX-15) Manufactured under provision of Serene Automation
LLC, Meet the following provisions of the EMC Directive (2004/108/EC) and
Low Voltage Directive (206/95/EC), and comply with the essential
requirements and other relevant provisions of Directive 1999/5/EC.
Industry Canada (ISED)
Declaration
This product meets the applicable Innovation,
Science and Economic Development Canada technical specifications
Disposal recommendations
Always follow local requirements when disposing of
electronic waste. These devices and batteries should
not be treated as household waste for disposal. They
should be taken to an applicable collection point for
recycling of electrical and electronic equipment.
By ensuring proper disposal, you will help prevent
potential negative consequences to the environment and potential
negative health effects that might otherwise result from improper disposal.
Please contact local agencies or authorities for the best method of
disposing of batteries and electronic equipment if and when disposal is
warranted.

Basic Operation
RoboSHOOT
+
©
User Manual Page 7
RoHS Declaration
Date: May 30, 2015
We hereby declare that products manufactured for Serene Automation of
Folsom California USA, namely, the RoboSHOOT© family of products (MX20, MX-15, RX-20 and RX-15) are compliant to RoHS Directive 2011/65/EU
of the European Parliament and the Council from 08/06/2011 on restriction
of the use of certain hazardous substances in electrical and electronic
appliances.
Following substances namely are involved:
Lead (Pb)
Cadmium (Cd)
Hexavalent chromium (Cr)
Polybrominated Biphenyls (PBB)
Polybrominated diphenyl ethers (PentaBDE, OctaBDE; DecaBDE)
Mercury (Hg)
Serene Automation, Limited herewith declares that all of our products are
manufactured in compliance with RoHS. This claim is based on our own
internal analyses, vendor supplied analyses, and/or material certifications
of raw materials used in manufacture of all Serene Automation products,
we declare that all products comply with and conform to RoHS II
regulations of “RoHS Directive 2011/65/EU”.

Basic Operation
RoboSHOOT
+
©
User Manual Page 8
System Overview
Congratulations on your purchase of RoboSHOOT©!
These devices facilitate fully automatic off camera
flash and will greatly enhance your flash experience
with your Fujifilm Cameras.
The RoboSHOOT© X-series TTL trigger and timing
modules enhance your Fujifilm X-Series camera with
TTL off-camera flash. The modules are plug-and-play
and can be used directly without configuration. And
for more advanced use, the MX-20+ can be
configured via an intuitive user interface right from
your Bluetooth© enabled phone - no button
sequences to remember! In addition to In-Camera
and App controlled radio flash trigger, the MX-20+
supports a wide variety of advanced technical
photography applications requiring precise timing
and control.
This manual provides an overview of the
RoboSHOOT© system. Further details, updated
specifications, and tips are available via the Quick
Guide on the App and or via Serene Automation at
www.SereneAutomation.com.

Basic Operation
RoboSHOOT
+
©
User Manual Page 9
Features
Nikon i-TTL compatibility
**
AutoFP/HSS (High Speed Sync) both TTL and
Manual (with Flashes in TTL mode) **
Advanced In-Camera Flash / Group Control **
Fujifilm-X series compatible with 4 flash groups
Fully automatic plug-and-play operation
Flash Group Profile selection and edit
Flash Exposure Lock
Focus Beam / Catch Light support
**
App Group Settings including: Man/TTL flash
power, Man/Auto Head Zoom, and TTL Offset.
Remote shutter control via App
Multi-Angle support via RX Shutter Release
Modeling Light function
**
Built-in Intervalometer/Timer/HS Capture
Flash Group Profile Bracketing
Flash sync output for external strobes (RX-20)
Full support for External Triggering via optional
remote switch or sensors (MX-20+)
** On compatible speedlights and/or cameras. See compatibility
information at www.sereneautomation.com.
Plus, for the X-20+ series:
Basic Operation
RoboSHOOT
+
©
User Manual Page 10
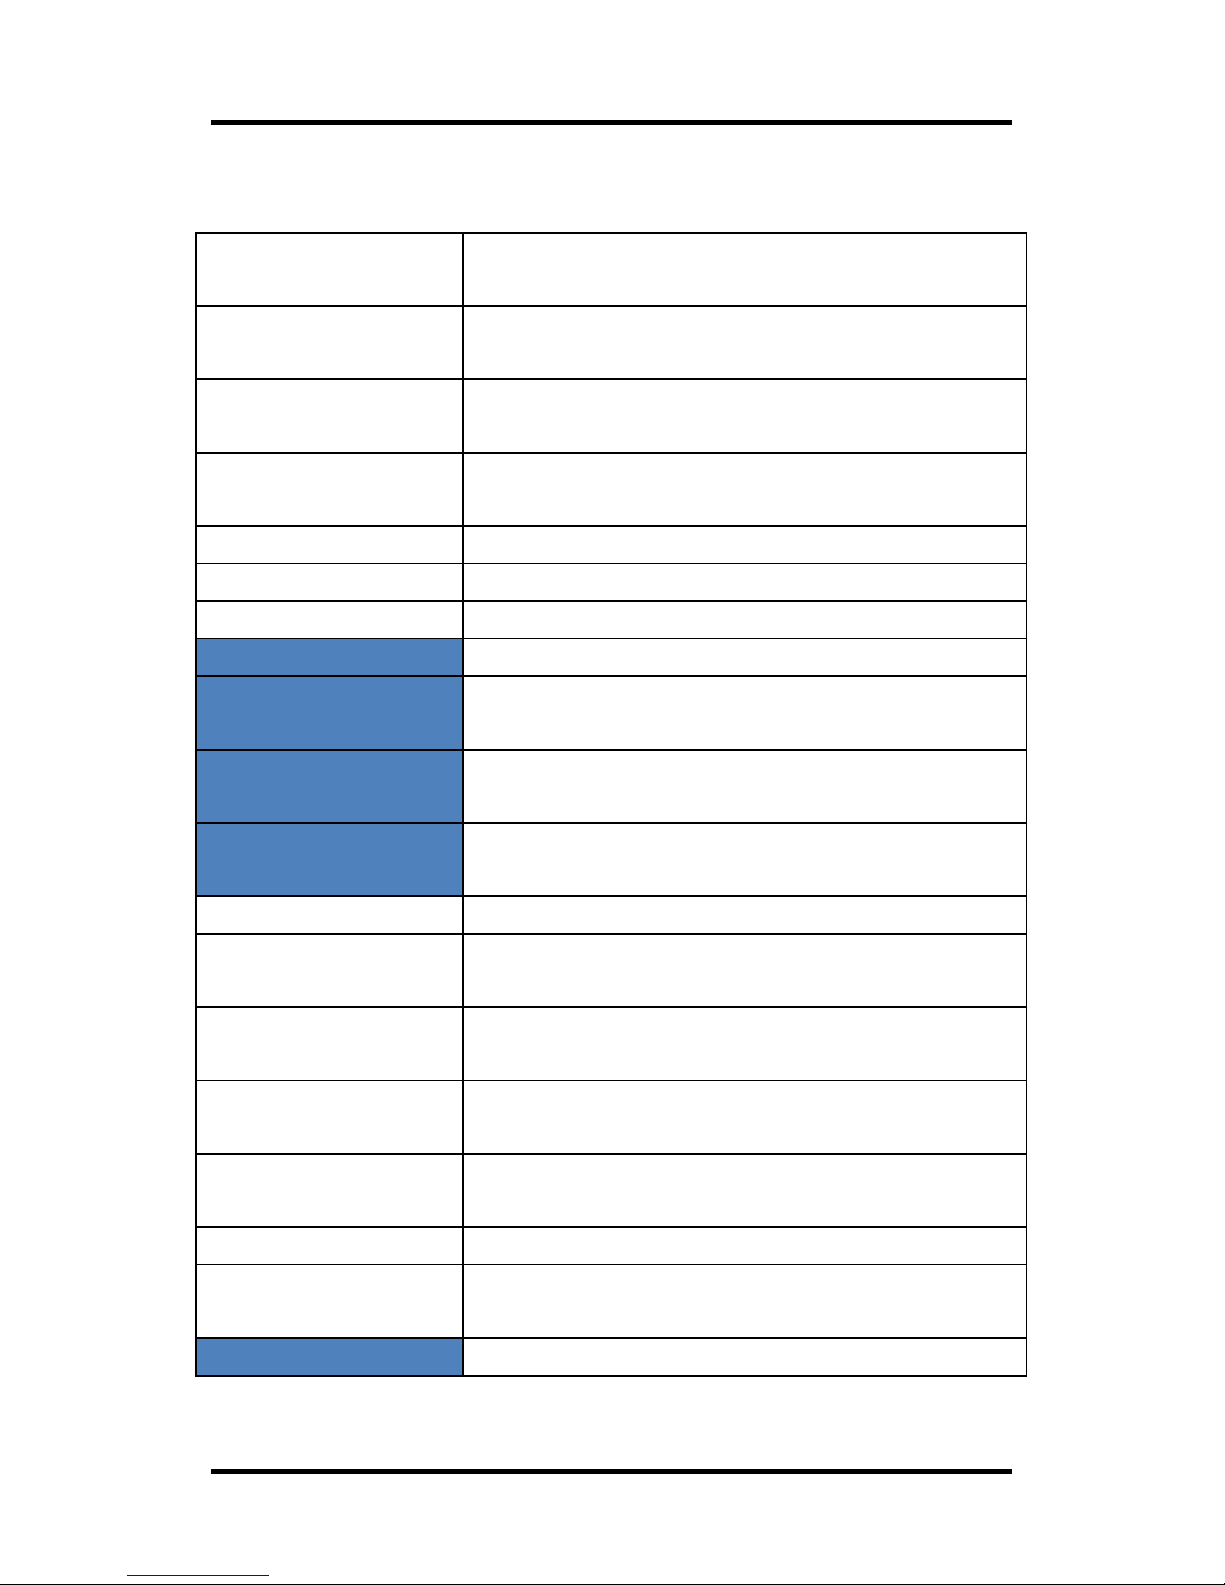
Specifications (Blue denotes X-20+ only)
Supported
Cameras
Most Fujifilm X-Series cameras.
Supported
Speedlights
See compatibility table on
www.sereneautomation.com
Supported Nikon
speedlights
See compatibility table on
www.sereneautomation.com
Sync Speed
Per camera limits (Max Curtain 1/250, HSS
1/8000, Leaf 1/2000)
Flash Groups
4 TTL groups (3 In-Camera), +/- 5 EV
TTL Override
+/- 5 EV exposure adjust from TTL
All Flashes
Fully TTL Controlled – configurable group
Timer Config*
Exposure Counter, Initial Delay
Intervalometer
Config*
Exposure Counter, Initial Delay, Interval,
Duration, Profile Bracketing
High-Speed Flash
Config*
Mode (Proportional/Fixed delay), Exposure
Duration, Delay from trigger, Shutter Mode
Trigger Module
Settings*
Trigger Assignment, Trigger Source,
Sensitivity, Sensor select. (optional)
Batteries
2 AAA
Battery Life
Unit on and operational - typical 12 hours
Unit in standby – typical 5 days
Size (LxWxH)
3.3 x 1.7 x 0.9 in (84 x 43 x 23 mm) + 1/2 in
(13 mm) for shoe mount
Weight (no
batteries)
Master - 2 oz (56 g), Slave 1.8 oz (50 g)
Master-Slave
Range
Approximately 45-60 ft (depending on
settings and environment)
Radio
2.4GHz Globally License Free ISM Band
Conformance
FCC, CE, IC, RoHS for distribution in United
States, Canada, and European Community.
App Support
iOS© 8.3 or later. Android© 4.0 or Later.
Specifications Subject to change without notice.
* Requires App (MX-20+ only)

Basic Operation
RoboSHOOT
+
©
User Manual Page 11
Master (MX) Devices
1) Top Function Button
Flash Exposure Lock
Profile Select /
Bracketing*
(½) Flash Test
(½) Modeling Light
2) Side Function Button
Return to Normal
Flash Enable/Disable
3) Power Switch
9) Flash Shoe
4) Main Indicators
5) Group Indicators
6) Camera Port*
7) Sensor/Trigger Port*
8) Camera Shoe
(beneath)
* - MX-20+ Only
1) Top function button (defaults)
- Full Click to activate Flash Exposure Lock – p23
- Full Hold to activate Profile Select / Bracketing – p24
(Profile Select only on MX-15+)
- Half Click (Hold on MX-15
+
) to Test Flashes – p22
- Half Hold to Activate Modeling Light (MX-20
+
) – p22
- During Profile Select, Half Hold to save current profile.
2) Side Function Button
- Click to Clear Active Functions (Return to Normal) - p22
- Hold to Toggle Flash Enable / Disable – p23
- Click with camera menu active toggles between basic and
commander mode in supported cameras
3) Power Switch
4) Main Indicators – p17
5) Group Indicators – p18
6) Camera Shutter Port (MX-20
+
only) – p19
Connects to camera shutter release for a variety of functions
7) Sensor Trigger Port (MX-20
+
only) – p19

Basic Operation
RoboSHOOT
+
©
User Manual Page 12
Slave (RX) Devices
6) PC Sync Port
(RX-20 Only)
1) Top Function Button
Group Select
(½) Flash Test
2) Side Function Button
Unused
3) Power Switch
7) Flash Shoe
4) Main Indicators
5) Group Indicators
1) Top function button
- Full Hold to Change Group Assignment – p22
- Half Hold or Click to Test Flash - p22
2) Side Function Button
- Presently Unused
3) Power Switch
4) Main Indicators – p17
5) Assigned Group Indicators – p18
6) External Sync Port (RX-20 only) – p19
To trigger external Low Voltage Strobes – Read and follow all
Safety guidelines carefully. Use only as recommended by the
strobe manufacturer and in conjunction with RoboSHOOT©
safety guidelines. We strongly recommend use with a
voltage isolator intended for external strobes and never
connect directly to strobe. Never under any circumstance
connect to any voltage greater than 6V.

Basic Operation
RoboSHOOT
+
©
User Manual Page 13
Getting Started
Connecting the modules
Note: Be sure all batteries are fresh!
Alignment
Pin
Extends when
knob is tight
1) Attach MX-15 or MX-20
Master to Camera.
2) Attach Speedlights to
RoboSHOOT© Flash Shoe.
Make sure alignment pin
is engaged if present.
3) Turn on RoboSHOOT©
devices.
4) Turn on Speedlights.
5) Turn on Camera.
Turning on the camera
activates and synchs
RoboSHOOT© devices and
wakes the speedlights.
Should a speedlight not
support wake up, you
may need to cycle power
on that speedlight.
Must engage
with this
alignment hole
Retractor Pin
shows when
aligned
Camera
MX-15 or MX-20
MX-15 or MX-20
MX-15 or MX-20
IMPORTANT: To ensure proper operation and minimize drop risk
check that alignment pin is mated and engage locking mechanism
on all RoboSHOOT© units and speedlights. Always turn off the
speedlight when attaching or detaching it!
NOTE: Each time you turn on the camera the units will resync for
a few seconds. Thus if you power on a remote unit after the
master unit, it will be recognized by recycling the camera power.

Basic Operation
RoboSHOOT
+
©
User Manual Page 14
Camera Settings
Any camera setting that works with an external
speedlight will be a good place to start. Consult the
owner’s manual for your camera when in doubt.
Typically, settings similar to below should be used:
Start with Single Frame Modes - Single, multiple-
exposure, or special effects. Panorama, Video
modes, and others may disable flash.
Use Standard Flash Modes - Forced, 2
nd
Curtain,
or Slow Synchro. It is suggested not to use
Suppressed Flash: instead use the RoboSHOOT©
Flash Enable/Disable buttons for this.
AutoFP/HSS is supported with compatible
cameras and speedlights.
Flash Exposure Compensation – The camera and
App provide flash compensation settings. They
are additive. Use whichever you find most
convenient. We recommend against using
compensation provided on the speedlight itself.
Shutter Speed – Some X series cameras support
flash sync up to 1/250s (leaf shutter cameras up
to 1/2000s). The RoboSHOOT devices easily
cover this range. If your camera and speedlight
support HSS, speeds up to 1/8000s are possible.
The most creative results are usually achieved in
Aperture Priority, Shutter Priority, and especially
Manual Camera Modes.

Basic Operation
RoboSHOOT
+
©
User Manual Page 15
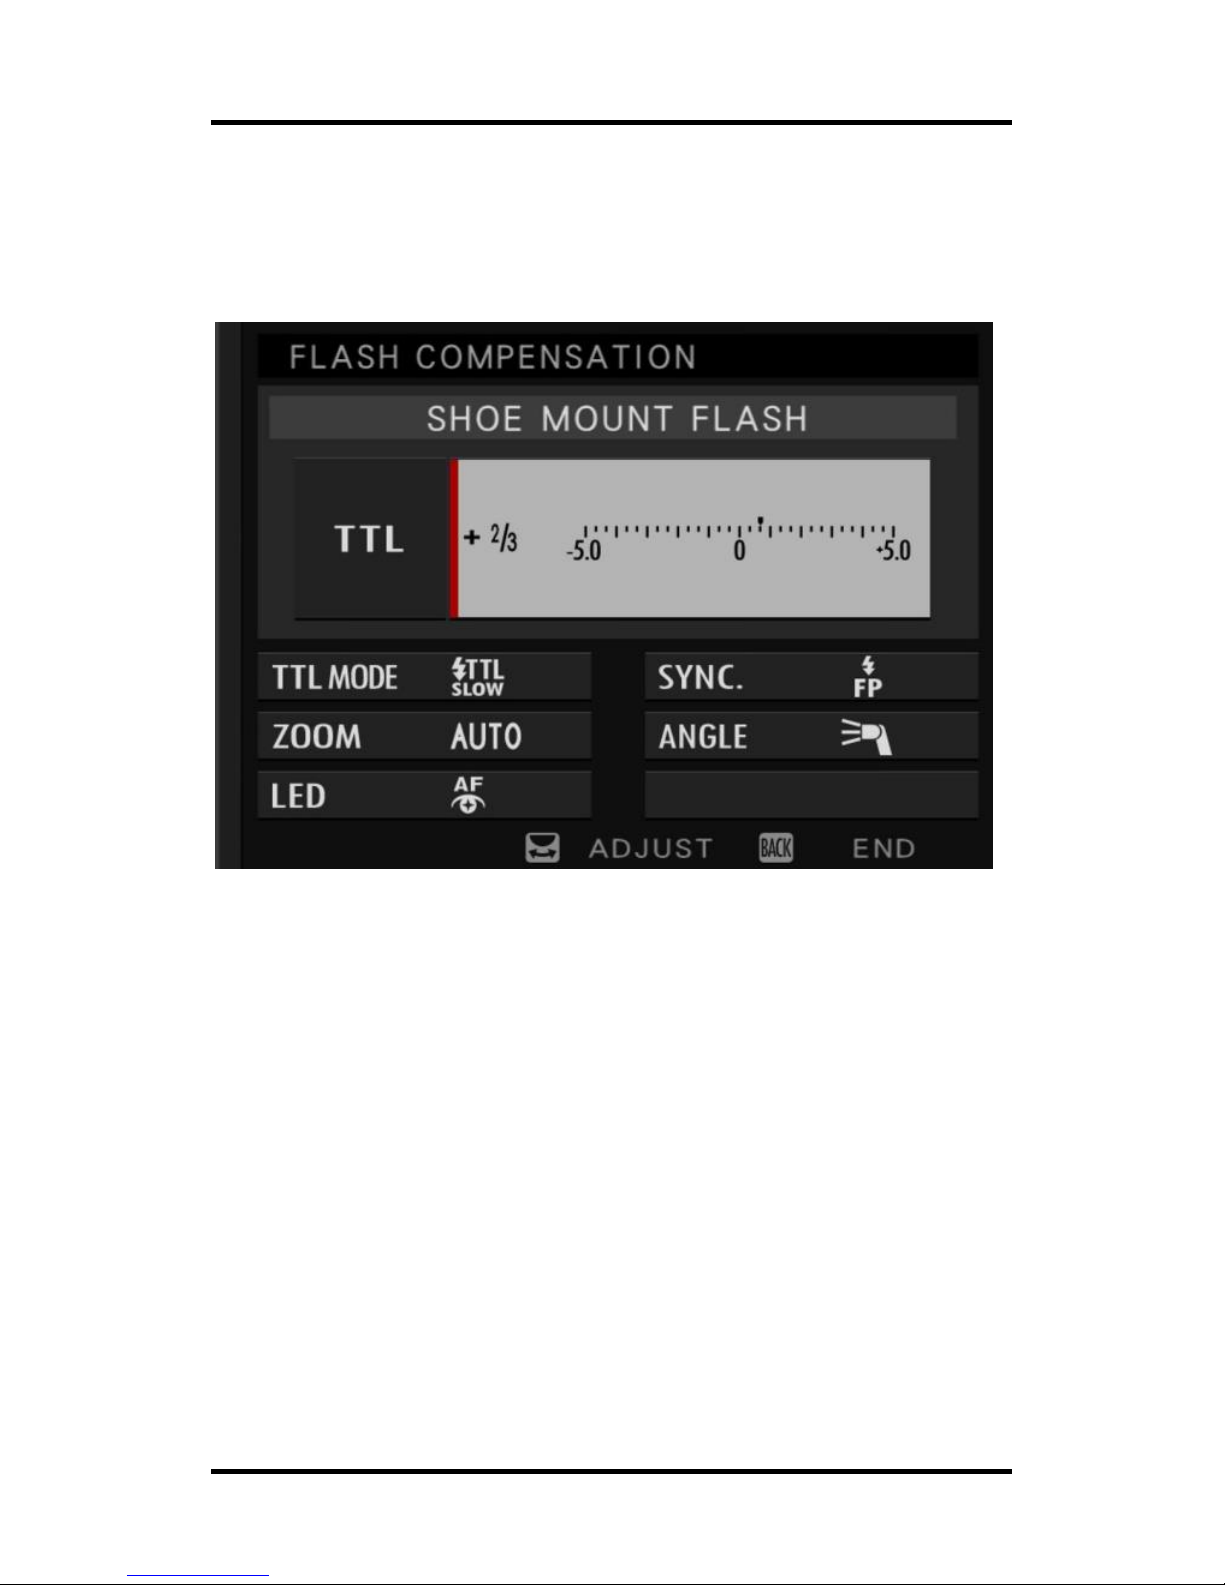
Speedlight Settings
To utilize TTL be sure to use Speedlights fully TTL
compatible with RoboSHOOT©. These should be set
to TTL mode normally with compensation set to
+/- 0. In addition, set Zoom to Auto if you want the
camera or App to control zoom. For supported
manual or supported TTL-incompatible speedlights
set the speedlight to manual.
Consult www.sereneautomation.com for current
information about compatible speedlights.
Unsupported speedlights should not be used.
Speedlights with unknown support status may or
may not operate even in manual mode. Worse,
damage to the speedlight or RoboSHOOT© device
could occur. For any speedlight with unknown
support status, always use manual mode and ensure
voltages on the shoe do not exceed 6V. If in doubt,
do not attempt to try a speedlight that is not
officially supported.

Basic Operation
RoboSHOOT
+
©
User Manual Page 16
Tips
Always start a shoot with fresh batteries and
carry spares.
Speedlights may have different recycle times.
You will be more satisfied using similar and
faster recycle times.
Speedlight types may have different color
temperatures. Many times the color
temperature variation and color gels can be
used to your creative advantage. For
consistency use the same type of speedlight in
all groups.
Metering type (Spot, Center-Weighted, etc) is
more reactive when using flash. Spot metering is
especially useful when using Flash Exposure
Lock. Remember, the camera will try to achieve
middle-gray in the metered area.
When TTL operation is employed it can be used
as another auto exposure mode. For example, If
Exposure (M mode) and ISO are all manually set,
the photographic exposure will still be
controlled by the camera as it automatically
adjusts flash power.
Aperture or Program mode may show Flash
Exposure Compensation in the display preview
but not change exposure. This is due to shutter
speed limiting. To avoid this, use other modes
along with exposure meter and histogram.
Basic Operation
RoboSHOOT
+
©
User Manual Page 17
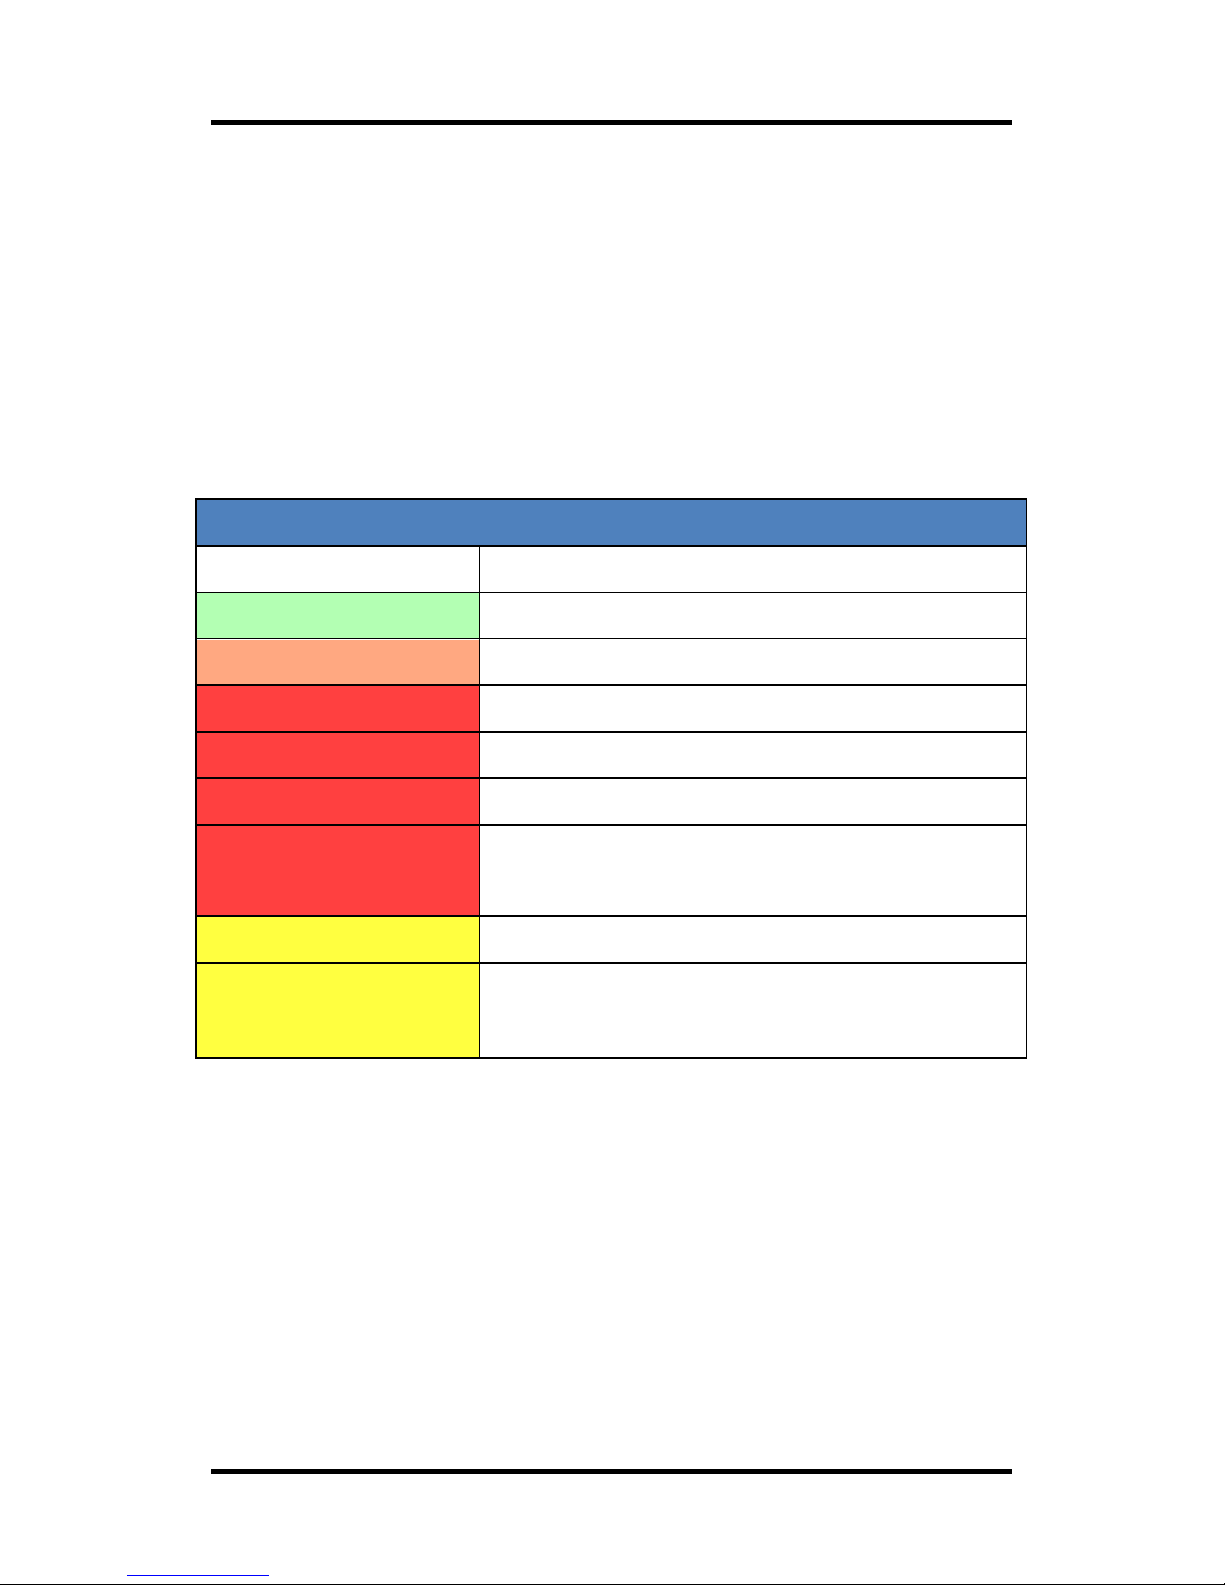
Main Indicators
The main indicator color and blink rate indicate
specific conditions. Typically, Blue indicates radio
activity, Yellow indicates timing activity, Orange is a
warning, Red indicates flash control, activity and
status, and Green indicates ready status.
MX-20+ / MX-15+ Master Units
Color / Pattern
Indication
Pulsing
Ready with Camera Power On
Blinking
Camera off
Fast Blinking
Check Flash Settings
Slow Pulsing
Low Power Standby
Pulse
Shutter Release
Other
Flash Exposure Lock or Profile
Select Active
Single Pulse
Focusing
Blinking
Intervalometer, Timer, or
Bracketing (MX-20
+
only)
During firmware updates, different indications apply:
Yellow and blue main LEDs indicate activity. Group
LEDs indicate progress. Upon power up, update
mode is indicated by flashing ALL Group LEDs Green,
Red, Green - followed by the main LED blinking
yellow.

Basic Operation
RoboSHOOT
+
©
User Manual Page 18
RX-20 / RX-15 Slave Units
Color / Pattern
Indication
Pulsing
Ready / Connected to Master
Blinking
Not Connected to Master
Blinking
Check Flash Settings
Slow Pulsing
Low Power Standby
Pulse
PC-Sync
Group Indicators
These provide status for the group or attached
speedlight. On the slave they also indicate which
group the slave is assigned to.
All Units
Color / Pattern
Indication
Slow Pulsing
Standby, Assigned group
Blinking
Charging
On
Ready
Slow Blinking
Flash/Group Disabled
Profile Select Mode (MX Units Only)
On (MX units)
Indicates Profile Number
On at varied
Brightness
Relative Group Power values

Basic Operation
RoboSHOOT
+
©
User Manual Page 19
External Ports
External Ports appear on the X-20 devices only. On
the MX-20+ a Camera Port and Trigger/Sensor port is
present, while on the RX-20 a flash sync port is
present. Use only approved connections on these
ports. If an overvoltage is connected it is not only
unsafe, but it also voids all manufacturer warranties.
Consult Safety guidelines before using external
ports. When using any port Read and follow all
related Safety guidelines carefully. Never connect
to any voltage greater than 6V.
MX-20
+
Ports
The Camera Port provides an optically isolated
shutter and focus release. When doing profile
bracketing, App or Sensor triggered exposures, or
any timing functions connect a shutter release cable
from this port to your camera. If you only have a
mechanical release, several vendors offer electromechanical release adapters.
MX-20

Basic Operation
RoboSHOOT
+
©
User Manual Page 20
The Trigger/Sensor port is used to initiate a timing
function (Timer / Intervalometer), Profile Bracketing,
or High Speed Capture sequence. A sensor or switch
contact can be used to act as trigger. A detailed
specification for this port is available for those who
wish to provide a custom sensor or trigger device.
RX-20 Port
The External Flash Sync port on the RX-20 provides
an optically isolated interface for low voltage sync
inputs. This is used as either a shutter release for
additional cameras for multi-angle photography* or
to trigger external Low Voltage Strobes – Use only as
recommended by the strobe manufacturer and in
conjunction with RoboSHOOT© safety guidelines.
We strongly recommend use with a voltage isolator
intended for external strobes and never connect
directly to strobe unless it is known to be
compatible.
* New Feature – see Device Admin for details.
MX-20
+
/ RX-20

Basic Operation
RoboSHOOT
+
©
User Manual Page 21
Stand Alone Operation
Using the MX-15+ or MX-20
+
(without using smartphone)
Fully automatic TTL off-camera flash is supported
without a user interface. No cables are required
unless you wish to activate the shutter from the
device (MX-20+ only). Just connect the units as
indicated in ‘Getting Started’, set the camera and
flash modes, and you are ready to begin shooting.
With the new Fujifilm cameras with EF-X500 control,
nearly all functions are available even without the
App. Key new additions and changes to prior
versions include:
Extensive In-Camera Group Control
Flash Enable / Disable
Flash Exposure Lock
Profile Selection and Edits
Improved Profile Bracketing*
Sensor Activated Exposures*
Flash Test
Modeling Light activation*
And much more…
* - MX-20+ only, shutter release cable may be
required.

Basic Operation
RoboSHOOT
+
©
User Manual Page 22
Group Assignment on Slaves
The slave group defaults to Group A. To change a
slave to a specific group, push-and-hold the top
button fully on that slave (see page 12). The group
LEDs will indicate assignment.
Customization (MX-20
+
Only)
Note: Several Features, Defaults, and Button
functions can be customized via App settings and
may function differently than described here. (see
‘Settings’ info on the in-App info pages for more
details).
Clear
Currently active functions can be cancelled by
pressing the side button (see page 11). This causes
operations such as Flash Disabled, Flash Exposure
Lock, and Profile Bracketing to deactivate and
return-to-normal. Turning the camera on also
performs this clear operation.

Basic Operation
RoboSHOOT
+
©
User Manual Page 23
Flash Test / Modeling Light
To Test fire each TTL speedlight ½ click (½ hold on
MX-15+) the top button to perform a Flash Test. On
the MX-20+ you ½ hold the button to briefly activate
the Modeling Light if your compatible flash is so
equipped. (see page 11).
Top Button configuration for the MX-20+ can be
changed via Flash Group Settings while connected
to the unit. The unit will respond according to last
programmed settings.
Enabling or Disabling Flashes quickly
Push-and-hold the side button to enable/disable
flash (see page 11). The Main LEDs will strobe when
the command is accepted and the Group LEDs will
indicate current status. To re-enable the flashes, just
repeat the push-and-hold or click the button to
clear. Turning on the camera or engaging another
device function will also re-enable all groups.

Basic Operation
RoboSHOOT
+
©
User Manual Page 24
Flash Exposure Lock
Flash Exposure Lock (FEL) is engaged by fully clicking
the top button (see page 11). If an exposure was
previously taken, the reference power may be
already available for use. Otherwise, the next
exposure will be used for the reference. If a camera
mode change occurs (exposure mode, aperture, ISO,
etc), the reference will remain active and set using
prior exposure values. This allows for more
creativity. If you wish to compensate you can use
flash exposure compensation (TTL Offset).
Exit FEL by clicking the side button or turning the
camera off/on.
Button Lockout
If the Main LED flashes red every time a button is
pressed, the buttons are locked out. This mode
allows you to prevent unwanted button operations.
Lockout mode is toggled by a 5 second hold on the
top button (fully pressed) and side button at the
same time. The main LEDs will blink red when
lockout is engaged and green when it is disengaged.

Basic Operation
RoboSHOOT
+
©
User Manual Page 25
Selecting a Profile
With profiles, you can quickly set all group levels, the
Master Offset, Zoom, and Angle to previously
defined values. Briefly, a profile is just a snapshot of
values used to setup the flashes. RoboSHOOT has
space for four profile snapshots. This is useful, for
example, to:
Quickly Access a set of favorite values
Provide repeatability – for example, when
taking several shots of multiple subjects,
you can quickly apply the same settings to
each subject.
Experiment with uncertain lighting very
quickly, for example with Macros. In this
case, RoboSHOOT can bracket across the
four profiles automatically. (MX-20+)
Profile selection is performed by holding the top
button to enter select mode and clicking the same
button to select the desired profile. While in profile
Select Mode, the main Red LED is blinking a slow
dash-dot pattern and the Green Group LEDs indicate
which profile is active (A is profile 1, D is profile 4).
The group Red LED brightness indicates the relative
power levels of the current profile. Profile Select
mode exists after about 10 seconds of inactivity.
Basic Operation
RoboSHOOT
+
©
User Manual Page 26
When Profile Select is activated the Button functions
are reconfigured:
Full Hold – Exit profile Select mode, and
optionally enter Profile Bracketing Mode
(MX-20+, per setting option).
Full click – Select the next profile.
½ hold – Save the Current Profile values.
½ click – Restore Profile values that were
present before profile selection was
activated. Thereby allowing you to save the
prior settings to the selected profile.
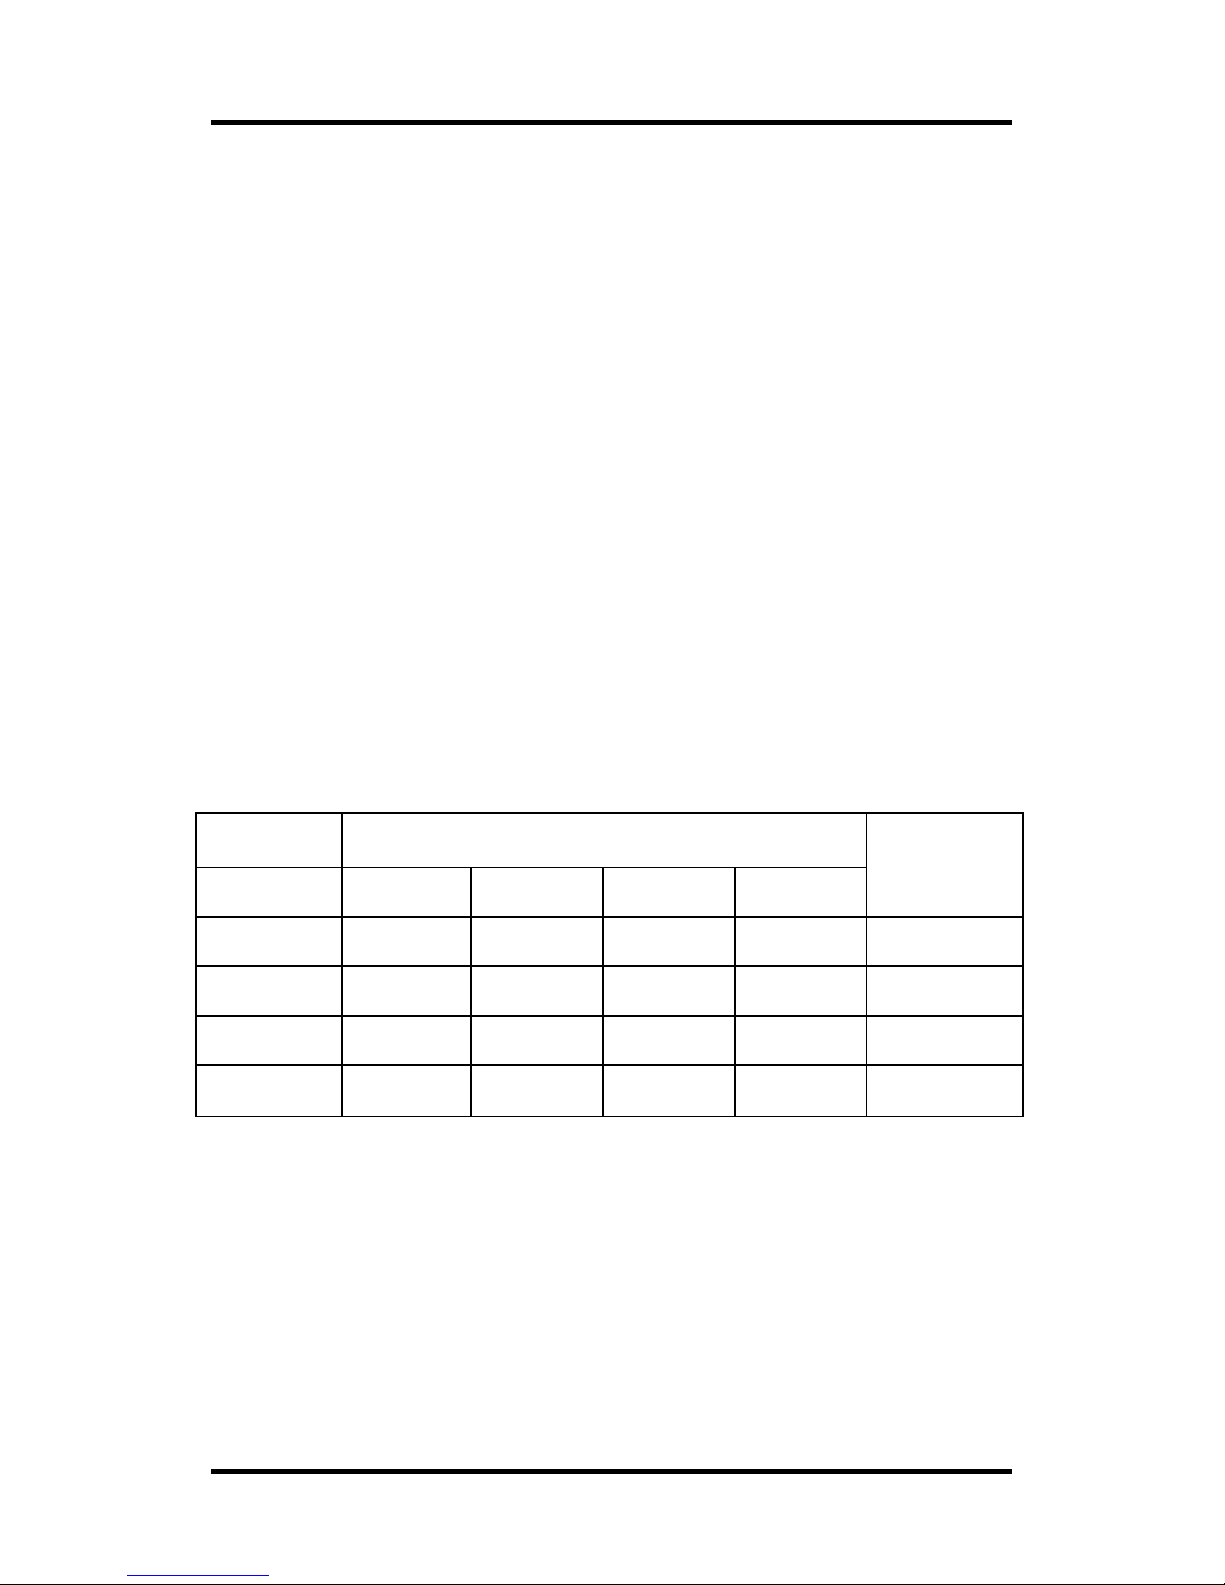
Default Profile TTL Power values (blank is zero).
Group
Master
Profile
A B C
D
1
2 - 2/3
3
- 2/3
4 -1 2/3
-1
If you save a new profile the current group values
and zoom modifiers are saved (such as Zoom
override and Angle, if provided by camera). Editing is
only possible on cameras that support In-Camera
group control.

Basic Operation
RoboSHOOT
+
©
User Manual Page 27
Profile Bracketing
Profiles Bracketing (MX-20+ only) takes four
exposures sequentially, one for each profile. To use
profile bracketing, a shutter release cable must be
connected between RoboSHOOT© and your
Camera. The camera shutter release button is
configured by default to start the bracketing
sequence.
Profile Bracketing is engaged by a full push-and-hold
of the top button twice until the LEDs strobe. The
Main Yellow LED will periodically pulse three times
indicating this mode is active.
Exit Bracketing by clicking the side button or turning
the camera off/on.
Mult-Angle Photography
MX-20+/ RX-20 can be configured for remote release
of additional cameras. This enables simultaneous
exposures from different camera angles via the App
or external trigger. See Device Admin for details and
to configure the RX-20 for this purpose.
MX-20
+
Note, by default, holding the Top button toggles
between Profile Select, Profile Bracketing (MX20+ only), and none. This can be configured via
the App.

Basic Operation
RoboSHOOT
+
©
User Manual Page 28
Multi-Master Mode
Multi-Master mode allows you to share flashes with
additional cameras. Each MX unit configured in
multi-master mode will take control of shared RX
units when its camera is turned on. This is all done
automatically. The flash Group settings are retained
for each MX independently, so, the flashes will
respond to each camera as if they are not shared. In
this way, your settings can be customized according
to the use of the camera. For example, a flash
pointed at a camera can be disabled for that camera
and enabled for another – set automatically
according to which camera is in-use.
To use Multi-Master mode:
Set each MX unit to Multi-Master mode
(see Device Admin page for information)
Make sure each MX device is using the
same radio channel and the same App
settings
It is recommended to use this mode ONLY when the
capability is needed. Otherwise, you may start
sharing your flashes with others unintentionally!
Flashes in use by Multi-Master MX units will ignore
MX units not in this mode, so unintentional
sharing can only happen when others are using

In-Camera Control
RoboSHOOT
+
©
User Manual Page 29
In-Camera Control
Cameras that support In-Camera control of the
Fujifilm EF-X500 flash also can control the MX-20+ or
MX-15+. There are two menus within these cameras
for this purpose: Basic and Commander. We
recommend setting a function button to ‘Flash
Function Setting’ to quickly access these menus.
RoboSHOOT makes use of both menus. This is a
conceptual change from the X500, where the Basic
menu is only available when controlling on-camera
flash and the Commander menu is only available
when controlling off-camera flash. RoboSHOOT does
not distinguish between on-camera and off-camera.
Instead, all flashes are considered members of
groups which may or may not be off-camera. This
gives you more powerful control: The Basic menu
applies to global control for one or more flashes and
groups and the Commander menu lets you control
individual groups.
When the Camera’s flash function menu is
displayed you can toggle between the two menu
types by clicking the side button on your MX unit.
In-Camera Control
RoboSHOOT
+
©
User Manual Page 30
Basic Menu Mode
Basic Flash Function Menu
The Basic menu provides the following controls:
Flash Enable or Disable: M/Off with no TTL
flash present, TTL/Off otherwise. MultiStrobe not supported.
TTL Offset: Master offset for all TTL groups.
Manual Power – Not supported (cannot set
manual power for all groups at once, use
commander menu instead).
TTL Mode: All modes available per camera
settings.

In-Camera Control
RoboSHOOT
+
©
User Manual Page 31
Sync: All modes available with TTL flash
present.
Zoom: Usual usage: lets you manually set
zoom head focal length.
Angle: Usual usage: lets you modify zoom
head focal length to be wider or narrower
than lens or set value.
LED: Enables Catch Light and/or Focus beam
on assigned group.

In-Camera Control
RoboSHOOT
+
©
User Manual Page 32
Commander Menu Mode
Commander Menu
The Commander Menu provides the following
controls:
Group Mode, Enable or Disable: TTL, %TTL,
M, or Off. Multi-strobe not supported.
Group TTL Offset or Group Manual Power
o %TTL enables setting of overall TTL
offset for all groups and Group
A/Group B balance.
TTL Mode: All modes available per camera
settings.

In-Camera Control
RoboSHOOT
+
©
User Manual Page 33
Sync: All modes available with TTL flash
present.
Zoom: Usual usage: lets you manually set
zoom head focal length.
Angle: Usual usage: lets you modify zoom
head focal length to be wider or narrower
than lens or set value.
Master (Group Assignments): this lets you
determine the On-Camera group assignment.
And for the MX-20+ it can control which group
the Auxiliary (Catch/Focus) Light emits from.
App settings specify how this is done.
o On-Camera flash can be set to: Group
D, Group A, or According to the Master
Group assignment.
o Focus Beam / Catch light can be sent
from: On-Camera flash, All Groups, of
the Master Group Assignment. (MX-20+
only)
Profile Number: Because channels are
robust in RoboSHOOT, channel assignment
is rarely needed. So, CH is reassigned to
Profile selection to quickly recall your
favorite settings. This also facilitates the

In-Camera Control
RoboSHOOT
+
©
User Manual Page 34
ability to modify stored group values to a
profile (profile editing) when used in
conjunction with the device Top button.
In-Camera Control Considerations
Please check out the In-App help pages for more
information on each individual control and note these
items to be aware of:
When shooting using M exposure mode,
the focus beam is not provided by the
camera.
Unsupported modes will be skipped if
selected.
o Multi-Strobe flash (strobe effect) is
not supported at the present time.
It will be skipped, if possible, when
selected and TTL flashes are
present.
o On Basic menu Manual mode is
prevented if TTL flashes are
present and TTL mode is prevented
if no TTL flashes are present.
A shutter mash when the menu is active
may result in a misfire if commander mode

In-Camera Control
RoboSHOOT
+
©
User Manual Page 35
(group control) is active. If a misfire does
happen, simply take another shot.
However, this is an unusual circumstance
and easily avoided by any of the following:
o Exit the menu before shooting.
o Slowly pressing the shutter to take
an exposure rather than ‘mash’ it.
o Half press the shutter.
o Exit commander mode (side
button).
Focus Beam / Catch Light
This utilizes the auxiliary beam of selected
compatible speedlights. For the MX-15+ the light is
sent from the Camera Master Assigned group
(‘Master’ in the Commander menu). This defaults to
On-Camera flash. For the MX-20+ you can specify
where it is emitted from as specified in the App’s
Flash Group Settings. Default is Camera Master
Assigned group, but you can also decide from, MXFlash (always On-Camera) or All groups. The focus
beam and catch light is enabled via the LED setting in
the camera menus.

App Control
RoboSHOOT
+
©
User Manual Page 36
App Control
Using a Smartphone unleashes the power of your
MX-20+ RoboSHOOT©.
To obtain your app, just download it from the Apple
App Store or Google Play. Search for ‘RoboSHOOT’.
On iOS, there is no need to pair. Just make sure
Bluetooth is on. If you do attempt to pair, you may
get a ‘unsupported’ message which can be ignored.
On Android, first pair with the RoboSHOOT© before
use. This only needs to be done once. To do this,
turn on the MX-20+ (Master) and go to Settings>Bluetooth and select ‘Search (or Scan) for devices’.
Select ‘RoboSHOOT’ from the list of devices. A
dialog asking if you wish to Pair with it should be
shown shortly. Select to Pair with the device. It is
now ready for connection when you start the App.
MX-20
+

App Control
RoboSHOOT
+
©
User Manual Page 37
App Start-up
You will be presented a connect screen after the App
starts much like this:
From here, you can set App
and Device level settings or
just connect. Any settings
changes you make will be
saved for the next time you
run the App. If no device is
available, Demo Mode will
run. In Demo Mode,
connection is simulated and
an info view with text
bubbles will show how to navigate. In this mode, no
device interactions will take place and the screens
will be somewhat static.
Forcing Settings Consistency
The App can be used to maintain the same settings in
each MX unit. This is done by forcing settings update
upon connect by selecting “All Settings” of the
“Update Upon Connect” App Setting. Otherwise,
those App Settings may not reflect the current device
settings. These settings are found by pressing the
“App Settings” button on the App prior to connecting
to a device.
MX-20
+

App Control
RoboSHOOT
+
©
User Manual Page 38
Overview
At the top of each function page or view is a bar with
two icons on it:
Info settings
The App Icon (left side) accesses a quick guide. Use it
to get quick information about RoboSHOOT© it is a
good reference for experienced users and also great
place to start to get more detail.
The Function Settings (right side) provides access to
all the settings for this view (in this case, Flash
Groups).
On the bottom of each function page or view is a
status and navigation bar:
Nav
There are several icons on it, but, only one is
clickable: the ‘+’. This brings up a Navigation menu
as shown below. The other icons on the bar provide
status about Radio Signal Strength, Battery Power
(Master and Slaves), Flash and Camera, Shutter, and
External Trigger.
MX-20
+

App Control
RoboSHOOT
+
©
User Manual Page 39
The previously mentioned Navigation menu
provides access to information about the current
function and lets you go to any primary function
page: Flash Groups, Timer, Intervalometer, High
Speed Capture, or External Trigger (respectively,
sweeping from left to right on this image of the
Navigation Menu).
Notice the far left icon on this
Navigation menu is an
‘information’ icon. This takes
place of the Flash Groups icon
here because we are
currently on the Flash Groups
function page.
For other function pages it is located in place of the
that page’s navigation icon.
Note, even though a function is running you can
still select another function. A message will indicate
the function that is running as a reminder. No
parameter changes are allowed until the running
function is stopped.
MX-20
+

App Control
RoboSHOOT
+
©
User Manual Page 40
Flash Groups
Flash groups
are controlled
by simply
adjusting the
group knobs and
buttons. To set relative
power from one group to
the next you adjust the
power knobs. This balances
power between groups and
will minimally affect the
overall exposure. So,
setting all levels to -2 EV, for
example, is the same as
setting all to 0. But, setting Group A to -2 and Group
B to +2 will result in a 4EV difference in requested
power from the speedlights in those groups.
However, by long clicking instead of turning the
knob, you toggle between TTL and manual. Manual
bypasses TTL and will affect overall exposure.
Note: if you drag your finger off a knob, the knob’s
pointer will follow your finger. This allows for much
more precise settings. Clicking toggles between
automatic and manual modes. A button tray
covering the ready LEDs also appears, allowing for
quick set and adjust of the last touched knob value.
MX-20
Supports
drag and
long click
MX-20
+
App Control
RoboSHOOT
+
©
User Manual Page 41
TTL requested power can be overridden by adjusting
the Master knob. This always affects overall flash
exposure when any knobs are in TTL mode and a
ready speedlight is assigned to that group.
The left side indicators are similar to the flash ready
on your speedlight, except they indicate ready for
the entire group.
At the bottom third of the page you find controls for
Flash Enable, Overall TTL Power Offset, Flash
Exposure Lock, TTL Flash Test, Shutter Release, and
optionally Modeling Light.
Modeling Light, Profile tray and zoom controls may
not be visible. To modify, click the settings icon in
the upper right corner and select ‘group function
settings’
Zoom controls allow you to set the speedlight zoom
for each group. It can be set as a specific value or as
a multiple of the current lens/camera setting. This
gives you finer control over your subject
illumination.
Modeling light briefly activates this function on your
flash, if compatible.
The profile tray allows you to select and edit profiles,
which may be used individually or for bracketing.
MX-20
+
App Control
RoboSHOOT
+
©
User Manual Page 42
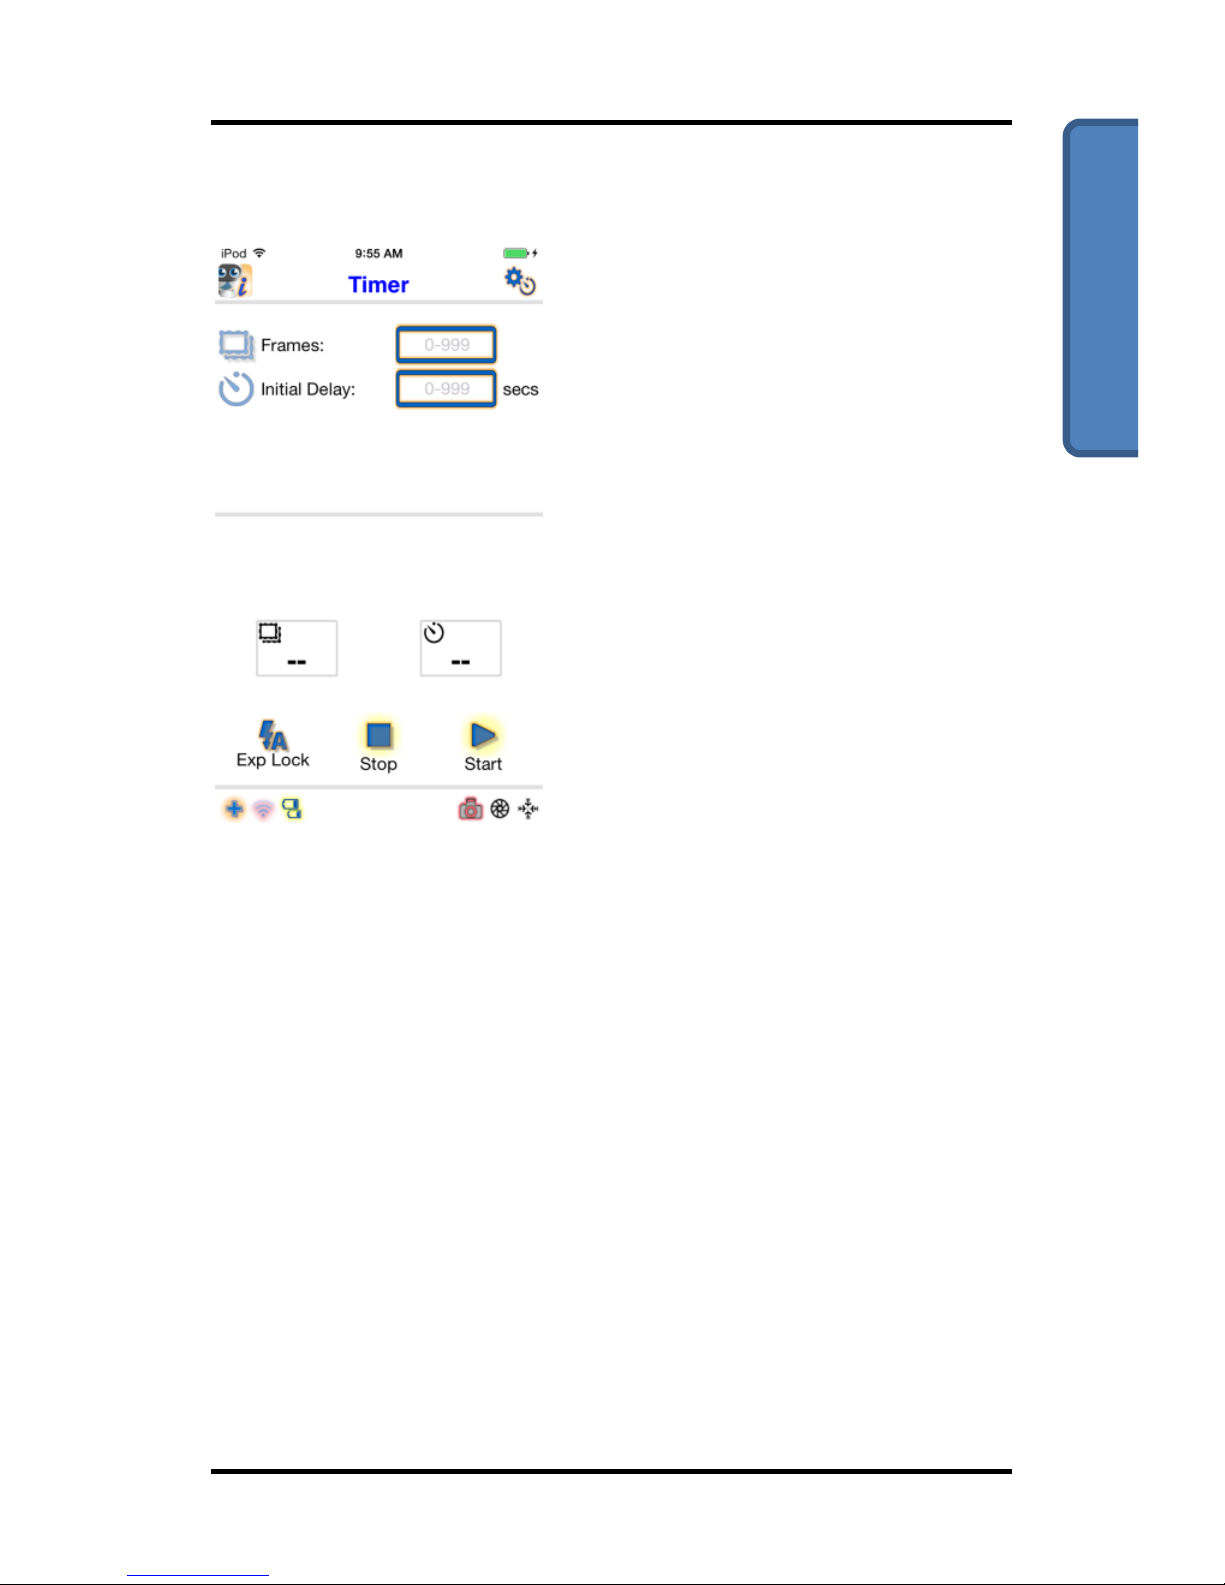
Timer
The timer lets you take time
delayed exposures with a
delay of your choosing.
Useful, if you need to trigger
a timed exposure remotely,
such as a shot with you in
the picture and since it is
triggered with your App
there is no need to rush to
get into position!
The timer mode also allows
you to take a sequence of
triggered shots, one
exposure for each trigger, with or without delay. This
is ideal for stop-motion photography. It’s also great
for candid shots where you might trigger an
exposure when a loud noise is heard.
Other uses of triggered exposure are fireworks and
other events that might be triggered via sensor. Of
course, you have to take in account shutter delay
when attempting these and set your sensor for
proper detection.
MX-20
+

App Control
RoboSHOOT
+
©
User Manual Page 43
Intervalometer
The intervalometer lets you
take bracketed, time-lapse,
or multi-shot sequences.
You can optionally include
flash in these sequences. By
clicking the Frames icon, you
toggle between
Intervalometer and Profile
Bracketing modes.
Bracketing is great for many
types of photography
including macro, portraits,
and even street scenes. It
assures repeatable results using a variety of settings.
This goes well beyond the capabilities of your
camera’s built-in intervalometer when utilizing flash.
Note, if during the first exposures the shutter
release cable is not detected the intervalometer
sequence will abort automatically. Check cable and
camera connections.
MX-20
+

App Control
RoboSHOOT
+
©
User Manual Page 44
High Speed Capture
High Speed Capture enables
you to take elusive high
speed events such as a
projectile in mid-air, a
balloon popping, a glass
shattering, suspended water
drops, or similar subjects.
This type of exposure usually
requires a sensor (optional),
bulb mode, and a dark
environment. Other than
that, RoboSHOOT© takes
care of the complexity.
To use this capability, set up your darkened
environment and get ready to take the shot. Using
the high speed capture settings page, set the values
as needed and take a reference shot (‘Set Ref’
button) to set exposure levels for the next shots.
Then, when you are ready, press ‘Armed’. When the
sensor detects an event, the speedlight is triggered,
optionally with a delay.
The delay mode can be changed by pressing the
Flash Delay Icon. The modes are: Fixed Delay or
Proportional Delay.
MX-20
+

App Control
RoboSHOOT
+
©
User Manual Page 45
Fixed Delay fires the flash a fixed
time after the trigger event. For
example, a time of 0 can be used
to fire the flash as soon as
possible after a noise is heard by
an audio sensor connected to the
MX-20. You can use this to
capture events such as a balloon bursting.
Proportional mode fires the flash a multiple of the
time between two trigger events. In the following
example, two sensors 1m apart are 3.5m from the
subject.
1 m 3.5 m
The proportional delay factor is 3.5m / 1m = 3.5. This
allows you to position the camera without knowing
how fast the projectile is moving. A custom sensor
would be required for this method.
Parameters for shutter control are also provided.
See the in-App guide for more information.
MX-20
+

App Control
RoboSHOOT
+
©
User Manual Page 46
External Trigger
The External Trigger lets you
set up a sensor to trigger an
action. This is used in any
situation where you wish to
autonomously trigger the
flash, start the
intervalometer, or take an
exposure caused by some
sensed event.
The sensor will be detected
when you plug it into the
External Trigger Port (ECP)
on the Master.
Sensor modules such as an Audio Detector, Optical
Detector, or Digital Trigger are available on a per
request basis subject to availability. You can also
plug in a switch to the Trigger Port to trigger from
switch closures or provide your own sensors. A
detailed specification for trigger port sensors is
available upon request.
MX-20
+

Device Admin
RoboSHOOT
+
©
User Manual Page 47
Special Power-up Button Functions
Several button combinations can be used at power
up to select various functions on the MX unit. These
are intended as one-time or seldom used
configurations. You may repeat the operation if it
was not successful (for example if you accidentally
moved while holding buttons).
MX-20+ Firmware Update: At power up hold Side +
½ Top buttons until LEDs complete cycling one-by-
one.
To initiate a firmware upload on an MX-20+ device:
1. Remove MX-20
+
from the camera and turn it off.
2. Press-and-hold the side button with the top
button held ½ way and turn the unit on.
3. Once the LED cycle through all LEDs is complete
release both buttons. If successful, the main
LEDs will indicate Yellow with rapid Red flashing
followed by ALL Group LEDs Blink Green-RedGreen. Click side button if this pattern does not
stop. Then, the main Yellow will indicate a
double blink pattern.
4. Start the App and connect to the MX-20
+
.
5. The App will start in Updater mode, Check for an
update and install it if available.

Device Admin
RoboSHOOT
+
©
User Manual Page 48
You can cancel an upload if it hasn’t yet begun by
restarting the MX device while pressing-and-holding
the side button. If successful, update will halt and
normal operation resume the next time you restart.
RX unit Update: RX devices are uploaded
automatically when the Master (MX) device gets
new firmware and you sync the RX devices with the
MX device. To do this, place the MX and RX units
near each other, turn on all RX units then turn on the
MX unit. The RX update takes about 3 minutes.
MX-15+ Firmware Update: Since the MX-15+ does
not support the App, updates are not available using
it. Instead the MX-15+ supports unit-to-unit updates.
If you have access to an MX-20+, you can use it to
update your MX-15+. To do this, place your MX-15+
in update mode as described above in in steps 1-3.
Once the MX-15+ in in update mode turn on the MX20+ and place it close to the MX-15+. After about five
minutes the update will be complete either unit can
be used to update your RX units.
See www.sereneautomation.com for further details.
Note, firmware update resets all settings to default.
If you’ve changed MX-20+ settings via the App, prior
settings can be restored by forcing consistency
(p37).

Device Admin
RoboSHOOT
+
©
User Manual Page 49
Reset to Factory Defaults (All unit types): At power
up hold Side plus Full Top buttons until LEDs
complete cycling one-by-one. If successful, the main
LEDs will indicate Yellow with rapid Red flashing.
Wait 5 seconds and continue use or turn off unit.
Profile Select Enable (MX-15+ only):
Continue to hold Side plus Full Top buttons after
Reset to Defaults until main LEDs flash Green three
times in succession. This disables profile
selection/editing capability. This function is
unavailable on the MX-20 as its button functions are
set via App Settings.
Change Radio Channel: At power up hold Side
button until LEDs complete cycling one-by-one. If
successful, the Main Yellow will flash three times
rapidly, then the Green Group LEDs will flash three
times indicating the new channel number coded per
the same table used for version number indication
on p50. There is normally no need to change the
channel even in the presence of other units.
However, you choose to, for the MX-20+ it is best to
change channels via the App to keep the channel
values in sync.

Device Admin
RoboSHOOT
+
©
User Manual Page 50
Firmware Version Display: At power up fully hold
the Top button until the LEDs complete cycling oneby-one. Then observe the Group LEDs to indicate the
version number as a Green-Red-Green pattern
corresponding to the Major.Minor.Revision firmware
version. The individual Major.Minor.Revision
numbers are coded per the following table:
Group LED Version Number Coding
D C B A Value
D C B A Value
0 l 8 l 1
l
l 9 l 2 l
l
10
l
l 3 l l l
11 l 4
l
l
12
l
l 5 l l l
13
l
l 6 l l l
14
l l l 7 l l l
l
15
So, for example, the pattern of ON LEDs: Green A,
Red B & C, Green A - indicates version v1.6.1,
whereas Green B, ,Green D & C indicates v2.0.12.
Multi-Master Mode: To toggle Multi-Master mode,
Continue to fully hold the Top button of your MX
unit about 5 seconds after version display. This
mode allows sharing or RX units with multiple MX
units so several cameras can use the same flashes.

Device Admin
RoboSHOOT
+
©
User Manual Page 51
All MX units must have Multi-Master mode active if
the wish to participate in RX sharing. When this
mode is active, turning on a camera will cause the
flashes to associate with it and disassociate with any
other camera. Any profiles and settings are taken
from the newly associated camera/MX unit. Thus,
you are able to set up the flashes according to the
needs of that camera without affecting a different
camera’s settings. So, for example, you might have
one group enabled on one camera and a different
group enabled on another camera. Likewise for
Power, Zoom, and TTL offset settings and any other
modes.
Note, while operating in Multi-Master mode, if
someone else is also using Multi-Master mode in the
same area they could take control of your flashes. If
this occurs, simply change all your MX units to a
different channel (they must be all on the same
channel), restart your RX-units and turn on a camera.
This will set all RX units to the new channel and
avoid any possibility of interference. App Settings,
including channel number can be sent to each MX
unit by forcing consistency (p37). To connect the
App to an MX unit only one MX unit may be on at a
time. The Multi-master mode setting is maintained
even if power is switch off or batteries are changed
and is unaffected by App Settings.

Device Admin
RoboSHOOT
+
©
User Manual Page 52
Multi-Angle Photography: The MX-20+/RX-20
supports Multi-Angle photography by taking
simultaneous exposures from different locations. To
enable this mode the RX-20 X-sync port must be
reconfigured as a shutter release port. This is done
on each RX unit individually and you can have
multiple RX-20s configured either way as you wish.
To Toggle the RX-20 port between X-sync and
shutter release, turn off the RX-20 and fully hold the
Top button while turning it back on. Continue to
hold for several seconds after the main yellow LED is
steadily on. Once you see the main Red LED blink
you can release. If set to X-sync the Red LED blinks
3x slowly or is set to Shutter Release the Red LED
blinks 5x quickly. This same 5x blink will occur every
time to turn on the unit to indicate it is set to Shutter
Release. This mode will remain active until you
toggle it again, restore the unit to defaults, or load
new firmware.
With Shutter Release configured and release cable
attached to the RX-20, its camera will take exposures
either by App (Expose button, Timer, Intervalometer,
or High Speed Capture) or by external trigger on the
MX-20+. While Flash is not supported in this mode, it
is not prevented either and may work with low
shutter speeds using 2
nd
curtain sync.

Device Admin
RoboSHOOT
+
©
User Manual Page 53
Troubleshooting
Make sure batteries are fresh and devices are
powered. Otherwise, turn off devices and follow this
procedure.
MX Main LED
flashing?
RX Main LED
flashing?
Green Slow
Orange
Medium
Red Pulse
Red
Orange
Medium
Green Slow
Check Camera
Alignment and
Power
Unit asleep,
Cycle power
No sync with
Master. Check
MX Unit.
Turn on units
then Camera
off/on
RX Green
Group LED On?
MX Green
Group LED On?
Camera
Indicates Flash
Ready?
Check Flash
Battery
Alignment and
Power
Restart MX
device to resync
Check Camera
Settings
Begin Shooting!
Yes
Yes
Yes
No
No
No
Red LED blink
speed
Check Flash
Settings (TTL
Mode)
Fast Blink
Slow Pulse

Notes

Notes
 Loading...