

Roberts Super Six 6 Owner's Manual
10-46
SUPER SIX 6"Jamb Saw
OWNER’S MANUAL
Scie de Jambage de 15,2cm
SUPER SIX
MANUEL D’UTILISATION
Sierra de 15,2cm para
Recortar Jambas
SUPER SIX
MANUAL DE OPERACIÓN
WARNING!
Read and understand
all instructions. Failure to
follow all instructions listed
below may result in electric shock,
fire and/or serious bodily injury.
SAVE THESE INSTRUCTIONS FOR
FUTURE REFERENCE.
AVERTISSEMENT! Lire et comprendre
toutes les directives. Le non-respect
des directives décrites ci-dessous
peut causer des chocs électriques, un
incendie ou des blessures graves.
VEUILLEZ CONSERVER CES DIRECTIVES
POUR RÉFÉRENCE ULTÉRIEURE.
¡ADVERTENCIA! Lea y comprenda todas las
instrucciones. Si no se cumplen todas las instrucciones
enumeradas a continuación se puede producir choque
eléctrico, incendio y/o lesiones físicas graves.
CONSERVE ESTAS INSTRUCCIONES PARA
CONSULTARLAS EN EL FUTURO
Double insulated
Double isolement
Doble aislamiento

GENERAL SAFETY RULES
WORK AREA: Keep your work area clean and well lit. Cluttered and dark work areas invite
accidents. Do not operate power tools in explosive atmospheres, such as in the presence of
flammable liquids, gases, or dust. Power tools create sparks which may ignite the dust or
fumes. Keep bystanders, children, and visitors away while operating a power tool. Distractions
can cause you to lose control.
ELECTRICAL SAFETY: Double insulated tools are equipped with a polarized plug (one blade
is wider than the other.) This plug will fit in a polarized outlet only one way. If the plug does not
fit fully in the outlet, reverse the plug. If it still does not fit, contact a qualified electrician to
install a polarized outlet. Do not change the plug in any way. Double insulation eliminates the
need for the three wire grounded power cord and grounded power supply system.
Avoid body contact with grounded surfaces such as pipes, radiators, ranges and refrigerators.
There is an increased risk of electric shock if your body is grounded.
Don’t expose power tools to rain or wet conditions. Water entering a power tool will increase
the risk of electric shock.
Do not abuse the cord. Never use the cord to carry the tools or pull the plug from an outlet.
Keep cord away from heat, oil, sharp edges or moving parts. Replace damaged cords
immediately. Damaged cords increase the risk of electric shock.
When operating a power tool outside, use an outdoor extension cord marked “W-A” or “W”.
These cords are rated for outdoor use and reduce the risk of electric shock.
PERSONAL SAFETY:
Stay alert, watch what you are doing and use common sense when
operating a power tool. Do not use tools while tired or under the influence of drugs, alcohol,
or medication.
Dress properly. Do not wear loose clothing or jewelry. Contain long hair. Keep your hair,
clothing and gloves away from moving parts. Avoid accidental starting. Be sure switch is off
before plugging in. Carrying tools with your finger on the switch or plugging in tools that have
the switch on invites accidents.
Remove adjusting keys or switches before turning the tool on. A wrench or key that is left
attached to a rotating part of the tool may result in personal injury.
Do not overreach. Keep proper footing and balance at all times. Proper footing and balance
enables better control of the tool in unexpected conditions.
TOOL USE AND CARE: Do not use tool if switch does not turn it on or off. Any tool that
cannot be controlled with the switch is dangerous and must be repaired.
Disconnect the plug from the power source before making any adjustment, changing
accessories, or storing the tool. Such preventive safety measures reduce the risk of starting the
tool accidentally.
Store idle tools out of reach of children and other untrained persons. Tools are dangerous in
the hands of untrained users.
Maintain tools with care. Keep cutting tools sharp and clean. Properly maintained tools with
sharp cutting edges are less likely to bind and are easier to control.
Check for misalignment or binding of moving parts, breakage of parts and any other condition
that may affect the tools operation. If damaged, have the tool serviced before using. Many
accidents are caused by poorly maintained tools.
Use only accessories that are recommended by the manufacturer for your model. Accessories
that may be suitable for one tool may become hazardous when used on another tool.
SERVICE: Tool service must be performed only by qualified repair personnel. Service or
maintenance performed by unqualified personnel could result in a risk of injury.
When servicing a tool, use only identical replacement parts. Follow instructions in the
maintenance section of this manual. Use of unauthorized parts or failure to follow maintenance
instructions may create a risk of electric shock or injury.
Hold tool by insulated gripping surfaces when performing an operation where the cutting tools
may contact hidden wiring or its own cord. Contact with a “live wire” will make exposed metal
parts of the tool “live” and shock the operator.
SAFETY SWITCH: For your safety, and to comply with safety regulations, the switch on the
10-46 6" Jamb Saw DOES NOT LOCK in the “on” position. The motor will turn off when the
switch is released.

GENERAL SAFETY RULES CONTINUED
MAINTENANCE: After use, check tool to keep it in top condition.
1. Clean out accumulated dust.
2. Check the brushes periodically for wear and replace both brushes when either is worn to
about 1/3 in length.
DO NOT MAKE ANY ADJUSTMENT WHILE THE MOTOR IS IN MOTION!
WARNING:
KEEP SAFETY GUARDS IN PLACE TO AVOID POSSIBLE SERIOUS INJURY!
Never cover, nor allow dust to accumulate in air vents since they must always be open for
proper motor cooling.
Always remove the electric cord from the power supply before changing brushes, lubricating
or when working on the unit, to avoid possible serious injury.
To assure safety and reliability all repairs with the exception of external accessible brushes
should be performed by an Authorized Service Center or other qualified
Service Organization.
PRODUCT SPECIFIC SAFETY WARNINGS
1. The Roberts 10-46 SUPER SIX Jamb Saw is manufactured for the specific use of trimming
wood door jambs and base molding by professional flooring installation craftsmen only! It
can cause bodily harm if used improperly or if operated by inexperienced persons.
2. Do not use this product for any purpose other than stated in these instructions.
3. Never operate this saw “freehand”.
4. Always wear eye protection and gloves. It is recommended that safety goggles which are
fully enclosed and contact your forehead and cheeks be worn to prevent injury. Do not wear
loose clothing. Dust masks are recommended.
5. Unplug the Roberts 10-46 SUPER SIX 6" Jamb Saw when not in use. Store it in the custom
molded case.
6. Keep blade safety guards installed at all times.
7. Avoid hitting nails, screws, masonry, tile or other hard materials. Keep work area clear of
tools and scraps.
a. These materials can cause dangerous chips and debris to be ejected from the saw.
b. The blade will be damaged or dulled. Teeth can be broken or bent, requiring
replacement of the blade.
c. Check jambs and base moldings carefully to locate nails or other fasteners so they can
be removed or avoided during trimming.
8. Do not use this or any electric tool on wet floors or near standing water.
9. Make sure blade retaining nut and handle retaining nuts are tightened securely
before operating.
10. Do not use masonry or diamond blades in this saw. Cutting tile, bricks, or masonry creates
abrasive dust, which can damage the gears and ball bearings. Product warranty is VOID if
the Roberts 10-46 SUPER SIX 6" Jamb Saw is used to cut masonry.

ASSEMBLY AND BLADE CHANGING
1. Make sure the saw is unplugged.
2. Insert the blade retaining nut into the saw blade arbor hole,
so the blade retainer is securely seated in the blade.
* Make sure the blade teeth are facing the direction of rotation
(counterclockwise viewed from the bottom).
3. Screw the blade retainer nut, with the saw blade
centered, onto the saw arbor shaft. When the nut is
finger tight, check that the blade is centered and fully seated.
4. Depress the black arbor lock knob on the top of the saw motor
head to engage and lock the arbor.
5. Using the spanner wrench (with two extended pins), turn the
retainer nut clockwise until the retainer nut is tight on the shaft.
6. Attach the plastic handle, using the two 3/8" diameter bolts. Put the lock washers between the
outside of the handle and under the bolt head. Tighten both bolts with the open end wrench
provided. Make sure the handle is secure before using the Roberts 10-46 SUPER SIX
6" Jamb Saw.
OPERATING THE ROBERTS 10-46 SUPER SIX 6" JAMB SAW
1. Make sure you have read all safety instructions before operating.
2. Make sure the saw is unplugged. Make sure the safety guard and handle are
attached securely, and that you are wearing protective goggles.
3. Check for nails, screws, masonry or other hard material in the area you want to
cut. Remove all such material and debris from the cutting area.
4. Determine the amount of material you need to remove from the bottom of the
jamb and draw a scribe line on the door jamb.
5. Loosen the three wing nuts on the adjustment skirt.
a. Set the base of the adjustment skirt on the floor and adjust the saw so the TOP of the
blade is even with the scribe mark on the jamb. You can also measure the distance
from the floor to your scribe line with a ruler, then set the Roberts 10-46 SUPER SIX
Jamb Saw height against the ruler. Remember to measure to the top of the saw blade.
b. Tighten the wing nuts enough to hold the adjustment skirt firmly in the saw body.
c. Check the inside of the adjustment skirt to make sure the saw body is parallel to the
index lines inside the skirt. This step is important to prevent “binding” of the blade
against the material you are cutting.
d. If the adjustment skirt is parallel, tighten the wing nuts securely.
e. Double check your saw height adjustment against the scribe mark on your work.
f. DO
NOT allow the blade to contact the floor or substrate material. This can damage the
blade, and the floor, and place excess loads on the motor.
6. Set the depth guide by loosening the screw knob on the adjustment tab. Set the depth guide
to allow the saw blade to cut the depth needed to just CLEAR your jamb or base molding.
a. Deeper cuts will cause damage to plaster or wall board, and will create excessive dust.
This will also cause excessive wear to your saw blade.
b. Plaster dust will cause excess wear to the gears and bearings in the power unit.
7. Plug the electrical cord into a 120V outlet or extension cord.
Place the saw on the floor.
8. Grasp the saw firmly and push the saw into the wood and
move the saw parallel to the to the floor to cut the jamb
9. Limit the depth of your cut to the thickness of the
base material to minimize the chance of hitting nails,
drywall, plaster, etc.
10. For your safety, and to comply with safety regulations,
the switch on the Roberts 10-46 SUPER SIX 6" Jamb
Saw DOES NOT LOCK in the “on” position. The motor
will turn off when the switch is released.
ROBERTS 10-46 SUPER SIX JAMB SAW INSTRUCTIONS
ROBERTS 10-46 SUPER SIX 6" JAMB SAW
INSTRUCTIONS CONTINUED
REGARDING WOOD BASE MOLDINGS
While some flooring installers trim wood base molding with
jamb saws, it is not a recommended practice.
Professional Flooring and Trade Associations recommend that the base molding be removed
then replaced after the new floor is installed. This results in a better looking installation and
preserves the height and appearance of the base molding. Should you choose to trim the wood
base molding with the jamb saw, be especially careful to avoid embedded finishing nails.
Make sure you have a flat, even, smooth surface to support the saw base plate as you cut the
base molding. Never run the saw over carpeting or pad. Do not allow the blade to contact the
floor or substrate! This will overload the motor, and damage the blade.
REGARDING DOOR TRIMMING
ALWAYS remove doors, and cut evenly with a table saw or circular saw. It is not recommended
practice to cut doors with a jamb saw.
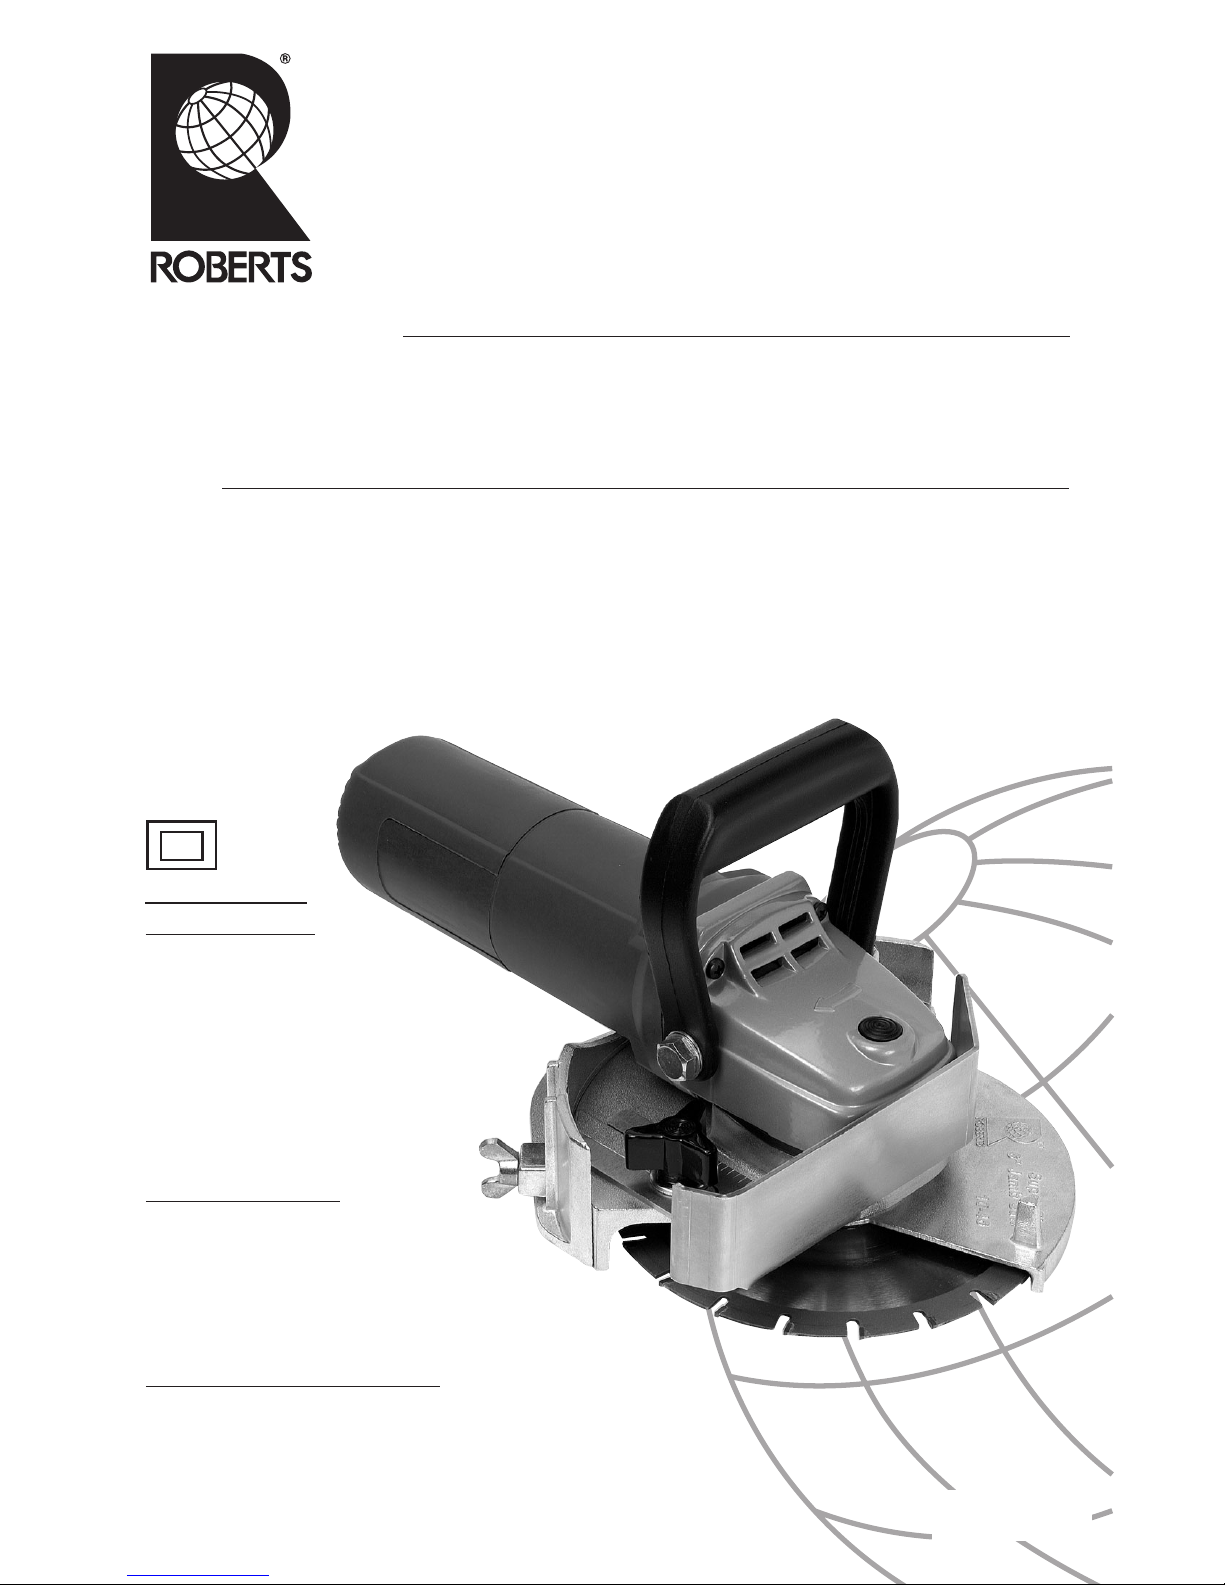
NOTE: ALWAYS feed the saw to your RIGHT so
the blade teeth advance into the wood. If the
saw is moved to your left, it could result in
“kickback” and loss of control of the saw,
which can result in damage to the material or
personal injury. Move the saw slowly and
evenly through the material. Hold the saw
firmly and keep it firmly on the floor as you cut
through the material.
Motor Unit:
Current: 120 V, 60 Hz
No Load Speed: 7,000 RPM
Arbor Diameter: 5/8" (16mm)
Blade Adapter Diameter: 20mm
Ball and Needle Bearings: Spiral ground gears
for smooth, quiet operation
Blade:
Diameter: 63⁄16
"
Teeth: 20, carbide
Width of Teeth: .080 (approx 1/12")
Arbor Size: 20mm
Saw:
Saw Assembly: Diecast and machined aluminum
Height Adjustment Range: "Flush" to 11⁄16"
SPECIFICATIONS
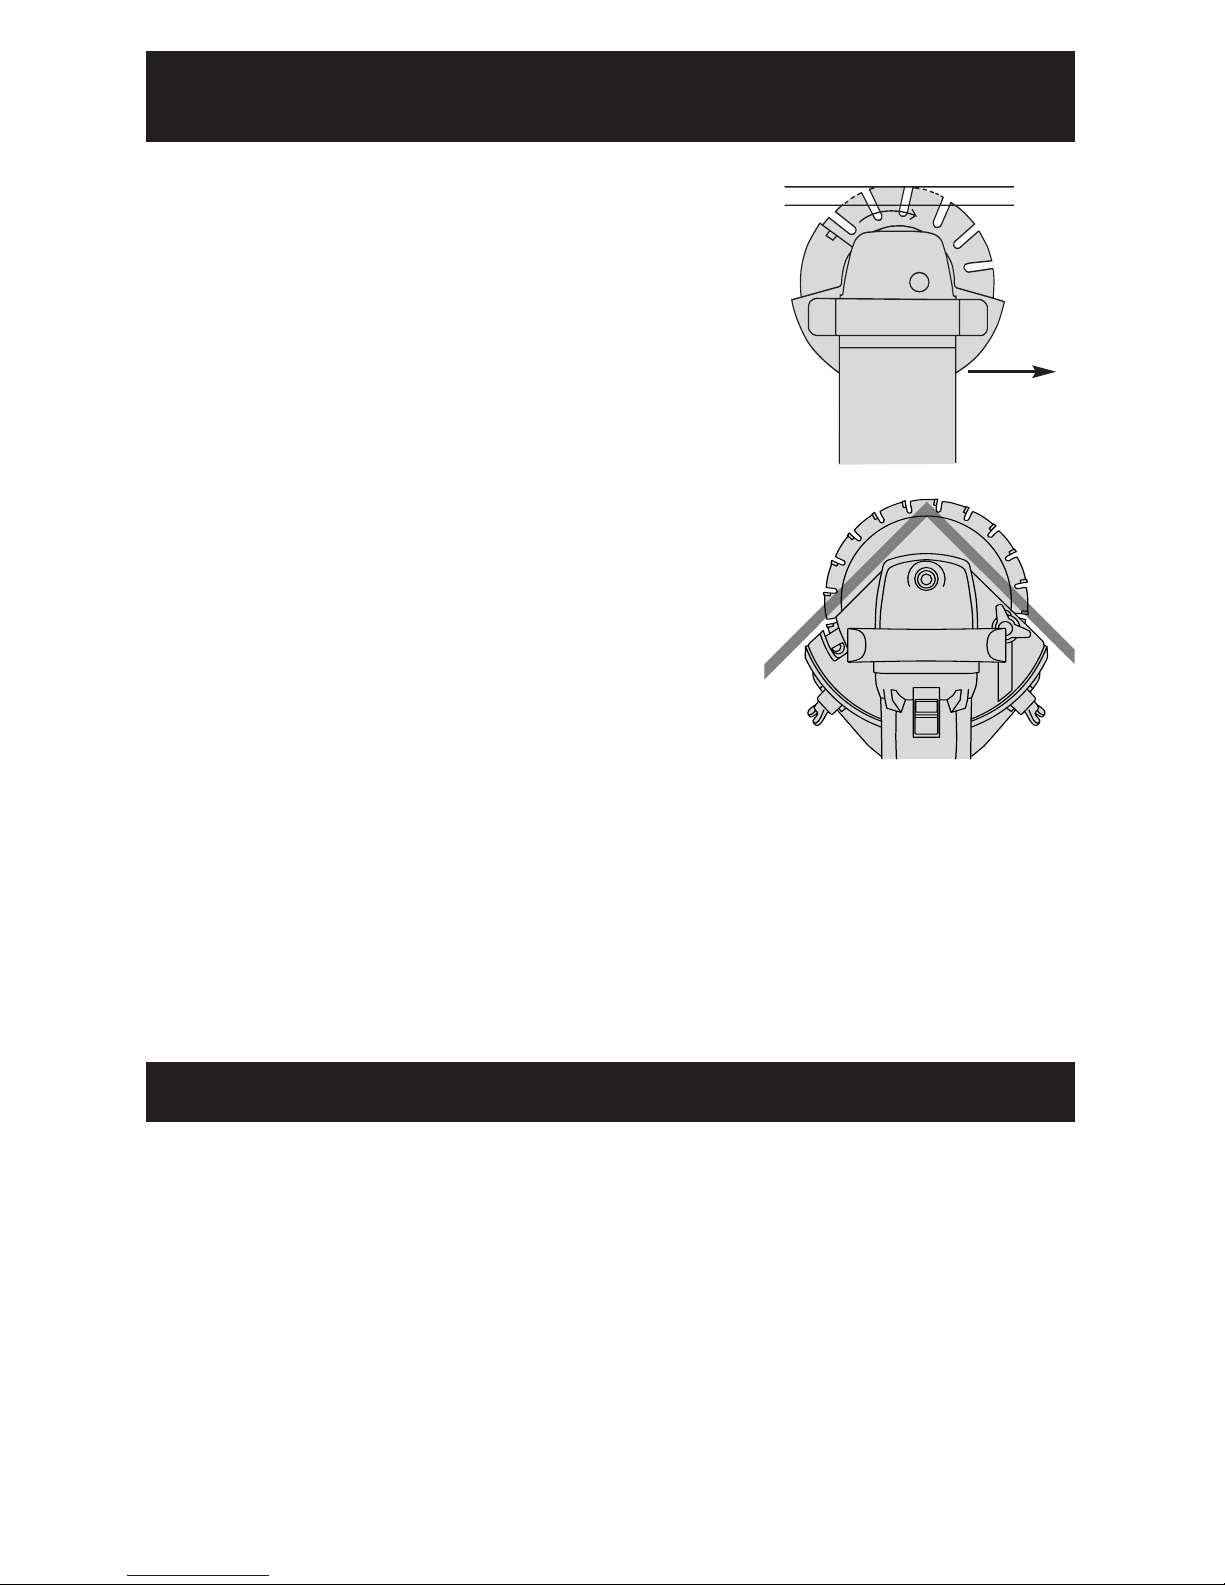
CUTTING INSIDE CORNERS
1. The Roberts 10-46 SUPER SIX Jamb Saw will cut completely
though 90° corners in base moldings up to 1/2" thick. The depth
gauge must be removed, and the motor must be unplugged
while removing the depth gauge.
2. Set the height adjustment skirt to the proper level.
3. Turn the saw on, and advance the blade slowly into the
base, to the left of the corner. Move the saw evenly and
steadily to the RIGHT, and carefully into the corner. Maintain
your depth of cut so you do not cut more than the thickness
of the wood base molding. Note: With the blade fully
inserted into the corner, the depth of cut will be slightly
deeper than needed to fully cut 1/2" thick wood
base molding.
Wall Board
Base
Move Saw
This
Direction
Only
ON
OFF
 Loading...