

Roberts Sports 995 User Manual

FM Stereo/AM PLL Digital Radio
ROBERTS
Enjoy Listening
Please read this manual before use

Contents
Contents ..........................................................................................1
Controls ......................................................................................... 2-4
Earphones ......................................................................................5
Display ............................................................................................6
Battery .............................................................................................7
Lock switch .................................................................................... 9
Earphones ...................................................................................... 11
Aerials ............................................................................................ 11
Setting the time ..............................................................................13
Scan tuning ....................................................................................15
Manual tuning ................................................................................ 17
Presetting stations ......................................................................... 19
Recalling a preset station ...............................................................19
Mono / Stereo mode - FM ..............................................................21
Deep bass boost button .................................................................21
Auto power off ................................................................................23
Setting the FM frequency range .....................................................23
Tuning step size - FM and AM ....................................................... 25
Troubleshooting ............................................................................. 27
General ..........................................................................................27
Specifi cations .................................................................................29
Guarantee ...................................................................................... 30
1
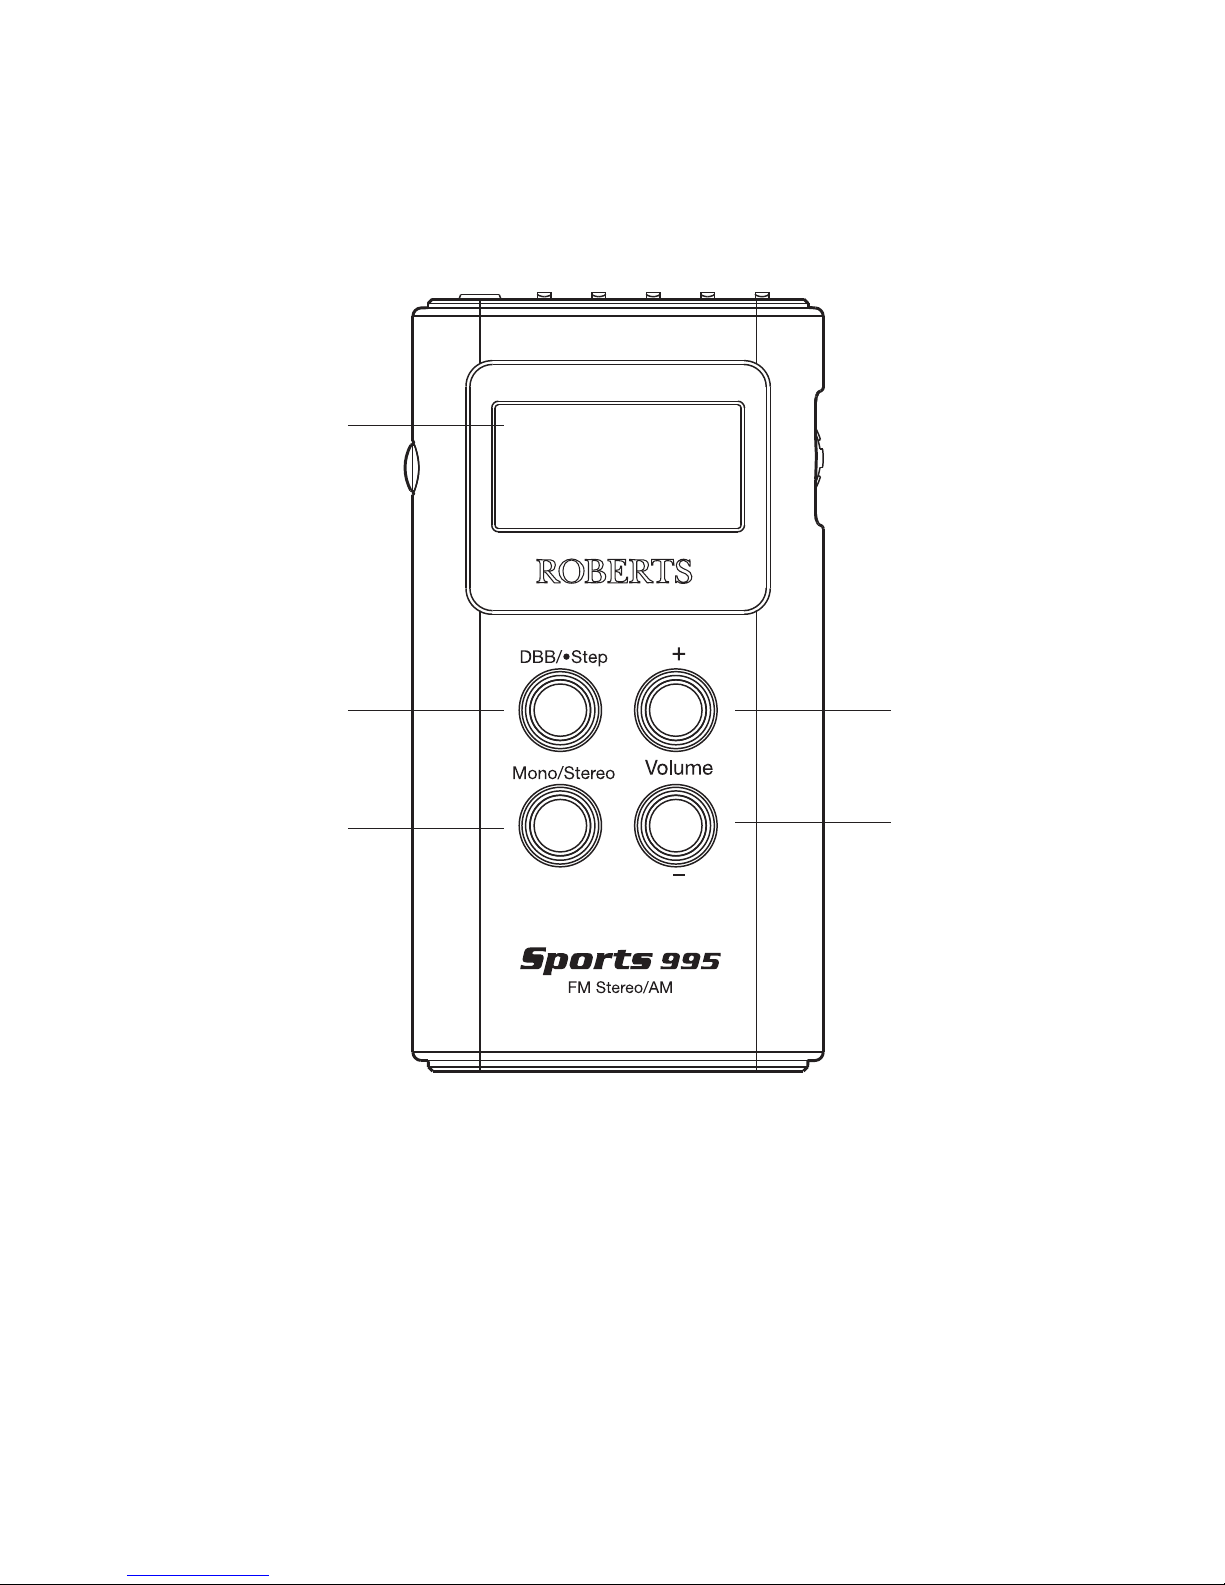
Controls (front)
3
2
1
1. Mono/Stereo button
2. Deep bass boost / Step button
3. LCD display
4
5
4. Volume Up button
5. Volume Down button
If you need any further advice, please call our Technical Helpline on :020 8758 0338 (Mon-Fri)
2
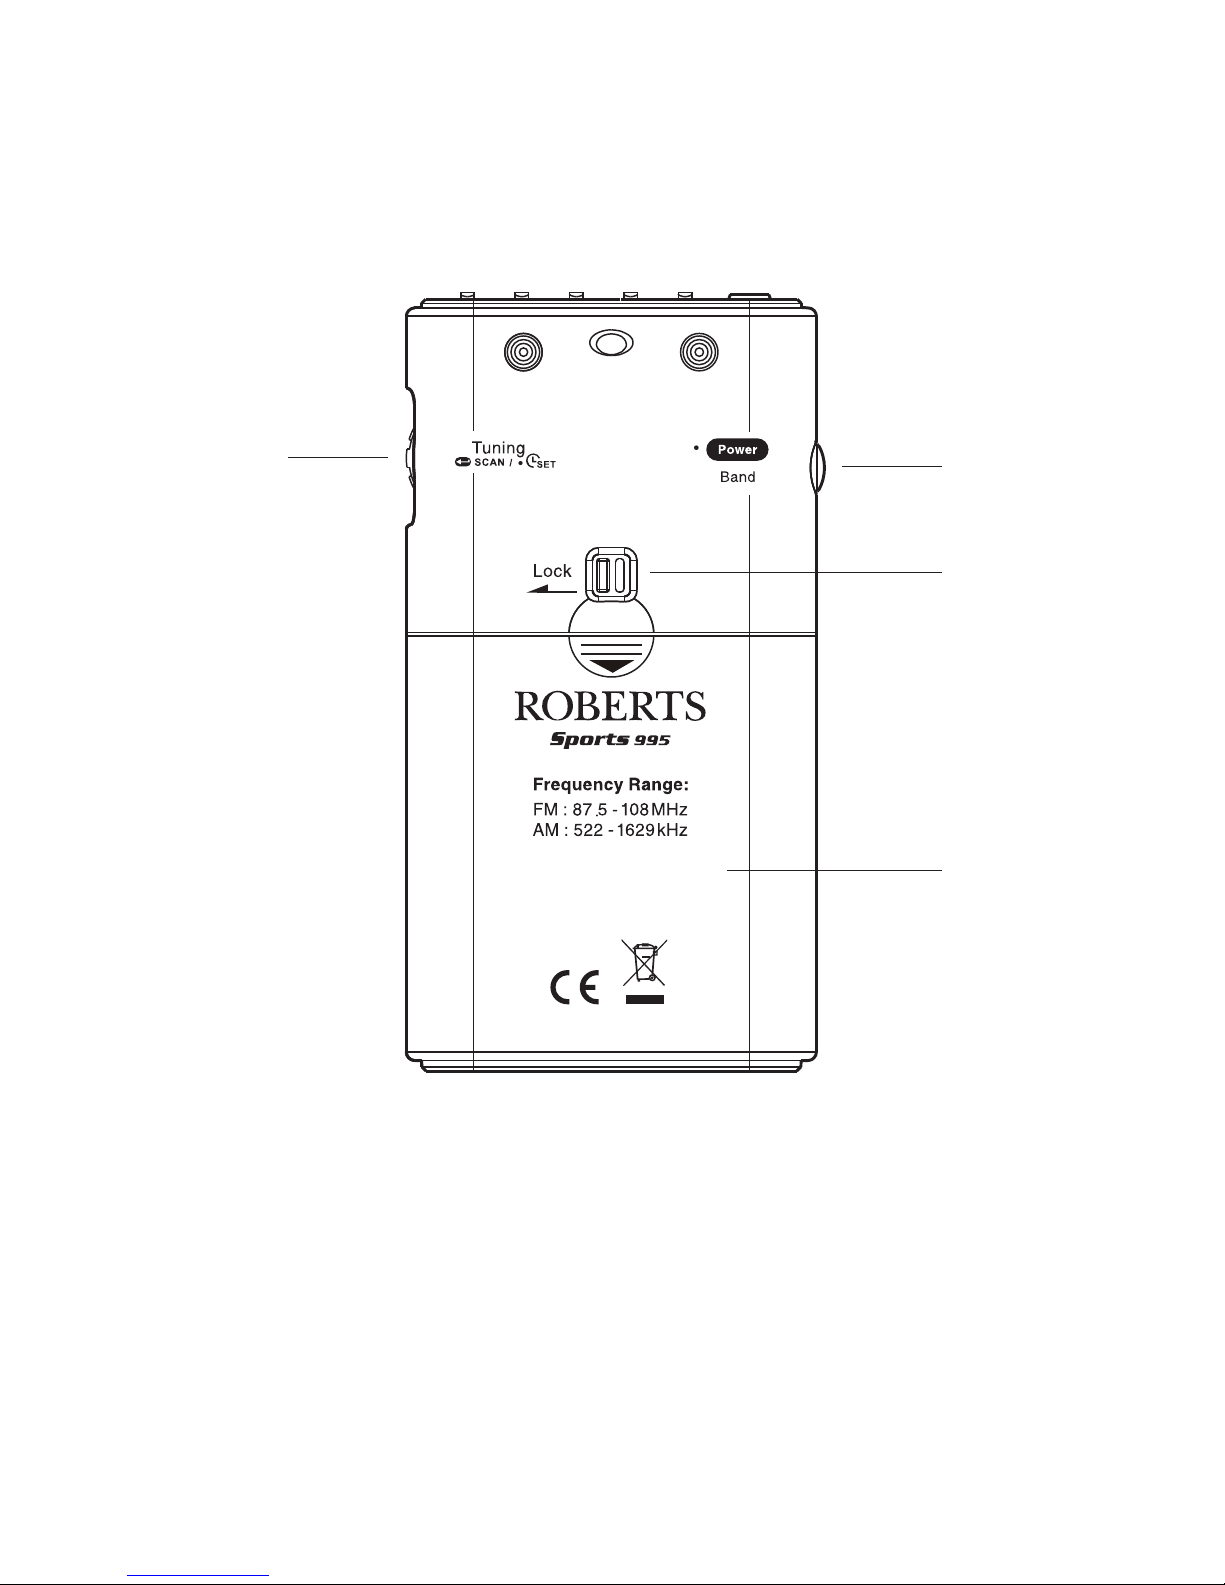
Controls (rear)
6
7
8
9
6. Tuning / Jog wheel
7. Power / Band button
3
8. Lock switch
9. Battery compartment
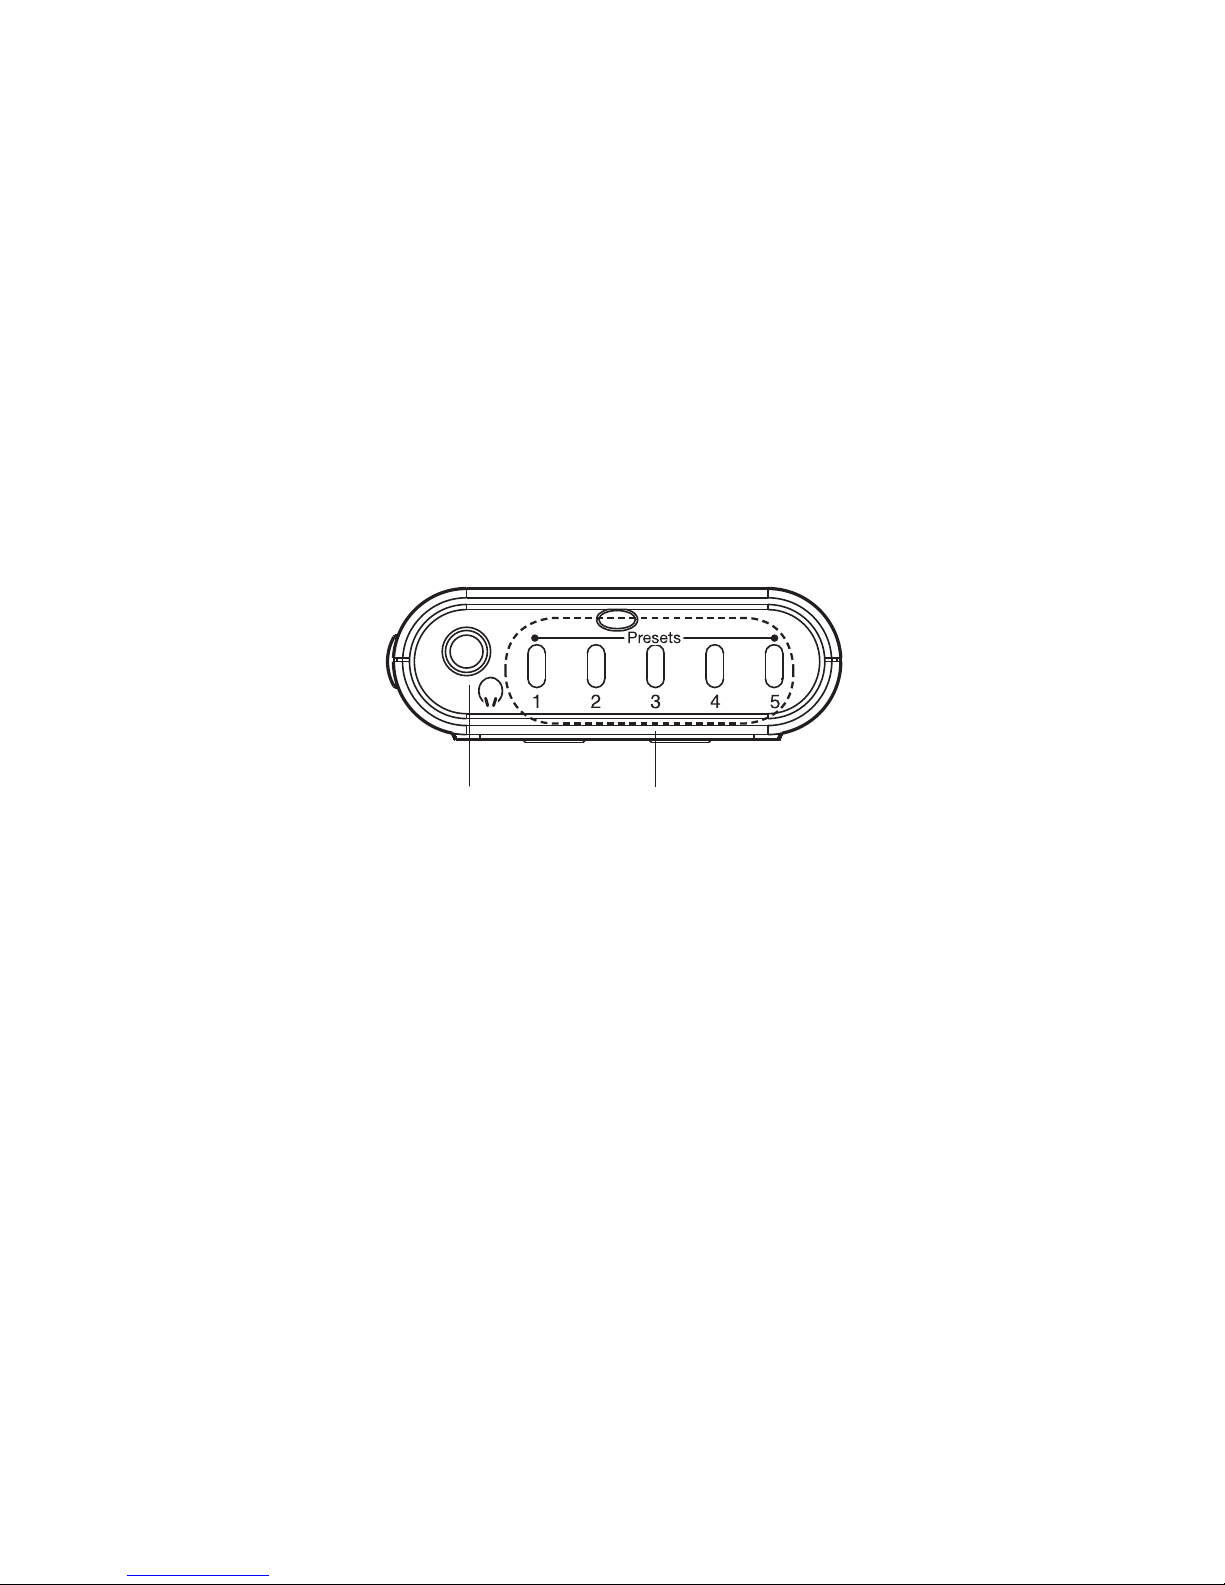
Controls (top)
10 11
10. Earphone socket
11 . Memory preset buttons
If you need any further advice, please call our Technical Helpline on :020 8758 0338 (Mon-Fri)
4
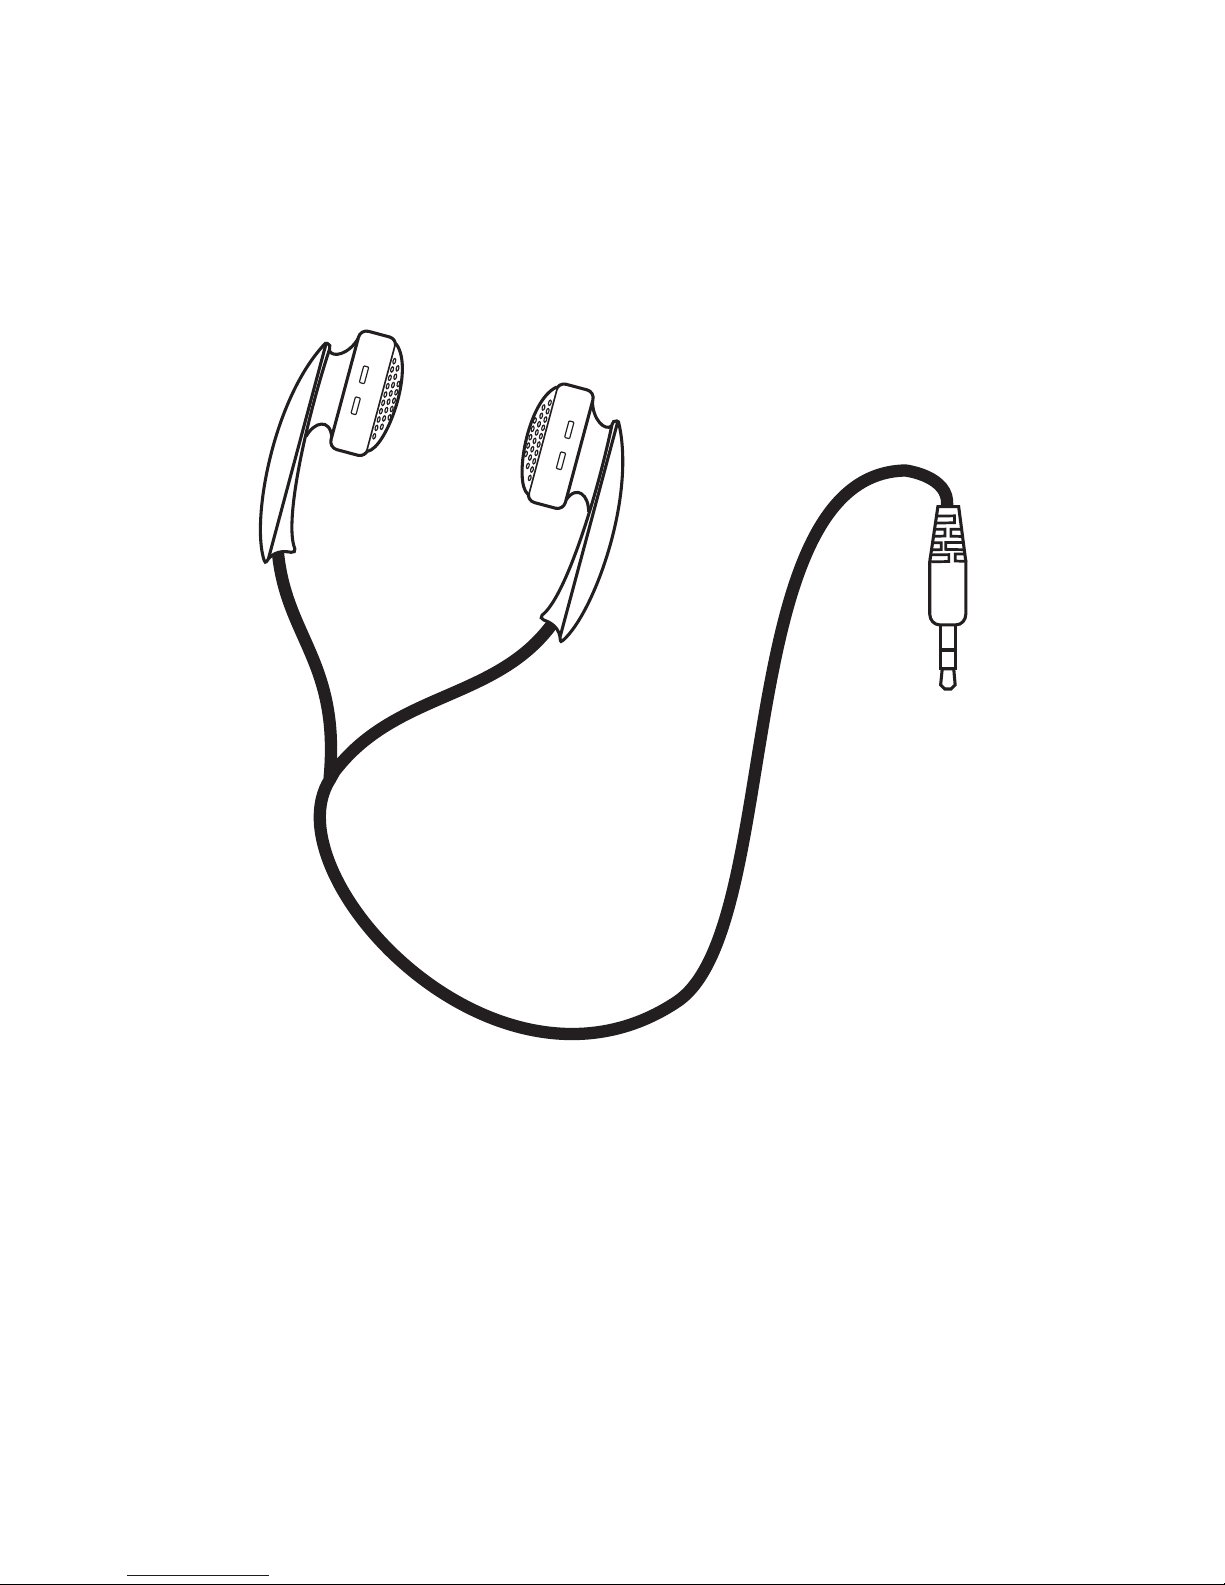
Earphones
12. Earphones
5
ST
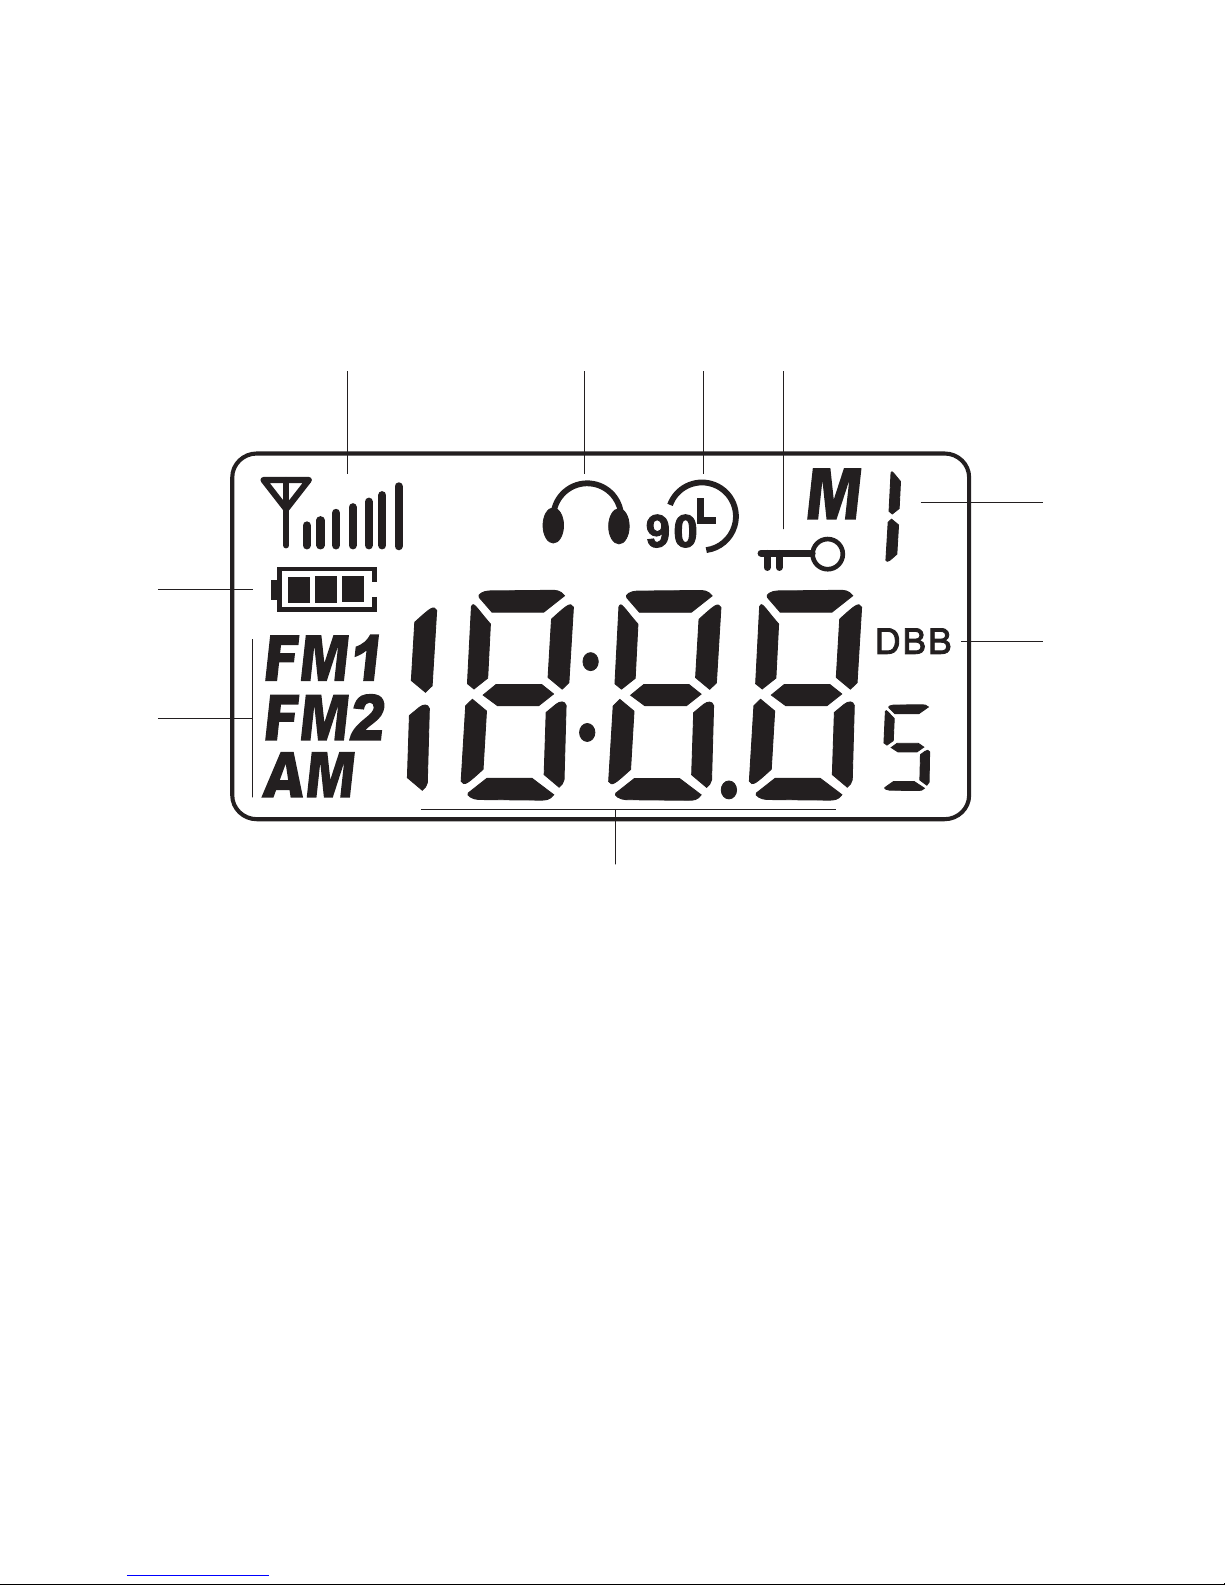
Display
B
A
C
D E F
G
H
I
A. Waveband indicator
B. Battery power indicator
C. Signal strength indicator
D. FM Stereo indicator
F. Lock indicator
G. Memory preset indicator
H. Deep bass boost indicator
I. Time / Frequency indicator
E. 90 minute auto shut off indicator
If you need any further advice, please call our Technical Helpline on :020 8758 0338 (Mon-Fri)
6

Battery
1. Open the battery cover located on the rear of your radio by sliding
it in the direction shown by the arrow.
2. Insert two LR03 (AAA) size batteries into the compartment. Ensure
that batteries are inserted in accordance with the diagram shown
inside the battery compartment and close the battery cover.
3. Batteries should be replaced when the low battery indicator
fl ashes and ‘E’ appears on the display.
4. During battery replacement ensure that the radio is turned off and
the Lock switch is in the ‘Lock’ position. Battery replacement
should be completed within three minutes to prevent loss of
stations stored in memory presets.
5. If the radio is not to be used for a long period, set the Lock switch
to the ‘Lock’ position, this will reduce power drain on the batteries
during storage.
6. Reduced power, distortion and a ‘stuttering’ sound are all signs that
the batteries may need replacing.
7. If the radio is not to be used for an extended period of time it is
recommended that the batteries are removed from the radio.
IMPORTANT: The batteries should not be exposed to excessive heat
such as sunshine, fi re or the like. After use, disposable batteries should
if possible be taken to a suitable recycling centre. On no account
should batteries be disposed of by incineration.
7

If you need any further advice, please call our Technical Helpline on :020 8758 0338 (Mon-Fri)
8

Lock switch
The Lock switch is used to prevent unintentional operation of your
radio.
1. Set the Lock switch located on the back of your radio to the ‘Lock’
position. The power and all other buttons will be disabled, this will
prevent accidental operation when your radio is packed in a suitcase
or travel bag.
2. To prevent accidental operation of the controls when your radio is
switched on, set the Lock switch to the left ‘Lock’ position, the
symbol will appear in the display.
3. To release the Lock switch, move the lock switch to the right ‘Unlock’
position, the
symbol will be removed from the display.
9
 Loading...