

Page 1

DAB / DAB+ / FM RDS Bluetooth sound system
with dock for iPod®, iPhone® and iPad
®
ROBERTS
Please read this manual before use
Page 2

Contents
Controls ............................................................................................. 2-4
Remote handset battery replacement .................................................. 5
Using the radio for the fi rst time............................................................ 6
Operating your radio ............................................................................. 7
Selecting a station - DAB...................................................................... 8
Secondary services - DAB.................................................................... 8
Display options - DAB...................................................................... 9-10
Finding new stations - DAB ................................................................ 10
Manual tuning - DAB ...........................................................................11
Dynamic Range Control (DRC) - DAB................................................ 12
Station order - DAB ............................................................................ 13
Prune stations - DAB .......................................................................... 14
Operating your radio - FM auto-tune .................................................. 15
Manual tuning - FM............................................................................. 16
Display options - FM ........................................................................... 17
Scan sensitivity setting - FM ............................................................... 18
Stereo / Mono setting - FM ................................................................. 19
Presetting stations ......................................................................... 20-21
iPod, iPhone and iPad docking........................................................... 22
Playing a fi le on your iPod, iPhone or iPad ........................................ 23
Display options - iPod mode ............................................................... 24
Bluetooth mode ............................................................................. 25-28
Connecting Bluetooth devices ............................................................ 26
Playing audio fi les in Bluetooth mode................................................. 27
Connecting and disconnecting a Bluetooth device ............................. 28
Setting the alarm times .................................................................. 29-31
When the alarm sounds...................................................................... 32
Controlling alarm status ...................................................................... 33
Snooze and sleep functions .......................................................... 34-35
Setting the clock manually ............................................................. 36-38
To return to auto clock set mode ........................................................ 39
Equaliser function .......................................................................... 40-43
Mute function ...................................................................................... 43
Language function .............................................................................. 44
Display backlight dimmer.................................................................... 44
Software version ................................................................................. 45
System reset....................................................................................... 46
Headphone socket.............................................................................. 47
Auxiliary input (Line in) socket ............................................................ 47
Line output socket .............................................................................. 48
USB socket for smart-phone charging................................................ 48
Cautions ............................................................................................. 49
Specifi cations ..................................................................................... 49
Circuit features ................................................................................... 49
Guarantee.............................................................................. Back page
1
Page 3
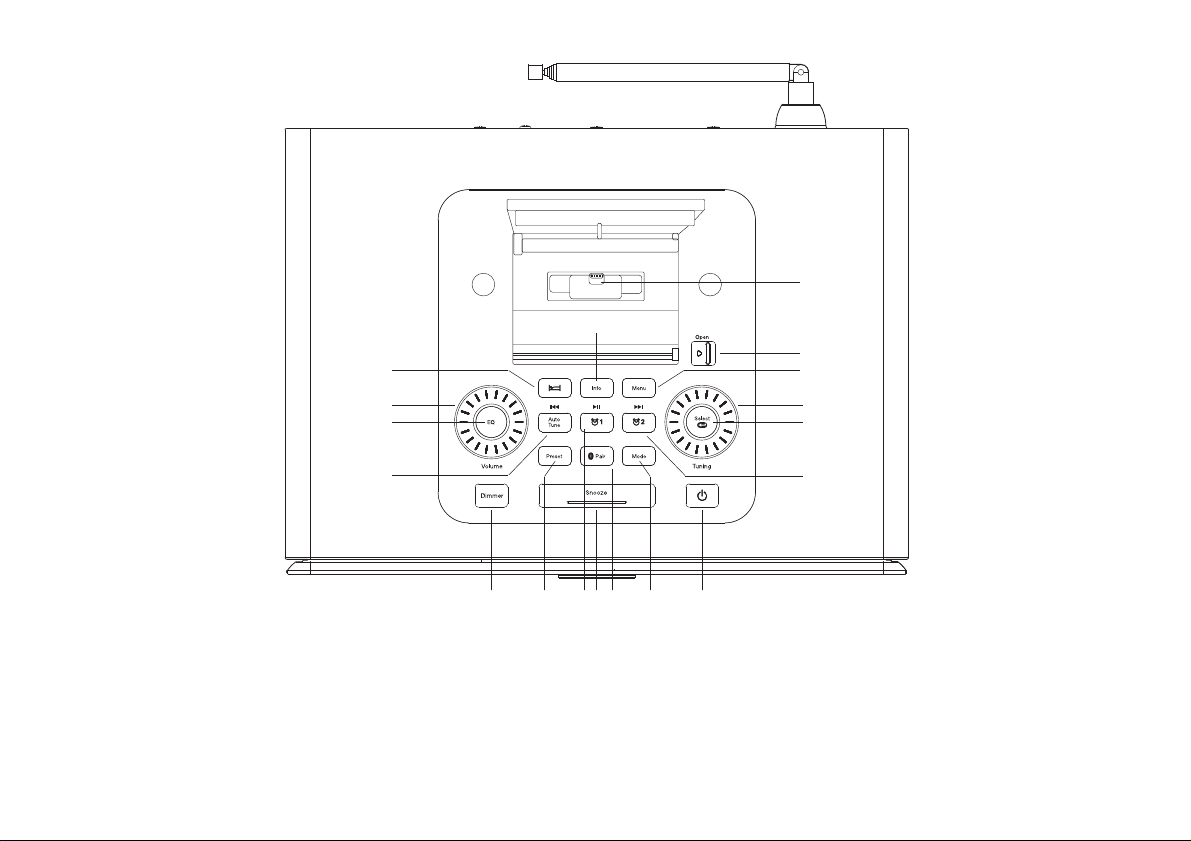
Controls (Top)
15
17
16
18
1
1. Menu button
2. Tuning control
3. Select button
4. Alarm 2 / Fast-Forward button
5. On / Standby button
14
13
12
6. Mode button
7. Bluetooth Pair button
8. Snooze button
9. Alarm 1 / Play / Pause button
10. Preset button
811 7 610
9
11. Dimmer button
12. Auto Tune / Rewind button
13. Equaliser (EQ) button
14. Volume control
15. Sleep button
5
2
3
4
16. Info button
17. Apple Lightning®connector
18. Dock access button
2
Page 4
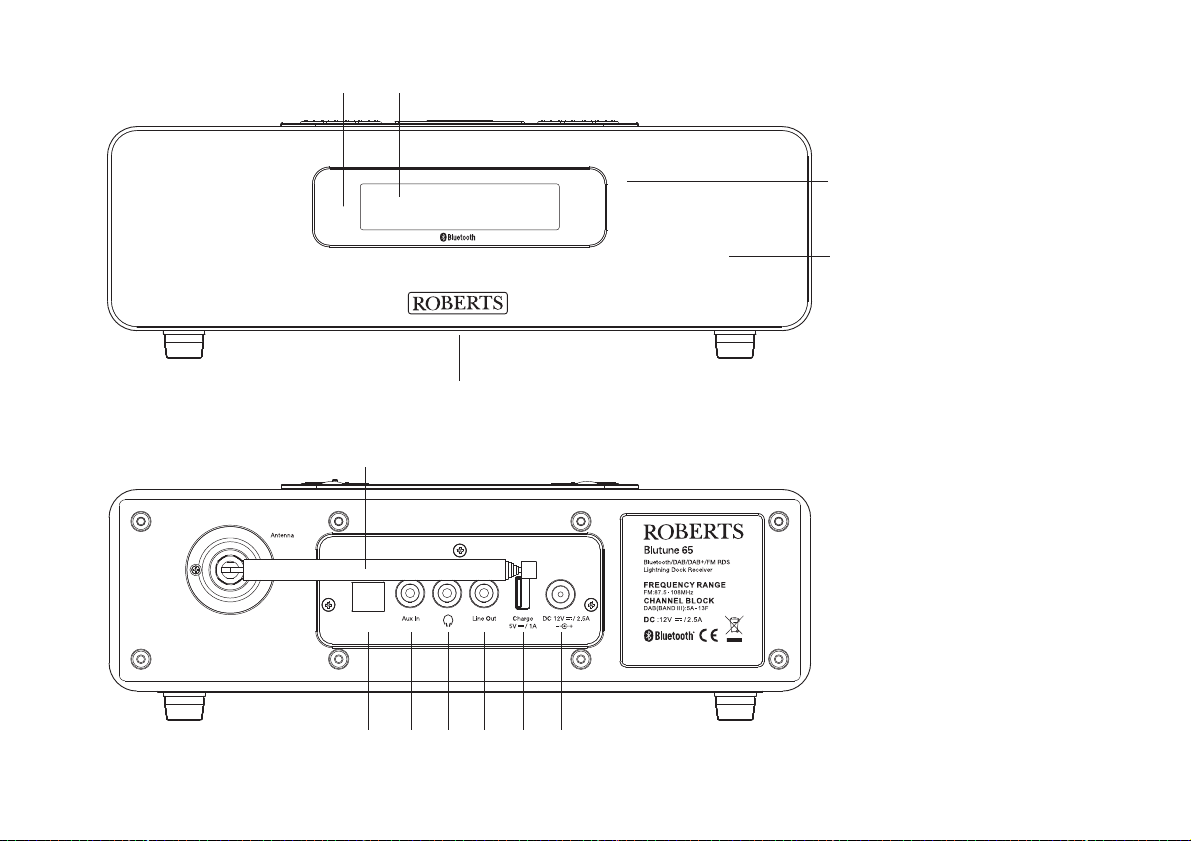
Controls (front)
Controls (rear)
19
24
Service
20
23
21
22
19. Bluetooth indicator
20. LCD display
21. Infra-red sensor
22. Speakers x 2
23. Bass radiator
24. Telescopic aerial
25. DC in socket
26. Charge socket
27. Line output socket
28. Headphone socket
29. Auxiliary input socket
30. USB socket
(for service use only)
27282930 26
25
3
Page 5
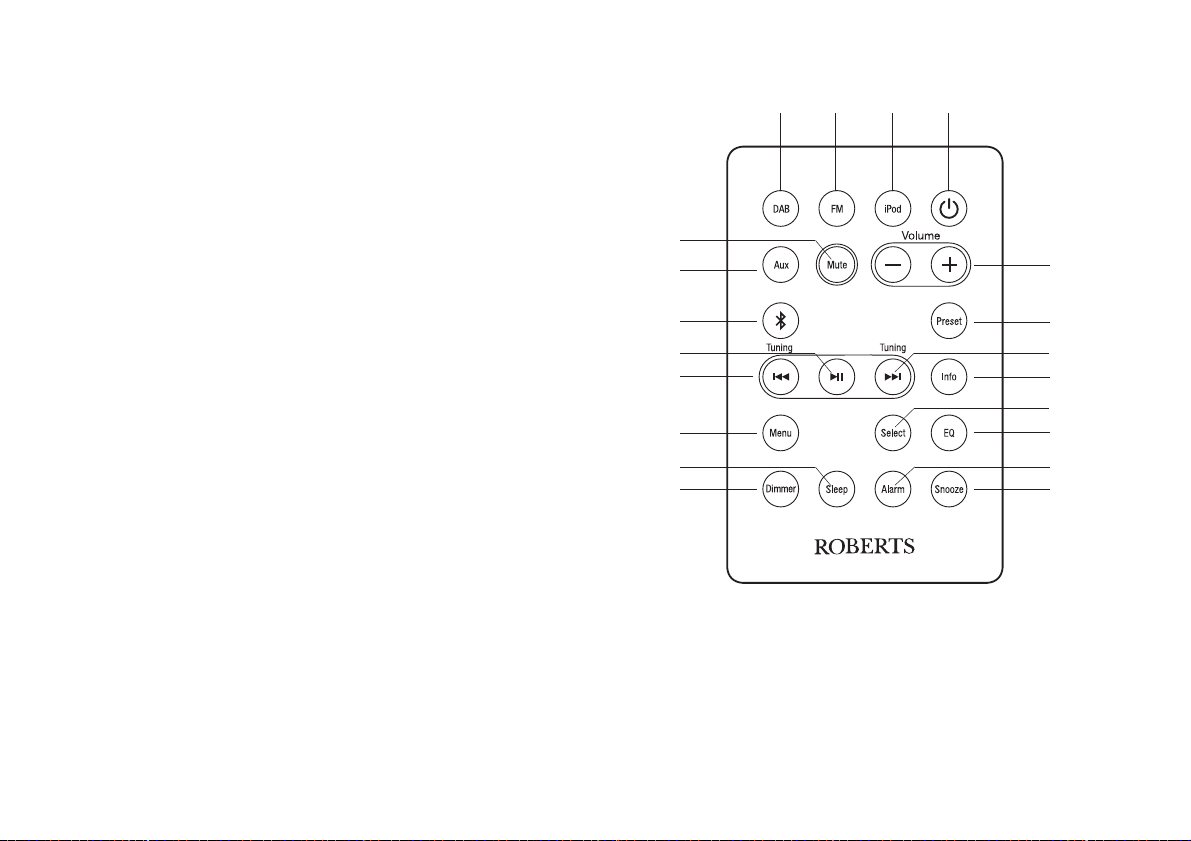
Controls (remote control)
1. On / Standby button
2. iPod button
3. FM button
4. DAB button
5. Mute button
6. Auxiliary in button
7. Bluetooth button
8. Play / Pause button
9. Tuning Down / Rewind button
10. Menu button
11. Sleep button
12. Dimmer button
13. Snooze button
14. Alarm button
15. Equaliser (EQ) button
16. Select button
17. Info button
18. Tuning Up / Fast-forward button
19. Preset button
20. Volume Up / Down buttons
10
11
1
234
5
6
7
8
9
20
19
18
17
16
15
14
1312
Note: For the sake of clarity, the instructions for the use of the controls throughout this instruction manual show the buttons on the radio. The buttons
on the remote can be used if you prefer. However the mute is only available when using the remote control.
Please note: The mode button on the radio will access the DAB, FM, iPod, Bluetooth and Auxiliary input modes.
4
Page 6
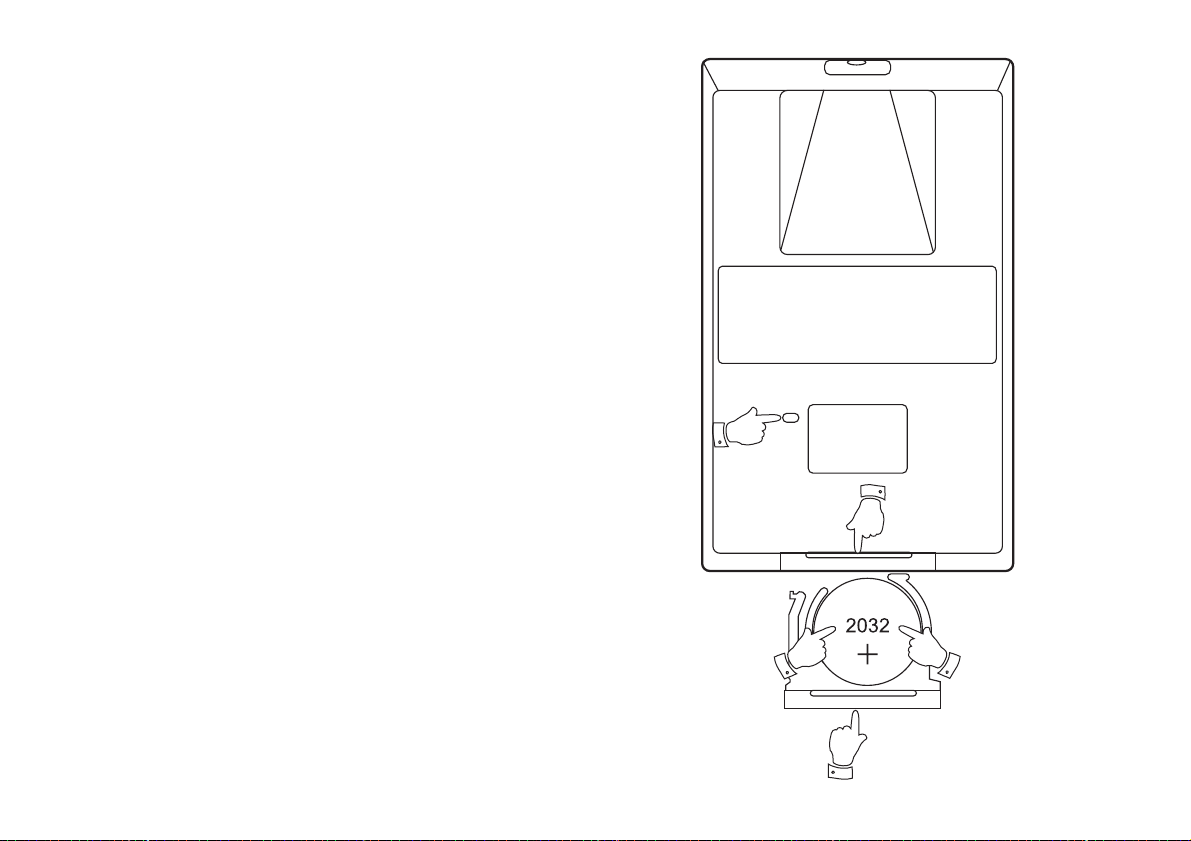
Remote handset battery replacement
1. With the aid of the end of a paper clip slide the catch to the right hand
side.
2. Remove the battery holder by pushing the holder in the direction
shown.
3. Remove the battery from holder.
4. Replace the battery (CR2032 or equivalent) ensuring that the positive
side of the battery faces you with the holder positioned as shown.
5. Replace the battery holder.
If the remote is not to be used for an extended period of time it is
recommended that the battery is removed.
IMPORTANT: The battery should not be exposed to excessive heat
such as sunshine, fi re or the like. After use, disposable batteries should
if possible be taken to a suitable recycling centre. On no account should
batteries be disposed of by incineration.
5
1
2
3
5
4
Page 7
Using the radio for the fi rst time
1. Place your radio on a fl at surface.
2. Fully extend the telescopic aerial. The aerial should be fully extended
and positioned vertically for optimum reception.
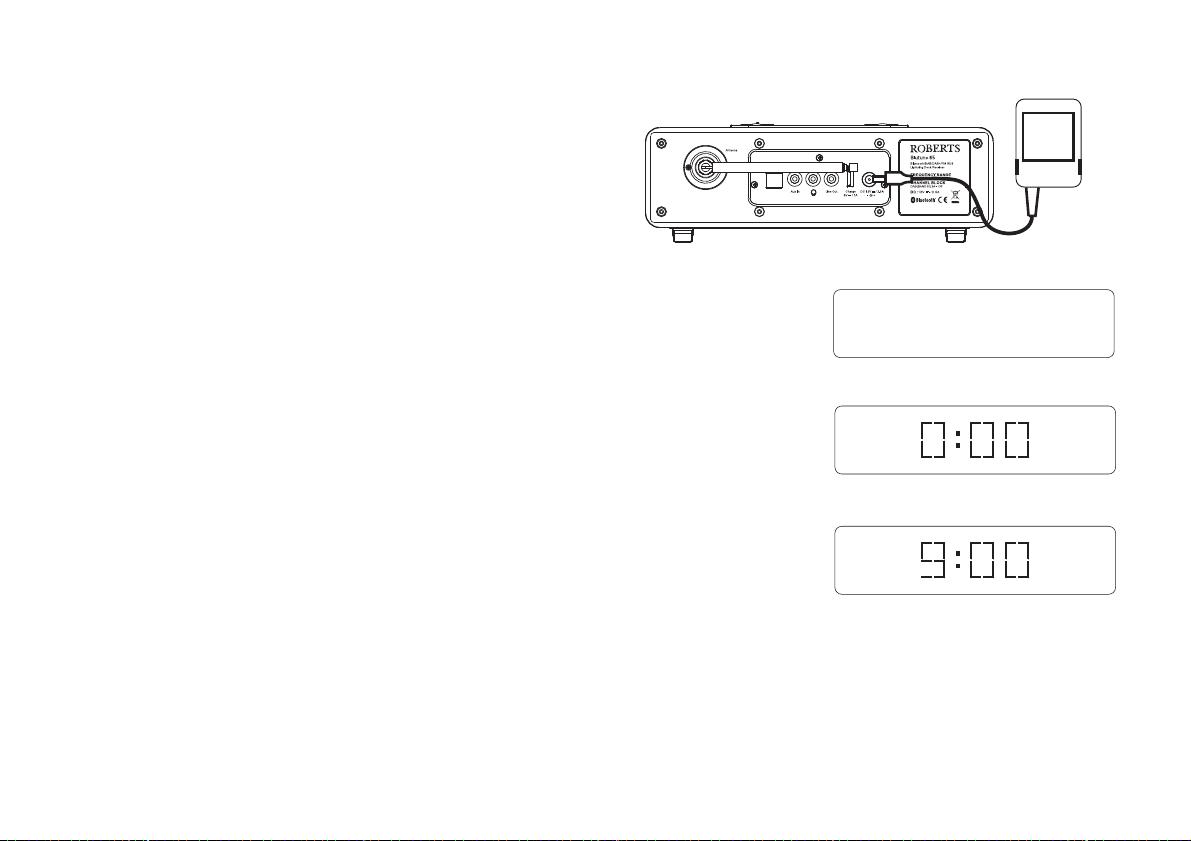
3. Insert the adaptor plug into the DC socket located on the rear of your
radio. Plug the adaptor into a standard mains socket outlet. The display
will show 'Welcome to Digital Radio' for a few seconds and then the
display will then show '0:00'. After a short time the current time will
appear on the display.
4. If no stations are found, it may be necessary to relocate your radio to
a position giving better reception. You should then carry out a scan
to fi nd stations as described on page 10.
IMPORTANT: The mains adaptor is used as the means of connecting the
radio to the mains supply. The mains socket used for the radio must remain
accessible during normal use. In order to disconnect the radio from the
mains completely, the mains adaptor should be removed from the mains
socket outlet completely.
Characters appearing on the LCD display indicate that the radio is connected
to and powered from the mains supply.
Service
Welcome to
Digital Radio
6
Page 8
Operating your radio
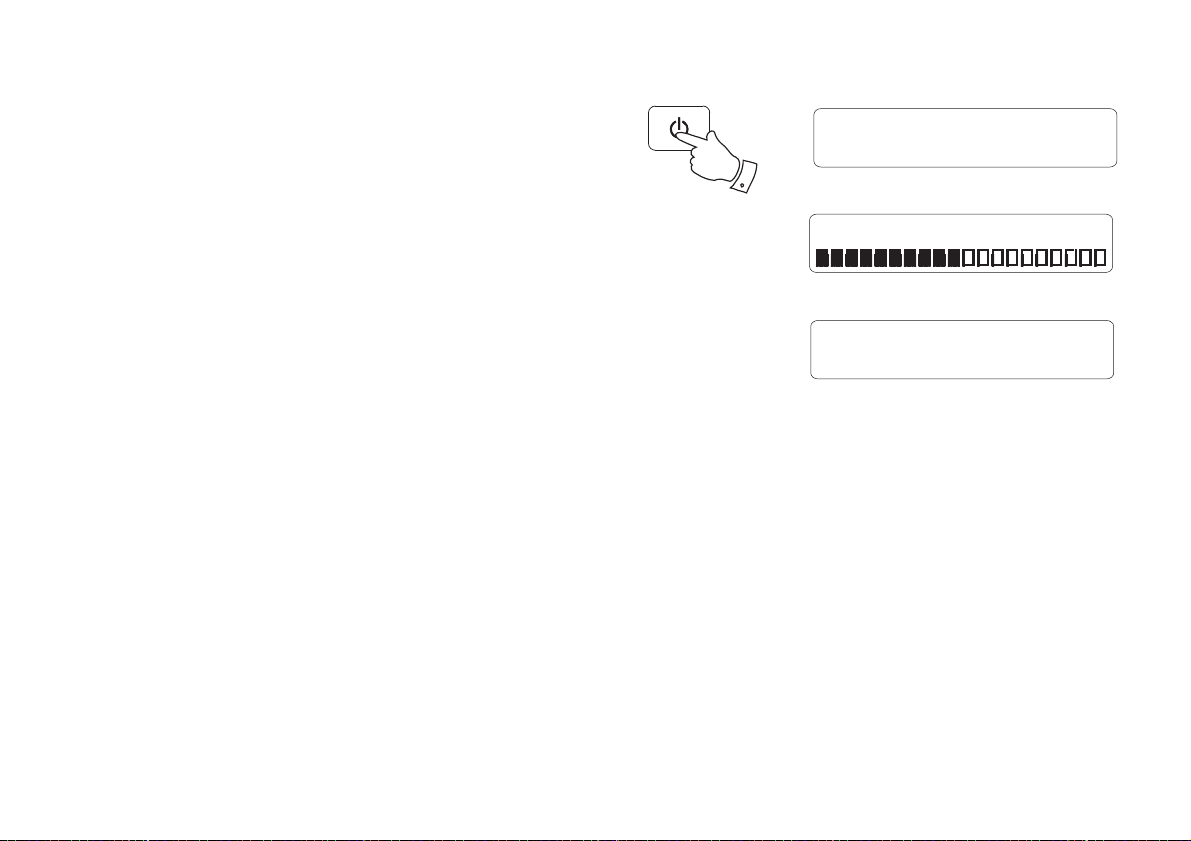
1. Press and release the On / Standby button to switch on your radio.
When fi rst switched on, the radio will be in DAB mode. After each use
the radio will remember the mode used and then switch on in that
mode the next time that it is used.
2. If the radio has been used before, the last used station will be selected.
3. If this is the fi rst time that the radio has been used a scan of the Band
III DAB channels will be carried out. The fi rst station in the list of
stations found during scanning will be played. The display will show
the station name.
4. During the scanning process the display will show progress of the
station search. The number on the right of the display is the number
of stations that have been found. When the scan is completed the fi rst
station (in numeric-alpha order 0....9, A....Z) will be selected.
5. If no signals are found then it may be necessary to relocate your radio
to a position giving better reception. You should then carry out a scan
to fi nd stations as described on page 10.
Note: When fi rst switched on, the radio will set the volume to a moderately
high level, in case the broadcast is very quiet. After you have set the volume
using the Volume control, the radio will remember the setting that you
have applied for the next time that it is used.
DAB Mode
1
Scanning... 24
Absolute Rad 60s
Now playing on the r
7
Page 9
Selecting a station - DAB
1. Press and release the On / Standby button to switch on your radio.
The display will show 'Connecting' for a few seconds.
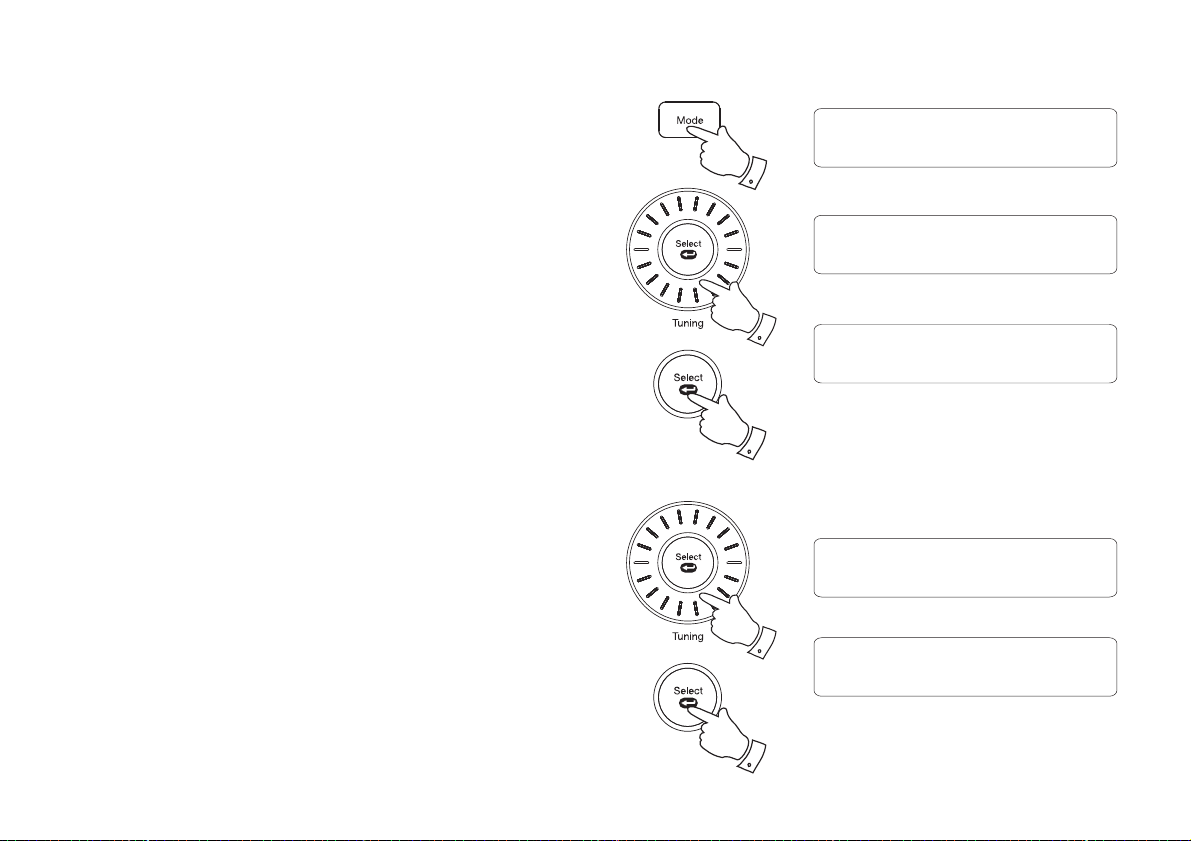
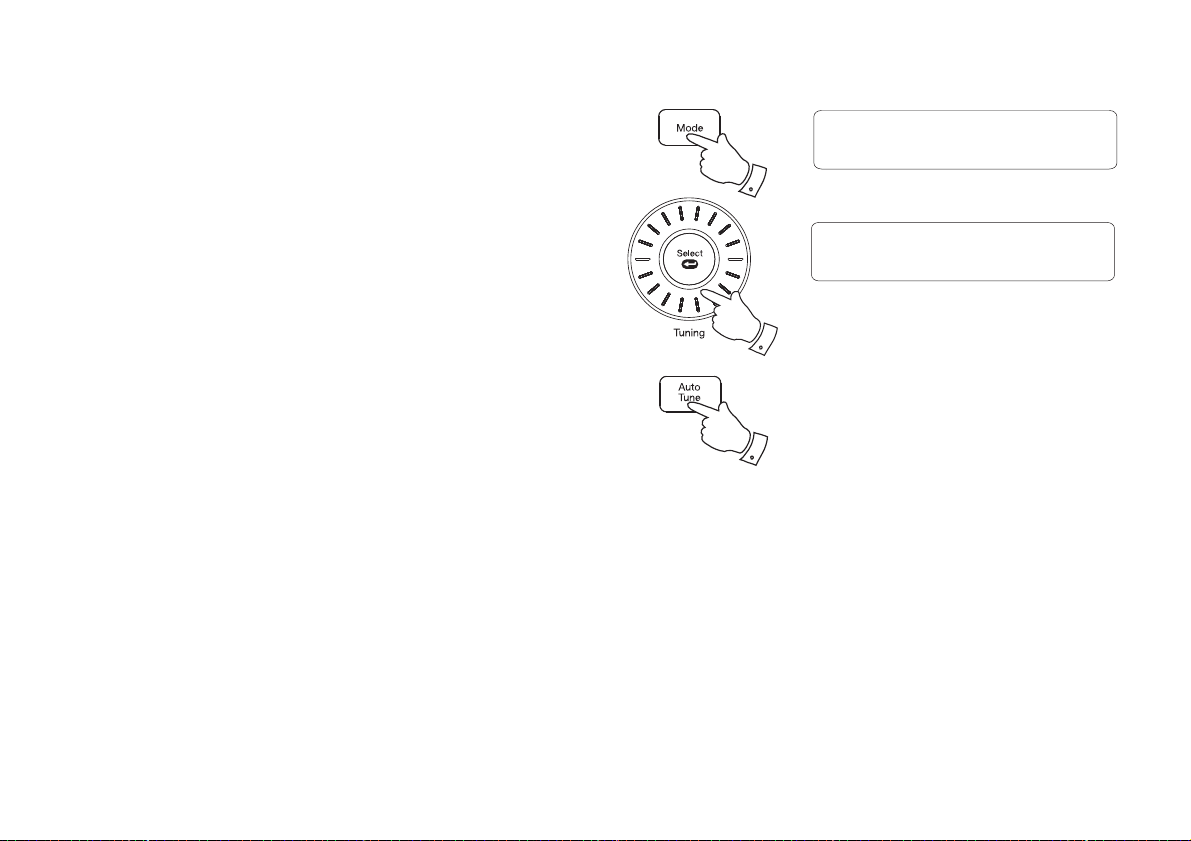
2. Press and release the Mode button (DAB button on remote) until the
DAB mode is selected. The display will show the name of the radio
station currently selected.
3. Rotate the Tuning control (Tuning buttons on remote) to step through
the list of available stations.
4. When the desired station name appears on the display, press and
release the Select button to select the station. The display will show
'Connecting' while your radio fi nds the new station.
5. Adjust the Volume control to the required setting.
Note: If after selecting a station the display shows 'Service not available' it
may be necessary to relocate your radio to a position giving better reception.
Secondary services - DAB
1. Certain radio stations have one or more secondary services associated
with them. If a station has a secondary service associated with it then
the secondary service will then appear immediately after the primary
service as you rotate the Tuning control (Tuning buttons on remote).
2. To tune to the secondary service, press and release the Select button.
Most secondary services do not broadcast continually and if the selected
service is not available, the radio will re-tune to the associated primary
service.
DAB Mode
2
Station List
<
BBC Radio 2
3
<
BBC Radio 2
Connecting...
4
Station List
<
<
BBC Radio 5 Live
1
<
<
Station List
< <
<
BBC R5LiveSportX
2
<
8
Page 10
Display options - DAB
Your radio has a range of display options when in DAB mode:-
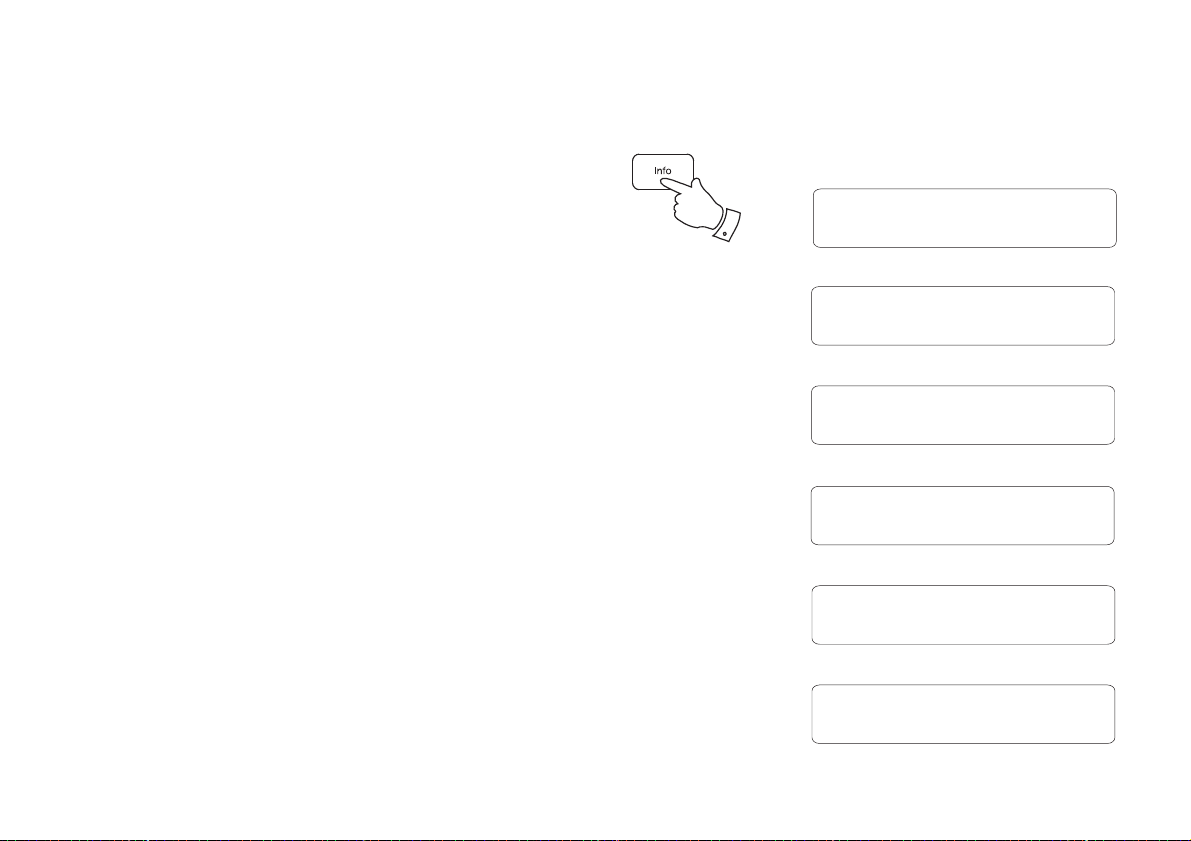
1. Press and release the Info button to cycle through the various options.
All displays will revert to the time and date display after about 30
seconds.
a. Scrolling text Displays scrolling text messages such
as artist/track name, phone in number,
etc.
b. Programme type Displays type of station being listened to
e.g. Pop, Classic, News, etc.
c. Multiplex Name Displays the name of the DAB multiplex
to which the current station belongs.
d. Time and date Displays the current time and date.
e. Frequency & channel Displays frequency and channel number
for the currently tuned DAB station.
f. Bit rate & audio type Displays the digital audio bit rate and audio
type for the currently tuned DAB station.
1
BBC Radio 2
a
Now playing on the r
BBC Radio 2
b
Pop Music
BBC Radio 2
c
BBC National DAB
BBC Radio 2
d
10:28 18-07-2014
BBC Radio 2
e
12B 225.648MHz
BBC Radio 2
f
128kbps / DAB
9
Page 11
Display options - DAB cont.
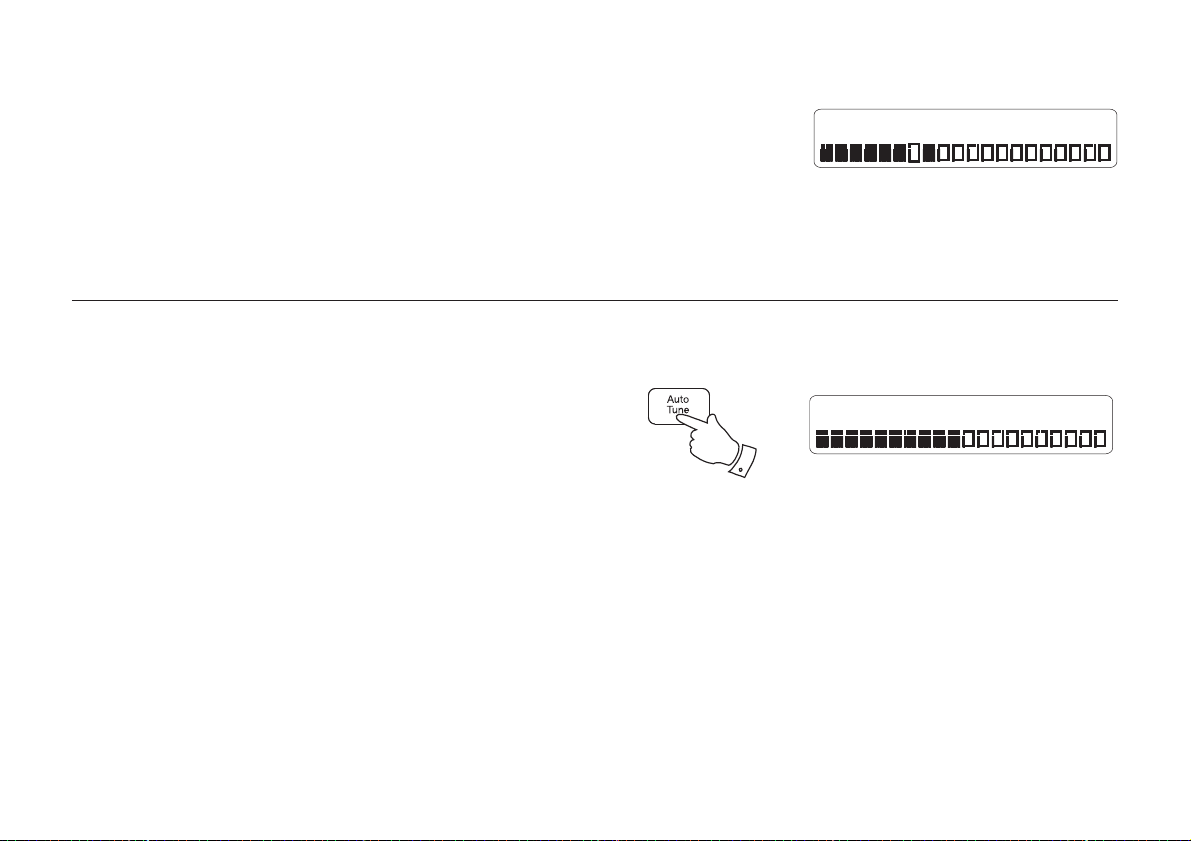
g. Signal strength Displays the signal strength for the currently
tuned DAB station. The open block in the
signal strength graph shows the minimum
signal strength needed for good DAB
reception. The signal blocks will go up or
down showing the changing signal strength
as you adjust the telescopic aerial or the
radio position.
Finding new stations - DAB
From time to time, new DAB radio stations may become available. Or you
may have moved to a different part of the country. In this case you may
need to cause your radio to scan for new stations.
1. Press and release the Auto Tune button.
2. Your radio will perform a scan of the Band III DAB channels. As new
stations are found, the station counter on the right-hand side of the
display will increase and stations will be added to the list.
BBC Radio 2
g
Scanning... 24
1
10
Page 12
Manual tuning - DAB
Manual tuning allows you to tune your radio to a particular DAB frequency
in Band III. Any new stations found will be added to the station list. This
function can also be used to assist the positioning of the aerial or the radio
to optimise reception for a specifi c channel or frequency. Note that UK
DAB stations are located in the range of channels 11B to 12D.
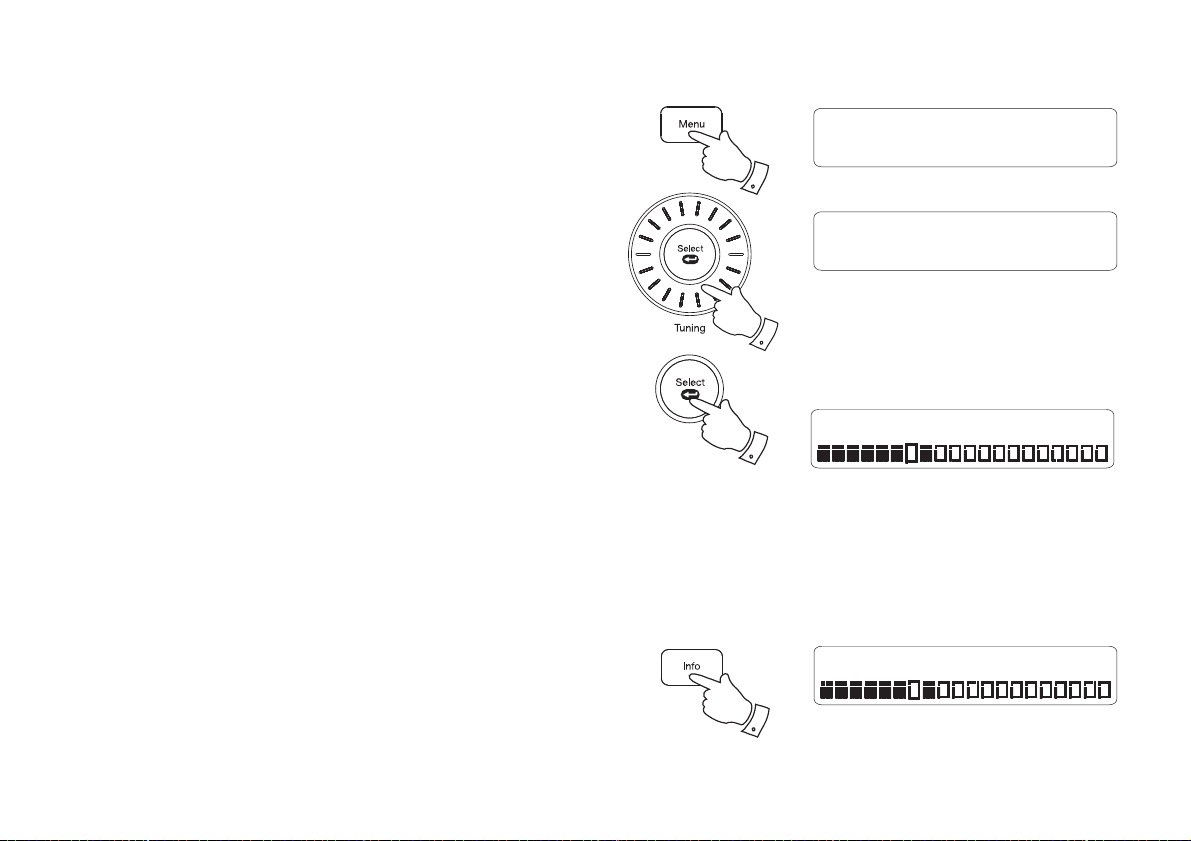
1. Press and release the Menu button to enter the DAB menu.
2. Rotate the Tuning control (Tuning buttons on remote) until the display
shows 'Manual Tune'. Press and release the Select button to enter
the manual tuning mode.
3. Rotate the Tuning control to select the desired DAB channel. Press
and release the Select button to tune to the chosen frequency.
4. The open block in the signal strength graph shows the minimum signal
strength needed for good DAB reception. The signal blocks will go
up and down showing the changing signal strength as you adjust the
telescopic aerial or the radio position. Any new radio stations found on
the tuned DAB multiplex will be added to the list stored in the radio.
Press and release the Select button again to return to the normal DAB
tuning mode.
Signal strength display - DAB
1. Press and release the Info button until the display shows signal strength.
The open block in the signal strength graph shows the minimum signal
strength needed for good DAB reception. The signal blocks will go
up and down showing the changing signal strength as you adjust the
telescopic aerial or the radio position.
1
2,3
2-4
1
DAB
<
Manual Tune
Manual Tune
<
12B 225.648MHz
12B 225.648MHz BBC
BBC Radio 2
<
<
11
Page 13

Dynamic Range Control (DRC) - DAB
DRC Value
DRC low
<
<
The DRC facility can make quieter sounds easier to hear when your radio
is used in a noisy environment.
There are three levels of compression:
DRC Off No compression applied. (default)
DRC High Maximum compression applied.
DRC Low Medium compression applied.
1. Press and release the On / Standby button to switch on your radio.
2. Press and release the Mode button (DAB button on remote) until the
DAB band is selected.
3. Press and release the Menu button to enter the DAB menu.
4. Rotate the Tuning control until 'DRC Value' appears on the display.
Press and release the Select button. The display will show the current
DRC value which will be marked with an asterisk.
5. Rotate the Tuning control to select the required DRC setting
(default is off).
6. Press and release the Select button to confi rm the setting. After several
seconds the display will return to the normal radio display.
2
3
4,5
4-6
<
DRC Value
DRC Value
<
DRC off
DRC Value
<
DRC high
DAB
<
*
<
<
Note: Not all DAB broadcasts are able to use the DRC function. If the
broadcast does not support DRC, then the DRC setting in the radio will
have no effect.
12
Page 14
Station order - DAB
Your radio has 3 station order settings from which you can choose. The
station order settings are, alphanumeric, ensemble and valid.
Note: The default station order setting is alphanumeric.
DAB
<
2
Station Order
<
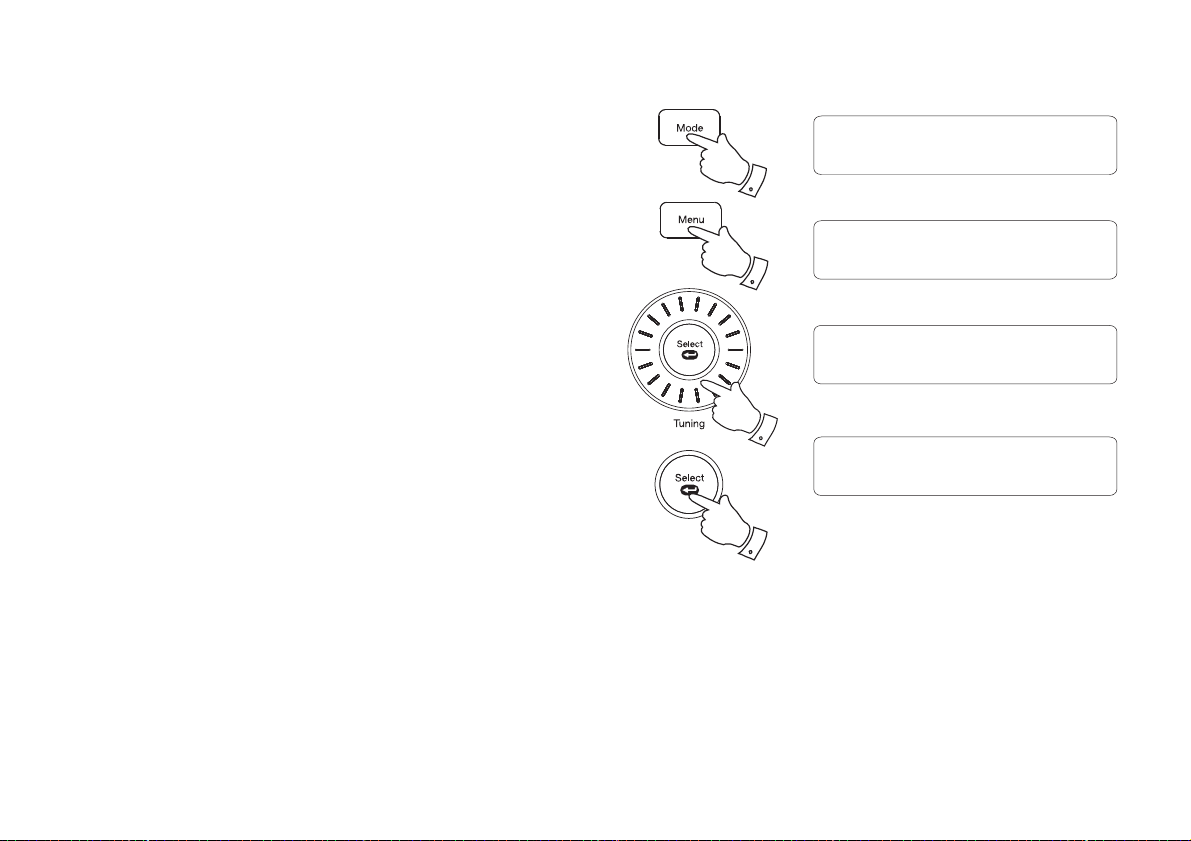
1. Press and release the On / Standby button to switch on your radio.
2. Press and release the Mode button (DAB button on remote) until the
DAB mode is selected.
3. Press and release the Menu button to enter the DAB menu.
4. Rotate the Tuning control (Tuning buttons on remote) until 'Station
Order' appears on the display. Press and release the Select button.
5. Rotate the Tuning control to choose between alphanumeric, ensemble
or valid. The chosen setting will be marked with an asterisk.
'Alphanumeric' - sorts the station list alpha-numerically 0...9 A...Z).
'Ensemble' - organises the station list by DAB multiplex.
'Valid' - Shows only those stations for which a signal can be found.
6. Press and release the Select button to select the required station
order.
3
4,5
4-6
Station Order
<
Alphanumeric
Station Order
<
Ensemble
Station Order
<
Valid
*
<
<
<
13
Page 15
Prune stations - DAB
Over time, some DAB services may stop broadcasting, or may change
location and then not be able to receive a station. In order to remove such
stations from the DAB station list, the Prune stations function will delete
the DAB stations from your station list that can no longer be received.
Stations which cannot be found or which have not been received for a very
long time are shown in the station list with a question mark.
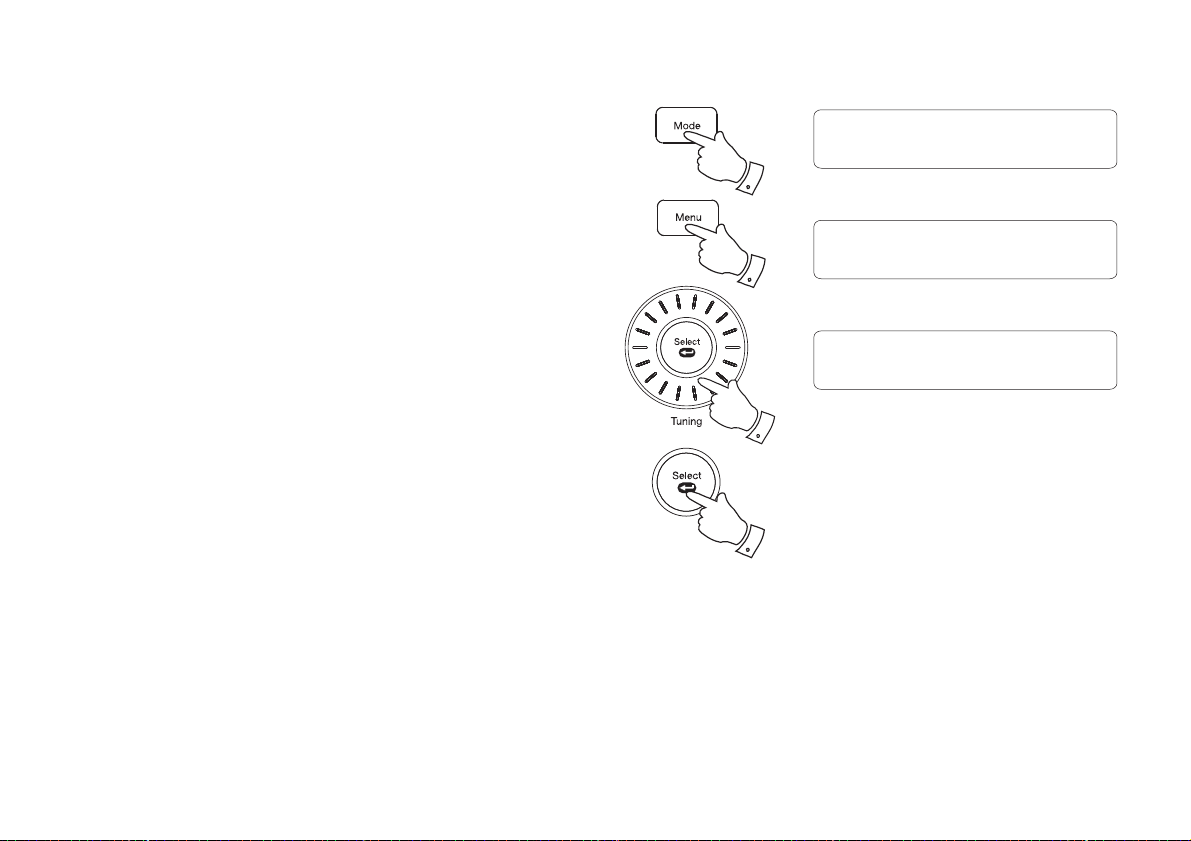
1. Press and release the On / Standby button to switch on your radio.
2. Press and release the Mode button (DAB button on remote) until the
DAB mode is selected.
3. Press and release the Menu button to enter the DAB menu.
4. Rotate the Tuning control (Tuning buttons on remote) until 'Prune'
appears on the display. Press and release the Select button.
5. Rotate the Tuning control to highlight 'Yes'. Press and release the
Select button to cause the stations list to be pruned, eliminating
unavailable stations.
6. If you do not wish to prune stations highlight 'No' in step 5 and then
press and release the Select button. The display will revert back to
the previous display.
2
3
4,5
4-6
<
Prune
DAB
Prune?
No
Prune?
<
No
<
<
Yes
Yes
<
<
Note: If you have moved to a different part of the country you should
also carry out a search for new stations (please see the section 'Finding
new stations' on page 10).
14
Page 16
Operating your radio - FM auto-tune
1. Fully extend the telescopic aerial. The aerial should be fully extended
and positioned vertically for optimum reception.
FM Mode
2. Press and release the On / Standby button to switch on your radio.
3. Press and release the Mode button (FM button on remote) to select
the FM mode.
4. Rotate the Tuning control clockwise and then press and release the
Auto Tune button to cause your radio to search from low frequency
to high frequency and to stop automatically when it fi nds a station of
suffi cient strength.
5. After a few seconds the display will update. The display will show the
frequency of the signal found. If the signal is strong enough and there
is RDS data present then the radio may display the station name.
6. To fi nd other stations press and release the Auto Tune button as
before.
7. Rotate the Tuning control anti-clockwise and then press and release
the Auto Tune button to cause your radio to search from high frequency
to low frequency and to stop automatically when it fi nds a station of
suffi cient strength.
8. When the end of the waveband is reached your radio will recommence
tuning from the opposite end of the waveband.
9. Adjust the Volume to the required setting. To switch off your radio
press and release the On / Standby button.
3
87.50MHz
Scanning...
4-7
4-7
Note:
Press and hold the Tuning Up button on the remote control to cause your
radio to search from low frequency to high frequency.
Press and hold the Tuning Down button on the remote control to cause
your radio to search from high frequency to low frequency .
Note:
If you fi nd that FM reception is poor, try repositioning the Telescopic aerial.
Fully extend and position vertically for optimum reception. If you fi nd that
an FM broadcast has a lot of background hiss, this may often be reduced
by setting the radio into Mono reception mode for the current FM station.
Please refer to the section "Stereo / Mono setting - FM" on page 19 for
further details.
15
Page 17

Manual tuning - FM
1. Fully extend the telescopic aerial. The aerial should be fully extended
and positioned vertically for optimum reception.
FM Mode
2. Press and release the On / Standby button to switch on your radio.
3. Press and release the Mode button (FM button on remote) to select
the FM mode.
4. Rotate the Tuning control (Tuning Up or Down buttons on remote) to
tune to a station. The frequency will change in steps of 50kHz.
If the radio is tuned to a station of suffi cient signal strength with RDS
information present, then the display may change to show the station
name.
5. When the waveband end is reached the radio will recommence tuning
from the opposite waveband end.
6. Adjust the Volume to the required setting.
7. To switch off your radio press and release the On / Standby button.
Note:
If you fi nd that FM reception is poor, try repositioning the Telescopic aerial.
Fully extend and position vertically for optimum reception.
If you fi nd that an FM broadcast has a lot of background hiss, this may
often be reduced by setting the radio into Mono reception mode for the
current FM station. Please refer to the section "Stereo / Mono setting - FM"
on page 19 for further details.
3
87.50MHz
4
16
Page 18

Display options - FM
Your radio has a range of display options for FM mode:-
The Radio Data System (RDS) is a system in which inaudible digital
information is transmitted in addition to the normal FM radio programme.
RDS offers several useful features. The following are available on your radio.
1. Press and release the Info button to cycle through the various options.
All displays will revert to the time and date display after about 30
seconds.
a. Scrolling text Displays scrolling text messages such
as artist/track name, phone in number,
etc.
b. Programme type Displays type of station being listened to
e.g. Pop, Classic, News, etc.
c. Name Displays the radio station name for the
currently tuned FM station.
d. Audio type Displays the audio type for the currently
tuned FM station.
e. Time & date Displays the current time and date.
Note: If no RDS information is available, the radio will be unable to display
the station name, scrolling text and programme type information.
1
BBC R4
a
The best variety of
BBC R4
b
Pop Music
BBC R4
c
89.30MHz
BBC R4
d
Mono
BBC R4
e
10:08 21-07-2014
17
Page 19

Scan sensitivity setting - FM
Your radio includes a local/distant option for the auto-scan function. By
setting the radio to the 'local' scan option, weaker signals from more
distant transmitters can be ignored by the radio, making stronger signals
easier to fi nd.
1. Press and release the On / Standby button to switch on your radio.
2. If needed, press and release the Mode button (FM button on remote)
until the FM band is selected.
3. Press and release the Menu button to enter the FM menu.
4. Rotate the Tuning control (Tuning buttons on remote) until 'FM Scan
Zone' shows on the display. Press and release the Select button to
enter the scan sensitivity adjustment mode. The current setting will
be marked with an asterisk.
5. Rotate the Tuning control to switch between 'Local' (Strong stations
only) and 'Distant' (All stations) options on the lower line of the display.
The Distant option will allow the radio to fi nd weaker signals when
scanning.
6. Press and release the Select button to confi rm your selection. The
Local or Distant setting is stored in the radio and remains in force until
changed or until a System Reset.
2
3
4,5
4-6
FM
<
FM Scan Zone
FM Scan Zone
<
Distant
FM Scan Zone
<
Local
<
*
<
<
18
Page 20

Stereo / Mono setting - FM
FM Audio
Auto
<
<
Your radio will play stereo FM broadcasts in stereo provided that the
received signal is of adequate strength. However, as a stereo signal
becomes weaker the audio signal will become poorer. It may be preferable
to force the radio to play the station in mono in order to reduce the level
of background hiss.
1. Press and release the On / Standby button to switch on your radio.
2. Tune to the required FM radio station as previously described.
3. Press and release the Menu button to enter the FM menu.
4. Rotate the Tuning control (Tuning buttons on remote) until 'FM Audio'
appears on the display. Press and release the Select button.
5. To switch to mono to reduce the hiss from a weak FM signal rotate the
Tuning control (Tuning buttons on remote) until 'Mono' appears on the
display. Press and release the Select button to confi rm the setting.
The current audio setting will be marked with an asterisk.
6. Alternatively to return to stereo, rotate the Tuning control (Tuning
buttons on remote) until 'Auto' appears on the display. Press and
release the Select button to confi rm the setting. The radio will play
the current station in stereo if the signal is suffi ciently strong.
3
4-6
4-6
<
FM Audio
<
Mono
FM
FM Audio
<
*
<
19
Page 21

Presetting stations
You may store your preferred DAB and FM radio stations to the preset
station memories. There are 20 memory presets in your radio, 10 for
DAB and 10 for FM. Presets are remembered by your radio in the event
of a power failure.
The procedure for setting presets and using them to tune stations is the
same for FM and DAB modes, and is described below.
1. Press and release the On / Standby button to switch on the radio.
BBC Radio 2
2
Now playing on the r
Preset Store
4
<1: (Empty) >
2. Press and release the Mode button (DAB or FM buttons on remote)
to select the desired waveband.
3. Tune to the required station as previously described.
4. Press and hold the Preset button. The display will show, for example,
'1: (Empty)' if no station has been stored to that preset.
5. Rotate the Tuning control (Tuning buttons on remote) to select the
desired preset station number under which you wish to store the station.
6. Press and release the Select button. The display will show for example,
'Preset 1 stored'. The station will be stored under the chosen preset.
Repeat this procedure for the remaining presets.
7. Stations which have been stored in preset memories may be overwritten
by following the above procedure.
Preset 1
stored
5
6
20
Page 22

Recalling a preset station
1. Press and release the On / Standby button to switch on the radio.
2. Press and release the Mode button (DAB or FM buttons on remote)
to select the desired waveband.
3. Press and release the Preset button. The display will show, for example,
'1: (Empty)' if no station has been stored to that preset. If a preset has
been stored, then the display will show either the station name (for
DAB stations) or the frequency (for FM stations).
4. Rotate the Tuning control (Tuning buttons on remote) to select the
desired preset station.
5. Press and release the Select button. Your radio will tune to the chosen
preset station stored in the preset memory.
Preset Recall
2
<1: BBC Radio 2 >
BBC Radio 2
3
4
5
Now playing on the r
21
Page 23

®
iPhone® and iPad® docking
iPod
Your radio has an iPod dock facility which allows you to play digital audio
fi les and video soundtracks held on your iPod, iPhone or iPad using the
radio's loudspeakers.
Your radio uses the Apple Lightning®connector introduced by Apple in 2012.
Within this section iPod means that you may use a compatible iPod,
iPhone or iPad.
Accessing your iPod, iPhone or iPad dock
1. To access the iPod lightning dock, slide the dock access button to the
right. The door will open allowing access to the lightning connector.
2. To close the door gently push the door down until it clicks into place.
Docking your iPod, iPhone or iPad
1. Carefully place your iPod onto the Lightning connector.
Note: If you dock your iPod whilst the radio is playing it will automatically
change to the iPod mode. If you dock your iPod whilst the radio is in
Standby mode you will need to press the Mode button (iPod button
on the remote) as described below.
2. To select the iPod mode press the Mode button (iPod button on the
remote) until 'iPod' shows on the display. If it was previously playing,
your iPod will switch on and continue playing from where it was
previously stopped.
Apple Lightning connector
1
iPod
2
Note: Your radio is able to recharge your iPod internal battery. Your iPod
will use its backlight settings as confi gured. If these need changing, use
the Settings menu on your iPod.
22
Page 24

Playing a fi le on your iPod, iPhone or iPad
1. Use the touch screen on your iPod to select the content to be played.
2. Adjust the volume to the required setting using the Volume control
on your radio.
3. To pause playback press the Play / Pause button. To resume playback
press the Play / Pause button again.
4. iPod does not have a Stop button (it uses the Pause function). To play
an alternative selection, use the iPod menus to make the selection using
the Play / Pause button to stop playing the current item if needed.
Search function
1. While the iPod is playing, press and hold the Fast-forward or Rewind
buttons to move through the current fi le or track. Release the button
when the desired point in the fi le or track is reached.
2. Press and release either the Fast-forward or Rewind buttons to start
playing the next or previous fi le or track.
Volume
09
2
3,4
1,2
1,2
23
Page 25

Display options - iPod mode
Your radio has a range of display options when in iPod mode:-
1. Press and release the Info button to cycle through the various options.
All displays will revert to the time and date display after about 30
seconds.
a. Title Displays the title of the track currently playing.
b. Album Displays the name of the album from which the current
track is taken.
c. Artist Displays the name of the artist for the track currently
playing.
d. Time & date Display shows the current time and date.
Whenever the radio is displaying an information screen, the playback
progress of the current track will be displayed.
Note: If you need to set the alarm whilst in iPod mode you will need to
use the remote control as the alarm buttons on the radio are used for
iPod playback control.
1
a
iPod
01:57
Magic Lantern
b
iPod
01:57
Beyond the Storm
c
iPod
01:57
Edgar Froese
iPod
d
09:30
01:57
22-7-2014
24
Page 26

Bluetooth mode
The Bluetooth mode on your radio allows you to play audio, play sound
from video fi les and stream music from Bluetooth capable devices such as
your moblie phone, computer, tablet etc. through your radio's loudspeakers.
● When a Bluetooth enabled device such as your Blutune 65 radio is in
a 'discoverable' state other Bluetooth devices can detect, pair with or
connect to it.
● 'Bluetooth pairing' occurs when two Bluetooth enabled devices agree
to establish a connection and communicate with each other.
● Your radio will fl ash the Bluetooth indicator light on the front
panel when it is discoverable or when it is trying to connect to a
previously paired Bluetooth device. When a device is paired with
and connects to your radio, the Bluetooth indicator light on the
radio will remain lit.
Bluetooth connectivity performance may vary depending on the connected
Bluetooth devices. Please refer to the Bluetooth capabilities of your device
before connecting to your radio. All features may not be supported on
some paired Bluetooth devices.
A Bluetooth connection can provide a link for audio up to a distance of
approximately ten metres. When pairing two Bluetooth enabled devices,
for convenience, we recommend they should be no more than 2 to 3
metres apart.The presence of other functioning Bluetooth devices during
connection may lead to operational diffi culties.
Bluetooth is a short-range radio communication system and generally
Bluetooth devices can communicate with each other clearly within a regular
sized room or offi ce. The reliability of a Bluetooth connection between
different rooms will greatly depend upon the construction of the building.
Bluetooth communication range may be substantially reduced if the signal
passes through a solid object. Human bodies, brick and concrete walls,
heavy furniture or bookcases will all reduce the operational range of your
Bluetooth devices to a greater or lesser extent. Glass, dry-wall or wood
paneled walls and offi ce partitions may have a less severe but noticeable
effect. Metal pipes, foil-lined plasterboard, metal window frames and
domestic wiring can also have an effect. You should position your Bluetooth
devices closer to each other if you observe communication diffi culties.
WiFi networks and cordless phones generally use similar radio frequencies
to Bluetooth and may interfere with one another. If any interference is
noticed, then try relocating the radio or one of the other devices.
The Bluetooth capabilities of your radio enable it to receive audio from many
Bluetooth capable devices including mobile phones, personal computers
and tablets. Only one Bluetooth device can be connected to your radio
at a time. It supports the following Bluetooth profi les and functionality.
● Your radio supports A2DP (Advanced Audio Distribution Profi le) which
is a stereo audio connection that streams stereo music from PCs,
mobile phones etc. SBC and AAC audio codecs are supported.
● Your radio supports AVRCP (Audio Video Remote Control Profi le)
which allows your radio to control music playback from the connected
device.
Note: Some mobile phones may temporarily disconnect from your radio
when you make or receive calls. Some devices may temporarily mute their
Bluetooth audio streaming when they receive text messages, emails or for
other reasons unrelated to audio streaming. Such behaviour is a function
of the connected device and does not indicate a fault with your radio.
25
Page 27

Connecting Bluetooth devices
1. Ensure that the Bluetooth capability on your phone, tablet or PC is
enabled. You may need to refer to the user documentation for your
device, since the method will vary with each device.
2. Press and release the On / Standby button to switch on the radio.
3. Repeatedly, press and release the Mode button on your radio (press
the Bluetooth button on remote) until the Bluetooth mode is selected.
Your radio will show that it is 'discoverable' by fl ashing the Bluetooth
indicator and showing 'Bluetooth discoverable...' on the display. The
display may change to show the time and date, but the Bluetooth
indicator will continue to fl ash.
4. Using the Bluetooth settings of your phone, tablet or PC direct it to
search for 'discoverable' devices. After a few seconds, you should see
a device named 'Blutune 65'. Just occasionally it may take longer for
the radio to be found by your device.
5. Select 'Blutune 65' to cause your phone, tablet or PC to pair with your
radio and to establish a connection.
6. Once the connection is established, the Bluetooth indicator on the
display will stop fl ashing and will remain lit. A message will be displayed
briefl y confi rming the name of the connected device.
You can now begin playing music from your smart-phone, tablet, etc.
Some Bluetooth devices may require a 'Passkey' (an authentication key)
in order to establish a link between devices. A passkey is similar to a
password, although you only need to use the passkey once to establish
a link. If your device asks for a passkey to be able to pair with your radio
then enter a code of 0000 (four zeroes).
Bluetooth
3
discoverable
BT connected:
3
Julia’s iPod tou
BT
01:57
Magic Lantern
26
Page 28

Playing audio fi les in Bluetooth mode
When you have successfully connected your radio with your chosen
Bluetooth device you can start to play your music using the controls on
the device.
1. Once playing has started adjust the volume to the required setting
using the Volume controls on your radio or the connected Bluetooth
device.
2. The volume of your radio in Bluetooth mode is affected by the volumes
setting on the radio and also on the connected Bluetooth device.
If you adjust the volume control on the radio but you fi nd that the volume
from the radio is not suffi cient, it may be that the volume setting of the
connected device needs to be increased.
Volume
09
1
BT
01:57
Magic Lantern
3. The audio player in your phone, tablet or PC may be able to respond to
the Play/Pause, Next track and Previous track buttons on the radio.
Note:That not all player applications or devices may respond to all of
these buttons.
4. If your connected device is able to provide information from the track
being played, you may press and release the Info button to display the
Title, Album, Artist, Format and time and date details on the display.
Note: If you need to set the alarm whilst in Bluetooth mode you will need
to use the remote control as the alarm buttons on the radio are used for
playback control.
27
3
BT
01:57
Beyond the Storm
3
BT
01:57
Edgar Froese
3
BT
01:57
AAC 44100Hz
4
BT
14:13
01:57
22-7-2014
Page 29

Connecting and disconnecting a Bluetooth device
You can only have one Bluetooth device connected to the radio at any
one time although it may be paired with several devices. Once you have a
Bluetooth enabled device connected to your radio it cannot be interrupted
by another Bluetooth device unless you choose to break the connection.
1. To connect to a new device, press and hold the Bluetooth Pair button
(Bluetooth button on remote control) until the display shows "Bluetooth
discoverable". The Bluetooth indicator on the front panel will fl ash and
the radio will then be discoverable by other devices. The radio will
remain discoverable while the indicator continues to fl ash.
2. You may then pair the radio with the new device using its Bluetooth
settings (the radio will be listed on the device as 'Blutune 65'). The
name of the newly connected device will be briefl y shown on the radio's
display. You may then play music from the new device through the
radio.
3. To connect to a previously paired device, press and release the
Bluetooth Pair button on the radio to access the menu options. The
display will show the name of the currently paired device.
4. Then press and release the Bluetooth Pair button on the radio to
step through a list of previously connected devices. To connect to a
previously connected device, press and release the Select button
when the device's name is displayed. The radio will then connect to
the device. If automatic reconnection fails, then you will generally be
able to connect simply by selecting the 'Blutune 65' pairing in your
device's Bluetooth settings.
5. If you no longer want your Bluetooth device to be paired with your
radio you will need to delete the 'Blutune 65' pairing on the device.
Please refer to the device's Bluetooth documentation.
Bluetooth
1
discoverable
Switch to 1:
1
Julia’s iPod tou
Switch to 2:
3,4
Janet’s iPod
BT connected:
4
Note: If using the remote control to connect to a previously paired device
press and release the Bluetooth button to access the menu options. Then
use the Tuning Up or Down buttons to step through a list of previously
connected devices. To connect to a previously connected device, press
and release the Select button.
Julia’s iPod tou
28
Page 30

Alarms
Your radio has 2 separate alarms which can be set to wake you to DAB, FM radio, iPod or buzzer alarm. Each alarm can be set to sound once, daily,
on weekdays or at weekends. The alarms can be set whether the radio is on or in standby mode. In the event of a power interruption your radio has
a built in memory chip that will maintain your alarm settings for when the power is restored.
The way in which the alarm settings are accessed varies slightly according to whether you use the alarm buttons on the product or on the remote
control. The alarm buttons on the product may be used when the radio is in standby, or in use in DAB, FM, or Auxiliary Input modes (but not iPod or
Bluetooth modes). The alarm button on the remote control may be used when the radio is in use regardless of the operating mode, but it has a different
function when the radio is in standby - see page 33.
After gaining access to the settings for the chosen alarm (1 or 2) the setting method is the same for all operating modes of the product and you may use
the controls on the product or the buttons on the remote control equally. If no buttons are pressed for 10 seconds, the radio will exit the alarm setup.
Setting an alarm
1. To set an alarm using the controls on the product (if the radio is in standby,
or in DAB, FM or Auxiliary input mode) press and release the Alarm 1 or
Alarm 2 button. 'Alarm 1 Setup' or 'Alarm 2 Setup' will show on the display.
To set an alarm using the buttons on the remote control (if the radio is not in
standby) press and release the Alarm button once to enter Alarm 1 setup
and again to enter Alarm 2 setup.
1
Alarm 1 Setup
Alarm 1 Wizard
2. Press and release the Select button to enter the setup for the chosen alarm.
The current alarm status will fl ash on the display.
Alarm On
3. Rotate the Tuning control (Tuning buttons on remote) to select On or Off. If
Off is selected any current setting for that alarm will be cancelled.
4. With 'On' selected, press and release the Select button to cause the alarm
hour digits to fl ash on the display.
5. Rotate the Tuning control (Tuning buttons on remote) to choose the desired
hour for the alarm and then press the Select button to cause the alarm minute
digits to fl ash on the display.
29
2-5
3-5
Alarm 1 Wizard
On time
Alarm 1 Wizard
On time
09:00
09:30
Page 31

If the radio has been set to the 12 hour clock format, there will also be an
option here for setting AM or PM for the alarm time.
6. Rotate the Tuning control (Tuning buttons on remote) to choose the desired
minute for the alarm and then press the Select button. The alarm duration
will fl ash on the display.
7. Rotate the Tuning control (Tuning buttons on remote) to choose the alarm
duration. Choose between 15, 30, 45, 60 or 90 minutes.
8. Press and release the Select button to enter the alarm duration. The alarm
source option will fl ash on the display.
9. Rotate the Tuning control (Tuning buttons on remote) to choose the desired
source for the alarm (DAB, FM, iPod or Buzzer). Press the Select button
when the desired alarm source is highlighted on the display. For which ever
radio mode is selected, the radio alarm may be set to any of the stations
which have been stored as presets or to the station most recently listened
to.
6-10
6-11
Alarm 1 Wizard
Duration
60
Alarm 1 Wizard
Source
Buzzer
Alarm 1 Wizard
Soucre DAB
10. If setting the alarm to a radio option, Rotate the Tuning control (Tuning
buttons on remote) to choose either last listened or from presets 1-10.
Press and release the Select button to confi rm the selection.
Note: that you can only set the alarm to use a preset which as already
been stored.
11. The alarm day option will fl ash on the display.
12. Your alarm can be set to sound once, daily, weekdays and weekends.
Once - Will sound at one time only.
Daily - Will sound every day.
Weekdays - Will sound only on weekdays.
Weekends - Will sound only on weekends.
Alarm 1 Wizard
Last listened
Alarm 1 Wizard
1: BBC Radio 4
30
Page 32

13. Rotate the Tuning control (Tuning buttons on remote) to choose the
day option and then press and release the Select button to confi rm
the setting.
• If setting alarms to daily, weekdays or weekends proceed to point 18.
14. If selecting the alarm to once you will need to set the day, month and
year options as described below.
Alarm 1 Wizard
Once
15. Rotate the Tuning control (Tuning buttons on remote) to select the
correct day and then press the Select button to confi rm the setting.
16. Rotate the Tuning control (Tuning buttons on remote) to select the
correct month and then press the Select button to confi rm the setting.
17. Rotate the Tuning control (Tuning buttons on remote) to select the
correct year and then press the Select button to confi rm the setting.
18. The alarm volume option will show on the display. Rotate the Tuning
control (Tuning buttons on remote) to select the required volume and
then press the Select button to confi rm the setting.
19. Your radio will show 'Alarm Saved' and will exit the alarm setting
procedure.
Active alarms are indicated in the display by the alarm '
If using the alarm clock function, the alarm may not be heard if headphones
are connected when the radio is not in use.
Important: If using your iPod, iPhone or iPad as the source for the alarm,
then be sure to dock your iPod, iPhone or iPad. If the iPod, iPhone or iPad
is not detected a buzzer alarm will sound instead.
' symbol.
A
31
13-18
13-18
Alarm 1 Wizard
Date
22- 7-2014
Alarm 1 Wizard
Date
22- 7-2014
Alarm 1 Wizard
Date
22- 7-2014
Alarm 1 Wizard
Volume
07
Alarm
Saved
A
Page 33

When the alarm sounds
The alarm will sound at the selected times for up to 90 minutes unless
cancelled. The duration and volume used for the alarm will be specifi ed
during the alarm setting procedure. If the radio cannot connect to the
specifi ed radio station or iPod track the buzzer will be used instead.
Note: If the radio is switched on because of a radio alarm you can control
basic functions such as the volume control.
When the buzzer alarm activates it will start softly and gradually increase
in level.
The alarm icon will fl ash on the screen and the radio will automatically
switch back to standby mode when the 90 minutes have elapsed.
To cancel the alarm press the On / Standby button.
Alarm off
32
Page 34

Controlling alarm status using the product
When your radio is in standby or whilst playing the alarms can be controlled
using the alarm buttons on the product.
Note: If you wish to set the alarm whilst in iPod or Bluetooth mode you
will need to use the remote control, see below.
1. To change the states of the alarms, press and release the Alarm 1 or
2 button, 'Alarm 1 Setup' or 'Alarm 2 Setup' will show on the display.
2. Rotate the Tuning control to select alarm On or Off.
3. Press the Select button to confi rm the setting your radio will show
'Alarm Saved'.
Controlling alarm status using the remote control
When your radio is in standby or whilst playing, the alarms can be controlled
using the Alarm button on the remote control.
1. To change the states of the alarms when the unit is in standby repeatedly
press and release the Alarm button on the remote control. The display
will cycle through all combinations of alarms on and off for both alarms.
To save the alarm status press and release the Select button. 'Alarm
Saved' will show on the display.
2. To change the states of the alarms when the unit is playing using
the remote control press and release the Alarm button. (Press and
release the Alarm button on the remote control once to enter Alarm 1
setup and again to enter Alarm 2 setup).
3. Press and release the Tuning Up or Down buttons to select alarm
On or Off.
4. Press the Select button to confi rm the setting your radio will show
'Alarm Saved'.
33
1
Alarm 1 Setup
Alarm 1 Setup
Alarm On
2
Alarm
Saved
3
Alarm 1: On
1,2
Alarm 2: Off
Alarm
1,4
Saved
Alarm 1 Setup
3
3
Alarm On
Page 35

Snooze function
Z
1. When the radio, iPod or buzzer alarm sounds, pressing the Snooze
button will silence the alarm for the selected number of minutes. The
Snooze duration can be adjusted between 5 and 20 minutes in 5
minute increments. The default setting is 5 minutes.
When the Snooze button has been pressed during an alarm, the
Snooze symbol
2. To cancel the Snooze function, press and release the On / Standby
button.
will fl ash.
Z
To set the snooze time
1. Press and release the On / Standby button to switch on the radio.
2. To set the snooze to the desired snooze time, press and release the
Menu button.
1
Snooze
2
5 minutes
DAB
<
2
System Setting
<
3. Rotate the Tuning control (Tuning buttons on remote) until 'System
Setting' appears on the display. Then press and release the Select
button.
4. Rotate the Tuning control (Tuning buttons on remote) until 'Snooze
Duration' appears on the display. Then press and release the Select
button. The current snooze duration will be marked with an asterisk.
5. Rotate the Tuning control (Tuning buttons on remote) to choose the
desired snooze setting from between 5, 10, 15 and 20 minutes.
6. Press and release the Select button to enter the desired snooze
duration. The radio will exit the menu options and return to the normal
radio display.
3-5
3-6
System Setting
<
Snooze Duration
Snooze Duration *
<15 mins
<
>
34
Page 36

Sleep function
Absolute Rad 60s S
Now playing on the r
Your radio can be set to turn off after a preset time has elapsed. The
sleep setting can be adjusted between 15 and 90 minutes. Ensure your
radio is switched on.
1. To set the desired sleep time, press and release the Sleep button to
enter the sleep setup.
2. Repeatedly press and release the Sleep button to select the desired
sleep time. The sleep settings available are 15, 30, 45, 60, or 90
minutes. A further press will cause the sleep timer to be set to 'off'
which will cancel the sleep function.
Alternatively the Tuning controls may be used.
1-6
1-6
Set sleep time
15 minutes
Set sleep time
30 minutes
3. Press and release the Select button to confi rm the setting. The display
will exit the sleep options. The sleep symbol '
4. Your radio will switch off after the preset sleep time has elapsed.
5. To cancel the sleep timer and switch off your radio before the chosen
sleep time has elapsed, press the On / Standby button.
To cancel the sleep timer without switching off your radio, repeatedly
press the Sleep button until ' Sleep off' is displayed.
6. When the sleep time has been set you may view the remaining sleep
time. Press the Sleep button. The remaining sleep time will show on
the display.
35
' will show on the display.
S
3
5
Set sleep time
Sleep off
Set sleep time
14 minutes
Page 37

Setting the clock format
The clock display used in Standby mode and when the radio is in use can be
set to 12 or 24 hour format. The clock format can only be set while the unit
is playing. The selected format is then also used when setting the alarms.
1. Press and release the On / Standby button to switch on the radio.
DAB
<
2
System Setting
<
2. To set the clock format, press and release the Menu button.
3. Rotate the Tuning control (Tuning buttons on remote) until 'System
Setting' appears on the display. Then press and release the Select
button.
4. Rotate the Tuning control (Tuning buttons on remote) until 'Time'
appears on the display. Press and release the Select button.
5. Rotate the Tuning control (Tuning buttons on remote) until
'Set 12/24 hour' appears on the display. Press and release the Select
button.
6. Rotate the Tuning control (Tuning buttons on remote) to display either
12 or 24 hour format.
7. Press and release the Select button to confi rm the setting.
If the 12 hour clock format is chosen, the radio will then use the 12 hour
clock for the setting of alarms, and will display a 12 hour clock with an AM
or PM indicator on the display.
3-6
3-7
System Setting
<
Time
Time
<
Set 12/24 hour
Set 12/24 hour
<
Set 12 hour
<
<
*
<
36
Page 38

Setting the clock manually
Normally your radio will set its clock automatically using the DAB radio
signal. If no DAB signal is available and you need to set the time manually,
please follow the procedure shown below.
1. Press and release the On / Standby button to switch on the radio.
2. To set the clock time, press and release the Menu button to enter the
setup menu.
3. Rotate the Tuning control (Tuning buttons on remote) until 'System
Setting' appears on the display. Then press and release the Select
button.
4. Rotate the Tuning control (Tuning buttons on remote) until 'Time'
appears on the display. Press and release the Select button.
5. Rotate the Tuning control (Tuning buttons on remote) until
'Set Time /Date' appears on the display.
6. Press and release the Select button to enter the manual setting
procedure. The hour digits will then fl ash on the display.
7. Rotate the Tuning control (Tuning buttons on remote) to set the desired
hour.
8. Press and release the Select button to enter the hour setting.
2
3-9
3-8
DAB
<
System Setting
System Setting
<
Time
Time
<
Set Time/Date
Set time
09:00
Set time
09:30
<
<
<
9. The minute digits will then fl ash on the display. Rotate the Tuning
control (Tuning buttons on remote) to set the desired minute.
37
Page 39

10. Press and release the Select button to enter the minutes setting. The
day will then fl ash on the display.
• If your radio has been set to use the 12 hour clock format there will
be an option here to set either AM or PM.
11. Rotate the Tuning control (Tuning buttons on remote) to change the
day as needed.
12. Press and release the Select button to enter the day setting. The
month will then fl ash on the display.
13. Rotate the Tuning control (Tuning buttons on remote) to select the
current month.
14. Press and release the Select button to enter the month setting. The
year will then fl ash on the display.
15. Rotate the Tuning control (Tuning buttons on remote) to select the
current year.
16. Press and release the Select button to confi rm. 'Time Saved' will show
on the display and return to the normal radio display.
10-16
11-15
Set date
23- 7-2014
Set date
23- 7-2014
Set date
23- 7-2014
Time
Saved
38
Page 40

To return to auto clock set mode
1. Press and release the On / Standby button to switch on your radio.
2. Press and release the Menu button to enter the setup menu.
3. Rotate the Tuning control (Tuning buttons on remote) until 'System
Setting' appears on the display. Press and release the Select button.
4. Rotate the Tuning control (Tuning buttons on remote) until 'Time'
appears on the display. Press and release the Select button.
DAB
<
2
System Setting
<
System Setting
<
Time
<
5. Rotate the Tuning control (Tuning buttons on remote) until 'Auto
update' appears on the display. Press and release the Select button.
6. Rotate the Tuning control (Tuning buttons on remote) to choose an
update option from 'Update from Any', 'Update from DAB', Update
from FM' or 'No update' as required. The current update option will
be marked with an asterisk. Press and release the Select button to
confi rm your choice. The radio will exit to the previous menu.
Note: If you select 'Update from Any', 'Update from DAB', Update from
FM' the current time received will be displayed. If no signal is found
you should either position the radio or its aerial so that a signal can be
received, or revert to manual clock mode (see page 37).
39
3-6
3-6
Time
<
Auto update
Auto update
<
Update from Any
Auto update
<
Update from DAB
<
*
<
<
Page 41

Equaliser function using the radio's buttons
The sound on your radio can be adjusted to suit your personal taste
for the material that you are listening to. The clock radio has six preset
equaliser options. Alternatively, you may set the bass and treble levels to
your own preferences.
1. Press and release the On / Standby button to switch on your radio.
2. Press and release the EQ button.
Equaliser
1
<
Classic
<
3. Rotate the Tuning control to cycle through the various options until
the desired option is displayed. Press and release the Select button.
After several seconds the radio will exit the menu.
a. Normal - no tone modifi cation is applied
b. Jazz
c. Rock
d. Classic
e. Pop
f. News
g. Treble - tone setting may be adjusted
h. Bass - tone setting may be adjusted
• For details on setting the bass and treble settings, please see
overleaf.
Equaliser
<
Normal
2
3
3
<
40
Page 42

Treble control
1. Follow steps 1-2 on the proceding page to enter the EQ setup menu.
2. Rotate the Tuning control to cycle through the options until 'My EQ'
appears on the display.
3. Press and release the Select button. Rotate the Tuning control until
'Treble' shows on the display.
4. Press and release the Select button. The current Treble setting will
show on the display and will be marked with an asterisk.
5. To adjust the Treble setting rotate the Tuning control until the desired
level is displayed.
6. Press and release the Select button to confi rm the setting.
Bass control
1. Follow steps 1-2 on the proceding page to enter the EQ setup menu.
2. Rotate the Tuning control to cycle through the options until 'My EQ'
appears on the display.
3. Press and release the Select button. Rotate the Tuning control until
'Bass' shows on the display.
4. Press and release the Select button. The current Bass setting will
show on the display and will be marked with an asterisk.
5. To adjust the Bass setting rotate the Tuning control until the desired
level is displayed.
6. Press and release the Select button to confi rm the setting.
• To quickly cancel the effect of the treble or bass settings rotate the
Tuning control until 'Normal' appears on the display and press the
Select button. The treble or bass settings will be remembered for the
next time that you wish to adjust them.
2-5
3-6
2-5
3-6
Equaliser
<
My EQ...
<
My EQ...
<
Treble
Treble
<
+3
<
*
<
Equaliser
<
My EQ...
<
My EQ...
<
Bass
Bass
<
+3
<
*
<
41
Page 43

Equaliser function using remote control
The sound on your radio can be adjusted to suit your personal taste for
the material that you are listening to. The radio has six preset equaliser
options. Alternatively, you may set the treble and bass levels to your own
preferences.
1. Press the EQ button and then the Tuning Up or Down buttons to
cycle through the various options.
a. Normal - no tone modifi cation is applied
b. Jazz
c. Rock
d. Classic
e. Pop
f. News
g. Treble - tone setting may be adjusted
h. Bass - tone setting may be adjusted
2. Press and release the Select button to confi rm your selection.
Treble control
1. Press the EQ button and then the Tuning Up or Down buttons to
cycle through the options until 'My EQ' appears on the display.
2. Press and release the Select button. Press and release the Tuning
Up or Down buttons until 'Treble' shows on the display.
3. Press and release the Select button.The current Treble setting will be
shown on the display.
4. To adjust the Treble setting press and release the Tuning Up or Down
buttons until the desired level is displayed.
5. Press and release the Select button to confi rm the setting.
1
<
Classic
<
Equaliser
Equaliser
1
1
2
1
<
<
1
1
<
2
<
Normal
Equaliser
My EQ...
My EQ...
Treble
Treble
+3
<
<
<
*
<
42
Page 44

Bass control
1. Press the EQ button and then the Tuning Up or Down buttons to
cycle through the options until 'My EQ' appears on the display.
2. Press and release the Select button. Press and release the Tuning
Up or Down buttons until 'Bass' shows on the display.
3. Press and release the Select button.The current Bass setting will be
shown on the display.
4. To adjust the Bass setting press and release the Tuning Up or Down
buttons until the desired level is displayed.
5. Press and release the Select button to confi rm the setting.
Mute function (Remote control only)
Pressing the Mute button will mute the output from the loudspeakers.
1. Press the Mute button to mute the sound output.
2. Press the Mute button again or one of the Volume buttons to un-mute
the sound output.
1
<
My EQ...
<
My EQ...
Equaliser
1
1
<
Bass
Bass
2
<
+3
<
*
<
Volume
Muted
2
43
Page 45

Language function
Your radio can be confi gured to a different language.
1. Press and release the On / Standby button to switch on your radio.
2. Press and release the Menu button.
3. Rotate the Tuning control (Tuning buttons on remote) until 'System
Setting' appears on the display. Press and release the Select button.
4. Rotate the Tuning control (Tuning buttons on remote) until 'Language'
appears on the display.
5. Press and release the Select button to enter the language adjustment
menu.
6. Rotate the Tuning control (Tuning buttons on remote) until your desired
language appears on the display.
7. Press and release the Select button to confi rm your choice. The
display will change to the chosen language. The chosen language
will be marked with an asterisk.
Display backlight dimmer
1. In order to adapt the intensity of the display to suit the ambient room
lighting, Press the Dimmer button to select the dimmer brightness
from Low, Mid, High or OFF settings. The dimmer can set when the
radio is in standby mode or whilst playing.
2
3-6
3-7
1
DAB
<
System Setting
System Setting
<
Language
Language
<
English
<
<
*
<
44
Page 46

Software version
The software display cannot be altered and is just for your reference.
1. Press and release the On / Standby button to switch on your radio.
2. Press and release the Menu button.
3. Rotate the Tuning control (Tuning buttons on remote) until 'System
Setting' appears on the display. Press and release the Select button.
4. Rotate the Tuning control (Tuning buttons on remote) until 'SW Version'
appears on the display.
5. Press and release the Select button. The software version shows on
the display.
6. Press and release the Menu button to exit the software version display.
Clock display
1. When your clock radio is in standby mode or in use the time can be
shown either in the 12 or 24 hour format.
2
3,4
3-5
DAB
<
System Setting
System Setting
<
SW Version
SW Version
dab-mmi-FS2030-0000-
<
<
45
AM
Page 47

System reset
If your radio fails to operate correctly, or some digits on the display are
missing or incomplete carry out the following procedure.
1. Press and release the On / Standby button to switch on your radio.
DAB
<
2
System Setting
<
2. Press and release the Menu button.
3. Rotate the Tuning control (Tuning buttons on remote) until 'System
Setting' appears on the display. Press and release the Select button.
4. Rotate the Tuning control (Tuning buttons on remote) until 'Factory
Reset' appears on the display. Press and release the Select button.
5. Rotate the Tuning control (Tuning buttons on remote) until 'Yes' is
highlighted on the display. If you do not wish to carry out a system
reset, highlight 'No' and then press the Select button. The display will
revert back to the previous display.
6. With 'Yes' highlighted, press and release the Select button. A full reset
will be performed. The station list and presets will be erased. Alarms
will be cancelled and sleep timer settings will be set to their default
values. The display will show 'Welcome to Digital Radio' and the unit
will behave as when fi rst switched on (see page 6).
In case of malfunction due to electrostatic discharge, reset the product
using the above procedure. In some circumstances it may be necessary
to disconnect and then reconnect the mains power in order to resume
normal operation.
If a problem persists please refer to the guarantee section at the back
of this instruction book which explains how to obtain support for your
radio.
3-5
3-6
System Setting
<
Factory Reset
Factory Reset?
<
No
Yes
<
<
46
Page 48

Headphone socket
A 3.5mm stereo Headphone Socket located on the rear of your radio is
provided for use with either headphones or an earpiece. Inserting a plug
automatically mutes the internal loudspeaker.
Please be aware that the sensitivity of headphones can vary widely. We
therefore recommend setting the volume to a low level before connecting
headphones to the radio.
IMPORTANT: Excessive sound pressure from earphones and headphones
can cause hearing loss.
To prevent possible hearing damage, do not listen at high
volume levels for long periods.
Auxiliary Input (Line in) socket
A 3.5mm stereo Auxiliary Input socket is provided on the rear of your
radio to permit an audio signal to be fed into the unit from an external
audio device such as iPod, MP3 or CD player.
1. Connect a stereo or mono audio source (for example, iPod, MP3 or
CD player) to the Auxiliary Input socket (marked "Aux In").
2. Press the Mode button (Aux button on remote) until 'Auxiliary Input'
is shown on the display.
3. Adjust the Volume control on your iPod, MP3 or CD player to ensure
an adequate signal and then adjust the volume on the radio for
comfortable listening.
Service
Service
1
2
47
Page 49

Line out socket (3.5mm Jack)
A 3.5mm Line Out socket located on the rear of your radio is provided
for connecting the audio signal to an external amplifi er. Inserting an audio
cable into this socket will not mute the internal loudspeaker. Set the volume
control on the radio to minimum if desired.
USB socket for iPhone or smartphone charging
Your radio has a USB socket which can be used for charging an iPhone
or smart phone and similar devices. This may be used to charge devices
which are not compatible with the lightning connector.
Charge time may vary and in some cases may take longer to charge than
when using the manufacturers charging unit supplied with the smart phone.
1. Ensure your radio is plugged in.
2. Connect your smart phone to the USB charging socket at the rear of
your radio.
3. Your iPhone or smart phone will begin to charge.
4. Once your iPhone or smart phone has charged remove the USB lead.
Service
Service
USB socket for software upgrade
As software updates become available software and information on
how to update your radio may be found at www.robertsradio.com
48
Page 50

Cautions
Do not allow this radio to be exposed to water, steam or sand. Do not
leave your radio where excessive heat could cause damage such as in
a parked car where the heat from the sun can build up even though the
outside temperature may not seem too high. It is recommended that the
DAB band be used wherever possible as better results in terms of quality
and freedom from interference will usually be obtained than on the the
FM band.
• The name plate is located on the rear of the unit.
Specifi cations
Power Requirements
Mains AC 100 240V 50/60Hz (Adaptor)
Frequency Coverage
FM 87.5-108MHz
DAB 174.928 - 239.200MHz
The Company reserves the right to amend the specifi cation without notice.
• Your radio should not be exposed to dripping or splashing and that no
objects fi lled with liquids, such as vases, shall be placed on the radio.
• It is recommended to operate the product such that there is a minimum
distance (10cm recommended) to adjacent objects in order to ensure
good ventilation.
• The ventilation of the product should not be restricted by covering it or
its ventilation openings with items such as newspapers, tablecloths,
curtains etc.
• No naked fl ame sources such as lighted candles should be placed on
the product.
• It is recommended to avoid using or storing the product at extremes
of temperature. Avoid leaving the unit in cars, on window sills, in direct
sunlight etc.
Circuit Features
Output Power 2 x 2.5 Watts
Headphone socket 3.5mm dia
Auxiliary Input socket 3.5mm dia
Line Output socket 3.5mm dia
Aerial System FM Telescopic aerial
DAB Telescopic aerial
49
Page 51

“Made for iPod,” “Made for iPhone,” and “Made for iPad” mean that an electronic accessory has been designed to connect specifi cally to iPod, iPhone,
or iPad, respectively, and has been certifi ed by the developer to meet Apple performance standards. Apple is not responsible for the operation of
this device or its compliance with safety and regulatory standards. Please note that the use of this accessory with iPod, iPhone, or iPad may affect
wireless performance.
iPad, iPhone and iPod are trademarks of Apple Inc., registered in the U.S. and other countries. Lightning is a trademarks of Apple Inc.
50
Page 52

Guarantee
This product is guaranteed for twelve months from the date of purchase by the original owner against failure due to faulty workmanship or component
breakdown, subject to the procedure stated below. Should any component or part fail during this guarantee period it will be repaired or replaced free
of charge.
The guarantee does not cover:
1. Damage resulting from incorrect use.
2. Consequential damage.
3. Product with removed or defaced serial numbers.
N.B. Damaged or broken telescopic aerials will not be replaced under guarantee.
Procedure:
Any claim under this guarantee should be made through the dealer from whom the product was purchased. It is likely that your Roberts dealer will be
able to attend to any defect quickly and effi ciently, but should it be necessary the dealer will return the product to the company’s service department
for attention. In the event that it is not possible to return the product to the Roberts dealer from whom it was purchased, please contact Roberts Radio
using the contact details on the www.robertsradio.com website.
For product repairs falling outside the guarantee period, please refer to the “customer care” tab on the www.robertsradio.com website.
These statements do not affect the statutory rights of a consumer.
Issue 1
ROBERTS RADIO LIMITED
PO Box 130
Mexborough
South Yorkshire
S64 8YT
Website: http://www.robertsradio.com
© 2014 Roberts Radio Limited
 Loading...