

Roadstar TTR-1923UCEN Instruction Manual [ml]

3 4
ROADSTAR MANAGEMENT SA
via Passeggiata 7, CH 6883
NOVAZZANO (SWITZERLAND)
T U R N TAB L E WITH MP3 PLAYER AND
FM STEREO RADIO.
USB/SD PORTS, ENCODING FUNCTION
AND REMOTE CONTROL.
TTR-1923UCEN
Instructionmanual
Bedienungsanleitung
Manueld’instructions
Manualed’istruzioni
Manualdeinstrucciones
is a registered Trademark of RoadstarS.A. - Switzerland All rights reserved
Manualdeinstruções
INDEX
29
TTR-1923UCEN
English Page 1
Deutsch Seite 11
Français Pa g e 2 1
Italiano Pagina 31
Español Página 41
Portuguès Pagina 51
Fig.
Fig.
• Your new unit was manufactured and assembled
under strict ROADSTAR quality control.
Thank you for purchasing our product.
Before operating the unit, please read this instruction manual carefully. Keep it also handy for further
future references.
• Votre nouvel appareil a été fabriqué et monté en
étant soumis aux nombreaux tests ROADST AR. Nous
espérons que cet appareil vous donnera entière satisfaction.
Avant de vous adonner à ces activités, veuillez lire
attentivement ce manuel d’instructions. Conservezle
à portée de main à fin de référence ultérieure.
• Vuestro nuevo sistema ha sido construido según las
normas estrictas de control de calidad ROADSTAR.
Le felicitamos y le damos las gracias por su elección
de este aparado. Por favor leer el manual antes de
poner en funcionamiento el equipo y guardar esta
documentación en case de que se necesite
nuevamente.
• Ihr neues Gerät wurde unter Beachtung der strengen
ROADSTAR-Qualitätsvorschriften gefertigt.
Wir danken Ihnen für den Kauf unseres Produktes.
Bitte lesen Sie diese Bedienungsanleitung durch,
und heben Sie sie auf, um jederzeit darin
nachschlagen zu können.
• Il vostro nuovo apparecchio è stato prodotto ed
assemblato sotto lo stretto controllo di qualitá
ROADSTAR.
Vi ringraziamo di aver acquistato un nostro prodotto.
Prima di procedere all'utilizzo dell'apparecchio,
leggete attentamente il manuale d’istruzioni e
tenetelo sempre a portata di mano per futuri
riferimenti.
• Seu novo aparelho foi construido e montado sob o
estrito controle de qualidade da ROADSTAR.
Agradecemos por ter comprado nosso produto para
a sua diversão.
Antes de usar esta unidade é necessário ler com
atençâo este manual de instruções pare que possa
ser usada apropriadamente; mantenha o manual
ao seu alcance para outras informações.
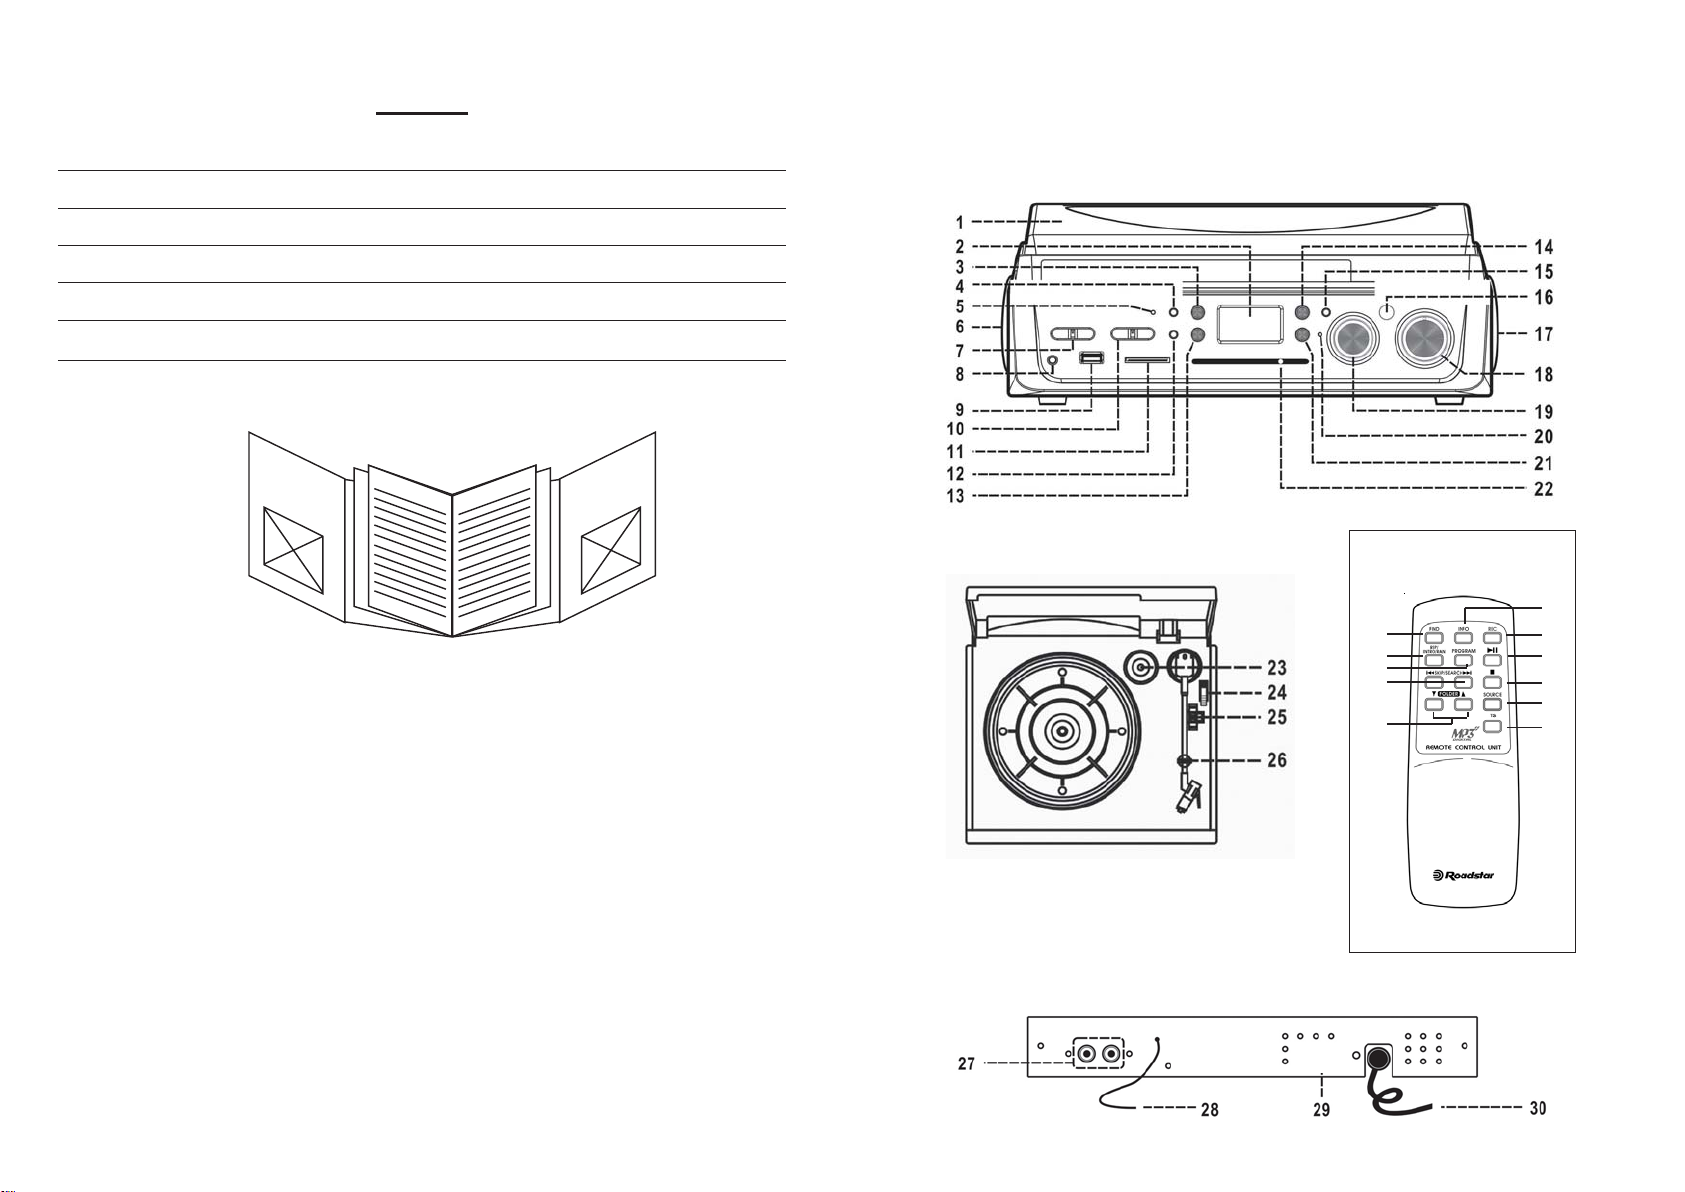
Front view
T op view Remote control
1
4
5
7
9
Rear view
2
3
6
8
10
11
EnglishEnglish 1 2
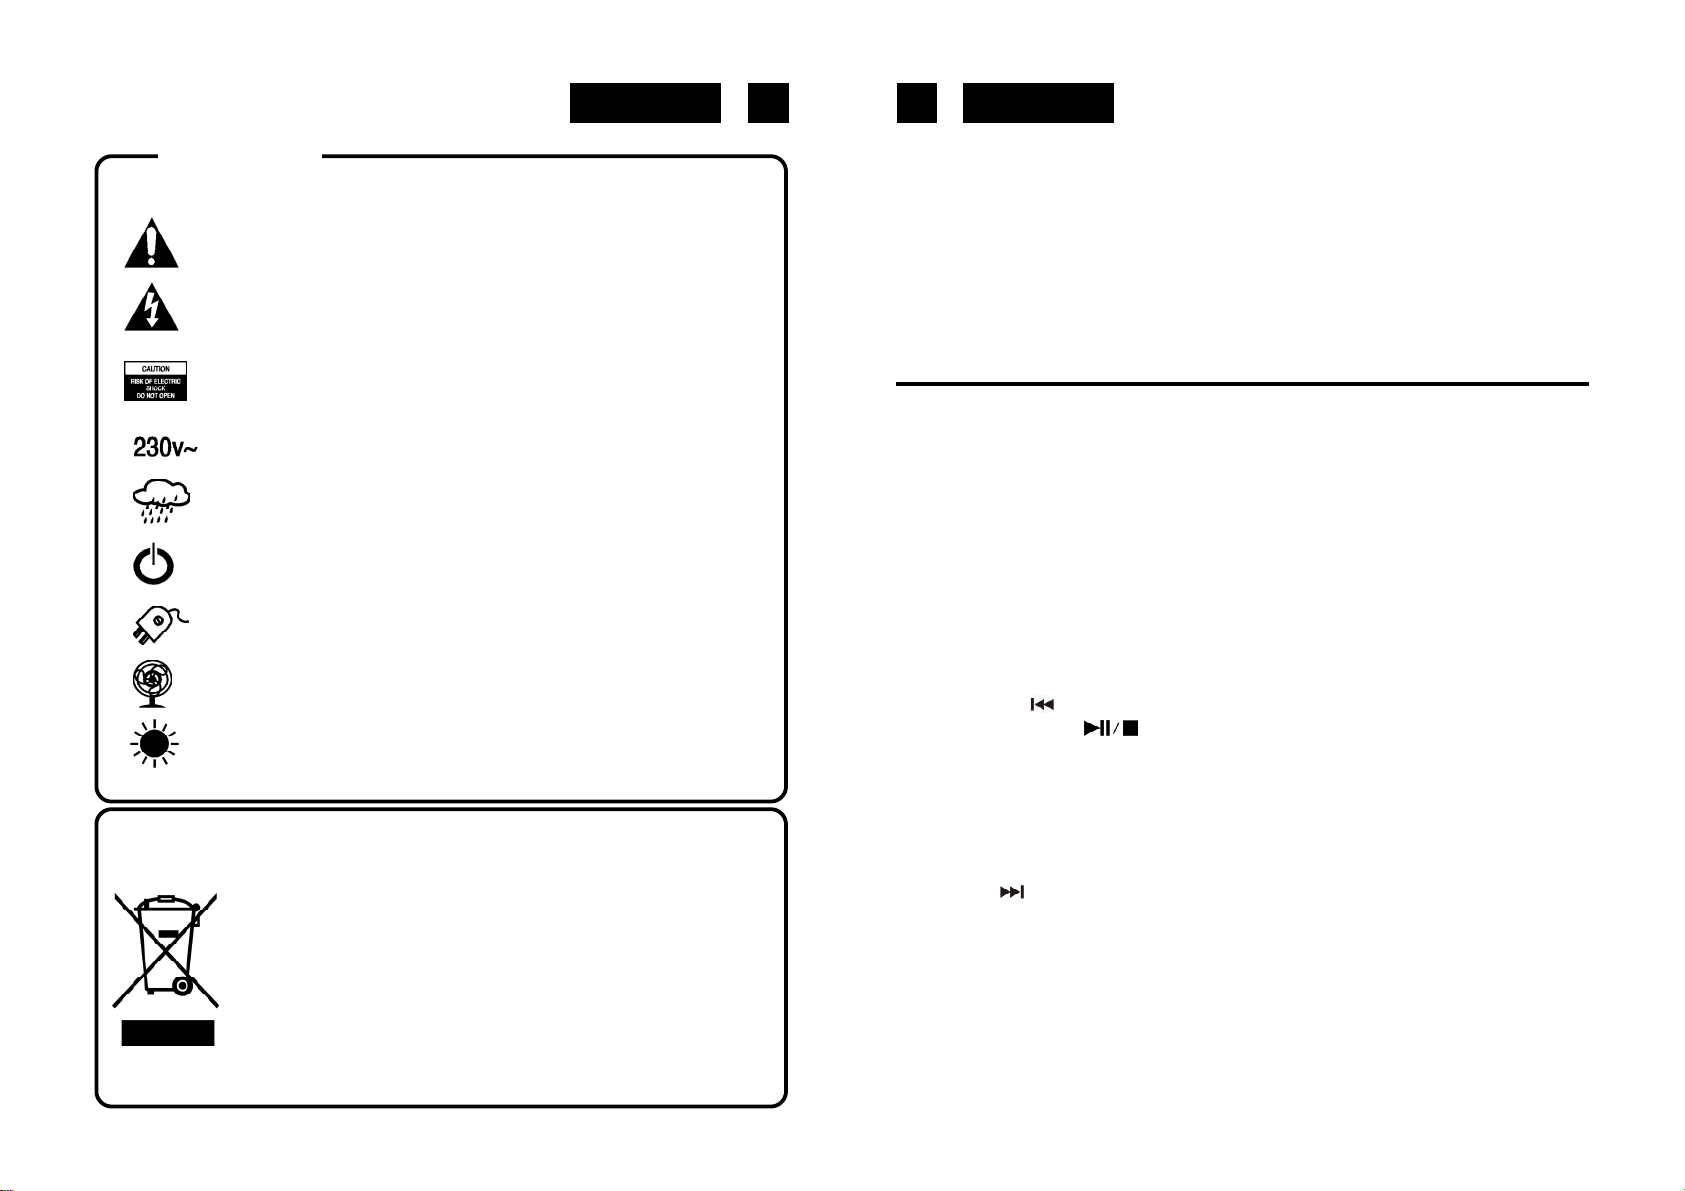
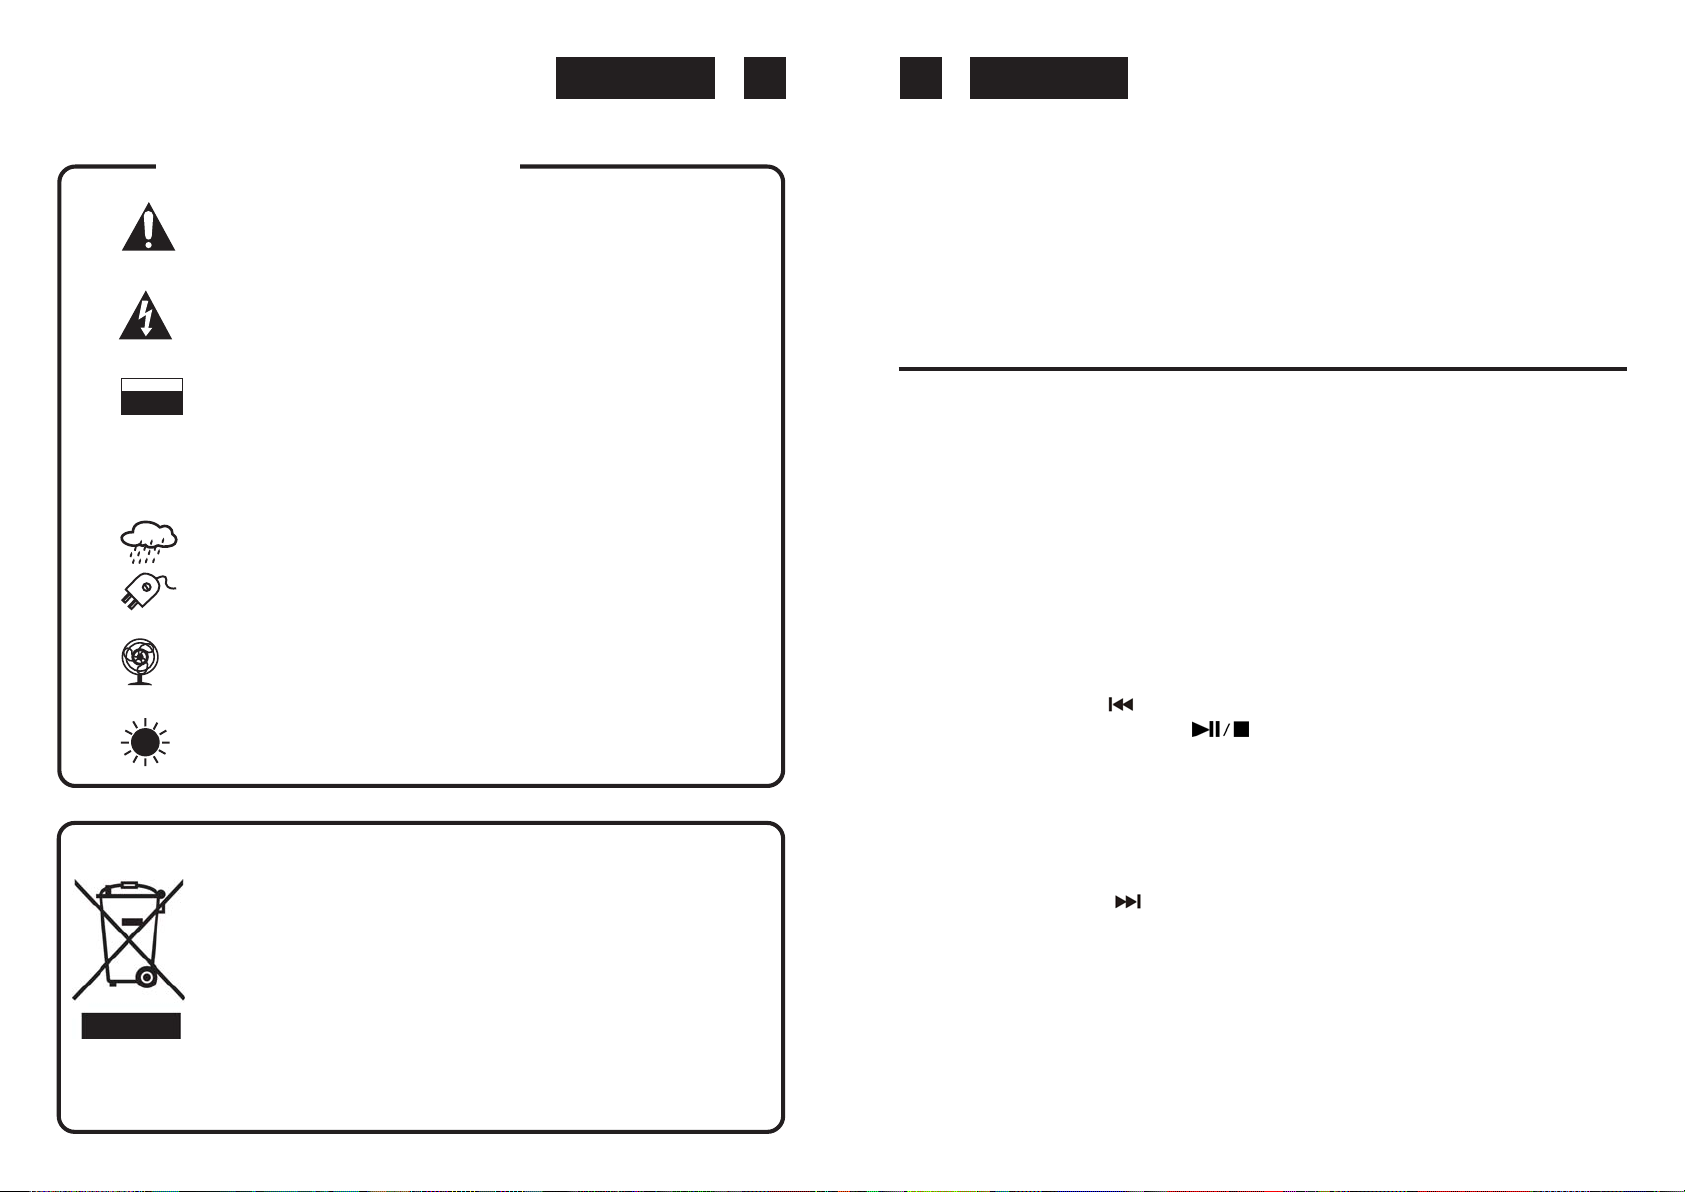
WARNINGS
The exclamation point within the triangle is a warning sign alerting the
user of important instructions accompanying the product.
The lightening flash with arrowhead symbol within the triangle is a warning
sign alerting the user of “dangerous voltage” inside the unit.
To reduce the risk of electric shock, do not remove the cover. No user
serviceable parts inside the unit. Refer all servicing to
qualified personnel.
This unit operates on 230V ~ 50Hz. If the unit is not used for a long period
of time, remove the plug from the AC mains.
This unit must not be exposed to moisture or rain.
The power switch in this unit is mounted on the secondary circuit and
does not disconnect the whole unit from the mains in OFF position.
Ensure all connections are properly made before operating the unit.
This unit should be positioned so that it is properly ventilated. Avoid placing
it, for example, close to curtains, on the carpet or in a built-in installation
such as a bookcase.
Do not expose this unit to direct sunlight or heat radiating sources.
Correct Disposal of This Product
(Waste Electrical & Electronic Equipment)
This marking shown on the product or its literature, indicates that it should not
be disposed with other household wastes at the end of its working life. To prevent
possible harm to the environment or human health from uncontrolled waste
disposal, please separate this from other types of wastes and recycle it
responsibly to promote the sustainable reuse of material resources.
Household users should contact either the retailer where they purchased this
product, or their local government office, for details of where and how they
can take this item for environmentally safe recycling.
Business users should contact their supplier and check the terms and conditions
of the purchase contract. This product should not be mixed with other commercial
wastes for disposal.
TTR-1923UCEN
MP3 PLAYER WITH TURNTABLEAND STEREO RADIO.
USB/SD PORTS, ENCODING FUNCTION AND REMOTE CONTROL.
INSTRUCTION MANUAL
Please read this instruction manual carefully and familiarize yourself with your new Audio
system before using it for the first time. Please retain this manual for future reference.
LOCATION OF CONTROLS
1) DUST COVER
2) LCD DISPLAY
3) RECORD BUTTON
4) SOURCE BUTTON
5) POWER LED INDICATOR
6) LEFT SPEAKER
7) POWER OFF/ON/FUNCTIONSSELECTOR
8) 3.5 MM HEADPHONE JACK
9) USB SOCKET
10) FM / FM STEREO SELECTOR
11)SD/MMCCARD SLOT
12) MP3 +10 BUTTON
13) SKIP DOWN BUTTON
14) PLAY/PAUSE/STOP BUTTON
15) X-BASSON/OFFBUTTON
16) REMOTESENSOR
17) RIGHTSPEAKER
18) VOLUMEKNOB
19) TUNING KNOB
20) FMSTEREOLED INDICATOR
21) SKIP UP BUTTON
22) LED DIAL POINTER
23) SPINDLEADAPTOR
24)TONEARM LEVER
25) 33/45 RPM SPEED SELECTOR
26) PICK-UP HOLDER
27) LINE OUT SOCKET
28) FMANTENNA
29) AUTOSTOP SWITCH
30) AC CORD
3 4
EnglishEnglish
REMOTE CONTROL
BATTERY INSTALLATION
the infra-red transmitter requires 2 pcs AAA size battery for operation (not included).
BUTTONSDESCRIPTION
1) FIND in MP3 mode, press to activate file/folder name search function.
2)INFO in USB mode, press to active the ID3 feature.
3) REC in PHONO mode, press to activate recording function.
4)REP/INTRO/RAN in USB mode, press to activate Repeat one/ Repeat All/ Folder/ Intro/
/ Random functions.
5)PROGRAM in USB mode, press to active programming function.
6)PLAY/PAUSE in USB mode, press once to start playback. press again to enter
pause mode.
7) SKIP/SEARCHforward press once to Skip to next track.
Press & hold for search forward
SKIP/SEARCH backward press once to Skip to previous track.
Press & hold for search backward.
For your own safety read the following instructions carefully before attempting to
connect this unit to the mains.
MAINS (AC) OPERATION
This unit is designed to operate on AC 230V 50Hz current only. Connecting it to
other power sources may damage the unit.
CAUTION
To prevent electric shock disconnect from the mains before removing cover. No user
serviceable prts inside. Refer servicing to qualified service personnel.
SAFETY PRECAUTION
Do not allow this unit to be exposed to rain or moisture.
Mains Supply: 230V 50Hz - AC only
This symbol means that this unit is double insulated. An earth connection is not
required.
POWER SUPPLY
Remove the stereo carefully from the box, retaining the packaging for future use (servicing).
ACPOWER OPERATION
Connect the plug to a mains power inlet 230V AC ~ 50 Hz.
FM TUNER
8)STOP in USB mode, press to stop playback
9) +10/-10 in MP3 mode, press to selec the track +10 forward or -10 backward
10) SOURCE in USB mode, press to select USB/CARD function repeatly.
11)TRACKSEPARATION press to divide, one by one, the recording track from turntable,
during encoding.
CONNECTING TO POWER
Before switching on make sure that the voltage of your electricity supply is the same as
that indicated on the rating plate.
Operation
• Set the Function Selector (7) to the RADIO position.
The red Power Indicator (5) will light up.
• Select the desired FM or FM Stereo with the Selector (10).
• Tune to the desired radio station by turning the Tuning control (19).
ANTENNA
• For FM reception there is a built-in FM antenna wire (28) at the rear of the unit. Move the
wire around to obtain the best reception.
FM& FM-STEREO RECEPTION
• Stereo reception is possible when the tuned FM station is broadcasting in stereo.
• When in FM STereo mode and the station is broadscasting in Stereo, the STEREO
5 6
Remark: USB port does not support connection with usb extension cable and is not designed
for communication with computer directly.
EnglishEnglish
indicator (20) lights up.
• When FM stations are weak and are disturbed, listening can be improved by switching
the selector (10) to FM (Mono). Reception will then be in MONO.
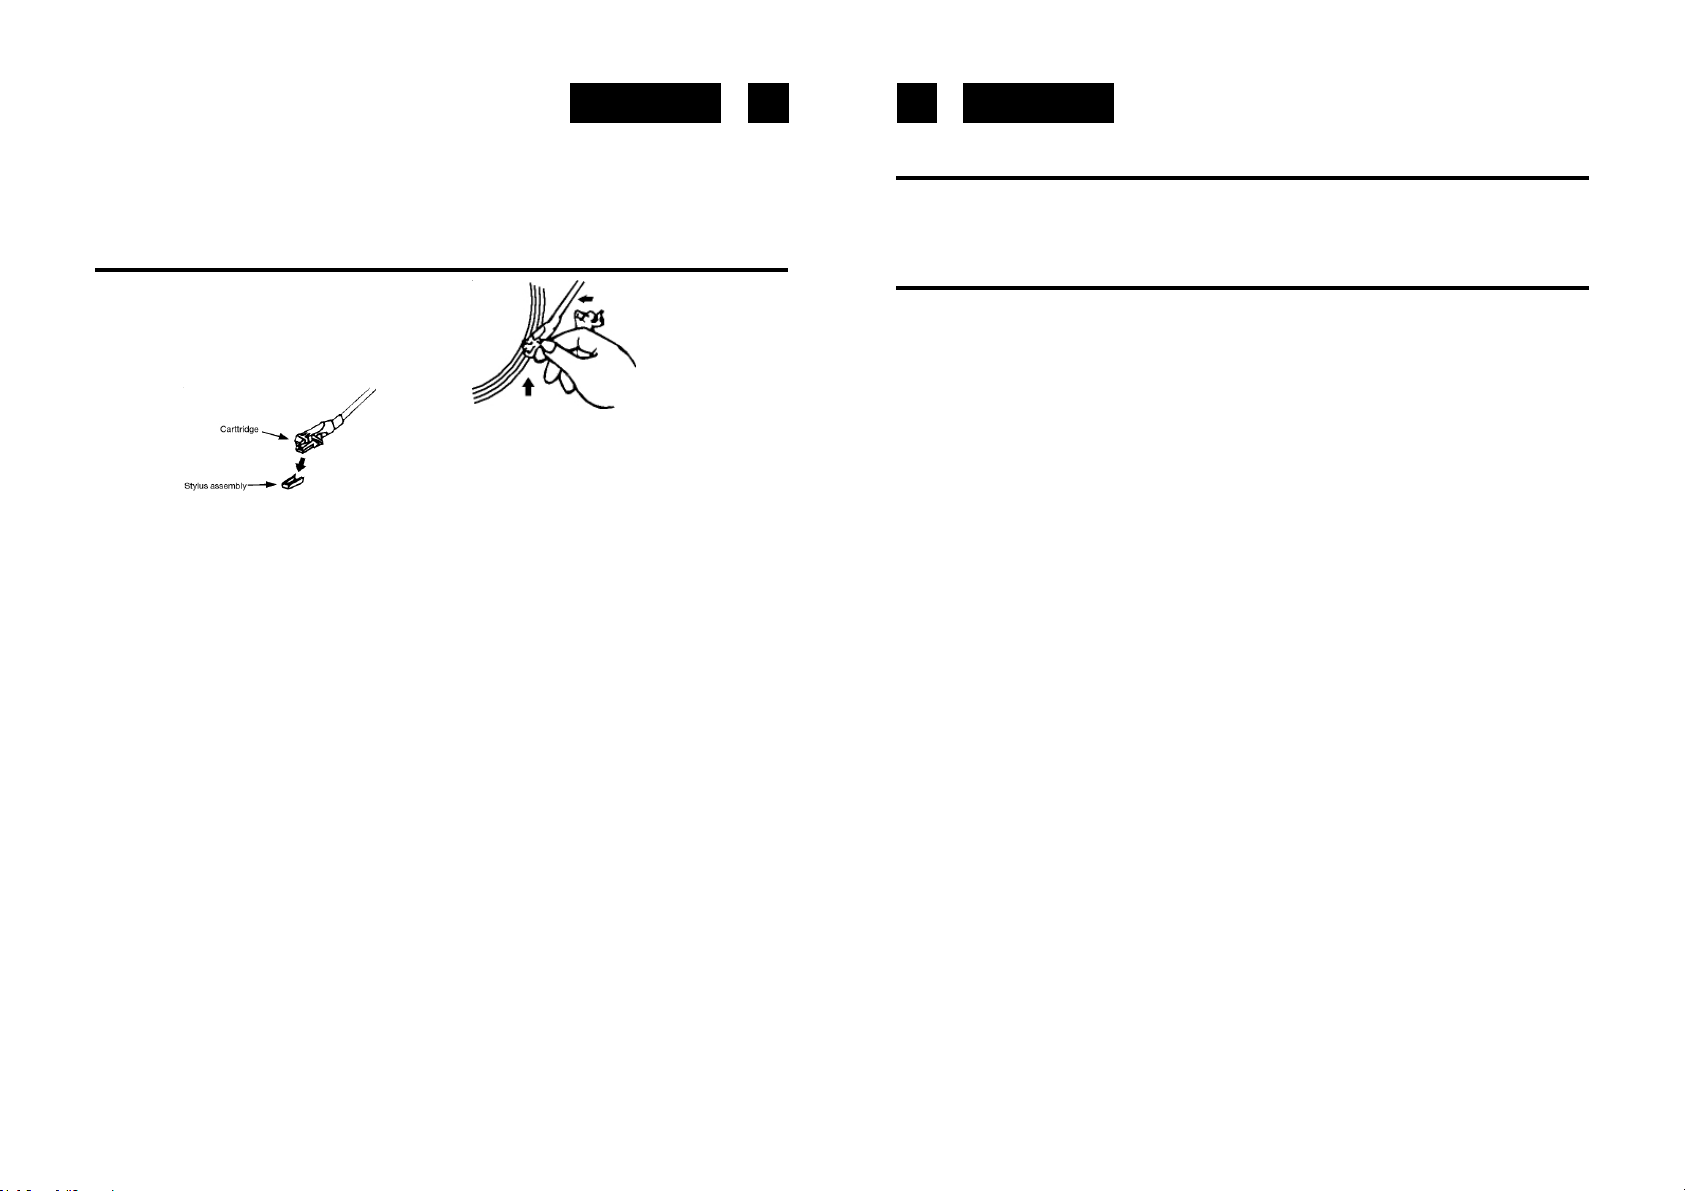
TURNTABLE OPERATION
Preparation
Open the Record Player Cover.
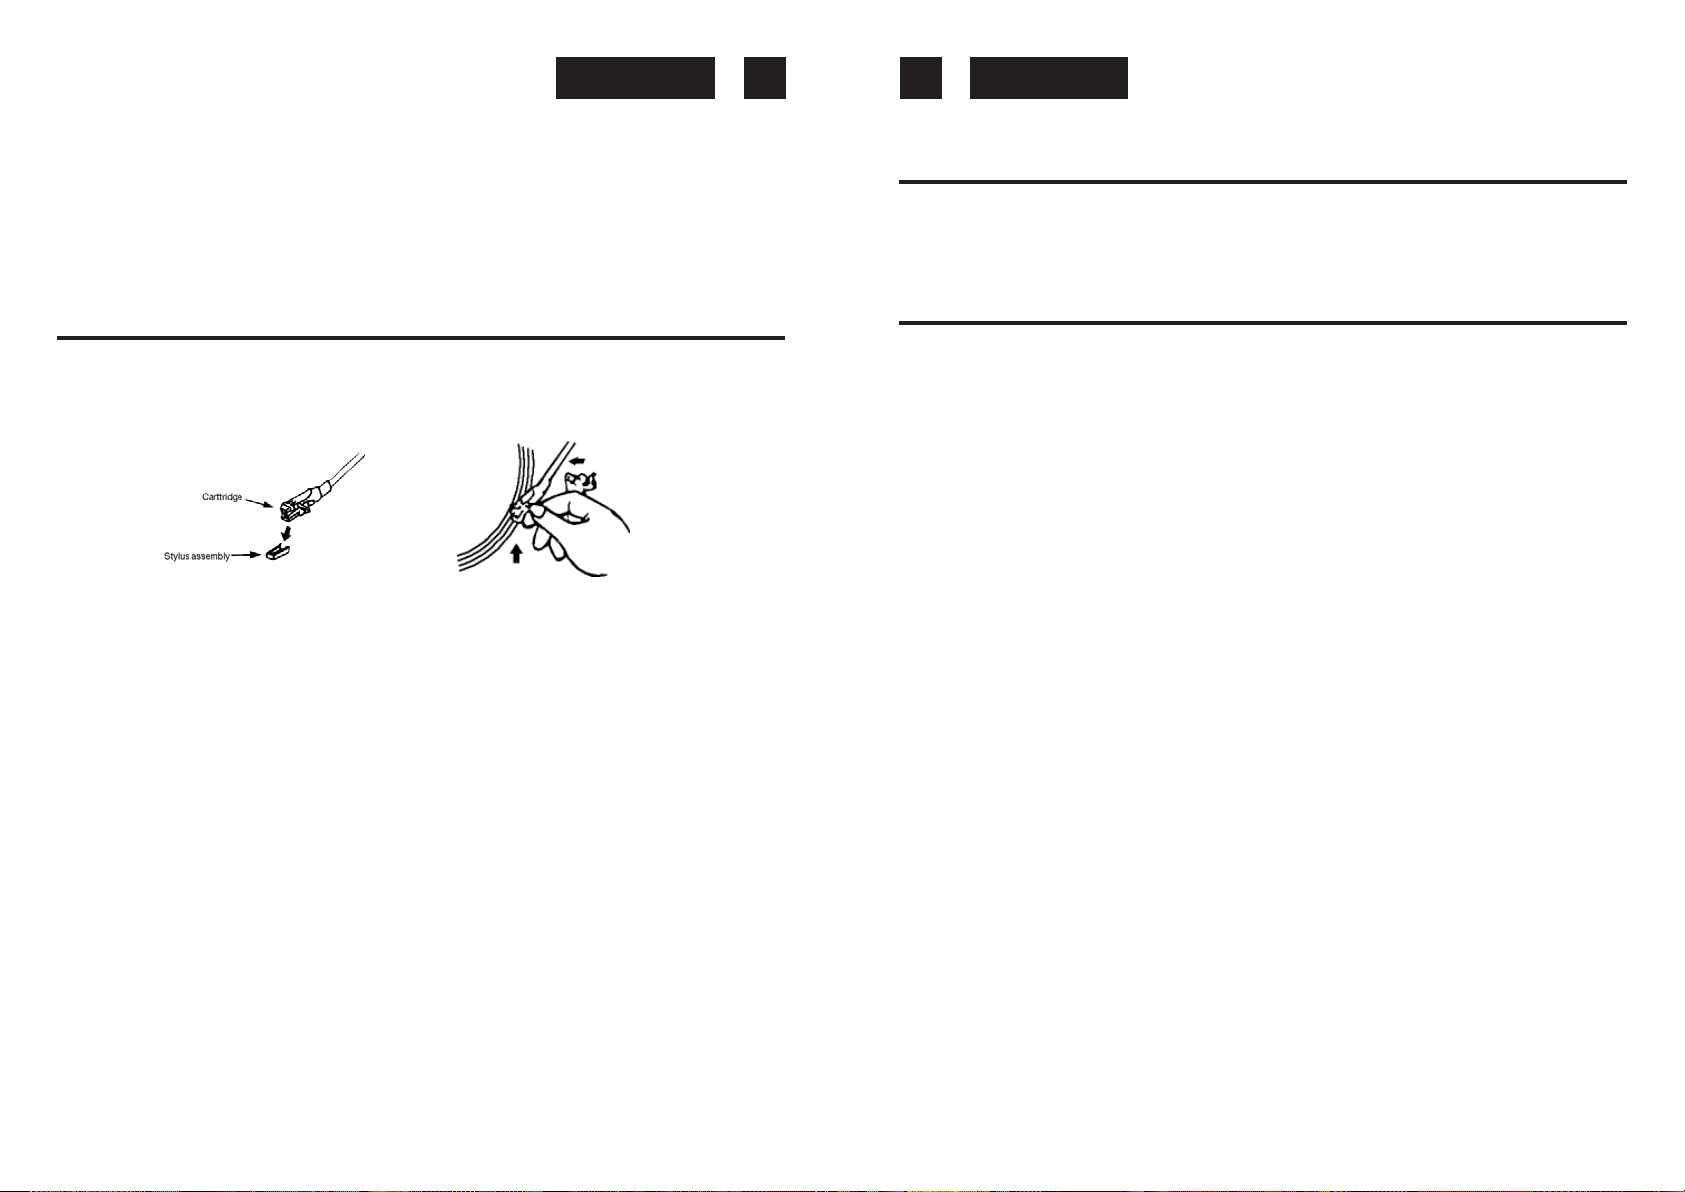
Release the Tonearm Clamp, and remove the stylus protector.
Listening to Records
1. Set the Function Selector (7) to the PHONO position.
2. Place a record on the turntable, over the central spindle. Place the EP adapter over the
central spindle when playing 17cm EP records.
3. Set the Speed Selector (25) to 33 or 45 rpm according to the record.
4. Release the tonearm clamp, and remove the protective cap from the stylus.
5. Lift the Tonearm with the Tonearm Lift Lever.
6. Move the tonearm to the beginning of the record, or to the start of a particular track.
7. Gently lower the tone arm onto the record with the Tonearm Lift lever to start playing.
8. When the record is finished the tonearm will automatically stop. Lift the tonearm from
the record and return it to the rest .
9. To stop manually, lift the tonearm from the record and return it to the rest.
10. To select Auto Stop mode, move the Auto Stop Switch (29) to ON position.
Notes: Do not stop or turn the platter manually.
Moving or jarring the turntable without securing the Tonearm clamp could result in damage
to the Tonearm. Replace the protective cap on the stylus when not in use.
ID3(TRACK/ALBUM TITLE) FUNCTION(BYREMOTEHANDSET)
1. Press the “ INFO “ (2) button during playback of MP3 file, the song title is being
displayed. press the “ INFO “ button again to disable the function.
SONGTITLE/FOLDER NAME SEARCHFUNCTION(BYREMOTEHANDSET)
You can search the track by the name during Stop mode:
1. Press the “ FIND “ (1) button once, then press the “skip up” (or skip down) button (7),
you can search the title of each song one by one under alphabet order on Lcd display,
then press the “ PLAY/PAUSE “ button (6) to start the playback of the selected track.
REMARK:
- In case no name had been assigned for the track, “ none “ or “ unknown “ is being
displayed” on the display.
- The LCD display supports English language only.
MP3/WMATRACK FORMAT REQUIREMENT:
- MP3 bit rate : 128 kbps
- The performance of playing MP3 disc is various from the quality of recording disc and
the method of recording.
7 8
EnglishEnglish
REPEAT/INTRO/RANDOMMODE(BY REMOTECONTROL)
Press the Repeat/Intro/Random button (4) on the remote control before or during playback,
a single track, single folder (MP3 only) or all the tracks can be played in different mode as
follows:
FOR MP3/WMA
(1) REPEAT1 (2) REPEATALL TRACK
(5) OFF MODE (4) RANDOM (3) INTRO PLAY
INDICATOR
PLAYMODE ON LCD DISPLAY
REPEATSINGLETRACK
REPEATALLTRACKS ALL
INTROPLAYMODE INTRO
RANDOMMODE RANDOM
OFFMODE ------------
Repeat play
You can listen the desired tracks or folder repeatedly by this function.
Intro play
You can listen the beginning (10 seconds) of each track in a cd by this function & saving
your time to search the desire song
Random play
You can listen all the tracks or folder in a random order by this function
USB/SDPROGRAMMING(BY REMOTECONTROL)
Up to 10 tracks can be programmed for MP3 file and play in any order. before use, be sure
the system is at stop mode before programming:
1. Set in USB mode with the Source button (10).
2. Press the “PROGRAM” button (5), “ PROG “ will appear on LCD display. Moreover, it
will indicate program no. and digits for track no. to be programmed.
3. Select a desired track by pressing SKIP or buttons (7).
4. Press the “ program “ button to store the trace into memory.
5. Repeat steps 3 and 4 to enter additional tracks into the memory if necessary.
6. When all the desired tracks have been programmed, press “ PLAY/PAUSE “ button
(6) to play the disc in assigned order.
7. To cancel the programmed file, press PROGRAM” button on remote handset
during STOP mode until “PROG“ is disappear on LCD display (2).
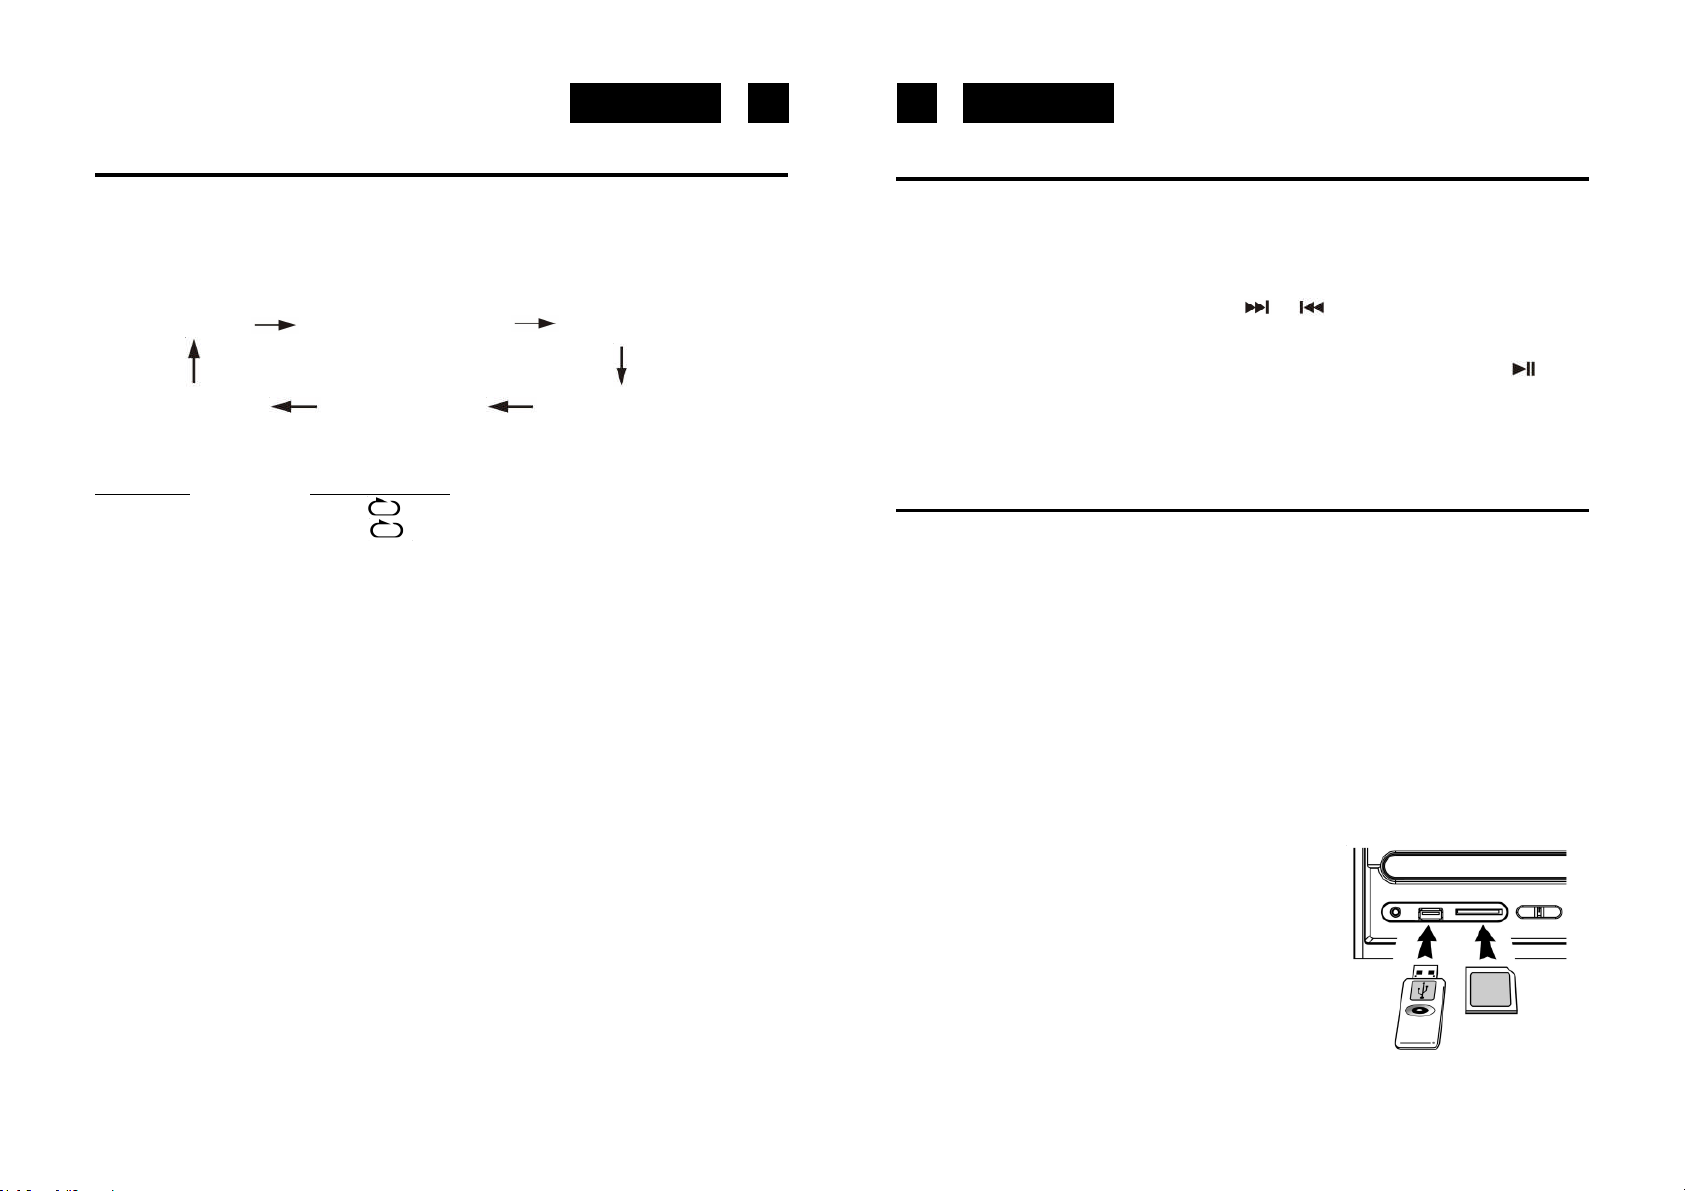
PLAYBACK OF MP3/WMA SONG VIA USB STORAGE MEDIA ORMEMORY
CARD CONNECTING
The system is able to decode and playback all MP3 /WMA file which stored in the memory
media with USB connecting port or SD/MMC memory card.
1. Set Function selector (7) at USB mode and then press SOURCE button (10) to select
“ USB or CARD” mode.
2. Plug-in the USB plug with the face up & make sure it going into completely or insert
the memory card in the direction of the arrow as shown in the label on the underside
of the MEMORY CARD slot cover. Insert straight without bending.
Connecting the USB upside down or backwards could damage the audio system or
the storage media (usb thumb drive / sd/mmc card). Check to be sure the direction is
correct before connection.
3. The system will start reading the storage media automatically after connecting, and
LCD display (2) will show the total number of MP3 files, then will start playback
automatically.
REMARK
- The system can detect and read the file under mp3
and wma format only though the usb port.
- If connect the system to MP3 player via the usb
socket, due to variances in MP3 encoding format,
some mp3 player may not be able to play via the
usb socket. this is not a maul-function of the
system.
9 10
EnglishEnglish
ENCODING OF PHONO INTO MP3FILE
The system is able to ENCODE music from TURNTABLE to MP3 format and recording at
memory media with USB connecting port.
REMARK:
- The recording speed is 1:1 and according to the actual plying time of the track
- The system will creat a “ AUDIO “ folder and then store the encoding track in it.
- The recording format is preset at – MP3 bit rate : 128 kbps, sampling rate : 44.1khz
- No song title will be recorded during encoding mode
- To interrupt the recroding, press the “ RECORD “ button again during record mode.
In both media (USB/SD) inserted to the unit, until will defaulted record to USB media when
encoding from Phono.
Due to this defaulted to USB mode encode, thus, during encoding to SD card, please do
not insert the USB media, it will case the unit had abnormal pthenomenon.
A)PHONO ENCODING
1) Set the Function button to “ PHONO “ mode and then press the “ RECORD “ button (3)
directly.
2) The LCD display with show the word “ USB “ and then flashing, and then display “
“ & “ “ and flashing after few seconds. Now the system is starting the
encoding mode.
3) Start playback at PHONO for the track which you want to record to USB.
4) After finishing of recoding, press and hold the “ RECORD “ button (3) until the LCD
stops flashing and returns to “ PHONO “ mode.
B) TRACK SEPARATION(BY REMOTE HANDSET)
You can divide the recorded music in single tracks during encoding from Phono to USB/SD.
Every time “TS” (Track Separation) button is pressed on the remote control during encoding
from Phono to USB/SD, the system will generate a new track and continue the recording.
“PHONO” will flash on the LCD display once to inform that the unit has successfully
created a new track.
LINEOUTCONNECTION
You can connect the system to your home Hi-fi system by connecting the LINE OUT socket
(27) to the auxiliary input socket with a RCA cable (not included).
SPECIFICATIONS
Power Supply
AC: 230V ~ 50Hz
RCBattery: 2xAAA(UM-4) 1.5V (notincluded)
Radio Frequency Coverage
FM: 87.5- 108MHz
Power output 2 x 2 W RMS (10% THD)
Design and specifications are subject to change without notice.
REMOVING OF USB / MEMORY CARD
To remove the USB / MEMORY CARD, turn off the power or switch the function mode to
either AUX orTUNER first. For USB port – un-plug it by pulling out the USB socket directly,
for memory card – press the memory card inward & then release, now the card being
partially eject and you can remove it by hand.
SICHERHEITSHINWEISE
Das Ausrufezeichen im Dreieck weist den Benutzer auf wichtige
Bedienungs- und Wartungsanweisungen (Service) in diesem
Handbuch hin, die unbedingt zu befolgen sind.
Das Blitzsymbol im Dreieck weist den Benutzer auf “gefährliche
Spannungen” an einigen freiliegenden Bauteilen im Innem des Gerätes
hin.
Um die Gefahr elektrischer Schläge auszuschliessen, Gehäuse auf
CAUTION
RISK OF ELECTRIC
DO NOT OPEN
230v~
keinen Fall abnehmen. Im Innern befinden sich keine vom Benutzer
SHOCK
selbst instandsetzbaren Teile. Reparaturen dürfen nur von einer
autorisierten Fachwerkstatt durchgeführt werden.
Dieses Gerät ist für 230V ~ 50Hz Netzspannung ausgelegt. Bei längerer
Nichtbenutzung des Geräts ziehen Sie den Stecker aus der Steckdose.
Setzen Sie das Gerät weder Feuchtigkeit noch Regen aus.
Schalten Sie das System erst dann ein, wenn Sie alle Verbindungen
genau geprüft haben.
Stellen Sie das Gerät so auf, dass immer eine ungestörte
Frischluftzufuhr sichergestellt ist. Stellen Sie das Gerät keinesfalls auf
Teppiche und in die Nähe von Gardinenund bauen Sie es nicht in
Bücherregale ein.
Setzen Sie das Gerät weder direkter Sonneneinstrahlung noch
Wärmequellen aus.
Korrekte Entsorgung dieses Produkts (Elektromüll)
Die Kennzeichnung auf dem Produkt bzw. auf der dazugehörigen Literatur gibt
an, dass es nach seiner Lebensdauer nicht zusammen mit dem normalen
HaushaltsmüIl entsorgt werden darf. Entsorgen Sie dieses Gerat bitte getrennt
von anderen Abfallen, um der Umwelt bzw. der menschlichen Gesundheit nicht
durch unkontrollierte Müllbeseitigung zu schaden. Recyceln Sie das Gerät, um
die nachhaltige Wiederverwertung von stofflichen Ressourcen zu fördern.
Private Nutzer sollten den Händler, bei dem das Produkt gekauft wurde, oder
die zuständigen Behörden kontaktieren, um in Erfahrung zu bringen, wie sie das
Gerät auf umweltfreundliche Weise recyceln können.
Gewerbliche Nutzer sollten sich an Ihren Lieferanten wenden und die
Bedingungen des Verkaufsvertrags konsultieren. Dieses Produkt darf nicht
zusammen mit anderem Gewerbemüll entsorgt werden.
11 12
T T R- 1923U CE N
MP3 PLA YER MIT PLAT TENSP IELER UND UKW STEREO RA DIO.
US B/S D-E IN GÄN GE , EN COD IER UN G FUNK TIO N UND FER NBE DI ENU NG.
BEDIENUNGSANLEITUNG
Bitte lesen Sie aufmerksam diese Bedienungsanleitung, um sich mit Ihrem neuen RadioPlattenspieler vertraut zu machen, bevor Sie ihn zum ersten Mal in Betrieb nehmen. Bitte
bewahren Sie diese Anleitung auf, um später jederzeit nachschlagen zu können.
LAGE DER BEDIENUNGSELEMENTE
1) SC HUTZDECKEL
2) LCD-DISPLAY
3) EINZEICHENTASTE (RECORD)
4) TASTE QUELLE (SOURCE)
5) POWER -LED-ANZEIGE
6) LIN KER LAU TSPRECHE R
7) POWER OFF/ON-FUNKTIONSWAHLSCHALTER
8) 3,5-MM-KOPFHÖR ERBUCHSE
9) USB-PORT
10) FM FM STEREO WAHLSCHALTER
11) SD/MMC- K ARTENST ECKPLATZ
12) TASTE MP3 +10
13) SPRUNG AB TASTE
14) TASTE CD PLA Y/PAUSE/STOP
15) X-BASS EIN/ AUS T AST E
16) FERNBEDI E NUNG SSENSOR
17 ) R ECHTERL AUTSPRECHER
18) LAUTSTÄRKETASTEN + / -
19) T UNING-REGL ER
20) LED-ANZEIGE FÜR FM-STEREO
21) SPRUNG AUFTASTE
22) LED-SK ALENZEIGER
23) SINGLE-ADAPTER
24) TONARM-HEBEL
25) GESCHWINDIGKEITSWAHLSCHALTER 33/45
U/MIN26) TONARM ABL AGE
27 ) L I N
28) FM-ANTENNE
29) AUTO-STOP-SCHALTER
30) WECHSELSTROMKABEL
DeutschDeutsch
E-OUT-BUCHSE
13 14
DeutschDeutsch
FERNBEDIENUNG
BATTERIE
Die Infrarot-Fernbedienung erfordert zum Betrieb zwei Batterien vom T yp AAA (nicht mitgeliefert).
BESCHREIBUNG DER BEDIENT ASTEN
1) FIND Im MP3/WMA-Modus zur Suche nach Datei- oder Albumnamen.
2) INFO I m U SB-m odus Drücken zurück zum Aktivierung die ID3 funktion
3) REC Im Phono-Modus zur Aktivierung der Aufzeichnungsfunktion.
4) REP/INTRO/RAN Im USB-Modus zum Aufrufen der Funktionen Wiederholung (1/Alle),
Intro und Zufallswiedergabe.
5) PROGRAM Im USB-Modus zum Aufrufen der Programmierfunktion.
6) PLAY/PAUSE Im USB-Modus zum Starten der Wiedergabe einmal drücken; bei
erneuter Betätigung schaltet das Gerät in den Pausenmodus.
7) SKIP/SEARCH vorwärts
Vorwärtssuchlauf bei dauerhafter Betätigung.
SKIP/SEARCH rückwärts
Rückwärtssuchlauf bei dauerhafter Betätigung.
8) STOP
Im U S B - M od u s zum Stoppen der Wiedergabe bzw.
Bei einmaligem Drücken weiter zum nächsten Lied;
Bei einmaligem Drücken zurück zum vorangehenden Lied;
Zu Ihrer eigenen Sicherheit lesen Sie sorgfältig die folgende Bedienungsanleitung, bevor
Sie das Gerät ans Netz anschließen.
NETZBETRIEB (AC)
Dieses Gerät funktioniert nur mit einer Spannung von AC 230V 50Hz. Wird das Gerät an
andere Stromquellen angeschlossen, könnte es Schaden nehmen.
Vorsicht
Um elektrischen Schlägen vorzubeugen, trennen Sie das Gerät vom Netz ab, bevor Sie den
Deckel entfernen. Verwenden sie keine nutzbaren inneren Teile. Für die Wartung wenden
Sie sich an qualifiziertes Kundendienstpersonal.
Sicherheitsmaßnahmen
Setzen Sie das Gerät weder Regen noch Feuchtigkeit aus.
Stromversorgung: AC 230Volt / 50Hz - nur Wechselstrom (AC)
Dieses Zeichen bedeutet, daß dieses Gerät doppelt isoliert ist. Eine Erdung ist nicht
notwendig.
VORBEREITUNG FÜR INBETRIEBNAHME
• Nehmen Sie das Gerät vorsichtig aus der Verpackung.
Bewahren Sie diese für einen eventuellen späteren Gebrauch auf (Service).
• Bitte lesen Sie diese Bedienungsanleitung sorgfältig, bevor Sie das Gerät in
Betrieb nehmen.
Netzbetrieb (AC)
• Schließen Sie das AC-Netzkabel an Ihr AC-Haushaltstromnetz an.
9) +10/-10
oder rückwärts.
10) SOURCE Im USB-Modus zur Auswahl der USB/Card-Funktion.
11) TRACK SEPARATION um die eingezeichnete Stücke in einzelne Stücke (Pisten) zu
Im MP3-Mo dus Drücken zurück zum zu überspringen +10 verfolgen vorwärts
unterteilen, während der Kodierung vom Plattenspieler.
NETZANSCHLUSS
Bevor Sie das Gerät einschalten, vergewissern Sie sich, daß Ihre örtliche Netzspannung
mit der auf dem Typenschild angegebenen Spannung übereinstimmt.
RUNDFUNKEMPFANG
1. Stellen Sie den Funktionswahlschalter (7) auf Radio.
Die EIN-Anzeige erleuchtert (5).
2. Wählen Sie das gewünschte FM oder FM STEREO mit dem schalter (10).
3. Stimmen Sie die gewünschte Radiostation mit dem Abstimmregler (19) ab.
Antenne
Für den UKW-Empfang befindet sich auf der Rückseite des Gerätes ein eingebauter
UKW- Antennend ra ht (2 8) . B ew eg en Si e d en D r ah t hi n u nd he r, bis de r b es te Em pfang err ei ch t
wird.
15 16
DeutschDeutsch
UKW-Stereo- und Mono-Empfang
Wenn ein UKW-Signal eingestellt wird und Sie den UKW-Modus-Wahlschalter auf FM ST
(UKW-Stereo) stellen, können Sie die Sendung in Stereo empfangen. Die UKW-StereoAnzeige (20) leuchtet auf. Wenn die Stereosignale schwach sind und der Empfang
geräuschvoll ist, ist es oft vorzuziehen, die Sendung in Mono zu empfangen. S tellen Sie den
UKW-Modus-Wahlschalter auf FM (Mono). Der Empfang ist dann weniger geräuschvoll.
PLATTENSPIELERBETRIEB
Vorbereitung
Öffnen Sie die Abdeckung. Entfernen Sie die Tonarmklemme und nehmen Sie die
Schutzkappe der Wiedergabenadel weg.
Plattenspielerbetrieb
1. Stellen Sie den Funktionswahlschalter (7) auf PHONO.
2. Legen Sie eine Schallplatte auf die mittlere Spindel des Plattentellers. Legen Sie den
EP- Adapter auf die mittlere Spindel, wenn Sie 17 cm-EP-Platten abspielen.
3. Stellen Sie die Drehzahl-Wahlschalter (25) auf 33 oder 45 U./Min., entsprechend der
Schallplatte.
4. Entriegeln Sie die Tonarm-Klemme und entfernen Sie die Schutzklappe von der
Wiedergabenadel.
5. Heben Sie den Tonarm mit dem Tonarm-Hebel an.
6. Bewegen Sie den Tonam an den Anfang der Plane oder eines bestimmten Titels.
7. Senken Sie den Tonarm vorsichtig mit dem Tonarm-Hebel auf die Platte, um die
Wiedergabe zu starten.
8. Am Ende der Platte, heben Sie den Tonarm und bringen Sie es zum Rest.
9. Wenn Sie die Platte während der Wiedergabe stoppen wollen, den Tonarm von der
Platte heben und zur Ruhe zurückbringen.
10. Auto Stop schalter auf OFF (29), für die Platte automaisch stoppen.
ID3-FUNKTION ZUR ANZEIGE VON TRACK-/ALBUMTITELN
(MITTELS FERNBEDIENUNG)
1. Drücken Sie zur Anzeige des Tracktitels während der Wiedergabe einer MP3/WMADisc auf die Taste „INFO”. Betätigen Sie die Taste „INFO” erneut, um die Funktion
wieder zu deaktivieren.
SUCHE NACH TRACKTITELN/ORDNERNAMEN (MITTELS FERNBEDIENUNG)
Sie können einen gewünschten Track über seinen Titel oder den Namen des
entsprechenden Albums auf der Disc im Stoppmodus suchen:
1. Drücken Sie einmal auf die Taste „FIND” und anschließend auf die Taste „SKIP UP/
DOWN” (3), um die Tracktitel in alphabetischer Reihenfolge auf dem LCD-Display zu
durchsuchen. Nach Auswahl eines Tracks drücken Sie auf die T aste „CD PLA Y/P AUSE”
(6), um die Wiedergabe dieses Tracks zu starten.
Hinweise: Drehen oder stoppen Sie den Plattenteller nicht manuell. Wenn Sie den
Plattenteller bewegen oder anstossen, ohne den Tonarm mit der Klemme gesichert zu
haben, konnte der Tonarm beschadigt werden
Stecken Sie die Schutzkappe auf die Wiedergabenadel, wenn das Gerät nicht benutzt wird.
ANMERKUNG:
- Wenn einem Track kein Name zugewiesen ist, wird „None” (Keiner) oder „Unknown”
(Unbekannt) auf dem Display angezeigt.
- Das LCD-Display unterstützt nur die englische Sprache.
AN FO RD E RU NG EN
- Die Qualität bei der Wiedergabe einer MP3-Disc hängt von der Aufnahmequalität
und dem Auf nahmeverfa hren a b. Auße rdem d auert auch der S uch- u nd
Einles evorgang bei ei ner MP 3-Di sc a ufgr und de s unt ersc hied lich en
Forma ts l änge r al s be i einer her kömm lichen CD.
AN DA S
M P3 - TR AC KF OR M AT:- MP 3 - B i t ra t e : 128 kbps.
 Loading...