

Page 1

TRA-1957N
User manual
Bedienungsanleitung
Manuel d’instructions
Manuale d’istruzioni
Manual de instrucciones
Manual de instruções
Gebruiksaanwijzing
Návod k použití
Návod na použitie
Instrukcja obsługi
www.roadstar.com
Page 2

INDEX
English Page 1
Deutsch Seite 3
Français Page 5
Italiano Pagina 7
Español Página 9
Português Página 11
Nederlands Pagina 13
Čeština Strana 15
Slovenský Strana 17
Polski Strona 19
Your new unit was manufactured and assem-
bled under strict ROADSTAR quality control.
Thank-you for purchasing our product for your
music enjoyment. Before operating the unit,
please read this instruction manual carefully.
Keep it also handy for further future references.
Votre nouvel appareil a été fabriqué et monté
en étant soumis aux nombreaux tests ROADSTAR. Nous espérons que cet appareil vous
donnera entière satisfaction. Avant de vous
adonner à ces activités, veuillez lire attentivement ce manuel d’instructions. Conservez-le à
portée de main à fin de référence ultérieure.
Vuestro nuevo sistema ha sido construido se-
gún las normas estrictas de control de calidad
ROADSTAR. Le felicitamos y le damos las
gracias por su elección de este aparado. Por
favor leer el manual antes de poner en funcionamiento el equipo y guardar esta documen-
tación en case de que se necesite nuevamen-
te.
Ihr neues Gerät wurde unter Beachtung der
strengen ROADSTAR Qualitätsvorschriften gefertigt. Wir danken Ihnen für den Kauf unseres
Produktes und wünschen Ihnen optimalen Hör-
genuss. Bitte lesen Sie diese Bedienungsanleitung durch, und heben Sie sie auf, um jederzeit
darin nachschlagen zu können.
Il vostro nuovo apparecchio é stato prodotto ed
assemblato sotto lo stretto controllo di qualità
ROADSTAR. Vi ringraziamo di aver acquistato
un nostro prodotto per il vostro piacere d’ascolto.
Prima di procedere all'utilizzo dell'apparecchio,
leggete attentamente il manuale d’istruzioni e
tenetelo sempre a portata di mano per futuri riferimenti.
Seu novo aparelho foi construido e montado sob
o estrito controle de qualidade da ROADSTAR.
Agradecemos por ter comprado nosso produto
para a sua diversão. Antes de usar esta unidade
é necessário ler com atençâo este manual de
instruções pare que possa ser usada apropriada-
mente; mantenha o manual ao seu alcance para
outras informações.
Page 3
TRA-1957N
Page 4

1 English
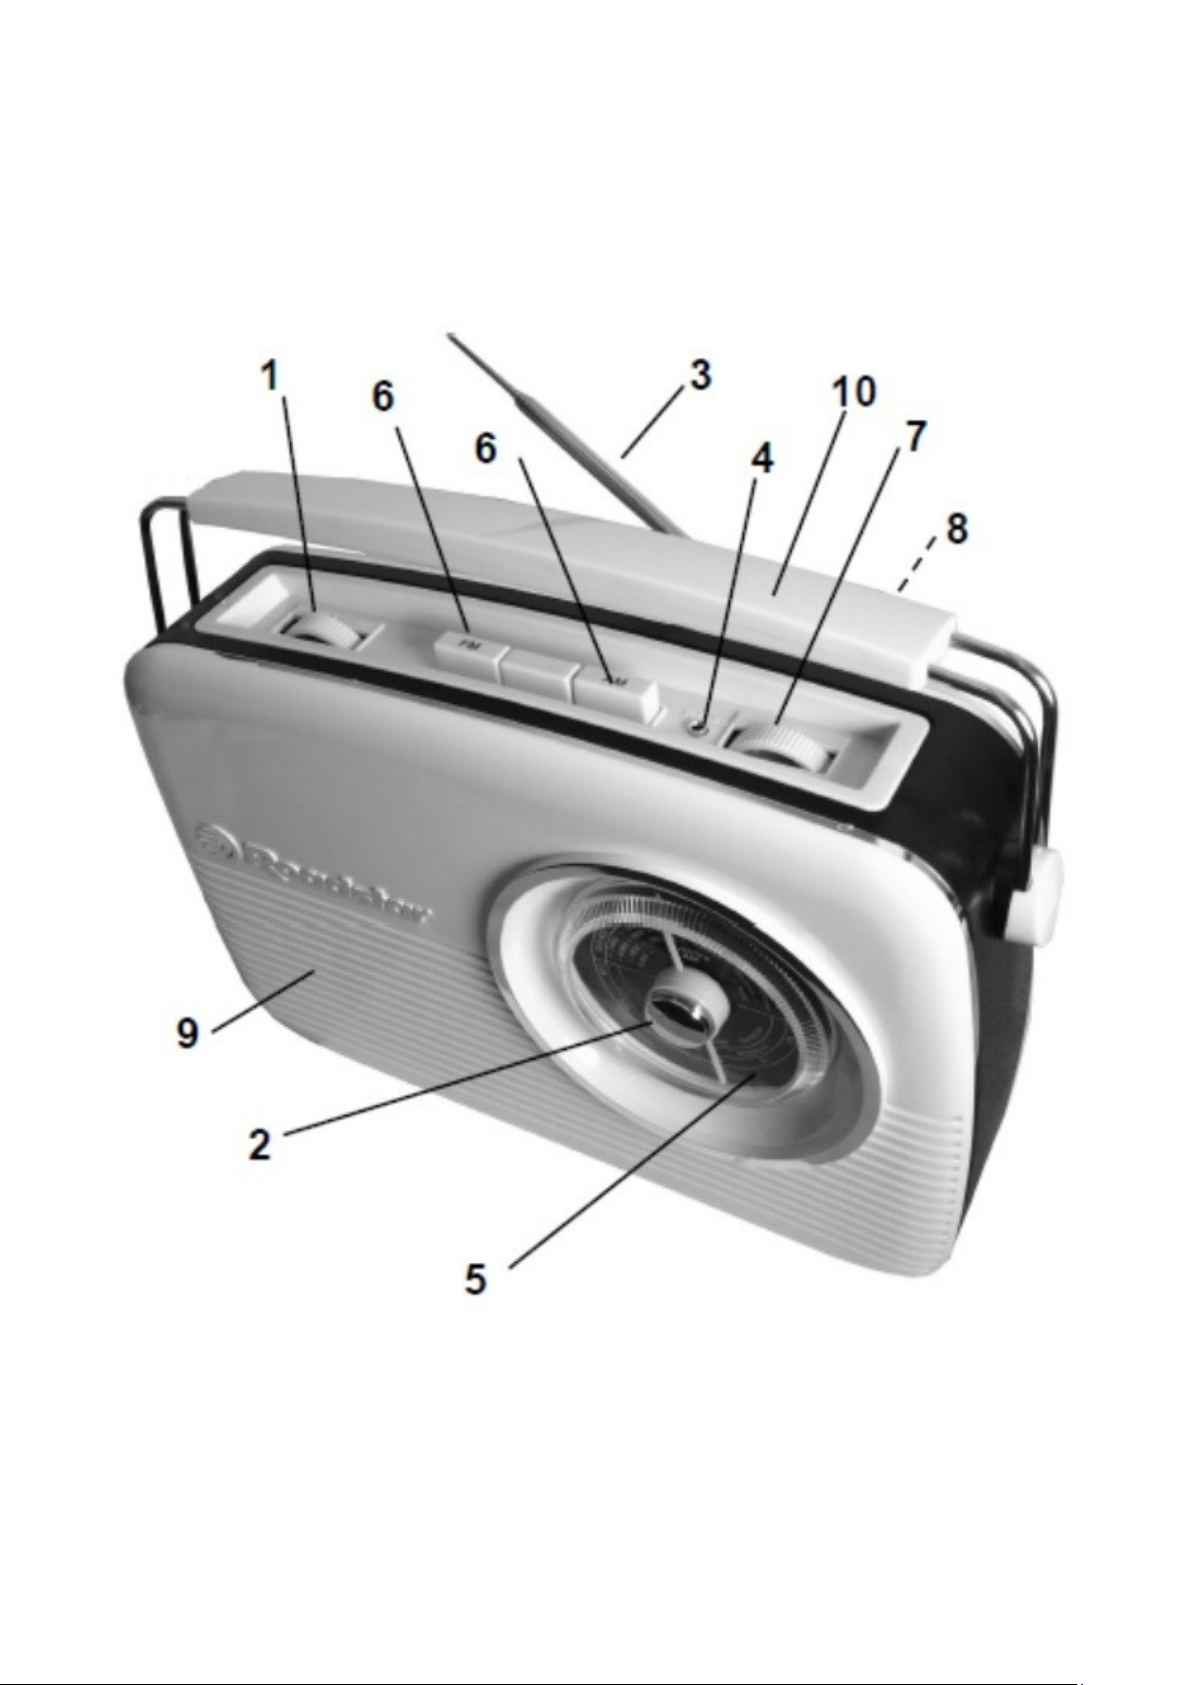
LOCATION OF CONTROLS
1. ON/OFF/VOLUME CONTROL
2. TUNING CONTROL
3. FM ANTENNA
4. HEADPHONE JACK
5. RADIO DIAL SCALE
6. BAND SELECTORS (MW/FM)
7. TONE CONTROL (HIGH/LOW)
8. BATTERY COMPARTMENT
9. SPEAKER
10. HANDLE
POWER SUPPLY
Battery Operation
Open the Battery Compartment (8) at the back of the unit.
Insert first 6 x UM-2 batteries following the polarity diagram shown inside
the battery compartment.
Batteries should be removed from the compartment if the unit is not to
be used for some time.
Flat batteries should be removed from the unit to avoid leakage.
AC Power Operation
Connect the AC Power Cord to your AC household mains outlet and
switch on the mains supply. Make sure the voltage is compatible.
Before switching on make sure that the voltage of your electricity supply
is the same as that indicated on the rating plate.
For your own safety read the following instructions carefully before at-
tempting to connect this unit to the mains.
RADIO OPERATION
1. Turn the VOLUME/OFF knob (1) until you hear a click.
2. Adjust the volume by turning the VOLUME control.
3. Turn the Tone Control (Hight/Low) for adjust the Tone (7).
4. Extend the telescopic antenna for FM Band. To optimize MW reception
turn horizontally the radio until reaching the best reception position.
5. Select the desired radio Band (FM/MW) with the Band selector (6).
6. Tune to the desired station with the Tuning knob (2).
7. To switch off the radio turn the volume knob counterclock-wise until a
Page 5

click is heard.
HEADPHONES
Headphones should have a 3.5 mm diameter stereo plug and an impedance of 8-32 ohms, and should be connected to the HEADPHONES Socket
(4). When headphones are connected, the speaker iss automatically disconnected.
SPECIFICATIONS
AC: 230V ~ 50Hz
Batteries: 6 x UM-2
FM: 87.5 - 108 MHz
MW: 530 - 1600 kHz
2 English
Note: Specifications and the design are subject to possible modifications
without notice due to improvement.
WARNINGS
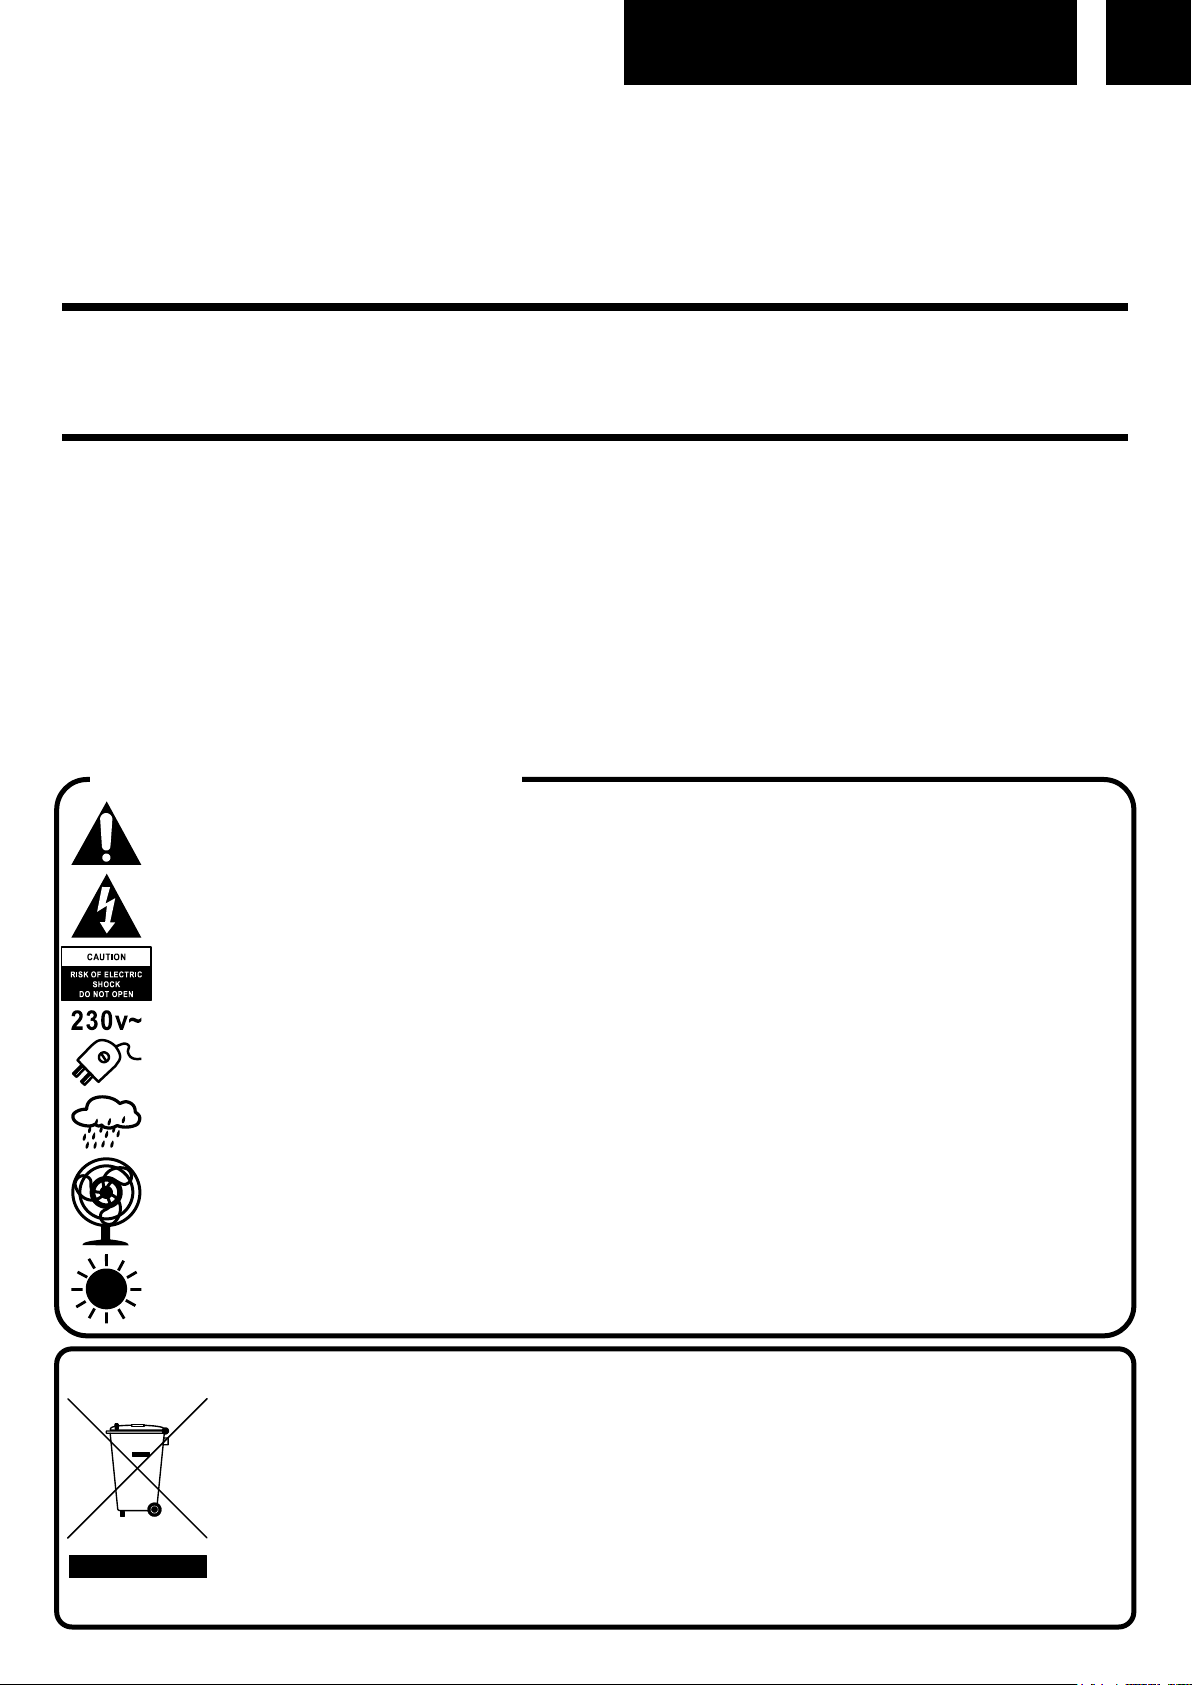
The exclamation point within the triangle is a warning sign alerting the user of important instructions accompanying the product.
The lightening flash with arrowhead symbol within the triangle is a warning sign alerting the user
of “dangerous voltage” inside the unit.
To reduce the risk of electric shock, do not remove the cover. No user serviceable parts inside
the unit. Refer all servicing to qualified personnel.
This unit operates on 230V ~ 50Hz. If the unit is not used for a long period of time, remove the
plug from the AC mains.
Ensure all connections are properly made before operating the unit.
This unit must not be exposed to moisture or rain.
This unit should be positioned so that it is properly ventilated. Avoid placing it, for example, close
to curtains, on the carpet or in a built-in installation such as a bookcase.
Do not expose this unit to direct sunlight or heat radiating sources.
CORRECT DISPOSAL OF THIS PRODUCT
(Waste Electrical & Electronic Equipment)
This marking shown on the product or its literature, indicates that it should not be disposed with
other household wastes at the end of its working life. To prevent possible harm to the environment
or human health from uncontrolled waste disposal, please separate this from other types of wastes and recycle it responsibly to promote the sustainable reuse of material resources. Household
users should contact the retailer where they purchased this product, or their local government
office, for details of where and how they can take this item for environmentally safe recycling. Business users should contact their supplier and check the terms and conditions of the purchase
contract. This product should not be mixed with other commercial wastes for disposal.
Page 6

3 Deutsch
BEDIENUNGSELEMENTE
1. EIN-/AUS-/LAUTSTÄRKE-REGLER
2. ABSTIMM-REGLER
3. TELESKOP-ANTENNE
4. KOPFHÖRER-BUCHSE
5. FREQUENZ-SKALA
6. BAND-WAHLSCHALTER (MW/UKW)
7. TONALITÄT-REGLER
8. BATTERIEFACH
9. LAUTSPRECHER
10. GRIFF
STROMVERSORGUNG
BATTERIEBETRIEB
Öffnen Sie das BATTERIE-Fach (8) des Radios und setzen Sie 6 UM-2-
Batterien (CZellen oder gleichwertige) ein. Befolgen Sie dabei die richtige Polarität, wie sie im Innern des Batteriefachs angezeigt wird.
Wenn Sie das Gerät einige Zeit lang nicht verwenden, sollten Sie die
Batterien aus dem Fach des Gerätes entfernen.
Entladene Batterien sollten aus dem Gerät entfernt werden, um das Au-
slaufen von Säure zu vermeiden.
WS-NETZBETRIEB
Schließen Sie das AC-Netzkabel an Ihre AC-Netzsteckdose an, und
schalten Sie das Gerät ein. Vergewissern Sie sich, daß die Spannungen
übereinstimmen.
Ziehen Sie das Netzkabel aus der Steckdose, wenn Sie das Gerät nicht
verwenden.
RUNDFUNKEMPFANG
1. Schalten Sie das Radio mit dem Ein-/Aus-/Lautstärke-Kontrolle (1) ein.
2. Stellen Sie die gewünschte Lautstärke mit dem Lautstärke-Regler (1)
ein.
3. Stellen Sie die gevünschene Tone mit dem Tonalität-Regler (7) ein.
4. Ziehen Sie die Teleskop-Antenne für UKW aus. Um die optimale MWEmpfangsqualität zu erreichen, drehen Sie das Radio horizontal.
5. Wählen Sie das gewünschte Band (UKW, MW) mit dem Band-Schalter
(6).
Page 7
6. Stimmen Sie die gewünschte Station mit der Abstimm-Kontrolle (2) ab.
7. Um das Radio auszuschalten, drehen Sie die Ein-/Aus-/LautstärkeKontrolle in Gegenuhrzeigersinn bis Sie einen "Klick" hören.
KOPFHORER
Dieses Gerät ist mit einer 3.5 mm Kopfhörer-Buchse (4) ausgestattet.
TECHNISCHEDATEN
AC: 230V ~ 50 Hz
Batterien: 6 x UM-2-Zellen
UKW: 87.5 - 108 MHz
MW: 530 - 1600 kHz
ALLGEMEINES: Das Typenschild befindet sich an der Gehäuseunterseite
4 Deutsch
des Gerätes.
SICHERHEITSHINWEISE
Das Ausrufszeichen im Dreieck weist den Benutzer auf wichtige Bedienungs- und Wartungsanweisungen (Service) in diesem Handbuch hin, die unbedingt zu befolgen sind.
Um die Gefahr elektrischer Schläge auszuschliessen, Gehäuse auf keinen Fall abnehmen.
Im Innem befinden sich keine vom Benutzer selbst instandsetz-baren Teile. Reparaturen dürfen
nur von einer autorisierten Fachwerkstatt durchgeführt werden.
Dieses Gerät ist für 230V ~ 50Hz Netzspannung ausgelegt. Bei längerer Nichtbenutzung des Geräts ziehen Sie den Stecker aus der Steckdose.
Setzen Sie das Gerät weder Feuchtigkeit noch Regen aus.
Schalten Sie das System erst dann ein, wenn Sie alle Verbindungen genau geprüft haben.
Stellen Sie das Gerät so auf, dass immer eine ungestörte Frischluftzufuhr sichergestellt ist. Es ist
zum beispiel keinesfalls auf Teppiche und in der Nähe von Gardinen zu stellen oder in Bücherre-
gale einzubauen.
Setzen Sie das Gerät weder direkter Sonneneinstrahlung noch Wärmequellen aus.
KORREKTE ENTSORGUNG DIESES PRODUKTS
(Elektromüll)
Die Kennzeichnung auf dem Produkt bzw. auf der dazugehörigen Literatur gibt an, dass es nach seiner Lebensdauer nicht zusammen mit dem normalen HaushaltsmüIl entsorgt werden darf. Entsorgen Sie dieses Gerat
bitte getrennt von anderen Abfallen, um der Umwelt bzw. der menschl i chen Gesundhei t ni cht durch unkontrol
l i erte Mül l besei ti gung zu schaden. Recycel n Si e das Gerät, um di e nachhaltige Wiederverwertung von
stofflichen Ressourcen zu fördern. Private Nutzer sollten den Händler, bei dem das Produkt gekauft wurde, oder
die zuständigen Behörden kontaktieren, um in Erfahrung zu bringen, wie sie das Gerät auf umweltfreundliche
Weise recyceln können. Gewerbliche Nutzer sollten sich an Ihren Lieferanten wenden und die Bedingungen des
Verkaufsvertrags konsultieren. Dieses Produkt darf nicht zusammen mit anderem Gewerbemüll entsorgt wer-
den.
Page 8

5 Français
FONCTIONS ET COMMANDES
1. CONTRÔLE M/A//VOLUME
2. CÔNTROLE DE SYNTONISATION
3. ANTENNE TELESCOPIQUE
4. PRISE DE CASQUE
5. ECHELLE DE FRÉQUENCE
6. SÉLECTEUR BANDE (MW/FM)
7. CONTRÔLE DE LA TONALITÉ
8. COMPARTIMENT BATTERIES
9. HAUT-PARLEUR
10. POIGNÉE
SOURCES D’ALIMENTATION
UTILISATION SUR PILES
Insérer 6 piles UM-2 (du type C ou des piles équivalentes) selon le sché-
ma des polarités indiqué dans le compartiment des piles de l’appareil.
En cas d’inutilisation prolongée de l’appareil, retirer les piles du compar-
timent.
Retirer les piles usagées pour éviter qu’elles coulent.
UTILISATION SOURCE D’ALIMENTATION CA
Brancher le cordon d’alimentation à la prise de courant. S’assurer que la
tension soit compatible.
Débrancher le cordon d’alimentation du réseau quand l’appareil n’est
pas utilisé.
ECOUTE DE LA RADIO
1. Allumer l’appareil avec le controle M/A/VOLUME (1) jusqu’à entendre
un click.
2. Régler le volume pour obtenir le niveau de son souhaité.
3. Régler la tonalité avec le contrôle de la tonalité (7).
4. Extraire l’antenne telescopique pour les FM et l’orienter de manière à
ce que la qualité de la réception soit la meilleure possible. Pour la réception en MW les signaux sont interceptés par une antenne en ferrite
incorporée. Pour que la réception soit la meilleure possible, il faut orienter l’appareil.
5. Sélectionner la bande désirée à l’aide du sélecteur Band (FM/MW) (6).
6. A l’aide du contrôle de SYNTONISATION (2), intercepter la station é-
Page 9

mettrice souhaitée.
7. Pour éteindre la radio, tourner le contrôle VOLUME en sens antihoraire.
CASQUES
Pour les casques il faut une fiche stéréo de 3.5 mm. de diamètre et une impédance de 8-32 ohm. Ils devraient être branchés à la prise de CASQUE
(4). Quand les casques sont branchés, le haut-parleur est automatiquement déconnecté.
CARACTERISTIQUESTECHNIQUES
CA: 230 V - 50 Hz
Piles: 6 piles du type UM-2
6 Français
FM: 87.5 - 108 MHz
MW: 530 - 1600 kHz
Les spécifications peuvent êtres modifiées sans avis préalable.
ATTENTION
Le symbole “point d’exclamation” à l’intérieur d’un triangle avertit l’utilisateur que d’importantes instructions d’utilisation et de maintenance sont contenues dans le mode d’emploi.
Le symbole “éclair” à l’intérieur d’un triangle sert à avertir l’utilisateur de la présence du courant à
l’intérieur du l’appareil qui pourrait constituer un risque.
Afin de minimiser les risques, ne pas ouvrir le boîtier ni ôter le dos de l’appareil. En case de panne, faites
appel aux techniciens qualifiés pour les réparations. L’appareil ne renferme aucune pièce reparable par
l’utilisateur.
Cet appareil a été conçu pour une tension d’alimentation de 230V ~ 50Hz. Débranchez la prise de courant quand on prévoit de ne pas utiliser l’appareil pendant un certain temps.
Mettez l’appareil sous tension seulement après avoir vérifié que tous les raccordements soient corrects.
L’unité ne doit pas être exposée à l’humidité ou à la pluie.
L’appareil doit être gardé dans un endroit suffisamment ventilé. Ne le gardez jamais par exemple près
des rideaux, sur un tapis ou dans des meubles, tels qu’une bibliothèque.
L’unité ne doit pas être exposée à la lumière directe du soleil ou à des sources de chaleur.
COMMENT ÉLIMINER CE PRODUIT
(déchets d'équipements électriques et électroniques)
Ce symbole sur le produit ou sa documentation indique qu'il ne doit pas être éliminé en fin de vie avec
les autres déchets ménagers. L' élimination incontrôlée des déchetspouvant porter préjudice a l'environnement ou a la santé humaine, veuillez le séparer des autres types de déchets et le recycler defaçon
responsable. Vous favoriserez ainsi la réutilisation durable desressources matérielles. Les particuliers
sont invites a contacter le distributeur leur ayant vendu le produit ou a se renseigner auprès de leur mairie pour savoir ou et comment ils peuvent se débarrasser de ce produit afin qu'il soit recycle en respectant l'environnement. Les entreprises sont invitées a contacter leurs fournisseurs et aconsulter les conditions de leur contrat de vente. Ce produit ne doit pas être éliminé avec les autres déchets commerciaux.
Page 10

7 Italiano
FUNZIONI E CONTROLLI
1. CONTROLLO ACCESO/SPENTO/VOLUME
2. CONTROLLO SINTONIA
3. ANTENNA FM
4. PRESA CUFFIE
5. SCALA FREQUENZA
6. SELETTORE BANDA (MW/FM)
7. CONTROLLO DEL TONO (HIGH/LOW)
8. COMPARTIMENTO BATTERIE
9. ALTOPARLANTE
10. MANIGLIA
FONTI ALIMENTAZIONE
ALIMENTAZIONE A BATTERIE
Aprire il Compartimento BATTERIA (8) dell’apparecchio ed inserire 6
batterie del tipo UM-2 seguendo la polarità del diagramma mostrato nel
compartimento batteria di questo apparecchio.
Le batteria dovranno essere rimosse dal compartimento se l’apparecchio
non verrà utilizzato per un lungo periodo di tempo.
Le batterie scariche dovranno essere rimosse per poter evitare la fuoriu-
scita d’acido.
ALIMENTAZIONE AC
Collegare il cavo di Alimentazione AC alla vostra presa di corrente AC
domestica e accendere l’apparecchio. Assicurarsi che il voltaggio sia
compatibile.
Scollegare il cavo di alimentazione dalla presa di corrente quando
l’apparecchio non verrà utilizzato.
UTILIZZO DELLA RADIO
1. Per accendere l’apparecchio girare la manopola del VOLUME (1) fino
a sentire un click.
2. Regolare il volume con il controllo VOLUME.
3. Regolare il Tono tramite il controllo del tono (7).
4. Estendere l’antenna e ruotarla fino ad ottenere la migliore ricezione
FM . Per la ricezione in MW il segnale verrà raccolto da un’antenna in
ferrite incorporata. Dovrà orientare l’apparecchio per ottenere la miglio-
re ricezione.
Page 11

5. Selezionare la banda desiderata (FM/MW) con il selettore Band (6).
6. Sintonizzare la stazione desiderata con la manopola di SINTONIA (2).
7. Per spegnere la radio girare la manopola del volume in senso anti orario fino a sentire un click.
CUFFIE
Le cuffie devono avere una spina stereo di 3.5 mm di diametro e una impedanza di 8-32 Ohm. Quando le cuffie saranno collegate (4), l’altoparlante
verrà escluso automaticamente.
SPECIFICHE TECNICHE
AC: 230V ~ 50 Hz
Batterie: 6 x UM-2
8 Italiano
FM: 87.5 - 108 MHz
MW: 530 - 1600 kHz
Caratteristiche soggette a variazioni senza preavviso.
ATTENZIONE
Il punto esclamativo all’interno di un triangolo avverte l’utente che il libretto d’istruzioni contiene delle
importanti istruzioni per l’uso e la manutenzione.
Il simbolo del fulmine all’interno di un triangolo avverte l’utente della presenza di una pericolosa tensione all’interno dell’apparecchio.
Per ridurre i rischi di scosse elettriche, non aprire l’apparecchio. L’apparecchio non contiene parti riparabili dall’utente. In caso di guasto fare appello a tecnici qualificati per le riparazioni.
Questo apparecchio è stato progettato per funzionare a 230V ~ 50Hz. Se non si intende utilizzare
l’apparecchio per un lungo periodo di tempo, rimuovere la spina dalla presa di corrente.
Utilizzare l’apparecchio solo dopo aver verificato che tutte le connessioni siano state eseguite corretta-
mente.
Non esporre l’apparecchio alla pioggia o all’umidità.
Posizionare l’apparecchio in un luogo sufficientemente ventilato. Evitare di sistemarlo vicino a tende,
sul tappeto o all’interno di un mobile quale, ad esempio, una libreria.
Non esporre l’apparecchio alla luce diretta del sole o a fonti di calore.
CORRETTO SMALTIMENTO DEL PRODOTTO
(rifiuti elettrici ed elettronici)
II marchio riportato sul prodotto e sulla sua documentazione indica che il prodotto non deve essere smaltito
can altri rifiuti domestici al termine del ciclo di vita. Per evitare eventuali danni all'ambiente o alla salute
causati dall'inopportuno smaltimento dei rifiuti, si invita l'utente a separare questo prodotto da altri tipi di
rifiuti e di riciclarlo in maniera responsabile per favorire il riutilizzo sostenibile delle risorse materiali. Gli utenti domestici sono invitati a contattare il rivenditore presso il quale e stato acquistato il prodotto a l'ufficio
locale preposto per tutte le informazioni relative alla raccolta differenziata e al riciclaggio per questo tipo di
prodotto. Gli utenti aziendali sono invitati a contattare il proprio fornitore e verificare i termini e le condizioni
del contratto di acquisto. Questo prodotto non deve essere smaltito unitamente ad altri rifiuti commerciali.
Page 12

9 Español
FUNCIONES Y CONTROLES
1. CONTROL ON/OFF/VOLUME
2. CONTROL SINTONIA
3. ANTENA FM
4. TOMA AURICULARES
5. ESCALA DE FRECUENCIA
6. SELECTOR BAND (MW/FM)
7. CONTROL DE LA TONALIDAD
8. COMPARTIMENTO BATERIÁS
9. ALTAVOZ
10. MANIJA
FUENTES ALIMENTACIÓN
ALIMENTACIÓN CON BATERÍAS
Abrir el Compartimento BATERÍA (8) del aparato e instalar 6 baterías del
tipo UM-2 (elemento C o equivalente) siguiendo la polaridad del diagrama mostrado en el compartimento batería de este aparato.
Las baterías tendrán que ser extraídas del compartimento si el aparato
no se utilizará por un período de tiempo prolongado.
Las baterías descargadas tendrán que ser removidas para evitar la pér-
dida de ácido.
ALIMENTACIÓN CA
Conectar el cable de Alimentación CA a su toma de corriente CA domé-
stica y activar el aparato. Asegurarse de que el voltaje sea compatible.
Desconectar el cable de alimentación de la toma de corriente cuando el
aparato no se utilizará.
USO DE LA RADIO
1. Para encender el aparato girar el control ON/OFF/VOLUME (1) en el
sentido horario hasta escuchar un "click".
2. Ajuste el nivel de volumen con el control VOLUME (1).
3. Ajuste el nivel de la tonalidad con el control de la tonalidad (7).
4. Extraer la antena telescópica para la banda FM. Para optimizar la re-
cepción en MW, rotar la radio en el sentido horizontal.
5. Seleccionar la banda deseada (FM, MW) con el selector BANDA (6).
6. Sintonizar la estación deseada con el control SINTONIA (2).
7. Para apagar la radio girar el control ON/OFF/VOL (1) en el sentido anti
Page 13

-horario hasta escuchar un "click".
AURICULARES
Los auriculares tienen que poseer una clavija estéreo de 3.5 mm de diámetro y una impedancia de 8-32 Ohmio. Cuando se conectarán los auriculares (4), el altavoz automáticamente se desactivará.
ESPECIFICACIONES TÉCNICAS
AC: 230 V ~ 50 Hz
Baterías: 6 x UM-2
FM: 87.5 - 108 MHz
MW: 530 - 1600 kHz
Las características tecnicas estan sujetas a cambios sin aviso previo.
10 Español
ATTENTIÓN
El símbolo de exclamación dentro un triángulo tiene el objeto de advertir al usuario de la presencia de
instrucciones importantes de funcionamiento y mantenimiento en la documentación adjunta con el equipo.
El símbolo del rayo con punta de flecha dentro de un triángulo adverte al usuario de la presencia de ten-
siones peligrosas en el equipo.
Para reducir los riesgos de descargas eléctricas, no retire la cubierta. La unidad no hay en su enterior
componentes que pueda manipular el usuario. Encargue su reparación a personal cualificado.
Esta unidad funciona con 230V ~ 50Hz. Cuando el equipo vaya a estar un tiempo prolongado sin utilizarse, desenchufar el cable de alimentación.
No conecte la unidad hasta que no se hayan efectuado todas las otras conexiones.
La unidad no debería ser expuesta a lluvia o humedad.
La unidad se debe instalar de forma que su posición no le impida tener ventilación adecuada. Por ejemplo, el equipo no se debe colocar cerca de cortinas o sobre el tapete, ni en una instalación como puede
ser un armario.
La unidad no debería ser expuesta a la luz solar directa ni a fuentes emisora de calor.
ELIMINACIÓN CORRECTA DE ESTE PRODUCTO
(material electrico y electrónico de descarte)
La presencia de esta marca en el producto o en el materiál informativo que lo acompaña, indica que al finalizar su vida útil no deberá eliminarse junto con otros residuos domésticos. Para evitar los posi bl es daños al
medi o ambi ente o a l a sal ud humane que representa la eliminación incontrolada de residuos, separe este
producto de otros tipos de residuos y reciclelo correctamente para promover la reutilización sostenible de re-
cursos materiales. Los usuarios particulares pueden contactar con el establecimiento donde adqui ri eron el
producto, o con l as autori dades l ocal es pertinentes, para informarse sobre cómo y dónde pueden lIevario
para que sea sometido a un reciclaje ecológico y seguro. Los usuarios comerciales pueden contactar con su
proveedor y consultar las condiciones del contrato de compra. Este produco no debe eliminarse mezclado con
otros residuos comerciales.
Page 14

11 Português
LOCALIZAÇÃO DOS COMANDOS
1. COMANDO DO ON/OFF/VOLUME
2. COMANDO DO SINTONIA
3. ANTENA FM
4. TOMADA DOS FONES DE OUVIDO
5. ESCALA SINTONIA RÁDIO
6. SELECTOR BANDA(MW/FM)
7. CONTROLE DE TOM
8. COMPARTIMENTO PILHA
9. ALTIFALANTE
10. MANIVELA
LIGAÇÃO À FONTE DE ALIMENTAÇÃO
Funcionamento com pilhas
Abra o Compartimento das Pilhas (8) atrás do aparelho e coloque 6
pilhas UM-2 seguindo o diagrama de polaridade mostrado no interior do compartimento das pilhas.
É necessário tirar as pilhas se durante muito tempo não for utilizar o
aparelho.
É necessário tirar do aparelho as pilhas descarregadas para evitar
que vaze ácido.
FUNCIONAMENTO MEDIANTE REDE CA
Este aparelho foi concebido para funcionar somente com uma fonte
de alimentação de CA de 230 V. 50 Hz. Ligá-lo outro tipo de fonte de
alimentação poderá danificar o aparelho.
UTILIZAÇÃO DO RÁDIO
1. Girar o controlo VOLUME/OFF (1).
2. Ajuste o volume ao nível desejado com o controlo VOLUME.
3. Ajuste o tom ao nível desejado com o controlo de tom (7).
4. Estenda a antena e rode-a até obter a melhor recepção em Banda
FM. Para recepção em MW (ondas médias) os sinais serão captados mediante a antena interna de ferrite. Será necessário girar o
aparelho até obter a melhor recepção.
5. Seleccione a banda desejada (FM, MW) com o seletor BAND (6).
Page 15

12 Português
6. Sintonize a estação desejada com o controlo TUNING (2).
7. Para desligar o aparelho, seleccione OFF com o controlo VOLUME.
FONES DE OUVIDO
É possível usar fones de ouvido de plugue de 3,5 mm. de diâmetro e
de 8-32 Ohm de impedância. Quando ligar os fones de ouvido (4), o
altifalante será automaticamente desativado.
ESPECIFICAÇÕ ESTÉCNICAS
CA: 230 V. ~ 50 Hz
Pilhas: 6 Pilhas tipo UM-2 (rádio)
FM: 87.5 - 108 MHz
MW: 540 - 1600 kHz
Observação: As características e o projeto estão sujeitos a modificaç-
ATENÇÃO
O ponto de exclamação dentro de um triângulo avisa o utilizador que no livrete de instruções
há importantes informações para a utilização e a manutenção.
O símbolo com o raio dentro de um triângulo avisa o utilizador que há tensão perigosa no
interior do aparelho.
Para reduzir o risco de choque eléctrico, não abra o aparelho. O aparelho não contém peças
que podem ser reparadas pelo utilizador. Em caso de defeitos, para a reparação, contacte
um técnico qualificado.
Este aparelho foi projectado para funcionar com 230 V. ~ 50 Hz. Se o aparelho não for utilizado durante muito tempo, tire a ficha eléctrica da tomada de corrente.
Não exponha o aparelho à chuva nem à humidade.
Coloque o aparelho num local suficientemente ventilado. Evite colocá-lo perto de cortinas,
em cima de alcatifas ou dentro de quaisquer móveis como por exemplo uma estante.
Não exponha o aparelho directamente à luz do sol nem a fontes de calor.
ELIMINAÇAO CORRECTA DESTE PRODUTO
(Resíduo de Equipamentas Eléctricos e Electrónicos)
Esta marca, apresentada no produto ou na sua literatura indica que ele não deverá ser eliminado juntamente
com os residuos domésticos indiferenciados no final do seu periodo de vida útil. Para impedir danos ao ambiente
e á saúde humana causados pela eliminação incontrolada de resíduos deverá separar este equipamento de
outros tipos de residuos e reciclá-lo de forma responsável, para promover uma reutilização sustentável dos recursos materiais. Os utilizadores domesticos deverão contactar ou o estabelecimento onde adquiriram este produto ou as entidades oficiais locais para obterem informaçães sobre onde e de que forma podem levar este produto para permitir efectuar uma reciclagem segura em termos ambientais. Os utilizadores profissionais deverão
contactar o seu fornecedor e consultar os termos e condições do contrato de compra. Este produto não devera
ser misturado com outros residuos comerciais para eliminação.
Page 16

13 Nederlands
FUNCTIES EN BEDIENING
1. AAN-/UIT-REGELAAR/VOLUMEREGELAAR
2. TUNING-REGELAAR
3. FM-ANTENNE
4. KOPTELEFOONAANSLUI TING
5. FREQUENTIESCHAAL
6. KEUZESCHAKELAAR FM/MW BANDBREEDTE
7. TOONREGELING
8. BATTERIJCOMPARTIMENT
9. SPREKER
10. HANDVAT
ENERGIEBRONNEN
BATTERIJVOEDING
Open het BATTERIJcompartiment(8) van het apparaat en plaats 6 UM-2
batterijen met de polen zoals weergegeven in het batterijcompartiment van
dit apparaat.
De batterijen dienen te worden verwijderd indien het apparaat voor een
lange tijd niet zal worden gebruikt.
Lege batterijen dienen te worden verwijderd om het lekken van accuzuur te
vermijden.
AC NETVOEDING
Sluit de AC voedingskabel aan op uw AC huisstopcontact en schakel het
apparaat in. Controleer of het voltage overeenkomt.Verwijder de voedingskabel uit het stopcontact als het apparaat niet zal worden gebruikt.
WAARSCHUWINGEN: Verwijder de voedingskabel uit het stopcontact als
het apparaat niet zal worden gebruikt. Om het risico op elektrische schokken te vermijden mag de deksel van het apparaat niet worden verwijderd.
Er bevinden zich geen bruikbare onderdelen in de binnenkant apparaat voor de gebruiker.
GEBRUIK VAN DE RADIO
1. Druk op de schakelaar om het apparaat in te schakelen.
2. Stel het volume af met de VOLUME-regelaar.
3. Schuif de antenne uit en draai deze totdat u de beste FM ontvangst
verkrijgt. Voor de MW-ontvangst zal het signaal worden opgevangen
met behulp van een ingebouwde ferrietantenne. Richt het apparaat om
Page 17

14 Nederlands
de beste ontvangst te verkrijgen.
4. Selecteer de gewenste bandbreedte (FM/MW) met de keuzeschakelaar Band.
5. Stem af op het gewenste station met de TUNING-knop.
6. Sintonize a estação desejada com o controlo TUNING.
KOPTELEFOON AANSLUITING
Verbind uw koptelefoon of oordopjes met dit aansluitpunt om naar de radio
te luisteren.
TECHNISCHE SPECIFICATIES
AC: 230V ~ 50 Hz
FM: 88 - 108 MHz
MW: 530 - 1600 kHz
Kenmerken zijn zonder voorafgaande kennisgeving onderhevig aan veranderingen.
WAARSCHUWING
Het uitroepteken in een gelijkzijdige driehoek is bedoeld om de gebruiker erop attent te maken dat de
gebruikershandleiding belangrijke instructies bevat voor het gebruik en het onderhoud.
De bliksemschicht in een gelijkzijdige driehoek is bedoeld om de gebruiker te waarschuwen voor de aanwezigheid van gevaarlijke spanning binnen in het apparaat.
Om het risico op elektrische schokken te reduceren, dient het apparaat niet te worden geopend. Het
apparaat bevat geen onderdelen die gerepareerd kunnen worden door de gebruiker. In het geval van
een defect dient contact opgenomen te worden met een gekwalificeerde technicus voor de reparatie.
Dit apparaat is ontworpen om te werken op 230v~ 50Hz. Als het apparaat voor een langere tijd niet gebruikt gaat worden, dient de stekker uit het stopcontact te worden gehaald.
Stel het apparaat niet bloot aan regen of vocht.
Gebruik het apparaat uitsluitend nadat is gecontroleerd dat alle aansluitingen correct zijn uitgevoerd.
Plaats het apparaat op een voldoende geventileerde plek. Plaats het apparaat niet in de buurt van gordijnen, op het tapijt of in in een stuk meubilair, zoals bijvoorbeeld een boekenkast.
Stel het apparaat niet bloot aan direct zonlicht of aan warmtebronnen.
CORRECTE AFVALVERWERKING VAN HET PRODUCT
(elektrisch en elektronisch afval)
Dit symbool dat staat weergegeven op het product en in de documentatie ervan, duidt erop dat het product niet
kan worden weggegooid met het gewone huisvuil aan het einde van de levensduur. Om schade aan het milieu
of aan de gezondheid door ongepaste afvalverwijdering te voorkomen, dient de gebruiker dit product te schei-
den van andere soorten afval op verantwoorde wijze ter bevordering van duurzaam hergebruik van de materië-
le hulpbronnen. De thuisgebruiker dient contact op te nemen met de verkoper van het apparaat of met de lokale gemeente voor informatie met betrekking tot het scheiden en recyclen van dit type product. Zakelijke gebruikers dienen contact op te nemen met hun leverancier en de algemene voorwaarden van de verkoopovereenkomst te raadplegen. Dit product dient niet te worden gemengd met ander bedrijfsafval voor de verwijdering.
Page 18

15 Čeština
POPIS PŘÍSTROJE
1. REGULÁTOR HLASITOSTI KOMBINOVANÝ S PŘEPÍNAČEM
PRO ZAPNUTÍ / VYPNUTÍ PŘÍSTROJE
2. KNOFLÍK LADĚNÍ
3. FM ANTENNA
4. SLUCHÁTKA
5. STUPNICE LADĚNÍ
6. PŘEPÍNAČ FUNCTION PRO VÝBĚR ZDROJE SIGNÁLU S POLOHAMI AM/FM
7. OVLÁDÁNÍ TÓNU
8. PROSTOR PRO BATERIE
9. SPEAKER
10. RUKOJEŤ
NAPÁJENÍ PŘÍSTROJE
Přístroj je konstruován pro napájení střídavým napětím 230 V / 50 Hz
z elektrické sítě.
Před připojením přístroje k elektrické síti překontrolujte (např. na štítku
elektroměru), zda napětí elektrické sítě v místě používání přístroje odpovídá napětí specifikovanému výrobcem přístroje pro jeho napájení.
Nepřipojujte přístroj k jinému než k uvedenému napětí - mohl by tak
být poškozen.
OPERACE RADIO AM/FM
1. Připojte přístroj k elektrické síti a zapněte jej otáčením regulátorem
hlasitosti směru pohybu hodinových ručiček – po překonání odporu
aretace (slyšitelné klapnutí) bude přístroj zapnut, dalším otáčením
regulátorem nastavte požadovanou hlasitost.
2. Přepněte přístroj na příjem rozhlasu (přepínač FUNCTION, polohy
AM nebo FM).
3. Knoflíkem ladění nalaďte požadovaný vysílač.
4. Pro vypnutí přístroje otáčejte regulátorem hlasitosti proti směru po-
hybu hodinových ručiček – bude tak postupně snižována hlasitost,
po překonání odporu aretace bude přístrojypnut.
5. Pro optimální příjem požadovaného vysílače V rozhlasovém pásmu FM použijte teleskopickou anténu, pro optimální příjem poža-
Page 19

16 Čeština
dovaného vysílače je nastavení délky, úhlu a směru antény.
6. V rozhlasovém pásmu AM je pro optimální příjem požadovaného
vysílače nutné nasměrování (natočení) celého přístroje.
SLUCHÁTKA
Sluchátka by měla mít průměr 3,5 mm stereo konektor a impedanci 832 ohmů, a měl by být připojen k Zásuvka pro sluchátka (4). Jsou-li
připojena sluchátka, je reproduktor automaticky odpojí.
TECHNICKÉ ÚDAJE
Napájení 230 V / 50 Hz
Přijímané kmitočty AM 540 - 1 600 kHz
FM 87,5 – 108 MHz
Změny designu a technických údajů vyhrazeny bez předchozího oznámení.
UPOZORNĚNÍ
Vykřičník uvnitř trojúhelníka na zadní straně skříňky přístroje upozorňuje uživatele na důležité pokyny pro obsluhu a
ošetřování přístroje, uvedené v jeho doprovodné dokumentaci. čeština
Symbol blesku uvnitř trojúhelníka na zadní straně skříňky přístroje upozorňuje uživatele na existenci životu nebezpečného napětí na některých dílech uvnitř skříňky přístroje.
Nevyjímejte přístroj ze skříňky – riziko úrazu elektrickým proudem. Uvnitř skříňky nejsou díly, které by mohl opravit
nebo seřídit jeho uživatel bez odpovídajícího vybavení a kvalifikace. Bude-li přístroj vyžadovat seřízení nebo opravu
kontaktujte odborný servis. Zásahem do přístroje v době platnosti záruky se vystavujete riziku ztráty event. záručních
plnění.
Přístroj je konstruován pro napájení střídavým napětím 230 V / 50 Hz z elektrické sítě. Pokud nebudete přístroj delší
dobu používat odpojte jej od elektrické sítě vyjmutím vidlice síťového kabelu přístroje ze síťové zásuvky.
Chraňte přístroj před zmoknutím, postříkáním nebo politím jakoukoliv kapalinou.
Vypnutím přístroje není přístroj odpojen od elektrické sítě. Pro odpojení přístroje od elektrické sítě vyjměte vidlici síťového kabelu přístroje ze síťové zásuvky. Před zapnutím přístroje překontrolujte všechna připojení k přístroji.
Okolo přístroje ponechejte na všech stranách dostatečný volný prostor, nutný pro cirkulaci vzduchu okolo přístroje. Je
tak odváděno teplo vznikající během jeho provozu.
Neumísťujte přístroj na přímém slunci nebo v blízkosti zdrojů tepla. Vysokými teplotami je významně zkracována životnost elektronických dílů přístroje.
POKYNY PRO SPRÁVNOU LIKVIDACI VÝROBKU
(likvidaci použitých elektrických a elektronických zařízení)
Tento symbol na výrobku, jeho příslušenství nebo obalu označuje, že při pozdější likvidaci výrobku (z jakýchkoliv důvodů) nesmí být s výrobkem zacházeno jako s domovním odpadem. Výrobek zlikvidujte jeho
předáním na sběrné místo pro likvidaci použitých elektrických a elektronických zařízení šetrnou
k životnímu prostředí. Zajištěním jejich správné likvidace zabráníte vzniku potenciálních rizik pro životní
prostředí a lidské zdraví, která by mohla vzniknout nesprávným zacházením s odpady. Kromě toho recyklace odpadových materiálů napomáhá udržení přírodních zdrojů surovin pro příští generace. Podrobné
informace k likvidaci tohoto výrobku šetrné k životnímu prostředí získáte u pracovníka ochrany životního
prostředí místního (městského nebo obvodního) úřadu nebo v prodejně, ve které jste výrobek zakoupili.
Page 20

17 Slovenský
POPIS PŘÍSTROJE
1. REGULÁTOR HLASITOSTI KOMBINOVANÝ S PREPÍNAČOM
PRE ZAPNUTIE / VYPNUTIE PRÍSTROJA
2. KNOFLÍK LADENIA
3. FM ANTENNA
4. SLUŠALKE
5. STUPNICA LADENIA
6. PREPÍNAČ FUNCTION PRE VÝBER ZDROJA SIGNÁLU S POLOHAMI AM/FM
7. NADZOR TONE
8. PRIESTOR PRE BATERIE
9. SPEAKER
10. ROČAJ
NAPÁJENÍ PŘÍSTROJE
Prístroj je konštruovaný pre napájanie striedavým napätím 230 V / 50
Hz z elektrickej siete.
Pred pripojením prístroja k elektrickej sieti prekontrolujte (napr. Na štítku elektromera), či napätie elektrickej siete v mieste používania prístroja zodpovedá napätiu špecifikovanému výrobcom prístroja pre jeho
napájanie. Nepripájajte prístroj k inému ako k uvedenému napätia mohol by tak byť poškodený.
OPERÁCIA RADIO AM / FM
1. Pripojte prístroj k elektrickej sieti a zapnite ho otáčaním reguláto-
rom hlasitosti smeru
2. Pohybu hodinových ručičiek - po prekonaní odporu aretácie
(počuteľné klapnutie) bude prístroj zapnutý, ďalším otáčaním regulátorom nastavte požadovanú hlasitosť.
3. Prepnite prístroj na príjem rozhlasu (prepínač FUNCTION, polohy
AM alebo FM).
4. Gombíkom ladenia nalaďte požadovaný vysielač.
5. Pre vypnutie prístroja otáčajte regulátorom hlasitosti proti smeru
pohybu hodinových ručičiek Bude tak postupné znižovanie hlasitosti, po prekonaní odporu aretácie bude přístrojypnut.
6. Pre optimálny príjem požadovaného vysielačaV rozhlasovom pá-
Page 21

18 Slovenský
sme FM použite teleskopickú anténu, pre optimálny príjem požadovaného Vysielač je správne nastavenie dlzka, Uhla a smeru antény.
7. V rozhlasovom pásme AM je pre optimálny príjem požadovaného
Vysielač nutné nasmerovaním (natočením) celého prístrojov
SLÚCHADLÁ
Slúchadlá by mala mať priemer 3,5 mm stereo konektor a impedanciu
8-32 ohmov, a mal by byť pripojený k Zásuvka pre slúchadlá (4). Keď
sú pripojené slúchadlá, je reproduktor automaticky odpojí.
TECHNICKÉ ÚDAJE
Napájanie 230 V / 50 Hz Přijímané
Kmitočty AM 540 - 1 600 kHz
FM 87,5 - 108 MHz
OPOZORILO
Výkričník vo vnútri trojuholníka na skrinke prístroja upozorňuje užívateľa na existenciu dôležitých pokynov pre jeho obsluhu uvedených v návode.
Symbol blesku vo vnútri trojuholníka upozorňuje užívateľa na nebezpečné napätie na niektorých dieloch
vo vnútri skrinky prístroja.
Nevyberajte prístroj zo skrinky - riziko úrazu elektrickým prúdom. Vo vnútri skrinky prístroja nie sú diely
ktoré by mohol opraviť alebo nastaviť jeho užívateľ bez zodpovedajúceho vybavenia a kvalifikácie. Ak
bude prístroj vyžadovať nastavenie alebo opravu kontaktujte odborný servis. Zásahom do prístroja v
dobe platnosti záruky sa vystavujete riziku straty príp. záručných plnení.
Chráňte prístroj pred zmoknutím, postriekaním alebo poliatím akoukoľvek kvapalinou - riziko úrazu lektrickým prúdom. Nepoužívajte prístroj mimo miestnosti.
Pre odpojenie prístroja od elektrickej siete vyberte vidlicu sieťového kábla prístroja zo sieťovej zásuvky.
Prístroj umiestenie na dobre vetranom mieste. Nezakrývajte vetracie otvory skrinky prístroja - riziko jeho
prehriatia a poškodenia.
Chráňte prístroj pred priamym slnkom, neumiestňujte prístroj v blízkosti zdrojov tepla. Vysokými teplotami je výrazne skracovaná životnosť elektronických komponentov prístroja.
POKYNY PRE SPRÁVNU LIKVIDÁCIU VÝROBKU
(likvidácii použitých elektrických a elektronických zariadení)
Tento symbol na výrobku, jeho príslušenstve alebo obale označuje, že pri naskoršej likvidácii výrobku (z akýchkoľvek dôvodov) nesmie byť s výrobkom zachádzané ako s domácim odpadom. Výrobok zlikvidujte jeho
odovzdaním na zberné miesto pre likvidáciu použitých elektrických a elektronických zariadení šetrnú
k životnému prostrediu. Zaistením ich správnej likvidácie zabránite vzniku potenciálnych rizík pre životné prostredie a ľudské zdravie, ktorá by mohla vzniknúť nesprávnym zachádzaním s odpadmi. Okrem toho recyklácia odpadových materiálov napomáha udržaniu prírodných zdrojov surovín pre budúce generácie. Podrobné
informácie k likvidácii tohto výrobku šetrné k životnému prostrediu získate u pracovníka ochrany životného
prostredia miestneho (mestského alebo obvodného) úradu alebo v predajni, v ktorej ste výrobok zakúpili.
Page 22

19 Polski
OPIS ELEMENTÓW
1. POKRĘTŁO ON/OFF/GŁOŚNOŚĆ
2. POKRĘTŁO STROJENIA STACJI
3. FM ANTENNA
4. WYJŚCIE SŁUCHAWKOWE
5. SKALA RADIA
6. WYBÓR FUNKCJI (AM/FM)
7. POKRĘTŁO STROJENIA TONÓW (WYSOKIE/NISKIE)
8. KOMORA NA BATERIĘ
9. SPEAKER
10. UCHWYT
ZASILANIE
Zasilanie bateryjne
Otwórz komorę na baterię (8) znajdującą się z tyłu urządzenia.
Włóż 6 sztuk baterii R14 zgodnie z obrazkiem widocznym w środku.
Wyładowane baterie powinny zostać wyjęte z urządzenia.
Płaskie baterie powinny być usunięte z urzadzenia aby zapobiec ich wycieko-
wi.
Zasilanie sieciowe AC
Podłącz kabel sieciowy do gniazdka sieciowego. Upewnij się, że napięcie w
sieci odpowiada temu wskazanemu na tabliczce znamionowej umieszczonej
z tyłu urządzenia.
Dla własnego bepieczeństwa przed podłączeniem przeczytaj dokładnie in-
strukcję obsługi.
ZASILANIE SIECIOWE
To urządzenie zostało zaprojektowane do działania w sieci zasilanej prądem AC
230V~50Hz. Podłączenie do innego źródła zasilania może spowodować uszkodzenie urządzenia.
UWAGA!
Aby uniknąć popażenia przed zdjęciem pokrywy należy odłączyć urządzenie od
zasilania. Naprawę sprzętu należy zlecać tylko wykfalikowanemu serwisowi..
TUNER RADIOWY
1. Przekręć pokrętło VOLUME/OFF (1), aż usłyszysz klikniecie.
2. Dostosuj głośność do pożądanego poziomu.
3. Dostosuj zakres tonów (wysokie/niskie) pokrętłem (7).
Page 23

20 Polski
4. Rozłóż antenę teleskopową FM.
5. Wybierz preferowaną funkcję FM/AM (6).
6. Ustaw ulubione stacje radiowe poprzez obracanie pokrętłem do strojenia
stacji (2).
7. Aby wyłączyć radio przekręć pokrętło VOLUME/OFF w przeciwną stronę.
SŁUCHAWKI
Słuchawki powinny mieć złącze 3,5 mm (impedencja 8-32 ohmy) i powinny być
podłączone do gniazda słuchawkowego (4). Kiedy słuchawki są podłączone gło-
śniki zostaną automatycznie wyłączone
SPECYFIKACJA
Zasilanie AC: 230V ~ 50Hz
Baterie: 6 x UM-2 (radio operation)
FM: 87.5 - 108 MHz
AM: 530 - 1600 kHz
Zmiana specyfikacji technicznej produktu zastrzeżona przez producenta.
UWAGA
SYMBOL WYKRZYKNIKA w trójkącie równobocznym, służy zwróceniu uwagi użytkownika na fakt, że instrukcja obsługi zawiera bardzo istotne dla bezpieczeństwa informacjedotyczące obsługi, utrzymania i serwisowania urządzenia.
SYMBOL BŁYSKAWICY ZE STRZAŁKĄ w trójkącie równobocznym służy ostrzeżeniu użytkownika przed
obecnością niebezpiecznych, nieizolowanych elementów pod napięciem, które grozi ryzykiem porażenia.
Aby zminimalizować ryzyko porażenia prądem, nie należy zdjemować pokrywy. Nie należy samodzielnie
podejmować prób naprawy.
Urządzenie działa pod napięciem 230V ~ 50Hz. Jeżeli nie jest używane należy odłączyć wtyczkę od źródła zasilania.
Przed użyciem należy upewnić się, że wszystko jest prawidłowo podłączone.
Urządzenie nie powinno być wystawione na działanie wilgoci lub deszczu.
To urządzenie powinno być ustawione w miejscu przewiewnym. Unikać miejsc niewentylowanych, blisko
zasłon lub na dywanie.
Nie wystawiać na bezpośrednie działanie promieni słonecznych lub źródeł ciepła.
Likwidacja zużytego sprzętu elektrycznego/elektronicznego
Ten symbol znajdujący się na produkcie, jego wyposażeniu lub opakowaniu oznacza, że z produktem nie można obchodzić się jak
ze zwykłymi odpadami domowymi. Kiedy urządzenie lub bateria/akumulator będą nadawały się do wyrzucenia prosimy, aby Państwo przewieźli ten produkt na odpowiednie miejsce zbiorcze, gdzie zostanie przeprowadzona jego utylizacja. Na terenie Unii
Europejskiej oraz w innych europejskich krajach znajdują się miejsc zbiówki zużytych urządzeń elektrycznych i elektronicznych
oraz baterii i akumulatorów. Dzięki zapewnieniu właściwej utylizacji produktów mogą Państwo zapobiec możliwym negatywnym
skutkom dla środowiska naturalnego i ludzkiego zdrowia. Mogłyby one wystąpić w wypadku nieodpowiedniego postępowania z
odpadami elektrycznymi i elektronicznymi lub zużytymi bateriami i akumulatorami. Utylizacja materiałów pozwala chronić źródła
naturalne. Z tego powodu prosimy nie wyrzucać starych elektrycznych oraz elektronicznych urządzeń oraz akumulatorów i baterii
wraz z odpadami domowymi . Aby uzyskać więcej informacji o sposobach utylizacji starych urządzeń, należy skontaktować się z
władzami lokalnymi, przedsiębiorstwem zajmującym się utylizacją odpadów lub sklepem, w którym produkt został zakupiony.
Page 24

Hereby, Roadstar Management SA declares that the radio equipment type
TRA-1957N is in compliance with Directive 2014/53/EU.
The full text of the EU declaration of conformity is available at the following internet address: http://roadstar.com/images/ce/TRA-1957N.pdf
VER.3
14 FEB 2018
Roadstar Management SA, via Passeggiata 7 CH 6883 Novazzano (Switzerland)
is a registered Trademark of Roadstar S.A. - Switzerland. All rights reserved.
 Loading...