

Roadstar RCR-4730U, RCR-4730RD, CDR-265U Instruction Manual
Instructionmanual
Bedienungsanleitung
Manueld’instructions
Manualed’istruzioni
Manualde instrucciones
Manualdeinstruções
is a registered Trademark of Roadstar S.A. - Switzerland All rights reserved
RCR-4730U/RD
PORTABLE STEREO MW/FM/FM-STEREO
R
ADIO-PLAYER WITH CD/CD-R/CD-RW/
MP3 PLAYBACK, USB PORT / AUX-IN.
English Page 1
Deutsch Seite 11
Français Page 21
Italiano Pagina 31
Español Página 41
Portuguès Pagina 51
INDEX
• Your new unit was manufactured and assembled
under strict ROADSTAR quality control.
Thank-you for purchasing our product for your music
enjoyment.
Before operating the unit, please read this instruction manual carefully. Keep it also handy for further
future references.
• Votre nouvel appareil a été fabriqué et monté en
étantsoumisauxnombreauxtestsROADSTAR. Nous
espérons que cet appareil vous donnera entière satisfaction.
Avant de vous adonner à ces activités, veuillez lire
attentivement ce manuel d’instructions. Conservezle
à portée de main à fin de référence ultérieure.
• Vuestro nuevo sistema ha sido construido según las
normas estrictas de control de calidad ROADSTAR.
Le felicitamosy le damos lasgracias por su elección
de este aparado. Por favor leer el manual antes de
poner en funcionamiento el equipo y guardar esta
documentación en case de que se necesite
nuevamente.
• Ihrneues Gerät wurdeunter Beachtung der strengen
ROADSTAR-Qualitätsvorschriften gefertigt.
Wir danken Ihnen für den Kauf unseres Produktes
und wünschen Ihnen optimalen Hörgenuss. Bitte
lesen Sie diese Bedienungsanleitung durch, und
heben Sie sie auf, um jederzeit darin nachschlagen
zu können.
• Il vostro nuovo apparecchio é stato prodotto ed
assemblato sotto lo stretto controllo di qualità
ROADSTAR.
Vi ringraziamo di aver acquistato un nostro prodotto
per il vostro piacere d’ascolto.
Prima di procedere all'utilizzo dell'apparecchio,
leggete attentamente il manuale d’istruzioni e
tenetelo sempre a portata di mano per futuri
riferimenti.
• Seu novo aparelho foi construido e montado sob o
estrito controle de qualidade da ROADSTAR.
Agradecemos por ter compradonosso produto para
a sua diversão.
Antes de usar esta unidade é necessário ler com
atençâo este manual de instruções pare que possa
ser usada apropriadamente; mantenha o manual
ao seu alcance para outras informações.
RCR-4730U/RD

English English
1 2
INSTRUCTION MANUAL
Please read this instruction manual carefully and familiarize yourself with your new Radio
Cassette/CD/USB/MMC Player before using it for the first time. Please retain this manual
for future reference.
LOCATION OF CONTROLS
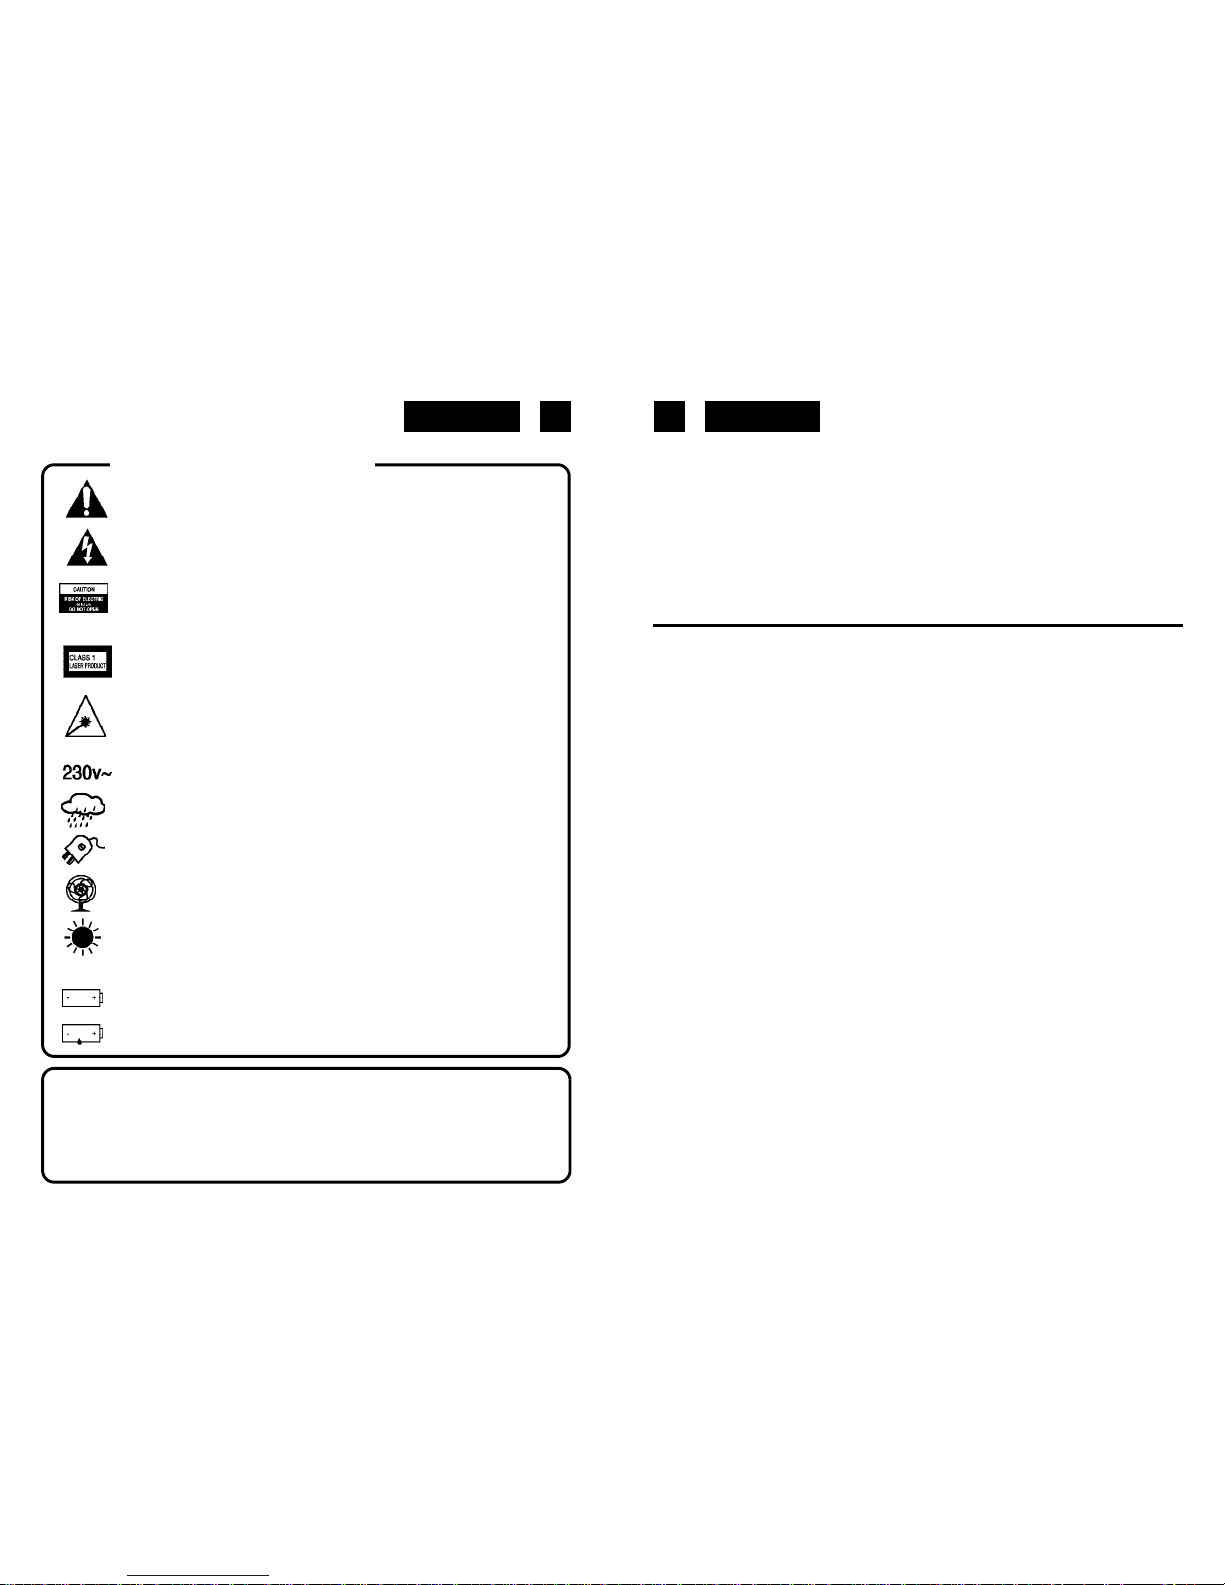
The exclamation point within the triangle is a warning sign alerting the
user of important instructions accompanying the
product.
The lightening flash with arrowhead symbol within the triangle is a warning sign alerting the user of “dangerous voltage” inside the unit.
To reduce the risk of electric shock, do not remove the cover. No user
serviceable parts inside the unit. Refer all servicing to
qualified personnel.
This unit employs a laser. Only a qualified service person should remove the cover or attempt to service this device, due to
possible eye injury.
Invisible laser radiation when the unit is opened or interlocks defeated.
Avoid exposure to laser beam. Use of controls,
adjustments or procedures other than those specified herein may result
in hazardous radiation exposure.
This unit operates on 230V ~ 50Hz. If the unit is not used for a long period
of time, remove the plug from the AC mains.
This unit must not be exposed to moisture or rain.
Ensure all connections are properly made before operating the unit.
This unit should be positioned so that it is properly ventilated. Avoid
placing it, for example, close to curtains, on the carpet or in a built-in
installation such as a bookcase.
Do not expose this unit to direct sunlight or heat radiating sources.
Make sure all batteries are inserted according to the proper
polarity. Do not mix old batteries with new ones.
If the unit is not used for a long period of time (more than 1 month),
remove all batteries from their compartment to avoid possible leaking.
WARNINGS
Playability of self-made CDs on Roadstar CD drive mechanisms.
CD-R/CD-RWin CD-DA and inMP3 format canbeplayedback.Howeverit can
occur,dueto differencesin thequality of the media as well as the characteristics
of the recording, that individual self-made CDs cannot be read. This does not
indicate an incorrect function of the playback unit in these cases.
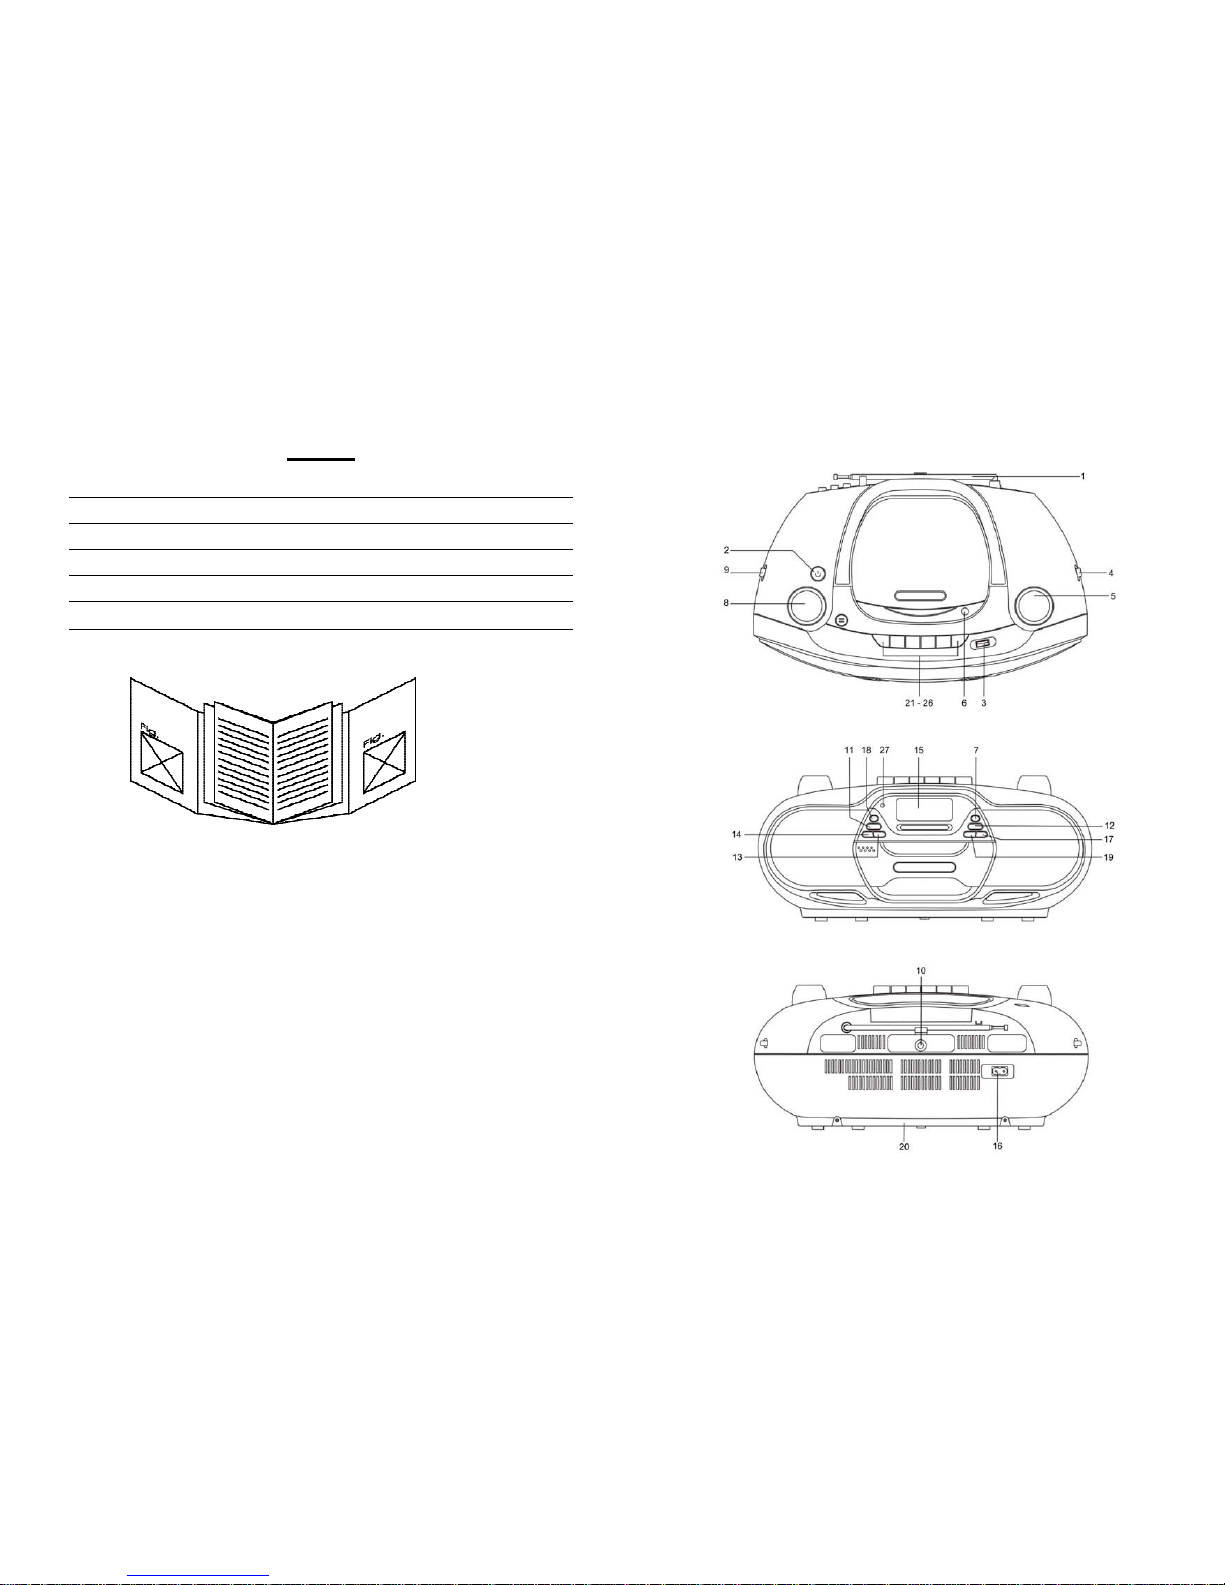
RCR-4730U/RD
PortableStereo Radio-player with CD/CD-R/CD-RW/MP3 playback, USB Port
1 FM Antenna
2 Stand-By Button (ON-OFF Switch)
3 USB Port
4
Band Switch (FMST/FM/MW)
5 Tuning Control
6 CD Open / Close corner
7 CD FOLDER + / +10 Button
8 Volume Control
9 Function Switch(RADIO/TAPE/CD/MP3/USB/AUX)
10AUX-IN Jack
11 CD PROGRAM/ P-MODE Button
12 CD FOLDER - / -10 Button
13 CD Forward Skip/Search Button ()
14 CD Back Skip/Search Button ()
15 LCD Display
16 AC Socket
17 CD Play/Pause/USB Button
18 Bass Boost Button
19 CD Stop Button
20 Battery Compartment
21 Tape Pause Button
22 Tape Stop/Eject Button
23 Tape Fast Forward Button
24 Tape Rewind Button
25 Tape Play Button
26 Tape Record Button (NOT AVAILABLE ON THIS MODEL)
27 Stand-By Indicator
English English
3 4
RADIOOPERATION
Antenna
For FM reception there is a built-in telescopic FM antenna (1) at the rear of the unit. Extend
the antenna and move it around to obtain the best reception.
For MW reception the signals are picked up through a built-in ferrite antenna. Your may have
to orient the unit to obtain the best reception.
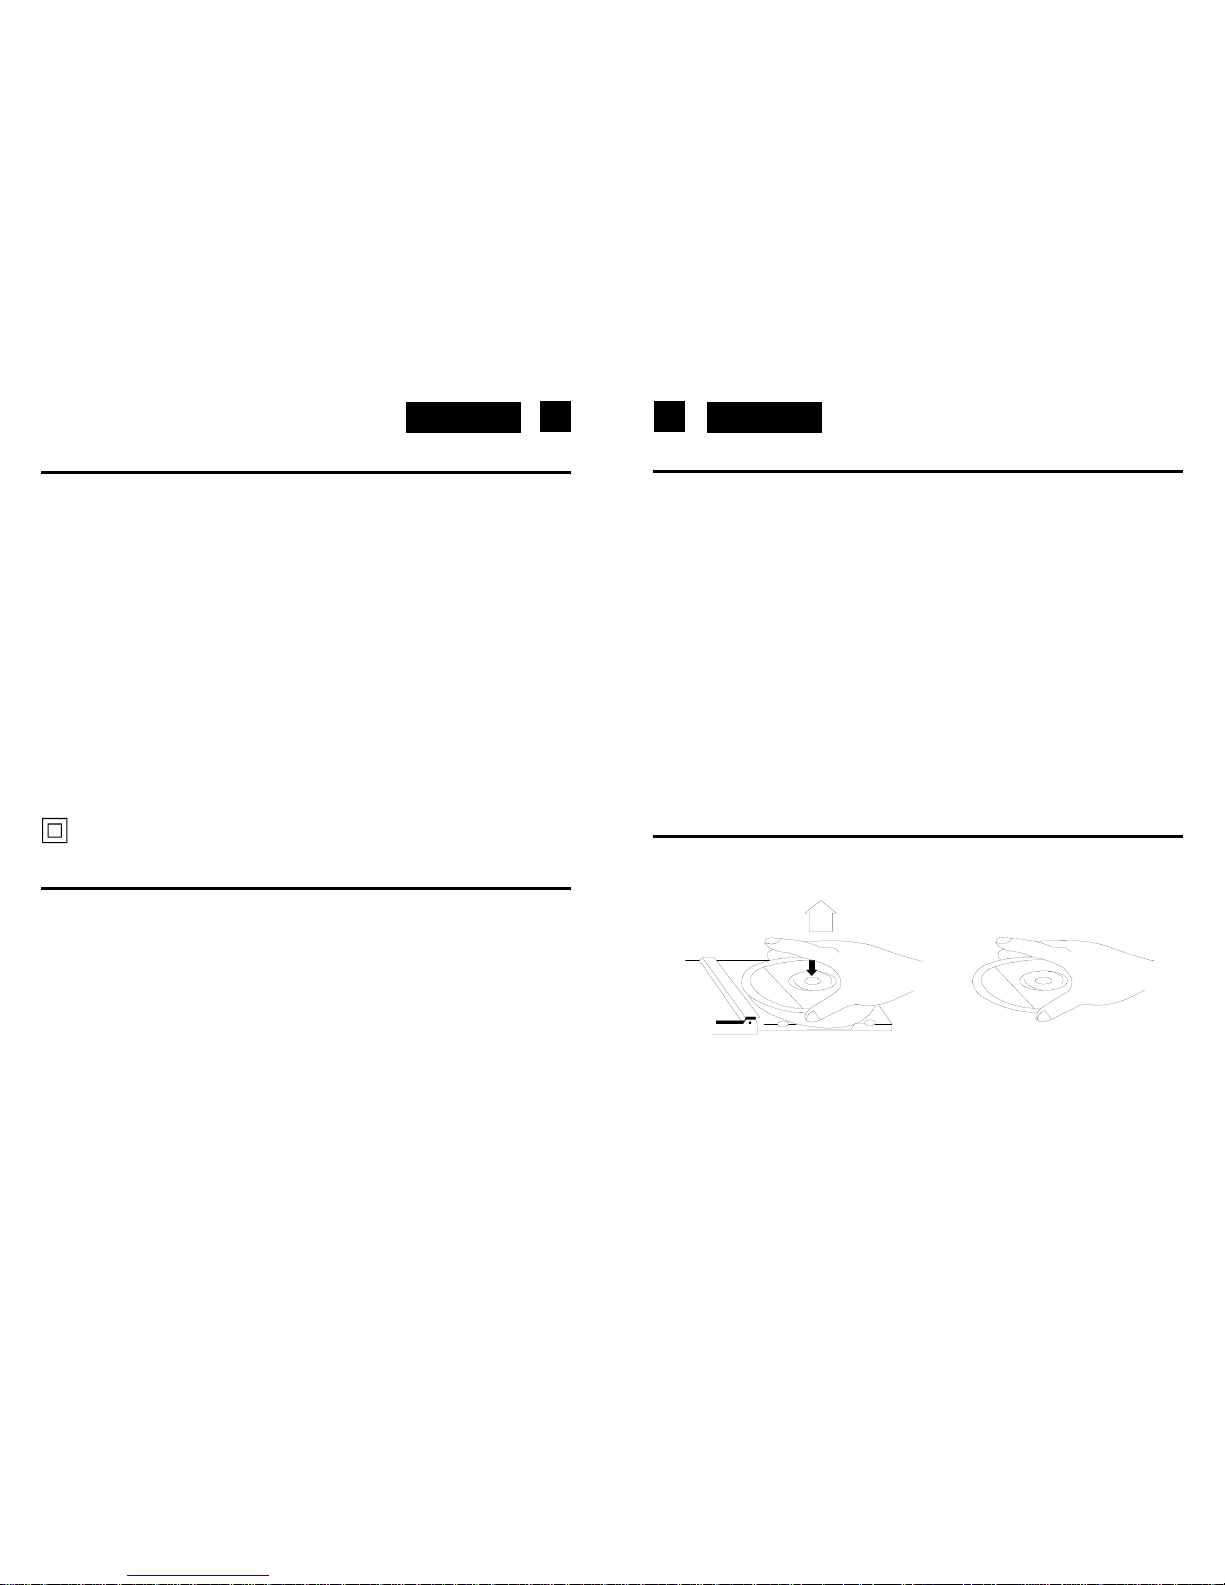
COMPACT DISC OPERATION
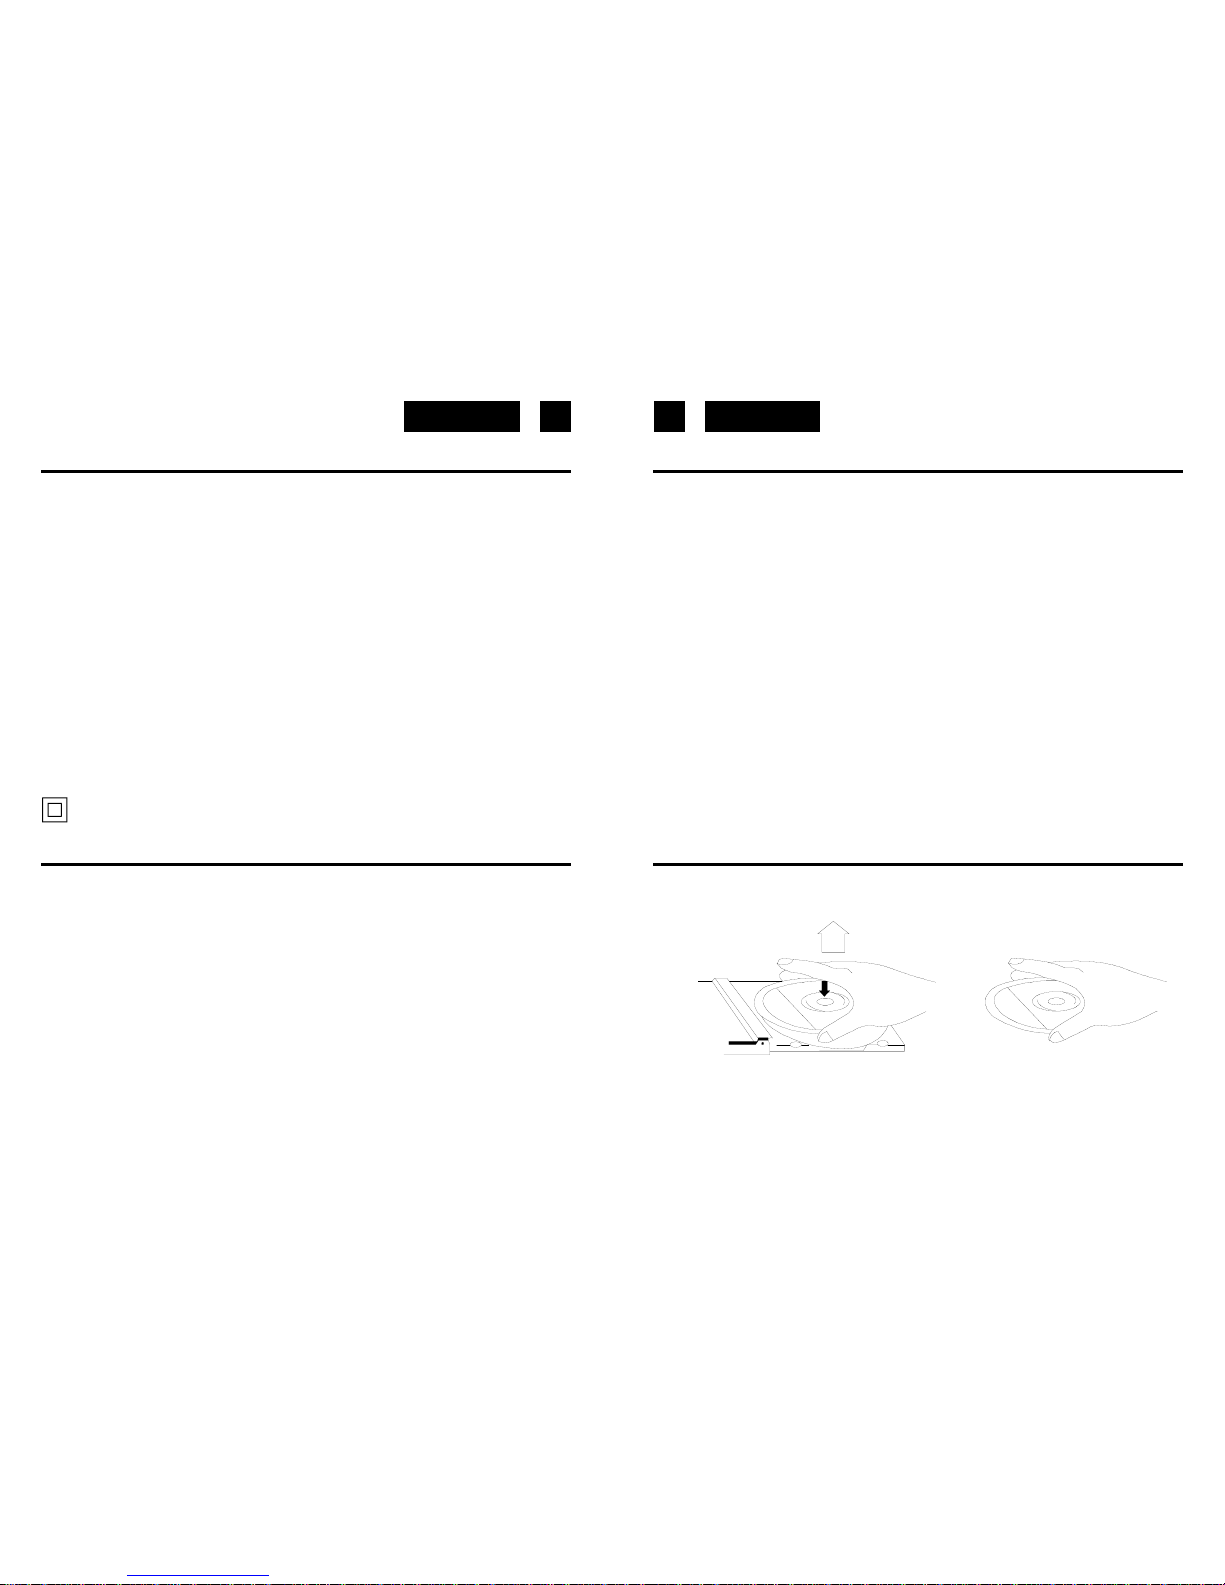
• To remove a disc from its storage case, press down on the centre of the case and lift the
disc out, holding it carefully by the edges.
• Fingerprints and dust should be carefully wiped off the disc's recorded surface with a
soft cloth. Unlike conventional records, compact discs have no grooves to collect dust
and microscopic debris so gently wiping with a soft cloth should remove most particles.
Wipe in a straight line from the inside to the outside of the disc. Small dust particles and
light stains will have absolutely no effect on reproduction quality.
CONNECTING TO POWER
Before switching on make sure that the voltage of your electricity supply is the same as
that indicated on the rating plate.
For your own safety read the following instructions carefully before attempting to connect
this unit to the mains.
MAINS (AC) OPERATION
This unit is designed to operate on AC 230V 50Hz current only. Connecting it to other
power sources may damage the unit.
Caution
To prevent electric shock disconnect from the mains before removing cover. No user
serviceable parts inside. Refer servicing to qualified service personnel.
Safety Precaution
Do not allow this unit to be exposed to rain or moisture.
Mains Supply: AC230Volts / 50Hz - AC only
This symbol means that this unit is double insulated. An earth connection is not
required.
POWER SUPPLY
• Remove the stereo carefully from the box, retaining the packaging for future use.
• Please read this instruction book carefully before operating this unit.
AC Power Operation
• Plug the supplied AC power cord into the AC power socket on the back of this portable
stereo. Connect the AC Power Cord to your AC household mains outlet and switch on
the mains supply. Make sure the voltage is compatible.
following the polarity diagram shown inside the battery compartment.
• Batteries should be removed form the compartment if the unit is not to be used for
some time.
• Flat batteries should be removed from the unit to avoid leakage.
Battery Operation
• Remove mains lead from the unit for battery operation.
• Openthe Battery Compartment (20) at the back of thestereo andinsert 8 UM-1 batteries
1. Set the Function Selector (9) to the RADIO position.
2. Select the desired frequency band with the Band Selector (4).
3. Tune to the desired radio station by turning the Tuning control (5).
4. Adjust the Volume (8) control to the desired level.
5. To turn off the radio, press the Stand-By button.
FM Stereoand Mono Reception
When an FM signal istuned in,setting the BANDselector (4) to the FM ST positionwill enable
the broadcasting to be received in stereo sound. The FM Stereo indicator will light up.When
stereo signals are weak and the reception is noisy, it is often preferable to receive the
broadcastinginmono. SwitchtheBand Selector(4)toFM(Mono). Reception willthen be lessnoisy.
• Never use chemicals such as cleaning sprays, antistatic sprays, benzine, or thinners
toclean compact discs. These chemicals can irreparably damage the disc’s surface.

English English
5 6
FOLDER FUNCTION IN MP3/WMA MODE
2. Press the PLAY/PAUSE ( >II ) button again to resume playback of that Album from
track 1.
• Discs should be returned to their cases after use. This avoids serious scratches that
could cause the Laser pickup to skip.
• Do not expose discs to direct sunlight, high humidity, or high temperatures for extended
periods. Long exposure to high temperatures can warp the disc.
• Do not stick paper or write anything with a ballpoint pen on the label side of the disc.
compartment with the label side facing up. Locate 3” discs, on the central spindle in the
compartment.
4. Close the door by pressing on the corner of the CD door.
The total number of tracks appears on the display:Press PLAY/PAUSE Button (II ) (17)
During playback, the actual track appears.
5. Adjust the VOLUME control to your desired listening level.
6. To stop playback temporarily, press the PLAY/PAUSE(II ) button (17) once. The Play
indicator will flash on the display. Press the PLAY/PAUSE(II ) button again to resume
playback.
Notes:
• When the CD door is accidentally opened during playback, "OP" will appear on the
display.
• Wait until the disc is fully stopped before opening the CD (2) compartment.
• This unit can play 3" (8cm) single CDs without an adaptor.
tracks.
LOCATING A PARTICULAR TRACK ORPOINT OF THE TRACK
1. Press the SKIP Back ()(14) button once to go back to the beginning of the current
track.
2. Press the SKIP Back button repeatedly to go back to previous tracks.
3. Press the SKIP Forward ()(13) button repeatedly to go to next tracks.
4. Press and hold either SKIP Forward or SKIP Back button to search backwards or
forwards, at high speed, a particular point of track.
Note: Low level audio will be heard during the search process to assist in locating the
correct point in the track.
REPEAT PLAYBACK WITH CD/MP3
1. Press the PLAY/PAUSEbutton (17).
2. To repeat the same track,pressthe PROGRAM/ P-MODEbutton (11)once. The indicator
7. To stop playback, press the STOP () (19) button once.
8. To switch OFF the unit press the Stand-By button (2).
1. Keep pressed the FOLDER +/+10 or FOLDER -/-10 button (7/12) to select the
desiredALBUM number, then press Skip + or - to select the folder.
Note:Youcan usetheFOLDER +/+10 or FOLDER -/-10 Button (7/12)to jump10tracksup
or down.
4. To repeat the th
e entere disc, press the PROGRAM/ P-MODE button(11) 3times.
will l appear on the display.
Press the P-MODE button repeatedly until the indicator disappears fromthe
display to cancel all repeat.
CD/MP3/USB PLAYBACK
Loading and Unloading Compact Discs
1. Set the Function Selector (9) to the CD/MP3/USB/AUX Position.
2. Open the disc compartment by lifting the CD OPEN corner (6).
3. When the door has opened, remove a disc from its case and place it carefully in the
‘ compare on the display.
The CD will start single repeat playback until STOP button (19) is pressed. Press the
PROGRAM/ P-MODE button (11) button 4 times more to cancel single repeat. The
indicator disappears from the display.
3. To repeat the entire FOLDER, press the PROGRAM/ P-MODE button (11) twice. will
appear FOLDER on the display (MP3 mode only).
Press the PROGRAM/ P-MODE button (11) button 3 times more to cancel all disc
repeat. The indicator FOLDER disappears from the display.
Loading MP3 files from a USB memory Stick
1.
Set the function switch to CD/MP3/USB/AUX.
2. Press the PLAY/PAUSE/USB button (17) few seconds until ‘USB’ is shown on the display.
3. Connect the MP3 player to the USB port to switch it on.
4. Once playing,the USB MP3 track can be selected in the same way as the CD

English English
7 8
RANDOM PLAYWITH CD
INCD
1. Press the PLAY/PAUSE button (17) and after 5 seconds the STOP button (19).
2. Press the PROGRAM/ P-MODE button (11). The track number “P01” will appear and
programmed. The track number which will be programmed will appears on the display.
4. Press once the PROGRAM/ P-MODE button (11). to enter the track into memory. “P02”
will appear.
5. Repeat the steps 3 and 4 to program up to 20 tracks in CD or 99 tracks in MP3.
6. Press PLAY/PAUSE (II)
button (10) once to start programmed playback.
7. To cancel programmed playback, press the STOP button (19) twice.
Note: During program playback, if you wish to repeat the entire programmed playback,
press the PROGRAM/ P-MODE button (11) repeatedly until the indicator
appears on the display.
ANTI-SHOCKFUNCTION
• If in use, the player is likely to receive shocks or vibrations (i.e. whilst walking or in a
moving vehicle), The ANTI-SHOCK function is active to provide uninterrupted playback
when power on.
• Should the player receive shocks for more than 8 seconds continuously in CD playback
or 30 seconds in MP3 playback, the sound can mute for a very short while and will
resume once the player has stabilised from the shock.
Notes:
• The Anti-shock function will not correct the errors arising from the use of defective
scratched or dirty discs.
• IMPORTANT! DuringCD/MP3 playback, the ANTI-SHOCK function isalways ON and
this functioncan notbe disactivated.
CASSETTEOPERATION
INSERTION ANDREMOVALOF CASSETTES
1. Press the Stop/Eject Button (22) to open the Cassette Door.
2. Slip your cassette tape into the holder with the exposed side facing up (the side for
playing faces you).
3 Close the Cassette Doors securely before starting.
4 When finished playback, press the Stop/Eject Button to open the Cassette Door, and
PROGRAMMED PLAYBACKFORCD/USB
“P
” will appear on the display indicating the first selection.
3. Press SKIP Back () or SKIP Forward () button to select the desired track to be
BASS BOOST
TAPE
RECORDING IS NOT AVAILABLE ON THIS MODEL
retrieve your cassette tape.
PLAYBACK
1. Set the Function Selector (9) to the TAPEposition.
2. Insert your cassette tape with the exposed side facing up.
3. Press the Play Key (25) to activate playback.
4. Set the Volume to the desired level.
5 Press the Stop/Eject Key (22) when finished.
2. Press SKIP Forward button (13) to go to next Random track.
3. Press the PROGRAM/ P-MODE button repeatedly until “RAND” disappears from
the display to return to the Normal Playback mode.
1. Pressthe PLAY/PAUSEbutton (17) andafter press the PROGRAM/ P-MODEbutton (11)
3 times to enter the Random mode. “RAND” appears on the display, then press
PLAY/PAUSE button (17) to start playback in Random order.
ATTENTION! THE RECORDING BUTTON IS NOT OPERATIVE!!
Press the BASS BOOST Button (18) to “ ON ” position to enjoy a more powerful Bass sound.
English English
9 10
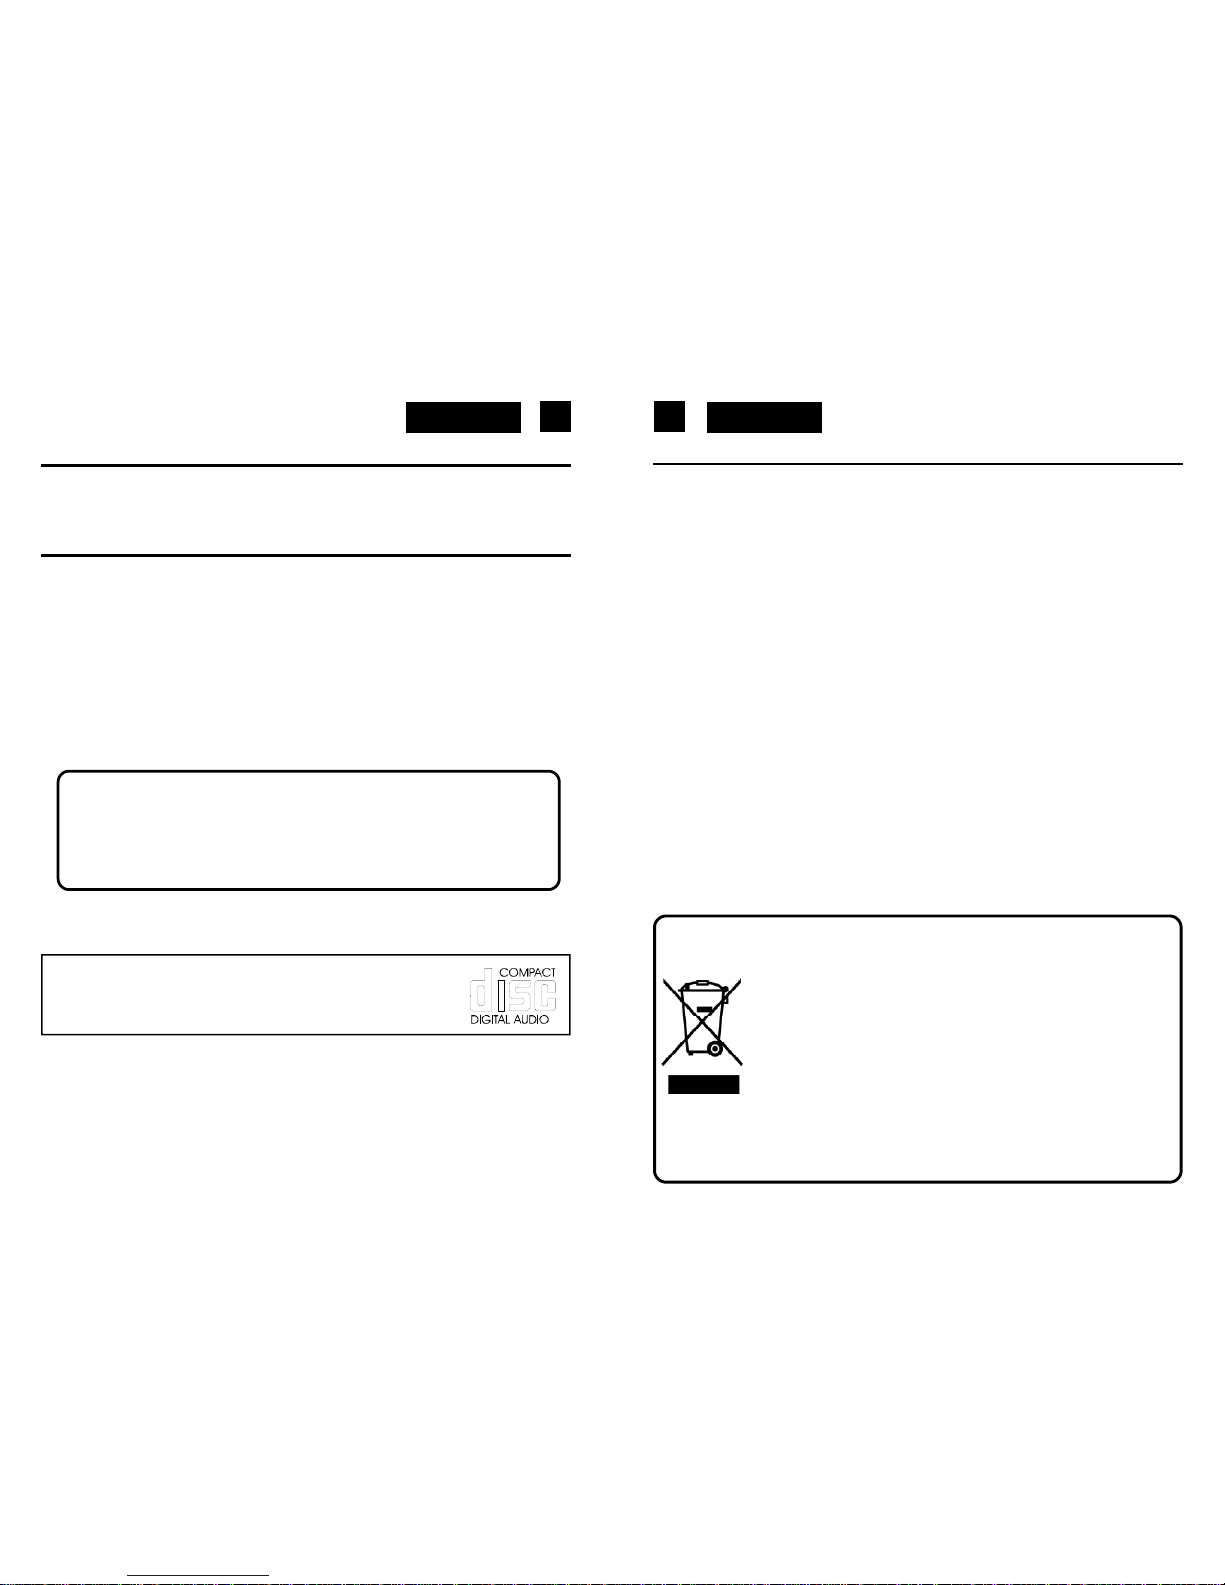
Correct Disposal of This Product
(Waste Electrical & Electronic Equipment)
This marking shown on the product or its literature, indicates that it
should not be disposed with other household wastes at the end of its
working life. To prevent possible harm to the environment or human
health from uncontrolled waste disposal, please separate this from
other types of wastes and recycle it responsibly to promote the
sustainable reuse of material resources.
Household users should contact either the retailer where they
purchased this product, or their local government office, for details of
where and how they can take this item for environmentally safe recycling.
Business users should contact their supplier and check the terms and
conditions of the purchase contract. This product should not be mixed
with other commercial wastes for disposal.
IMPORTANT
Sin
ce movement of the CD mechanism and the sensitive circuitry may cause interference
to a radio tuner nearby switch this unit off while operating other radio devices.
This product utilizes a laser
Danger - Invisible laser radiation when opened and interlock failed or defeated. Avoid
direct exposure to the beam.
Caution - Use of controls, adjustments, or procedures not listed in this manual may result
in hazardous radiation exposure.
Concerning Compact Discs
Only compact discs identified with this mark can be used with
this player.
SPECIFICATIONS
Note: Specifications and the design are subject to possible modifications without notice due to
improvement.
AUX-IN
Source should have a 3.5mm diameter stereo plug.When Audio is connected (10), it can
be ear from the speakers (other sources will be aut
omatically disconnected).
Set the Funtion Selector (9) ro CD/MP3/USB/AUX position.
Power Supply
A
C: 230V ~ 50Hz
Batteries: 8 xUM-1
Radio FrequencyCoverage
FM: 87.5 - 108 MHz
MW: 540 - 1600 kHz
General
AUX-IN: 3.5mm stereo jack plug
CD Player
Pick Up: 3-Beam. Semiconductor Laser
Encoding: 16-Bit Linear
Playability of self-made CDs on Roadstar CDdrive mechanisms.
C
D-R/CD-RW in CD-DA and in MP3 format can be played back. However it can occur,
due to differences in the quality of the media as well as the characteristics of the
recording, that individual self-made CDs cannot be read. This does not indicate an
incorrect function of the playback unit in these cases.
DeutschDeutsch 11 12
BEDIENUNGSANLEITUNG
Bitte lesen Sie aufmerksam diese Bedienungsanleitung, um sich mit Ihrem neuen
Radiorekorder vertraut zu machen, bevor Sie ihn zum ersten Mal in Betrieb nehmen. Bitte
bewahren Sie diese Anleitung auf, um später jederzeit nachschlagen zu können.
LAGE DERBEDIENUNGSELEMENTE
SICHERHEITSHINWEISE
DasAusrufszeichenim Dreieckweistden BenutzeraufwichtigeBedienungs-und
Wartungsanweisungen(Service)indiesemHandbuchhin,dieunbedingtzubefolgen
sind.
DasBlitzsymbolimDreieckweistden Benutzer auf “gefährlicheSpannungen”an
einigenfreiliegendenBauteilenimInnemdesGeräteshin.
Um die Gefahr elektrischer Schläge auszuschliessen, Gehäuse auf keinen Fall
abnehmen.ImInnembefindensichkeinevomBenutzerselbstinstandsetz-baren
Teile. Reparaturendürfen nur von einerautorisiertenFachwerkstattdurchgeführt
werden.
DieseApparatbenützt einen Laserstrahl. da GefahrAugenschädernbesteht,darf
nur qualifiziertes Personal den Deckel des Gerätes aufheben, entfernen oder
reparieren.
DunkelstrahlungbeigeöffnetenGerätenunddefektemVerschluss.Bedienungoder
RegulierungdertechnischenEigenshaftenodersonstigenichtspezifierteProzeduren
aufdiesermanuellenBetriebsartkönnenzurAusetzunggefährlicherLaserstrahlen
führen.
Dieses Gerät ist für 230V ~ 50Hz Netzspannung ausgelegt. Bei längerer
NichtbenutzungdesGerätsziehenSiedenStecker aus der Steckdose.
SetzenSiedasGerätwederFeuchtigkeitnoch Regenaus.
SchaltenSie das System erstdannein,wennSiealleVerbindungen genaugeprüft
haben.
Stellen Sie das Gerät so auf, dass immer eine ungestörte Frischluftzufuhr
sichergestelltist.Esistzum beispiel keinesfallsaufTeppiche und in derNähevon
Gardinenzu stellenoder in Bücherregaleeinzubauen.
SetzenSie das GerätwederdirekterSonneneinstrahlungnochWärmequellenaus.
BeimEinlegen der Batterien achten Sieauf die richtige Polarität.VermischenSie
keineneue Batterienmit altenoderentladenenBatterien.
Bei längerer Nichtbenutzung des Geräts (mehr als einen Monat) ziehen Sie die
Batterien heraus, um Auslaufen zu vermeiden, die schädlich für das Gerät sein
konnen.
Abspielbarkeit selbsterstellter CDsauf CD-Laufwerken von Roadstar.
CD-R/CD-RW im CD-DA- und im MP3-Format können abgespielt werden. Es
ist jedoch möglich, dass einzelne selbsterstellte CDs aufgrund einer
unterschiedlichenMedienqualitätundAufnahmeartnichtgelesenwerdenkönnen.
Dies bedeutet nicht, dass das Wiedergabegerät in diesen Fällen nicht
ordnungsgemäßfunktioniert.
RCR-4730U/RD
Tragbarer Stereo-Radiokassettenplayer mit CD/CD-R/CD-RW/MP3-Spieler,
und USB Port.
1. UKW-Antenne
2. Stand-By-Taste
3 USB Port
4. BAND-Wahlschalter (FMST/FM/
MW)
5. ABSTIMM-Knopf TRAGEGRIFF
6. CD-Fach Öffnungs-Ecke
7. CD FOLDER + / +10 -Taste
8. LAUTSTÄRKE-Regler
9. FUNKTIONS-Wahlschalter(RADIO/TAPE/CD/MP3/USB/AUX)
10. AUX-IN-Buchse
11. CD-PROGRAM/ P-MODE-Taste
12. CD FOLDER - / -10-Taste
13. CD-SUCH-/SPRUNG-Taste vorwärts ()
14. CD-SUCH-/SPRUNG-Taste rückwärts ()
15. LCD-Anzeige
16. AC-230V-Buchse
17. WIEDERGABE/PAUSE-Taste CD
18. BASS-BOOST-TASTE
19. STOP-Taste CD
20. BATTERIE-Fach
21. PAUSE-Taste
22. KASSETTEN-STOP-/AUSWURF-Taste
23. KASSETTEN-SCHNELLVORLAUF-Taste
24. KASSETTEN-RÜCKSPUL-Taste
25. KASSETTEN-WIEDERGABE-Taste
26.KASSETTEN-AUFNAHME-Taste (in diesem Modell nicht verfügbar)
27.STAND-BY-ANZEIGE
DeutschDeutsch
RUNDFUNKEMPFANG
Antenne
Für den UKW-Empfang befindet sich eine eingebaute UKW-Teleskopantenne (1) auf der
Rückseite des Gerätes. Ziehen Sie die Antenne heraus und drehen sie, bis der beste
Empfang erreicht wird.
Für den MW-Empfang werden die Signale über eine eingebaute Ferritantenne empfangen.
Sie brauchen das Gerät nur auszurichten, bis der beste Empfang erreicht wird.
UKW-Stereo-und Mono-Empfang
Wenn ein UKW-Signal eingestellt wird und Sie den UKW-Modus-Wahlschalter (4) auf FM
ST (UKW-Stereo) stellen, können Sie die Sendung in Stereo empfangen. Die UKW-StereoAnzeige (16) leuchtet auf. Wenn die Stereosignale schwach sind und der Empfang
geräuschvoll ist, ist es oft vorzuziehen, die Sendung in Mono zu empfangen. Stellen Sie den
UKW-Modus-Wahlschalter (4) auf FM (Mono). Der Empfang ist dann weniger geräuschvoll.
ZUM UMGANG MIT DENCOMPACT DISCS
• Um eine Disc aus ihrer Schutzhülle zu nehmen, drücken Sie auf die mittlere Halterung
und heben Sie die Disc hoch, wobei Sie vorsichtig an den Rändern halten sollten.
• Fingerabdrücke und Staub sollten von der bespielten Oberfläche der Disc vorsichtig
miteinem weichenTuch entferntwerden. Im Unterschiedzu denherkömmlichen Platten,
haben Compact Discs keine Rillen, in denen sich Staub und feinste Schmutzteilchen
ansammeln können. Somit werden durch das Abwischen mit einem weichen Tuch die
meisten Teilchen entfernt. Wischen Sie in geraden Bewegungen von der Mitte der Disc
zum Außenrand. Kleine Staubteilchen oder leichte Streifen beeinflussen keinesfalls
die Wiedergabequalität.
NETZANSCHLUSS
Bevor Sie das Gerät einschalten, vergewissern Sie sich, daß Ihre örtliche Netzspannung
mit der auf dem Typenschild angegebenen Spannung übereinstimmt.
Zu Ihrer eigenen Sicherheit lesen Sie sorgfältig die folgende Bedienungsanleitung, bevor
Sie das Gerät ans Netz anschließen.
NETZBETRIEB(AC)
Dieses Gerät funktioniert nur mit einer Spannung von AC 230V 50Hz. Wird das Gerät an
andere Stromquellen angeschlossen, könnte es Schaden nehmen.
Vorsicht
Um elektrischen Schlägen vorzubeugen, trennen Sie das Gerät vom Netz ab, bevor Sie den
Deckel entfernen. Verwenden sie keine nutzbaren inneren Teile. Für die Wartung wenden
Sie sich an qualifiziertes Kundendienstpersonal.
Sicherheitsmaßnahmen
Setzen Sie das Gerät weder Regen noch Feuchtigkeit aus.
Stromversorgung:AC 230Volt / 50Hz - nur Wechselstrom (AC)
Dieses Zeichen bedeutet, daß dieses Gerät doppelt isoliert ist. Eine Erdung ist nicht
notwendig.
VORBEREITUNGFÜRINBETRIEBNAHME
• Nehmen Sie das Gerät vorsichtig aus der Verpackung. Bewahren Sie diese für einen
eventuellen späteren Gebrauch auf.
• Bitte lesen Sie diese Bedienungsanleitung sorgfältig, bevor Sie das Gerät in Betrieb
nehmen.
Netzbetrieb(AC)
• Stecken Sie das mitgelieferte AC-Netzkabel in die AC-Netzbuchse auf der Rückseite
dieses tragbaren Stereo-Recorders. Schließen Sie das AC-Netzkabel an Ihr ACHaushaltstromnetz an, und schalten Sie den Netzschalter ein. Vergewissern Sie sich,
daß die Spannung übereinstimmt.
entsprechend der im Batteriefach angezeigten Polarität ein.
• Die Batterien sollten entfernt werden, wenn das Gerät für einige Zeit nicht benutzt wird.
• VerbrauchteBatteriensolltenentferntwerden,umdasAuslaufenvonSäurezu vermeiden.
13 14
Batteriebetrieb
• Bei Batteriebetrieb ziehen Sie das Netzkabel aus dem Gerät.
• ÖffnenSie das Batteriefach(20) auf der Geräterückseite undsetzen Sie 8 UM1-Batterien
1. Stellen Sie den Funktionswahlschalter (9) auf RADIO.
2. Wählen Sie das gewünschte Frequenzband mit dem Bandwahlschalter (4).
3. Stimmen Sie die gewünschte Radiostation mit dem Abstimmregler (5) ab.
4. Stellen Sie mit dem Lautstärkeregler (8 den gewünschten Lautstärkepegel ein.
5. Drücken Sie die Standby-Taste, um das Radio auszuschalten.

DeutschDeutsch 15 16
Drücken Sie die FOLDER + oder– Taste (7/12) um die gewünschte Album Nr. auszuwählen
DrückenSie diePLAY/PAUSE Taste () nocheinmal, um dieWiedergabe des Album von Titel
1 zu starten
ACHTUNG:Sie können auchdie Taste FOLDER+/+10oder FOLDER -/-10(7/12) um 10Titel
vor- oder zurück zu springen
AUFFINDEN EINES BESTIMMTEN TITELS ODEREINERTITELSTELLE
1. Drücken Sie die RÜCKWÄRTS-Taste()(14) einmal, um an den Anfang des laufenden
Titel zurückzukehren.
2. Drücken Sie die RÜCKWÄRTS-Taste () mehrmals, um zum vorherigen Titel
zurückzukehren.
3. DrückenSiedieVORWÄRTS-Taste (13) mehrmals,umzudenfolgendenTitelnzuspringen.
4. Halten Sie die VORWÄRTS-Taste () oder die RÜCKWÄRTS-Taste () gedrückt, um
schnell eine bestimmte Titelstelle vorwärts oder rückwärts aufzusuchen.
Hinweis: Während des Suchlaufs hören Sie einen niedrigeren Audio-Pegel, was Ihnen
erleichtert, die richtige Titelstelle zu finden.
Hinweis:Während der Sprungfunktion ,wegender Antischock-Funktion, wird der Spieler
einige Sekunden brauchen, um die gewünschte Titel zufinden.
WIEDERHOLTE WIEDERGABEINCD
1. Drücken Sie die PLAY/PAUSE-Taste (II)(17).
2. Um denselben Titel zu wiederholen, drücken Sie einmal die PROGRAM/ P-MODETaste (11). Auf dem Display blink die Anzeige . .
Beginnt die wiederholte Wiedergabe bis der STOP-Taste (19) gedrückt wird.
Um den Wiederhol-Modus zu löschen, drücken Sie die PROGRAM/ P-MODE-Taste (11)
viermal.
Die Anzeige verschwindet vom Display .
• Verwenden sie niemals chemische Produkte, wie Plattensprays, Antistatik-Sprays,
Benzin oder Verdünner, um Compact Discs zu reinigen. Diese Produkte könnten die
Oberfläche der CD ernsthaft beschädigen.
• Nach der Verwendung sollten die CDs wieder in ihre Schutzhülle zurückgelegt werden.
Damit werden ernsthafte Kratzer vermieden, die das Springendes Laser-Tonabnehmers
hervorrufen könnten.
• Setzen Sie die Discs nicht längere Zeit dem direkten Sonnenlicht, hoher Feuchtigkeit
oder hohen Temperaturen aus. Werden die CDs längere Zeit hohen Temperaturen
ausgesetzt, könnten sie sich verformen.
• Vermeiden Sie es, auf die beschriftete Seite der CD Aufkleber anzubringen oder mit
einem Kugelschreiber darauf zu schreiben.
öffnen.
3. Wenn die Klappe geöffnet ist, nehmen Sie eine Disc aus ihrer Schutzhülle und legen
Sie sie vorsichtig mit der beschrifteten Seite nach oben ins Fach ein. Legen Sie 3"Discs auf die mittlere Spindel im Fach.
4. Schließen Sie den Deckel, indem Sie auf die Ecke der Klappe des CD-Fachs drücken.
Auf dem Display erscheint die Gesamtanzahl der Titel.
Während der Wiedergabe wird die Titelnummer auf dem Display angezeigt.
5. Stellen Sie mit dem LAUTSTÄRKE-Regler den gewünschten Hörpegel ein.
6. Um die Wiedergabe zeitweilig zu stoppen, drücken Sie einmal die WIEDERGABE/
PAUSE-Taste (II)(16). Die PLAY-Anzeige blinkt auf dem Display. Drücken Sie erneut
die WIEDERGABE/PAUSE-Taste (II)(16), um die Wiedergabe fortzusetzen.
“ OP ” auf dem Display.
• Bevor Sie die Klappe öffnen, warten Sie, bis die CD vollständig stoppt.
• Dieses Gerät kann 3" (6cm) CD-Singles ohne Adapter wiedergeben.
CD/MP3/USB-BETRIEB
3.
Schliessen Sie den MP3-Player/carte an den USB, um ihn anzuschalten.
4. Während der Wiedergabe, wählen Sie das USB MP3-Lied wie mit normalen CDs.
3
. Umdie FOLDER (Titel) zuwiederholen(nurin MP3), drückenSiedreimal diePROGRAM/
P-MODE-Taste (11). Auf dem Display erscheint die Anzeige FOLD, und alle Titel der
Folder werden wieder gespielt.
Um den wiederholen FOLDER zu löschen, drücken Sie die PROGRAM/ P-MODE-Taste
(11)bis die Anzeige “FOLD” verschwindet vom Display .
7. Um die Wiedergabe zu stoppen, drücken Sie einmal die STOP-Taste (
)(19).
8. Um das Gerät auszuschalten, wählen Sie TAPE (9).
Hinweise:
• Wenn die CD-Klappe während der Wiedergabe versehentlich geöffnet wird, erscheint
FOLDER FUNKTION MIT MP3
Einlegen undHerausnehmen der Compact Discs
1. Stellen Sie den Funktionswahlschalter (9) auf CD/MP3/USB/AUX.
2. Heben Sie die CD-Öffnungsecke des CD-Fachdeckels (6) an, um das CD-Fach zu
Laden vonMP3-Dateien voneinem USB-MemoryStick.
1. Stellen Sie den Funktionswahlschalter (9) auf CD/MP3/USB/AUX.
2. Drücken Sie die PLAY/PAUSE/USB Taste (17) bis ‘USB’ erscheint auf dem
Display.
 Loading...