

PORTABLE STEREO MW/FM/FM-STEREO
Roadstar Management SA, via Passeggiata 7, CH 6883 Novazzano (Switzerland)
RADIO WI TH CASSETTE/CD/CD-R/ CD-RW/
MP3 PLAYER, USB PORT AND
MMC/SDCARD SLOT, WITH ANTI-S HOCK
FUNCTION.
RCR-4650USMP
Instruction manual
Bedienungsanleitung
Manuel d’instructions
Manuale d’istruzioni
Manual de instrucciones
Manual de instruções
R
is a registered Trademark of Roadstar S.A. - Switzerland All rights reserved
AUDIO VIDEO
INDEX
English Page 1
Deutsch Seite 11
Français Page 21
Italiano Pagina 31
Español Página 41
Portuguès Pagina 51
Fig.
Fig.
RCR-4650USMP
TOP VIEW
FRONT VIEW
• Your new unit was manufactured and assembled
under strict ROADSTAR quality control.
Thank-you for purchasing our product for your music
enjoyment.
Before operating the unit, please read this instruction manual carefully. Keep it also handy for further
future references.
• Votre nouvel appareil a été fabriqué et monté en
étant soumis aux nombreaux tests ROADSTAR. Nous
espérons que cet appareil vous donnera entière satisfaction.
Avant de vous adonner à ces activités, veuillez lire
attentivement ce manuel d’instructions. Conservezle
à portée de main à fin de référence ultérieure.
• Vuestro nuevo sistema ha sido construido según las
normas estrictas de control de calidad ROADSTAR.
Le felicitamos y le damos las gracias por su elección
de este aparado. Por favor leer el manual antes de
poner en funcionamiento el equipo y guardar esta
documentación en case de que se necesite
nuevamente.
• Ihr neues Gerät wurde unter Beachtung der strengen
ROADSTAR-Qualitätsvorschriften gefertigt.
Wir danken Ihnen für den Kauf unseres Produktes
und wünschen Ihnen optimalen Hörgenuss. Bitte
lesen Sie diese Bedienungsanleitung durch, und
heben Sie sie auf, um jederzeit darin nachschlagen
zu können.
• Il vostro nuovo apparecchio é stato prodotto ed
assemblato sotto lo stretto controllo di qualità
ROADSTAR .
Vi ringraziamo di aver acquistato un nostro prodotto
per il vostro piacere d’ascolto.
Prima di procedere all'utilizzo dell'apparecchio,
leggete attentamente il manuale d’istruzioni e
tenetelo sempre a portata di mano per futuri
riferimenti.
• Seu novo aparelho foi construido e montado sob o
estrito controle de qualidade da ROADSTAR.
Agradecemos por ter comprado nosso produto para
a sua diversão.
Antes de usar esta unidade é necessário ler com
atençâo este manual de instruções pare que possa
ser usada apropriadamente; mantenha o manual
ao seu alcance para outras informações.
REAR VIEW

English English
12
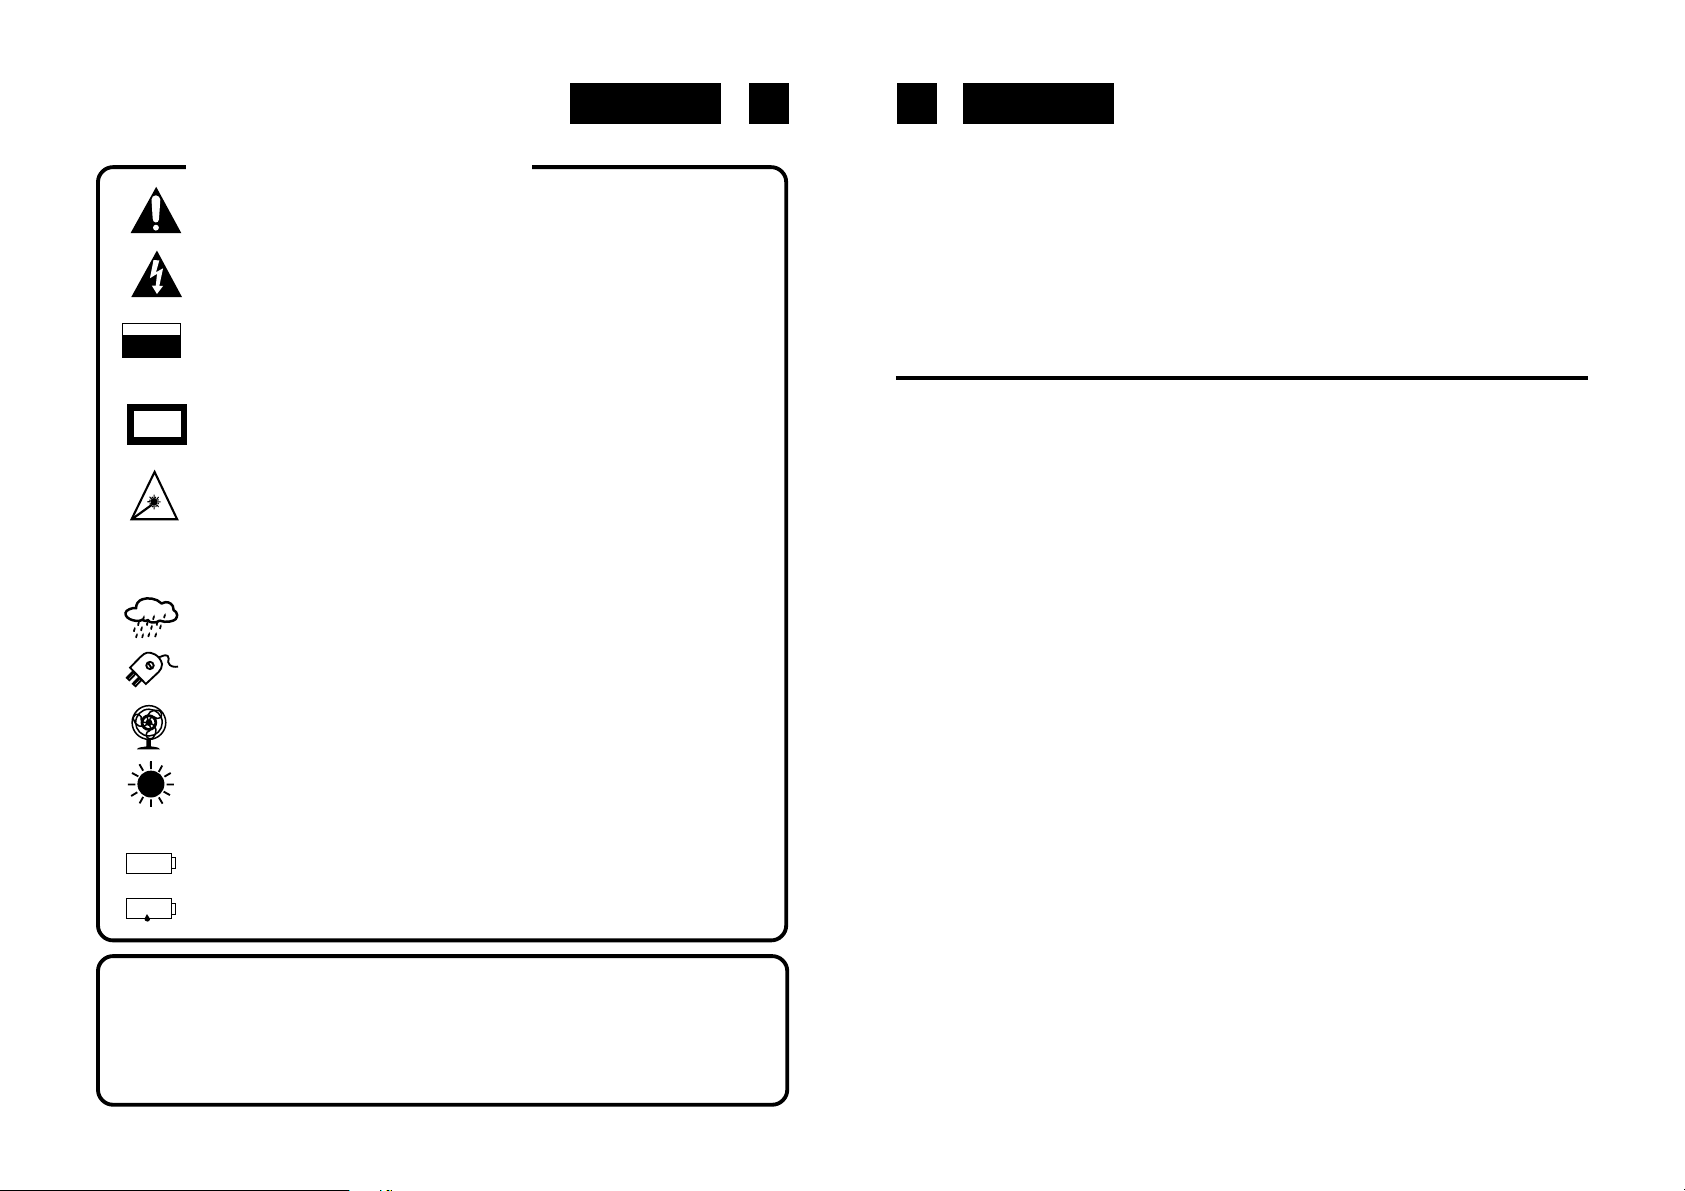
W ARNINGS
The exclamation point within the triangle is a warning sign alerting the
user of important instructions accompanying the
product.
The lightening flash with arrowhead symbol within the triangle is a warning sign alerting the user of “dangerous voltage” inside the unit.
CAUTION
RISK OF ELECTRIC
SHOCK
DO NOT OPEN
CLASS 1
LASER PRODUCT
230v~
- +
- +
Playability of self-made CDs on Roadstar CD drive mechanisms.
CD-R/CD-RW in CD-DA and in MP3 format can be played back. However it can
occur, due to dif ferences in the quality of the media as well as the characteristics
of the recording, that individual self-made CDs cannot be read. This does not
indicate an incorrect function of the playback unit in these cases.
To reduce the risk of electric shock, do not remove the cover. No user
serviceable parts inside the unit. Refer all servicing to
qualified personnel.
This unit employs a laser. Only a qualified service person should remove the cover or attempt to service this device, due to
possible eye injury.
Invisible laser radiation when the unit is opened or interlocks defeated.
Avoid exposure to laser beam. Use of controls,
adjustments or procedures other than those specified herein may result
in hazardous radiation exposure.
This unit operates on 230V ~ 50Hz. If the unit is not used for a long period
of time, remove the plug from the AC mains.
This unit must not be exposed to moisture or rain.
Ensure all connections are properly made before operating the unit.
This unit should be positioned so that it is properly ventilated. Avoid
placing it, for example, close to curtains, on the carpet or in a built-in
installation such as a bookcase.
Do not expose this unit to direct sunlight or heat radiating sources.
Make sure all batteries are inserted according to the proper
polarity. Do not mix old batteries with new ones.
If the unit is not used for a long period of time (more than 1 month),
remove all batteries from their compartment to avoid possible leaking.
RCR-4650USMP
Portabl e S tereo with Cassette/CD/CD-R/CD-R W/MP3 player , USB Por t a nd
MMC/SD Card slot.
INSTRUCTION MANUAL
Please read this instruction manual carefully and familiarize yourself with your new Radio
Cassette/CD/USB/MMC Player before using it for the first time. Please retain this manual
for future reference.
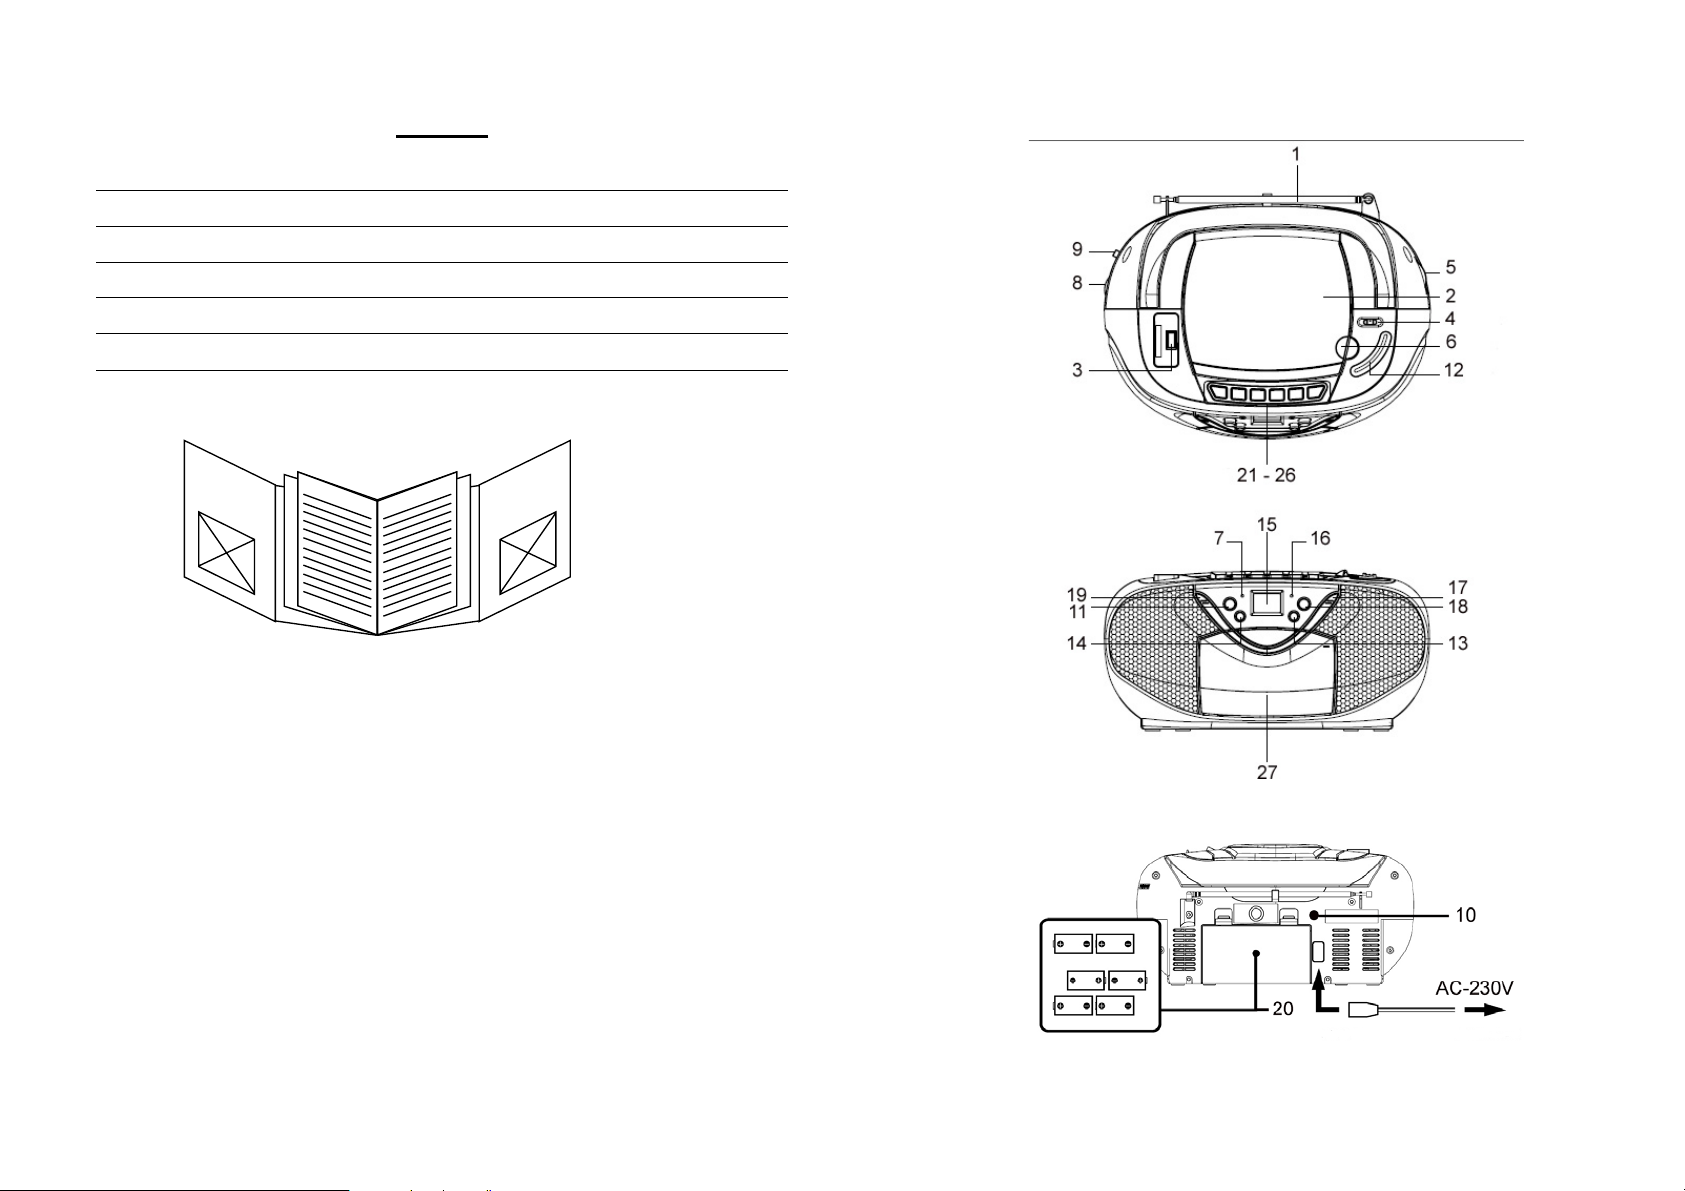
LOCATION OF CONTROLS
1 FM Antenna
2 CD Co mpar tment
3 USB Port
4 Band Switch ( FMST/FM/AM)
5 Tuni ng Con trol
6 CD Op en / Cl ose co rner
7 Power O N I ndicator
8 Volume C ontrol
9 Functi on Sw itch (RADIO/ TAP E-OFF/ C D/MP3/ USB/SD )
10 Not used on this model
11 CD Mode Bu tton
12 Dia l Sca le
13 CD For ward S kip/Search Bu tton ( )
14 CD Rev erse Skip/ Search Butt on ( )
15 LCD D ispl ay
16 FM Stereo indica tor
17 CD Pl ay/paus e B utton
18 Alb um CD Bu tton
19 CD Stop Button
20 Bat tery Compa rtment
21 Tape Pa use But ton
22 Tape Stop/Eje ct Bu tton
23 Tape Fa st Fo rward Butt on
24 Tape Rew ind Bu tton
25 Tape Pl ay B utton
26 But ton not operative in this model
27 Cass ette C omp artm ent
28 SD/MMC Card Slot
English English
VERY IMPORTANT: This unit has a built-in circuit to switch OFF automatically
the unit after 10 minutes that NO Audio is played from CD/USB/SD or Radio. To
switch ON again, move the function switch to OFF for about 3 seconds then
switch to the desired function to turn ON the unit again.
34
CONNECTING TO POWER
Before switching on make sure that the voltage of your electricity supply is the same as
that indicated on the rating plate.
For your own safety read the following instructions carefully before attempting to connect
this unit to the mains.
MAINS (AC) OPERATION
This unit is designed to operate on AC 230V 50Hz current only. Connecting it to other
power sources may damage the unit.
Caution
To prevent electric shock disconnect from the mains before removing cover. No user
serviceable parts inside. Refer servicing to qualified service personnel.
Safety Precaution
Do not allow this unit to be exposed to rain or moisture.
Mains Supply: AC230Volts / 50Hz - AC only
This symbol means that this unit is double insulated. An earth connection is not
required.
RADIO OPERATION
1. Set the Function Selector (9) to the RADIO position.
2. Select the desired frequency band with the Band Selector (4).
3. Tune to the desired radio station by turning the Tuning control (5).
4. Adjust the Volume (8) control to the desired level.
5. To turn off the radio, set the Function Selector (9) to the TAPE-OFF position.
Antenna
For FM reception there is a built-in telescopic FM antenna (1) at the rear of the unit. Extend
the antenna and move it around to obtain the best reception.
For MW reception the signals are picked up through a built-in ferrite antenna. Y our may have
to orient the unit to obtain the best reception.
FM Stereo and Mono Reception
When an FM signal is tuned in, setting the BAND selector (4) to the FM ST position will enable
the broadcasting to be received in stereo sound. The FM Stereo indicator (16) will light up.
When stereo signals are weak and the reception is noisy, it is often preferable to receive the
broadcasting in mono. Switch the Band Selector (4) to FM (Mono). Reception will then be less noisy.
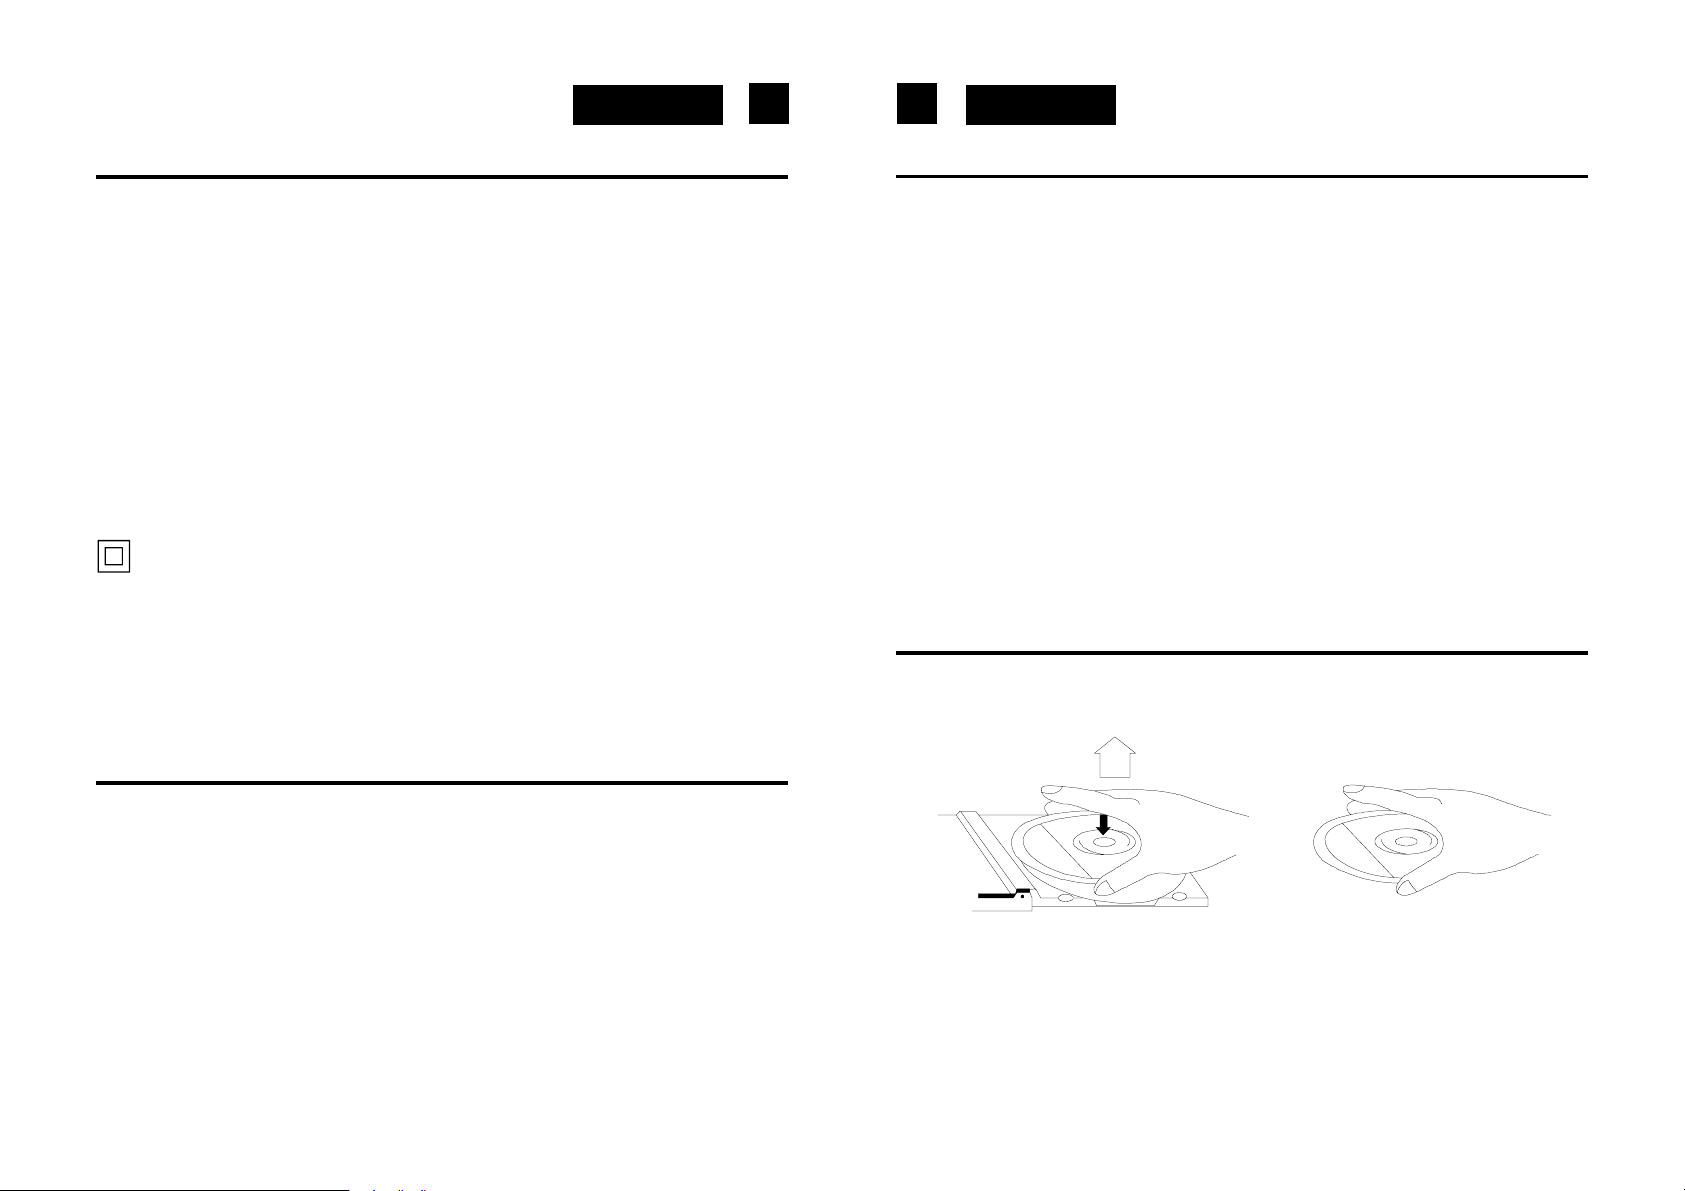
COMPACT DISC OPERA TION
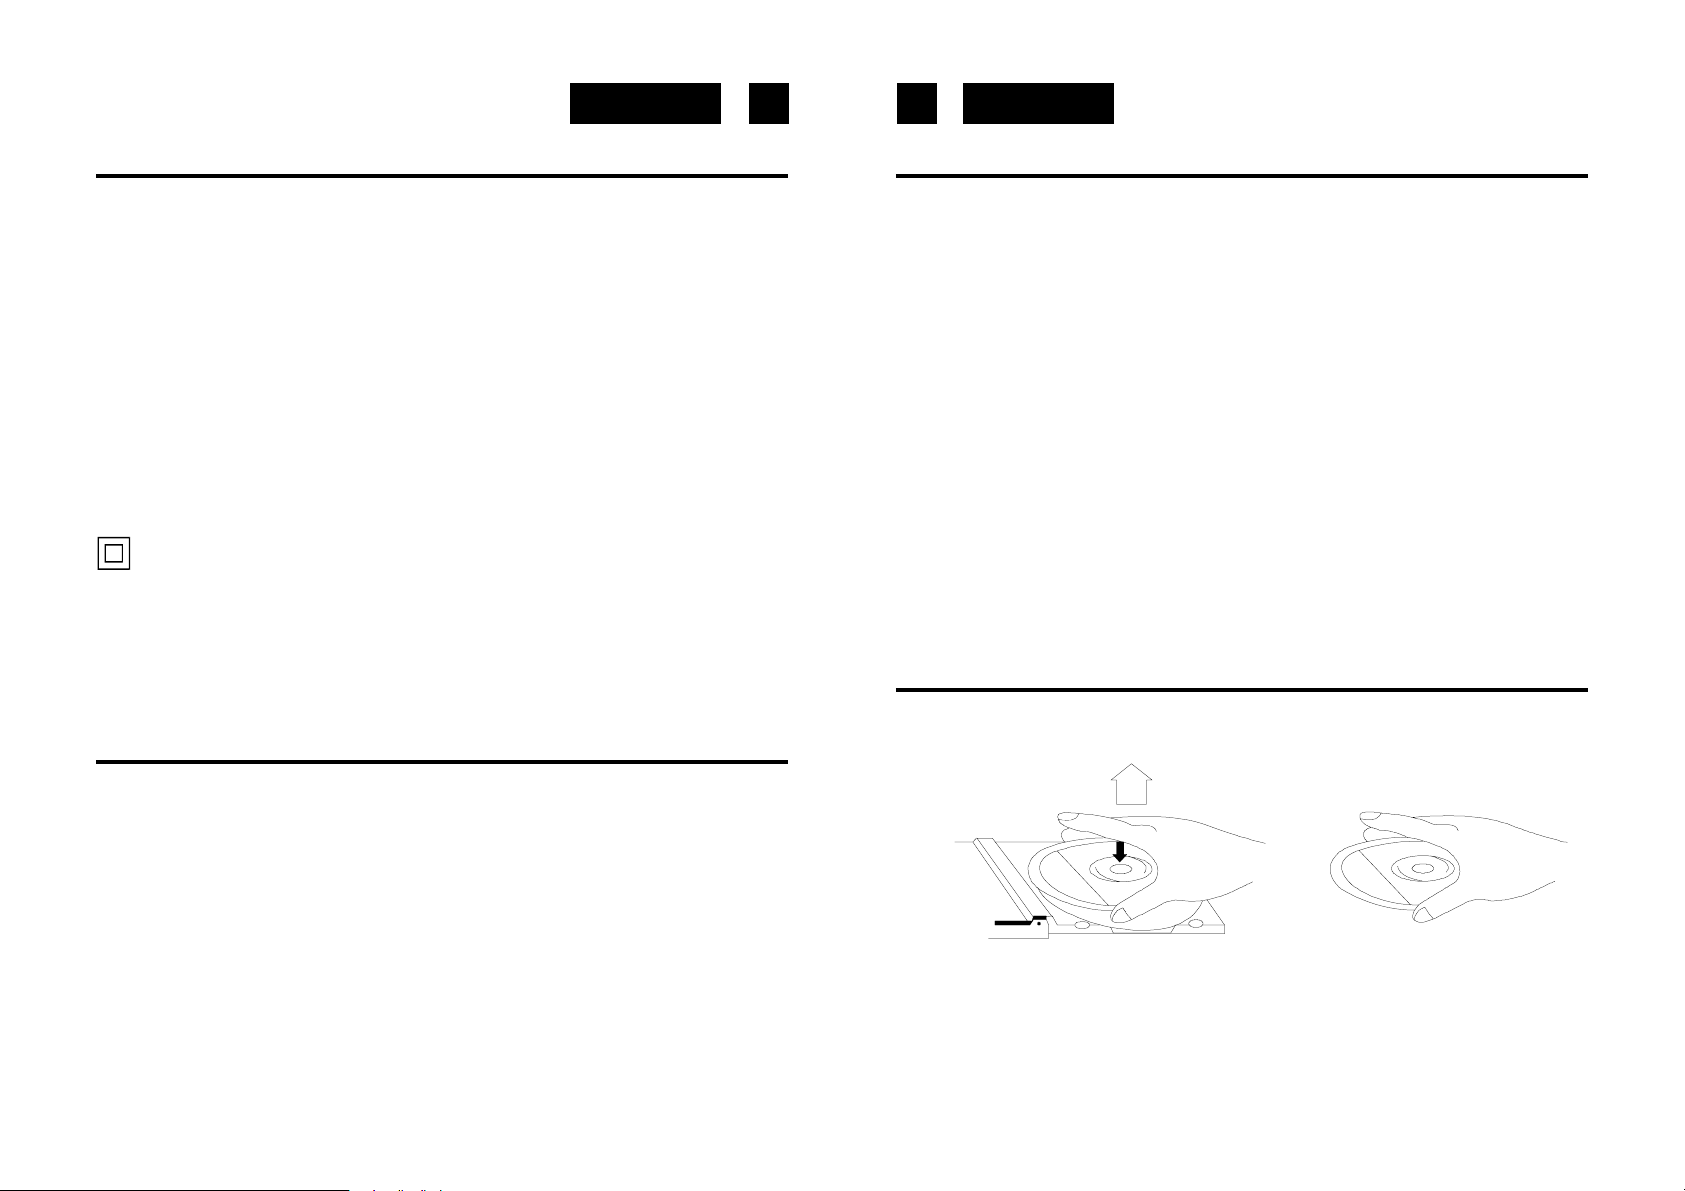
• To remove a disc from its storage case, press down on the centre of the case and lift the
disc out, holding it carefully by the edges.
POWER SUPPL Y
• Remove the stereo carefully from the box, retaining the packaging for future use.
• Please read this instruction book carefully before operating this unit.
AC Power Operation
• Plug the supplied AC power cord into the AC power socket on the back of this portable
stereo. Connect the AC Power Cord to your AC household mains outlet and switch on
the mains supply. Make sure the voltage is compatible.
Battery Operation
• Remove mains lead from the unit for battery operation.
• Open the Battery Compartment (20) at the back of the stereo and insert six UM-2
batteries following the polarity diagram shown inside the battery compartment.
• Batteries should be removed form the compartment if the unit is not to be used for
some time.
• Flat batteries should be removed from the unit to avoid leakage.
• Fingerprints and dust should be carefully wiped off the disc's recorded surface with a
soft cloth. Unlike conventional records, compact discs have no grooves to collect dust
and microscopic debris so gently wiping with a soft cloth should remove most particles.
Wipe in a straight line from the inside to the outside of the disc. Small dust particles and
light stains will have absolutely no effect on reproduction quality.
• Never use chemicals such as record sprays, antistatic sprays, benzine, or thinners to
clean compact discs. These chemicals can irreparably damage the disc’s surface.

English English
56
• Discs should be returned to their cases after use. This avoids serious scratches that
could cause the Laser pickup to skip.
• Do not expose discs to direct sunlight, high humidity, or high temperatures for extended
periods. Long exposure to high temperatures can warp the disc.
• Do not stick paper or write anything with a ballpoint pen on the label side of the disc.
CD/MP3 PLA YBACK
Loading and Unloading Compact Discs
1. Set the Function Selector (9) to the CD/MP3/USB Position.
2. Open the disc compartment by lifting the CD OPEN corner (6).
3. When the door has opened, remove a disc from its case and place it carefully in the
compartment with the label side facing up. Locate 3” discs, on the central spindle in the
compartment.
4. Close the door by pressing on the corner of the CD door.
The total number of tracks appears on the display: Playback starts.
During playback, the actual track appears.
5. Adjust the VOLUME control to your desired listening level.
6. To stop playback temporarily, press the PLAY/PAUSE (II ) button (17) once. The Play
indicator will flash on the display. Press the PLAY/P AUSE (II ) button again to resume
playback.
7. To stop playback, press the STOP () (19) button once.
8. To switch OFF the unit select TAPE with the Function Selector (9).
Notes:
• When the CD door is accidentally opened during playback, " --- " will appear on the
display.
• Wait until the disc is fully stopped before opening the CD (2) compartment.
• This unit can play 3" (8cm) single CDs without an adaptor.
Loading MP3 files from a USB memory Stick
1. Set the function switch to CD/MP3/USB.
2. Connect the MP3 player to the USB port to switch it on.
3. Once playing, the USB MP3 track can be selected in the same way as the CD tracks.
LOCATING A P ARTICULAR TRACK OR POINT OF THE TRACK
1. Press the SKIP DN ()(14) button once to go back to the beginning of the current track.
2. Press the SKIP DN button repeatedly to go back to previous tracks.
3. Press the SKIP UP ()(13) button repeatedly to go to next tracks.
4. Press and hold either SKIP UP or SKIP DN button to search backwards or forwards, at
high speed, a particular point of track.
Note: Low level audio will be heard during the search process to assist in locating the
correct point in the track.
REPEA T PLAYBACK WITH CD
1. Press the PLAY/PAUSE button (17).
2. To repeat the same track, press the MODE button (11) once. The indicator ‘REP 1’
appears on the display.
The CD will start single repeat playback until STOP button (19) is pressed. Press the
MODE button 4 times more to cancel single repeat. The indicator ‘REP 1’ disappears
from the display.
3. To repeat the entire disc, press the MODE button (11) twice. REP ALL will appear on
the display.
Press the MODE button 3 times more to cancel all disc repeat. The indicator REP ALL
disappears from the display.
RANDOM PLA Y WITH CD
1. Press the PLAY/PAUSE button (17) and after press the MODE button (11) 4 times to
enter the Random mode. “RAND” appears on the display, then press PLAY/PAUSE
button (17) to start playback in Random order.
2. Press SKIP UP button (13) to go to next Random track.
3. Press the MODE button once more to return to the Normal Playback mode.
REPEAT PLA YBACK WITH MP3
1. Press the PLAY/PAUSE button (17).
2. To repeat the same track, press the MODE button (11) once. The indicator ‘REP 1’
appears on the display.
The CD will start single repeat playback until STOP button (19) is pressed. Press the
MODE button 4 times more to cancel single repeat. The indicator ‘REP 1’ disappears
from the display.

English English
78
3. To repeat the entire disc, press the MODE button (11) three times. REP ALL will appear
on the display.
4. Press the MODE button 3 times more to cancel all disc repeat. The indicator
disappears from the display.
RANDOM PLA Y IN MP3
1. Press the PLAY/PAUSE button (17) and after press the MODE button (11) 3 times to
enter the Random mode. “RAND” appears on the display, then press PLAY/PAUSE
button (17) to start playback in Random order.
2. Press SKIP UP button (13) to go to next Random track.
3. Press the MODE button once more to return to the Normal Playback mode.
PROGRAMMED PLA YBACK FOR CD/USB AND MMC/SD CARD
IN CD
1. Press the PLAY/PAUSE button (17) and after 5 seconds the STOP button (19).
2. Press the MODE button (11). The track number “P-01” will appear and “PROG” will
appear on the display indicating the first selection.
3. Press SKIP DN () or SKIP UP () button to select the desired track to be programmed.
The track number which will be programmed will appears on the display.
4. Press once the MODE button (11) to enter the track into memory. “P-02” will appear.
5. Repeat the steps 3 and 4 to program up to 20 tracks.
6. Press PLAY/PAUSE (II) button (10) once to start programmed playback.
7. To cancel programmed playback, press the STOP button (19) twice.
Note: During program playback, if you wish to repeat the entire programmed playback,
press the MODE button (11) repeatedly until the “REP” indicator appears on the
display.
Notes:
• The Anti-shock function will not correct the errors arising from the use of defective
scratched or dirty discs.
• IMPORTANT! During CD/MP3 playback, the ANTI-SHOCK function is always ON and
this function can not be disactivated.
CASSETTE OPERATION
INSERTION AND REMOV AL OF CASSETTES
1. Press the Stop/Eject Button (22) to open the Cassette Door.
2. Slip your cassette tape into the holder with the exposed side facing up (the side for
playing faces you).
3 Close the Cassette Doors securely before starting.
4 When finished playback, press the Stop/Eject Button to open the Cassette Door, and
retrieve your cassette tape.
PLA YBACK
1. Set the Function Selector (9) to the TAPE position.
2. Insert your cassette tape with the exposed side facing up.
3. Press the Play Key (25) to activate playback.
4. Set the Volume to the desired level.
5 Press the Stop/Eject Key (22) when finished.
ANTI-SHOCK FUNCTION
• If in use, the player is likely to receive shocks or vibrations (i.e. whilst walking or in a
moving vehicle), The ANTI-SHOCK function is active to provide uninterrupted playback
when power on.
• Should the player receive shocks for more than 10 seconds continuously in CD playback
or 35 seconds in MP3 playback, the sound can mute for a very short while and will
resume once the player has stabilised from the shock.
English English
910
IMPORT ANT
Since movement of the CD mechanism and the sensitive circuitry may cause interference
to a radio tuner nearby switch this unit off while operating other radio devices.
This product utilizes a laser
Danger - Invisible laser radiation when opened and interlock failed or defeated. Avoid
direct exposure to the beam.
Caution - Use of controls, adjustments, or procedures not listed in this manual may result
in hazardous radiation exposure.
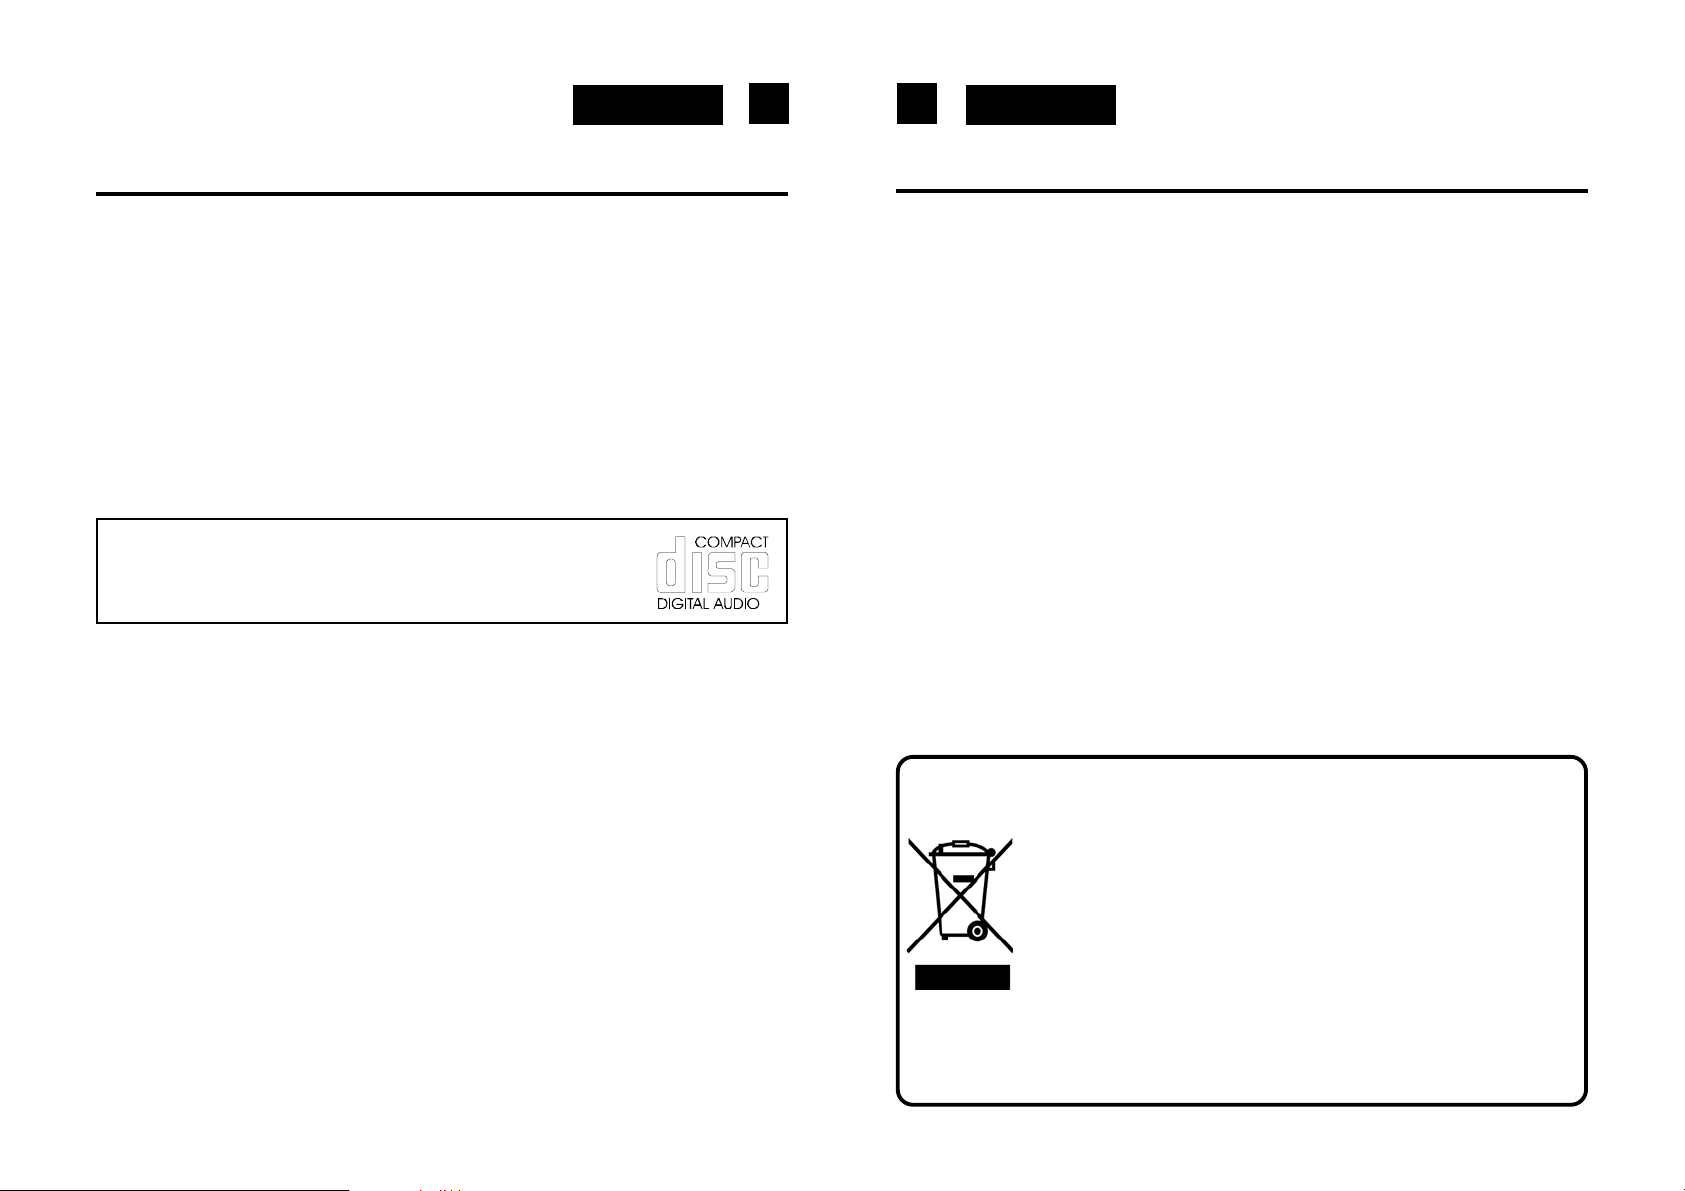
Concerning Compact Discs
Only compact discs identified with this mark can be used with
this player.
VERY
power Management) when not operative for some time it switch
OFF automathically. To re-activate the unit, move the Function
IMPORTANT: this unit is equipped with ErP circuit (Stand-By
and
please
Selector to TAPE/OFF then move it again to CD / RRadio mode.
SPECIFICA TIONS
Power Supply
AC : 230V ~ 50Hz
Batteries: 6 x UM-2
Radio Freque ncy Coverag e
FM: 87.5 - 108 MHz
MW: 540 - 1600 kHz
CD Player
Pick Up: 3-Beam. Semicon ductor
Laser Encodi n g : 16-Bit Linear
Note: S pecifications and the design are subject to possible modifications without notice due to improvem
Correct Disposal of This Product
(Waste Electrical & Electronic Equipment)
This marking shown on the product or its literature, indicates that it
should not be disposed with other household wastes at the end of its
working life. To prevent possible harm to the environment or human
health from uncontrolled waste disposal, please separate this from
other types of wastes and recycle it responsibly to promote the
sustainable reuse of material resources.
Household users should contact either the retailer where they
purchased this product, or their local government office, for details of
where and how they can take this item for environmentally safe recycling.
Business users should contact their supplier and check the terms and
conditions of the purchase contract. This product should not be mixed
with other commercial wastes for disposal.
11 12
DeutschDeutsch
SICHERHEITSHINWEISE
Das Ausrufszeichen im Dreieck weist den Benutzer auf wichtige Bedienungs- und
Wartungsanweisungen (Service) in diesem Handbuch hin, die unbedingt zu befolgen
sind.
Das Blitzsymbol im Dreieck weist den Benutzer auf “gefährliche Spannungen” an
einigen freiliegenden Bauteilen im Innem des Gerätes hin.
CAUTION
RISK OF ELECTRIC
SHOCK
DO NOT OPEN
CLASS 1
LASER PRODUCT
230v~
- +
- +
Abspielbarkeit selbsterstellter CDs auf CD-Laufwerken von Roadstar .
CD-R/CD-RW im CD-DA- und im MP3-Format können abgespielt werden. Es
ist jedoch möglich, dass einzelne selbsterstellte CDs aufgrund einer
unterschiedlichen Medienqualität und Aufnahmeart nicht gelesen werden können.
Dies bedeutet nicht, dass das Wiedergabegerät in diesen Fällen nicht
ordnungsgemäß funktioniert.
Um die Gefahr elektrischer Schläge auszuschliessen, Gehäuse auf keinen Fall
abnehmen. Im Innem befinden sich keine vom Benutzer selbst instandsetz-baren
T eile. Reparaturen dürfen nur von einer autorisierten Fachwerkstatt durchgeführt
werden.
Diese Apparat benützt einen Laserstrahl. da Gefahr Augenschädern besteht, darf
nur qualifiziertes Personal den Deckel des Gerätes aufheben, entfernen oder
reparieren.
Dunkelstrahlung bei geöffneten Geräten und defektem Verschluss. Bedienung oder
Regulierung der technischen Eigenshaften oder sonstige nicht spezifierte Prozeduren
auf dieser manuellen Betriebsart können zur Ausetzung gefährlicher Laserstrahlen
führen.
Dieses Gerät ist für 230V ~ 50Hz Netzspannung ausgelegt. Bei längerer
Nichtbenutzung des Geräts ziehen Sie den Stecker aus der S teckdose.
Setzen Sie das Gerät weder Feuchtigkeit noch Regen aus.
Schalten Sie das System erst dann ein, wenn Sie alle Verbindungen genau geprüft
haben.
Stellen Sie das Gerät so auf, dass immer eine ungestörte Frischluftzufuhr
sichergestellt ist. Es ist zum beispiel keinesfalls auf T eppiche und in der Nähe von
Gardinen zu stellen oder in Bücherregale einzubauen.
Setzen Sie das Gerät weder direkter Sonneneinstrahlung noch Wärmequellen aus.
Beim Einlegen der Batterien achten Sie auf die richtige Polarität. Vermischen Sie
keine neue Batterien mit alten oder entladenen Batterien.
Bei längerer Nichtbenutzung des Geräts (mehr als einen Monat) ziehen Sie die
Batterien heraus, um Auslaufen zu vermeiden, die schädlich für das Gerät sein
konnen.
RCR-4650USMP
Tragbarer Stereo-Radiokassettenrekorder mit CD/CD-R/CD-RW/MP3-Spieler,
USB Port und MMC/SD Card Reader.
BEDIENUNGSANLEITUNG
Bitte lesen Sie aufmerksam diese Bedienungsanleitung, um sich mit Ihrem neuen
Radiorekorder vertraut zu machen, bevor Sie ihn zum ersten Mal in Betrieb nehmen. Bitte
bewahren Sie diese Anleitung auf, um später jederzeit nachschlagen zu können.
LAGE DER BEDIENUNGSELEMENTE
1. UKW-Antenne
2. CD-Fach
3 USB Port
4. BAND-Wah lschalt er (FMS T/FM/AM )
5. ABST IMM- Kno pf T RAG EGR IFF
6. CD-Fach Öffnungs-Ecke
7. Power-Anzei g e
8. LAUTSTÄRKE-Regler
9. FUNKTIONS-W ahlschalter
10. Nicht verwendet bei diesem Modell
11. CD-MODE-Taste
12. Radio Dial Scale
13. CD-SUCH-/SPRUNG-Taste vorwärts ()
14. CD-SUCH-/SPRUNG-Taste rückwärts ()
15. LCD-Anze ige
16. UKW-Stereo-Anzeige
17. WIEDERGABE/P AUSE-T aste
18. Album-TASTE
19. STOP-Taste CD
20. BATTERIE -Fach
21. PAUSE-Taste
22. KASSETTEN-STOP-/AUSWURF-Taste
23. KASSETTEN-SCHNELLVORLAUF-Taste
24. KASSETTEN-RÜCKSPU L -Taste
25. KASSETTEN-WIEDERGABE-Taste
26. Taste nicht operative in diesem Modell
27. KASSETT EN-Fach
28. SD/MMC-Eingang
(RADIO/T APE-OFF /CD/MP3/USB/ SD)
CD
13 14
SEHR WICHTIG: Dieses Gerät verfügt über eine eingebaute Schaltung automatisch ausschalten das Gerät nach 10 Minuten, dass NO Audio von CD/USB/SD
oder Radio gespielt wird. So schalten Sie wieder ein, schieben Sie den Schalter
auf OFF für ca. 3 Sekunden wechseln Sie dann auf die gewünschte Funktion, um
das Gerät wieder einzuschalten.
DeutschDeutsch
NETZANSCHLUSS
Bevor Sie das Gerät einschalten, vergewissern Sie sich, daß Ihre örtliche Netzspannung
mit der auf dem Typenschild angegebenen Spannung übereinstimmt.
Zu Ihrer eigenen Sicherheit lesen Sie sorgfältig die folgende Bedienungsanleitung, bevor
Sie das Gerät ans Netz anschließen.
NETZBETRIEB (AC)
Dieses Gerät funktioniert nur mit einer Spannung von AC 230V 50Hz. Wird das Gerät an
andere Stromquellen angeschlossen, könnte es Schaden nehmen.
Vorsicht
Um elektrischen Schlägen vorzubeugen, trennen Sie das Gerät vom Netz ab, bevor Sie den
Deckel entfernen. Verwenden sie keine nutzbaren inneren Teile. Für die Wartung wenden
Sie sich an qualifiziertes Kundendienstpersonal.
Sicherheitsmaßnahmen
Setzen Sie das Gerät weder Regen noch Feuchtigkeit aus.
Stromversorgung: AC 230Volt / 50Hz - nur Wechselstrom (AC)
Dieses Zeichen bedeutet, daß dieses Gerät doppelt isoliert ist. Eine Erdung ist nicht
notwendig.
VORBEREITUNG FÜR INBETRIEBNAHME
• Nehmen Sie das Gerät vorsichtig aus der Verpackung. Bewahren Sie diese für einen
eventuellen späteren Gebrauch auf.
• Bitte lesen Sie diese Bedienungsanleitung sorgfältig, bevor Sie das Gerät in Betrieb
nehmen.
Netzbetrieb (AC)
• Stecken Sie das mitgelieferte AC-Netzkabel in die AC-Netzbuchse auf der Rückseite
dieses tragbaren Stereo-Recorders. Schließen Sie das AC-Netzkabel an Ihr ACHaushaltstromnetz an, und schalten Sie den Netzschalter ein. Vergewissern Sie sich,
daß die Spannung übereinstimmt.
Batteriebetrieb
• Bei Batteriebetrieb ziehen Sie das Netzkabel aus dem Gerät.
• Öffnen Sie das Batteriefach (20) auf der Geräterückseite und setzen Sie 6 x LR20Batterien (UM-2) entsprechend der im Batteriefach angezeigten Polarität ein.
• Die Batterien sollten entfernt werden, wenn das Gerät für einige Zeit nicht benutzt wird.
• Verbrauchte Batterien sollten entfernt werden, um das Auslaufen von Säure zu vermeiden.
RUNDFUNKEMPFANG
1. Stellen Sie den Funktionswahlschalter (9) auf RADIO.
2. Wählen Sie das gewünschte Frequenzband mit dem Bandwahlschalter (4).
3. Stimmen Sie die gewünschte Radiostation mit dem Abstimmregler (5) ab.
4. Stellen Sie mit dem Lautstärkeregler (8 den gewünschten Lautstärkepegel ein.
5. Stellen Sie den Funktionswahlschalter (9) auf TAPE-OFF, um das Radio auszuschalten.
Antenne
Für den UKW-Empfang befindet sich eine eingebaute UKW-Teleskopantenne (1) auf der
Rückseite des Gerätes. Ziehen Sie die Antenne heraus und drehen sie, bis der beste
Empfang erreicht wird.
Für den MW-Empfang werden die Signale über eine eingebaute Ferritantenne empfangen.
Sie brauchen das Gerät nur auszurichten, bis der beste Empfang erreicht wird.
UKW-Stereo- und Mono-Empfang
Wenn ein UKW-Signal eingestellt wird und Sie den UKW-Modus-Wahlschalter (4) auf FM
ST (UKW-Stereo) stellen, können Sie die Sendung in Stereo empfangen. Die UKW-StereoAnzeige (16) leuchtet auf. Wenn die Stereosignale schwach sind und der Empfang
geräuschvoll ist, ist es oft vorzuziehen, die Sendung in Mono zu empfangen. Stellen Sie den
UKW-Modus-Wahlschalter (4) auf FM (Mono). Der Empfang ist dann weniger geräuschvoll.
ZUM UMGANG MIT DEN COMP ACT DISCS
• Um eine Disc aus ihrer Schutzhülle zu nehmen, drücken Sie auf die mittlere Halterung
und heben Sie die Disc hoch, wobei Sie vorsichtig an den Rändern halten sollten.
• Fingerabdrücke und Staub sollten von der bespielten Oberfläche der Disc vorsichtig
mit einem weichen Tuch entfernt werden. Im Unterschied zu den herkömmlichen Platten,
haben Compact Discs keine Rillen, in denen sich Staub und feinste Schmutzteilchen
ansammeln können. Somit werden durch das Abwischen mit einem weichen Tuch die
meisten Teilchen entfernt. Wischen Sie in geraden Bewegungen von der Mitte der Disc
zum Außenrand. Kleine Staubteilchen oder leichte Streifen beeinflussen keinesfalls
die Wiedergabequalität.

15 16
DeutschDeutsch
• Verwenden sie niemals chemische Produkte, wie Plattensprays, Antistatik-Sprays,
Benzin oder Verdünner, um Compact Discs zu reinigen. Diese Produkte könnten die
Oberfläche der CD ernsthaft beschädigen.
• Nach der Verwendung sollten die CDs wieder in ihre Schutzhülle zurückgelegt werden.
Damit werden ernsthafte Kratzer vermieden, die das S pringen des Laser-Tonabnehmers
hervorrufen könnten.
• Setzen Sie die Discs nicht längere Zeit dem direkten Sonnenlicht, hoher Feuchtigkeit
oder hohen Temperaturen aus. Werden die CDs längere Zeit hohen Temperaturen
ausgesetzt, könnten sie sich verformen.
• Vermeiden Sie es, auf die beschriftete Seite der CD Aufkleber anzubringen oder mit
einem Kugelschreiber darauf zu schreiben.
CD/MP3-BETRIEB
Einlegen und Herausnehmen der Compact Discs
1. Stellen Sie den Funktionswahlschalter (9) auf CD/MP3/USB.
2. Heben Sie die C D-Öffnungsecke des CD-Fachdeckels ( 6) an, um das CD-Fach zu
öffnen.
3. Wenn die Klappe geöffnet ist, nehmen Sie eine Disc aus ihrer Schutzhülle und legen
Sie sie vorsichtig mit der beschrifteten Seite nach oben ins Fach ein. Legen Sie 3"Discs auf die mittlere Spindel im Fach.
4. Schließen Sie den Deckel, indem Sie auf die Ecke der Klappe des CD-Fachs drücken.
Auf dem Display erscheint die Gesamtanzahl der Titel.
Während der Wiedergabe wird die Titelnummer auf dem Display angezeigt.
5. Stellen Sie mit dem LAUTSTÄRKE-Regler den gewünschten Hörpegel ein.
6. Um die Wiedergabe zeitweilig zu stoppen, drücken Sie einmal die WIEDERGABE/
PAUSE-Taste (II)(16). Die PLAY-Anzeige blinkt auf dem Display. Drücken Sie erneut
die WIEDERGABE/PAUSE-Taste (II)(16), um die Wiedergabe fortzusetzen.
7. Um die Wiedergabe zu stoppen, drücken Sie einmal die STOP-Taste ()(19).
8. Um das Gerät auszuschalten, wählen Sie TAPE (9).
Hinweise:
• Wenn die CD-Klappe während der Wiedergabe versehentlich geöffnet wird, erscheint
“---” auf dem Display.
• Bevor Sie die Klappe öffnen, warten Sie, bis die CD vollständig stoppt.
• Dieses Gerät kann 3" (6cm) CD-Singles ohne Adapter wiedergeben.
Laden von MP3-Dateien von einem USB-Memory Stick
1. Stellen Sie den Funktionswahlschalter (9) auf CD/MP3/USB.
2. Schliessen Sie den MP3-Player an den USB Port, um ihn anzuschalten.
3. Während der Wiedergabe, wählen Sie das USB MP3-Lied wie mit normalen CDs.
AUFFINDEN EINES BESTIMMTEN TITELS ODER EINER TITELSTELLE
1. Drücken Sie die RÜCKWÄRTS-Taste ()(14) einmal, um an den Anfang des laufenden
Titel zurückzukehren.
2. Drücken Sie die RÜCKWÄRTS-Taste ( ) mehrmals, um zum vorherigen Titel
zurückzukehren.
3. Drücken Sie die VORWÄRTS-T aste (13) mehrmals, um zu den folgenden T iteln zu springen.
4. Halten Sie die VORWÄRTS-Taste () oder die RÜCKWÄRTS-Taste () gedrückt, um
schnell eine bestimmte Titelstelle vorwärts oder rückwärts aufzusuchen.
Hinweis: Während des Suchlaufs hören Sie einen niedrigeren Audio-Pegel, was Ihnen
erleichtert, die richtige Titelstelle zu finden.
Hinweis: Während der Sprungfunktion , wegen der Antischock-Funktion, wird der Spieler
einige Sekunden brauchen, um die gewünschte Titel zu finden.
WIEDERHOLTE WIEDERGABE IN CD
1. Drücken Sie die PLAY/PAUSE-Taste (II)(17).
2. Um denselben Titel zu wiederholen, drücken Sie einmal die MODE-Taste (11). Auf dem
Display erscheint die Anzeige ‘REP1’.
Beginnt die wiederholte Wiedergabe bis der STOP-Taste (19) gedrückt wird.
Um den Wiederhol-Modus zu löschen, drücken Sie die MODE-Taste (11) viermal.
Die Anzeige ‘REP1’ verschwindet vom Display .
3. Um die gesamte CD zu wiederholen, drücken Sie zweimal die MODE-Taste (11). Auf
dem Display erscheint die Anzeige REP ALL, und alle Titel werden wieder gespielt.
Beginnt die wiederholte Wiedergabe der gesamter CD bis der STOP-Taste (19) gedrückt wird.
4. Um den Wiederhol-Modus zu löschen, drücken Sie die MODE-Taste (10) dreimal.
Die Anzeige REP ALL verschwindet vom Display .
ZUFÄLLIGE TITELFOLGE (RANDOM)
1. Drücken Sie die PLAY/PAUSE-Taste(17) und dann die MODE-Taste (11) dreimal, um
den Zufallsmodus zu aktivieren. Auf dem Display erscheint “RAND”. Drücken Sie die
PLAY/PAUSE-Taste (17), startet die Wiedergabe der CD in zufälliger Reihenfolge.
3. Drücken Sie die VORWÄRTS-Taste (), um am nächsten zufälligen Titel zu gehen.
4. Drücken Sie erneut die MODE-Taste, um zum Normalen Wiedergabe-Modus
zurückzukehren.

17 18
DeutschDeutsch
WIEDERHOL TE WIEDERGABE IN MP3
1. Drücken Sie die PLAY/PAUSE-Taste (II)(17).
2. Um denselben Titel zu wiederholen, drücken Sie einmal die MODE-Taste (11). Auf dem
Display erscheint die Anzeige ‘REP1’.
Beginnt die wiederholte Wiedergabe bis der STOP-Taste (19) gedrückt wird.
Um den Wiederhol-Modus zu löschen, drücken Sie die MODE-Taste (11) dreimal.
Die Anzeige ‘REP1’ verschwindet vom Display.
3. Um die gesamte CD zu wiederholen, drücken Sie zweimal die MODE-Taste (11). Auf
dem Display erscheint die Anzeige REP ALL, und alle Titel werden wieder gespielt.
Beginnt die wiederholte Wiedergabe der gesamter CD bis der STOP-Taste (19) gedrückt wird.
4. Um den Wiederhol-Modus zu löschen, drücken Sie die MODE-Taste (10) dreimal.
Die Anzeige REP ALL verschwindet vom Display .
ZUFÄLLIGE TITELFOLGE (RANDOM) IN MP3
1. Drücken Sie die PLAY/PAUSE-Taste (17) und dann die MODE-Taste (11) viermal, um
den Zufallsmodus zu aktivieren. Auf dem Display erscheint “RAND”. Drücken Sie die
PLAY/PAUSE-Taste (17), startet die Wiedergabe der CD in zufälliger Reihenfolge.
3. Drücken Sie die VORWÄRTS-Taste (), um am nächsten zufälligen Titel zu gehen.
4. Drücken Sie erneut die MODE-Taste, um zum Normalen Wiedergabe-Modus
zurückzukehren.
PROGRAMMIERTE WIEDERGABE FÜR CD/USB UND MMC/SD CARD
IN CD
1. Drücken Sie die PLAY/PAUSE-Taste (17) und nach 5 Sek. die STOP-Taste (19).
2. Drücken Sie die MODE-Taste (11) einmal. Auf dem Display erscheint die Titelnummer
“P-01” und “PROG”.
3. Drücken Sie die VORWÄRTS-Taste () oder die RÜCKWÄRTS-Taste (), um den
gewünschten Titel zu wählen, der programmiert werden soll.
Die Titelnummer, die programmiert wird, erscheint auf dem Display.
4. Drücken Sie die MODE-T aste (11), um den Titel zu speichern. Erscheint die Titelnummer
“P-02”.
5. Wiederholen Sie die Schritte 3 bis 4, um bis zu 20 Titel zu speichern.
6. Drücken Sie die WIEDERGABE/PAUSE-Taste(16) einmal, um die programmierte
Wiedergabe zu starten.
7. Um die programmierte Wiedergabe zu löschen, drücken Sie die STOP-T aste (19) zweimal.
Hinweis: Wenn Sie während der programmierten Wiedergabe das Programm
wiederholen möchten, drücken Sie mehrmals die MODE-Taste (11), bis die
Anzeige “REP“ auf dem Display erscheint.
ANTISPRUNG-FUNKTION (ANTI-SCHOCK)
• Während des Betriebes könnte der CD-Spieler Stößen oder Schwingungen ausgesetzt
werden (beim Laufen oder in einem sich bewegenden Fahrzeug). Die ANTI-SHOCKFunktion wird eine ununterbrochene Wiedergabe garantieren.
• Wenn der Spieler während mehr als 10 Sekunden in CD oder 35 Sek. in MP3 angestoßen
wird, es ist möglich, dass Sie für weniger als 1 Sek. keinen Ton hören. Erst wenn sich
das Gerät wieder stabilisiert hat, wird die Wiedergabe fortgesetzt.
WICHTIG:
Die Anti-Schock -Funktion ist immer aktiv im CD/MP3-Betrieb.
KASSETTENBETRIEB
EINLEGEN UND HERAUSNEHMEN DER KASSETTEN
1. Drücken Sie die Auswurf-Taste (22), um das Kassettenfach zu öffnen.
2. Schieben Sie eine Kassette in die Halterung, mit der sichtbaren Bandseite nach oben
(mit der abzuspielenden Seite auf Sie gerichtet).
3. Schließen Sie das Kassettenfach richtig, bevor Sie die Wiedergabe beginnen.
4. Am Ende der Wiedergabe drücken Sie die Stop-/Auswurf-Taste, um das Kassettenfach
zu öffnen und die Kassette herauszunehmen.
WIEDERGABE
1. Stellen Sie den Funktionswahlschalter (9) auf TAPE.
2. Legen Sie eine Kassette mit der sichtbaren Bandseite nach oben ein.
3. Drücken Sie die Wiedergabetaste (25), um die Wiedergabe zu aktivieren.
4. Stellen Sie den Lautstärkeregler auf den gewünschten Pegel ein.
5. Am Ende der Wiedergabe drücken Sie die Stop-/ Auswurf-Taste (22).

19 20
DeutschDeutsch
WICHTIG
Die Bewegung des CD-Mechanismus und der empfindliche Stromkreis können Störungen
bei einem nahestehenden Radio oder Tuner hervorrufen. Schalten Sie dieses Gerät aus,
wenn Sie andere Radios verwenden.
Dieses Gerät verwendet einen Laser
Gefahr - Unsichtbare Laserstrahlung beim Öffnen und wenn das Schließsystem versagt
oder beschädigt ist. Vermeiden Sie es, sich der direkten Strahlung auszusetzen.
Vorsicht - Die Benutzung von Bedienelementen, das Vornehmen von Regulierungen
oder Einstellungen, die nicht in dieser Bedienungsanleitung aufgeführt sind,
könnten Sie einer gefährlichen Strahlung aussetzen.
Bezüglich der Compact Discs
Nur Compact Discs mit dieser Marke dürfen mit diesem
CD-Spieler wiedergegeben werden.
SEHR WICHTIG: Dieses Gerät ist mit ErP Schaltung (Stand-By Power Management)
und wann nicht operative seit einiger Zeit automatisch abschaltet ausgestattet. So
aktivieren Sie das Gerät bewegen Sie bitte die Funktion auf TAPE / OFF bewegen Sie
ihn dann wieder auf CD / Radio-Modus.
TECHNISCHE DATEN
Stromversorgung
Netzbetrieb (AC) 230V ~ 50Hz
Batteriebetrieb: 6 x UM-2
Radio-Freq u e n z b e re i c h
UKW: 87.5 - 108MHz
MW: 540 - 1600kHz
CD-Spie l er
Ton a b n e h me r : 3-Beam, H albleiter-La ser
Encod in g : 16-Bit linear
Hinweis: Änderung vorbehalten.
Korrekte Entsorgung dieses Produkts (Elektromüll)
Die Kennzeichnung auf dem Produkt bzw. auf der dazugehörigen
Literatur gibt an, dass es nach seiner Lebensdauer nicht zusammen
mit dem normalen HaushaltsmüIl entsorgt werden darf. Entsorgen Sie
dieses Gerat bitte getrennt von anderen Abfallen, um der Umwelt bzw.
der menschlichen Gesundheit nicht durch unkontrollierte
Müllbeseitigung zu schaden. Recyceln Sie das Gerät, um die
nachhaltige Wiederverwertung von stofflichen Ressourcen zu fördern.
Private Nutzer sollten den Händler, bei dem das Produkt gekauft wurde,
oder die zuständigen Behörden kontaktieren, um in Erfahrung zu
bringen, wie sie das Gerät auf umweltfreundliche Weise recyceln
können.
Gewerbliche Nutzer sollten sich an Ihren Lieferanten wenden und die
Bedingungen des Verkaufsvertrags konsultieren. Dieses Produkt darf
nicht zusammen mit anderem Gewerbemüll entsorgt werden.

21 22
FrançaisFrançais
ATTENTION
Le symbole “point d’exclamation” à l’intérieur d’un triangle avertit l’utilisateur que
d’importantes instructions d’utilisation et de maintenance sont contenues dans le
mode d’emploi.
Le symbole “éclair” à l’intérieur d’un triangle sert à avertir l’utilisateur de la
présence du courant à l’intérieur du l’appareil qui pourrait constituer un risque.
CAUTION
RISK OF ELECTRIC
SHOCK
DO NOT OPEN
CLASS 1
LASER PRODUCT
230v~
- +
- +
CD réalisé a la maison reproduit par un lecteur de CD Roadstar.
Il est possible de lire les CD-R/CD-RW au format CD-DA et MP3. Cependant,
il se peut qu'à cause des différences de qualité du support multimédia et des
caractéristiques d'enregistrement, les CD gravés chez soi ne soient pas lisibles.
Dans ce cas là, il ne s'agit pas d'un dysfonctionnement de l'appareil de reproduction.
Afin de minimiser les risques, ne pas ouvrir le boîtier ni ôter le dos de l’appareil. En
case de panne, faites appel aux techniciens qualifiés pour les réparations.
L’appareil ne renferme aucune pièce reparable par l’utilisateur.
Cet appareil utilise un rayon laser. Etant donné le danger que ceci représente
pour les yeux, seulement un technicien qualifié devrait retirer le couvercle et
réparer cet appareil.
Un rayonnement laser invisible est présent lorsque l’appareil est ouvert ou le
verrouillage de sécurité est inopérant. Eviter toute exposition directe au rayon
laser. L ’utilisation des commandes, réglages ou procédés autres que ceux stipulés
dans le présent mode d’emploi sont dangereux.
Cet appareil a été conçu pour une tension d’alimentation de 230V ~ 50Hz.
Débranchez la prise de courant quand on prévoit de ne pas utiliser l’appareil
pendant un certain temps.
L’unité ne doit pas être exposée à l’humidité ou à la pluie.
Mettez l’appareil sous tension seulement après avoir vérifié que tous les
raccordements soient corrects.
L’appareil doit être gardé dans un endroit suffisamment ventilé. Ne le gardez
jamais par exemple près des rideaux, sur un tapis ou dans des meubles, tels
qu’une bibliothèque.
L’unité ne doit pas être exposée à la lumière directe du soleil ou à des sources de
chaleur.
Installez vos piles en veillant à respecter la correcte polarité. N’utilisez pas en
même temps des piles neuves et des piles usées.
Quand vous prévoyez de ne pas utiliser l’appareil pendant un mois ou plus,
retirez les piles du logement pour empêcher toute fuite d’acide.
RCR-4650USMP
Radi o sté réo por tab le av ec l ect eur de ca sse tte s et l ect eur CD/ CD-R /CD-RW/MP 3,
entrées USB et cartes mémoires MMC/SD.
MODE D’EMPLOI
Veuillez lire attentivement ce mode d’emploi, afin de familiariser avec votre nouvel appareil
avant de l’utiliser pour la première fois. Veuillez s’il vous plaît garder ce mode d’emploi
comme référence pour le futur.
POSITIONNEMENT DES COMMANDES
. Antenne FM
2. Réce ptacl e C D
3. Entrée USB
4. Sélecteur de BANDES (FMST/FM/AM)
5. Régl age d’A CCORD
6. Coin ou vertu re c ompar timent C D
7. Afficheur Alim entation
8. Réglage du VOL UME
9. Sélecteur de FONCTION (RADIO/TAPE-OFF/CD/MP3/USB/SD)
10. pas utilisé sur ce modèle
11. Touche de MOD E C D
12. Sca le Si ntoni e R adio
13. Touche de SAUT EN AVANT CD ()
14. Touche de SAUT EN ARRIER E CD ()
15. Afficheur LCD
16. Indicateur FM-STEREO
17. Touche de LECTURE / PAUSE CD
18. Touche CD/USB
19. Touche ALBUM CD
20. Couve rcle c ompa rtim ent d es p iles
21. Tou che de PAUS E C assett e
22. Touche d’A RRET/EJECT ION Ca ssette
23. Touche d’AVANCE RAPIDE Casse tte
24. Touche de REMBOB INAGE Ca ssette
25. Touche d e L ECTU RE C assette
26. Touche pas opérationnel dans ce modèle
27. Réce ptacle CASSETTE
28. Entrée cartes SD/MMC

23 24
TRES IMPORTANT: Cet appareil est doté d'un circuit intégré d'éteindre
automatiquement l'appareil après 10 minutes que le NO audio est lu à
partir du CD/USB/SD et la Radio.Pour allumer à nouveau, déplacez le
commutateur de fonction sur OFF pendant environ 3 secondes, puis passer
à la fonction désirée pour allumer l'appareil en marche.
FrançaisFrançais
BRANCHEMENT A LA SOURCE D’ALIMENT A TION
Avant l’utilisation, vérifier que la tension électrique de votre source d’alimentation
corresponde à celle indiquée sur la plaque des caractéristiques techniques de l’appareil.
Avant de brancher l’appareil au réseau, il faut lire attentivement les instructions suivantes
pour des raisons de sécurité.
UTILISATION DU RESEAU (CA)
L’appareil est conçu pour fonctionner sur une tension de CA 230V, 50Hz seulement. S’il est
branché à d’autres sources d’alimentation cela peut endommager l’appareil.
Danger
Pour éviter tout risque de décharge électrique, débrancher l’appareil avant d’enlever la
protection. A l’intérieur il n’y a pas de parties utilisables. S’adresser au personnel qualifié
pour toute opération d’entretien.
Consignes de Sécurité
N’exposer cet appareil ni à la pluie ni à l’humidité.
Alimentation du réseau: CA 230Volt 50Hz - CC seulement
Ce symbole signifie que l’appareil a été doublement isolé. La connexion de terre
n’est pas nécessaire.
PREP ARATION POUR L ’UTILISA TION
• Enlever le stéréo de son emballage avec attention et garder la boîte en cas d’utilisation
future.
• Avant la mise en service de l’appareil, lire attentivement le mode d’emploi présent.
Utilisation source d’alimentation CA
• Brancher le cordon d’alimentation fourni à la prise d’alimentation CA à l’arrière de ce
stéréo portable. Brancher le cordon d’alimentation CA à votre prise murale CA et alimenter
le réseau. S’assurer que la tension est compatible.
Utilisation des piles
• Enlever le cordon d’alimentation pour utiliser les piles.
• Ouvrir le compartiment des piles (20) à l’arrière du stéréo et insérer 6 piles UM-2 selon
le schéma des polarités indiqué dans le compartiment des piles.
• En cas d’inutilisation prolongée de l’appareil, retirer les piles du compartiment.
• Retirer les piles usagées pour éviter qu’elles coulent.
ECOUTE DE LA RADIO
1. Placer le Sélecteur de Fonctions (9) sur la position RADIO.
2. Choisir la bande de fréquence souhaitée avec le Sélecteur de Bandes (4)
3. A l’aide du Sélecteur de Recherche des Stations (5), intercepter la st ation émettrice souhaitée.
4. Régler le Sélecteur de Volume (8) pour obtenir le niveau de son souhaité.
5. Pour éteindre la radio, placer le Sélecteur de Fonctions (9) sur la position TAPE-OFF.
Antenne
Pour la réception en FM il y a une antenne télescopique FM incorporée (1) à l’arrière de
l’appareil. Extraire l’antenne et l’orienter de manière à ce que la qualité de la réception soit
la meilleure possible.
Pour la réception en MW les signaux sont interceptés par une antenne en ferrite incorporée.
Pour que la réception soit la meilleure possible, il faut orienter l’appareil.
Réception FM en Stéréophonie et Monophonie
Quand un signal FM est intercepté, si l’on place le sélecteur de BANDES (4) sur la position
FM ST il est possible d’écouter la station émettrice en stéréophonie. L’indicateur FM Stéréo
(16) s’allume. Si la puissance des signaux stéréo est faible et la réception devient bruyante.
il vaut souvent mieux de recevoir la station émettrice en monophonie. Placer le Sélecteur
FM ST (4) sur Mono. La réception devrait être alors moins bruyante.
POUR TENIR LES DISQUES COMPACTS
• Lors du retrait du disque de son coffret, appuyer sur l’axe en prenant le disque avec
attention par les bords.
• Essuyer attentivement la surface enregistrée d’un disque souillé avec des traces de
doigts ou de la poussière à l’aide d’un chiffon doux. Comme contrairement aux disques
conventionnels, les disques compacts n’ont pas de rayures qui retiennent de la
poussière ou des débris microscopiques, il suffit de les nettoyer à l’aide d’un chiffon
doux pour enlever la plupart des particules. Passer le chiffon en partant du centre
directement vers l’extérieur. La qualité de la reproduction ne sera pas modifiée même
s’il y a de petites particules de poussière ou de légères taches.
• Pour nettoyer le disque, ne jamais utiliser de solvants chimiques tels que des sprays

25 26
FrançaisFrançais
pour disques, des sprays anti-statiques, de la benzine ou du diluant. Ces produits
chimiques peuvent endommager la surface du disque irréparablement.
• Après l’écoute, ranger le disque dans son coffret. Un disque rayé peut faire sauter le
dispositif de lecture laser (pickup).
• Ne pas exposer le disque pour longtemps dans un endroit en plein soleil, trop humide
ou à des températures trop élevées. Les disques se voilent à cause d’une exposition
prolongée à des températures trop élevées.
• Ne pas coller de papier ni écrire avec un stylo à bille sur l’étiquette ou sur la surface du disque.
FONCTIONNEMENT DU LECTEUR CD/MP3
1. Placer le sélecteur de fonction (9) sur la position CD/MP3/USB.
2. Soulever le coin d’ouverture compartiment CD (6) pour l’ouvrir.
3. Une fois le couvercle ouvert, sortir un disque de son coffret et le mettre en place avec
attention dans le compartiment, avec l’étiquette vers le haut. Les disques de 3" doivent
être placés au centre sur l’axe du compartiment.
4. Fermer le couvercle du compartiment des disques en appuyant sur son angle.
5. Appuyer sur la touche de LECTURE / ATTENTE (>ll) (16) pour que l’appareil se mette
automatiquement sous tension.
Le nombre total des pistes apparaît sur l’afficheur.
Pendant la lecture le numéro de la piste actuelle est affichée.
6. Régler le Sélecteur de VOLUME pour obtenir le niveau de son souhaité.
7. Pour arrêter momentanément la lecture, appuyer une fois sur la touche de LECTURE
/ ATTENTE (II) (17). L’indicateur de lecture cligote sur l’afficheur. Appuyer à nouveau
sur la touche de LECTURE / ATTENTE (II) pour recommencer la lecture du CD.
8. Pour arrêter la lecture, appuyer une fois sur la touche d’ARRET () (19).
9. Pour éteindre l’appareil, placer le Sélecteur de Fonction (9) sur la position TAPE-OFF.
SELECTION D’UNE PISTE PARTICULIERE OU RECHERCHE A L’INTERIEUR D’UNE PISTE
1. Appuyer une fois sur la touche de SAUT/RECHERCHE EN ARRIERE () (14) pour
revenir au début de la piste en cours de lecture.
2. Appuyer plusieurs fois sur la touche de SAUT/RECHERCHE EN ARRIERE () pour
revenir aux pistes précédentes.
3. Appuyer plusieurs fois sur la touche de SAUT/RECHERCHE EN AVANT () (13) pour
passer aux pistes suivantes.
4. Appuyer et maintenir enfoncée l’une des deux touches de SAUT/RECHERCHE EN
AVANT () ou SAUT/RECHERCHE EN ARRIERE () pour rechercher rapidement un
point particulier d’une piste, respectivement en avant ou en arrière.
Note: Vous pouvez entendre un son bas pendant la recherche.
LECTURE REPETEE EN CD
1. Appuyer sur la touche LECTURE / ATTENTE (17).
2. Pour répéter la même piste, appuyer une fois sur la touche de MODE (11). L’indication
“REP1” apparaît sur l’afficheur.
La lecture répétée de la piste commence, jusqu’à quand la touche STOP (19) est
préssée.
Appuyer 4 fois encore sur la touche de MODE (11) pour annuler la fonction de répétition.
L’afficheur “REP1” disparaît.
3. Pour répéter le CD entier, appuyer deux fois sur la touche de MODE (11). L’indication
REP ALL apparaît sur l’afficheur.
La lecture répétée de toutes les pistes commence.
4. Pour annuler le mode de répétition, appuyer 3 fois encore sur la touche de MODE (10).
L’indication REP ALL disparaît de l’afficheur.
Remarques:
• Si par hasard le compartiment CD est ouvert pendant la lecture d’un disque, le symbole
“ --- ” apparaît sur l’afficheur.
• Attendre que le CD soit complètement arrêté avant d’ouvrir le couvercle du CD.
• Cet appareil peut lire des CD de 3 pouces (8 cm) sans utiliser aucun adaptateur.
Chargement de fichiers MP3 d’une mémoire USB Stick
1. Placer le sélecteur de fonction (9) sur laposition CD/MP3/USB.
2. Brancher le lecteur MP3 à la porte USB pour l’allumer.
3. Pendant la lecture, les piste MP3 peuvent être sélectionné de la même façon
qu’avec les pistes CD.
LECTURE ALEA TOIRE (RANDOM) EN CD
1. Appuyer sur la touche LECTURE / ATTENTE (17) et après sur la touche MODE (11) 4
fois pour entrer en modalité Random (lecture Aléatoire). “RAND” apparaît sur l’afficheur.
Appuyer sur la touche de LECTURE / ATTENTE pour commencer la lecture du CD dans
un ordre aléatoire.
3. Presser la touche de Saut en avant (13) pour sauter à la prochaine piste casuelle.
4. Presser la touche MODE (11) encore une fois pour sortir de la modalité Random.
LECTURE REPETEE EN MP3
1. Appuyer sur la touche LECTURE / ATTENTE (17).

27 28
FrançaisFrançais
2. Pour répéter la même piste, appuyer une fois sur la touche de MODE (11). L’indication
“REP1” apparaît sur l’afficheur.
La lecture répétée de la piste commence, jusqu’à quand la touche STOP (19) est préssée.
Appuyer 4 fois encore sur la touche de MODE (11) pour annuler la fonction de répétition.
L’afficheur “REP1” disparaît.
4. Pour répéter le CD entier, appuyer trois fois sur la touche de MODE (11). L’indication
REP ALL apparaît sur l’afficheur.
La lecture répétée de toutes les pistes commence.
5. Pour annuler le mode de répétition, appuyer 3 fois encore sur la touche de MODE (10).
L’indication REP ALL disparaît de l’afficheur.
LECTURE ALEA TOIRE (RANDOM) EN MP3
1. Appuyer sur la touche LECTURE / ATTENTE (17) et après sur la touche MODE (11) 4
fois pour entrer en modalité Random (lecture Aléatoire). “RAND” app araît sur l’af ficheur.
Appuyer sur la touche de LECTURE / ATTENTE pour commencer la lecture du CD dans
un ordre aléatoire.
3. Presser la touche de Saut en avant (13) pour sauter à la prochaine piste casuelle.
4. Presser la touche MODE (11) encore une fois pour sortir de la modalité Random.
LECTURE PROGRAMMEE POUR CD/USB ET CARTES MMC/SD
1. Appuyer sur la touche LECTURE / ATTENTE (17) et après 5 secondes sur STOP (19).
2. Presser la touche MODE (11) une fois. Le numéro de piste “P-01” e “PROG” app araîssent
sur l’afficheur.
3. Appuyer sur la touche de SAUT/RECHERCHE EN ARRIERE () ou sur celle de SAUT/
RECHERCHE EN AVANT () pour sélectionner la piste que l’on désire programmer.
4. Appuyer sur la touche de MODE (11) pour mémoriser la piste choisie. Le numéro de
piste “P-02” et “PROG” apparaîssent sur l’afficheur.
5. Répéter les opérations dont aux points 3 et 4 pour programmer jusqu’au maximum de
20 pistes.
6. Appuyer une fois sur la touche de LECTURE / ATTENTE (17) pour commencer la
lecture programmée.
7. Pour annuler la lecture programmée, appuyer deux fois sur la touche d’ARRET (19).
Remarque:
Pendant la lecture programmée, si l’on désire répéter la séquence entière des pistes
programmées, il faut appuyer plusieurs fois sur la touche de MODE (11) jusqu’à ce
que l’indication “ REP“ apparaisse sur l’afficheur.
quand on marche ou dans une voiture en mouvement).La fonction Anti-Choc permet
une reproduction sans interruptions.
• Les son sera interrompu pour moins de une seconde si l’appareil est heurté
continuellement pendant 10 secondes en lecture CD ou 35 secondes en lecture MP3,
et la lecture recommencera dès que le lecteur se stabilise après les vibrations.
Remarques:
• La fonction Anti-choc ne corrige pas les erreurs provenant de l’utilisation d’un disque
défectueux, rayé ou sale.
FONCTIONNEMENT DU LECTEUR DE CASSETTES
INSERTION ET RETRAIT DES CASSETTES
1. Appuyer sur la Touche d’Ejection (22) pour ouvrir le Compartiment des Cassettes.
2. Insérer la cassette dans le réceptacle, la section de bande visible dirigée vers le haut
(le côté à lire face à vous).
3. Bien fermer le Compartiment des Cassettes avant de commencer la lecture.
4. Quand la lecture est terminée, appuyer sur la Touche d’Arrêt /Ejection (21) pour ouvrir le
Compartiment et enlever la cassette.
LECTURE
1. Placer le Sélecteur de FONCTION (9) sur la position TAPE (Cassette).
2. Mettre la cassette en place, la section de bande visible dirigée vers le haut.
3. Appuyer sur la Touche de Lecture (25) pour commencer la lecture.
4. Régler le sélecteurs de Volume pour obtenir le niveau de son souhaité.
5. Appuyer sur la Touche d’Arrêt/Ejection (22) quand vous avez terminé
FONCTION ANTI-CHOC
• Pendant son utilisation l’appareil peut être heurté ou sujet à des vibrations (par ex.

29
30
FrançaisFrançais
IMPORT ANT
Comme le mouvement du mécanisme du lecteur CD et des circuits sensibles peut interférer
avec d’autres syntoniseurs radio à proximité, débrancher cet appareil en cas d’utilisation
d’autres dispositifs.
Cet appareil utilise un faisceau laser.
DANGER - Lorsqu’on ouvre le couvercle en cas de défaillance ou de cassure du
dispositif de synchronisation, des radiations laser invisibles se
produisent. éviter donc l’exposition directe aux faisceaux laser.
AVERTISSEMENT - L’utilisation des touches de commande, les rectifications ou les
procédures autres que celles spécifiées dans le mode d’emploi
présent peuvent entraîner une dangereuse exposition au radiations.
Remarques sur les disques compacts
Avec cet appareil n’utiliser que des disques compacts de la
marque suivante: COMP ACT DISC DIGITAL AUDIO.
CARACTERISTIQUES TECHNIQUES
Alimentatio n Electrique
CA : 230V ~ 50Hz
Pile s : 6 piles du type UM-2
Limites d’Audi bilité Fréqu ences Radio
FM: 87.5 - 108 MHz
MW: 540 - 1600 MHz
Lecteur CD
Pickup: 3 Faisceaux - Laser à semiconducteur
Encod in g : 16-Bit linéaire
Les spécifications et le design peuvent changer sans avis
préalable.
TRES IMPORTANT: cet appareil est équipé d' une circuit 'ErP (Stand-By gestion
d'alimentation) et lorsqu'il n'est pas opérationnel pendant un certain temps, il s'éteint
automatiquement. Pour réactiver l'appareil, s'il vous plaît déplacer le sélecteur de
fonction sur TAPE / OFF puis déplacez-le à nouveau pour CD / Radio.
Comment éliminer ce produit -
(déchets d'équipements électriques et électroniques)
Ce symbole sur le produit ou sa documentation indique qu'il ne doit
pas être éliminé en fin de vie avec les
autres déchets ménagers. L'élimination incontrôlée des déchets
pouvant porter préjudice a l'environnement ou a la santé humaine,
veuillez le séparer des autres types de déchets et le recycler de
façon responsable. Vous favoriserez ainsi la réutilisation durable des
ressources matérielles.
Les particuliers sont invites a contacter le distributeur leur ayant vendu
le produit ou a se renseigner auprès de leur mairie pour savoir ou et
comment ils peuvent se débarrasser de ce produit afin qu'il soit recyclé
en respectant l'environnement.
Les entreprises sont invitées a contacter leurs fournisseurs et a
consulter les conditions de leur contrat de vente. Ce produit ne doit
pas être éliminé avec les autres déchets commerciaux.

Italiano Italiano31 32
A TTENZIONE
Il punto esclamativo all’interno di un triangolo avverte l’utente che il libretto d’istruzioni
contiene delle importanti istruzioni per l’uso e la manutenzione.
Il simbolo del fulmine all’interno di un triangolo avverte l’utente della presenza di una
pericolosa tensione all’interno dell’apparecchio.
CAUTION
RISK OF ELECTRIC
DO NOT OPEN
CLASS 1
LASER PRODUCT
230v~
- +
- +
CD realizzati in casa riprodotti tramite un lettore di CD Roadstar .
Si possono riprodurre i CD-R/CD-RW in formato CD-DA e MP3. Tuttavia, è possibile
che a causa di differenze nella qualità del supporto multimediale e delle caratteristiche
della registrazione, i CD masterizzati in casa non siano leggibili. In questo caso, ciò
non rappresenta un malfunzionamento dell'apparecchio di riproduzione.
Noi. Roadstar Italia Spa
Dichiariamo che il modello Radio Lettore di Cassette e CD/MP3 Stereo Port
della Roadstar è prodotto in conformità al D.M. no. 548 datato 28/08/95 (G .U. no. 301 dat ata 28/
12/95) e, in particolare, è in conformità alle prescrizioni dell’articolo 2 comma 1.
Per ridurre i rischi di scosse elettriche, non aprire l’apparecchio. L’apparecchio non
contiene parti riparabili dall’utente. In caso di guasto fare appello a tecnici qualificati
SHOCK
per le riparazioni.
Questo apparecchio utilizza un raggio laser. A causa del pericolo di danni alla vista,
solo personale qualificato può aprire l’apparecchio o tentare di ripararlo.
Radiazioni laser invisibili possono fuoriuscire ad apparecchio aperto on in caso di
guasto del dispositivo di sicurezza. Evitare l’esposizione diretta ai raggi laser. L ’uso
di comandi, regolazioni o procedure non specificate in questo manuale possono
causare pericolose esposizioni alle radiazioni laser.
Questo apparecchio è stato progettato per funzionare a 230V ~ 50Hz. Se non si
intende utilizzare l’apparecchio per un lungo periodo di tempo, rimuovere la spina
dalla presa di corrente.
Non esporre l’apparecchio alla pioggia o all’umidità.
Utilizzare l’apparecchio solo dopo aver verificato che tutte le connessioni siano
state eseguite correttamente.
Posizionare l’apparecchio in un luogo sufficientemente ventilato. Evitare di sistemarlo
vicino a tende, sul tappeto o all’interno di un mobile quale, ad esempio, una libreria.
Non esporre l’apparecchio alla luce diretta del sole o a fonti di calore.
Assicurarsi di aver inserito tutte le pile rispettando la corretta polarità. Non inserire
pile vecchie assieme a pile nuove.
Se non intendete utilizzare l’apparecchio per un lungo periodo di tempo (un mese o
più), rimuovere tutte le pile dal compartimento per evitare possibili fuoriuscite di acido.
Viale Matteotti 39
I-22012 Cernobbio (Como)
atile RCR-4650USMP
RCR-4 6 50 U S M P
Radio portatile Stereo con lettore cassette / CD/CD-R/CD-RW/MP3,
ingressiUSB e MMC/SD Card.
MANUALE D’ISTRUZIONI
Raccomandiamo la lettura accurata di questo manuale per potervi familiarizzare con il
vostro nuovo Radio Lettore di Cassette/CD/MP3 prima di utilizzarlo per la prima volta.
Raccomandiamo di conservare questo manuale per futuri riferimenti
LOCALIZZAZIONE DEI CONTROLLI
1. Antenna FM
2. C omparti ment o CD
3. Conne ttore US B
4. Selettore B ANDA (FMST/FM/AM )
5. Manopola SINTONIA
6. Ango lo a pertu ra com partim ento C D
7. Indica tore Alime ntazione
8. Controllo V OLUME
9. Selettore FUNZIONE (RADIO/TAPE-OFF/CD/MP3/USB/SD)
10. Non usato in questo modello
11. Tasto MO DE C D
12. Sca la Si ntoni a R adio
13. Tasto SALTO AVANTI CD ()
14. Tasto S ALTO INDIETRO CD ()
15. Di splay LC D
16. Indicatore FM-STEREO
17. TTasto LETTURA/PAUSA CD
18. Tasto Selezione Album
19. Tasto ARR ESTO le ttura CD
20. Co mpartimento BATTERIA
21. Tasto PAUSA C assetta
22. Tasto ARRE STO / ESP ULSIONE Casse tta
23. Tasto AVANZAMENTO RAPIDO Cassetta
24. Tasto RIAVVOLGIMENTO Cassetta
25. a sto LE TTURA Cass etta
26. Tasto non operativo in questo modello
27. C ompartimento CA SSETTA
28. I ngresso C ard M MC/SD

Italiano Italiano
MOLTO IMPORTANTE: Questo apparecchio è dotato di un circuito per
spegnere automaticamente l'unità dopo 10 minuti che l audio non è riprodotto da CD/USB/SD o dalla Radio. Per accendere di nuovo, spostare l'interruttore
di funzione su OFF per circa 3 secondi, quindi passare alla funzione desiderata
per accendere nuovamente l'unità.
33 34
COLLEGAMENTO ALLA FONTE DI ALIMENT AZIONE
Prima di accendere l’apparecchio assicurarsi che il voltaggio locale sia lo stesso di quello
indicato sulla targhetta dei dati di funzionamento.
Per la vostra propria sicurezza leggere le seguenti istruzioni accuratamente prima di cercare
di collegare questo apparecchio alla presa di corrente.
FUNZIONAMENTO A RETE AC
Questo apparecchio è stato disegnato per funzionare solo con una fonte di alimentazione
di AC 230V 50Hz. Il collegamento ad un altro tipo di fonte di alimentazione potrebbe
danneggiare l’apparecchio.
Attenzione
Per prevenire le scariche elettriche, scollegare la spina prima di rimuovere il coperchio.
Non impiegare le parti usabili all’interno. Fare riferimento al personale di un centro di
servizi qualificato.
Precauzioni di Sicurezza
Non permettere che l’apparecchio venga esposto alla pioggia o all’umidità.
Fonte di Alimentazione Principale: solo CA 230V / 50Hz.
Questo simbolo significa che questo apparecchio è doppiamente isolato. Non è
richiesto un collegamento a terra.
UTILIZZO DELLA RADIO
1. Regolare il Selettore Funzione (9) sulla posizione RADIO.
2. Selezionare la banda di frequenza desiderata con il Selettore Banda (4).
3. Sintonizzare la stazione radio desiderata girando il controllo Sintonia (5).
4. Regolare il controllo Volume (8) al livello desiderato.
5. Per spegnere la radio, regolare il Selettore Funzione (9) sulla posizione TAPE-OFF.
Antenna
Per una ricezione in FM si trova incorporata un’antenna telescopica FM (1) sul retro
dell’apparecchio. Estendere l’antenna e ruotarla fino a raggiungere la migliore ricezione.
Per una ricezione in MW i segnali verranno raccolti attraverso l’antenna in ferrite incorporata.
Dovrà orientare l’apparecchio fino a raggiungere la migliore ricezione.
Ricezione FM Stereo e Mono
Quando un segnale FM viene sintonizzato, regolando il selettore BANDA (4) sulla posizione
FM ST permetterà alla stazione di essere ricevuta in suono stereo. L’indicatore FM Stereo
(16) si illuminerà. Quando i segnali stereo sono deboli e la ricezione è rumorosa, spesso
è preferibile ricevere la stazione in mono. Spostare il Selettore FM ST (4) sulla posizione FM
(Mono). La ricezione sarà meno rumorosa.
MANIPOLAZIONE DEI COMPACT DISCS
• Per rimuovere il disco dalla custodia, premere verso il basso sul centro dell’astuccio e
tirare fuori il disco prendendolo con cura dai bordi.
PREP ARAZIONE ALL’UTILIZZO
• Rimuovere l’apparecchio dalla scatola accuratamente, conservare l’imballaggio per
un eventuale utilizzo in futuro.
• Raccomandiamo una lettura accurata di questo manuale d’istruzioni prima di mettere
in funzione l’apparecchio.
Funzionamento a rete CA (Corrente alternata)
• Collegare il terminale del cavo di alimentazione CA incluso, alla presa di alimentazione
CA sul retro dell’apparecchio portatile. Collegare il Cavo di Alimentazione alla vostra
presa di corrente domestica e accendere l’apparecchio. Assicurarsi che il voltaggio sia compatibile.
Funzionamento con pile
• Rimuovere il terminale principale dall’apparecchio prima del funzionamento a batterie.
• Aprire il Compartimento batterie (20) sul retro dell’apparecchio e inserire 6 batterie UM-2
seguendo il diagramma di polarità mostrato all’interno del compartimento batterie.
• Le batterie dovranno essere rimosse quando l’apparecchio non verrà utilizzato per un
lungo periodo di tempo.
• Le batterie scariche dovranno essere rimosse dall’apparecchio per evitare la fuoriuscita di acido.
• Impronte digitali e polvere dovranno essere pulite con cura dalla superficie registrata
del disco con un panno morbido. A differenza dei dischi convenzionali, i compact discs
non hanno solchi dove si possa depositare la polvere e detriti microscopici pertanto
pulirli con un panno morbido per poter rimuovere la maggior parte delle particelle.
Pulire il disco in linea retta dall’interno verso l’esterno. Piccole particelle di polvere e
macchie leggere non avranno nessun effetto sulla qualità della riproduzione.
• Non utilizzare prodotti chimici come spray per dischi, spray antistatici, benzina o diluenti
per pulire i compact discs. Questi prodotti chimici potrebbero danneggiare
irreparabilmente la superficie del disco.

Italiano Italiano35 36
• Riporre i dischi nella loro custodia dopo l’utilizzo. Questo evita seri graffi che potrebbero
causare che il fonorivelatore laser salti.
• Non esporre i dischi alla luce diretta del sole, umidità eccessiva o alte temperatura per lunghi
periodi di tempo. Una lunga esposizione ad alte temperature potrebbe deformare il disco.
• Non attaccare etichette o scrivere sul lato dell’etichetta del disco con una penna a sfera.
UTILIZZO CD/MP3
Caricamento e Rimozione dei Compact Discs
1. Regolare il Selettore Funzione (9) sulla posizione CD/MP3/USB.
2. Aprire il compartimento CD alzando l’angolo di apertura vano CD (6).
3. Quando il compartimento sarà aperto, rimuovere un disco dalla custodia e posizionarlo
accuratamente nel compartimento con il lato dell’etichetta rivolto verso l’alto. Posizionare
il CD sul perno centrale del compartimento.
4. Richiudere il compartimento premendo sull’angolo del compartimento CD.
Il numero totale dei brani apparirà sul display. Inizia la lettura. Durante la lettura, il
numero del brano apparirà sul display.
5. Regolare il controllo VOLUME al vostro livello d’ascolto desiderato.
6. Per fermare temporaneamente la lettura, premere il tasto LETTURA/PAUSA ( II ) (17)
una volta. L’indicatore di lettura lampeggerà sul display. Premere il tasto LETTURA/
PAUSA (II ) nuovamente per riprendere la lettura.
7. Per fermare la lettura, premere il tasto STOP () (19) una volta.
8. Per spegnere l’apparecchio selezionare la funzione TAPE (9).
Note:
• Quando il compartimento CD viene accidentalmente aperto durante la lettura,
“ --- ” apparirà sul display.
• Aspettare che il disco si fermi completamente prima di aprire il compartimento CD.
· Questo apparecchio può leggere dischi di 3” (8 cm) senza un adattatore.
Caricamento di brani MP3 da una Memory Stick USB
1. Regolare il Selettore Funzione (9) sulla posizione CD/MP3/USB.
2. Collegare il lettore MP3 all’ingresso USB per accenderlo.
3. Durante la lettura, il brano USB MP3 può essere selezionato come con i CD.
LOCALIZZAZIONE DI UN BRANO P ARTICOLARE O DI UN PUNTO DEL BRANO
1. Premere il tasto SALTO INDIETRO ()(14) una volta per tornare all’inizio del brano
corrente.
2. Premere il tasto SALTO INDIETRO () ripetutamente per ritornare ai brani precedenti.
3. Premere il tasto SALTO AVANTI () (13) ripetutamente per andare ai brani successivi.
4. Mantenere premuto il tasto SALTO AVANTI () o il tasto SALTO INDIETRO () per
ricercare all’indietro o in avanti, ad alta velocità, un punto particolare del brano
Nota: Durante il processo di ricerca si ascolterà l’audio a basso livello per aiutare a
localizzare il punto corretto del brano.
LETTURA RIPETUT A IN CD
1. Premere Il tasto LETTURA/P AUSA (17).
2. Per ripetere lo stesso brano che sta suonando, premere il tasto MODE (11) una volta.
L’indicatore “REP1” apparirà sul display.
Il CD inizierà la lettura ripetuta di quel brano finché il tasto STOP (19) non viene premuto.
Premere il tasto MODE 4 volte ancora per cancellare la funzione ripetizione brano e
tornare alla lettura normale. L’indicatore “ REP1“ sparirà dal display.
3. Per ripetere tutto il CD, premere il tasto MODE (11) due volte. L’indicatore REP ALL
apparirà sul display.
Il CD inizierà la lettura ripetuta di tutti i brani.
4. Per cancellare la modalità di ripetizione di tutto il CD, premere il tasto MODE 3 volte ancora
per cancellare la funzione ripetizione tutti i brani e tornare alla lettura normale.
L’indicatore REP ALL sparirà dal display.
LETTURA IN ORDINE CASUALE IN CD
1. Premere Il tasto LETTURA/PAUSA (17) e dopo cinque secondi il tasto STOP (19).
2. Premere il tasto MODE (11) 4 volte per entrare nella modalità di Lettura in Ordine
Casuale (Random), “RAND” apparirà sul display. Premere il tasto LETTURA/PAUSA
(17) per iniziare la lettura in ordine casuale.
3. Premere il tasto SAL TO AV ANTI ()(13) per saltare al prossimo brano in ordine casuale.
4. Premere il tasto MODE (11) ancora una volta per tornare alla modalità di Lettura Normale.
LETTURA RIPETUT A IN MP3
1. Premere Il tasto LETTURA/P AUSA (17).
2. Per ripetere lo stesso brano che sta suonando, premere il tasto MODE (11) una volta.
L’indicatore “REP1” apparirà sul display.
Il CD inizierà la lettura ripetuta di quel brano finché il tasto STOP (19) non viene premuto.
Premere il tasto MODE 4 volte ancora per cancellare la funzione ripetizione brano e
tornare alla lettura normale. L’indicatore “REP1“ sparirà dal display.
4. Per ripetere tutto il CD, premere il tasto MODE (11) due volte. L’indicatore REP ALL
apparirà sul display. Il CD inizierà la lettura ripetuta di tutti i brani.
5. Per cancellare la modalità di ripetizione di tutto il CD, premere il tasto MODE 3 volte ancora
per cancellare la funzione ripetizione tutti i brani e tornare alla lettura normale.

Italiano Italiano37 38
L’indicatore REP ALL sparirà dal display.
LETTURA IN ORDINE CASUALE IN MP3
1. Premere Il tasto LETTURA/PAUSA (17) e dopo cinque secondi il tasto STOP (19).
2. Premere il tasto MODE (11) 4 volte per entrare nella modalità di Lettura in Ordine
Casuale (Random), “RAND” apparirà sul display. Premere il tasto LETTURA/PAUSA
(17) per iniziare la lettura in ordine casuale.
3. Premere il tasto SAL TO AVANTI ()(13) per saltare al prossimo brano in ordine casuale.
4. Premere il tasto MODE (11) ancora una volta per tornare alla modalità di Lettura Normale.
LETTURA PROGRAMMA T A PER CD/USB E MMC/SD CARD
1. Premere Il tasto LETTURA/PAUSA (17) e dopo cinque secondi il tasto STOP (19).
2. Premere il tasto MODE (1 1) una volta. Il numero del brano “P-01” e “PROG” lampeggerà
sul display per indicare la prima selezione.
3. Selezionare il brano da programmare con i tasti SAL TO A V ANTI () e SALTO INDIETRO
(). Il no. di brano sarà visualizzato sul display.
4. Premere il tasto MODE (11) per inserire il brano nella memoria. Appare “P-02”.
5. Ripetere i passi 3 e 4 per programmare fino a un massimo di 20 brani.
6. Premere il tasto LETTURA/PAUSA (17) una volta per iniziare la lettura programmata.
7. Per cancellare la lettura programmata, premere il tasto STOP (18) due volte.
Nota: Se durante la lettura programmata, si desidera ripetere tutta la lettura, premere il tasto
MODE (11) ripetutamente fino a quando l’indicatore “ REP “ appare sul display.
rimane sempre attivata.
UTILIZZO LETTORE CASSETTE
INSERIMENTO E RIMOZIONE DELLE CASSETTE
1. Premere il Tasto Arresto/Espulsione (22) per aprire il Compartimento Cassetta.
2. Inserire la vostra cassetta nel contenitore con il lato esposto rivolto verso l’alto (il lato da
leggere rivolto verso l’esterno).
3. Richiudere il Compartimento Cassetta completamente prima dell’inizio.
4. Quando la lettura finirà, premere il Tasto Arresto/Espulsione (22) per aprire il
Compartimento Cassetta, e prelevare la vostra cassetta.
LETTURA
1. Regolare il Selettore Funzione (9) sulla posizione TAPE (Cassetta).
2. Inserire la vostra cassetta con il lato esposto rivolto verso l’alto.
3. Premere il Tasto Lettura (25) per attivare la lettura.
4. Regolare il Controllo Volume al livello desiderato.
5. Premere il Tasto Arresto/Espulsione (22) quando sarà finita la lettura.
REGISTRAZIONE DAL CONNETTORE USB/CARD SD
FUNZIONE ANTI - SHOCK
• Durante l’uso, il lettore è soggetto con molta probabilità a scosse o vibrazioni (per
esempio mentre si sta camminando o in un’automobile in movimento). Se la funzione
ANTI-SHOCK è attiva, permette una lettura senza interruzioni.
• Appena il tasto LETTURA/P AUSA viene premuto, la funzione ANTI-SHOCK viene attivata
per permettere un ascolto ininterrotto.
• Il suono verrà interrotto per meno di un secondo se il lettore è stato soggetto a scosse
continue per 10 secondi in lettura CD o 35 secondi in lettura MP3. Il suono verrà
ripristinato una volta che il lettore si stabilizzerà dopo la scossa.
Note:
• La funzione Anti - Shock non correggerà gli errori causati dall’uso di dischi difettosi ,
graffiati o sporchi.
• IMPORTANTE! Durante la riproduzione di dischi CD/MP3/WMA, la funzione ANTI SHOCK

Italiano Italiano39 40
IMPORT ANTE
Dato che il movimento del meccanismo del CD ed il circuito delicato possono causare
interferenza su una sintonizzazione radio vicina; spegnere questo apparecchio mentre si
sta utilizzando l’altro dispositivo radio.
Questo prodotto laser utilizza:
Pericolo - Radiazione laser invisibile quando viene aperto e il dispositivo di
sincronizzazione si arresta o fallisce. Evitare l’esposizione diretta ai raggi.
Attenzione - L’uso dei controlli, regolazioni o procedure non elencate in questo manuale
potrebbero causare un’esposizione rischiosa a radiazioni.
Riguardo i Compact Discs
Solo i compact discs che portano questo marchio possono
essere utilizzati con questo lettore CD.
SPECIFICHE TECNICHE
Fonti Al imenta zione
AC : 230V ~ 50 Hz
Batterie: 6 Batterie tipo UM-2
Gamma Frequenza Radio
FM: 87.5 - 108 MHz
MW: 540 - 1600 kHz
Lettore CD
Fonorivelatore: Raggio Azione 3, Semiconduttore Laser
Codific a : 16-Bit Lineari
Nota: Le caratteristiche ed il design sono soggetti a variazioni senza preavviso.
MOLTO IMPORTANTE: questo apparecchio è dotato di circuito di ErP (Stand-By Power
Management) e quando non è operativo per qualche tempo si spegne automaticamente. Per
riattivare l'unità, spostare il selettore di funzione TAPE / OFF e poi spostarlo di nuovo su CD /
Radio.
Corretto smaltimento del prodotto - (rifiuti elettrici ed elettronici)
II marchio riportato sul prodotto e sulla sua documentazione indica che
il prodotto non deve essere smaltito can altri rifiuti domestici al termine
del ciclo di vita. Per evitare eventuali danni all'ambiente o alla salute
causati dall'inopportuno smaltimento dei rifiuti, si invita l'utente a
separare questo prodotto da altri tipi di rifiuti e di riciclarlo in maniera
responsabile per favorire il riutilizzo sostenibile delle risorse materiali.
Gli utenti domestici sono invitati a contattare il rivenditore presso il quale
e stato acquistato il prodotto a l'ufficio locale preposto per tutte le
informazioni relative alla raccolta differenziata e al riciclaggio per questo
tipo di prodotto.
Gli utenti aziendali sono invitati a contattare il proprio fornitore e verificare
i termini e le condizioni del contratto di acquisto. Questo prodotto non
deve essere smaltito unitamente ad altri rifiuti commerciali.

Español
41 42
Español
ATENCIÓN
El símbulo de exclamación dentro un triángolo tiene el objeto de advertir
al usuario de la presencia de instrucciones importantes de
funcionamiento y mantenimiento en la documentación adjunta con el
equipo.
El símbulo del rayo con punta de flecha dentro de un triángolo adverte al
usuario de la presencia de tensiones peligrosas en el equipo.
CAUTION
RISK OF ELECTRIC
SHOCK
DO NOT OPEN
CLASS 1
LASER PRODUCT
230v~
- +
- +
CD realizado en casa reproducido por un lector de CD Roadstar.
Pueden reproducirse CD-R / CD-RW en formatos CD-DA y MP3. No obstante,
puede ocurrir que, debido a diferencias en la calidad del soporte, así como a
características de la grabación, determinados CD individuales creados por el
usuario no puedan leerse. Esto no indica un funcionamiento incorrecto de la
unidad de reproducción en estos casos.
Para reducir los riesgos de descargas eléctricas, no retire la cubierta. La
unidad no hay en su enterior componentes que pueda manipular el
usuario. Encargue su reparación a personal cualificado.
Esta unidad utiliza el laser. Solamente personal autorizado puede remover la cobertura del aparato, causa de posibles daños a la vista.
Radiaciones laser invisibles a aparado abierto. El uso de interruptores o
regulaciones de las caracteristicas tecnicas o manejos diferentes de
aquellos especificados, puede resultar una peligrosa exposición a
radiaciones laser.
Esta unidad funciona con 230V ~ 50Hz. Cuando el equipo vaya a estar un
tiempo prolongado sin utilizarse, desenchufar el cable de alimentación.
La unidad no debería ser expuesta a lluvia o humedad.
No conecte la unidad hasta que no se hayan efectuado todas las otras
conexiones.
La unidad se debe instalar de forma que su posición no le impida tener
ventilación adecuada. Por ejemplo, el equipo no se debe colocar cerca
de cortinas o sobre el tapete, ni en una instalación como puede ser un
armario.
La unidad no debería ser expuesta a la luz solar directa ni a fuentes
emisora de calor.
Todas las pilas deben ser instaladas respectando la correcta polaridad.
No asociar pilas nuevas con pilas viejas o usadas.
Si no se usará el aparato por mucho tiempo (un mes o más), quitar las
ilasdel alojamiento para evitar daños provocados por eventuales pérdidas
de ácido.
RCR-4650USMP
Radio Lector de Casetes y CD/CD-R/CD-RW/MP3 Estéreo Portátil, entradas USB
y MMC/SD Card.
MANUAL INSTRUCCIONES
Recomendamos la lectura cuidadosa de este manual para poderse familiarizar con su
nuevo Radio Lector antes de utilizarlo por la primera vez. Recomendamos conservar este
manual para futuras consultaciones.
LOCALIZACIÓN DE LOS CONTROLES
1. Antena FM
2. C omparti ment o CD
3. Entrad a U SB
4. Selector BA NDA
5. Mando Sintonizacion
6. Ánu lo Ab ie rt u ra C om par ti me nt o C D
7. Ind ic ad or A li me nta ci on
8. Control VOLUM EN
9. Selector FUNCIÓN (RADIO/TAPE-OFF/CD/MP)
10. No se tiliza en este modelo
11. Bot ón CD MODE
12 . I ndi cad or S Int oni a R adi o
13. Botón SALTO/BUSQUEDA HACIA ADELANTE ()
14. Botón SALTO/BUSQUEDA HACIA ATRÁS ()
15 . P an tal la L CD
16. Indicador FM-ESTÉREO
17. Botón
LECTURA/PA USA CD
18. Botón ALBUM
19. Botón PARADA CD
20. C ompartimento BATERÍA
21. B otón PAUSE (C asete)
22. Botón PARADA/EXPULSIÓN (Casete)
23. Botón AVANCE RÁPIDO (Casete)
24. Bo tón REBOB INADO (Ca sete)
25. B otón LEC TURA (Ca sete)
26. botón no operativo en este modelo
27. Co mpar tim ento C ase te
28. Entrada SD/MMC Card
(FMS T/F M/A M)

Español
MUY IMPORTANTE: Esta unidad cuenta con un circuito integrado para
apagar automáticamente la unidad después de 10 minutos que no hay
audio se reproduce desde CD/USB/SD o Radio. Para encender de nuevo, mueva
el selector de función en OFF durante 3 segundos y luego cambiar a la función
deseada para encender de nuevo la unidad
43 44
Español
CONEXIÓN A LA FUENTE DE ALIMENT ACIÓN
Antes de activar el aparato asegurarse de que el voltaje local corresponda al voltaje indicado
en la placa de los datos de funcionamiento.
Para su propia seguridad leer las siguientes instrucciones con cuidado antes de conectar
este aparato a la toma de corriente.
FUNCIONAMIENTO CON RED CA
Este aparato ha sido diseñado para que funcione con una fuente de alimentación de CA
230V, 50Hz. La conexión a otro tipo de fuente de alimentación podría dañar el aparato.
Atención
Para prevenir las descargas eléctricas desconectar la clavija antes de remover la tapa. No
emplear las partes utilizables en el interior. Dirigirse al personal de un centro de servicios
calificado.
Precauciones de Seguridad
No exponer el aparato a la lluvia o a la humedad.
Fuente de Alimentación Principal: solamente CA 230V 50 Hz - CA
Este símbolo significa que este aparato está doblemente aislado. No se requiere
una conexión a tierra.
PREP ARACIÓN AL USO
• Extraer con cuidado el aparato de la caja, conservar el embalaje para un eventual uso futuro.
• Recomendamos una lectura cuidadosa de este manual de instrucciones antes de
poner en función el aparato.
Funcionamiento con Red CA
• Conectar el cable de alimentación CA incluido a la toma de alimentación colocada en
la parte posterior del aparato portátil. Conectar el Cable de Alimentación a su toma de
corriente doméstica y activar el aparato. Asegurarse de que el voltaje sea compatible.
Funcionamiento con Pila
• Desconectar el terminal principal del aparato antes del funcionamiento con pilas.
• Abrir el Compartimento Pila (20) colocado en la parte posterior del aparato e instalar 6
pilas LR20 siguiendo el diagrama mostrado en la parte interna del compartimento pila.
• Extraer las pilas cuando no se utilizará el aparato por un período de tiempo prolongado.
• Las pilas descargadas tendrán que ser extraídas para evitar las pérdidas de ácido.
USO DE LA RADIO
1. Colocar el Selector Función (9) en la posición RADIO.
2. Seleccionar la banda de frecuencia deseada con el Selector Banda (4).
3. Sintonizar la estación radio deseada girando el control Sintonización (5).
4. Regular el control Volumen (8) al nivel deseado.
5. Para apagar la radio, colocar el Selector Función (9) en la posición TAPE (Casete).
Antena
Para la recepción en FM se encuentra incorporada una antena telescópica FM (1) en la
parte posterior del aparato. Extender la antena y girarla hasta alcanzar la mejor recepción.
Para una recepción en OM las señales serán recogidos a través de la antena de barra de
ferrita incorporada. Tendrá que orientar el aparato hasta alcanzar la mejor recepción.
Recepción FM Estéreo y Mono
Cuando se sintoniza una señal, colocando el selector BANDA (4) en la posición FM ST
permitirá a la estación de ser captada en sonido estéreo. El indicador FM Estéreo (16) se
iluminará. Cuando las señales estéreo son débiles y la recepción está perturbada, a
menudo es preferible recibir la estación en mono. Trasladar el Selector FM ST (4) en la
posición FM (Mono). La recepción estará menos perturbada.
MANIPULACIÓN DE LOS COMPACT DISCS
• Para extraer el disco del estuche pulsar hacia abajo en el centro del estuche y extraer
el disco con cuidado tomándolo por los bordes.
• Huellas digitales y polvo tendrán que ser removidas con cuidado de la superficie
grabada del disco usando un paño suave. A diferencia de los discos convencionales,
loa compact discs no poseen surcos dónde se puedan depositar el polvo y detritos
microscópicos por lo tanto limpiarlos con un paño suave para poder remover la mayor
parte de las partículas. Limpiar el disco en línea recta desde el centro hacia el borde.
Pequeñas partículas de polvo y manchas ligeras no afectarán la calidad de la reproducción.

Español
45 46
Español
• No utilizar productor químicos tales como rociadores para discos, rociadores
antiestáticos, bencina o diluentes para limpiar los compact discs. Estos productos
químicos podrían dañar irreparablemente la superficie del disco.
• Volver a colocar los discos en sus estuches después del uso. Esto evita que se rayen
seriamente y causar que el fonocaptor salte.
• No exponer los discos a la luz directa del sol, humedad excesiva o altas temperaturas
por períodos de tiempo prolongados. Un larga exposición a altas temperaturas podrían
deformar el disco.
• No encolar etiquetas o escribir sobre el lado de la etiqueta con un bolígrafo.
USO CD/MP3
Carga y Descarga de los Compact Discs
1. Colocar el Selector Función (9) en la posición CD/MP3/USB.
2. Levantar el ángulo de abiertura compartimento CD (6).
3. Cuando el compartimento estará abierto, extraer un disco del estuche y colocarlo
cuidadosamente en el compartimento con el lado de la etiqueta dirigido hacia arriba.
Colocar los discos de 3” sobre el eje central del compartimento.
4. Volver a cerrar el compartimento bajando el ángulo del compartimento CD.
El número total de las melodías aparecerá sobre la pantalla.
Durante la lectura, el número de la melodía aparecerá sobre la pantalla.
5. Ajustar el Control VOLUMEN (8), a su nivel de audición deseado.
6. Para detener temporalmente la lectura, pulsar el botón LECTURA/PAUSA (II )(17)
una vez. El indicador de lectura parpadeará sobre la pantalla. Pulsar el botón LECTURA/
PAUSA (II ) nuevamente para reanudar la lectura.
7. Para detener la lectura, pulsar el botón PARADA ()(19) una vez.
8. Para desactivar el aparato, selccionar TAPE (9).
Nota:
• Cuando el compartimento CD se abre accidentalmente durante la lectura, “ --- ”
aparecerá sobre la pantalla.
• Esperar que el disco se detenga completamente antes de abrir el compartimento CD.
• Este aparato puede leer discos singulares de 3” (8cms) sin un adaptador.
Cargar canciones MP3 desde Stick de memórias USB
1. Colocar el Selector Función (9) en la posición CD/MP3/USB.
2. Conectar el lector de MP3 a la entrada USB para encenderlo.
3. En lectura, la canción MP3 puede seleccionarse de la misma manera como los CD.
LOCALIZACIÓN DE UNA MELODÍA P ARTICULAR O DE UN PUNTO DE LA MELODÍA
1. Pulsar el botón SALTO HACIA ATRÁS ()(14) una vez para regresar al inicio de la
melodía corriente.
2. Pulsar el botón SALTO HACIA ATRÁS () repetidamente para regresar a las melodías
precedentes.
3. Pulsar el botón SALTO HACIA ADELANTE ()(13) repetidamente para ir a la melodías
sucesivas.
4. Mantener pulsado el botón SALTO HACIA ADELANTE () o el botón SALTO HACIA
ATRÁS ( ) para localizar hacia adelante o hacia atrás, a alta velocidad, un punto
particular de la melodía.
Nota: Durante el proceso de búsqueda se escuchará el audio a un nivel bajo para
ayudar a localizar el punto correcto de la melodía.
Nota: Durante la función de Salto melodía, el lector necesitará de algunos segundos
para saltar a la melodía deseada, debido a la función del Anti-choque.
LECTURA REPETIDA EN CD
1. Pulsar el botón LECTURA/PAUSA (17).
2. Para repetir la misma melodía, pulsar el botón MODE (11) una vez. El indicador “REP1”
aparecerá sobre la pantalla.
Inicia la lectura repetida fino a el pulsar del botón STOP (19).
Para borrar la función lectura repetida, pulsar MODE 4 veces. El indicador “REP1”
desaparece de la pantalla.
3. Para repetir todo el CD, pulsar el botón MODE (11) dos veces. El indicador REP ALL
aparecerá sobre la pantalla.
Inicia la lectura repetida fino a el pulsar del botón STOP (19).
4. Para borrar la modalidad de repetición, pulsar MODE 3 veces más. El indicador
REP ALL desaparece de la pantalla.
LECTURA EN ORDEN CASUAL (RANDOM) EN CD
1. Pulsar el botón LECTURA/PAUSA (17), después pulsar el botón MODE (11) 3 veces
para entrar en la modalidad de Lectura en Orden Casual (Random). “RND” aparecerá
sobre la pantalla. Pulsar el botón LECTURA/PAUSA (17) para activar la lectura en
Orden Casual.
2. Pulsar el botón SALT O HACIA ADELANTE () para ir a la melodías sucesiva en orden casual.
3. Pulsar el botón MODE (11) una vez más para regresar a la modalidad de Lectura Normal.

Español
47 48
Español
LECTURA REPETIDA EN CD
1. Pulsar el botón LECTURA/PAUSA (17).
2. Para repetir la misma melodía, pulsar el botón MODE (1 1) una vez. El indicador “REP1”
aparecerá sobre la pantalla.
Inicia la lectura repetida fino a el pulsar del botón STOP (19).
Para borrar la función lectura repetida, pulsar MODE 4 veces. El indicador “REP1”
desaparece de la pantalla.
4. Para repetir todo el CD, pulsar el botón MODE (11) 2 veces. El indicador REP ALL
aparecerá sobre la pantalla.
Inicia la lectura repetida fino a el pulsar del botón STOP (19).
5. Para borrar la modalidad de repetición, pulsar MODE 3 veces más. El indicador
REP ALL desaparece de la pantalla.
LECTURA EN ORDEN CASUAL (RANDOM) EN MP3
1. Pulsar el botón LECTURA/PAUSA (17), después pulsar el botón MODE (11) 4 veces p ara
entrar en la modalidad de Lectura en Orden Casual (Random). “RAND” aparecerá sobre
la pantalla. Pulsar el botón LECTURA/P AUSA (17) para activar la lectura en Orden Casual.
2. Pulsar el botón SAL TO HACIA ADELANTE () para ir a la melodías sucesiva en orden casual.
3. Pulsar el botón MODE (11) una vez más para regresar a la modalidad de Lectura Normal.
LECTURA PROGRAMADA EN CD/USB Y MMC/SD CARD
1. Pulsar el botón LECTURA/PAUSA (17), esperar 5 segundos y pulsar STOP (19).
2. Pulsar el botón MODE (11) una vez. El numero de la pista “P-01” y “PROG” aparecerá
sobre la pantalla para indicar la primera selección.
3. Pulsar el botón SALTO HACIA ATRÁS () o SALTO HACIA ADELANTE () para
seleccionar la melodía deseada por programar. El número de la melodía por programar
aparecerá sobre la pantalla.
4. Pulsar el botón MODE (11) para introducir la melodía en la memoria. Aparece “P- 02”.
5. Repetir los pasos 3 y 4 para programar hasta un máximo de 20 melodías.
6. Pulsar el botón LECTURA/PAUSA (17) una vez para iniciar la lectura programada.
7. Para borrar la lectura programada, pulsar el botón STOP (19) dos veces.
Nota: Durante la lectura programada, si desea repetir toda la lectura programada, pulsar
el botón MODE (11) repetidamente hasta cuando el indicador “REP“ aparezca
sobre la pantalla.
(por ejemplo mientras se camina o en un automóvil en movimiento). La función ANTICHOQUE permite una reproducción sin interrupción.
• El sonido se interrumpirá por aproximadamente 1 segundo si el lector está sujeto a
sacudida para más de 10 segundos en CD o 35 segundos en MP3, y el sonido se
reanudará cuando el lector se estabilizará después de la sacudida.
Notas:
• La función Anti - CHOQUE no corregirá los errores causados por el uso de discos
defectuosos, rayados o sucios.
¡IMPORTANTE! Durante la lectura de CD y MP3, la función del ANTI-CHOQUE es
siempre operatíva y esta función no puede ser disactivada.
USO LECTOR CASETES
INTRODUCCIÓN Y EXTRACCIÓN DE LOS CASETES
1. Pulsar el Botón Parada/Expulsión (22) para abrir el Compartimento Casete.
2. Introducir su casete en el contenedor con el lado expuesto dirigido hacia arriba (el lado
por leer dirigido hacia afuera).
3. Volver a cerrar el Compartimento Casete firmemente antes del inicio.
4. Cuando la lectura terminará, pulsar el Botón Parada/Expulsión (21) para abrir el
Compartimento Casete, y extraer su casete.
LECTURA
1. Colocar el Selector Función (9) en la posición TAPE (Casete).
2. Introducir su casete con el lado expuesto dirigido hacia arriba.
3. Pulsar el Botón Lectura (25) para activara la lectura.
4. Ajustar el Control Volumen (8) a el nivel deseado.
5. Pulsar el Botón Parada/Expulsión (22) cuando terminará la lectura.
FUNCIÓN ANTI - CHOQUE
• Durante el uso, el lector está sujeto con mucha probabilidad a sacudidas o vibraciones

Español
49 50
Español
IMPORT ANTE
Dado que el movimiento del mecanismo del CD y el circuito delicado pueden causar
interferencias en una sintonización radio cercana; apagar este aparato mientras se está
utilizando el otro dispositivo radio.
Este producto láser utiliza:
Peligro -Radiación láser invisible cuando se abre y el dispositivo de sincronización se
detiene o falla. Evitar la exposición directa a los rayos.
Atención -El uso de los controles, regulaciones o procedimientos no mencionados en
este manual podrían causar una exposición a radiaciones arriesgada.
Acerca de los Compact Discs
Solamente los compact discs que llevan este sello pueden
ser utilizados con este lector CD.
IMPORTANTE: Esta unidad está equipada con un circuito ErP (Stand-By
Power Management) y cuando no está en funcionamiento desde hace algún tiempo
libre de forma automática. Para reactivar la unidad, mueva el selector de función en
la posición TAPE / OFF y luego devolverlo a CD / Radio
ESPECIFICACIONES TÉCNICAS
Fuentes Alime ntación
CA : 230V ~ 50 Hz
Baterías: 6 Baterías tipo UM-2
Gama Frecuencia Radio
FM: 87.5 - 108 MHz
OM: 540 - 1600 kHz
Lector CD
Fonocaptor: Rayo Acción 3, Semiconductor Láser
Codifica : 1 6 - Bi t Linea re s
Nota: Especificaciones y diseño sujetos a posibles modificaciones sin previo aviso.
Eliminación correcta de este producto -
(material electrico y electrónico de descarte)
La presencia de esta marca en el producto o en el materiál informativo
que lo acompaña, indica que al finalizar su vida útil no deberá
eliminarse junto con otros residuos domésticos. Para evitar los
posibles daños al medio ambiente o a la salud humane que
representa la eliminación incontrolada de residuos, separe este
producto de otros tipos de residuos y reciclelo correctamente para
promover la reutilización sostenible de recursos materiales.
Los usuarios particulares pueden contactar con el establecimiento
donde adquirieron el producto, o con las autoridades locales
pertinentes, para informarse sobre cómo y dónde pueden lIevario para
que sea sometido a un reciclaje ecológico y seguro.
Los usuarios comerciales pueden contactar con su proveedor y
consultar las condiciones del contrato de compra. Este produco no
debe eliminarse mezclado con otros residuos comerciales.

Português Português
51 52
CAUTION
RISK OF ELECTRIC
SHOCK
DO NOT OPEN
CLASS 1
LASER PRODUCT
230v~
- +
- +
ATENÇÃO
O ponto de exclamação dentro de um triângulo avisa o utilizador que no livrete de
instruções há importantes informações para a utilização e a manutenção.
O símbolo com o raio dentro de um triângulo avisa o utilizador que há tensão
perigosa no interior do aparelho.
Para reduzir o risco de choque eléctrico, não abra o aparelho. O aparelho não
contém peças que podem ser reparadas pelo utilizador. Em caso de defeitos, para
a reparação, contacte um técnico qualificado.
Este aparelho utiliza um ráio laser. Por causa de perigo de danos a vista,somente
pessoas qualificadas podem abrí-lo para tentar consertá-lo.
Radiações laser invisíveis podem sair se a aparelhagem for aberta ou se estragarse o dispositivo de segurança. Evite a exposição directa aos raios laser. A utilização
de comandos, regulações ou procedimentos não especificados neste manual
pode causar perigosas exposições a radiações laser.
Este aparelho foi projectado para funcionar com 230 V . ~ 50 Hz. Se o aparelho não
for utilizado durante muito tempo, tire a ficha eléctrica da tomada de corrente.
Não exponha o aparelho à chuva nem à humidade.
Utilize o aparelho somente depois de ter verificado que todas as conexões foram
correctamente ligadas.
Coloque o aparelho num local suficientemente ventilado. Evite colocá-lo perto de
cortinas, em cima de alcatifas ou dentro de quaisquer móveis como por exemplo
uma estante.
Não exponha o aparelho directamente à luz do sol nem a fontes de calor.
Certifique-se que as pilhas foram colocadas respeitando as polaridades certas.
Não coloque pilhas velhas junto com pilhas novas.
Se o aparelho não for utilizado durante muito tempo (um mês ou mais), tire todas
as pilhas de dentro para evitar possíveis vazamentos de ácido.
RCR-4 6 50 U S M P
Rádio Estéreo com T oc a Fitas Ca ssete Auto stop e T oca CD/CD-R/CD-RW/MP3
com entradas USB e MMC/SD Card.
INTRODUÇÃO DO MANUAL
É recomendado ler atentamente este manual para familiarizar-se com o novo Rádio Toca
Fitas Cassete antes de usá-lo pela primeira vez. É recomendável guardar este manual
para futuras consultas.
LOCALIZAÇÃO DOS CONTROLES
1. Antena FM
2. C ompartimento CD
3. Entrada USB
4. Selector ONDA (FMST/FM/AM)
5. Mando SINTONIA
6. Angulo de ab ertura compar timento CD
7. Indicador A limentaci on
8. Controlo do VOLUME
9. Selector Função RADIO/TAPE-OFF/CD/MP3/USB/SD)
10. não utilizados neste modelo
11. Tecla CD MODE
12. Sc ala Sintonia Radio
13. Tecla Salto/Busq ueda à frente ()
14. Tecla Salto/ Busqueda atrás ( )
15. Ec rã LCD
16. Indicador FM-Stéreo
17. Tecla Toca r/Pausa CD
18. Tecla Album
19. Tecla Parar CD
20. Co mpartimento PIL HAS
21. Tecla PAUSA (Cassete)
22. Tecla PARAR/TIRAR (EJECT) (Cassete)
23. Tecla AVANÇAR VELOZ (FAST FORWARD)
(Cassete) 24. Tecla BOBINA R ( REWIND) (Cassete)
25. Tecla TOVAR (PLAY) (Cassete)
26. botão não ocorre neste modelo
27. Com partimento CASSE TE
28 Entrada SD/MMC Card

Português Português
MUITO IMPORTANTE: Este aparelho tem um circuito interno para se desligar
automaticamente a unidade depois de 10 minutos que o NO áudio é reproduzido
a partir de CD/USB/SD ou Rádio. Para ligar novamente, mova o seletor de funções
para fora por cerca de 3 segundos e depois mudar para a função desejada para l
igar o aparelho novamente.
53 54
LIGAÇÃO À FONTE DE ALIMENT AÇÃO
Antes de ligar o aparelho, certifique-se se a tensão eléctrica local é a mesma que a
indicada na placa dos dados de funcionamento.
Para a própria segurança, leia com atenção as seguintes instruções antes de ligar este
aparelho à tomada eléctrica.
FUNCIONAMENTO COM ELECTRICIDADE DA REDE
Este aparelho foi projectado para funcionar somente com uma fonte de alimentação de
Corrente Alternada de 230 V. 50 Hz. A ligação a qualquer outro tipo de alimentação poderá
danificar o aparelho.
Atenção
Para evitar descargas eléctricas, desligue o aparelho da tomada eléctrica antes de abrir
tirar a tampa. O aparelho não contém peças que podem ser reparadas pelo utilizador. Em
caso de avarias, para a reparação, contacte um técnico qualificado.
Precauções de Segurança
Não deixe o aparelho exposto à chuva nem à humidade.
Fonte de Alimentação Principal: somente Corrente Alternada 230 V. / 50 Hz
Este símbolo significa que este aparelho é duplamente isolado. Não é
necessária uma ligação à terra.
PREP ARAÇÃO PARA A UTILIZAÇÃO
• Tire com cuidado o aparelho da caixa, guarde a embalagem para futuras utilizações.
• Leia com atenção estas instruções antes da utilização.
Operação com corrente alternada
• Conecte o cabo de corrente alternada na entrada correspondente na parte posterior
desta unidade portátil estéreo. Conecte o fio na tomada AC da corrente doméstica e
assione o botão de ligar. Esteja certo da corrente elétrica ser copatível.
• Lembre-se sempre de desconectar primeiro o plug da rede doméstica, antes de
desconectar do aparelho.
• Desconecte o cabo de força sempre que a unidade não estiver sendo utilizada.
• As baterias são desconectadas automaticamente quando a corrente alternada é
utilizada pela inserção da tomada na entrada.
Operação por pilhas
• Desconecte o cabo de força AC da entrada.
• Abra o compartimento das pilhas (20) na parte posterior de seu estéreo e coloque 6
pilhas tipo UM-2. Respeite a polaridade seguindo o diagrama mostrado no
compartimento de pilhas.
• As pilhas devem ser removidas da unidade, quando esta ficar algum tempo sem utilização.
• As pilhas devem ser retiradas para evitar vazamento.
OUVINDO O RÁDIO
1. Posicione o seletor de função (9) na posição RADIO.
2. Selecione a onda desejada com o seletor de onda (4).
3. Sintonize a estação desejada com o controle de sintonia (5).
4. Ajuste o volume (8) em sua intensidade desejada.
5. Para desligar o rádio, posicione o seletor de função na posição TAPE (Fita) (9).
Antena
Para recepção em FM, existe uma antena telescópica (1) na parte posterior da unidade.
Extenda a antena e mova-a de forma circular até encontrar a posição de melhor recepão.
Para recepção de ondas médias, os sinais são captados através de uma antena interna
de ferrite. Poderá ser necessário mover a unidade para se obter a melhor sintonia.
Recepción FM Estéreo y Mono
Cuando se sintoniza una señal, colocando el selector BAND (4) en la posición FM ST
permitirá a la estación de ser captada en sonido estéreo. El indicador FM Estéreo (16) se
iluminará.
Cuando las señales estéreo son débiles y la recepción está perturbada, a menudo es
preferible recibir la estación en mono. Trasladar el Selector (4) en la posición FM (Mono).
La recepción estará menos perturbada.
MANIPULACIÓN DE LOS COMPACT DISCS
Para tirar o CD da própria caixa, prima para baixo o centro da mesma e puxe o CD para fora,
preso com cuidado pelas beiradas.
É preciso limpar com cuidado as impressões digitais e a poeira da superfície gravada do

Português Português
55 56
CD mediante um pano macio. Os CDs não são como os discos convencionais, os CDs
não possuem sulcos nos quais a poeira e detritos microscópicos se acumulam; limpe-os
portanto com um pano macio para poder remover a maior parte das partículas. Limpe o
disco em linhas rectas do centro para a parte externa. Pequena partículas de poeira e
leves nódoas não terão efeito algum na qualidade da leitura.
Não utilize produtos químicos tais como 'sprays' para discos, 'sprays' anti-estáticos,
gasolina nem solventes para limpar CDs. Estes produtos químicos poderão danificar
irremediavelmente a superfície do CD.
Guarde o CD na sua caixa depois de utilizá-lo. Desta maneira evitam-se arranhões causados
por deslocações do compartimento toca-discos laser.
Não deixe CDs expostos muito tempo à luz solar, a humidade excessiva, nem a altas
temperaturas. Uma longa exposição a altas temperaturas poderá deformar o CD.
Não cole etiquetas nem escreva do lado da etiqueta do disco com uma esferográfica.
No encolar etiquetas o escribir sobre el lado de la etiqueta con un bolígrafo.
TOCAR COMP ACT DISCS/MP3
Colocar e Tirar CDs
1. Posicione o seletor de Função (9) na posição CD/MP3/USB.
2. Erga o canto Abertura do compartimento CD (6) para abrí-lo.
3. Quando o compartimento é aberto, removê-lo do estojo e posicioná-lo delicadamente
com a etiqueta voltada para cima.
4. Fechar o compartimento, pressionado um dos lados da tampa.
5. Pressionar a tecla Play/Pausa (16), e o disco começará a tocar, do primeiro trecho em diante.
6. No final da escuta, o disco entra na modalidade Stop (19).
O número total dos trechos aparecerá no ecrã. Inicia a leitura. Durante a leitura, o
número do trecho aparecerá no ecrã.
7. Regule o comando do VOLUME (8), para o nível de escuta que desejar.
8. Para parar temporariamente a leitura, carregue na tecla PLA Y/ P AUSE [LEITURA/P AUSA]
(II)(17) uma vez. O indicador de Leitura piscará no ecrã. Carregue na tecla PLAY/
PAUSE novamente para reiniciar a leitura.
9. Para parar a leitura, carregue na tecla STOP [PARADA] ()(18) uma vez.
10. Para desligar o aparelho, seleccionar TAPE (9).
Nota:
• Quando o Cd é acidentalmente aberto, durante a música, aparecerá “---” no display.
• Quando o disco acabar de girar, aí sim, pode abrir o compartimento.
• Esta unidade pode tocar 3 “(8cm) um único CD, sem um adaptador.
Carregando canções MP3 de uma memória USB
1. Posicione o seletor de Função (9) na posição CD/MP3/USB.
2. Conecte o leitor de MP3 na entrada USB para ligar-lo.
3. Em leitura, os canções MP3 poden ser selecionado da mesma maneira como os CD.
LOCALIZAÇÃO DE UMA F AIXA ESPECÍFICA OU DE UM PONTO DA F AIXA
1. Teclar SALTO atrás () (14) uma vez, para voltar pára o início da música corrente.
2. Teclar SALTO atrás () repetidamente, para voltar pára as músicas anteriores.
3. Teclar SALTO a frente () (13) repetidamente, para avançar pára as próximas músicas.
4. Teclar e manter em SALTO atrás () ou SALTO (), para procurar, em alta velocidade,
um ponto ou trecho particular.
Nota: Um baixo nível de audio será ouvido durante esta procura.
LEITURA REPETIDA EM CD
1. Pressione a tecla LEITURA/PAUSA (17).
2. Para repetir o mesmo trecho, teclar MODE (11) uma vez. O indicador
aparecerá no display.
“REP1”
Inicia a leitura repetida.
Se a tecla MODE (11) for pressionada 4 vezes, hasta o indicador “REP” apagará, a
repetição da faixa pára de tocar repetidamente e voltará a tocar normalmente o disco.
3. Para repetir todo o CD, teclar MODE duas vezes. O indicador REP ALL aparecerá no display.
Inicia a leitura repetida.
4. Se a tecla MODE (11) for pressionada 3 vezes, hasta o indicador REP ALL apagará, a
repetição da todo o CD pára de tocar repetidamente e voltará a tocar normalmente o
disco.
LEITURA EM ORDEM CASUAL (RANDOM) EM CD
1. Pressione a tecla LEITURA/PAUSA (17), depois premir MODE (1 1) 3 vezes, para entrar
em Random, «RAND» aparecerá no display. Pressione a tecla LEITURA/PAUSA (17),
o CD tocará em ordem casual.
2. Teclar SALTO a frente () para avançar pára as próximas músicas em ordem casual.
3. Teclar a MODE novamente para retornar ao andamento normal.
LEITURA REPETIDA EM MP3
1. Pressione a tecla LEITURA/PAUSA (17).
2. Para repetir o mesmo trecho, teclar MODE (11) uma vez. O indicador
aparecerá no display.
“REP1”
Inicia a leitura repetida.
Se a tecla MODE (11) for pressionada 4 vezes, hasta o indicador “REP1” apagará, a

Português Português
57 58
repetição da faixa pára de tocar repetidamente e voltará a tocar normalmente o disco.
3. Para repetir todo o CD, teclar MODE 2 vezes. O indicador REP ALL aparecerá no display.
Inicia a leitura repetida.
4. Se a tecla MODE (1 1) for pressionada 3 vezes, hast a o indicador REP ALL apagará, a
repetição da todo o CD pára de tocar repetidamente e voltará a tocar normalmente o
disco.
LEITURA EM ORDEM CASUAL (RANDOM) EM MP3
1. Pressione a tecla LEITURA/PAUSA (17), depois premir MODE (1 1) 4 vezes, para entrar
em Random, «RAND» aparecerá no display. Pressione a tecla LEITURA/PAUSA (17),
o CD tocará em ordem casual.
2. Teclar SALTO a frente () para avançar pára as próximas músicas em ordem casual.
3. Teclar a MODE novamente para retornar ao andamento normal.
LEITURA PROGRAMADA EM CD/USB E MMC/SD CARD
1. Carregue na tecla LEITURA/PAUSA (17) e, depois de 5 segundos, na tecla STOP (19).
2. Carregue na tecla MODE (1 1) uma vez. O número da faixa “P-01” e “PROG” aparece no
ecrã para indicar a primeira selecção. .
3. Seleccione o trecho a ser programado mediante as teclas SALTO atrás () ou SALTO
a frente (). O número do trecho será visualizado no ecrã.
4. Carregue na tecla MODE (11) para guardar o trecho na memória. “P-02” aparece.
5. Repita os pontos 3 e 4 para programar até no máximo 20 trechos.
6. Carregue na tecla LEITURA/PAUSA (17) uma vez para iniciar a leitura programada.
7. Para cancelar a leitura programada, carregue na tecla STOP (19) duas vezes.
Observação: Se durante a leitura programada, desejar repetir toda a leitura, carregue na
tecla MODE (11) várias vezes até o indicador “ REP“ aparecer no ecrã.
MÚSICA NO COMP ARTIMENTO CASSETE
INSERIR E REMOVER AS FIT AS
1. Teclar STOP/EJECT (22) para abrir o compartimento .
2. Encaixe a fita no compartimento, com a etiqueta voltada para cima e o lado da escuta
para fora.
3. Fechar o compartimento com cuidado.
4. Quando terminar teclar STOP/EJECT (22) para abrir o compartimento e retirar a fita.
MÚSICA
1. Posicionar o seletor (9) de FUNÇÃO no “TAPE”.
2. Inserir a fita com a etiqueta voltada para cima.
3. Teclar Play (25) para ativar a música.
4. Controlar Volume como quiser.
5. Teclar Stop (22) quando a fita acabar.
FUNÇÃO ANTI-CHOQUE
• Quando a tecla LEITURA/P AUSA é a função Anti-Choque é ativada.
• O som ficará mudo durante 1 segundo, se a música sujeita a choques para 10
segundos de CD ou 35 segundos de MP3.
Notas:
• A função Anti-Choque, não irá corrigir os erros do usuário, como arranhões ou sujeira
no disco.
ATENÇÃO: A função Anti-choque é sempre ativada en leitura CD e MP3 e no se pode
desativar.

Português Português
59 60
IMPORT ANTE
Como o movimento do mecanismo do CD e o circuito sensível poderão causar interferência
num rádio perto; desligue este aparelho quando estiver a utilizar o outro rádio.
Este produto utiliza raios laser:
Perigo - Uma radiação laser invisível é emitida quando for aberto e o dispositivo
bloqueio falhar ou for forçado. Evite exposição directa aos raios.
Atenção - A utilização de controlos, regulações ou procedimentos não apresentados
neste manual poderão causar uma exposição arriscada a radiações.
Em Relação aos Compact Discs
Somente os compact discs que possuírem
esta marca podem ser utilizados neste Toca CD.
IMPORTANTE: Este aparelho é equipado com circuito ErP (Stand-By Power
Management) e quando não está a funcionar por algum tempo, desliga
automaticamente. Para reativar a unidade, mova o seletor de função para TAPE / OFF
e, em seguida, movê-lo de volta para CD / Radio.
ESPECIFICAÇÕES
Potência dos Acessórios
AC : 230V ~ 50 Hz
Baterias: 6 x UM-2
Cobertura Frequência Rádio
FM: 87.5 - 108MHz
MW: 540 - 1600kHz
Aparelho CD
Alcance: 3-Raios, Laser Semi-condutor
Encoding: 16-Bit Linear
Nota: As especificacões e o desenho podem ser alterados sem pré-aviso.
Eliminaçao Correcta Deste Produto -
(Resíduo de Equipamentas Eléctricos e Electrónicos)
Capacidade de reprodução de CDs criados pelo próprio usuário em mecanismos
de unidades de CD da Roadstar .
Os tipos de mídia CD-R/CD-RW nos formatos CD-DA e MP3 podem ser
reproduzidos. Entretanto, devido a diferenças de qualidade da mídia e às
características da gravação, é possível que CDs individuais criados pelo usuário
não consigam ser lidos. Nesses casos, isso não indica uma função incorreta da
unidade de reprodução.
Esta marca, apresentada no produto ou na sua literatura indica que
ele não deverá ser eliminado juntamente com os residuos domésticos
indiferenciados no final do seu periodo de vida útil. Para impedir
danos ao ambiente e á saúde humana causados pela eliminação
incontrolada de resíduos deverá separar este equipamento de outros
tipos de residuos e reciclá-lo de forma responsável, para promover
uma reutilização sustentável dos recursos materiais.
Os utilizadores domesticos deverão contactar ou o estabelecimento
onde adquiriram este produto ou as entidades oficiais locais para
obterem informaçães sobre onde e de que forma podem levar este
produto para permitir efectuar uma reciclagem segura em termos
ambientais.
Os utilizadores profissionais deverão contactar o seu fornecedor e
consultar os termos e condições do contrato de compra. Este produto
não devera ser misturado com outros residuos comerciais para
eliminação.
 Loading...