

Page 1

www.roadstar.com
PCD-498MP
User manual
Bedienungsanleitung
Manuel d’instructions
Manuale d’istruzioni
Manual de instrucciones
Page 2

INDEX
English Page 1
Deutsch Seite 5
Français Page 9
Italiano Pagina 13
Español Página 17
Your new unit was manufactured and assem-
bled under strict ROADSTAR quality control.
Thank-you for purchasing our product for
your music enjoyment. Before operating the
unit, please read this instruction manual carefully. Keep it also handy for further future
references.
Votre nouvel appareil a été fabriqué et monté
en étant soumis aux nombreaux tests ROADSTAR. Nous espérons que cet appareil vous
donnera entière satisfaction. Avant de vous
adonner à ces activités, veuillez lire attentivement ce manuel d’instructions. Conservez-le
à portée de main à fin de référence ultérieure.
Vuestro nuevo sistema ha sido construido
según las normas estrictas de control de calidad ROADSTAR. Le felicitamos y le damos
las gracias por su elección de este aparado.
Por favor leer el manual antes de poner en
funcionamiento el equipo y guardar esta documentación en case de que se necesite
nuevamente.
Ihr neues Gerät wurde unter Beachtung der
strengen ROADSTAR Qualitätsvorschriften gefertigt. Wir danken Ihnen für den Kauf unseres
Produktes und wünschen Ihnen optimalen Hörgenuss. Bitte lesen Sie diese Bedienungsanleitung durch, und heben Sie sie auf, um jederzeit
darin nachschlagen zu können.
Il vostro nuovo apparecchio é stato prodotto ed
assemblato sotto lo stretto controllo di qualità
ROADSTAR. Vi ringraziamo di aver acquistato
un nostro prodotto per il vostro piacere d’ascolto. Prima di procedere all'utilizzo dell'apparec-
chio, leggete attentamente il manuale d’istru-
zioni e tenetelo sempre a portata di mano per
futuri riferimenti.
Seu novo aparelho foi construido e montado
sob o estrito controle de qualidade da ROADSTAR. Agradecemos por ter comprado nosso
produto para a sua diversão. Antes de usar
esta unidade é necessário ler com atençâo
este manual de instruções pare que possa ser
usada apropriadamente; mantenha o manual
ao seu alcance para outras informações.
Page 3
PCD-498MP
1 2 3 4
5
6
7
8
9
10 11 12 13
14
Page 4

1 English
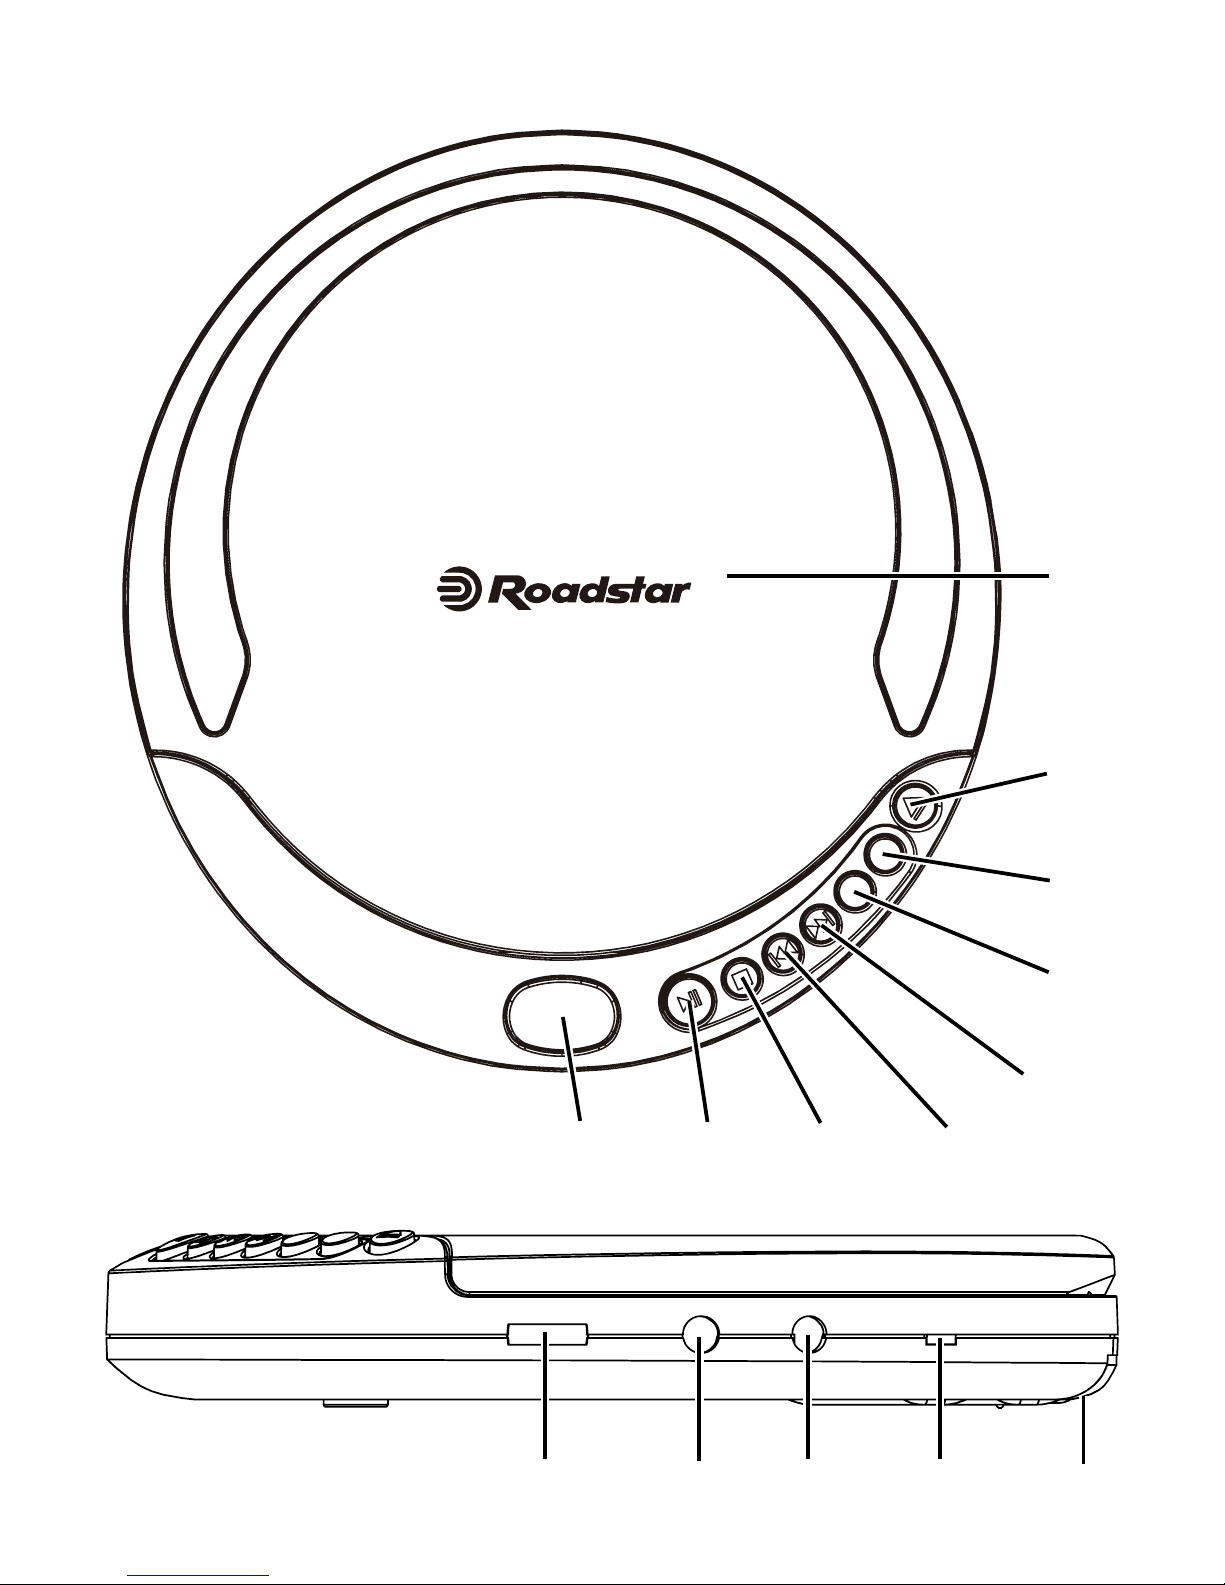
LOCATIONS OF CONTROLS
1. LCD DISPLAY
2. PLAY/PAUSE
3. STOP
4. SKIP-/SEARCH
5. SKIP+/SEARCH
6. PROGRAM
7. MODE
8. OPEN SWITCH
9. CD DOOR
10. VOLUME
11. PHONE JACK
12. DC INPUT JACK
13. RECHARGE SWITCH
14. BATTERY COMPARTMENT
POWERSUPPLY
Use with regular batteries
1. Open the battery compartment door, located on the bottom of the unit, by sliding
the door and lift it up. (Do not remove the battery door).
2. Insert 2 x 1.5V /UM-3/AA size alkaline batteries, following the correct polarity, as
indicated in the battery compartment.
3. Close the battery compartment door. If the symbol “LOW BATTERY“ appears in
the display, batteries are weak and ought to be replaced.
Use with AC/DC adaptor (included)
1. Insert the DC plug, at the end of the AC/DC adaptor cord, into the DC 5 V INPUT
socket (12) located on the back of the unit.
2. Connect the AC/DC adaptor into a 100-240V ~ 50-60 Hz AC power outlet.
Notes:
If the AC adaptor is connected when regular batteries are installed, the power supply
automatically switches to the AC power source.
Use only the supplied AC/DC adaptor. Using other types of adaptor may damage the
unit.
Make sure that the AC/DC adaptor matches with your household voltage before con-
necting it into the wall outlet.
When not using AC power, disconnect the AC/DC adaptor from the wall outlet.
Do not touch the AC/DC adaptor with wet hands.
Use rechargeable batteries
1. Disconnect the AC/DC adaptor from the wall outlet if it is being connected to the
unit.
2. Open the battery compartment door as mentioned previously.
3. Insert 2 recommended rechargeable batteries, following the correct polarity as indi-
cated in the battery compartment.
4. Close the battery compartment door.
5. Move the RECHARGE SWITCH (13) to ON to start recharging function.
Page 5

2 English
6. After 15 hours of charging set the RECHARGE SWITCH (13) to OFF.
Cautions:
DO NOT mix the rechargeable (Nickel-Cadmium) and regular(Carbon-zinc) batte-
ries.
DO NOT charge continuously for 24 hours or more, otherwise it will deteriorate the
performance of the rechargeable batteries.
DO NOT try to recharge normal (not rechargeable) batteries. They can explode! No-
tes:
If the rechargeable batteries are being charged for the first time, it will take approxi-
mately 15 hours to be fully charged.
If the operating time decreases drastically even when the rechargeable batteries are
properly recharged, purchase a new set of rechargeable batteries.
EARPHONES
Connect the stereo earphones (included) to the Phones jack (11).
CD/MP3 PLAYBACK
1. Connect the earphones (included) or optional headphones into the Phones jack.
2. Press the Door Open button (8) to open the CD compartment door.
3. Insert a disc with the label side facing up.
4. Close the CD compartment door until a click is heard.
5. Set the VOLUME control (10) to minimum.
6. Press the PLAY/PAUSE button (2), the unit power will turn on automatically and
show the number of the tracks. The total number of albums and tracks, and MP3
appear on the display: Playback starts. During playback, the actual album number,
track and the elapsed time appear. CD + MP3
7. Adjust the VOLUME control to your desired listening level.
8. To stop playback temporarily, press the PLAY/PAUSE button (2) once. The elap-
sed time will flash and track number compare on the display. Press the PLAY/
PAUSE button again to resume playback.
9. To stop playback, press the STOP (3) button once.
10. To turn the unit off, press the STOP (3) twice.
Notes:
When the CD door is accidentally opened during playback, "Open " will appear on
the display.
Wait until the disc is fully stopped before pressing the OPEN (8) button.
LOCATING A PARTICULAR TRACK OR POINT OF THE TRACK
1. Press the BACKWARD (4) button once to go back to the beginning of the current
track.
2. Press the BACKWARD button repeatedly to go back to previous tracks.
3. Press the FORWARD (5) button repeatedly to go to next tracks.
4. Press and hold either FORWARD or BACKWARD button to search backwards or
forwards, at high speed, a particular point of track. Low level audio will be heard
during the search process to assist in locating the correct point in the track.
Page 6

3 English
REPEAT PLAYBACK
1. Press the PLAY/PAUSE button (2).
2. To repeat the same track, press the MODE button (7) once during PLAYBACK.
“REP 1” will appear on the display. CD will start single track repeat playback until
STOP button (3) is pressed. Press the MODE button (7) 5 times to cancel single
repeat. The ‘REP 1’ indicator disappears from the display.
3. To repeat the entire ALBUM, press the MODE button (7) twice. “REP ALL” will ap-
pear on the display. Press the MODE button (7) 3 times to cancel all Album repeat.
The ‘REP ALL’’ indicator disappears from the display.
4. To repeat the entire MP3 disc, press the MODE (7) button (6) three times. “REP
DIR” will appear on the display. Press the MODE button (7) 3 times to cancel all
disc repeat. The “REP DIR” indicator disappears from the display.
INTRO PLAY
1. Press the PLAY/PAUSE button (2).
2. Press the MODE button (7) 4 times to enter the Intro mode, 'INT' appears on the
display.
3. Press PLAY, the CD start play the first 10 seconds of each track of each album on
the CD.
4. Press MODE button (7) twice more to cancel Intro playback and resume normal
playback.
5. Power is turned off automatically after 60 seconds, when all tracks have been
played.
RANDOM PLAY
1. Press the MODE button (7) 5 times to enter the Random mode. “RND” appears on
the display, then the CD start playback of all tracks of all albumsin Random order.
2. Press SKIP button to go to next Random track.
3. Press the MODE button (7) once more to return to the Normal Playback mode.
PROGRAM PLAY
1. Press the PLAY/PAUSE button (2) and after 8 seconds the STOP button (3).
2. Press the PROG button (6), the following will appear on the display: (00 000 P-01)
and the Album no. will flash.
3. Press the SKIP Forward and Backward (4,5) buttons to select the desired Album to
be programmed.
4. Press the PROG button (6) once to enter the Album into memory. The Album num-
ber will stop flashing and the track number will start flashing.
5. Press the SKIP Forward and Backward (4,5) buttons to select the desired track to
be programmed.
6. Press the PROG button (6) to select the desired track to be programmed.
7. Repeat the steps 3 to 6 to program up to 24 tracks.
8. Press PLAY/PAUSE button (2) once to start programmed playback.
9. To cancel programmed playback, press the STOP button (3) twice.
Page 7
4 English
ANTI-SHOCK FUNCTION
If in use, the player is likely to receive shocks or vibrations (i.e. whilst walking or in a
moving vehicle). As soon as the PLAY/PAUSE button is pressed, the ASP function is
automatically activated to allow uninterrupted playback.
Should the player receive shocks for more than 45 seconds continuously in CD play-
back or 100 seconds in MP3 playback, the sound can mute for a very short while
and will resume once the player has stabilised from the shock.
When using the Anti-shock function, the disc will rotate faster than normal playback
and memory is active. Only use the ANTI-SHOCK function when necessary to preserve the battery life.
The Anti-shock function will not correct the errors arising from the use of defective
scratched or dirty discs.
SPECIFICATIONS
DC: 5V (Adapter)
Batteries: 2 x AA
Specifications and the design are subject to possible modifications without notice due
to improvement.
This marking shown on the product or its literature, indicates that it should not be disposed with
other household wastes at the end of its working life. To prevent possible harm to the environment or human health from uncontrolled waste disposal, please separate this from other types of
wastes and recycle it responsibly to promote the sustainable reuse of material resources. Household users should contact the retailer where they purchased this product, or their local government office, for details of where and how they can take this item for environmentally safe recycling. Business users should contact their supplier and check the terms and conditions of the purchase contract. This product should not be mixed with other commercial wastes for disposal.
CORRECT DISPOSAL OF THIS PRODUCT
(Waste Electrical & Electronic Equipment)
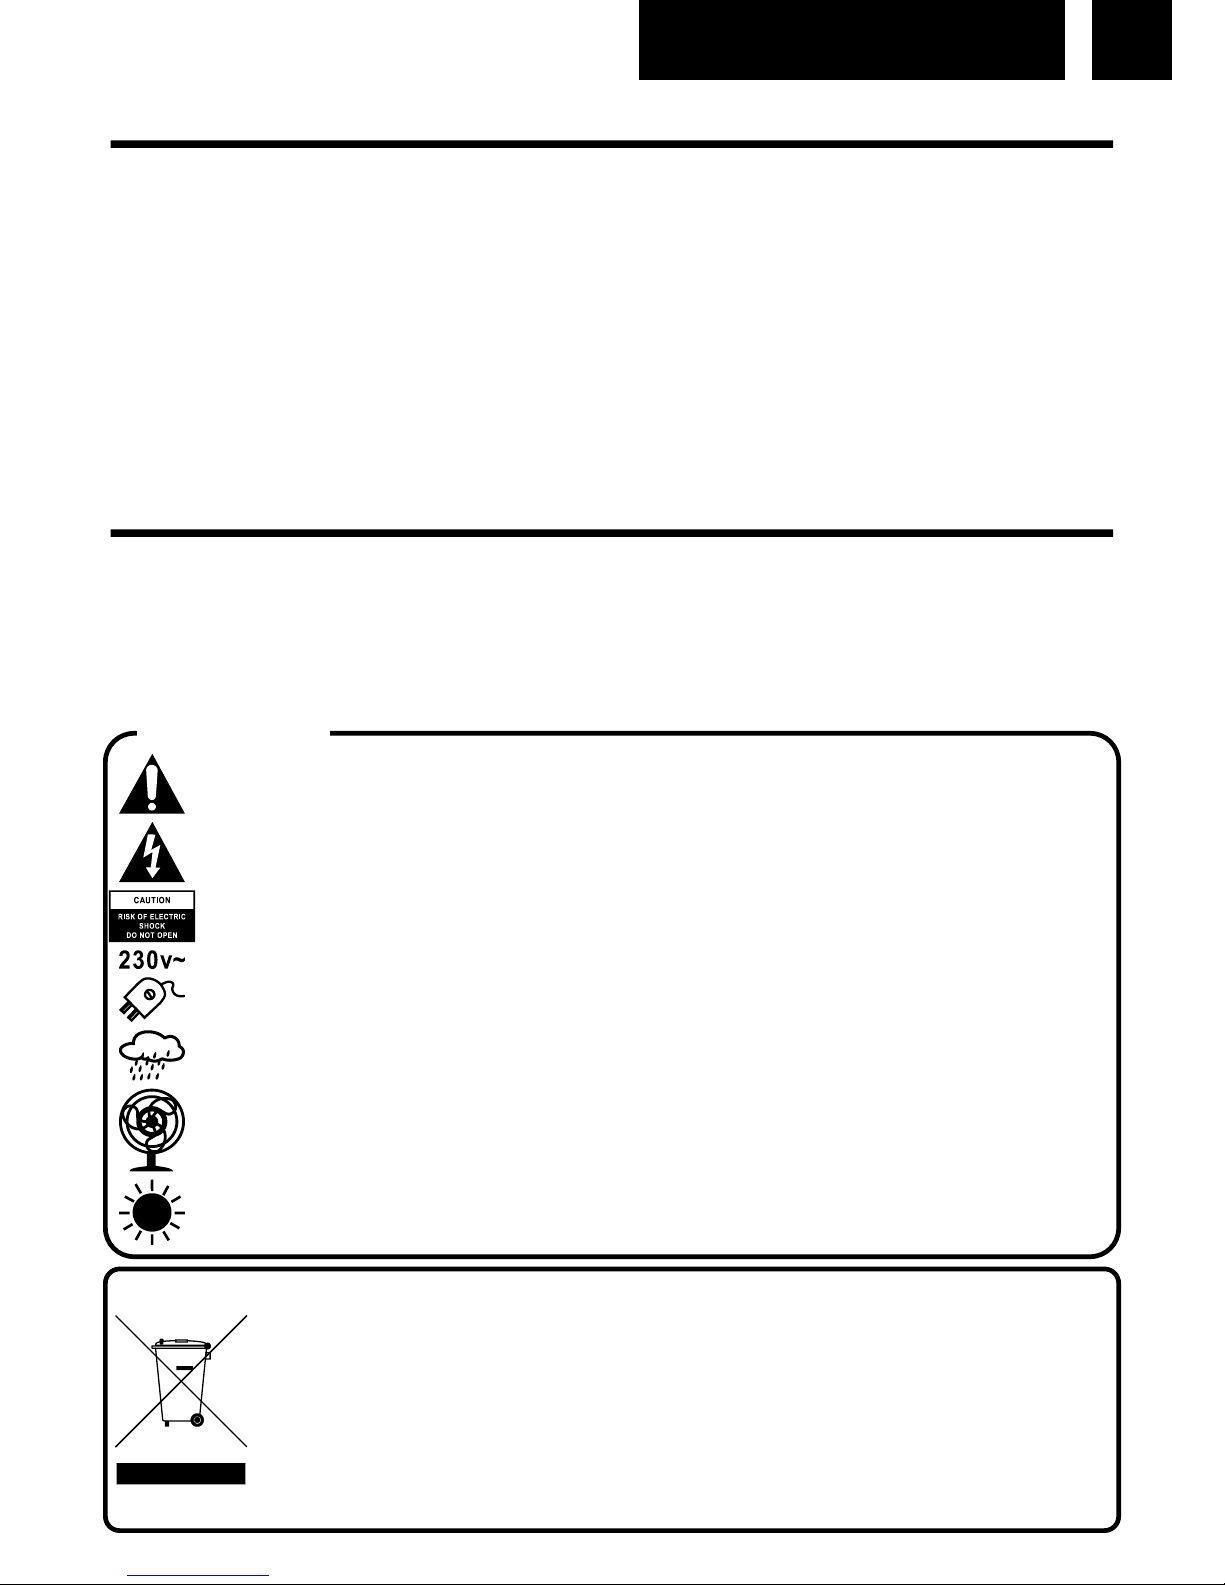
WARNINGS
The exclamation point within the triangle is a warning sign alerting the user of important instructions accompanying the product.
The lightening flash with arrowhead symbol within the triangle is a warning sign alerting the
user of “dangerous voltage” inside the unit.
To reduce the risk of electric shock, do not remove the cover. No user serviceable parts inside the unit. Refer all servicing to qualified personnel.
This unit operates on 230V ~ 50Hz. If the unit is not used for a long period of time, remove
the plug from the AC mains.
Ensure all connections are properly made before operating the unit.
This unit must not be exposed to moisture or rain.
This unit should be positioned so that it is properly ventilated. Avoid placing it, for example,
close to curtains, on the carpet or in a built-in installation such as a bookcase.
Do not expose this unit to direct sunlight or heat radiating sources.
Page 8

5 Deutsch
BEDIENUNGSELEMENTE
1. LCD-FUNKTION-ANZEIGE
2. PLAY/PAUSE
3. STOP
4. SPRUNG-/SUCH
5. SPRUNG+/SUCH
6. PROG
7. MODE
8. OPEN-SCHALTER
9. CD-TÜR
10. LAUTSTÄRKEREGELUNG
11. KOPFHÖRER
12. DC-EINGANGSBUCHSE
13. LADEN-SCHALTER
14. BATTERIEFACH
STROMVERSORGUNG
Betrieb mit normalen Batterien
1. Öffnen Sie den Batteriefachdeckel, der sich auf der unteren Seite des Gerätes befindet, in-
dem Sie ihn schieben und anheben. (Entfernen Sie den Batteriedeckel nicht.)
2. SetzenSie 2x1.5V-Alkaline-BatterienGrößeUM-3/AAentsprechendderrichtigen, indem Batte-
riefach angezeigten, Polarität ein.
3. Schließen Sie den Batteriefachdeckel.
Hinweis: Wenn das Symbol “LOW BATTERY“ auf dem Display erscheint, sind die Batterien
schwach und sollten ersetzt werden.
Betrieb mit einem AC/DC-Adapter (mitgeliefert)
1. SteckenSie den DC-Stecker am Ende des AC/DC-Adapters (5V) indie DC-EINGANGS Bu-
chse (12), die sich auf der Rückseite des Gerätes befindet.
2. Schließen Sie den AC/DC-Adapter an eine AC-Steckdose mit 100-240V ~ 50-60 Hz an.
HINWEISE:
Wenn normale Batterien im Gerät sind und der AC-Adapter angeschlossen wird, wird automa-
tisch auf die AC-Stromquelle umgeschaltet.
Verwenden Sie nur den mitgelieferten AC/DC-Adapter. Andere Adapter-Typen könnten das
Gerät beschädigen.
Vergewissern Sie sich, daß die Betriebsspannung des AC/DC-Adapters mit der örtlichen Ne-
tzspannung übereinstimmt, bevor Sie ihn in die Wandsteckdose stecken.
Wenn Sie das Gerät nicht mit Wechselstrom (AC) betreiben, trennen Sie den AC/DCAdapter
von der Wandsteckdose ab.
Berühren Sie den AC/DC-Adapter nicht mit feuchten Händen.
Betrieb mit Akkus
1. Wenn ein AC/DC-Adapter am Gerät angeschlossen ist, trennen Sie diesen von der
Wandsteckdose ab.
2. Öffnen Sie den Batteriefachdeckel wie oben beschrieben.
3. Setzen Sie die 2 empfohlenen Akkus entsprechend der richtigen, in dem Batteriefach an-
gezeigten, Polarität ein.
4. Schließen Sie den Batteriefachdeckel.
5. Stellen Sie den LADE-Schalter (13) auf ON, um das Aufladen zu starten. Nach 15 Stunden
stellen Sie den LADE-Schalter auf OFF.
Page 9

6 Deutsch
Vorsichtsmaßnahmen:
Mischen Sie NICHT aufladbare (Nickel-Kadmium) und normale (Karbon-Zink) Batterien mitei-
nander.
Laden Sie die Akkus NICHT 24 Stunden oder länger auf, ansonsten wird ihre Leistung-
sfähigkeit beeinträchtigt.
Versuchen Sie niemals normale Batterien (nicht auf la dbare) aufzuladen. Sie können explo-
dieren!
Hinweise:
Wenn die Akkus zum ersten Mal aufgeladen werden, benötigt man ca. 15 Stunden, bis sie
vollständig aufgeladen sind. Vergewissern Sie sich, den LADE-Schalter auf OFF zu stellen
und den AC/DC-Adapter aus der Wandsteckdose zu ziehen.
Wenn die Betriebsdauer stark nachläßt, auch wenn die Akkus richtig aufgeladen worden sind,
kaufen Sie bitte einen neuen Akku-Satz.
OHRHÖRER
Schließen Sie die Stereo-Ohrhörer (mitgeliefert) an die Hörerbuchse (11) an.
CD/MP3 WIEDERGABE
1. Schließen Sie die Ohrhörer (mitgeliefert) oder wenn Sie möchten Kopfhörer, an die Hörerbuchse an.
2. Drücken Sie die Tür-Offen-Taste (8), um die CD-Fach-Tür zu öffnen.
3. Schließen Sie die CD-Fachklappe, bis sie einrastet und Sie ein “Klick” hören.
4. Stellen Sie den LAUTSTÄRKE-Regler (10) auf das Minimum.
5. Drücken Sie die WIEDERGABE/PAUSE-Taste (2). Das Gerät wird automatisch eingeschal-
tet und die Anzahl der Titel angezeigt werden auf dem Display zeigen. Die Wiedergabe startet. Auf dem Display erscheint die Gesamtanzahl der Album, Titel und die totale Wiederga-
bezeit. Während der Wiedergabe wird die Album-/ Titelnummer und die verlaufende Wieder-
gabezeit auf dem Display angezeigt.
6. Stellen Sie mit dem LAUTSTÄRKE-Regler den gewünschten Hörpegel ein.
7. Um die Wiedergabe zeitweilig zu stoppen, drücken Sie einmal die WIEDERGABE/ PAUSETaste (2). Die Titelnummer und die verlaufende Wiedergabezeit blinken auf dem Display.
Drücken Sie erneut die WIEDERGABE/PAUSE-Taste (13), um die Wiedergabe fortzusetzen.
8. Um die Wiedergabe zu stoppen, drücken Sie einmal die STOP-Taste (3).
9. Um das Gerät auszuschalten, drücken Sie zweimal die STOP-Taste (3).
Hinweise:
Wenn die CD-Klappe während der Wiedergabe versehentlich geöffnet wird, erscheint “Open”
auf dem Display.
Bevor Sie die ÖFFNUNGS-Taste (8) drücken, warten Sie, bis die CD vollständig stoppt.
Dieses Gerät kann 3" (8cm) CD-Singles ohne Adapter wiedergeben.
AUF FINDEN EINES BESTIMMTEN TITELS ODER EINER TITELSTELLE
1. Drücken Sie die SPRUNG-RÜCKWÄRTS-Taste (4) einmal, um an den Anfang des laufen-
den Titel zurückzukehren.
2. Drücken Sie die RÜCKWÄRTS-Taste (5) mehrmals, um zum vorherigen Titel zurückzukeh-
ren.
3. Drücken Sie die SPRUNG-VORWÄRTS-Taste mehrmals, um zu den folgenden Titeln zu
springen.
4. Halten Sie die VORWÄRTS oder die RÜCKWÄRTS-Taste gedrückt, um schnell eine be-
stimmte Titelstelle vorwärts oder rückwärts aufzusuchen. Während des Suchlaufs hören Sie
Page 10

7 Deutsch
einen niedrigeren Audio-Pegel, was Ihnen erleichtert, die richtige Titelstelle zu finden.
WIEDERHOLTE WIEDERGABE
1. Drücken Sie die PLAY/PAUSE-Taste (2).
2. Um denselben Titel zu wiederholen, drücken Sie einmal die MODE-Taste (7). Auf dem Display erscheint die Anzeige “REP 1”. Beginnt die wiederholte Wiedergabe bis der STOPTaste (3) gedrückt wird. Um den Wiederhol-Modus zu löschen, drücken Sie die MODETaste (7) fünfmal. Die Anzeige “REP 1“ verschwindet vom Display.
3. Um das gesamte Album zu wiederholen, drücken Sie zweimal die MODE-Taste (7). Auf
dem Display erscheint die Anzeige “REP ALL”. Beginnt die wiederholte Wiedergabe und alle
Titel dieses Album werden wieder gespielt. Um den Album-Wiederhol-Modus zu löschen,
drücken Sie die MODE-Taste (7) viermal. Die Anzeige “REP ALL“ verschwindet vom Display.
4. Um die gesamte MP3-Disc zu wiederholen, drücken Sie dreimal die MODE-Taste (7). Auf
dem Display erscheint die Anzeige “REP DIR“. Beginnt die wiederholte Wiedergabe und alle
Titel der gesamter MP3-Disc werden wieder gespielt. Um den Wiederhol-Modus zu löschen,
drücken Sie die MODE-Taste (7) dreimal. Die Anzeige “ REP DIR“ verschwindet vom Display.
ANSPIELEN (INTRO SCAN)
1. Drücken Sie die PLAY/PAUSE-Taste (2).
2. Drücken Sie die MODE-Taste (7) viermal, um den Anspiel-Modus zu aktivieren. Auf dem
Display erscheint ‘INT’.
3. Drücken Sie die WIEDERGABE/PAUSE-Taste. Es werden die ersten 10 Sekunden jedes
Titels jedes Albums auf der CD angespielt.
4. Drücken Sie die MODE-Taste (7) noch zweimal, um den Anspiel-Modus zu löschen, und um
zum normalen Wiedergabe-Modus zurückzukehren.
5. Das Gerät wird sich nach 60 Sek. automatisch ausschalten, wenn alle Titel abgespielt sind.
ZUFÄLLIGE TITELFOLGE
1. Drücken Sie die PLAY MODE-Taste (7) fünfmal, um den Zufallsmodus zu aktivieren. Auf
dem Display blinkt “RND”.
2. Drücken Sie die PLAY/PAUSE-Taste (2), startet die Wiedergabe aller Titel der CD in zufälli-
ger Reihenfolge.
3. Drücken Sie die SKIP-Taste, um am nächsten zufälligen Titel zu gehen.
4. Drücken Sie erneut die MODE-Taste (7), um zum Normalen Wiedergabe-Modus zurückzu-
kehren.
PROGRAMMIERTE WIEDERGABE
1. Drücken Sie die PLAY/PAUSE-Taste (2) und nach 8 Sek. die STOP-Taste (3).
2. Drücken Sie die PROGRAMM-Taste (6) einmal. Auf dem Display erscheint: (P 00 000 P-01)
und die Album-Nummer blinkt.
3. Drücken Sie die VORWÄRTS/RÜCKWÄRTS-Tasten, um das gewünschte Albumzu wählen.
4. Drücken Sie einmal die die PROG-Taste (6), um dieses Album. Die Album-Nummer ist jetzt
fest und die Titelnummer beginnt zu blinken.
5. Drücken Sie die VORWÄRTS/RÜCKWÄRTS-Tasten, um die gewünschten Titel zu wählen.
6. Drücken Sie einmal die die PROG-Taste (6), um dieser Titel zu speichern. Die Titelnummer
ist jetzt fest.
7. Wiederholen Sie die Stufen 3 bis 6, um bis 24 Titeln zu speichern.
8. Drücken Sie die WIEDERGABE/PAUSE-Taste(2) einmal, um die programmierte Wiederga-
be zu starten.
9. Um die programmierte Wiedergabe zu löschen, drücken Sie die STOP-Taste (3) zweimal.
Page 11

8 Deutsch
ANTISPRUNG-FUNKTION(ANTI-SCHOCK)
Während des Betriebes könnte der CD-Spieler Stößen oder Schwingungen ausgesetzt wer-
den (beim Laufen oder in einem sich bewegenden Fahrzeug). Die ANTI-SHOCKFunktion wird
eine ununterbrochene Wiedergabe garantieren.
Wenn Sie die PLAY/PAUSE-Taste (6) drücken, blinkt “ESP” auf dem Display und damit ist die
Funktion installiert. Wenn “ESP” fest auf dem Display bleibt, ist der Speicher voll.
Wenn der Spieler während mehr als 45 Sekunden in CD oder 100 Sek. in MP3 angestoßen
wird, es ist möglich, dass Sie für weniger als 1 Sek. keinen Ton hören. Erst wenn sich das
Gerät wieder stabilisiert hat, wird die Wiedergabe fortgesetzt.
Wenn Sie die Antisprung-Funktion verwenden, dreht sich die Disc schneller als bei der norma-
len Wiedergabe und der Speicher wird aktiviert. Verwenden Sie die ANTISPRUNGFunktion
nur, wenn es notwendig ist, um die Betriebsdauer der Batterien zu bewahren.
Die Antisprung-Funktion korrigiert nicht Fehler, die durch defekte, zerkratzte oder schmutzige
Discs hervorgerufen werden.
TECHNISCHE DATEN
DC: 5V (Adapter)
Batterien: 2 x AA
Das Typenschild befindet sich an der Gehäuseunterseite des Gerätes.
Die Kennzeichnung auf dem Produkt bzw. auf der dazugehörigen Literatur gibt an, dass es nach seiner Lebensdauer nicht zusammen mit dem normalen HaushaltsmüIl entsorgt werden darf. Entsorgen Sie dieses
Gerat bitte getrennt von anderen Abfallen, um der Umwelt bzw. der menschl i chen Gesundhei t ni cht durch
unkontrol l i erte Mül l besei ti gung zu schaden. Recycel n Si e das Gerät, um di e nachhaltige Wiederverwertung von stofflichen Ressourcen zu fördern. Private Nutzer sollten den Händler, bei dem das Produkt
gekauft wurde, oder die zuständigen Behörden kontaktieren, um in Erfahrung zu bringen, wie sie das Gerät
auf umweltfreundliche Weise recyceln können. Gewerbliche Nutzer sollten sich an Ihren Lieferanten wenden
und die Bedingungen des Verkaufsvertrags konsultieren. Dieses Produkt darf nicht zusammen mit anderem
Gewerbemüll entsorgt werden.
KORREKTE ENTSORGUNG DIESES PRODUKTS
(Elektromüll)
SICHERHEITSHINWEISE
Das Ausrufszeichen im Dreieck weist den Benutzer auf wichtige Bedienungs- und Wartungsanweisungen (Service) in diesem Handbuch hin, die unbedingt zu befolgen sind.
Um die Gefahr elektrischer Schläge auszuschliessen, Gehäuse auf keinen Fall abnehmen.
Im Innem befinden sich keine vom Benutzer selbst instandsetz-baren Teile. Reparaturen dürfen nur von einer autorisierten Fachwerkstatt durchgeführt werden.
Dieses Gerät ist für 230V ~ 50Hz Netzspannung ausgelegt. Bei längerer Nichtbenutzung des
Geräts ziehen Sie den Stecker aus der Steckdose.
Setzen Sie das Gerät weder Feuchtigkeit noch Regen aus.
Schalten Sie das System erst dann ein, wenn Sie alle Verbindungen genau geprüft haben.
Stellen Sie das Gerät so auf, dass immer eine ungestörte Frischluftzufuhr sichergestellt ist.
Es ist zum beispiel keinesfalls auf Teppiche und in der Nähe von Gardinen zu stellen oder in
Bücherregale einzubauen.
Setzen Sie das Gerät weder direkter Sonneneinstrahlung noch Wärmequellen aus.
Page 12

9 Français
FONCTIONS ET COMMANDES
1. AFFICHEUR DISPLAY LCD
2. LECTURE/PAUSE
3. ARRÊT
4. SAUT-/RECHERCHE
5. SAUT+/RECHERCHE
6. PROG
7. MODE
8. SÉLECTEUR OPEN
9. COMPARTIMENT CD
10. VOLUME
11. ENTREE CASQUE
12. ENTREE DC
13. SÉLECTEUR RECHARGE
14. COMPART BATTERIES
ALIMENTATION
Fonctionnement de l’appareil sur piles normales
1. Pour ouvrir le compartiment des piles, placé en dessous de l’appareil, faire glisser le cou-
vercle et le tirer ensuite vers le haut. (Ne pas ôter le couvercle de son siège).
2. Insérer 2 piles alcalines du type 1,5 V UM-3/AA en respectant la polarité correcte, comme
indiqué dans le compartiment des piles.
3. Fermer le couvercle du compartiment des piles Remarques:Si le symbole “LOW BATTE-
RY“ apparaît sur l’afficheur, les batteries sont épuisées et devraient êtres changées.
Fonctionnement avec l’adaptateur de secteur CA/CC (fourni avec le lecteur)
1. Brancher la fiche CC se trouvant à la fin du cordon d’alimentation de l’adaptateur CA/CC
(230V/5V), à la prise d’ALIMENTATION EXTERNE CC (12), placée au dos de l’appareil.
2. Brancher l’adaptateur de secteur CA/CC à une prise murale CA de 100-240V ~ 50-60 Hz.
Remarques:
Si l’adaptateur de secteur CA est branché quand il y a déjà des piles dans l’appareil, son
alimentation est automatiquement fournie par le réseau.
N’utiliser que l’adaptateur CA/CC fourni avec le lecteur. L’utilisation d’autres types d’adapta-
teurs de secteur pourrait endommager l’appareil.
Avant de le brancher à la prise murale, vérifier que la tension de l’adaptateur de secteur CA/
CC corresponde à celle du réseau.
En cas d’inutilisation de l’appareil sur le réseau, débrancher l’adaptateur CA/CC de la prise
murale.
Ne pas toucher l’adaptateur de secteur CA/CC avec les mains mouillées.
Fonctionnement de l’appareil sur Piles Rechargeables
1. Brancher l’adaptateur de secteur CA/CC à la prise murale, s’il est connecté à l’appareil.
2. Ouvrir le couvercle du compartiment des piles, comme indiqué précédemment.
3. Insérer 2 piles rechargeables du type conseillé en respectant la polarité correcte, comme
indiqué dans le compartiment des piles.
4. Fermer le couvercle du compartiment des piles.
5. Placer le Sélecteur de RECHARGE (13) sur ON pour faire commencer la recharge des
piles.
6. Après 15 heures de recharge, placer le Sélecteur de RECHARGE sur OFF.
Page 13

10 Français
Précautions
NE PAS mélanger des piles rechargeables (au Nickel-Cadmio) avec des piles normales (au
Carbon-Zinc).
NE PAS recharger les piles en continu pendant plus de 24 heures. Cela peut détériorer la
performance des piles rechargeables.
NE PAS essayer de recharger des piles normales (non-rechargeables). Elles peuvent ex-
ploder!
Remarques:
Quand on recharge les piles pour la première fois, il faut 15 heures environ pour qu’elles
soient prêtes pour l’utilisation. S’assurer que le sélecteur de RECHARGE soit sur OFF et
que l’adaptateur de secteur CA/CC soit débranché de la prise murale.
Acheter des piles rechargeables neuves si la durée de fonctionnement diminue notable-
ment, même si celles-ci ont été convenablement rechargées.
CASQUES
Brancher les écouteurs stéréo (fournis avec le lecteur) à la prise de casques (11).
LECTURE DU CD/MP3
1. Brancher les écouteurs fournis avec le lecteur à la Prise de Casques (11).
2. Presser la touche d’ouverture du compartiment CD (8) pour ouvrir le compartiment CD.
3. Insérer un CD avec l’étiquette vers le haut.
4. Fermer le couvercle du compartiment CD, en poussant doucement jusqu’au «clic».
5. Régler le Sélecteur de VOLUME (10) sur le niveau munimum.
6. Appuyer sur la touche de LECTURE / ATTENTE (2) pour que l’appareil se mette automa-
tiquement sous tension. L’afficheur montrera le nombre total de plages et la lecture com-
mence. Le nombre total des albums, des pistes et le temps de lecture total apparaissent
sur l’afficheur. Pendant la lecture le numéro de l’album, de la piste et le temps de lecture
écoulé seront affichés.
7. Régler le Sélecteur de VOLUME pour obtenir le niveau de son souhaité.
8. Pour arrêter momentanément la lecture, appuyer une fois sur la touche de LECTURE /
ATTENTE (2). Le temps de lecture écoulé et le numéro de la piste cligotent sur l’afficheur.
Appuyer à nouveau sur la touche de LECTURE / ATTENTE (2) pour recommencer la lecture du CD.
9. Pour arrêter la lecture, appuyer une fois sur la touche d’ARRET (3).
10. Pour éteindre l’appareil, appuyer deux fois sur la touche d’ARRET (3).
Remarques:
Si par hasard le compartiment CD est ouvert pendant la lecture d’un disque, le symbole
“Open ” apparaît sur l’afficheur.
Attendreque leCDsoitcomplètementarrêtéavantd’appuyer surlatouche d’OUVERTURE(8).
Cet appareil peut lire des CD de 3 pouces (8 cm) sans utiliser aucun adaptateur.
SELECTION D’UNE PISTE PARTICULIERE
1. Appuyer une fois sur la touche de SAUT ARRIERE (4) pour revenir au début de la piste
en cours de lecture.
2. Appuyer plusieurs fois sur la touche de SAUT pour revenir aux pistes précédentes.
3. Appuyer plusieurs fois sur la touche de SAUT (5) pour passer aux pistes suivantes.
Appuyer et maintenir enfoncée l’une des deux touches de SAUT ou SAUT pour rechercher
rapidement un point particulier d’une piste, respectivement en avant ou en arrière. Vous pouvez entendre un son bas pendant la recherche
Page 14

11 Français
LECTURE REPETEE
1. Appuyer sur la touche LECTURE / ATTENTE (2).
2. Pour répéter la même piste, appuyer une fois sur la touche de MODE (7). L’indication
“REP 1 ” apparaît sur l’afficheur. La lecture répétée de la piste commence, jusqu’à quand
la touche STOP (3) est préssée. Appuyer cinq fois sur la touche de MODE (7) pour annuler la fonction de répétition. L’afficheur “REP 1” disparaît.
3. Pour répéter l’Album entier, appuyer deux fois sur la touche de MODE (7). L’indication
“REP A” apparaît sur l’afficheur. La lecture répétée de toutes les pistes de l’Album commence. Appuyer quatre fois sur la touche de MODE (7) pour annuler la fonction de répétition. L’afficheur “REP A” disparaît.
4. Pour répéter le disque MP3 entier, appuyer trois fois sur la touche de MODE (7). L’indica-
tion “REP DIR” apparaît sur l’afficheur. La lecture répétée de toutes les pistes du disque
commence.
5. Pour annuler le mode de répétition de tout le disque, appuyer trois fois sur la touche de
MODE (7). L’indication “ REP DIR“ disparaît de l’afficheur.
LECTURE INTRO
1. Appuyer sur la touche de MODE (7) quatre fois, pour programmer le mode de lecture In-
tro. L’indication “INT” apparaît sur l’afficheur.
2. Appuyer sur la touche de LECTURE / ATTENTE pour commencer la lecture des dix pre-
mières secondes de chaque piste du CD.
3. Appuyer sur la touche de MODE (7) deux fois encore, pour terminer la fonction Intro et
retourner à la lecture normale.
4. L’appareil s’éteint automatiquement après 60 secondes, lorsque toutes les pistes en été
jouées.
LECTURE ALEATOIRE (RANDOM)
1. Presser la touche MODE (7) cinq fois pour entrer en modalité Random (lecture Aléatoire).
“RND” apparaît sur l’afficheur.
2. Appuyer sur la touche de LECTURE / ATTENTE pour commencer la lecture du CD dans
un ordre aléatoire.
3. Presser la touche de MODE (7) pour sauter à la prochaine piste casuelle.
LECTURE PROGRAMMEE
1. Appuyer sur la touche LECTURE / ATTENTE (2) et après 8 secondes sur STOP (3).
2. Presser la touche PROG (6) une fois. Le numéro de l’Album et “P” apparaît sur l’afficheur:
(P 00 000 P-01) et le numèro de l’Album clignote.
3. Appuyer sur les touches de SAUT ou SAUT pour sélectionner l’Album que l’on désire pro-
grammer.
4. Appuyer sur la touche de PROG (6) pour mémoriser l’Album choisi. Le no. d’Album ces-
sera de clignoter et le no. de piste commencera à clignoter.
5. Appuyer sur les touches de SAUT ou SAUT pour sélectionner la piste que l’on désire pro-
grammer.
6. Appuyer sur la touche de PROG (6) pour mémoriser la piste choisie. Le no. de piste ces-
sera de clignoter.
7. Répéter les opérations dont aux points 2 à 6 pour programmer jusqu’au maximum de 24
pistes.
8. Appuyer une fois sur la touche de LECTURE / ATTENTE (2) pour commencer la lecture
programmée.
9. Pour annuler la lecture programmée, appuyer deux fois sur la touche d’ARRET (3).
Page 15

12 Français
FONCTION ANTI-CHOC
Pendant son utilisation l’appareil peut être heurté ou sujet à des vibrations (par ex. quand
on marche ou dans une voiture en mouvement).La fonction Anti-Choc permet une reproduction sans interruptions.
Assitôt que la touche LECTURE / ATTENTE (2) est préssée, sur l’afficheur “ESP” clignotera
et la fonction sera initialisée. Lorsque l’indication “ESP” cesse de clignoter, la mémoire est
pleine.
Les son sera interrompu pour moins d’une seconde si l’appareil est heurté continuellement
pendant 45 secondes en lecture CD ou 100 secondes en lecture MP3, et la lecture recommencera dès que le lecteur se stabilise après les vibrations.
Quand on utilise la fonction Anti-choc, le disque tourne plus rapidement que pendant la lec-
ture normale et la mémoire est activée. N’utiliser la fonction ANTI-CHOC que s’il est nécessaire, pour prolonger la durée de vie des piles.
La fonction Anti-choc ne corrige pas les erreurs provenant de l’utilisation d’un disque dé-
fectueux, rayé ou sale.
CARACTERISTIQUES TECHNIQUES
DC: 5V (Adapter)
Piles: 2 x AA
Les spécifications peuvent êtres modifiées sans avis préalable.
Ce symbole sur le produit ou sa documentation indique qu'il ne doit pas être éliminé en fin de vie avec
les autres déchets ménagers. L' élimination incontrôlée des déchetspouvant porter préjudice a l'environnement ou a la santé humaine, veuillez le séparer des autres types de déchets et le recycler defaçon
responsable. Vous favoriserez ainsi la réutilisation durable desressources matérielles. Les particuliers
sont invites a contacter le distributeur leur ayant vendu le produit ou a se renseigner auprès de leur mairie pour savoir ou et comment ils peuvent se débarrasser de ce produit afin qu'il soit recycle en respectant l'environnement. Les entreprises sont invitées a contacter leurs fournisseurs et aconsulter les conditions de leur contrat de vente. Ce produit ne doit pas être éliminé avec les autres déchets commerciaux.
COMMENT ÉLIMINER CE PRODUIT
(déchets d'équipements électriques et électroniques)
ATTENTION
Le symbole “point d’exclamation” à l’intérieur d’un triangle avertit l’utilisateur que d’importantes instructions d’utilisation et de maintenance sont contenues dans le mode d’emploi.
Le symbole “éclair” à l’intérieur d’un triangle sert à avertir l’utilisateur de la présence du courant à l’intérieur du l’appareil qui pourrait constituer un risque.
Afin de minimiser les risques, ne pas ouvrir le boîtier ni ôter le dos de l’appareil. En case de panne,
faites appel aux techniciens qualifiés pour les réparations. L’appareil ne renferme aucune pièce reparable par l’utilisateur.
Cet appareil a été conçu pour une tension d’alimentation de 230V ~ 50Hz. Débranchez la prise de courant quand on prévoit de ne pas utiliser l’appareil pendant un certain temps.
Mettez l’appareil sous tension seulement après avoir vérifié que tous les raccordements soient corrects.
L’unité ne doit pas être exposée à l’humidité ou à la pluie.
L’appareil doit être gardé dans un endroit suffisamment ventilé. Ne le gardez jamais par exemple près
des rideaux, sur un tapis ou dans des meubles, tels qu’une bibliothèque.
L’unité ne doit pas être exposée à la lumière directe du soleil ou à des sources de chaleur.
Page 16

13 Italiano
FUNZIONI E CONTROLLI
1. DISPLAY LCD
2. LETTURA/PAUSA
3. STOP
4. SALTO-/RICERCA
5. SALTO+/RICERCA
6. PROG
7. MODE
8. APERTURA COPERCHIO CD
9. COMPARTIMENTO CD
10. VOLUME
11. INGRESSO CUFFIE
12. INGRESSO DC
13. SELETTORE RICARICA
14. COMPARTIMENTO BATTERIE
FONTI DI ALIMENTAZIONE
Utilizzo con Batterie Normali
1. Aprire il compartimento batteria, posizionato sul fondo dell’apparecchio, facendo
scorrere il coperchio e poi sollevarlo. (Non rimuovere il coperchio del compartimento
batteria).
2. Inserire 2 batterie alcaline da 1.5V del tipo UM-3/AA, seguendo le polarità corrette,
come sta indicato nel vano batterie.
3. Richiudere il coperchio del compartimento batterie. Se il simbolo “Batterie Scariche“
appare nel display, significa che le batterie sono scariche e dovrebbero essere sosti-
tuite.
Utilizzo con adattatore AC/DC (incluso)
1. Inserire la spina DC, del terminale del cavo del adattatore AC/DC 5 V, nella presa
ENTRATA DC (12) posizionata sul retro dell’apparecchio.
2. Collegare l’adattatore AC/DC alla presa di corrente AC di 100-240V ~ 50-60 Hz.
Note:
Se l’adattatore AC viene collegato quando si trovano installate le batterie normali, le
batterie verranno escluse automaticamente.
Usare solo l’adattatore AC/DC fornito. L’utilizzo di altri tipi di adattatori potrebbero dan-
neggiare l’apparecchio.
Assicurarsi che il voltaggio dell’adattatore AC/DC sia lo stesso di quello della vostra
presa di corrente domestica prima di collegarlo alla presa a muro.
Quando l’apparecchio non verrà utilizzato ad alimentazione AC, scollegare l’adattatore
AC/DC dalla presa a muro.
Non toccare l’adattatore AC/DC con le mani bagnate.
Utilizzo di Batterie Ricaricabili
1. Collegare l’adattatore AC/DC alla presa a muro se questo è stato collegato all’appa-
recchio.
2. Aprire il compartimento batteria come è stato menzionato precedentemente.
3. Inserire 2 batterie ricaricabili del tipo raccomandato , seguendo le polarità corrette,
come indicato nel vano batterie.
Page 17

14 Italiano
4. Richiudere il compartimento batteria.
5. Regolare l’interruttore RICARICA (13) sulla posizione ON per iniziare la carica.
6. Dopo 15 ore di carica, regolare l’interruttore RICARICA sulla posizione OFF.
Attenzione:
NON mescolare batterie ricaricabili (Nichel - Cadmio) e batterie normali (Zinco - Carbo-
nio).
NON caricare ininterrottamente per 24 ore o più, altrimenti potrebbero deteriorarsi le
batterie ricaricabili.
NON cercare di caricare batterie normali (non ricaricabili). Possono esplodere!
Se le batterie ricaricabili vengono caricate per la prima volta, impiegheranno circa 15
ore per essere caricate completamente. Assicurarsi di regolare l’interruttore di RICARICA sulla posizione OFF e staccare la spina dell’adattatore AC/DC dalla presa a muro.
Se il tempo di funzionamento delle batterie ricaricabili diminuisce drasticamente anche
se sono state caricate in modo corretto, acquistare un nuovo set di batterie ricaricabili.
USCITA CUFFIE
Collegare gli auricolari stereo (incluse) alla presa Cuffie (11).
LETTURA DI DISCHI CD/MP3
1. Collegare le cuffie (incluse) o gli auricolari opzionali alla presa Cuffie.
2. Premere il tasto Apertura Porta CD (8) per aprire la porta del compartimento CD.
3. Inserire un disco con l’etichetta rivolta verso l’alto.
4. Richiudere il compartimento CD fino ad ascoltare un “clic”.
5. Regolare il controllo VOLUME (10) al minimo.
6. Premere il tasto LETTURA/PAUSA (2), l’apparecchio si accenderà automaticamente,
mostrerà il numero tottale dei brani e poi inizierà la lettura. Il numero totale degli Album e dei brani, e MP3 appariranno sul display. Inizia la lettura. Durante la lettura, il
numero del brano e il tempo di lettura trascorso appariranno sul display.
7. Regolare il controllo VOLUME (10), al vostro livello d’ascolto desiderato.
8. Per fermare temporaneamente la lettura, premere il tasto LETTURA/PAUSA (2) una
volta. Il tempo di lettura trascorso e il numero del brano lampeggeranno sul display.
Premere il tasto LETTURA/PAUSA (2) nuovamente per riprendere la lettura.
9. Per fermare la lettura, premere il tasto ARRESTO (3) una volta.
10. Per spegnere l’apparecchio, premere il tasto ARRESTO (3) due volte.
Note:
Quando il compartimento CD viene accidentalmente aperto durante la lettura, “Open”
apparirà sul display.
Aspettare che il disco si fermi completamente prima di premere il tasto OPEN (8).
Questo apparecchio può leggere dischi di 3” (8 cm) senza un adattatore.
LOCALIZZAZIONE DI UN BRANO PARTICOLARE O DI UN PUNTO DEL BRANO
1. Premere il tasto (4) una volta per tornare all’inizio del brano corrente.
2. Premere il tasto (4) ripetutamente per ritornare ai brani precedenti.
3. Premere il tasto SALTO (5) ripetutamente per andare ai brani successivi.
4. Mantenere premuto i tasti (5) o (4) per ricercare all’indietro o in avanti, ad alta veloci-
tà, un punto particolare del brano. Durante il processo di ricerca si ascolterà l’audio a
basso livello per aiutare a localizzare il punto corretto del brano.
Page 18

15 Italiano
LETTURA RIPETUTA
1. Premere il tasto LETTURA/PAUSA (2).
2. Per ripetere lo stesso brano che sta suonando, premere il tasto MODE (7) una volta.
L’indicatore ‘REP 1’ apparirà sul display. Il lettore inizierà la lettura ripetuta di quel
brano finché il tasto STOP (3) non viene premuto. Premere il tasto MODE (7) 5 volte
per cancellare la funzione ripetizione brano e tornare alla lettura normale. L’indicatore
“ REP 1 “ sparirà dal display.
3. Per ripetere tutto i brani del disco MP3, premere il tasto MODE (7) due volte. L’indi-
catore “REP ALL” apparirà sul display. Il lettore inizierà la lettura ripetuta di tutti i brani di quell’Album. Per cancellare la modalità di ripetizione di tutto l’Album, premere il
tasto MODE (7) 4 volte per cancellare la funzione ripetizione Album e tornare alla lettura normale. L’indicatore “ REPT ALL“ sparirà dal display.
4. Per ripetere tutto l’Album, premere il tasto MODE (7) tre volte. L’indicatore “REP DIR”
apparirà sul display. Il lettore inizierà la lettura ripetuta di tutti i brani di tutti gli Album
sul disco. Per cancellare la modalità di ripetizione di tutto il CD e tornare alla lettura
normale, premere il tasto MODE (7) ancora 3 volte . L’indicatore “ REP DIR “ sparirà
dal display.
LETTURA INTRO
1. Premere Il tasto LETTURA/PAUSA (2).
2. Premere il tasto MODE (7) 4 volte per entrare nella modalità Intro. “INT” apparirà sul
display.
3. Verranno letti i primi 10 secondi di ogni brano di ogni Album.
4. Premere il tasto MODE (7) ancora due volte per ritornare alla riproduzione normale.
5. Il lettore si spegne automaticamente dopo 30 secondi, dopo aver letto i primi 10 se-
condi di tutti i brani
LETTURA IN ORDINE CASUALE
1. Premere il tasto MODE (7) 5 volte per entrare nella modalità di Lettura in Ordine Ca-
suale (Random), “RND” apparirà sul display.
2. Premere il tasto LETTURA/PAUSA (2) per iniziare la lettura in ordine casuale.
3. Premere il tasto (5) per saltare al prossimo brano in ordine casuale.
LETTURA PROGRAMMATA
1. Premere Il tasto LETTURA/PAUSA (2) e dopo otto secondi il tasto STOP (3).
2. Premere il tasto PROG (6) una volta. Sul display apparirà: “P 00 000 P-01” e il nume-
ro di album lampeggerà.
3. Selezionare l’album da programmare con i tasti (5) e (4).
4. Premere il tasto PROG (6) per inserire l’album nella memoria, il numero di brano lam-
peggerà.
5. Selezionare il brano da programmare con i tasti (5) e (4).
6. Premere il tasto PROG (6) per inserire il brano nella memoria.
7. Ripetere i passi da 3 a 6 per programmare fino a un massimo di 24 brani.
8. Premere il tasto LETTURA/PAUSA (2) una volta per iniziare la lettura programmata.
Per cancellare la lettura programmata, premere il tasto STOP (3) una volte.
Page 19

16 Italiano
FUNZIONE ANTI-SHOCK
Durante l’uso, il lettore è soggetto con molta probabilità a scosse o vibrazioni (per
esempio mentre si sta camminando o in un’automobile in movimento). Se la funzione
ANTI-SHOCK (6) è attiva, permette una lettura senza interruzioni.
Appena il tasto LETTURA/PAUSA viene premuto, la funzione ANTI-SHOCK viene atti-
vata per permettere un ascolto ininterrotto. Sul display comparira “ASP”.
Il suono verrà interrotto per meno di un secondo se il lettore è stato soggetto a scosse
continue per 45 secondi in lettura CD o 100 secondi in lettura MP3. Il suono verrà ripristinato una volta che il lettore si stabilizzerà dopo la scossa.
Quando si utilizza la funzione Anti - Shock, il disco girerà più veloce che nelle lettura
normale e la memoria sarà attivata. Usare la funzione Anti - Shock solo quando sarà
necessario per preservare la vita delle batterie.
La funzione Anti - Shock non correggerà gli errori causati dall’uso di dischi difettosi ,
graffiati o sporchi.
SPECIFICHE TECNICHE
DC: 5V (Adapter)
Batterie: 2 x AA
Caratteristiche soggette a variazioni senza preavviso.
II marchio riportato sul prodotto e sulla sua documentazione indica che il prodotto non deve essere smaltito can altri rifiuti domestici al termine del ciclo di vita. Per evitare eventuali danni all'ambiente o alla salute causati dall'inopportuno smaltimento dei rifiuti, si invita l'utente a separare questo prodotto da altri tipi
di rifiuti e di riciclarlo in maniera responsabile per favorire il riutilizzo sostenibile delle risorse materiali. Gli
utenti domestici sono invitati a contattare il rivenditore presso il quale e stato acquistato il prodotto a l'ufficio locale preposto per tutte le informazioni relative alla raccolta differenziata e al riciclaggio per questo
tipo di prodotto. Gli utenti aziendali sono invitati a contattare il proprio fornitore e verificare i termini e le
condizioni del contratto di acquisto. Questo prodotto non deve essere smaltito unitamente ad altri rifiuti
commerciali.
CORRETTO SMALTIMENTO DEL PRODOTTO
(rifiuti elettrici ed elettronici)
ATTENZIONE
Il punto esclamativo all’interno di un triangolo avverte l’utente che il libretto d’istruzioni contiene delle importanti istruzioni per l’uso e la manutenzione.
Il simbolo del fulmine all’interno di un triangolo avverte l’utente della presenza di una pericolosa
tensione all’interno dell’apparecchio.
Per ridurre i rischi di scosse elettriche, non aprire l’apparecchio. L’apparecchio non contiene parti
riparabili dall’utente. In caso di guasto fare appello a tecnici qualificati per le riparazioni.
Questo apparecchio è stato progettato per funzionare a 230V ~ 50Hz. Se non si intende utilizzare
l’apparecchio per un lungo periodo di tempo, rimuovere la spina dalla presa di corrente.
Utilizzare l’apparecchio solo dopo aver verificato che tutte le connessioni siano state eseguite correttamente.
Non esporre l’apparecchio alla pioggia o all’umidità.
Posizionare l’apparecchio in un luogo sufficientemente ventilato. Evitare di sistemarlo vicino a tende, sul tappeto o all’interno di un mobile quale, ad esempio, una libreria.
Non esporre l’apparecchio alla luce diretta del sole o a fonti di calore.
Page 20

17 Español
FUNCIONES Y CONTROLES
1. PANTALLA LCD
2. LECTURA/PAUSA
3. STOP
4. SALTO-/BUSQUEDA
5. SALTO+/BUSQUEDA CD
6. PROG
7. MODE
8. ABRE EL COMPARTIMENTO CD
9. PUERTA CD
10. VOLUMEN
11. AURICULARES
12. INGRESO DC
13. SELECTOR RECARGA
14. COMPART. PILAS
FUENTES ALIMENTACIÓN
Uso con Baterías Normales
1. Abrir el compartimento batería, colocado en la parte inferior del aparato, haciendo de-
slizar la tapa e luego levantarla. (No extraer la tapa del compartimento batería).
2. Instalar 2 baterías alcalinas de 1.5V del tipo UM-3/AA, siguiendo las polaridades cor-
rectas, como está indicado en el compartimento batería.
3. Volver a cerrar la tapa del compartimento batería. Nota: Si el símbolo “LOW BATTE-
RY“ aparece en el display, las baterías son débiles y han de ser reemplazado.
Uso con adaptador CA/CD (incluido)
1. Introducir la clavija CD, del terminal del cable del adaptador CA/CC 5V, en la toma
ENTRADA CD (12) colocada en la parte posterior del aparato.
2. Conectar el adaptador CA/CD a la toma de corriente CA de 100-240V ~ 50-60 Hz.
Notas:
Si el adaptador CA se conecta cuando se encuentran instaladas las baterías normales,
la alimentación será automáticamente suministrada por la corriente CA.
Usar sólo el adaptador CA/CD suministrado. El uso de otros tipos de adaptadores podrí-
an dañar el aparato.
Asegurarse de que el voltaje del adaptador corresponda al voltaje de su toma de cor-
riente doméstica antes de conectarlo a la toma de corriente de pared.
No tocar el adaptador con la manos mojadas.
Uso de Baterías Recargables
1. Conectar el adaptador CA/CD a la toma de corriente de pared si este ha sido conecta-
do al aparato.
2. Abrir el compartimento batería como ha sido mencionado anteriormente.
3. Instalar 2 baterías recargables del tipo recomendado, siguiendo las polaridades cor-
rectas, como está indicado en el compartimento batería.
4. Volver a cerrar el compartimento batería.
5. Colocar el interruptor RECARGA (13) en la posición ON para iniciar la carga.
6. Después de 15 Horas de carga, colocar el interruptor RECARGA en la posición OFF .
Page 21

18 Español
Atención:
NO mezclar baterías recargables (Níquel - Cadmio) y baterías normales (Carbón - Zinc).
NO cargar continuamente por 24 horas o más, de otra manera se podría deteriorar el
rendimiento de las baterías recargables.
NO cargar baterías normales (no recargables). Pueden explosionar!
Si las baterías recargables se cargaran por la primera vez, emplearán aproximadamen-
te 15 horas para que se carguen completamente. Asegurarse de colocar el interruptor
de RECARGA en la posición OFF y desconectar la clavija del adaptador CA/CD de la
toma de corriente de pared.
Si el tiempo de funcionamiento de las baterías recargables disminuye drásticamente
aunque hayan sido cargadas correctamente, comprar baterías recargables nuevas.
AURICULARES
Conectar los auriculares estéreo (incluidos) a la toma Auriculares(11).
LECTURA DE LOS CD/MP3
1. Conectar los auriculares (incluidos) o los audífonos opcionales a la toma Auriculares.
2. Pulsar el botón de Abiertura Puerta CD (8) para abrir el compartimento CD.
3. Introducir un disco con la etiqueta dirigida hacia arriba.
4. Volver a cerrar el compartimento CD hasta escuchar clic.
5. Ajustar el Control VOLUMEN (10) al mínimo.
6. Pulsar el botón LECTURA/PAUSA (2), el aparato se activará automáticamenteel
número de pistas en el display. El número total de Album y el número total de las melodías aparecerán sobre la pantalla. Durante la lectura, el número de Album, de la melodía y el tiempo transcurrido aparecerán sobre la pantalla.
7. Ajustar el Control VOLUMEN (10), a su nivel de audición deseado.
8. Para detener temporalmente la lectura, pulsar el botón LECTURA/PAUSA (2) una vez.
El tiempo de lectura transcurrido y el número de la melodía parpadearán sobre la pantalla. Pulsar el botón LECTURA/PAUSA (2) nuevamente para reanudar la lectura.
9. Para detener la lectura, pulsar el botón PARADA (3) una vez.
10. Para desactivar el aparato, pulsar el botón PARADA (3) dos veces.
Nota:
Cuando el compartimento CD se abre accidentalmente durante la lectura, “Open” apare-
cerá sobre la pantalla.
Esperar que el disco se detenga completamente antes de pulsar el botón OPEN (8).
Este aparato puede leer discos singulares de 3” (8cms) sin un adaptador.
LOCALIZACIÓN DE UNA MELODÍA PARTICULAR
1. Pulsar el botón SALTO (4) una vez para regresar al inicio de la melodía corriente.
2. Pulsar el botón repetidamente para regresar a las melodías precedentes.
3. Pulsar el botón SALTO (5) repetidamente para ir a la melodías sucesivas.
4. Mantener pulsado el botón SALTO (5) o el botón SALTO (4) para localizar hacia ade-
lante o hacia atrás, a alta velocidad, un punto particular de la melodía. Durante el proceso de búsqueda se escuchará el audio a un nivel bajo para ayudar a localizar el
punto correcto de la melodía.
Page 22

19 Español
LECTURA REPETIDA
1. Pulsar el botón LECTURA/PAUSA (2).
2. Para repetir la misma melodía, pulsar el botón MODE (7) una vez. El indicador “REP
1” aparecerá sobre la pantalla. Inicia la lectura repetida fino a el pulsar del botón
STOP (3). Para borrar la función lectura repetida, pulsar MODE (7) 5 veces. El indicador “REP 1” desaparece de la pantalla.
3. Para repetir todo el CD-MP3, pulsar el botón MODE (7) dos veces. El indicador “REP
ALL” aparecerá sobre la pantalla. Inicia la lectura repetida fino a el pulsar del botón
STOP (3). Para borrar la modalidad de repetición de Album, pulsar MODE (7) 4 veces.
El indicador “REP ALL” desaparece de la pantalla.
4. Para repetir todo el Album, pulsar el botón MODE (7) tres veces. El indicador “REP
DIR” aparecerá sobre la pantalla. Inicia la lectura repetida de todas las pistas de todo
el CD fino a el pulsar del botón STOP (3). Para borrar la modalidad de repetición de
todo el CD-MP3, pulsar MODE (7) tres vecez. El indicador “REP DIR” desaparece de
la pantalla.
LECTURA INTRO
1. Pulsar el botón LECTURA/PAUSA (2).
2. Pulsar el botón MODE (7) 4 veces para entrar en la modalidad Intro. “INT” aparece so-
bre la pantalla.
3. Serán leídos los primeros 10 segundos de cada melodía de cada Album.
4. Pulsar el botón MODE (7) 2 veces más para borrar la función INTRO y volvér a la re-
producción normal.
5. El aparato se apaga automaticamente 60 segundos depués que todas las melodías
están reproducidos.
LECTURA EN ORDEN CASUAL (RANDOM)
1. Pulsar el botón MODE (7) 5 veces para entrar en la modalidad de Lectura en Orden
Casual (Random). “RND” aparecerá sobre la pantalla.
2. Pulsar el botón LECTURA/PAUSA (2) para activar la lectura en Orden Casual de to-
dos los títulos de todos los album.
3. Pulsar el botón SALTO (5) para ir a la melodías sucesiva en orden casual.
LECTURA PROGRAMADA
1. Pulsar el botón LECTURA/PAUSA (2), esperar 8 segundos y pulsar STOP (3).
2. Pulsar el botón PROG/MODE (7) una vez. En la pantalla aparece: “P 00 000 P-01” y
el número de Album relampagea.
3. Pulsar los botones SALTO (5) o el botón SALTO (4) para seleccionar el Album desea-
do por programar.
4. Pulsar el botón PROG (6) para introducir el Album en la memória. El número de Al-
bum para el relampagear y inicia a relampeagar el número de melodía.
5. Pulsar los botones SALTO (5) o el botón SALTO (4) para seleccionar la melodía de-
seada por programar. 6. Pulsar el botón PROG (6) para introducir la melodía en la
memoria. El número de melodía para el relampagear.
6. Repetir los pasos 3 - 6 para programar hasta un máximo de 24 melodías.
7. Pulsar el botón FILE/SEARCH-ENTER (5) para terminar la programación.
8. Pulsar el botón LECTURA/PAUSA (2) una vez para iniciar la lectura programada.
9. Para borrar la lectura programada, pulsar el botón STOP (3) dos veces.
Page 23

20 Español
FUNCIÓN ANTI-CHOQUE
Durante el uso, el lector está sujeto con mucha probabilidad a sacudidas o vibraciones
(por ejemplo mientras se camina o en un automóvil en movimiento). La función ANTICHOQUE permite una reproducción sin interrupción.
Cuando se pulsa la tecla LECTURA/PAUSA (2), la función ASP está activada automati-
camente y en la pantalla se muestra “ASP”.
El sonido se interrumpirá por aproximadamente 1 segundo si el lector está sujeto a sa-
cudida para más de 45 segundos en CD o 100 segundos en MP3, y el sonido se reanudará cuando el lector se estabilizará después de la sacudida.
Cuando se utiliza la función Anti - CHOQUE, el disco girará más rápido que en la lectura
normal y la memoria será activada. Usar la función Anti - CHOQUE sólo cuando será
necesario para preservar la vida de las baterías.
La función Anti - CHOQUE no corregirá los errores causados por el uso de discos defe-
ctuosos, rayados o sucios.
ESPECIFICACIONES TÉCNICAS
DC: 5V (Adapter)
Baterías: 2 x AA
Las características tecnicas estan sujetas a cambios sin aviso previo.
La presencia de esta marca en el producto o en el materiál informativo que lo acompaña, indica que al
finalizar su vida útil no deberá eliminarse junto con otros residuos domésticos. Para evitar los posi bl es
daños al medi o ambi ente o a l a sal ud humane que representa la eliminación incontrolada de residuos,
separe este producto de otros tipos de residuos y reciclelo correctamente para promover la reutilización
sostenible de recursos materiales. Los usuarios particulares pueden contactar con el establecimiento
donde adqui ri eron el producto, o con l as autori dades l ocal es pertinentes, para informarse sobre
cómo y dónde pueden lIevario para que sea sometido a un reciclaje ecológico y seguro. Los usuarios
comerciales pueden contactar con su proveedor y consultar las condiciones del contrato de compra.
Este produco no debe eliminarse mezclado con otros residuos comerciales.
ELIMINACIÓN CORRECTA DE ESTE PRODUCTO
(material electrico y electrónico de descarte)
ATTENTIÓN
El símbolo de exclamación dentro un triángulo tiene el objeto de advertir al usuario de la presencia de
instrucciones importantes de funcionamiento y mantenimiento en la documentación adjunta con el
equipo.
El símbolo del rayo con punta de flecha dentro de un triángulo adverte al usuario de la presencia de
tensiones peligrosas en el equipo.
Para reducir los riesgos de descargas eléctricas, no retire la cubierta. La unidad no hay en su enterior
componentes que pueda manipular el usuario. Encargue su reparación a personal cualificado.
Esta unidad funciona con 230V ~ 50Hz. Cuando el equipo vaya a estar un tiempo prolongado sin utilizarse, desenchufar el cable de alimentación.
No conecte la unidad hasta que no se hayan efectuado todas las otras conexiones.
La unidad no debería ser expuesta a lluvia o humedad.
La unidad se debe instalar de forma que su posición no le impida tener ventilación adecuada. Por
ejemplo, el equipo no se debe colocar cerca de cortinas o sobre el tapete, ni en una instalación como
puede ser un armario.
La unidad no debería ser expuesta a la luz solar directa ni a fuentes emisora de calor.
Page 24

is a registered Trademark of Roadstar S.A. - Switzerland. All rights reserved.
Roadstar Management SA, via Passeggiata 7 CH 6883 Novazzano (Switzerland)
VER.1
 Loading...