

Page 1
is a registered TrademarkofRoadstarS.A. - Switzerland All rights reserved
Instructionmanual
Bedienungsanleitung
Manueld’instructions
Manualed’istruzioni
Manualde instrucciones
Manualde instruções
FM PLL Clock Radio
with FLIP Digital
Display
CLR-2285/WD
Page 2
INDEX
English Page 1
Deutsch Seite 9
Français Page 17
Italiano Pagina 25
Español Página 33
Português Pagina 41
• Yournewunitwasmanufacturedandassembled
understrictROADSTARqualitycontrol.
Thank-youforpurchasing ourproductfor your
musicenjoyment.
Before operating the unit, please read this
instructionmanualcarefully.Keepit alsohandy
forfurtherfuturereferences.
• Votrenouvelappareilaétéfabriquéetmontéen
étantsoumisauxnombreauxtestsROADSTAR.
Nousespéronsquecetappareilvousdonnera
entièresatisfaction.
Avantdevousadonnerà cesactivités,veuillez
lire attentivement ce manuel d’instructions.
Conservez-leàportéedemainàfinderéférence
ultérieure.
• Vuestronuevosistemahasidoconstruidosegún
las normas estrictas de control de calidad
ROADSTAR.
Le felicitamos y le damos las gracias por su
elección de este aparado. Por favorleer el
manualantes de poner en funcionamiento el
equipoyguardarestadocumentaciónen case
deque senecesitenuevamente.
• IhrneuesGerätwurdeunterBeachtungderstrengen
ROADSTAR-Qualitätsvorschriftengefertigt.
WirdankenIhnenfürdenKaufunseresProduktesund
wünschen Ihnen optimalen Hörgenuss. Bittelesen
SiedieseBedienungsanleitungdurch,undhebenSie
sieauf, umjederzeitdarinnachschlagenzukönnen.
• Il vostro nuovo apparecchio é stato prodotto ed
assemblato sotto lo stretto controllo di qualità
ROADSTAR.
Viringraziamodi averacquistatoun nostroprodotto
perilvostro piacere d’ascolto.
Prima diprocedereall'utilizzodell'apparecchio,leggete
attentamenteilmanualed’istruzionie tenetelosempre
aportatadi manoper futuririferimenti.
•
Seunovoaparelhofoiconstruidoe montado sob o
estrito controledequalidadeda ROADSTAR.
Agradecemosportercompradonossoprodutoparaa
suadiversão.
Antes de usar esta unidade é necessário ler com
atençâoestemanual deinstruçõespare quepossa
serusadaapropriadamente;mantenhaomanualao
seualcancepara outrasinformações.
CLR-2285/WD
Page 3

English English
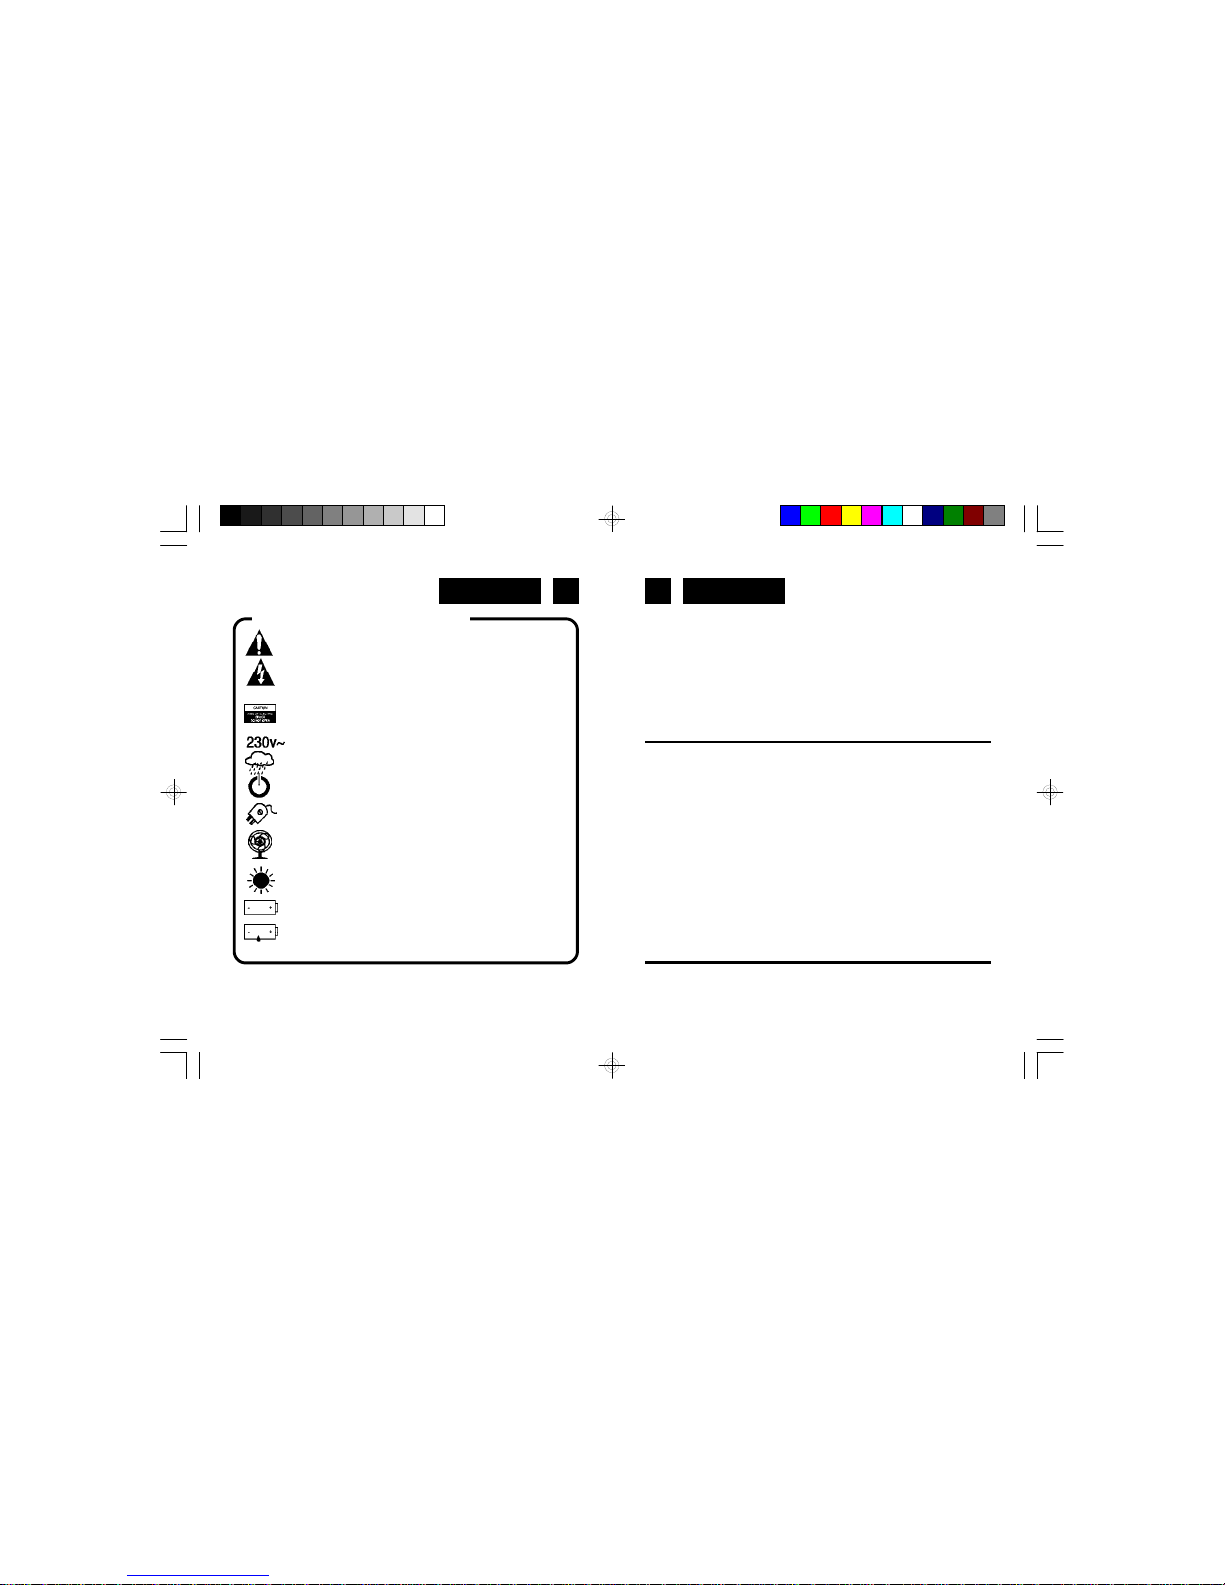
WARNINGS
The exclamation point within the triangle is a warning sign
alerting the user of important instructions accompanying the
product.
The lightening flash with arrowhead symbol within the triangle is
a warning sign alerting the user of “dangerous voltage” inside
the unit.
To reduce the risk of electric shock, do not remove the cover.
No user serviceable parts inside the unit. Refer all servicing to
qualified personnel.
This unit operates on 230V ~ 50Hz. If the unit is not used for a
long period of time, remove the plug from the AC mains.
This unit must not be exposed to moisture or rain.
The power switch in this unit is mounted on the secondary
circuit and does not disconnect the whole unit from the mains
in OFF position.
Ensure all connections are properly made before operating the
unit.
This unit should be positioned so that it is properly ventilated.
Avoid placing it, for example, close to curtains, on the carpet
or in a built-in installation such as a bookcase.
Do not expose this unit to direct sunlight or heat radiating
sources.
Make sure the batteriy is inserted according to the proper
polarity.
If the unit is not used for a long period of time (more than 1
month), remove the battery from the compartment to avoid
possible leaking.
TABLE OFCONTENTS
• LOCATION OF CONTROLS
• POWER SUPPLY
• AC POWER
• SPECIFICATIONS
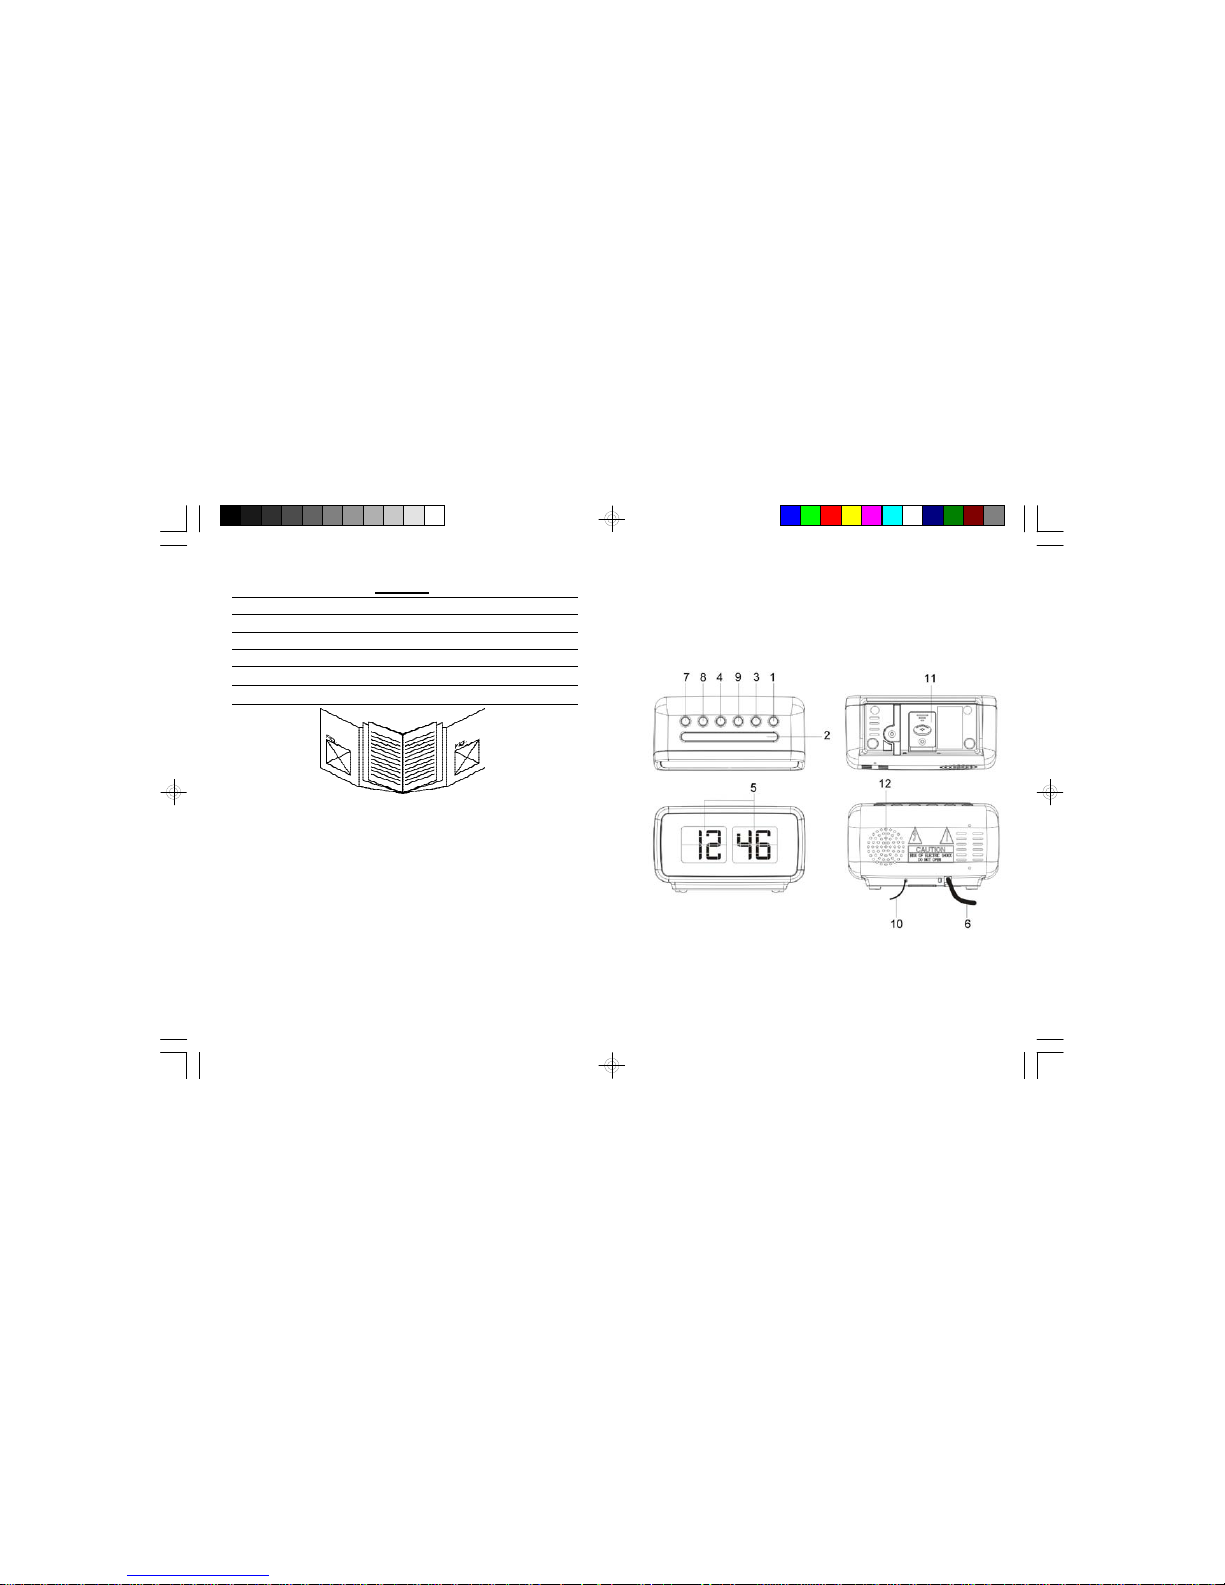
LOCATIONOFCONTROLS
POWERSUPPLY
This unit operates from a main supply of 230V ~ 50Hz. Connect the AC
1 2
6. AC POWER CORD
7. VOLUME DOWN / ALARM 1 Button
8. VOLUME UP / ALARM 2 Button
9. TUNING UP / D.S.T. Button
1. OFF/ON Switch (Radio)
2. SLEEP SNOOZER DIMMER Button
3
. SET CLOCK / MEM/M+ Button
4. TUNING Down AUTO TOGGLING Button
5. CLOCK LCD Display
10. FM WIRE ANTENNA
11. BATTERY COMPARTMENT (BACK-UP MEMORY)
1
2. SPEAKER
CLR-2285/WD
F
M DIGITAL PLL ALARM CLOCKRADIO
Page 4

English English
power cord to the AC household main outlet. Ensure that the voltage
is as indicated on the rating plate on the rear of the unit.
Battery Back-up Power Failure Protection
This radio has a battery back up circuit that will keep the correct time
and alarm settings in the event of a temporary power interruption.
Note: We recommend an alkaline battery for longer usable life.
Change the battery every 9 to 12 months for best result and avoid
possible battery leakage.
If power is temporarily interrupted the display will blink and the radio
will not play. However, the battery back-up circuit will continue to
maintain the clock and alarm settings. When power is restored the clock
will display the correct time and alarm settings, and no adjustment is
necessary.
Note: If power is interrupted and there is no battery in the compartment
or the battery is exhausted. The time and alarm settings will be
lost. When power is restored the clock will begin to flash
indicating that the time and alarm settings must be corrected.
3 4
DISPLAY
1. Normally the LCD DISPLAY indicates the DATE, which shows
informations.
SETTINGTHE LCDDISPLAY
1. In the normal Display mode, to set the TIME, keep pressed
MEM/M+ (3) Button until the YEAR digits will flash. Press UP/
DOWN (4-9) to adjust the YEAR digits.
2. To set the MONTH, press MEM/M+ (3) once more and the
MONTH digits will flash. Press UP/DOWN (4-9) to adjust the
MONTH digits.
3. To set the DAY mode, press MEM/M+ (3) once more and the
MEM/M+ (3) digits will flash. Press UP/DOWN (4-9) to adjust the
DAY digits.
4. To set the 12/24 mode, press MEM/M+ (3) once more and the
Year digits will flash. Press UP/DOWN (4-9) to adjust the 12/24
5. To set the HOUR, press MEM/M+ (3) again and the HOUR
digits will flash. Press UP/DOWN (4-9) adjust the HOUR digit.
6. To set the MINUTE, press MEM/M+ (3) again one more time
and the MINUTE digit will flash. Press UP/DOWN (4-9) to adjust
the MINUTE digit.
7. Press the MEM/M+ (3) button to conclude the setting.
SETTINGTHEALARM(BUZZERORRADIO)
"AL" icon indicates that the display is showing the ALARM
TIME.
Install a 3V battery (type CR-2032), not included, into the battery
compartment (11) located on the bottom of the unit.
2. To set the ALARM TIME, press ALARM 1 (7) or ALARM 2 (8)
1. In the normal Display mode, press ALARM 1 (7) or ALARM 2 (8)
button once and the display will show the ALARM TIME. The
the MONTH, YEAR, TIME and DAY.
2. Press YMD (9
) button to show sequentially the above
Page 5

English English5 6
button for 8 seconds and the OUR digits will flash. Press UP/
DOWN (4-9) to adjust the HOUR digits.
DOWN (4-9) to adjust the MINUTE digits.
4. To set the days 1-5, press ALARM 1 or ALARM 2 button Button
and the 1-5 digits will flash. Press UP/DOWN (4-9) to adjust
between 1-5 (Monday to Friday), 1-7 (whole week), 6-7
or Radio Frequency.
6. To disable the Alarm mode, during normal display mode keep
DIMMERFUNCTION
1. Press quickly the SNOOZE/SLEEP/DIMMER (2) button to
change the Display intensity.
Press again 3 seconds to go back one hour (Winter Time).
AUTOTOGGLINGBETWEENDISPLAYMODE
for 3 seconds.
FM PLLRADIO
on the radio.
3 ) Press the UP / DOWN (4-9) button to search for the station. Short
press mode is MANUAL research, press and hold that the search
mode is automatic.
4 . To save the channel, press the MEM / M + (3 ) 5 seconds to
enter the memory of the radio station , then press UP / DOWN
(4-9) to select the desired channel number where you want to
save the station.
5 . After selecting the desired channel , press the MEM / M + button
(3) to confirm the location of the memory.
6 . To recall radio stations , press the MEM / M + button (3)
sequentially until the desired channel is displayed.
SNOOZEFUNCTION
When the alarm sounds, pressing the SNOOZE Button (2) will temporary
stop about 9 minutes then the alarm sounds again.
3. To set the ALARM MINUTE, press ALARM 1 (7) or ALARM 2 (8)
button once more and the MINUTE digits will flash. Press UP/
(Saturday and Sunday) or 1-1 one day of week.
5. To set the BUZZER or RADIO Alarm Mode, press ALARM 1 (7) or
ALARM 2 (8) button one more time and the BU (Buzzer) digits
will flash. Press UP/DOWN (4-9) to adjust between BU (Buzzer)
pressed the Alarm 1 (7) or Alarm 2 (8) buttons for 5 seconds until
the symbols disappear from the display.
1 . Make sure the antenna wire (10 is completely unrolled and
extended.
2 . In normal clock mode, press the ON / OFF button (1) to switch
1. During normal clock mode, press for 3 seconds the DST (9)
button until the display advance by one hour (Summer time).
DAYLIGHT SAVINGTIME (D.S.T.)
s
equentially the Hour / Date and Year.
2. To exit from this function, press again the button (4)
1. In normal clock mode, press the button (4) for 3 seconds
until ON compare in the display. The unit show
Page 6

English English7 8
SLEEPFUNCTION
1. This function enables you to go to sleep listening to the Radio.
2. Press the SLEEP Button (2). The clock display will show 90 minutes.
The Radio turns on and will turn off automatically after 90 minutes.
3. To select a shorter time press the SLEEP Button (2) while holding
until the desired sleep time is displayed.
4. To turn off the Radio at any time during the Sleep period, press
the SNOOZE/SLEEP/DIMMER Button (2).
CAREANDMAINTENANCE
To prevent fire or shock hazard, do not allow this clock radio to be
exposed to rain or moisture.
This clock radio should not be exposed to direct sunlight, very high or
low temperature, moisture, vibration, or placed in a dusty environment.
Do not use abrasives, benzine, thinners, or other solvents to clean the
surfaces of the clock radio. To clean it, wipe with a mild non-abrasive
detergent solution on a clean soft cloth.
Never attempt to insert wires, pins, or other objects into the venlilation
holes or openings on the clock radio.
ACPOWER
Foryourownsafetyreadfollowinginstructionscarefullybefore attempting
to connect this clock radio to the mains.
This unit is designed to operate on a 230V~50Hz supply only.
Connecting it to other power sources may damage it.
Ensure that supply corresponds to the information on the rating label
on the bottom of the unit.
RESET (reset operation)
Remove the memory Back- Up battery and cord for three minutes .
Specifications subject to change without notice.
SPECIFICATIONS
Power Supply: 230VAC, 50 Hz
Back-up Battery : 3V CR-2032 (not included)
Correc t Dis posal of This Pr oduct
(Waste Electri cal & Electroni c Eq uipment)
This marking shown on the product or its literature, indicates
that it should not be disposed with other household wastes
at the end of its working life. To prevent possible harm to
the environment or human health from uncontrolled waste
disposal, please separate this from other types of wastes
and recycle it responsibly to promote the sustainable reuse
of material resources.
Household users should contact either the retailer where they
purchased this product, or their local government office, for
details of where and how they can take this item for
environmentally safe recycling.
Business users should contact their supplier and check the
terms and conditions of the purchase contract. This product
should not be mixed with other commercial wastes for disposal.
FM Band: 87,5 t
o 108 MHz
Page 7
Deutsch Deutsch
INHALTSVERZEICHNIS
• LAGE DER BEDIENUNGSELEMENTE
• SPEISUNG
• WECHSELSTROM (AC)
• TECHNISCHE DATEN
LAGE DERBEDIENUNGSELEMENTE
1. EIN / AUS Schalter (Radio)
SPEISUNG
Dieses Gerät funktioniert mit Netzstrom von 230V ~ 50Hz. Schließen
Sie das AC-Netzkabel an eine AC-Netzsteckdose an. Vergewissern Sie
sich, daß die Spannung mit der auf dem Typenschild angegebenen
9 10
SICHERHEITSHINWEISE
DasAusrufszeichenimDreieckweistdenBenutzeraufwichtigeBedienungsundWartungsanweisungen(Service)in diesemHandbuchhin,die unbedingt
zubefolgensind.
DasBlitzsymbolimDreieckweistdenBenutzerauf “gefährlicheSpannungen”
aneinigenfreiliegendenBauteilenim Innemdes Geräteshin.
UmdieGefahrelektrischerSchlägeauszuschliessen,GehäuseaufkeinenFall
abnehmen.ImInnembefindensichkeinevomBenutzerselbstinstandsetz-baren
Teile.ReparaturendürfennurvoneinerautorisiertenFachwerkstattdurchgeführt
werden.
Dieses Gerät ist für 230V ~ 50Hz Netzspannung ausgelegt. Bei längerer
NichtbenutzungdesGerätsziehenSiedenSteckerausderSteckdose.
SetzenSiedasGerätwederFeuchtigkeitnochRegenaus.
DerEIN-SchalterdiesesGerätsistandenSekundärschaltkreisange-schlossen.
SeineAbschaltungunterbrichtdieHauptstromzufuhrdesGerätsnichts.
SchaltenSie das Systemerstdann ein,wennSie alle Verbindungengenau
geprüfthaben.
Stellen SiedasGerätsoauf, dass immer eine ungestörte Frischluftzufuhr
sichergestelltist. Esist zumbeispielkeinesfallsauf Teppicheund inderNähe
vonGardinenzu stellenoderinBücherregaleeinzubauen.
SetzenSiedasGerätwederdirekterSonneneinstrahlungnoch Wärmequellen
aus.
BeimEinlegenderBatterie achtenSie aufdierichtigePolarität.
BeilängererNichtbenutzungdes Geräts(mehrals einenMonat)ziehenSiedie
Batterieheraus,umAuslaufenzuvermeiden,die schädlichfürdasGerätsein
konnen.
6. Netzkabel
7
. LAUTSTÄRKE-Regler - / ALARM 1-Taste
8. LAUTSTÄRKE-Regler + / ALARM 2-Taste.
9. Tuning-UP / D.S.T.-Taste
10.
UKW-ANTENNE
1
1. Batteriefach
12. Lautsprecher
2. EINSCHLAFEINSTELL / SCHLUMMER / DIMMER-Taste
3
. UHREINSTELLUNG / MEM/M+-Taste
4. Rückwärts-Tuning / Auto-Hin-und Herschalten-Taste
5. LCD-UHR-Display
CLR-2285/WD
D
IGITAL-WECKRADIOPLL
Page 8
Deutsch Deutsch11 12
EINSTELLUNG DER ALARM-WECKER (Buzzer oder Radio)
zu zeigen. Das Symbol "AL" zeigt an, dass das Display zeigt
die Alarmzeit ein.
einzustellen.
Dimmer-Funktion
1. Drücken Sie kurz die SNOOZE / SLEEP / DIMMER (2), um die
Display-Intensität ändern.
Sommerzeit (DST)
(Sommerzeit). Drücken Sie erneut 3 Sekunden, um eine
Stunde (Winterzeit) zurück.
Umschalten zwischen AUTO DISPLAYMODE
zeigen nacheinander die Stunde / Datum und Jahr.
2. Um verlassen von dieser Funktion, drückenSie die Lautstärker + -
ANZEIGE
1. Normalerweise wird die LCD-Anzeige zeigt das Datum, die den
oben genannten Informationen.
LCD-ANZEIGEEINSTELLEN
1. Im normalen Anzeigemodus, um die Zeit einzustellen, gedrückt
2. Um den Monat einzustellen, drücken Sie MEM/M + (3) taste
noch einmal und der MONAT blinken. Drücken Sie UP / DOWN
(4-9) um die Monateszhal anzupassen.
3. Um den Tag-Modus, drücken Sie MEM / M + set (3) einmal mehr
und die MEM / M + (3) blinken. Drücken Sie UP / DOWN (4-9),
um die TAG Ziffern anpassen.
4. Um die 12/24 Modus drücken MEM / M + (3) einmal mehr
eingestellt und die Jahresangabe blinkt. Drücken Sie UP /
DOWN (4-9), um die 12/24-Modus einzustellen.
5. Um die HOUR (3) wieder einzustellen, drücken Sie MEM / M +
und die Stundenanzeige blinkt. Drücken Sie UP / DOWN (4-9)
stellen Sie die Stundenziffer.
6. Um die MINUTE, drücken Sie MEM / M + set (3) wieder ein
weiteres Mal und die MINUTE Stelle blinkt. Drücken Sie UP /
DOWN (4-9), um die Minutenanzeige einzustellen.
7. Drücken Sie die MEM / M + (3), um die Einstellung
abzuschließen.
halten MEM / M + (3) taste, bis die Jahresangabe blinkt.
Drücken Sie UP / DOWN (4-9), um die Jahreszahl anzupassen.
1 . Im normalen Anzeigemodus, drücken Sie ALARM 1 (7) oder
ALARM 2 (8)
-Taste einmal und die Anzeige wird die Alarmzeit
2 . Um die Weckzeit einzustellen , drücken Sie ALARM 1 (7) oder
ALARM 2 (8)-
Taste 8 Sekunden lang und die UNSERE blinken.
Drücken Sie UP / DOWN (4-9) , um die Stundena-nzeige
1. Im der Uhr Normalmodus, drücken Sie für 3 Sekunden die
(9)
-Taste, bis die Anzeige vorab nach einer Stunde
Monat, Jahr, Tag und Uhrzeit zeigt.
2. Drücken Sie YMD -Taste (9), um nacheinander zeigen die
1. Im der Uhr Normalmodus, drücken Sie die Taste (4) für3
Sekunden, bis ON vergleichen in der Anzeige. Das Gerät
Page 9

Deutsch Deutsch
EINSCHLAF-FUNKTION
1. Diese Funktion ermöglicht es Ihnen, mit Musik einzuschlafen.
2. Drücken Sie die EINSCHLAF-Taste (2). Das Uhr-Display zeigt 90
Minuten an. Das Radio schaltet sich ein und nach 90 Minuten
automatisch wieder aus.
3. Wenn Sie eine kürzere Einschlafzeit wählen möchten, drücken
Sie die EINSCHLAF-Taste (2) gedrückt halten, bis die gewünschte
Einschlafzeit auf dem Display angezeigt wird.
4. Um das Radio zu einem beliebigen Moment während des
Einschlafzeit auszuschalten, drücken Sie die SCHLUMMER-Taste (2)
WARTUNGUNDPFLEGE
Um Bränden oder elektrischen Schlägen vorzubeugen, setzen Sie
dieses Weckradio nicht Regen oder Feuchtigkeit aus.
Dieses Weckradio sollte nicht dem direkten Sonnenlicht, sehr hohen
oder sehr niedrigen Temperaturen, Feuchtigkeit oder Schwingungen
ausgesetzt werden. Stellen Sie es nicht in einer staubigen Umgebung auf.
Verwenden Sie keine scharfen Reinigungsmittel, Benzin, Verdünner
oder andere Lösungsmittel, um das Gehäuse des Weckradios zu
reinigen. Um es zu reinigen, wischen Sie es mit einem sauberen und
weichen Tuch ab, das mit einer milden Reinigungslösung angefeuchtet ist.
Stecken Sie niemals Drähte, Nadeln oder andere Gegenstände in die
Belüftungslöcher oder Öffnungen des Weckradios.
Hinweis: Wenn Sie die Uhr- oder Weckzeit einstellen, denken Sie
daran, daß dieses Weckradio eine 24-Stunden-Uhr hat.
WECHSELSTROM(AC)
Zu Ihrer eigenen Sicherheit lesen Sie aufmerksam die folgende
13 14
taste (8) fur 3 sekunden.
UKWPLL FMRADIO
1. Stellen Sie sicher dass Antennenkabel vollständig abgerollt und
erweitert.
2. Im der Uhr Normalmodus , drücken Sie die EIN / AUS-Taste (1),
um das Radio einzuschalten.
3) Drücken Sie die UP / DOWN (4-9)-Taste, um den Sender zu
suchen. Kurz drücken Modus MANUAL Forschung, drücken und
halten, dass der Suchmodus erfolgt automatisch.
4. Um zu speichern den Sender, drücken Sie die MEM / M + (3) 5
Sekunden, um die Erinnerung an die Radio-station ein und
drücken Sie UP / DOWN (4-9), um die gewünschte
Kanalnummer, wo Sie den Sender speichern möchten.
5. Nach der Auswahl des gewünschten Kanals, drücken Sie die
MEM / M + Taste (3), um den Standort des Speichers zu
bestätigen.
6. Um Radiosender erinnern, drücken die MEM / M + Taste (3)
nacheinander, bis sich der gewünschte Kanal ist angezeigt.
RESET (Reset-Betrieb)
Entfernen Sie die Speicher Back-Up Batterie und Kabel für drei
Minuten.
SCHLUMMER-FUNKTION
Wenn der Wecker ertönt und Sie die SCHLUMMER-Taste (2) drücken,
stoppt der Wecker zeitweilig für ca. 9 Minuten, danach ertönt er wieder.
Page 10

Deutsch Deutsch15 16
Bedienungsanleitung,bevor Sie dieses Weckradio ans Netz anschließen.
Dieses Gerät funktioniert nur mit 230V ~ 50Hz - Wechselstrom (AC).
Wenn Sie es an andere Stromquellen anschließen, könnte es
beschädigt werden. Vergewissern Sie sich, daß die Stromversorgung
mit der auf dem Typenschild angegebenen übereinstimmt. Das
Typenschild befindet sich auf dem Boden des Gerätes.
TECHNISCHEDATEN
Stromversorgung: 230V 50Hz
Speicher-Batterie: 3V-CR-2032 (nicht mitgeliefert)
Korrekte Entsor gung dies es Produkts (Elektromüll)
Die Kennzeichnung auf dem Produkt bzw. auf der
dazugehörigen Literatur gibt an, dass es nach seiner
Lebensdauer nicht zusammen mit dem normalen
HaushaltsmüIl entsorgt werden darf. Entsorgen Sie dieses
Gerat bitte getrennt von anderen Abfallen, um der Umwelt
bzw. der menschlichen Gesundheit nicht durch unkontrollierte
Müllbeseitigung zu schaden. Recyceln Sie das Gerät, um die
nachhaltige Wiederverwertung von stofflichen Ressourcen zu
fördern.
Private Nutzer sollten den Händler, bei dem das Produkt
gekauft wurde, oder die zuständigen Behörden kontaktieren,
um in Erfahrung zu bringen, wie sie das Gerät auf
umweltfreundliche Weise recyceln können.
Gewerbliche Nutzer sollten sich an Ihren Lieferanten wenden
und die Bedingungen des Verkaufsvertrags konsultieren.
Dieses Produkt darf nicht zusammen mit anderem
UKW-Band: 8
7,5 - 108 MHz
Page 11

Français Français
TABLEDESMATIERES
• POSITIONNEMENT DES COMMANDES
• SOURCES D'ALIMENTATION
• ALIMENTATION SUR SECTEUR CA
• CARACTERISTIQUES TECHNIQUES
POSITIONNEMENTDESCOMMANDES
SOURCESD'ALIMENTATION
Cet appareil fonctionne sur secteurs de 230V - 50Hz. Brancher le
cordon de raccordement CA à votre prise de secteur CA. Vérifier que
17 18
ATTENTION
Lesymbole“pointd’exclamation”à l’intérieurd’un triangleavertit l’utilisateur
qued’importantesinstructionsd’utilisationetdemaintenancesontcontenues
danslemoded’emploi.
Lesymbole“éclair”àl’intérieurd’untrianglesertàavertirl’utilisateurdelaprésence
ducourantàl’intérieurdul’appareilquipourraitconstituerun risque.
Afindeminimiserlesrisques,nepasouvrirleboîtierniôterledosdel’appareil.En
casedepanne,faitesappelauxtechniciensqualifiéspourlesréparations.L’appareil
nerenfermeaucunepiècereparableparl’utilisateur.
Cetappareilaété conçu pour une tension d’alimentationde230V ~ 50Hz.
Débranchezla prisede courantquandon prévoitde nepasutiliserl’appareil
pendantun certaintemps.
L’uniténedoitpasêtreexposéeà l’humiditéouàla pluie.
L’interrupteurd’allumagede cetappareilestmontésurdescircuitssecondaires
etilne débranchepas l’appareiltout entierlorsqu’onl’éteint.
Mettez l’appareil sous tension seulement après avoir vérifié que tous les
raccordementssoientcorrects.
L’appareildoitêtregardédansun endroitsuffisammentventilé.Ne le gardez
jamaispar exempleprès desrideaux,surun tapisou dansdesmeubles,tels
qu’unebibliothèque.
L’uniténedoitpasêtre exposéeàlalumièredirectedu soleilou àdes sources
dechaleur.
Installezvotrepileen veillantà respecterla correctepolarité.
Quandvousprévoyez denepas utiliserl’appareilpendant unmoisou plus,
retirezla piledu logementpourempêchertoutefuited’acide.
1. MARCHÉ / ARRÊT (RADIO)
2
. Touche SLEEP / SNOOZE / DIMMER
3. Touche HORLOGE / MEM/M+
7. Touche Volume - / Alarm 1
8
. Touche Volume + / Alarm 2
9. Touche Recerche Radio + / D.S.T.
10. ANTENNE FM
11. COMPARTMENT PILE TAMPON
12. Haut-Parleur
4. Touche Recerche - /
Changement
5. Afficheur Horloge LCD
6. Câble alimentation
CLR-2285/WD
R
ADIO-REVEILFMNUMERIQUEPLL
Page 12

Français Français
la tension électrique corresponde à celle indiquée sur la plaque des
caractéristiques techniques placée au dos de l'appareil.
Pile de Réserve comme Protection contre les manques d'alimentation
électrique Cet appareil radio est équipé d'un circuit de réserve sur
pile pour préserver les programmations de l'horaire correct et du réveil
en cas d'interruption temporaire de l'alimentation électrique.
Installer une pile de 3 volt (du type CR-2032), non inclue, dans le
compartiment des piles, situé en dessous de l'appareil.
Remarque: On conseille une pile alcaline, pour que sa durée soit
plus longue. Remplacer la pile tous le 9 - 12 mois afin
d'obtenir les résultats les meilleurs et d'éviter que la pile
coule.
Si l'alimentation électrique est coupée momentanément, l'afficheur
clignote et la radio ne fonctionne pas. Cependant, le circuit de réserve
sur pile continuera a préserver les programmations de l'horaire et du
réveil. Quand l'alimentation électrique est rétablie, l'horloge affichera
l'horaire correct et les programmations du réveil. Aucun réglage n'est
nécessaire.
Remarque: Si l'alimentation électrique est coupé et il n'y a pas de
pile dans le compartiment, ou bien si la pile est usagée, les programmations
de l'horaire et du réveil seront perdues. Quand l'alimentation électrique est
rétablie,l'horlogecommence à clignoter en indiquant que les programmations
de l'horaire et du réveil doivent être corrigées.
19 20
AFFICHEUR
1. Normalement l'afficheur LCD montre le l'horaire avec le mois, la
date le jour et l'année.
REGLAGEDEL'AFFICHEURLCD
1. Dans la modalité d'affichage normale, pour régler l'horaire,
tendres pressé MEM/M+ jusqu' au les chiffres des l'année
clignoteront. Presser UP/DOWN pour régler l'année.
2. Pour régler le mois, presser MEM/M+ une fois et le mois
clignoteront. Presser UP/DOWN pour régler le mois.
3. Pour régler le jour, presser MEM/M+ une fois et le jour
clignoteront. Presser MEM/M+ pour régler.
4. Pour régler 12/24, presser MEM/M+ une fois encore et 12
clignotera. Presser UP/DOWN pour régler 12/24.
5. Pour régler l` heure, presser MEM/M+ une fois encore et l` heure
clignotera. Presser UP DOWN pour régler l` heure.
6. Pour régler le minute, presser MEM/M une fois et le minute
clignotera. Presser UP/DOWN pour régler le minute.
8. Presser MEM/M encore une fois pour retourner à l'affichage
normal.
REGLAGEDE L'ALARME (Radioou Sonnerie)
1. Dans la modalité d'affichage normale, presser ALARM 1 ou
ALARM 2 une fois et l'afficheur montrera l'horaire d'alarme. Le
symbole AL indique que l'horaire montré est celui de l'alarme.
2. Pour régler l'horaire d'Alarme, presser ALARM 1 ou ALARM 2
jusqu' au les chifres des heures clignoteront. Presser UP/DOWN
pour régler les heures.
3. Pour régler les minutes de l'alarme, presser ALARM 1 ou
ALARM 2 une fois et les minutes clignoteront. Presser UP/
DOWN pour régler les minutes.
4. Pour régler le jour 1-5, presser ALARM 1 ou ALARM 2 jusqu' au
les chifres des heures clignoteront. Presser UP/DOWN pour
2. Pour sélectionner le système d'affichage de l'heure, presser la
touche DMY (9)
en séquence.
Page 13

Français Français21 22
régler le jour entre 1-5 (lundi au vendredi), 1-7 (toute la
semaine), 6-7 (samedi et dimanche) ou 1-1 une journée de la
semaine.
5. Pour régler l'Alarme Radio ou Sonnerie presser ALARM 1 ou
ALARM 2 jusqu' au les chifres BU clignoteront. Presser UP/
DOWN pour régler entre BU (Buzzer) ou Radio FM.
6. Pour désactiver le mode d'alarme, pendant les heures normales
que les symboles disparaissent de l'écran.
FONCTIONDIMMER
Appuyez rapidement la touche SNOOZE SLEEP DIMMER (2)
pour changer l'intensité de l'affichage.
REPETITIONDEREVEIL
Lorsque l'anneau d'alarme, appuyez sur le bouton SNOOZE (2)
de suspendre l'alarme et activer la fonction de répétition.
L'alarme sera réactivée après 9 minutes.
Heure d'été (DST)
En mode normal de l'horloge, appuyez pendant 3 secondes sur le
boutons DST (3) jusqu'à l'affichage avance d'une heure (heure
d'été). Appuyez de nouveau 3 secondes pour revenir en arrière
d'une heure (heure d'hiver).
AUTO-REETITIONDESFUNCTIONNES
l'écran. L'unité affiche séquentiellement l'Heure / Date et Année.
2. Pour quitter cette fonction, appuyez de nouveau sur le bouton
Volume + (8) pendant 3 secondes.
RADIOFMPLL
1. Assurez-vous que le fil d'antenne est complètement déroulé et
étendu.
2. En mode normal de l'horloge, appuyez sur le bouton ON / OFF
(1) pour passer à la radio.
3) Appuyez sur le bouton UP / DOWN (3-4) pour rechercher la
station. Appui court est mode de recherche MANUEL, appuyez
longuement sur ce que le mode de recherche est automatique.
4. Pour enregistrer la station, appuyez sur le bouton MEM / M +
(3) 5 secondes pour entrer dans la mémoire de la station radio,
puis appuyez sur UP / DOWN (3-4) pour sélectionner le numéro de
canal désiré où vous souhaitez enregistrer la station.
5. Après sélectionner le canal désiré, appuyez sur le bouton MEM
/ M + (3) pour confirmer l'emplacement de la mémoire.
6. Pour rappeler les stations de radio, appuyez sur le bouton MEM /
M + (3) séquentiellement jusqu'à ce que le canal souhaité est
affiché.
FONCTIONSNOOZE
Quand le réveil sonne, en appuyant sur la Touche de SNOOZE (2) on
l'arrête momentanément pendant environ 9 minutes, après quoi le
réveil recommence à sonner.
FONCTIOND'ARRETAUTOMATIQUE(SLEEP)
donjon en mode d'affichage pressé le boutons alarme 1 (7) ou
alarme 2 (8) pendant 5 secondes jusqu'à ce
1. En mode normal de l'horloge, appuyez sur la touche (4)
pendant 3 secondes jusqu'à ce que ON comparer à
Page 14

Français Français23 24
1. Cette fonction permet de vous coucher en écoutant la Radio.
2. Appuyer sur la Touche d'ARRET AUTOMATIQUE (2). L'afficheur
de l'horloge montre 90 minutes. La radio se met en marche et
s'éteint automatiquement après 90 minutes.
3. Pour sélectionner un temps plus court, appuyer en même temps
sur la Touche d'ARRET AUTOMATIQUE (2), jusqu'à ce que le
temps souhaité pour l'arrêt soit affiché.
4. Pour éteindre la Radio n'importe quand pendant la fonction d'Arrêt
Automatique, appuyer sur la Touche de SNOOZE (2).
ENTRETIEN
L'appareil ne devrait être exposé ni dans un endroit en plein soleil, ni
à des températures très élévées ou très basses, ni à l'humidité, ni être
sujet à des vibrations, ni être placé dans un endroit poussiérex.
Pour nettoyer la surface de ce radio-réveil, n'utiliser ni abrasifs, ni
benzine, ni diluants, ni tout autre solvant. Si nécessaire, la nettoyer
avec un chiffon propre et doux, humidifié avec une solution détergente
délecate et non-abrasive.
Ne jamais tenter d'insérer ni câbles, ni fiches, ni tout autre object dans
les trous de ventilation ou bien dans les fentes de ce radio-réveil.
Remarque: Lors du réglage de l'horaire de l'Horloge et celui du Réveil,
se rappeler que l'horloge de cet appareil fonctionne sur
24 heures.
ALIMENTATIONSURSECTEURCA
Pour votre sécurité uniquement, veuillez lire attentivement le mode
d'emploi présent, avant de brancher cet appareil radio au réseau.
Alimentation du réseau de 230V - 50Hz - CA seulement.
RESET (rétablir le fonctionnement)
Retirez le cordon d'alimentation et la batterie de mémoire Back-Up
pendant trois minutes.
CARACTERISTIQUESTECHNIQUES
Sources d'alimentation: 230VAC - 50Hz
Plie tampon: CR-2032 3V CC (pas incluse)
Spécifications sous réserve de modifications sans avis.
Comment éliminer ce produit -
(déchets d'équipeme nts é lectriques et éle ctroniques)
Ce symbole sur le produit ou sa documentation indique qu'il
ne doit pas être éliminé en fin de vie avec les autres déchets
ménagers. L'élimination incontrôlée des déchets pouvant
porter préjudice a l'environnement ou a la santé humaine,
veuillez le séparer des autres types de déchets et le recycler
de façon responsable. Vous favoriserez ainsi la réutilisation
durable des ressources matérielles.
Lesparticulierssontinvitesa contacter le distributeur leurayant
vendu le produit ou a se renseigner auprès de leur mairie pour
savoir ou et comment ils peuvent se débarrasser de ce produit
afin qu'il soit recyclé en respectant l'environnement.
Les entreprises sont invitées a contacter leurs fournisseurs
et a consulter les conditions de leur contrat de vente. Ce
produit ne doit pas être éliminé avec les autres déchets
commerciaux.
Bande FM: de
87,5 à 108 MHz
Page 15

Italiano Italiano
INDICE
• LOCALIZZAZIONE DEI CONTROLLI
• FONTI ALIMENTAZIONE
• ALIMENTAZIONE AC
• SPECIFICHE TECNICHE
LOCALIZZAZIONEDEI CONTROLLI
25 26
ATTENZIONE
Ilpuntodiesclamazioneall’internodiun triangoloavvertel’utenteche illibretto
d’istruzionicontienedelleimportantiistruzioniper l’usoela manutenzione.
Ilsimbolodelfulmineall’internodi untriangoloavvertel’utentedellapresenza
diunapericolosatensioneall’internodell’apparecchio.
Perridurrei rischidiscosseelettriche,nonaprirel’apparecchio.L’apparecchio
noncontieneparti riparabilidall’utente.Incasodiguastofareappelloatecnici
qualificatiper le riparazioni.
Questoapparecchioèstatoprogettatoper funzionarea 230V~ 50Hz.Senon
siintendeutilizzarel’apparecchioperun lungoperiododi tempo,rimuoverela
spinadalla presadi corrente.
Nonesporrel’apparecchioalla pioggiaoall’umidità.
L’interruttoredi alimentazione diquestoapparecchio è montatosul circuito
secondarioenondisconnettecompletamentel’apparecchioquandovienespento.
Utilizzarel’apparecchiosolodopo aververificatoche tutteleconnessionisiano
stateeseguitecorrettamente.
Posizionarel’apparecchio in unluogosufficientemente ventilato.Evitaredi
sistemarlovicinoatende,sultappetoo all’internodiunmobilequale,adesempio,
unalibreria.
Nonesporrel’apparecchioalla lucediretta delsoleo afontidi calore.
Assicurarsidi averinseritola pilarispettando lacorrettapolarità.
Senonintendete utilizzarel’apparecchio perunlungo periododitempo (un
meseopiù),rimuovere lapiladalcompartimentoper evitarepossibilifuoriuscite
diacido.
Noi. RoadstarItaliaSpa
Viale Matteotti39
I-22012Cernobbio(Como)
Dichiariamo:
1. TASTO ACCESO / SPENTO (RADIO)
2.
TASTO SNOOZE / SLEEP / DIMMER
3. TASTO REG. OROLOGIO / MEM / M +
10. ANTENNA FM A FILO
11. COMPARTIMENTO BATTERIA MEMORIA
12. ALTOPARLANTE
4. TASTO SINTONIA - / COMMUTAZIONE AUTOMATICA
5. OROLOGIO DISPLAY A LCD
6. CAVO ALIMENTAZIONE
7.
TASTO VOLUME - / ALLARME 1
8. VOLUME + / ALLARME 2
9. TASTO SINTONIA + / D.S.T.
CLR-2
285/WD
R
ADIOSVEGLIADIGITALEPLLFM
Che il modello RADIOSVEGLIA DIGITALE CLR-2285/WD della Roadstar è
prodottoinconformitàalD.M.no.548datato28/08/95(G.U.no.301datata28/12/95)e,
inparticolare,è inconformitàalleprescrizionidell’articolo2comma 1.
Page 16

Italiano Italiano
DISPLAY
1 . Normalmente il DISPLAY LCD indica la data, che mostra il
mazioni di cui sopra.
IMPOSTAZIONEDEL DISPLAYLCD
1 . Nella normale modalità di visualizzazione, per impostare l'ora
tenere premuto MEM / M + (3) finché le cifre dell'anno
lampeggiano. Premere UP / DOWN (4-9) per regolare le cifre
dell'anno.
2 . Per impostare il mese, premere MEM / M + (3) ancora una volta
e le cifre del mese lampeggiano. Premere UP / DOWN (4-9) per
regolare le cifre del mese.
3 . Per impostare il giorno, premere MEM / M + (3) ancora
una volta e le cifre lampeggiano . Premere UP / DOWN (4-9) per
regolare le cifre del giorno.
4 . Per impostare il 12/24, premete MEM / M + (3) una volta di più
e le cifre 12/24 lampeggiano. Premere UP / DOWN (4-9) per
regolare il 12/24.
5 . Per impostare l'ora, premere MEM / M + (3) di nuovo e le cifre
dell'ora lampeggiano. Premere UP / DOWN (4-9), regolare la
cifra dell’ ora.
6 . Per impostare i minuti, premere MEM / M + (3) ancora una volta
e la cifra dei minuti lampeggiano. Premere UP / DOWN (4-9)
per regolare le cifre dei minuti.
7 . Premere il tasto MEM / M + (3) per concludere l'impostazione.
IMPOSTAZIONEDELASVEGLIA(RADIOO SUONERIA)
1 . Nella normale modalità di visualizzazione, premere ALARM 1 (
zando l'ora della sveglia.
Premere UP / DOWN (4-9) per regolare le cifre delle ore.
Premere UP / DOWN (4-9) per regolare le cifre dei minuti.
4 . Per impostare i giorni 1-5, premere il tasto ALARM 1 o ALARM 2
e 1-5 cifre lampeggiera. Premere UP / DOWN (4-9) per regolare
tra 1-5 (Lunedi a Venerdì), 1-7 (tutta la settimana), 6-7 (Sabato
e Domenica) o 1-1 un giorno alla settimana.
frequenza dellaRadio.
27 28
7) o ALARM 2 (8) tasto una volta e il display mostrerà l'ora
d
ella sveglia. L'icona "AL" indica che il display sta visualiz-
2 . Per impostare l'ora della sveglia, premere il tasto ALARM 1 (7) o
ALARM 2 (8) per 8 secondi ed i le cifre lampeggieranno.
3 . Per impostare i minuti, premere il tasto ALARM 1 (7) o ALARM 2
(
8)
una volta di più e le cifre dei minuti lampeggiano .
5 . Per impostare la suoneria o la RADIO, premere ALARM 1 (7) o
ALARM 2 (8) ancora una volta e “BU” (buzzer ) lampeggiera.
Premere UP / DOWN (4-9) per regolare tra BU (Buzzer) o
mese, anno, ora e giorno .
2 . Premere YMD (9) per visualizzare in sequenza le infor-
Page 17

Italiano Italiano29 30
6 . Per disattivare la modalità di allarme, durante la normale
display (5).
FUNZIONEDIMMER
1 . Premere velocemente il pulsante SNOOZE / SLEEP / DIMMER
(2) per modificare l'intensità del display.
ORALEGALE ( DST)
1 . Durante la normale modalità orologio, premere per 3 secondi il
pulsante DST (4) fino a quando verra visualizzata l’ ora con un’
ora di anticipo (ora estiva). Premere di nuovo 3 secondi per
tornare avanti di un ora (orario invernale).
VISUALIZZAZIONEAUTOMATICASEQUENZIALE
per 3 secondi fino quanco compare ON nel display. L'unità
mostra in sequenza l'ora / data e l'anno.
2 . Per uscire da questa funzione, premere nuovamente il tasto
Volume + (8) per 3 secondi.
RADIOFM PLL
1 . Assicurarsi che il filo dell'antenna sia completamente srotolato
ed esteso.
2 . In modalità normale orologio, premere il pulsante ON / OFF (1)
per accendere la radio.
3) Premere il tasto UP / DOWN (4-9) per cercare la stazione.
Premendo brevemente la ricerca manuale, premendo a lungo la
modalità di ricerca è automatica.
4 . Per salvare la stazione Radio, premere il tasto MEM / M + (3) 5
secondi per entrare nella memoria della stazione radio, quindi
premere UP / DOWN (4-9) per selezionare il numero del canale
desiderato in cui si desidera salvare la stazione.
5 . Dopo aver selezionato il canale desiderato, premere il tasto
MEM / M + (3) per confermare la posizione della memoria.
6 . Per richiamare le stazioni radio, premere il tasto MEM / M + (3)
in sequenza fino a visualizzare il canale desiderato.
FUNZIONE SNOOZE
Quando la sveglia suonerà, premendo il tasto SNOOZE (2) questa
si fermerà temporaneamente per circa 9 minuti e poi la sveglia
suonerà nuovamente trascorso questo tempo.
FUNZIONE SLEEP
1. Questa funzione vi permette di andare a dormire ascoltando la
radio.
2. Premere il Tasto SLEEP/SLEEP (2). Il display dell'orolo-gio
mostrerà 90 minuti. La Radio si accenderà e si spegnerà
automaticamente dopo 90 minuti.
modalità di visualizzazione il tasto ALLARME 1 (7) o
ALLARME
2 (8) per 5 secondi fino a quando i simboli scompaiono dal
1 . In modalità normale di orologio, premere il tasto (4)
Page 18

Italiano Italiano31 32
Corretto smaltim ento del prodotto - ( rifiuti elettrici ed
elettronic i)
II marchio riportato sul prodotto e sulla sua documentazione
indica che il prodotto non deve essere smaltito con altri rifiuti
domestici al termine del ciclo di vita. Per evitare eventuali
danni all'ambiente o alla salute causati dall'inopportuno
smaltimento dei rifiuti, si invita l'utente a separare questo
prodottoda altri tipidirifiutie di riciclarloinmanieraresponsabile
per favorire il riutilizzo sostenibile delle risorse materiali.
Gli utenti domestici sono invitati a contattare il rivenditore
presso il quale e stato acquistato il prodotto o l'ufficio locale
preposto per tutte le informazioni relative alla raccolta
differenziata e al riciclaggio per questo tipo di prodotto.
Gli utenti aziendali sonoinvitati a contattare il proprio fornitore
e verificare i termini e le condizioni del contratto di acquisto.
Questo prodotto non deve essere smaltito unitamente ad altri
rifiuti commerciali.
3. Per selezionare un tempo più corto premere il Tasto SLEEP/
SLEEP (2) fino a quando l'orario sleep venga visualizzato sul
display.
4. Per spegnere la radio in qualsiasi momento durante il periodo
sleep, premere il Tasto SNOOZE/SLEEP/DIMMER (2).
CURAE MANUTENZIONE
Per evitare il pericolo di incendi o scosse elettriche, non permettere
che questo radiosveglia per essere esposto a pioggia o umidità .
Questa radiosveglia non deve essere esposto alla luce diretta del
sole, temperatura molto alta o bassa , umidità, vibrazioni , o collocato in un ambiente polveroso.
Non utilizzare abrasivi , benzina, diluenti o altri solventi per pulire
le superfici della radiosveglia . Per pulirlo , strofinare con un
detergente delicato e non abrasivo soluzione detergente su un
panno morbido e pulito .
Non tentare mai di inserire i fili , spilli o altri oggetti nei fori di
venlilazione o aperture sulla radiosveglia .
ALIMENTAZIONEAC
Per la vostra lettura sicurezza seguendo attentamente le istruzioni
prima di tentare di collegare questo radiosveglia alla rete elettrica .
Questa unità è stata progettata per funzionare solo su un 230V ~
50Hz . Collegamento ad altre fonti di alimentazione può
danneggiarlo.
Assicurarsi che l'offerta corrisponda alle informazioni sulla targhettA
sul fondo dell'apparecchio .
RESET ( reset)
Rimuovere la batteria di backup di memoria e il cavo di
alimentazione per tre minuti.
Le specifiche sono soggette a modifiche senza preavviso .
SPECIFICHE
Back- up della batteria: 3V CR - 2032 ( non incluso)
Banda FM : da 87,5 a
108MHz
Alimentazione: 230V ,50 Hz
Page 19

Español Español
ÍNDICE
• LOCALIZACIÓN DE LOS CONTROLES
• FUENTES ALIMENTACIÓN
• ALIMENTACIÓN CA
• ESPECIFICACIONES TÉCNICAS
LOCALIZACIÓNDELOSCONTROLES
1. Botón ENCENDIDO APAGADO (RADIO)
2. Botón AJUSTE SLEEP / SNOOZER / DIMMER
5. Pantalla Reloj LCD
6. Cable alimentacion
FUENTESALIMENTACIÓN
Este aparato funciona con una fuente de alimentación de 230V50Hz. Conectar el cable alimentación CA a la toma de corriente CA
doméstica. Asegurarse de que el voltaje sea igual a aquel indicado
en la placa de los datos característicos colocada en la parte posterior
33 34
ATTENTIÓN
Elsímbolode exclamación dentrountriángulo tiene elobjetode advertir al
usuariodelapresencia de instrucciones importantes defuncionamientoy
mantenimientoenla documentaciónadjuntaconel equipo.
Elsímbolodelrayoconpuntade flechadentrodeuntriánguloadvertealusuario
delapresenciade tensionespeligrosasenel equipo.
Para reducir los riesgos de descargas eléctricas, no retire la cubierta. La
unidadno hay ensu enteriorcomponentesquepueda manipularel usuario.
Encarguesu reparaciónapersonalcualificado.
Estaunidadfuncionacon230V~ 50Hz.Cuandoelequipovayaaestaruntiempo
prolongadosinutilizarse,desenchufarel cablede alimentación.
Launidadno deberíaserexpuestaa lluviaohumedad.
Elinterruptordeencendidodelaparatoestá montadoenelcircuitosecundario
yalapagarlono desconectade laalimentacióntodoel aparato.
Noconectelaunidadhastaquenosehayanefectuadotodaslasotrasconexiones.
Launidadsedebeinstalardeformaquesuposiciónnoleimpidatenerventilación
adecuada.Porejemplo,elequiponosedebecolocarcercade cortinaso sobre
eltapete,nien unainstalacióncomopuedeserun armario.
Launidadno deberíaser expuestaa laluz solardirectaniafuentesemisorade
calor.
Instalar lapilarespectandola correctapolaridad.
Sino se usaráel aparatopormuchotiempo(un mesomás), quitarla piladel
alojamientoparaevitardañosprovocadosporeventualespérdidasdeácido.
7. Botón VOLUME - / ALARM 1
8
. Botón VOLUME + / ALARM 2
3. Botón MEM/M+ / AJUSTE RELOJ
4. Botón SINTONIZACIÓN - / AUTO TOGGLING
9. Botón SINTONIZACIÓN + D.S.T.
10. ANTENA FM
11. COMPARTIMENTO PILAS
12. ALTAVOZ
CLR-2285/WD
R
ADIODESPERTADORDIGITAL
Page 20

Español Español
del aparato.
Baterías de Reserva de Protección contra una Avería Eléctrica
La radio posee un circuito de baterías de reserva que mantiene el
horario correcto y los ajustes del despertador si se verifica una
interrupción momentánea de la corriente eléctrica.
Instalar una batería de 9 voltios (tipo3V CR-2032), no incluida, en el
compartimento batería colocado en la parte baja del aparato.
Nota: Recomendamos el uso de una batería alcalina porqué poseen
una mayor durada. Cambiar la batería cada 9-12 meses para
obtener mejores resultados y evitar posibles pérdidas de ácido
de las baterías.
Si la corriente eléctrica se interrumpe momentáneamente la pantalla
parpadeará y la radio no funcionará. Sin embargo, el circuito de
batería de reserva continuará a mantener los ajustes del horario y del
despertador. Cuando se restablecerá la corriente eléctrica, el reloj
visualizará el horario correcto y el ajuste del despertador, y no será
necesario efectuar ulteriores ajustes.
Nota: Si la alimentación se interrumpe y no hay alguna batería en el
compartimento o la misma está descargada. El horario y los
ajustes del despertador se perderán. Cuando se restablecerá la
corriente eléctrica el reloj iniciará a parpadear indicando que
el horario y los ajustes del despertador tendrán que ser
corregidos.
PANTALLA
1 . Normalmente, la pantalla LCD indica la fecha, que muestra el
informaciones anteriores.
AJUSTE DELAPANTALLALCD
1 . En el modo de visualización normal, para ajustar la hora, mantenga
pulsado MEM / M + (3) hasta que los dígitos del año parpadean.
Pulse ABAJO ARRIBA / (4-9) para ajustar los dígitos del año.
2 . Para ajustar el mes , oprima MEM / M + (3) una vez más y el mes
dígitos parpadearán. Pulse ABAJO ARRIBA / (4-9) para ajustar
los dígitos del mes.
3 . Para establecer el modo DÍA , presione MEM / M + (3) una vez más
y el MEM / M + (3) dígitos parpadearán. Pulse ABAJO ARRIBA
/ (4-9) para ajustar los dígitos del día.
4 . Para establecer el 12/24 modo, oprima MEM / M + (3) una vez más
y los dígitos del año parpadean. Pulse ABAJO ARRIBA / (4-9)
para ajustar la 12/24 5 . Para ajustar la hora, presione MEM / M
+ (3) de nuevo y los dígitos de la hora parpadean. Pulse UP /
DOWN (4-9) ajustar el dígito de la hora.
6 . Para ajustar los minutos , oprima MEM / M + (3) de nuevo una vez
más y el dígito de los minutos parpadearán . Pulse ABAJO ARRIBA
/ (4-9) para ajustar el dígito de los minutos.
7 . Presione el botón MEM / M + (3) para concluir el ajuste.
AJUSTE DELAALARMA (BUZZERoRADIO )
35 36
1 . En el modo de visualización normal, pulse ALARM 1 (7) o ALARM
2 (8) una vez y la pantalla mostrará la hora de alarma . El icono
"AL" indica que la pantalla muestra la hora de alarma .
2 . Para ajustar la hora de alarma, pulse EL Botón ALARM 1 (7) o
ALARM 2 (8) por 8 segundos y las dígitos parpadearán. Pulse
ABAJO ARRIBA (4-9) para ajustar los dígitos de la hora.
3 . Para ajustar los minutos ALARMA, pulse EL Botón ALARM 1 (7) o
ALARM 2 (8) una vez más y el MINUTO dígitos parpadearán. Pulse
mes, año, hora y el día .
2 . Presione YMD (9) para mostrar secuencialmente las
Page 21

Español Español
FM PLLRADIO
1 . Asegúrese de que el cable de la antena está completamente
desenrollada y extendida.
2 . En el modo de reloj normal, pulse el botón ON / OFF (1) para
encender la radio.
3 ) Pulse el botón UP / DOWN (4-9) para buscar la emisora. Modo de
Pulsación corta es la investigación MANUAL, mantenga pulsada
la tecla que el modo de búsqueda automática.
4 . Para memorizar el canal, pulse el Botón MEM / M + (3) 5 segundos
para entrar en la memoria de la estación de radio, a continuación,
pulse UP / DOWN (4-9) para seleccionar el número del canal
deseado en la que desea guardar la emisora.
5 . Una vez seleccionado el canal deseado, pulse el Botón MEM / M
+ (3) para confirmar la ubicación de la memoria.
6 . Para recuperar las emisoras de radio, pulse el botón (3)
secuencialmente MEM / M + hasta que aparezca el canal deseado.
FUNCIÓNSNOOZE
Cuando el despertador sonará, pulsando el botón SNOOZE (2) este
se detendrá momentáneamente por aproximadamente 9 minutos
luego el despertador sonará nuevamente.
FUNCIÓNSLEEP
1. Este función le permite adormecerse escuchando la radio.
2. Pulsar el botón SLEEP (2). La pantalla mostrará 90 minutos. La
Radio se activará y se desactivará automáticamente después de
90 minutos.
3. Para seleccionar un tiempo más corto pulsar el botón SLEEP (2)
ABAJO ARRIBA / (4-9) para ajustar los dígitos de los minutos .
4 . Para establecer los días 1-5, pulse el Botón ALARM 1 o ALARM 2
y los 1-5 dígitos parpadearán. Pulse ABAJO ARRIBA / (4-9)
para ajustar entre 1 a 5 (de lunes a viernes), 1-7 (toda la semana),
6-7 (sábado y domingo) o de 1-1 de un día de semana.
parpadearán. Pulse ABAJO ARRIBA / (4-9) para ajustar entre BU
(Buzzer) o de radiofrecuencia.
función de atenuación
1 . Presione rápidamente el botón SNOOZE / SLEEP / DIMMER (2 )
para cambiar la intensidad de la pantalla.
HORARIODEVERANO(DST)
1 . Durante el modo de reloj normal, pulse durante 3 segundos el
botón D.S.T. (4) hasta que la pantalla avance por una hora (horario
de verano) . Pulse de nuevo 3 segundos para volver una hora
(horario de invierno).
Alternar entre el modo AUTO PANTALLA
3 segundos hasta ON comparar en la pantalla. La unidad de muestra
secuencialmente la Hora / Fecha y año .
37 38
5 . Para configurar el zumbador o alarma RADIO, pulse el Botón
ALARM 1 (7) o ALARM 2 (8) una vez más y la BU (Buzzer) dígitos
6 . Para desactivar el modo de alarma, durante la visualización
normalel mantener el modo pulsado o botones da alarma 1 (7) o
Alarma 2 (8) durante 5 segundos hasta que los símbolos desaparecen
de la pantalla.
1 . En el modo de reloj normal, pulse el botón (4) durante
2 . Para salir de esta función , pulse de nuevo el botón
(4
) durante 3 segundos.
Page 22

Español Español
hasta cuando el horario sleep deseado se visualice sobre la
pantalla.
4. Para desactivar la radio en cualquier momento durante el período
sleep, pulsar el Botón SNOOZE/SLEEP (2).
CUIDADOY MANUTENCIÓN
Para prevenir el riesgo de incendio o de descarga eléctrica, no dejar
que este radio despertador se exponga a la lluvia o a la humedad.
Este radio despertador no tendrá que estar expuesto a la luz directa
del sol, temperaturas muy altas o muy bajas, humedad, vibraciones o
colocado en ambientes polvorientos.No utilizar abrasivos, bencina,
diluentes, u otros tipos de solventes para limpiar la superficie del
radio despertador. Para limpiarla, usar un paño suave limpio y
humedecido con un jabón delicado no abrasivo. No introducir nunca
hilos, clavijas u otros objetos en los orificios de ventilación o las
aberturas del radio despertador.
Nota: Cuando se ajusta el Reloj y el Despertador recordar que este
radio despertador posee un reloj de 24 horas.
RESET ( operación de reposición )
Retire la memoria de la batería de respaldo y el cable
durante tres minutos .
ALIMENTACIÓNCA
Para su propia seguridad, leer atentamente las siguientes instrucciones
antes de conectar este radio despertador a la fuente de alimentación
principal.
Alimentación Principal: Sólo CA de 230V - 50Hz.
Este aparato ha sido diseñado para funcionar con una alimentación
39 40
de 230V-50Hz. Conectarlo a otros tipos de alimentación podría dañarlo.
Controlar que la fuente de alimentación corresponda a aquella
indicada en la placa de los datos característicos colocada en la parte
baja del aparato.
ESPECIFICACIONESTÉCNICAS
Bateria memorias DC 3V del tipo CR-2032 (no incluida)
Las especificaciones están sujetas a cambios sin previo aviso.
Elimina ción correcta de este pro ducto -
(material electri co y electr ónico de descarte)
La presencia de esta marca en el producto o en el materiál
informativo que lo acompaña, indica que al finalizar su vida
útil no deberá eliminarse junto con otros residuos domésticos.
Para evitar los posibles daños al medio ambiente o a la salud
humanequerepresenta la eliminaciónincontrolada deresiduos,
separe este producto de otros tipos de residuos y reciclelo
correctamente para promover la reutilización sostenible de
recursos materiales.
Los usuarios particulares pueden contactar con el
establecimiento donde adquirieron el producto, o con las
autoridades locales pertinentes, para informarse sobre cómo
y dónde pueden lIevario para que sea sometido a un reciclaje
ecológico y seguro.
Los usuarios comerciales pueden contactar con su proveedor
y consultar las condiciones del contrato de compra. Este
produco no debe eliminarse mezclado con otros residuos
comerciales.
Banda FM: de 8
7,5 a108
MHzAlimentación: 230V - 50 Hz
Page 23

Português Português
ÍNDICE
• LOCALIZAÇÃO DOS CONTROLES
• LIGAÇÃO DOS ACESSÓRIOS
• LIGAÇÃO AC
• ESPECIFICAÇES
LOCALIZAÇÃODOSCONTROLES
1. Tecla OFF/ON (RADIO)
41 42
ATENÇÕES
Opontodeexclamaçãodentrodeumtriãnguloadvertequeomanualdeinstruções
contémimportantesinformaçõesdeusoedemanutenção.
Osimbolodoraiodentrodeumtriãnguloserveparaadvertirapresençadeuma
tensãoquepode constituir um riscoseo aparelho não forutilizadode uma
maneiracorreta.
Parareduzirorisco dechoqueelétrico,nãoabriroaparelho.Oaparelhonão
contémpartesreparáveispeloutilitário.Emcasodeproblema,apelaratécnicos
qualificadosparao conserto.
Esteaparelhofoiprojetadoparafuncionara 230V~50Hz. Senão for
utilizá-loporumlongoperíododetempo,sedevedesligá-loda correnteelétrica.
Nãoexporo aparelhoachuvaou aumidade.
O interruptor de alimentação deste aparelho foi montado sobre o circuito
secundário enãodesconectacompletamenteo aparelho quando este for
desligado.
Utilizaro aparelhosomentedepoisdeverificarseasconexõesforamseguidas
corretamente.
Colocaroaparelhoem umlocalsuficientementeventilado.Evitarde colocá-lo
vizinhoa cortinas,sobretapetesoudentrode ummóvelqualquer,porexemplo
umaestante.
Nãoexporoaparelhodiretamentea luzdo soloua fontesde calor.
Assegurar-sedeinserira pilharespeitandoajusta polaridade.
Sepretendernãoutilizaro aparelhoporum períodoprolongado(um mêsou
mais),removera pilhadocompartimentoparaevitarpossívelvazamentodecido.
CLR-2285/WD
RÁDIO RELÓGIODIGITALPLLM
2. Tecla SLEEP / SNOOZER / DIMMER
3. Tecla ajuste do relógio / MEM/M+
4. Tecla TUNING - / Auto-Alternando Display
5. Display relógio LCD
6. Cabo alimentação
7. Tecla VOLUME -
Alarme 1
8
. Tecla VOLUME + Alarme 2
9
. Tecla SINTONIA RADIO
12. ALTAVOZ
10. ANTENA FM
11. COMPARTIMENTO BATERIA MEMORIA
Page 24

Português Português43 44
LIGAÇÃODOSACESSÓRIOS
Este aparelho opera com acessórios de 230V - 50Hz. Ligar o fio AC à
tomada de parede AC. Verificar a voltagem como indicada atrás da
unidade.
BATERIADERESERVAPROTETORA
Este rádio possui uma bateria de reserva, com um circuito que mantem
a hora e o alarme em uma interrupção temporária.
Instalar baterias de 3-volt (tipo CR-2032), não incluída, dentro do
compartimento, localizada atrás do aparelho.
Notas: recomendamos pilhas alcalinas de longa duração. Trocá-las
de 9 a 12 meses para obter o melhor resultado e evitar
problemas.
Se a ligação é interrompida, o display se iluminará e o rádio não irá
tocar. Mesmo assim, o relógio e o display continuarão a funcionar e
nenhum ajuste será necessário.
Notas: se a ligação é interrompida, e não tem bateria, ou são gastas,
a hora e o alarme serão perdidos. Quando isso acontece,
aparecerá no display uma indicação para serem corrigidas a
data e a hora.
VISORLCD
1 . Normalmente, o visor LCD indica a data o que mostra o mês,
AJUSTEDATELA LCD
1 . No modo normal de exibição, para definir o tempo, mantenha
pressionado o Botão MEM / M + (3) até que os dígitos do ano
pisca. Prima PARA BAIXO PARA CIMA / (4-9) para ajustar os
dígitos do ano.
2 . Para definir o mês, pressione o Botão MEM / M + (3) mais de
uma vez no mês dígitos pisca. Prima PARA BAIXO PARA CIMA /
(4-9) para ajustar os dígitos do mês .
3 . Para definir o modo DIA , pressione MEM / M + (3) mais de uma
vez o MEM / M + (3) dígitos pisca. Prima PARA BAIXO PARA CIMA
/ (4-9) para ajustar os dígitos do dia .
4 . Para definir o 12/24 modo, pressione MEM / M + (3) mais uma
vez e os dígitos do ano pisca. Pressione BAIXO PARA CIMA / (4-9)
para ajustar a 12/24 5 . Para ajustar a hora , pressione MEM / M +
(3) novamente e os dígitos da hora pisca. Pressione UP / DOWN (4-
9) ajustar o dígito da hora .
6 . Para ajustar os minutos , pressione MEM / M + (3) novamente
mais uma vez e os dígitos dos minutos começam a piscar. Prima
PARA BAIXO PARA CIMA / (4-9) para ajustar os dígitos dos minutos
7 . Pressione o botão MEM / M + (3) para concluir a configuração.
Ajustar o alarme ( alarme ou radio )
1 . No modo normal de exibição, pressione o botão ALARM 1 (7)
ou ALARM 2 (8) uma vez eo visor mostrará a hora do alarme . O
ícone "AL" indica que a exposição está mostrando a hora do larme.
2 . Para definir a hora do alarme, pressione o Botão ALARM 1 (7)
ou ALARM 2 (8) por 8 segundos e os dígitos pisca. Prima PARA
ano, hora o dia.
2 . Imprensa o Botão AMD (9) para mostrar sequencialmente as
informações acima.
Page 25

Português Português45 46
BAIXO PARA CIMA / (3-4) para ajustar os dígitos da hora .
3 . Para definir o MINUTO DE ALARME, pressione o Botão ALARM
minutos.
4 . Para definir os dias 1-5, pressioneo Botão ALARM 1 ou ALARM
2 e os 1-5 dígitos pisca. Prima PARA BAIXO PARA CIMA / (4-9)
para ajustar entre 1-5 (de segunda a sexta-feira), 1-7 ( toda
semana), 6-7 (sábado e domingo) ou 1-1 um dia de semana.
5 . Para definir a campainha ou o Modo Alarme Rádio, Imprensa o
entre BU (campainha) ou frequência .
6 . Para desativar o modo de alarme, durante o normal, mantenha
tela.
FUNÇÃO DIMMER
1 . Pressione rapidamente o o Botão (2) SNOOZE / SLEEP /
DIMMER para alterar a intensidade de exibição.
Horário de Verão ( DST)
1 . Durante o modo de relógio normal, pressione por 3 segundos o
(4) Botão DST até o avanço de exibição por uma hora (horário de
verão). Pressione novamente 3 segundos para voltar uma hora (ora
de Inverno).
AUTO alternar entre Modo de exibição
durante 3 segundos até ON comparar no visor. A unidade
espectáculo sequencialmente a Hora / Data e Ano.
FMPLL RADIO
1 . Verifique se o fio da antena é totalmente desenrolada e
estendida.
2 . No modo de relógio normal, pressione o botão ON / OFF (1)
para ligar o rádio .
3) Pressione o botão UP / DOWN (4-9) para procurar a estação. Modo
de imprensa curto é a pesquisa MANUAL , pressione e segure que
o modo de busca é automática.
4 . Para guardar o canal , pressione o MEM / M + (3) 5 segundos
para entrar na memória da estação de rádio, em seguida,
pressione o Botão UP / DOWN (4-9) para selecionar o número do
canal desejado onde você deseja salvar a estação.
5 . Depois de selecionar o canal desejado, pressione o botão MEM
/ M + botão (3) para confirmar o local da memória.
6 . Para recuperar as estações de rádio, pressione o MEM / M +
botão (3) sequencialmente até que o canal desejado seja exibido.
FUNÇÃO SNOOZ
Quando o despertador tocar, poderá desliga-lo durante cerca de 8
minutos pressionando o botão SNOOZE (2). O despertador tornará a
tocar após os 9 minutos se não desactivar esta função.
1 (7) ou ALARM 2 (8) mais uma vez e no minuto dígitos pisca.
Pri
ma PARA BAIXO PARA CIMA / (3-4) para ajustar os dígitos dos
Botão ALARME 1 (7) ou ALARM 2 (8) mais uma vez e o BU (buzzer)
dígitos pisca. Prima PARA BAIXO PARA CIMA / (4-9) para ajustar
pressionado o Botão do modo de exibição de Alarme 1 (7) ou de
Alarme 2 (8) por 5 segundos até que os símbolos desaparecem da
1 . No modo de relógio normal, pressione o botão (4)
2 . Para sair desta função , pressione novamente o botão (4)
durante 3 segundos.
Page 26

Português Português47 48
FUNÇÃO SLEEP
1. Esta função permite o utilizador a adormecer ao som do rádio,
sem se preocupar em desligar o aparelho.
2. Pressione o botão SLEEP (2). O aparelho apresentará 90 minutos
no display. O rádio desligará após os 90 minutos.
3. Para reduzir o tempo SLEEP, pressione o botão SLEEP (2)
enquanto pressiona o botão SLEEP até visualizar os minutos
desejados para programar a função SLEEP.
4. Para desligar o aparelho, durante o período SLEEP, posicione o
botão SNOOZE/SLEEP/DIMMER (2).
CUIDADOSEMANUTENÇÃO
Para prevenir choques ou fogo, não posicionar o aparelho em lugares
úmidos com chuva, com a luz do sól, altas temperaturas e poeira.
Não usar produtos químicos, para a limpeza. Somente um pano
macio e um produto não abrasivo.
Não inserir pinos, fios ou objetos dentro do rolo de ventilação.
LIGAÇÃO AC
Para a sua segurança, ler as instruções antes do primeiro uso.
Alimentação 230V-50Hz - AC somente.
Esta unidade foi produzida para operar com acessórios de 230V-50Hz
- AC somente.
Ligá-lo em outra fonte, pode criar problemas. Verificar se as potências
correspondem ao indicado na etiqueta.
ESPECIFICAÇ£ES
Estas especificações estão sujeitas a alterações sem prévio aviso.
RESET ( operação dereposição )
Remova a bateria back-up de memória e cabo
por três minutos.
As especificações estão sujeitas a alterações sem aviso prévio.
Elimina çao Cor recta Des te Prod uto (Resíduo de Equipamentas Eléctricos e Electrónicos)
Estamarca, apresentada no produto ou na sua literatura indica
que ele não deverá ser eliminado juntamente com os residuos
domésticos indiferenciados no final do seu periodo de vida
útil. Para impedir danos ao ambiente e á saúde humana
causados pela eliminação incontrolada de resíduos deverá
separar este equipamento de outros tipos de residuos e
reciclá-lo de forma responsável, para promover uma
reutilização sustentável dos recursos materiais.
Os utilizadores domesticos deverão contactar ou o
estabelecimentoondeadquiriramesteprodutoouasentidades
oficiais locais para obterem informaçães sobre onde e de
que forma podem levar este produto para permitir efectuar
uma reciclagem segura em termos ambientais.
Os utilizadores profissionais deverão contactar o seu
fornecedor e consultar os termos e condições do contrato
de compra. Este produto não devera ser misturado com outros
residuos comerciais para eliminação.
Onda FM: 8
7,5 à 108
MHzAlimentação 230V, 50Hz
 Loading...