


AN505 User’s Manual
AN505
User Manual
Android PND

AN505 User’s Manual
Content
Precaution and Notice..................................................................................................1
In the Box......................................................................................................................1
ĉ
ĉ
. Basic Introduction...............................................................................................................1
1. Overview..................................................................................................................................1
2. Accessory Operations..............................................................................................................1
2.1 Charging by AC adapter..................................................................................................1
2.2 Charging by car charger ..................................................................................................2
2.3 Power supplied by built-in battery..................................................................................2
2.4 Install the car mount system ............................................................................................2
2.5 USB Cable usage ...............................................................................................................3
3. GPS Initial Start Up................................................................................................................3
Ċ
. Functions Operation...........................................................................................................4
1. Power On & Off..................................................................................................................4
1.1 Power on ............................................................................................................................4
1.2 Power off............................................................................................................................4
1.3 Reset the system ................................................................................................................4
2.
Main Interface.....................................................................................................................5
2.1 Navigation ………………………………………………………………………………..6
2.2 Music ..................................................................................................................................6
2.3 Gallery................................................................................................................................7
2.4 Video...................................................................................................................................9
2.5 E-Book…………………………………………………………………………………...10
2.6 FM………………………………………………………………………………………..11
2.7
Sound Recorder………………………………………………………………………12
2.8 Calculator………………………………………………………………………………..12
2.9 Clock……………………………………………………………………………………..13
2.10 Calendar………………………………………………………………………………..14
2.11 Email……………………………………………………………………………………14
2.12 Browser…………………………………………………………………………………15
2.13 Market............................................................................................................................16
2.14 Explorer………………………………………………………………………………...18
2.15 APK Installer…………………………………………………………………………..19
2.16 GPS info………………………………………………………………………………...20
3.
SETTING................................................................................................................................20
3.1 Wireless & networks……………………………………………………………………21
3.2 USB ……………………………………………………………………………………...23

AN505 User’s Manual
3.3 Sound ……………………………………………………………………………………24
3.4Display……………………………………………………………………………………25
3.5 Location and security…………………………………………………………………...26
3.6 Applications……………………………………………………………………………..27
3.7Accounts&sync…………………………………………………………………………..28
3.8 Privacy…………………………………………………………………………………...29
3.9Storage……………………………………………………………………………………29
3.10 Language & keyboard…………………………………………………………………29
3.11 Voice input & output…………………………………………………………………..30
3.12 Date & Time……………………………………………………………………………31
3.13 About device …………………………………………………………………………...31
3.14 Desktop function icon setting…………………………………………………………32
Specification................................................................................................................35

1
Precaution and Notice
¾ Any changes in GPS availability and accuracy, or in environmental conditions,
may impact the operation of your device. We can not accept any liability for the
availability and accuracy of GPS.
¾ The PND is used only as a navigation aid. It is not for precise measurement of
direction, distance, location or topography. The user must follow all traffic signs
and local regulations along the roads.
¾ GPS satellite signals cannot pass through solid materials (except glass). When
you are inside a tunnel or building, GPS position is not available.
¾ A minimum of 4 GPS satellite signals are needed to determine current location.
Signal reception can be affected by situations such as bad weather or wireless
devices or dense overhead obstacles (e.g. tall buildings).
¾ When you get out of the car, do not leave your PND on the dashboard or subject
to direct sunlight. The overheating of the battery may cause malfunctions and/or
dangerous conditions.
¾ For your own safety, do not operate the controls of the PND while driving. Do not
mount where the driver’s field of vision is blocked
In the Box
In the box you will find:
AN505 GPS Car charger
AC adapter(Optional) Bracket
Cradle USB cable
3G USB Dongle (Optional) User manual

AN505 User’s Manual
1
ĉ
ĉ
. Basic Introduction
1. Overview
1 LCD indicator
Indicator in red means the device is in charging, when
the device is fully charged, it will turn green.
2 Speaker Voice comes out from here.
3 Reset button Reboot the device.
4 Power switch Power on/off the device.
5 Earphone Jack Connect with the stereo earphone.
6 USB port
Connect and communicate with computer through a
MINI USB cable; used as charging port as well.
7 SIM card slot Insert the SIM card here.
8 COM Port Connect with external TMC or AV-IN.
9 MIC Support Sound Recorder
2. Accessory Operations
2.1 Charging by AC adapter
Please use the 5V, 2A AC adapter to charge the device for the first time. To maximize
the life of the battery, the device must be full of charge for the first time.
1. Plug the adapter’s USB port into the device’s USB port on its right-side panel
2. Plug the adapter into the main supply socket.
3. The charging indicator will light. When the unit is fully charged, the red indicator
will turn green.

AN505 User’s Manual
2
2.2 Charging by car charger
1. Plug the car charger into the device’s USB port on its side panel.
2. Plug car charger’s the other end into the car igniter.
3. To avoid damage caused by instant current when igniting the car, please plug in
the car charger after ignition.
2.3 Power supplied by built-in battery
When disconnect with external adapter, the device is powered by its built-in
Li-polymer battery. The icon [ ] on the main menu shows the current remaining
battery volume. When connect with external adapter, the device is powered by the
external adapter.
2.4 Install the car mount system
1. Take off the protected film on the bottom of the suction. Then put the bracket onto
a suitable location of your windscreen or side window, make sure the window or the
suction or windscreen is clean and without water and some dirty things inside, fixing
the stand on that position. Never place the stand where the driver's field of vision is
blocked. If the car's windshield is tinted with a reflective coating, an external antenna
(optional) may be needed to route the roads. The external antenna is stick to the top of
the car through the window. When closing the car window, be careful not to pinch the
antenna cable (Cars with an anti-jam window design may automatically leave
adequate space as needed.).
2. Install the holder into the car bracket, and then put PND into the holder.
3. To remove the bracket, press 2 side buttons, pull left lightly and then take off the
suction. If the bracket still doesn't detach from your windscreen, tug gently on the

AN505 User’s Manual
3
clear plastic tab at the edge of the suction mount, to break the vacuum seal.
2.5 USB Cable usage
The USB cable is provided for system upgrades. This USB cable will work on the PC
either with Microsoft Active Sync® or as a mass storage media. You can select the
mode in the “System-Sys Info-USB” menu.
3. GPS Initial Start Up
For the first time to start up the navigation program, the device shall be operated in an
open area without obstructions.
Hold the device still until it receiving up to 4 satellite signals, and then you can start
your program as you wish.
Note:
There are various ways for searching a location on the map or planning your routing.
See navigation user manual which guides you through the process of running this
function in detail
Rotate screw to lock
it onto car glass
Install the holder into
the Car cradle
Use the two screws to adjust the
angle and direction of the PND

AN505 User’s Manual
4
Ċ
Ċ
. Functions Operation
1. Power On & Off
1.1. Power on
Longtime press the power switch on the top panel to power on the device.
Remarks: When the device is transported from one place to another, it could be
powered on only after it adapts to the outside environment, because the great
fluctuations in humidity and moisture may lead internal short circuit.
1.2. Power off
Longtime press the power switch on the top panel to power off the device.
1.3. Reset the system
When no response reflected from the device, press the reset button on the rear panel to
reset the system.
Remarks: The info which is not saved timely will be lost when reset the system. Please save your
data timely.
2. Main Interface
Power on the device, the main menu screen will be displayed as following:
Enter into Desktop:

AN505 User’s Manual
5
2.1 Navigation
Double tap the icon “Navigation” to start the navigation program.
Note: During navigation or other operations, quickly press the MENU button, “Main
Menu” screen will be displayed.
2.2 Music
Tap the icon “ ” on the Desktop, enter into the following interface:
Click your desired file and enter into the following playing interface:
Return to the main menu
Artists
Albums
songs
Playlists
Now playing

AN505 User’s Manual
6
2.3 Gallery
Tap the icon “
” on the Desktop, and enter into the following interface:
Tap the” flash (9)”, enter into the following interface:
Backward playing
Stop
Forward playing
Playing list
Random playing
Repeat playing

AN505 User’s Manual
7
Tap the photo, enter into the following photo interface:
Zoom in
Zoom out
Slideshow
Menu
Delete
Rotate right

AN505 User’s Manual
8
2.4 Video
This Video support following format: MKVǃAVIǃRMǃRMVBǃMP4ǃMOVǃVOBǃDATǃ
FLVǃ3GP,etc.
Tap the icon “Video” on the Desktop, and enter into the following interface:
Click your desired video file and enter into the following interface:
Rotate left
Crop
Set as
Details
Return to the previous menu
Return to the main menu
Add bookmark
Light adjust

AN505 User’s Manual
9
Tap the icon “ ”, set play mode, and enter into the following interface:
Tap “Play mode”, select single, repeat or return. As below interface:
2.5 E-book
Tap the icon “E-book” on the Desktop, and enter into the following interface:
Backward playing
Forward playing
Stop
Video format:16˖9 /4˖3/ recovery
Exit
Media volume -
Media volume +
Menu

AN505 User’s Manual
10
Click “ ”, and enter into the following interface:
Click the upper right corner, turn to next page, as blow interface:
2.6 FM Transmitter
Click the “ ” button, and enter into the following interface:

AN505 User’s Manual
11
click “-”, frequency will decrease 0.1MHZ
click “+”, frequency will add 0.1MHZ
FM frequency
FM is on, the speaker is muted.
2.7 Sound Recorder
Tap the icon “ ” on the desktop, and enter into the following interface:
2.8 Calculator
Tap the icon “ ” on the desktop, and enter into the following interface:
Start to record
Stop
Playing record

AN505 User’s Manual
12
Tap the icon “ ” on upper right corner and enter into “Advanced panel”
interface:
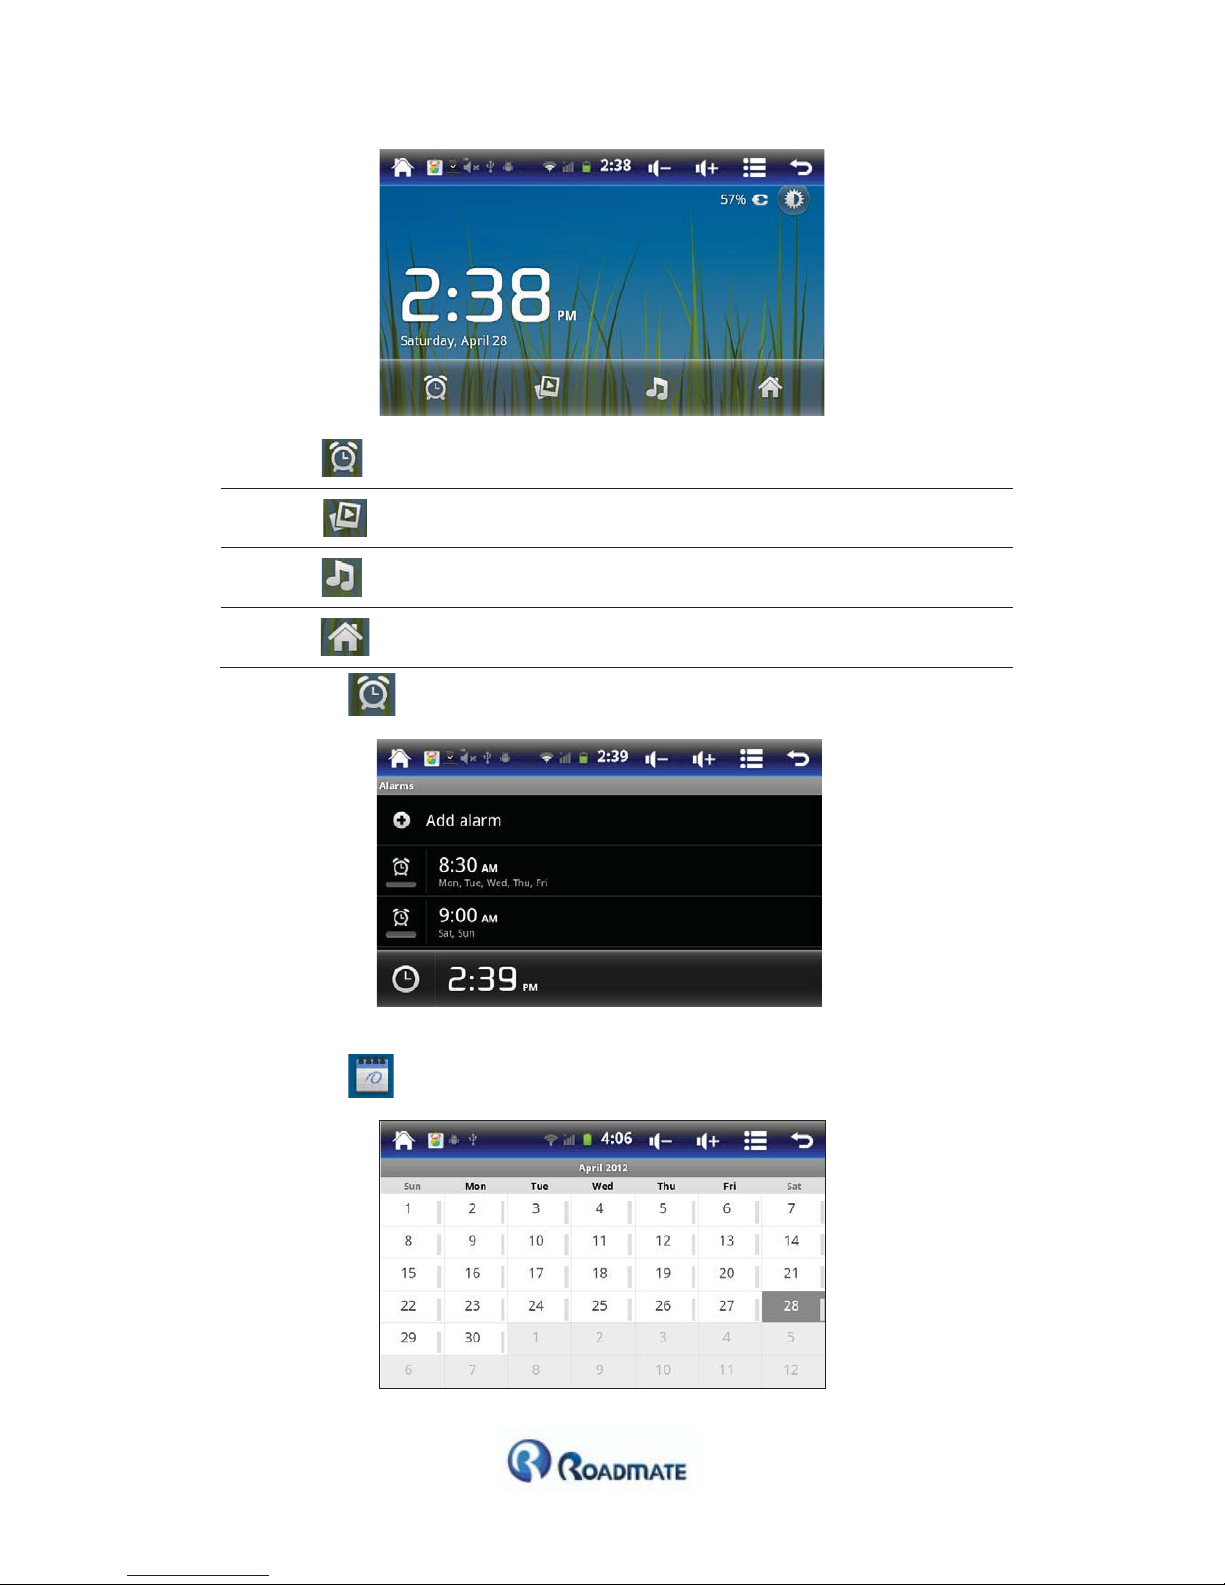
2.9 Clock
Tap the icon “ ” on the desktop, and enter into the following interface:
AN505 User’s Manual
13
Enter into Alarms interface
Enter into Gallery interface
Enter into Music interface
Return to the main menu
Tap the icon “ ”, enter into the “Alarm” interface:
2.10 Calendar
Tap the icon “ ” on the desktop, enter into the calendar interface:

AN505 User’s Manual
14
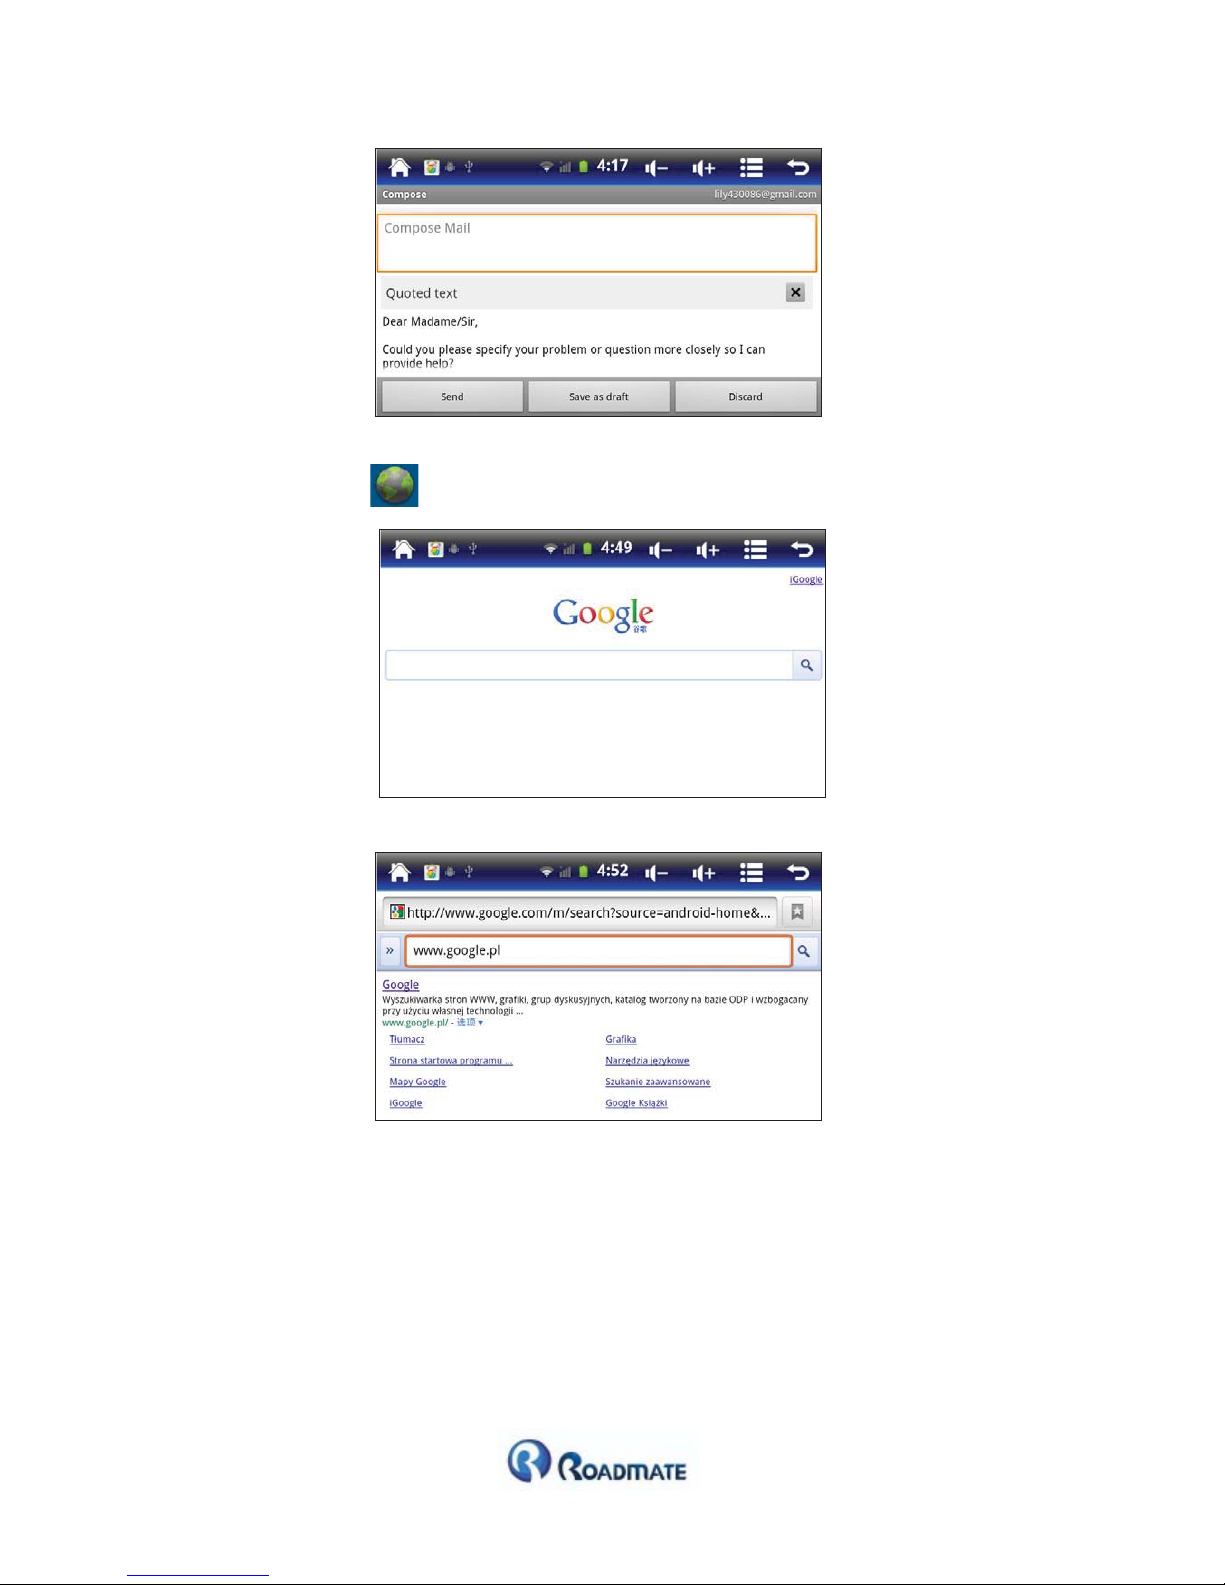
2.11 Email
1. Tap the icon “
” on the desktop, enter into following email interface:
2. Fill up email address and password, enter into following Inbox interface.
3. Click an email, check the email content.
4. If need reply email, enter into following interface.
AN505 User’s Manual
15
2.12 Browser
1. Tap the icon “ ” on the main menu, enter into following interface:
2. Fill up website, enter into following Inbox interface.
3. Surfing web page, c lick zoom out or zoom in buttons to decrease or increase the
font size.

AN505 User’s Manual
16
2.13 Market
1. Tap the icon “ ” on the main menu, enter into following interface:
2. The first time to enter into “Market”, please create an account or sign in a Google account.
3. Enter into “Market”:

AN505 User’s Manual
17
4. Enter into “APP”, select your desired application files and download them.
5. Enter into “Games”, select your desired games and download them.
6. Enter into “search”, select your desired files and download them.

AN505 User’s Manual
18
7. Check the download states, finished application will be showed on desktop.
2.14 Explorer
1. Tap the icon “
” on the desktop, selectǏSD Cardǐ,ǏInternal MemoryǐorǏUSBǐ,
operate files.
2: Select a file , you can edit it as following interface:

AN505 User’s Manual
19
2.15 APK Installer
1. Tap the icon “ ” on the desktop, and enter into the following interface:
2. Install: install APK files from Internal Memory or SD card
3. Manage: manage all application on desktop.

AN505 User’s Manual
20
3.1 You can select one application, operate as following interface:
-Launch˖run the application
- Export˖export the application to TF card
- Uninstall˖uninstall the application
-Cancel˖cancel the operation
2.16 GPS info
1. Tap the icon “ ” on the desktop, and enter into the following interface:
On the outdoor, Cold Start or Warm Start, it will get GPS and GLONASS satellites.
3. Setting
Tap the icon “ ” on the desktop, and enter into the following interface:

AN505 User’s Manual
21
3.1 Wireless & networks
Tap the icon “ ” on the settings, and enter into the following interface:
a. Tap “Wi-Fi settingsā, enter into following interface, system will automatically
find WIFI networks.
b. Setting IP address and connect:
Automatic & Manual distribution IP address˖
Tap the icon “ ” on upper right corner, enter into “Advanced”.

AN505 User’s Manual
22
Don’t tick off “ Use static IP”, enter into following “automatic distribution IP address” interface˖
Tick off “ Use static IP”, enter into following “manual distribution IP address” interface˖
After setting, Tap the icon “ ” on upper right corner, and then tap “ ”to save.

AN505 User’s Manual
23
Tap the WIFI network name, e.g. “PVE5”. Fill in password, then connect.
After connected, it will shows“ ”on desktop.
3.2 USB
Tap the icon "
" and enter into the following “USB mode” interface:

AN505 User’s Manual
24
Select “OTG” or “Device only”, then pull down the status bar, enter into following int erface:
1: USB storage: tap “USB connected”, turn on USB storage, enter into following interface:
2:
Synchronous: click “USB debugging connected”, tick off “stay awake” and “Allow mock
locations”, device will synchronous with PC.
3. 3G: Select “Host only”, then connect external 3G Dongle on USB port, when upper status bar
show “ ”, 3G connected.
3.3 Sound
Tap the icon “ ” on the settings, and enter into the following interface:

AN505 User’s Manual
25
a. [Silent mode]: tick off the silent mode, device will be in silent state.
b. [Volume]: set the Ringtone, Media, Alarm volume as following interface:
C. [Notification ringtone]: set ringtone as following interface:
d. [Audible touch tones]: play tones when using dial pad
e. [Audible selection]: play sound when making screen selection
f. [Screen lock sounds]: play sounds when locking and unlocking the screen.

AN505 User’s Manual
26
3.4 Display
Tap the icon “ ” on the settings, and enter into the following interface:
a. [Brightness]: adjust the screen brightness as following interface:
b. [Auto-rotate screen]: tick off auto-rotate screen, when rotate device, the screen will ch ange
direction.
c. [Animation]: select no animations or some animations or all animations.
d. [Screen timeout]: select 10 minutes or 30 minutes or never timeout.

AN505 User’s Manual
27
3.5 Location and security
Tap the icon “ ” on the settings, and enter into the following interface:
[Use wireless networks]˖see location in applications using wireless networks.
[Use GPS satellites]˖when locating, accurate to street level.
[Set up screen lock]˖lock screen with a pattern, PIN, or password
3.6 Applications
Tap the icon “ ” on the settings, and enter into the following interface:

AN505 User’s Manual
28
Manage applications, Running services, and storage use:
Battery use:
Development:
3.7Accounts&sync
Tap the icon “ ” on the settings, and enter into the following interface:

AN505 User’s Manual
29
Add account:
Remove account:
3.8 Privacy
Tap the icon “ ” on the settings, and enter into the following interface:
Factory data reset:

AN505 User’s Manual
30
3.9 Storage
Tap the icon “ ” on the settings, and enter into the following interface:
3.10 Language & keyboard
Tap the icon “ ” on the settings, and enter into the following interface
Select language:

AN505 User’s Manual
31
Keyboard settings:
3.11 Voice input & output
Tap the icon “ ” on the settings, and enter into the following interface
Text-to-speech settings:

AN505 User’s Manual
32
3.12 Date & Time
Tap the icon “ ” on the settings, and enter into the following interface
3.13 About device
Tap the icon “ ” on the settings, and enter into the following interface

AN505 User’s Manual
33
3.14 Desktop function icon setting
Tap the icon “ ” on the upper right corner, and enter into the following interface:
A) Add and Delete desktop function Icon
Tap the icon “ ”, add to home screen.
Select Shortcuts˖

AN505 User’s Manual
34
Choose Widget:
Select Folder:
Delete or Remove: Long press icon, then draw it to other place or recycle bin.
B) Wallpaper setting: Tap the icon “ ”, select wallpaper from gallery, live
wallpaper or wallpaper.

AN505 User’s Manual
35
Saves as wallpaper:
C) Edit: Tap the icon “ ”, and enter into below interface:
Edit or remove the screen and all the content:

AN505 User’s Manual
36
Specification
Manufacturer: C N S Marketing (Pty) Ltd
Manufactured & Distributed by
2 Noble Road, Bordeaux,
Randburg
Tel: + 27 117816001
Fax: + 27 117816000
CPU Cortex-A8 1.2GHz
Memory Flash 4G/8G/16 MLC Flash
Memory RAM DDR3 512M Up to 1G
Screen 5” TFT LCD screen, 800*480 pixel, with five points capacitive touch screen
Navigation Dual navigation system (GPS +GLONASS) ,cold start only takes 40s
Entertainment More than 300,000 android based applications
WIFI Embedded WIFI, 802.11b/g/n
3G External 3G, supports WCDMA/EVDO/TD-SCDMA format
OS Android 2.3
USB USB2.0 Slave or OTG
Graphic processing Embedded OpenGL ES2.0 Accelerated 3D Graphics
Video decoding 1080p @30fps video support hardware decoding
G-sensor G-sensor 360 degree screen rotation
Battery Built-in Li-Polymer battery, 1200mAH
Speaker Build-in loud speaker , 1W@8ohm
Headphone 3.5mm jack, stereo, 20 mW/32ohm
Temperature Operation :0 °C 60 °C; Storage: -20 °C 60 °C
Operating Humidity Operation: 20% 80%(40°C); Storage: 20% 80%˄40°C˅
Dimension & weight 133(L)*83(W)*10(H)mm, 198g

AN505 User’s Manual
37
www.roadmategps.co.za
 Loading...