

Page 1
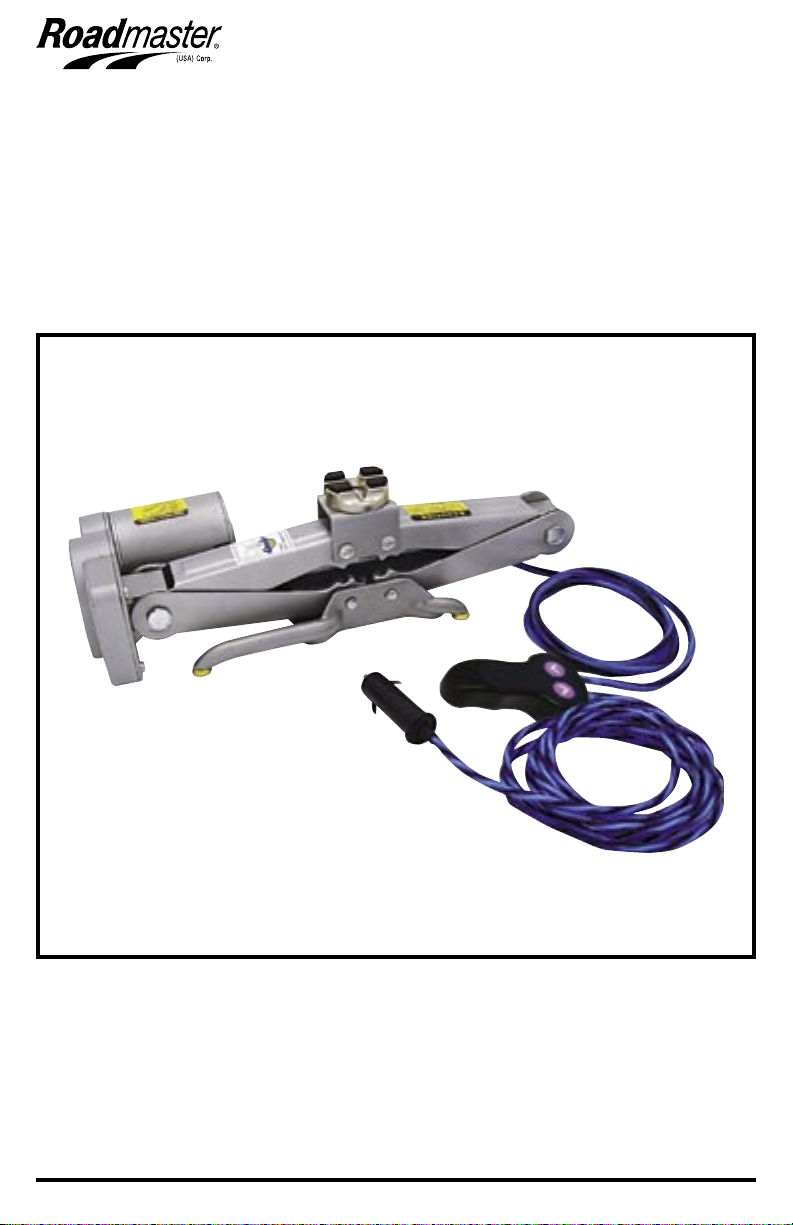
REJ2000
One Ton/2,000 Lbs.
12 Volt DC Electric Car* Jack
with Hand Held Controller
* For Compact To Medium Size Cars Only
Page 2

Page 3

Read First!
Important Safety Instructions for
Operation, Maintenance, and Inspection
1. Read All of The Instructions
All of the safety and operating instructions should
be thoroughly read and understood before operating the jack. If the person operating the jack
is not fluent in English, the product and safety
instructions shall be read to, and discussed with
the operator in the operator’s native language
by the purchaser/owner or his designee. The
operator should comprehend the manuals' contents. All operating and safety instructions for
this product should be followed. If the jack does
not operate according to the product operating
instructions, immediately stop use and contact
Roadmaster at 1-800-445-1797. The safety and
operating instructions should be retained for
future reference.
2. Observe All Warnings
Failure to follow all warning labels on the product and warnings in the operating instructions
may result in property damage, personal injury,
or death.
3. Inspection and Maintenance
Visually inspect the jack and all of its components before each use for abnormal conditions
such as cracked welds, leaks, and damaged,
loose, or missing parts. Do not attempt to service this unit yourself as opening or removing
covers may expose you to dangerous voltage
or other hazards. It is recommended that the
jack be inspected annually by Roadmaster, and
that any defective parts, decals, or safety labels
or signs be replaced with supplier's specified
parts. If the jack is believed to have been subjected to an abnormal load or shock, it should be
inspected immediately by Roadmaster. Contact
Roadmaster Customer Service toll-free at 1800-445-1797 for inspection, repair or replacement.
4. Damaged Jack or Components
If the jack, is damaged in any way, found to
be worn, or operates abnormally, remove the
jack from service, and contact Roadmaster
Customer Service toll-free at 1-800-445-1797
for repair or replacement. The jack should not
be operated until repairs are made.
5. Alterations, Attachments and Accessories
Because of potential hazards associated with
this type of equipment, no alterations shall be
made to the product. Only attachments and/or
adapters supplied by the manufacturer shall be
used. Any modification or alterations to the jack
or any of its components will void the warranty.
6. Unstable Ground or Base Warning
Do not use this product on uneven or unstable
ground. Do not use this product near or in water.
Avoid rain, mud, and puddles. Watch out for soft
highway shoulders and/or very hot pavement,
which may not support the jack. Place wheel
chocks (not included) in front of and behind a
wheel diagonally opposite of the vehicle’s wheel
being raised by the jack.
7. Power Sources
This product should be operated only by a
12 Volt DC power source. If you are not sure
what type of power is supplied by your vehicle,
consult a certified automotive technician or the
vehicle’s manufacturer. If you intend to use an
external battery or other power source, refer to
the operating instructions of the power source.
8. Grounding or Polarization
This product is polarized, this feature is to insure
that the jack operates properly. This is a safety
feature. Do not modify the wiring of this unit in
any way.
9. Power Cord Protection
Power supply cords should be routed so that
they will not be walked upon or pinched by items
placed upon or against them. Look for damage where the cords attach to plugs, electrical
receptacles, and at the point where they exit or
attach to the unit. If you find any damage, do not
use the jack.
10. Replacement Parts
Contact Roadmaster customer service tollfree at 1-800-445-1797 for replacement parts.
Unauthorized substitutions may result in fire,
electric shock, or other hazards.
11. Safety Check
Upon completion of any service or repairs to this
unit, ask the service technician to perform safety
checks to determine that the unit is in proper
operating condition.
THIS DEVICE CONFORMS TO
ASME PALD - 2003 (Rev. 1997)
1
Page 4

Instructions
Read the following instructions completely
before attempting to jack your vehicle. If
you do not understand these instructions,
or are unsure of your abilities to perform
any of the following steps, call for professional help.
WARNING: Examine the jack and all of
it’s components for signs of damage or
abuse before using. If the jack is damaged DO NOT USE.
Never place fingers or objects into the
moving parts of the jack.
WARNING: Never use the jack on soft
soil such as sand or loose gravel, on
highway shoulders, or very hot pavement, which will not support the jack. Do
not raise a car unless you're on a HARD
& LEVEL surface.
How to Raise a Car
For Compact to Medium Size Cars Only!
WARNING: It is NEVER safe to get
under a car that's supported only by a
jack. Use jack stands if the car will be
off the ground for any period of time,
if you plan to get underneath it, or if
you'll be working or making repairs
on the car.
1. Park the car on level ground and
put on the parking brake. Place manual
transmission cars in first gear or reverse
and put automatic transmissions in park.
Make sure everyone is out of the car
before raising it with the jack.
2. Unpack jack from carrying case.
Unwind the cables from the jack and
handheld controller.
3. Place wheel chocks (not included) in
front of and behind a wheel diagonally
opposite of the vehicle’s wheel being
raised by the jack.
4. Place the jack under the car's frame
nearest the wheel to be raised. Consult
your vehicle’s owner's manual for the
safest place to put the jack. Some cars
have special jacks and slots on the side
of the car or bumper for the jack .
6. When the jack is
in place, and the lug
nuts have been loosened, insert the 12
Volt cigarette lighter
adaptor into the vehicle’s cigarette lighter
socket.
Move away from
the vehicle and then
press the “UP” button until the jack is
extended enough to
properly place under
the vehicle’s frame.
Raise the jack high enough to either
replace a flat tire or place the car on a
jack stand (a stable, heavy duty, temporary stand at a fixed height).
If you're changing a flat, don't stop raising the car when the flat tire is just off the
ground. A fully inflated standard spare tire
will require more ground clearance.
DOWN
Hand Held Control
UP
8. When you're finished, press the
“DOWN“ button to lower the jack. Be
cautious and go slowly. If you've used a
jack stand, before lowering the jack you
will need to raise the car slightly to pull
2
Page 5

the stand from its place.
Twist Off
10 Amp Replacement Fuse
Discard Bad Fuse
After vehicle is firmly on the ground,
remove the jack and tighten lug nuts on
the spare replacement tire.
How to Change a Tire
1. Choose a safe place to change the
flat tire. Pull off the road so that you are
safely out of the flow of traffic. Try to stop
in a straight part of the road so that passing traffic can see you from a distance.
Stop the car on level ground, it is unsafe
to raise a car on an incline. Turn on your
Hazard lights.
2. Take out the tools for changing a flat
tire from the car, and place them within
reach of the flat tire.
Place a chock (not included) or a brick
behind and in front of the wheel diagonally opposite one being raised up by
the jack.
3. Remove the hubcap, if necessary.
Consult your owners' manual for proper
instructions on removing the hub caps.
USING THE LUG WRENCH, BEGIN
TO LOOSEN THE LUG NUTS. DO NOT
REMOVE THE LUG NUTS AT THIS
TIME, ONLY LOOSEN THEM.
4. Consult your owner’s manual for the
best position for the jack. The jack will
usually contact the car at a small plate on
the frame of the car. This plate will usually
be located just in front of the rear tires,
and just behind the front tires.
Position the jack under the car, and raise
the jack until it contacts the frame.
Check that the jack is properly positioned,
if the jack is not at a right angle (90º),
lower the jack and reposition it.
5. Extend the jack until the tire is about 6
inches off the ground. When raising the
car, remember a full size spare tire is
fully inflated and will require more ground
clearance, to be placed on the car. A
“donut” spare tire may be smaller.
6. Remove the lug nuts from the bolts,
and put them aside. Grab the tire. It
is easiest to grab the tire at the "nine
o'clock" and "three o'clock" positions.
Pull the tire straight toward you and off
the car.
7. Position the spare tire in front of the
wheel well. Align the holes in the rim of
the spare tire with the bolts on the car.
Lift up the spare tire and position it on
the threaded bolts. Push the tire onto the
car until it cannot go any farther. Replace
the lug nuts before lowering the car, making them finger-tight. Do not tighten fully.
Only finish tightening the lug nuts with the
lug wrench when the car is on the ground.
Vigorous movement may cause the car to
come off of the jack.
8. Lower the car with the jack until the car
is again resting on all four tires.
Tighten the lug nuts, starting with one,
then tightening to the one opposite it;
repeat with the rest of the lug nuts.
Ensure the lug nuts are all tight before
driving the vehicle.
9. Return the jack and lug wrench in their
proper locations. Place flat tire in trunk.
How to Change the Fuse
1. Hold the body of the cigarette lighter
plug and unscrew the tip by turning it
counter clockwise.
Remove the fuse to examine its condition.
2.
3. If the filament is broken, replace with
the supplied replacement 10 Amp fuse or
a fuse of the same amperage rating.
Cleaning The Unit
Unplug this product before cleaning. Do
not use petroleum distillate, liquid cleaners or aerosol cleaners. Use a damp cloth
or sponge for cleaning.
3
Page 6
Specifications
•
Study, understand, and follow all instructions before operating this device.
• DO NOT
exceed rated capacity.
•
Use
ONLY
on hard level surface.
•
Use for emergency tire changing
ONLY
.
• NEVER
get beneath the vehicle when it is supported by the jack.
•
Failure to heed these warnings may result in personal injury
and/or property damage.
•
Lift
ONLY
on areas of the vehicle as specified by the vehicle manufacturer.
•
Follow tire changing procedure as per the vehicle manufacturer’s owner
manual
•
Activate the hazard warning flasher, turn off ignition, set parking brake,
move automatic shift selector to park position. In the case of a manual
transmission, move gear selector into reverse position. In addition, the wheel
diagonally opposite the wheel being lifted shall be chocked in both
directions.
•
No alterations shall be made to this product.
WARNING
!
WARNING
!
Voltage
13.5 V +/- 1.0 V
Current
10 Amp Max.
Lift
Total Lift 10"
Range from 4.125" to 14.125"
(+/- 0.125")
Jack Dimensions
15.6" X 6.4" X 4.1" (+/- 0.125")
39.6 cm X 16.3 cm X 10.4 cm (+/- 0.3 cm)
Limited Warranty
ROADMASTER (USA) CORP. products are designed and manufactured to provide a high level of trouble-free performance. ROADMASTER
(USA) CORP. warrants, to the original purchaser, that its products are free from defects in material and workmanship for 30 days from the date
of original purchase. As part of our commitment to product excellence, ROADMASTER (USA) CORP. routinely improves the designs, materials
or production methods of its existing products. Because it is impractical to publicize all changes in every product, we reserve the right to make
such changes without notice.
CONDITIONS OF WARRANTY:
If during the 30-day warranty period your new product is found to be defective, ROADMASTER (USA) CORP. will repair such defect, or replace
the product, without charge for parts or labor subject to the following conditions:
1. All repairs must be performed by ROADMASTER (USA) CORP. in Eatontown, New Jersey.
2. The equipment must not have been altered or been damaged through negligence, accident, or improper operation.
3. The replacement of parts are exempted from this warranty when replacement is necessary due to normal wear and tear.
4. All warranty claims must be accompanied by a copy of the sales receipt or bill of sale.
5. Repair or replacement parts supplied by ROADMASTER (USA) CORP. under this warranty are protected only for the unexpired portion of the
original warranty.
6. In the case of car stereos, this warranty does not extend to the elimination of car static or motor noise; correction of antenna problems; costs
incurred for the removal or reinstallation of the product; damage to tapes, speakers, accessories or car electrical systems.
7. ROADMASTER (USA) CORP. will not be responsible for any charge incurred for installation.
OWNER’S RESPONSIBILITIES:
ROADMASTER (USA) CORP. will make every effort to provide warranty service within a reasonable period of time.
SHOULD YOU HAVE ANY QUESTIONS ABOUT SERVICE RECEIVED, OR IF YOU WOULD LIKE ASSISTANCE IN OBTAINING SERVICE,
PLEASE CALL TOLL-FREE 1-800-445-1797, 8:30am - 4:30pm EST.
In order to provide you with the proper warranty service, we request that you adhere to the following procedure:
1.Include a copy of your sales receipt or bill of sale with your unit when it is returned for warranty service.
2. If it is necessary to return your product for service, please return it securely packed, preferably in the original shipping carton, and freight and
insurance prepaid to the following address:
NEW JERSEY 07724.
3. Please include a detailed explanation of the problem you are having.
4. If your product is found by ROADMASTER (USA) CORP. to have a defect in material or workmanship, within the warranty period, it will be
repaired or replaced at no charge and returned to you prepaid. Where permitted by Iaw, ROADMASTER (USA) CORP.'S liability shall be limited
to that set forth in this warranty. This warranty shall be the exclusive remedy of the purchaser.
ROADMASTER (USA) CORP. makes no other warranty of any kind, expressed or implied; and all implied warranties, are hereby disclaimed by
ROADMASTER (USA) CORP. and excluded from this warranty, ROADMASTER (USA) CORP., the manufacturer, distributor and seller shall not
be liable for any injury, loss or damage, incidental or consequential, arising out of the use or intended use of the product.
ROADMASTER (USA) CORP., SERVICE DEPARTMENT, 6 G INDUSTRIAL WAY WEST, EATONTOWN,
Case Dimensions
16.5" X 8.4" X 5.0" (+/- 0.125")
41.9 cm X 21.3 cm X 12.7 cm (+/- 0.3 cm)
Weight, Jack
9.8 lbs, 4.4 kg
Weight, Jack & Case
11.2 lbs, 5.1 kg
4
Page 7

Page 8

©Copyright 2005 Roadmaster (USA) Corp. Ver.1 011405 Printed in China 00000
 Loading...