

Page 1
LD2000 Quick Start Guide
hank you for purchasing the SeaHawk LD2000. This guide describes
how to install the LD2000.
If you need further assistance, contact RLE Technologies on our
website at
http://www.rletech.com/ (go to the Support Link) or by calling
970.484.6510, Option 2.
1Supplies for Installation
Included with the LD2000
Wall mount kit (or purchase optional enclosure, LD-ENC)
Cross over cable (blue with yellow ends)
15ft. (4.57m) leader cable
End-of-line terminator (EOL)
Sold Separately
SeaHawk Leak Detection Cable
24VAC power supply (part #WA-AC-24-ST) or 24VDC power supply (part
#PSWA-DC-24-ST)
Information You Need
Consult with your IT administrator to determine the following network settings for
the LD2000:
IP address ___________________________________
Subnet mask ___________________________________
Default gateway__________________________ _________
2Installing the SeaHawk LD2000
The LD2000 is a wall mounted device. Using the wall mount kit (included) or the
LD-ENC wall-mountable enclosure (sold separately), mount the device to the wall
in a convenient location.
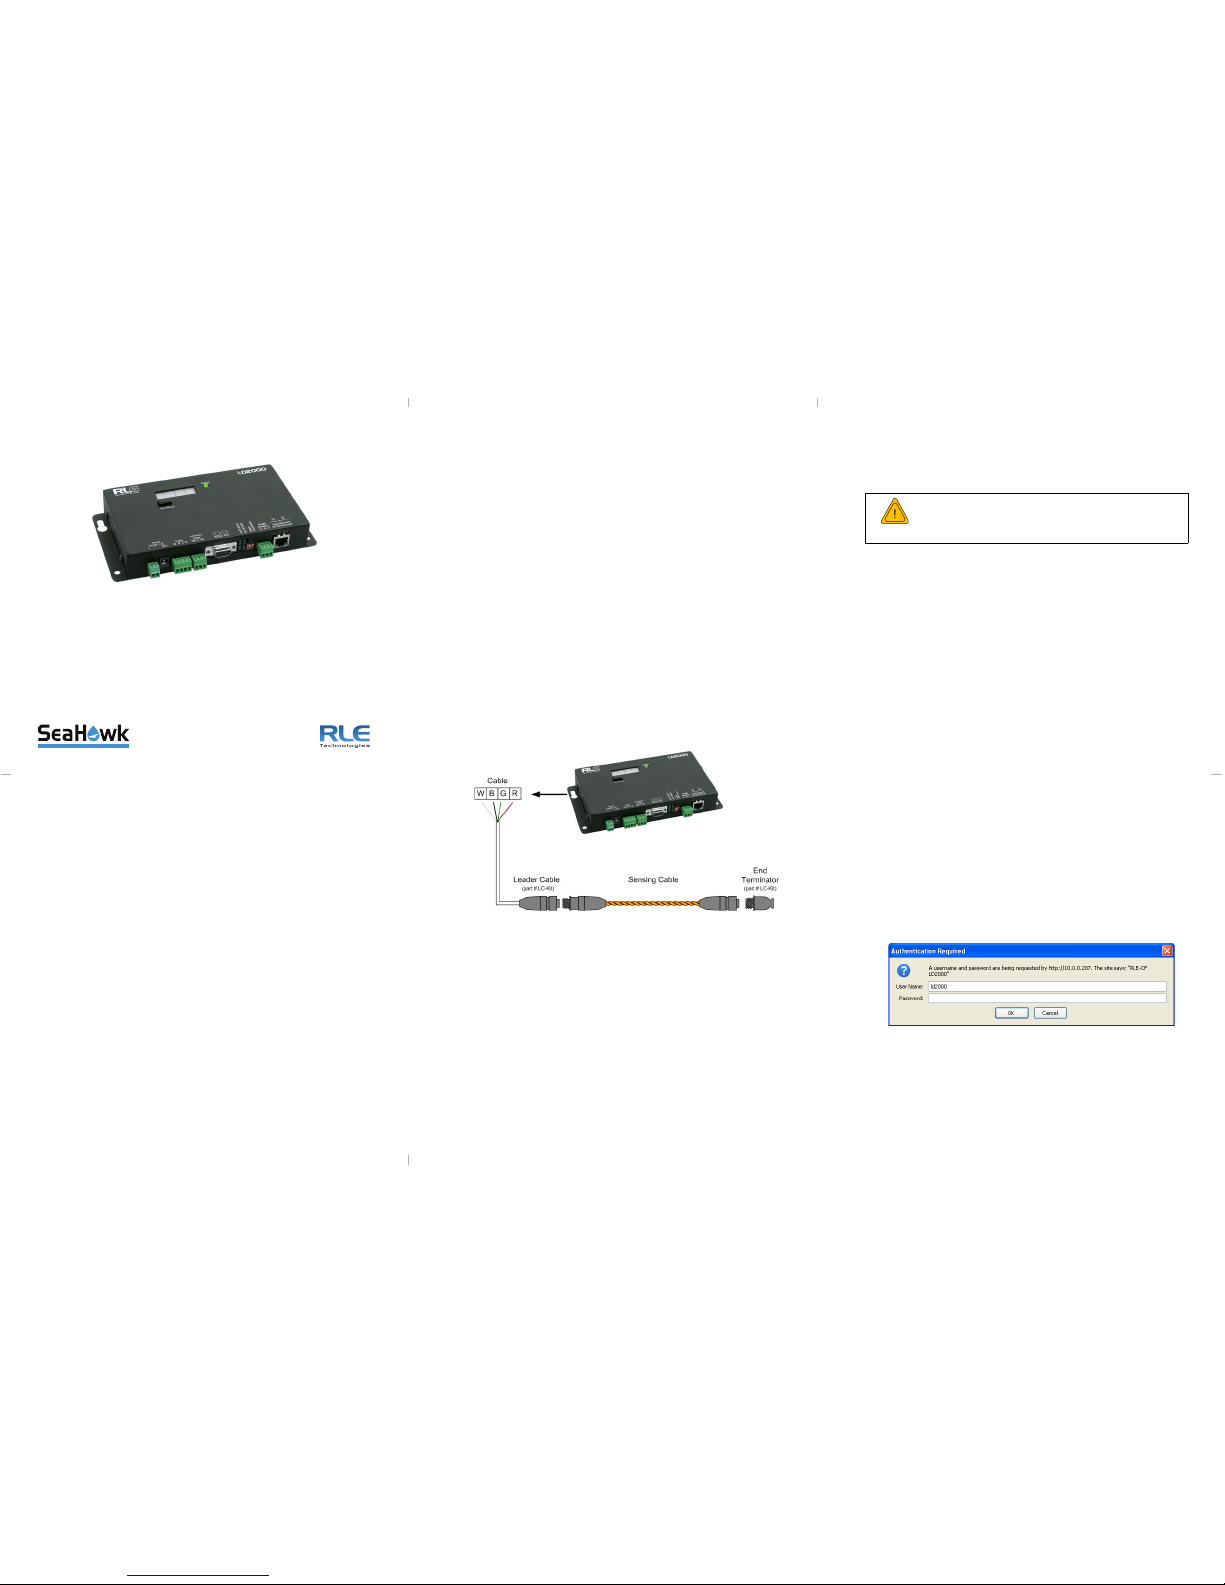
3Connecting the Water Leak Detection Cable
The LD2000 includes a 15-foot (4.57m) leader cable and an end-of-line (EOL)
terminator. To connect the leader cable:
1
Locate the stripped end of the leader cable and the terminal block labeled
“Cable” on the LD2000.
2
With the screws of the terminal block connector facing up, connect the
leader cable wires in this order from left to right: white, black, green, and
red.
Once the leader cable is plugged into the terminal blocks, it is ready to be
connected to the sensing cable. Perform these steps:
3
Unscrew the EOL terminator from the end of the leader cable.
4
Attach the first length of sensing cable to the leader cable.
5
Route the sensing cable according to a cable layout diagram; refer to the
LD2000 User Guide for details about the layout diagram.
6
Secure the EOL terminator on the unoccupied end of the sensing cable.
4Applying Power to the LD2000
The LD2000 operates on either 24VAC or 24VDC power.
1
Run a power supply to the location of the unit.
Note: RLE recommends the use of a 24VDC wall adapter power supply
(part # WA-DC-24-ST), which is available separately.
2
The LD2000 begins booting when power is applied.
3
Wait approximately one minute for the LD2000 to start up. No alarm should
be present. If an alarm is present, consult the LD2000 User Guide at
http://www.rletech.com.
5Accessing the Configuration Menu
You will use the Configuration Menu to configure communications for the
LD2000.
1
Plug the crossover cable (included with the LD2000) into the computer that
will be used to configure the LD2000.
Note: This cable is not intended to be connected to a network hub.
2
Connect the other end of the crossover cable to the Ethernet port on the
back of the LD2000.
Note: Alternatively, you could use the LD2000’s EIA-232 interface to
access the LD2000. Refer to the LD2000 User Guide (available at
http://www.rletech.com) for instructions.
3
Write down the computer’s current IP address, subnet mask, and default
gateway. Change these items temporarily so that the computer can
communicate with the LD2000.
LD2000 default IP address: 10.0.0.188
LD2000 default subnet mask: 255.255.255.0
4
Access the LD2000 through a Web browser by typing the LD2000’s default
IP address (10.0.0.188) into the location bar and pressing Enter.
Enter the following:
Default User Name: ld2000 (case sensitive)
Default Password: (No default password. Leave this field blank.)
Once you enter this information, the home page for the LD2000’s web
interface displays. Continue to the following section to configure network
communication for the LD2000.
T
WARNING
A dedicated circuit breaker must be provided within
close proximity to the LD2000 and be clearly marked as
the disconnecting device for the LD2000 leak detection
controller.
Page 2
©2010 RLE Technologies. All rights reserved. RLE is a registered trademark, and
SeaHawk, Falcon, and Raptor are trademarks of RLE Technologies. All other trademarks
or registered trademarks are the property of their respective companies. Although the
information contained in this document is believed to be accurate and correct, RLE
Technologies assumes no responsibility, and disclaims all liability, for any damages
resulting from the use of this information or any error or omission in this document. RLE
Technologies does not warrant, guarantee, or make any representations as to the
performance, fitness for use, safety, or reliability of any existing or future wiring,
equipment, additions or modifications to equipment, or any other component of the original
or modified system. Specifications are subject to change without notice.
Part number 110052 Rev. 2.0 6/2010
104 Racquette Drive
Fort Collins, CO 80524
970.484.6510
www.rletech.com
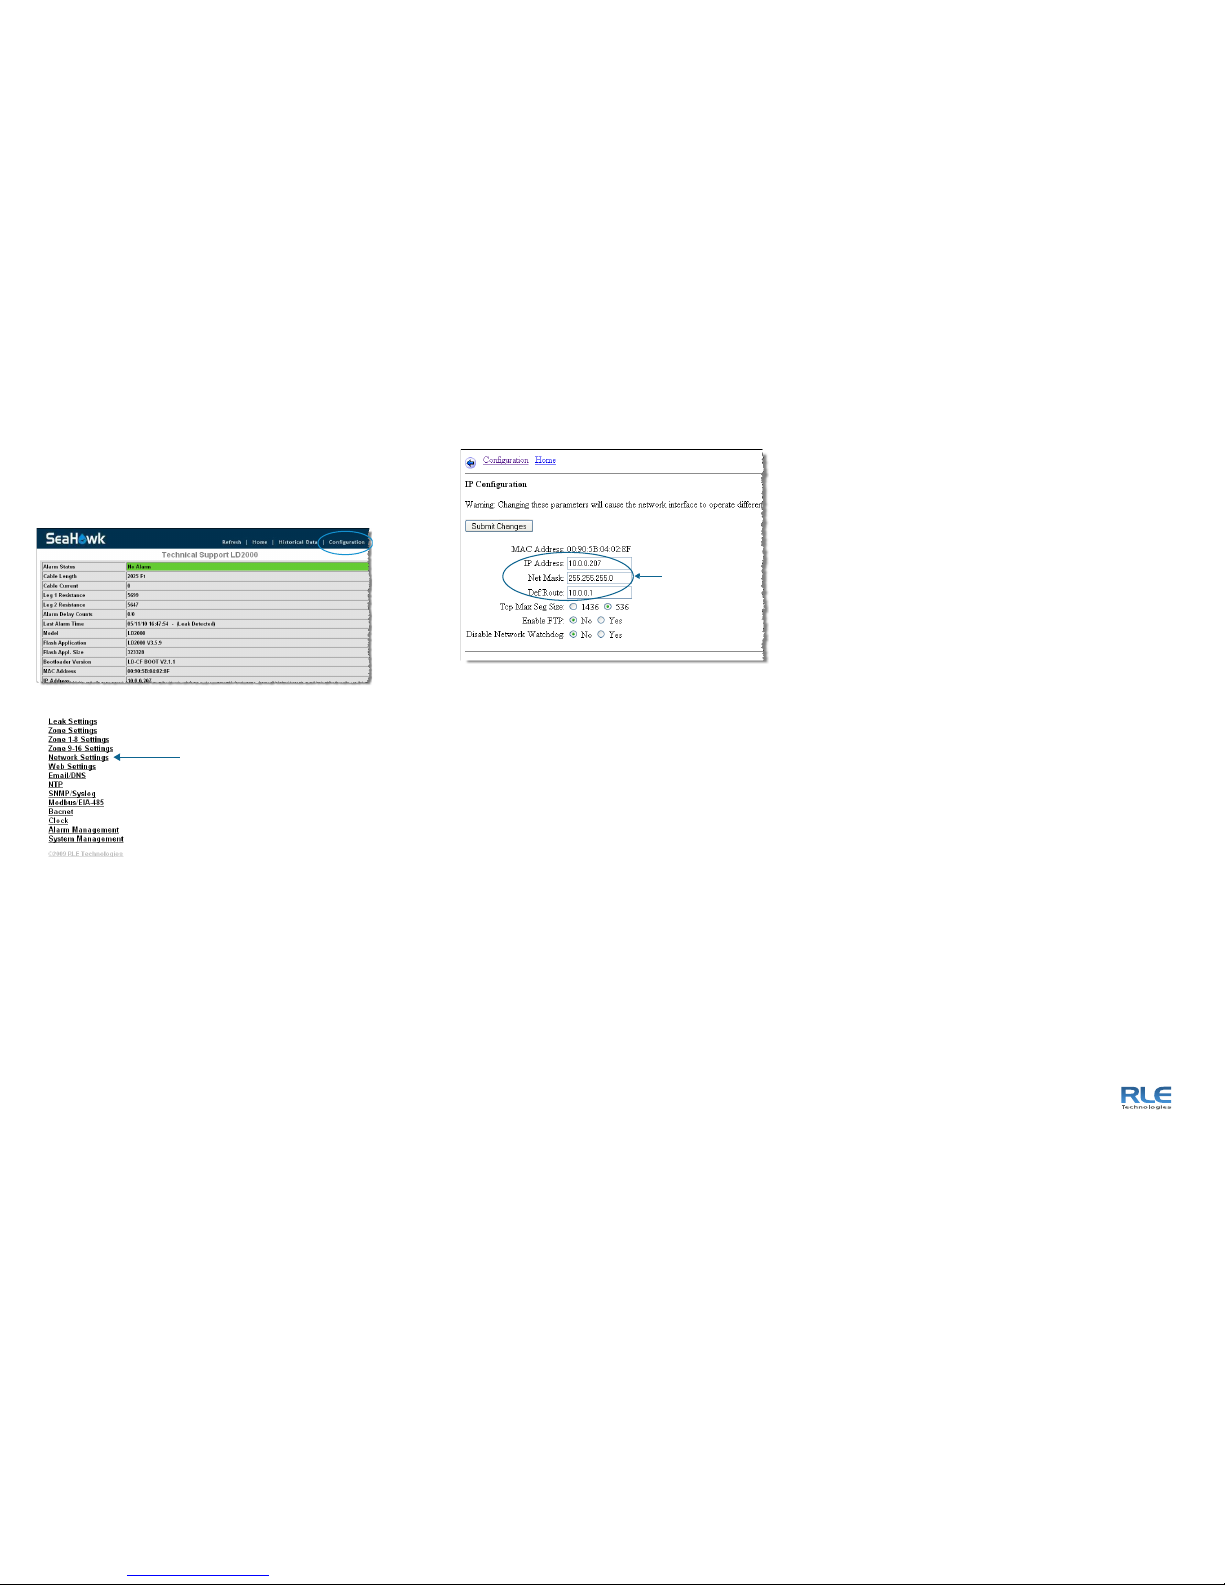
6Configuring Network Communication
IMPORTANT
Consult your IT administrator before performing these steps.
1
From the home page of the LD2000’s web interface, select the
Configuration Menu link. Then, select Network/IP Settings from the
Configuration Menu.
The Network/IP Configuration page displays.
2
Enter the values for IP Address, Net Mask (subnet mask), and Def Route
(default gateway) provided by your IT administrator.
Once you enter the values and click the Submit Changes button, the
LD2000 saves the changes and reboots. The system status LED on front of
the LD2000 stops flashing.
3
Reset the computer to its original IP address and subnet mask.
Note: This step might require assistance from your IT administrator.
The computer and the LD2000 are now both configured to communicate on
the network.
4
Connect the computer and the LD2000 to the network.
5
From the computer’s Web browser, go to the new IP address of the LD2000.
6
When prompted, enter the user name and password to verify network
access to the LD2000 (as you did in step 4 in the previous section).
If the login window for the LD2000 does not display:
a
Verify that the cables are firmly attached.
b
Verify that you entered the correct IP address for the LD2000.
c
Verify that the Status light on the top of the LD2000 is green.
For troubleshooting and additional configuration information, consult the LD2000
User Guide available at www.rletech.com
Select Network Settings
LD2000 Default Values
IP address: 10.0.0.188
Subnet mask: 255.255.255.0
Use values provided
by IT administrator
 Loading...