

Page 1
F110 Quick Start Guide
T
hank you for purchasing the Falcon F110 monitoring appliance. This
guide describes how to connect the F110 to the network and access
the setup functions in the F110’s web interface. The F110 User
Guide, located on our website, contains additional installation details.
If you need further assistance, contact RLE Technologies on our website at
http://www.rletech.com/ (go to the Support Link) or by calling
970.484.6510, Option 2.
1Preparing for Installation
It is important to ensure that you have extra IP addresses available on your
network that can be assigned to the Falcon F110. When connecting the F110
to the network, have the following information available. If necessary, ask your
IT administrator to provide this information so you can assign it to the F110.
2Connecting the Cables
Make the following cable connections:
1 Plug one end of the Ethernet cable (provided) into the Network port on
the F110 and the other end into the network.
2 Plug the 5VDC power adapter (provided) into the Power plug of the F110
and ensure that it is connected to an active Main or UPS power source.
IMPORTANT Make the network cable connection before applying power to the
F110.
3Configuring Network Communication
IMPORTANT Consult your IT administrator before performing these steps.
At the factory, the Falcon F110 is set to obtain an IP address automatically
using DHCP or AutoIP. If you do not have DHCP on your network, the Device
Discovery Utility (provided) can detect the Falcon F110, at which point you
should assign a static IP address.
To assign an IP address to the F110:
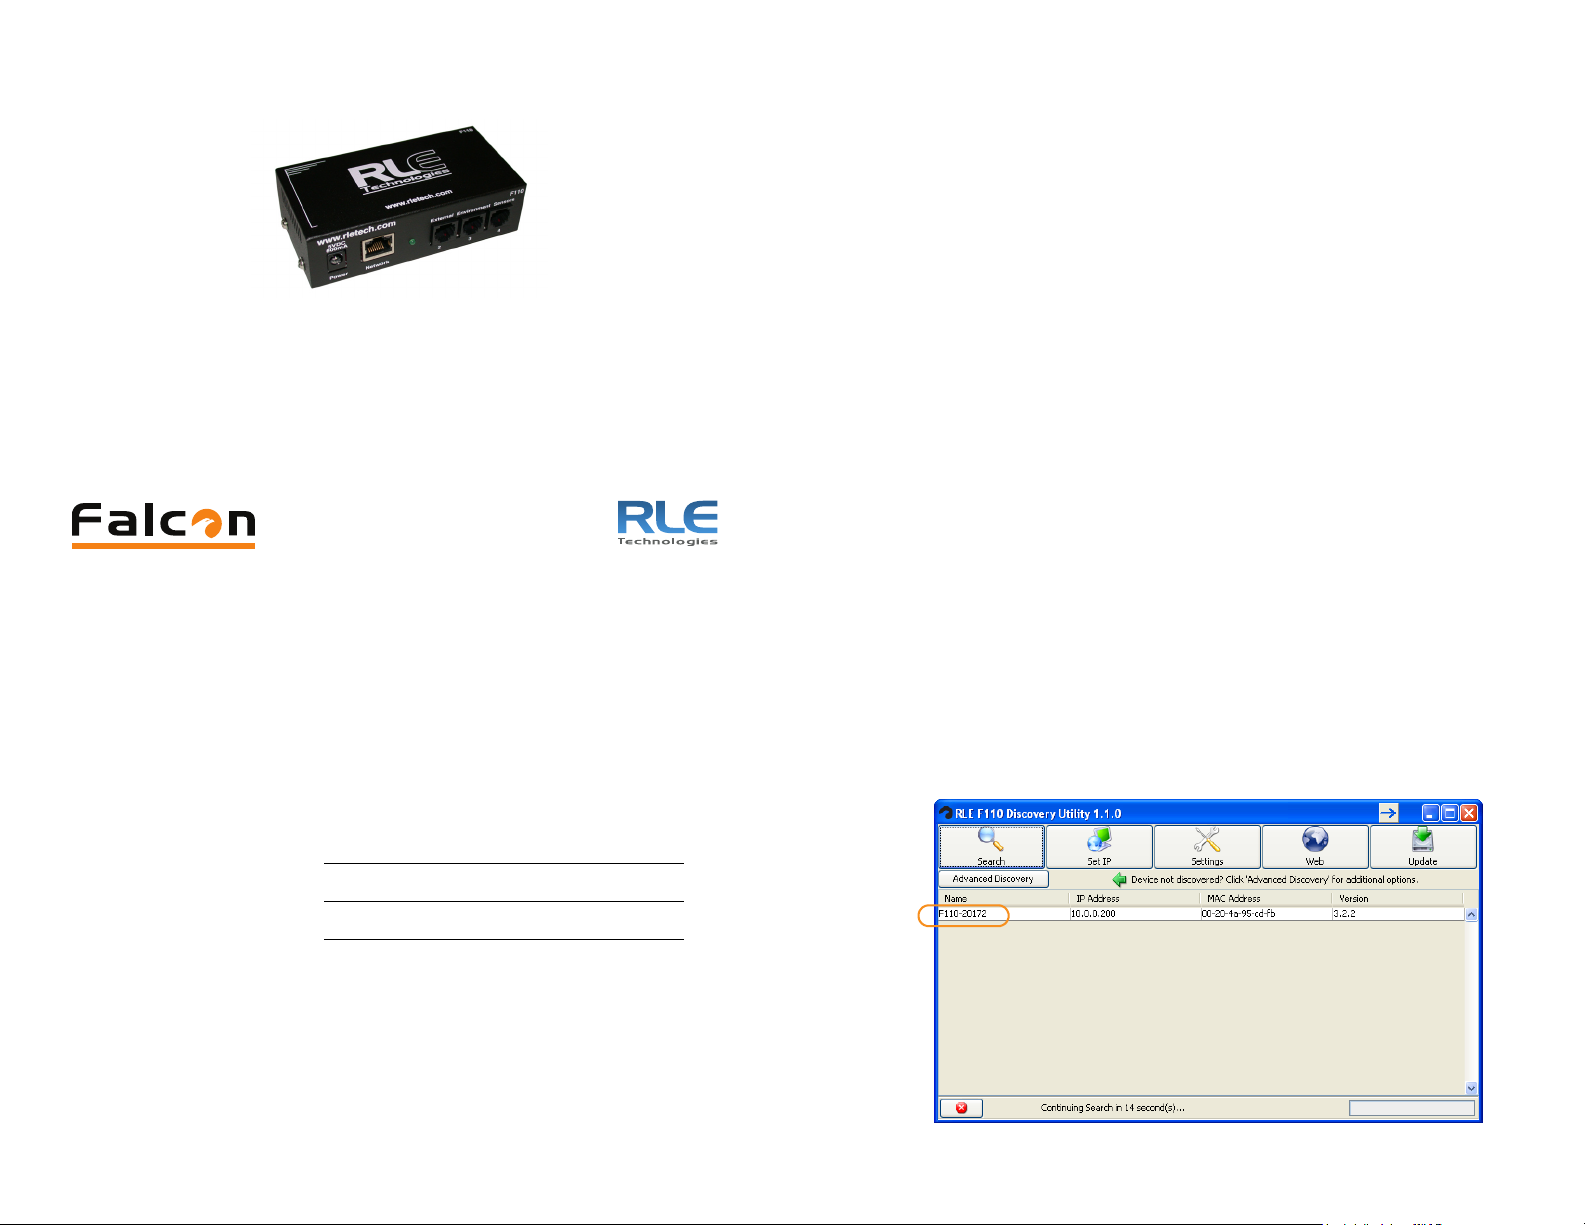
1 Install the Device Discovery Utility from the RLE Product User Guide CD
(provided) or on the Resources webpage at www.rletech.com.
2 Open the Device Discovery Utility and click the Search button.
The F110 is listed with the name RLE-<5-digit number>. The 5-digit
number corresponds with the 5-digit serial number located on the bottom
of the F110.
IP address
Subnet mask
Default gateway
Page 2
104 Racquette Drive
Fort Collins, CO 80524
970.484.6510
www.rletech.com
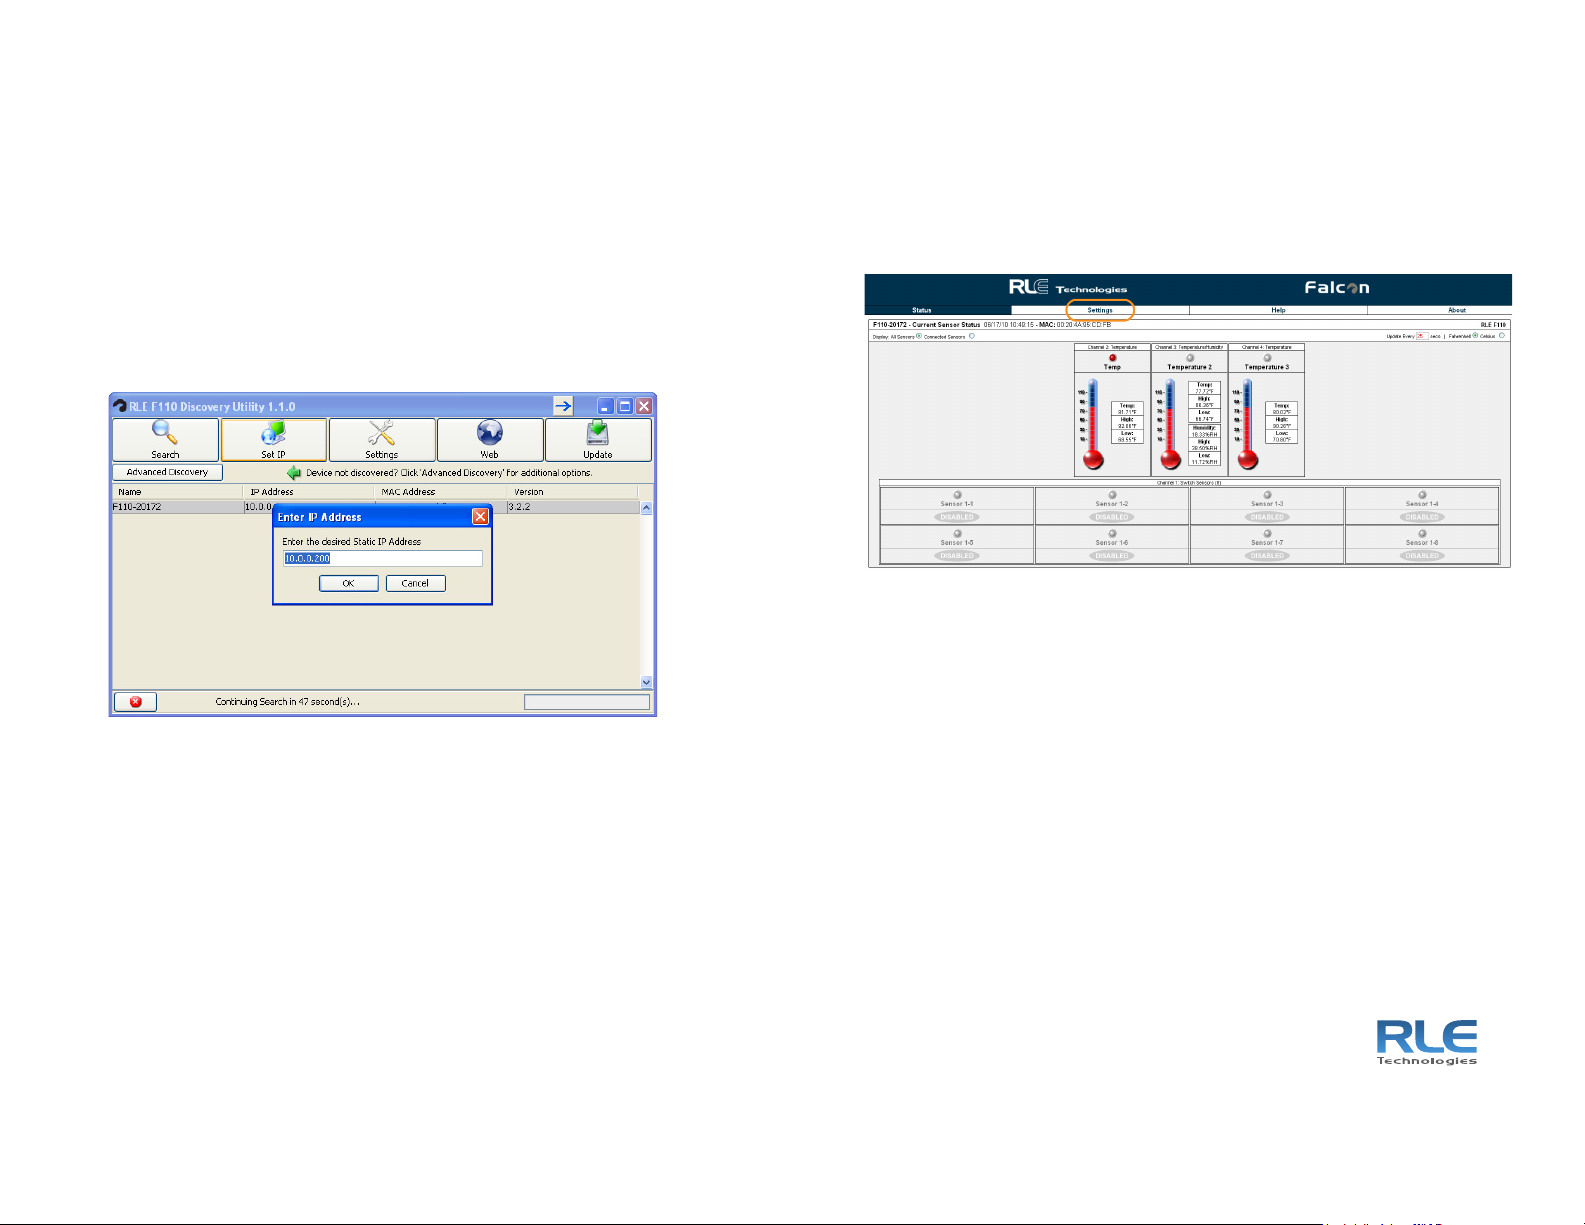
3 Left-click on the F110 that needs to be modified.
4 Click the Set IP button.
5 In the pop-up box, enter the IP address provided by your IT
administrator.
Notes:
a If you are configuring the F110 for a DHCP network, enter 0.0.0.0.
b If you need to change the subnet mask or default gateway, click the
Settings button, press enter when prompted for a user name and
password, and change the subnet mask and default gateway on the
Network Settings web page that displays. Click the Accept Changes
button when done.
4Completing the Installation
Once the Falcon F110 has been detected, you can configure it using the Web
interface:
1 View the Web interface by typing http://<IP address> in your Web
browser. Use the IP address you assigned to the F110.
2 Click the Settings button to display and change the configurable settings
of the F110.
Note: You do not need to enter a user name or password. When
prompted for these, press Enter on your keyboard.
For configuration details, see the F110 User Guide at
http://www.rletech.com.
© Raymond & Lae Engineering, Inc. 2011. All rights reserved. RLE® is a registered
trademark and Seahawk™, Falcon™, and Raptor™ are trademarks of Raymond &
Lae Engineering, Inc. The products sold by Raymond & Lae Engineering, Inc. are
subject to the limited warranty, limited liability, and other terms and conditions of sale
set forth at http://rletech.com/RLE-Terms-and-Conditions.html. 5144 3/2011
 Loading...