

Page 1
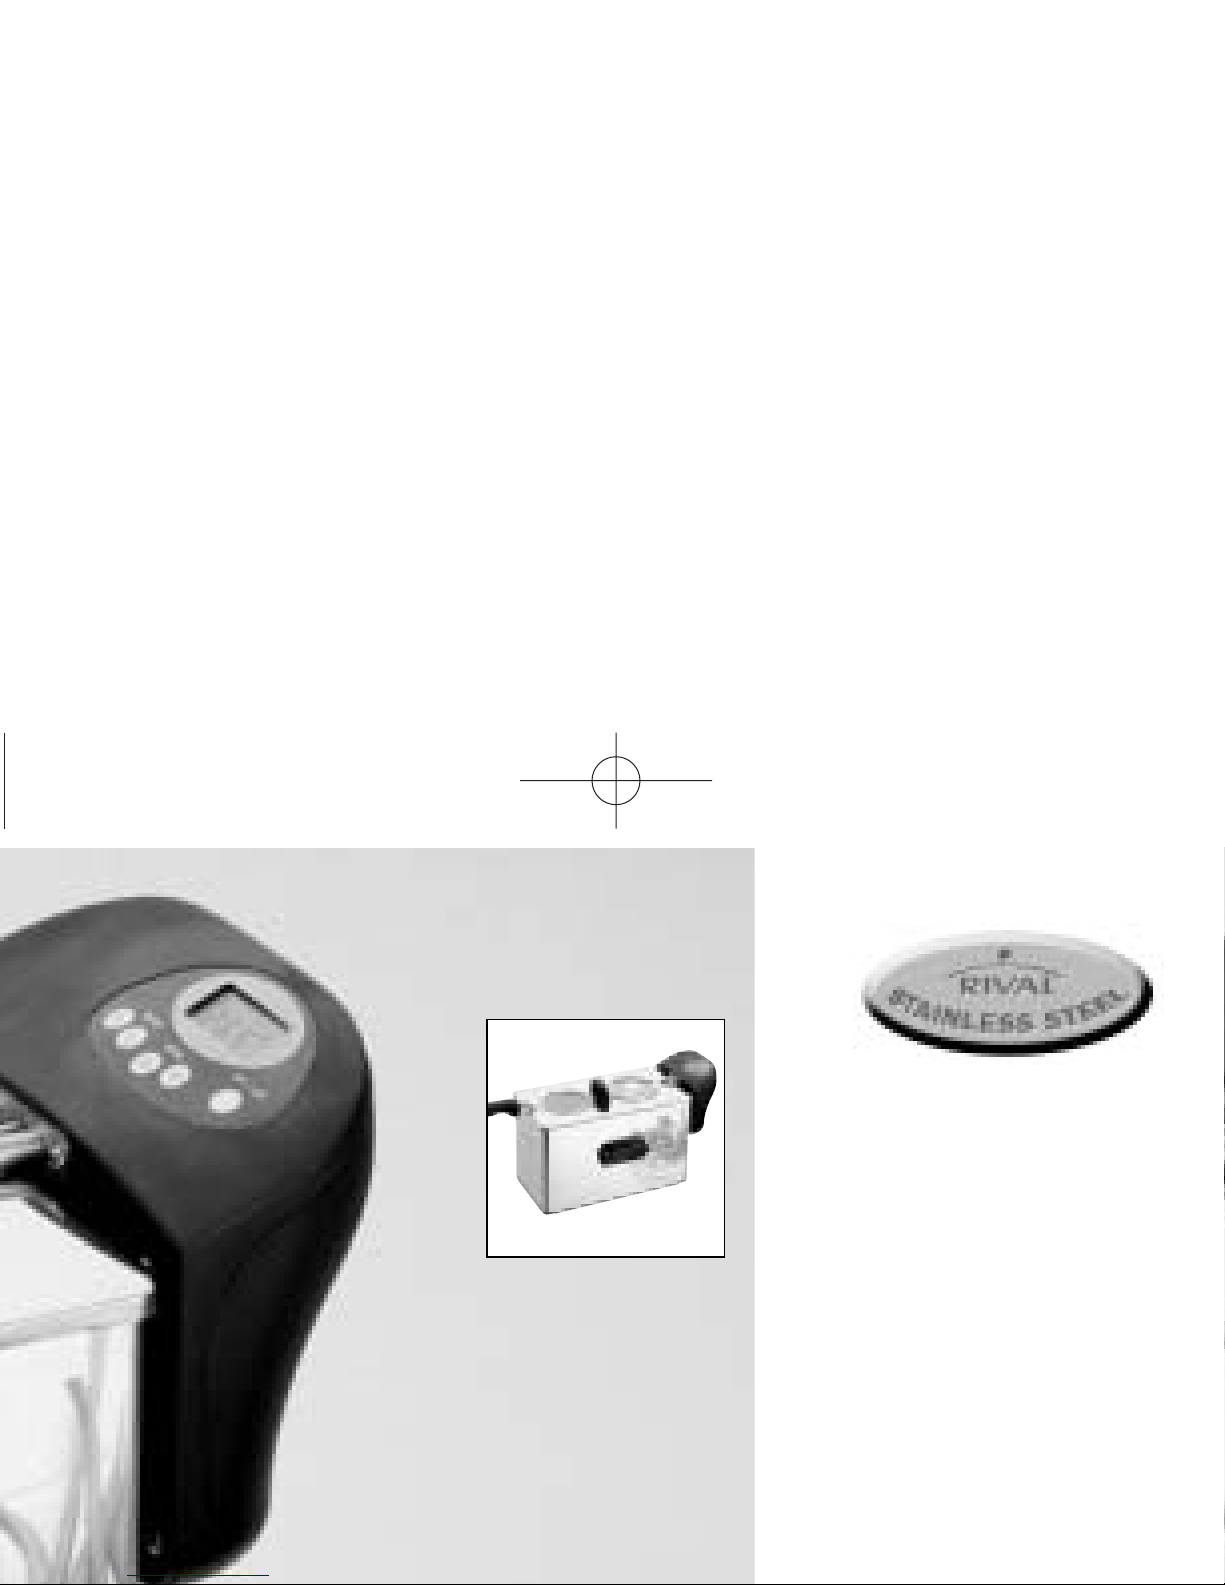
Stainless
Steel
Gourmet
CZF600 CN
CZF600CN.02.CN.OM1 (Visual) 08.10.2002 01.35pm Page 1
Page 2
SAVE THESE INSTRUCTIONS
THIS APPLIANCE IS INTENDED FOR HOUSEHOLD USE ONLY.
Congratulations on the purchase of your new Rival Deep Fryer. This Deep Fryer is
equipped with a Break-away Power Cord System,which includes a detachable
magnetic cord designed to separate from the unit when certain amounts of force are
applied (See details on pg.6 for instructions on the proper usage of the Break-away
magnetic cord.)
NOTE:This cord meets revised Underwriter’s Laboratories (UL) Standard 1083
requirements effective May 30,2001.
A short power supply cord is provided to reduce the risk resulting from
becoming entangled in or tripping over a longer cord.WARNING: Do not use an
extension cord.
No user-serviceable parts inside Control Panel Assembly.Do not attempt to
service this product.
IMPORTANT SAFEGUARDS
When using electrical appliances,basic safety precautions should always be
followed,including the following:
1. Read all instructions before using.
2. Do not touch hot surfaces.Use handles or knobs.
3. To protect against electric shock,do not immerse Control Panel Assembly,cord or
plugs in water or other liquids.
4. Close supervision is necessary when any appliance is used near children.This
appliance is not to be used by children.
5. Unplug from outlet when not in use and before cleaning.Allow to cool before
putting on or taking off parts,and before cleaning the appliance.
6. Do not operate any appliance with a damaged cord or plug or after the
appliance malfunctions,or has been damaged in any manner.Return appliance
to manufacturer (see warranty) for examination,repair,or adjustment.
7. The use of accessory attachments not recommended by manufacturer may
cause injuries.
8. Do not use outdoors.
9. Do not let cord hang over the edge of table or counter,or touch hot surfaces.
10. Do not place on or near a hot gas or electric burner,or in a heated oven.
11. Extreme caution must be used when moving fryer containing hot oil. Always use
oven mitts or hot pads.
12. Always attach plug to appliance first,then plug cord in the wall outlet.To
disconnect,turn control to “OFF,”then remove plug from wall outlet.
13. Do not use appliance for other than intended use.
14. Be sure handle is properly assembled to basket and locked in place.(See
detailed assembly instructions)
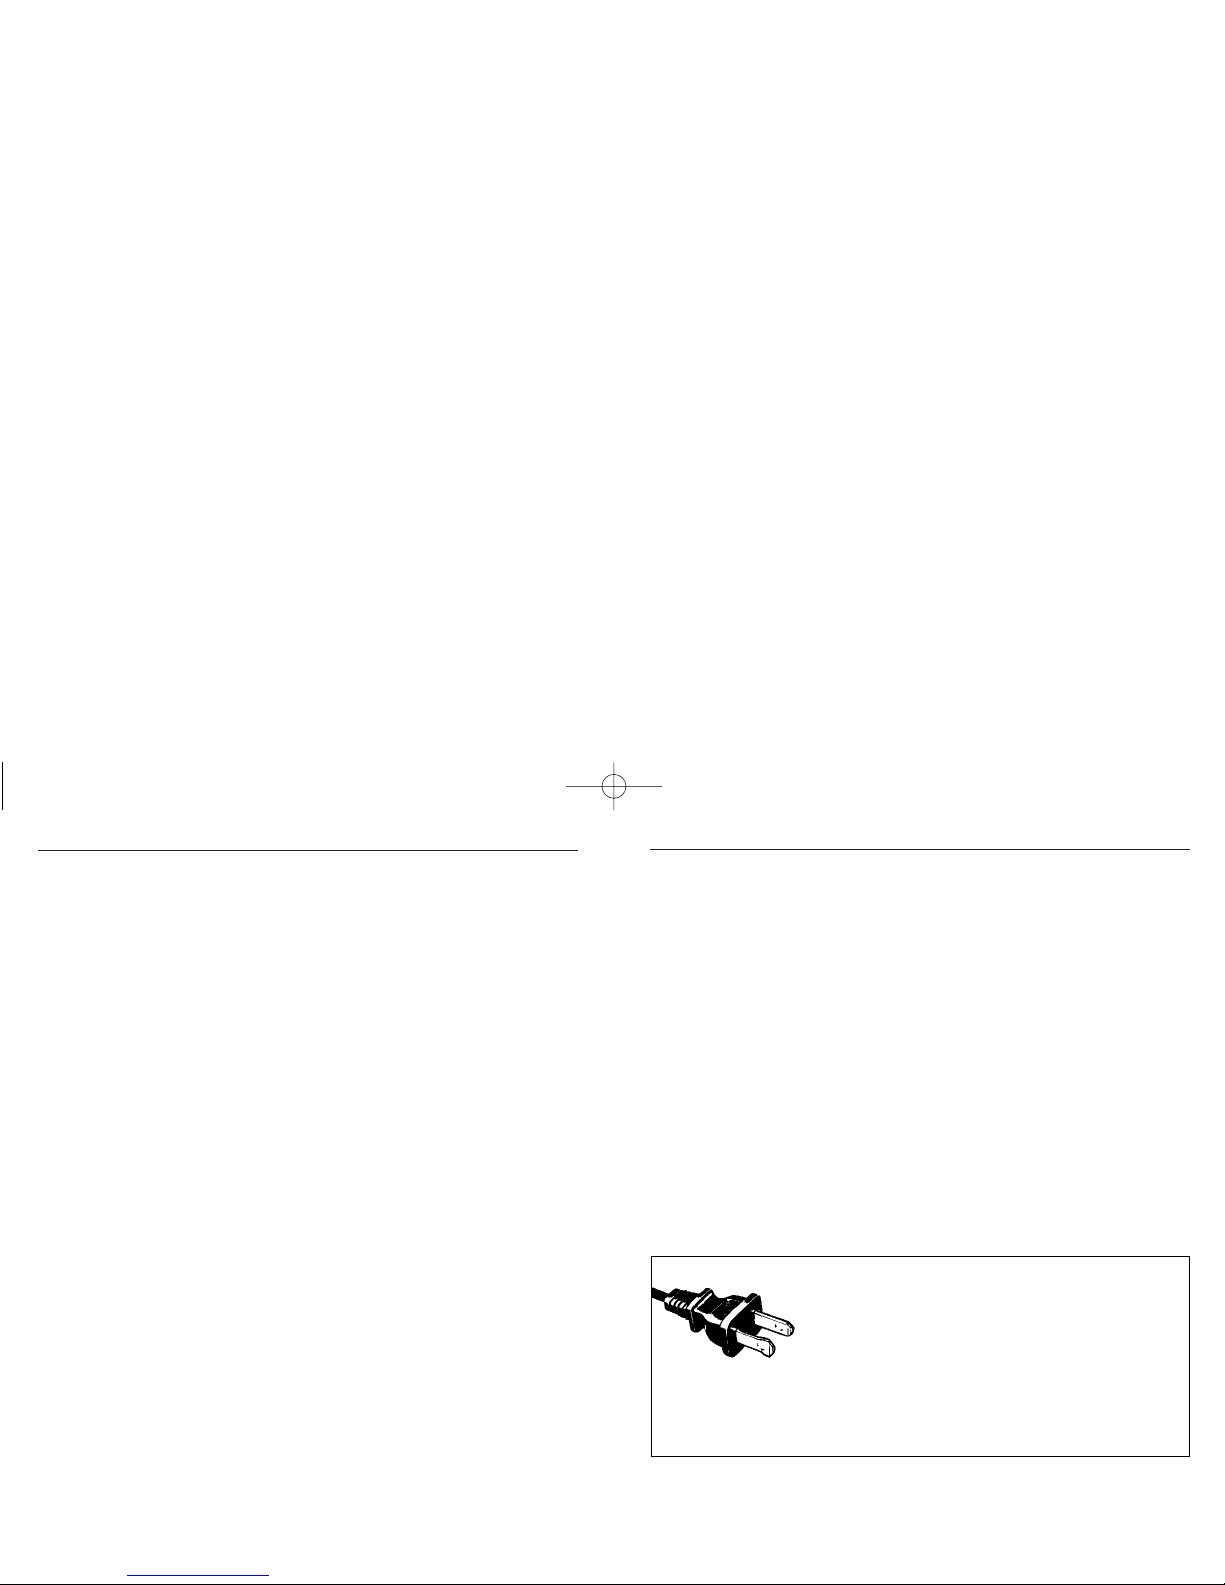
POLARIZED PLUG
This appliance has a polarized plug (one blade is wider
than the other). To reduce the risk of electric shock,
this plug is intended to fit into a polarized outlet
only one way. If the plug does not fit fully into the
outlet, reverse the plug. If it still does not fit, contact a
qualified electrician. Do not attempt to modify the plug in any way.
If the plug fits loosely into the AC outlet or if the AC outlet feels warm
do not use that outlet.
CZF600CN.02.CN.OM1 (Visual) 08.10.2002 01.35pm Page 2
Page 3
Before fryer is used for the first time; remove all packaging materials including plastic
bag covering Fryer Basket and notice inside.
Make sure fryer is unplugged.Wash the Frying Basket and Removable Oil Reservoir in
hot soapy water.Gently wipe the Cool-Zone Heating Element with a damp cloth.Dry
all parts thoroughly.Your fryer is now ready to use.
CAUTION: Do not immerse cord,plugs or Control Panel Assembly in water.
PREPARING YOUR ELECTRIC DEEP FRYER FOR USE
•Fill the unit to the maximum or minimum capacity lines only.
•Do not over fill the basket.To achieve quality results deep frying food needs to be
surrounded by oil.Too much food causes the oil temperature to drop,resulting in
“soggy”food.
•Be sure that all ice crystals are removed from the food and food is completely
dry.Excessive water and ice can cause the oil to splatter and/or overflow.
•Coated foods (bread crumbs,batters,etc.) are best for deep frying.The coating
acts as a protective layer keeping food moist on the inside and crisp on the
outside.
•Fry foods at the correct temperature for best results.This will prevent burning and
give you even colored,crispy food.
TIPS FOR DEEP FRYING
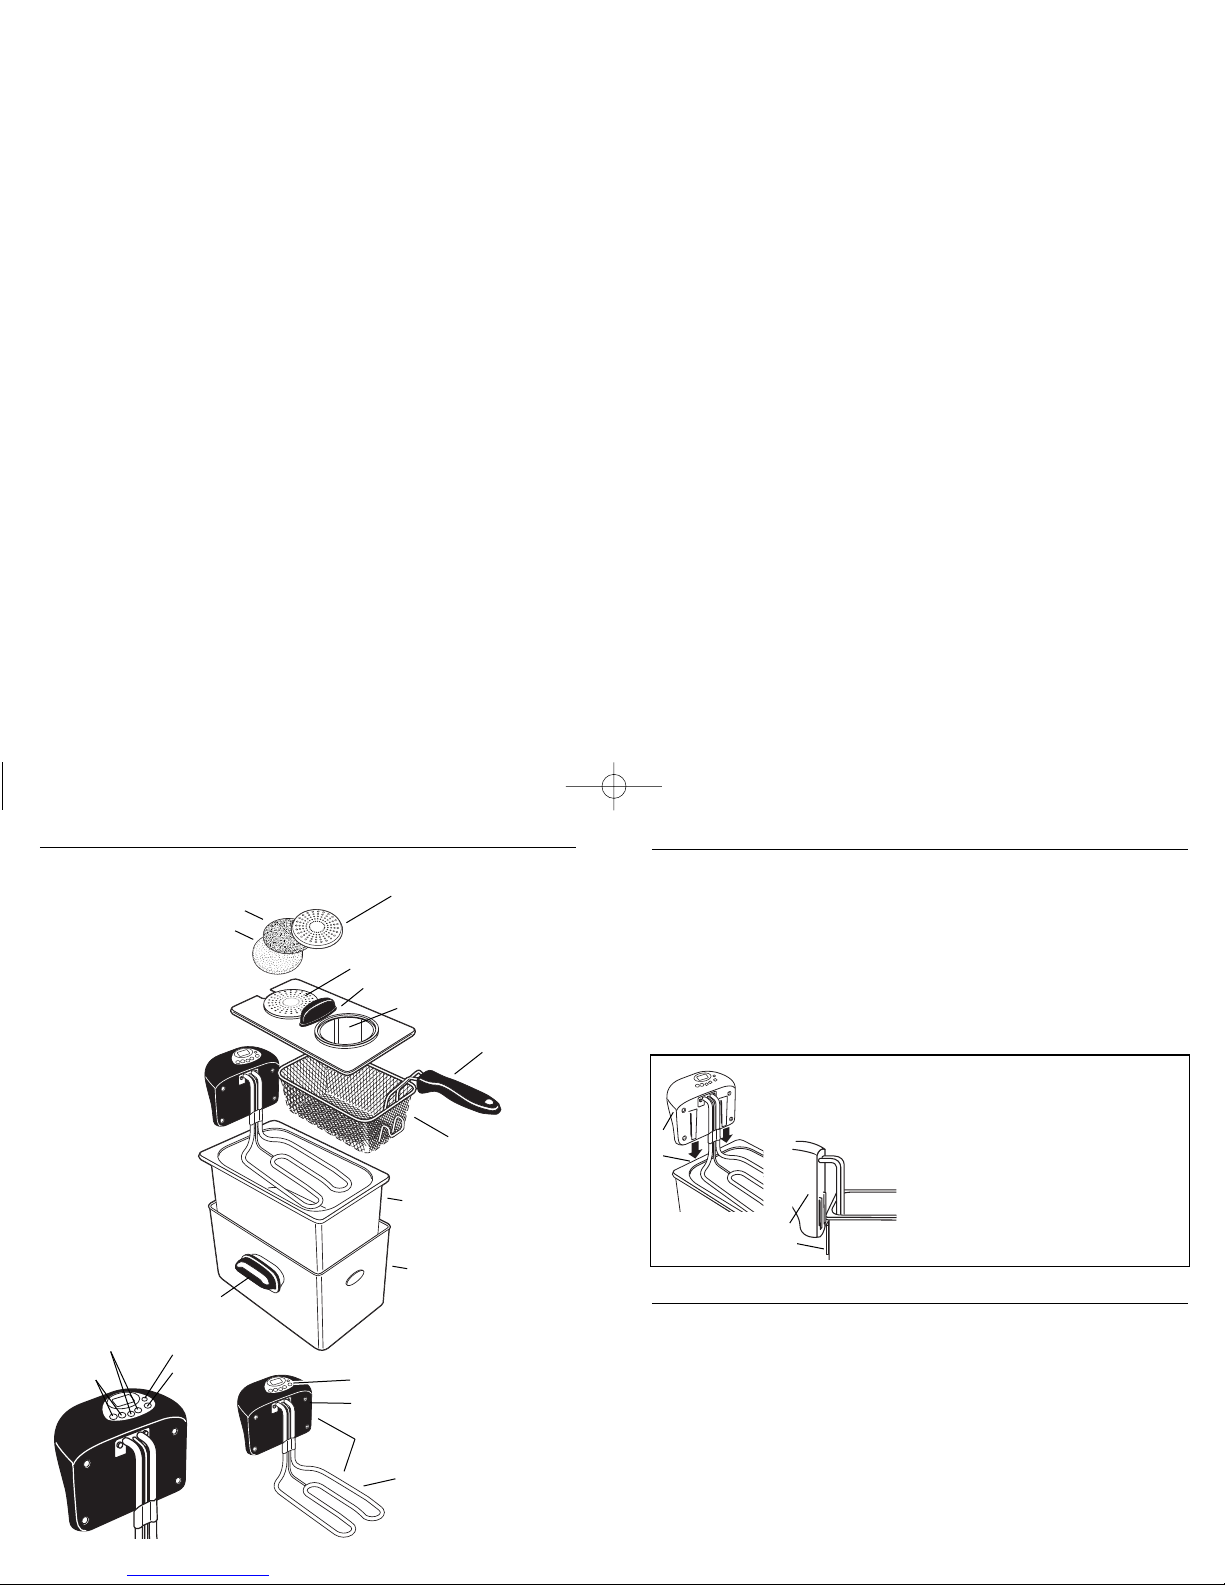
KNOW YOUR ELECTRIC DEEP FRYER
Removable Filter Cover
Charcoal Odor Filter
The Cool-Zone Heating Element can not be switched
on unless you insert the (1) Control Panel Assembly
to the locating slots of the (2) Connecting
Plate on the Stainless Steel Exterior.
White Cotton Grease Filter
Side Carrying Handles
Time + -
Temp + -
Removable Filter Cover
Removable Lid
View Window
Frying Basket
Folding Basket
Handle
Removable Stainless Steel
Oil Reservoir
Stainless Steel Exterior
Electric Control Panel
Control Panel Assembly
Preheat
Start/Stop
Manual Reset Button (Recessed
Red Button on Back of Control Panel
Cool Zone Heating Element
1
1
2
2
CZF600CN.02.CN.OM1 (Visual) 08.10.2002 01.35pm Page 4
Page 4
NOTE:
Never turn on the fryer with an empty Oil Reservoir.Always use
your fryer on a flat,heat resistant surface.
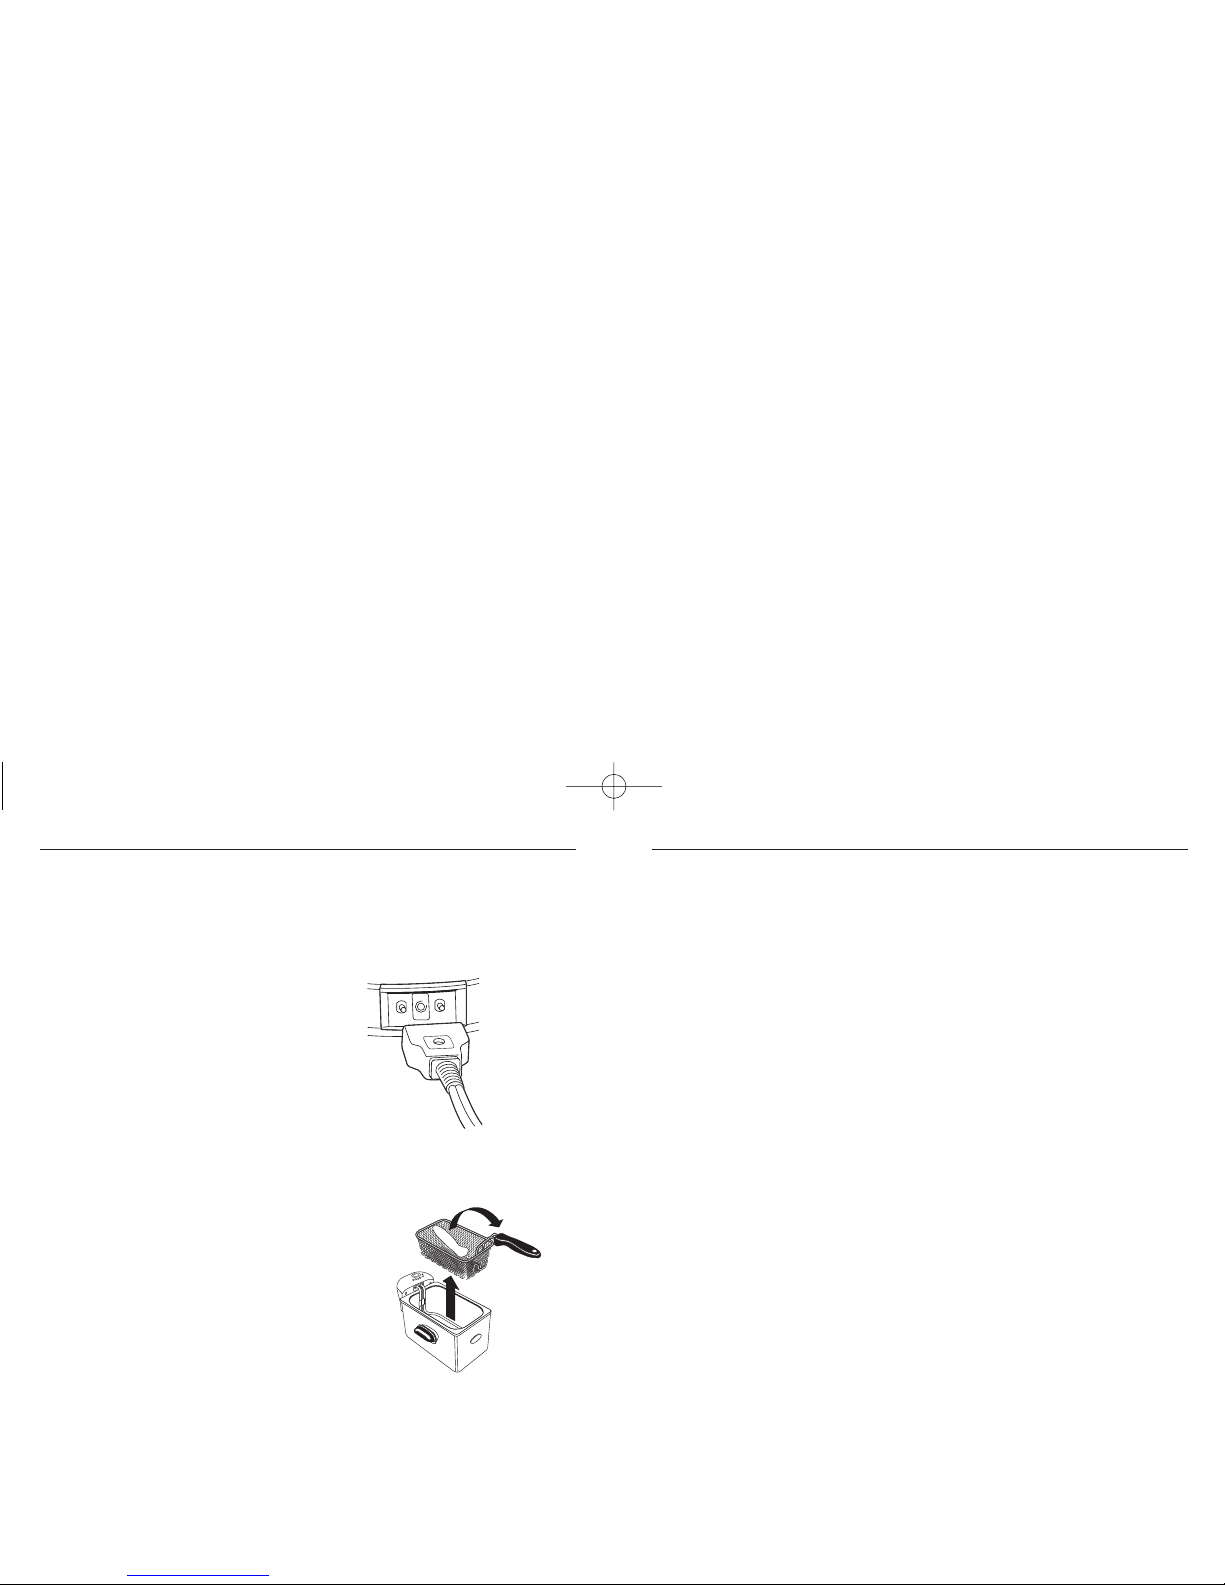
1.
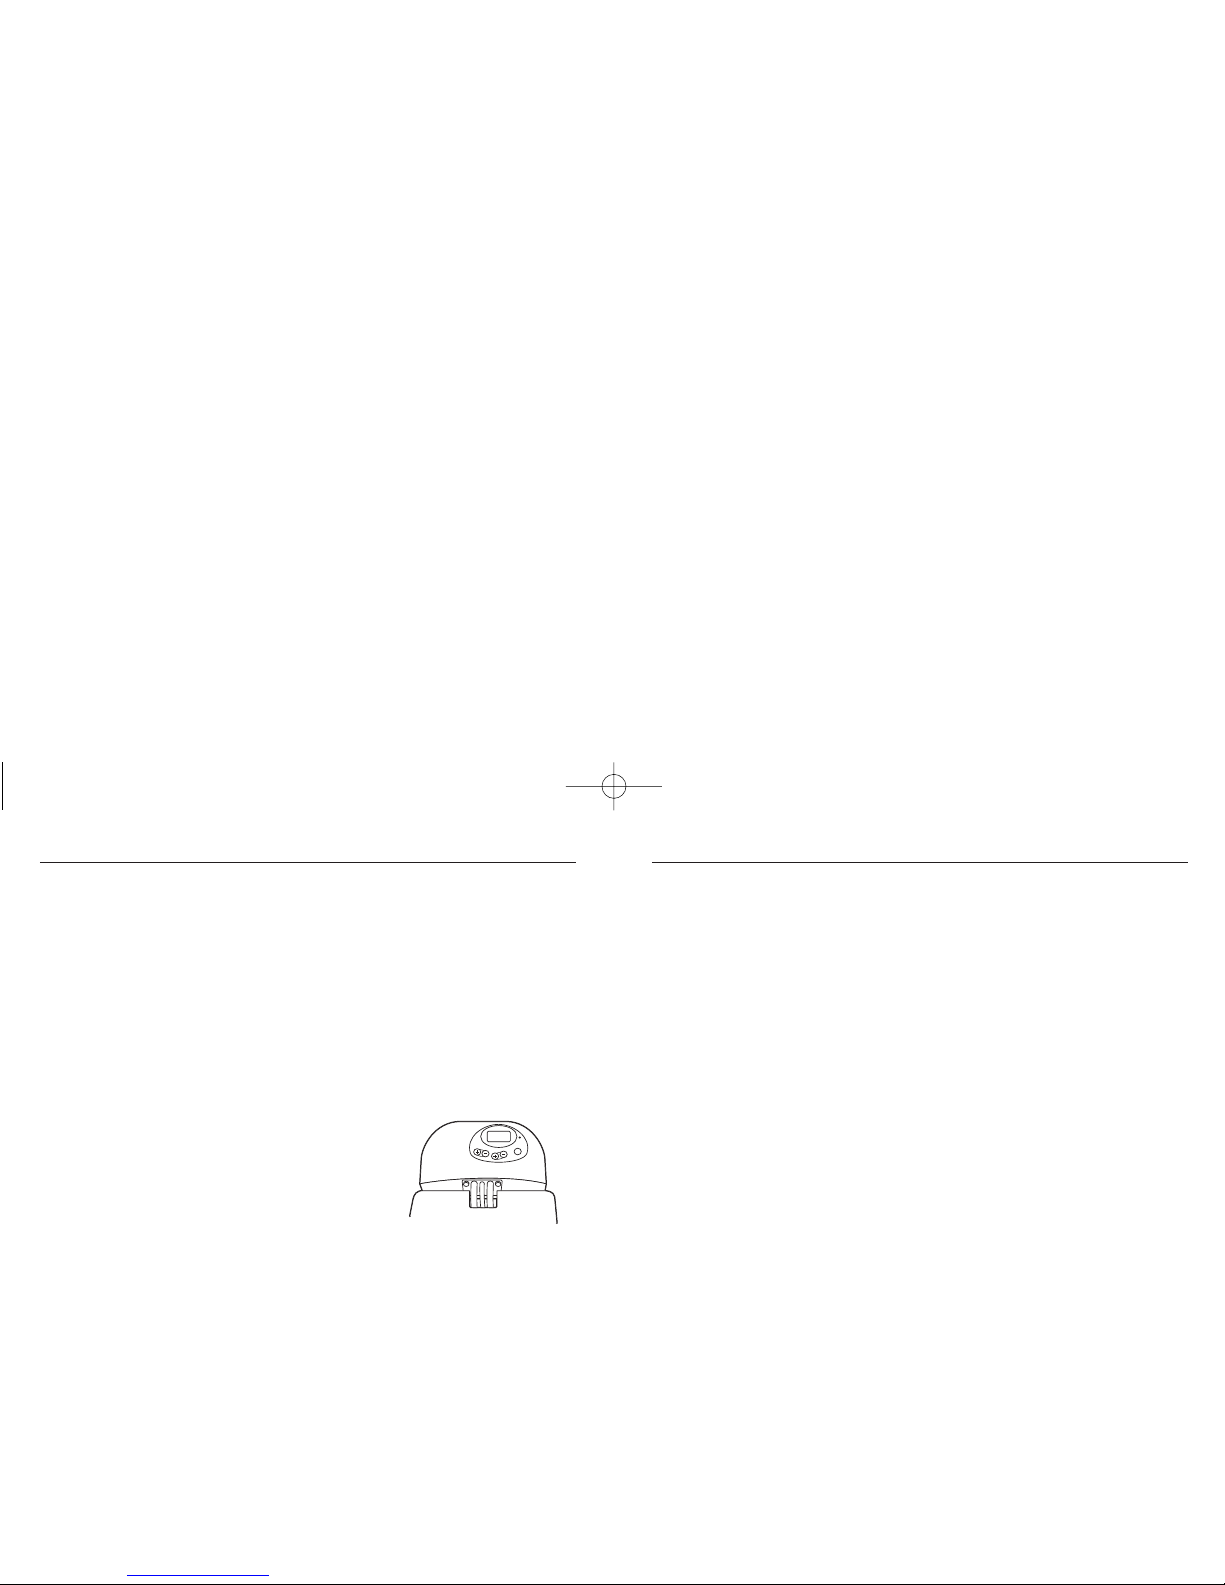
Attach magnetic end of Break-away cord assembly directly to the
fryer (See figure 1).
This should be done
prior to plugging the cord into the wall outlet.
The magnetic end of the cord is
designed to only go on one way. Be
sure the side stating "THIS SIDE UP" is
facing up.
2.
Remove lid.
3.
Remove Frying Basket,pull Basket
Handle up until it clicks into the
horizontal position (Fig.2).
4.
Make sure the Oil Reservoir is seated in
place with the Basket Hook on the side
opposite the Control Panel Assembly.The
Oil Reservoir is also marked indicating
which side is the “Heater Side”.Pour
cooking oil into Oil Reservoir until it
reaches between “MIN” and “MAX”
marks inside reservoir. DO NOT OVER OR
UNDER FILL.
5.
Smear a little oil on the inside of the
Viewing Window.This prevents
condensation,which impedes the view.
6.
Place lid onto the unit.
7.
Make sure that fryer is off and insert plug into 120 volts AC outlet.
(See “How to use the Digital Electronic Control Panel”)
8.
After oil has been preheated,remove lid and place Frying Basket
onto Basket Hook inside Oil Reservoir.
CAUTION:
Keep the Folding Handle in the locked position.
USING YOUR ELECTRIC DEEP FRYER
9.
Place food inside Frying Basket (Do not stack food).Place lid back
onto the unit.Lower Frying Basket into Oil Reservoir.
CAUTION:
Always replace lid before immersing food in oil.Do not
immerse or drain food with lid removed.
For cooking times,see fry chart on page 12 or use the recommended
times in your recipe.
10.
After time is up,lift Frying Basket and hang basket onto Basket Hook
in Oil Reservoir.To remove excess grease and retain crispness,let
food drain in Frying Basket at least 10-20 seconds.Open lid,then lift
Frying Basket by handle and pour contents onto plate covered with
paper towels before serving.
11.
When finished cooking,shut down fryer by pushing the
START / STOP BUTTON.
WARNING: DO NOT USE BREAK-AWAY POWER CORD SYSTEM TO DISCONNECT THE
FRYER. ALWAYS DISCONNECT PLUG FROM WALL OUTLET FIRST TO DISCONNECT
FRYER. Use only Model# DP16 magnetic cord set with this product. The use of any
other magnetic cord set may cause fire,electric shock,or injury.
CAUTION:
The Break-away power cord is only for accidental
disconnection and is not to be removed during normal operation. If the
cord becomes disconnected,the user should immediately unplug the
cord set from the wall outlet,then reconnect the magnetic cord to the
Deep Fryer.
NOTE:Your Deep Fryer is provided with a safety protection device:
If the Control Panel Assembly is not properly placed on the Stainless
Steel Exterior,the Control Panel Assembly will not operate.
USING YOUR ELECTRIC DEEP FRYER (CONT.)
Figure 1
Figure 2
CZF600CN.02.CN.OM1 (Visual) 08.10.2002 01.35pm Page 6
Page 5
1.
Plug the Power Cord into outlet.
2.
The LCD displays 265°F.Press “TEMP+”and “TEMP-”button to set the
desired temperature.“TIME+”and “TIME-”buttons will not operate
until the temperature reaches the preset temperature.
3.
Press Start/Stop to start.The LCD display shows the set temperature
with a small arrow on the top of the LCD showing “Preheat”.During
the preheat process,the heating element is energized and the LCD
small arrow under the “Preheat”marking will flash to show the
progress.You can press “Start/Stop”to stop
pre-heating,at this moment and the LCD
will show the set temperature.
4.
When the oil temperature reaches the set
temperature,the unit will give an audible
signal and the pre-set temperature on the
LCD display will also flash continuously.The
Preheat Light will extinguish,indicating that
the oil is at the preset temperature.
5.
Press “TIME+”and “TIME-”to stop the audible signal and to set
cooking time (from 1 min to 30 mins.).Put the basket with food into
the oil and start frying.The LCD display shows the remaining time for
frying food and the small arrow on the top of LCD display,displays
“Frying”.Five seconds after setting frying time,the unit starts frying
(or you can press “Start/Stop”button to start frying).During the frying
mode,the small arrow under the “frying”will flash.You can press
“TEMP+”or “TEMP-”to check the temperature you set but you cannot
adjust the temperature.3 seconds after you have checked the
temperature,the unit will return to the timing mode automatically.
HOW TO USE THE DIGITAL ELECTRIC CONTROL PANEL
You can press “TIME+”to prolong the frying time and the LCD display
shows the remaining frying time.You can press “Start/Stop”to stop
frying as well and the LCD display shows the temperature you set.
6.
When frying is finished the unit will give an audible signal and the
LCD display will show 0:00 only.The heater is turned off
automatically at this moment.You can press “TIME+”and “TIME-”to
fry again within 10 minutes after the unit beeps.After frying,if you
press the temperature button,either Temp+ or Temp-,only the latest
set temperature will be shown.To set up or down the temperature for
next run,please reset the “Start/Stop”button again and follow step 2.
7.
Press “Start/Stop”to reset another frying cycle.If you do not press
“Start/Stop”button,the unit will automatically reset back to your
latest frying temperature after 10 mins.The display will show the
latest temperature also.
NOTE: If you reset the temperature during the preheat process,as long
as the temperature is higher than the reset temperature,the unit will
beep and the reset temperature on the LCD display will also flash
continuously to indicate that food can be fried now,set time and
push Start.
HOW TO USE THE DIGITAL ELECTRIC CONTROL PANEL
temp
time
on/off
ready
light
CZF600CN.02.CN.OM1 (Visual) 08.10.2002 01.35pm Page 8
Page 6
1. Open the Filter Cover.
2. White Cotton Grease Filter may be washed in hot soapy water.Rinse
and allow to air dry.
3. Clean the inside of the cover with a damp soapy sponge.Rinse and
dry thoroughly.
4. Insert Charcoal Odor Filter on the bottom of Removable Lid,followed
by a clean Grease Filter,then replace the Filter Cover.
NOTE:
Replacement filters can be purchased at many retailer locations or
at www.rivalproducts.com.
CLEANING REPLACEMENT FILTERS
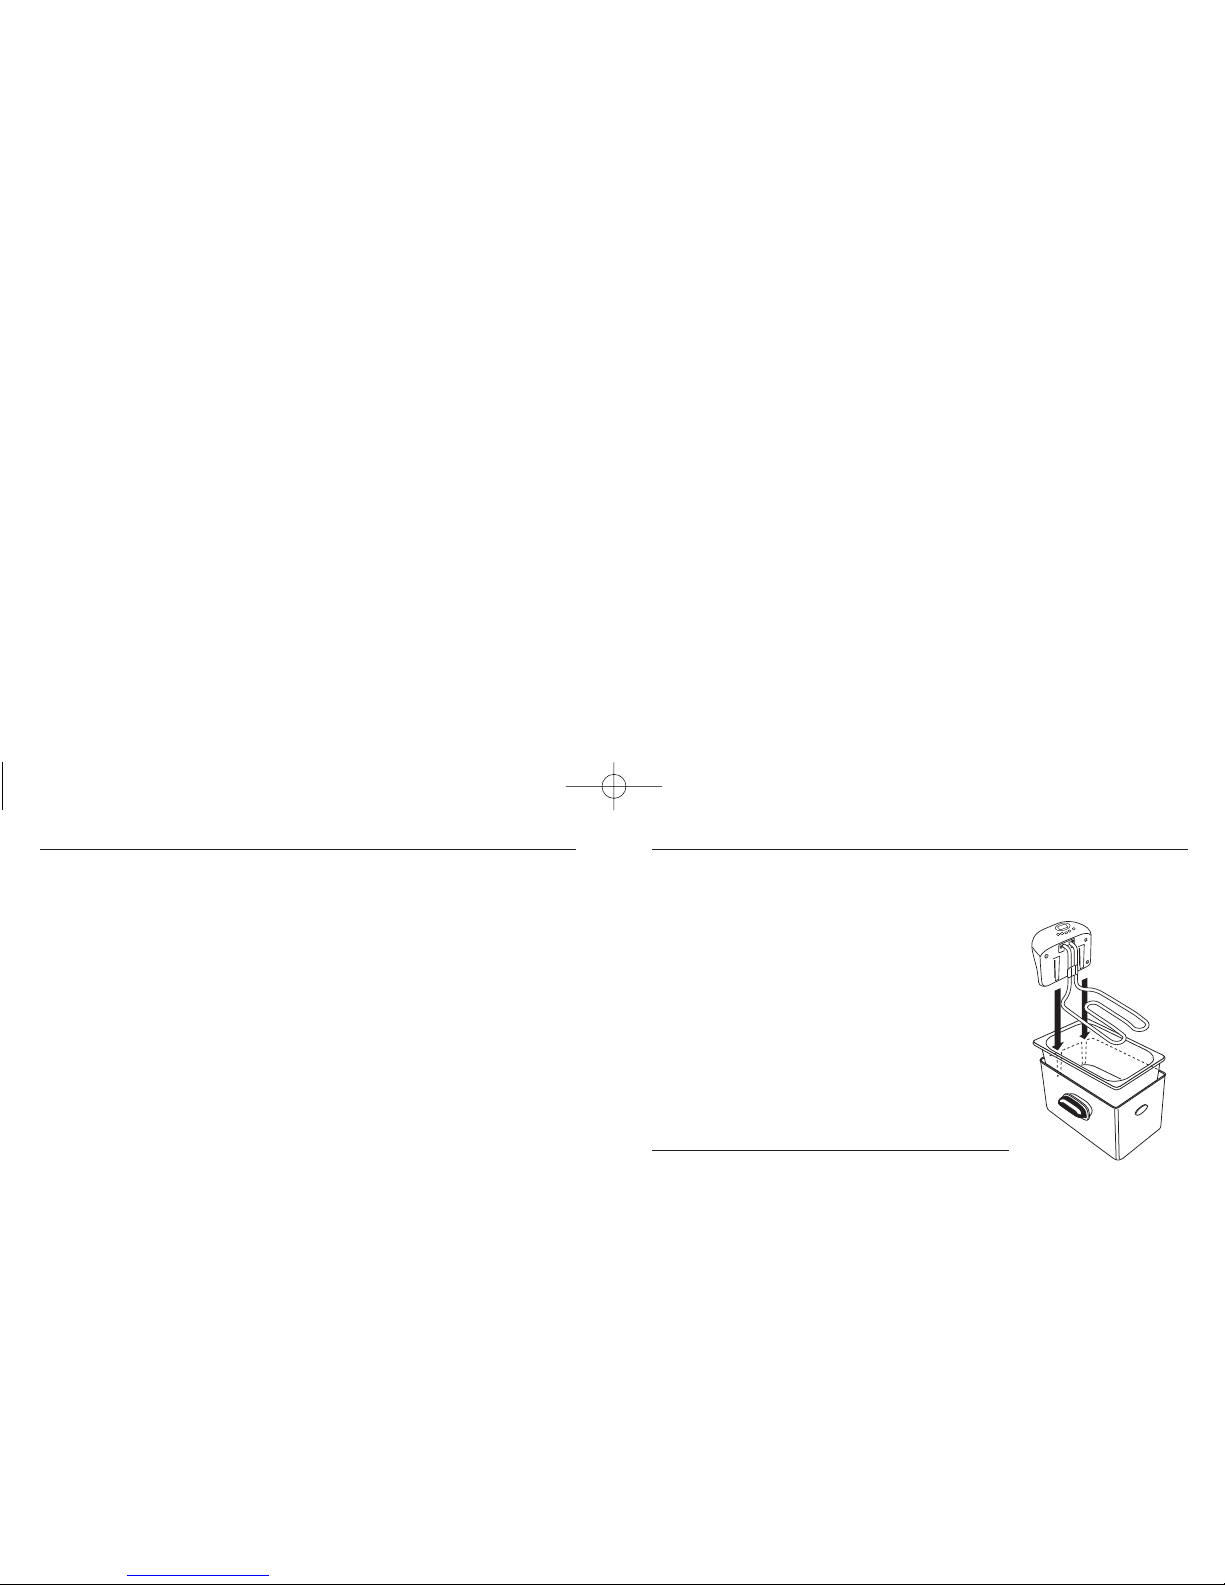
9.
After cleaning,reassemble Control Panel
Assembly onto the Stainless Steel Exterior
(See figure 3). The Control Panel Assembly
must be attached properly to the back of the
Stainless Steel Exterior or the appliance will
not operate.
10.
For storage,Folding Basket Handle can be
folded down to fit inside the Oil Reservoir.
HOW TO CLEAN YOUR ELECTRIC DEEP FRYER (CONT)
WARNING:A l ways turn control to “OFF”then disconnect plug from wall
outlet BEFORE disconnecting BREAK-AWAY CORD.
CAUTION:
•Do not immerse cord sets in water or any liquids.
• Do not attempt to defeat the detachable magnetic Break-away cord
system by trying to permanently attach cord set to product.
• Do not stick pins or other sharp objects in holes on magnetic cord
set.
•Do not use any type of steel wool to clean magnetic contacts.
1.
Unplug from outlet and allow unit to cool completely.
2.
Remove Break-away magnetic cord from the fryer.
3.
Clean the outside of the Deep Fryer and lid with a damp cloth.
CAUTION:
Do not use abrasive pads or alcohol.
4.
Remove Frying Basket.Wash the Frying Basket in the dishwasher or
with hot soapy water.Rinse and towel dry carefully.
5.
Lift Control Panel Assembly up from backside of fryer.
CAUTION:
Be sure you have allowed enough time,after using,for Control
Panel Assembly to cool down completely.
•Carefully lift Oil Reservoir out by holding the rim of the bowl.Store in
an airtight container.See Tips for Oil Use and Storage on page 13.
6.
The Basket,Main Lid (remove Filters), and Oil Reservoir are
dishwasher safe. Dry all parts thoroughly after cleaning.
7.
The Control Panel Assembly should never be immersed into water or
other liquids.Gently clean the outer surface of the Control Panel
Assembly with a damp cloth containing mild soap solution or plain
water.
8.
Ensure that both the lid and the Oil Reservoir are completely dry
after washing and before use.
HOW TO CLEAN YOUR ELECTRIC DEEP FRYER
Figure 3
CZF600CN.02.CN.OM1 (Visual) 08.10.2002 01.35pm Page 10
Page 7

•Do not use seasoned or flavored oil such as walnut,olive oil, lard or
drippings because they have a low smoke point.Use blended
vegetable oil,pure corn oil,sunflower oil,soybean oil or grapeseed
(canola oil) because these oils have a high smoke point.Peanut oil
is not recommended because it impacts the flavor greatly.
• Oils should never be mixed when deep frying.
• High heat,water,and burnt food particles break down the oil’s smoke
point.
•Replace oil if you notice:
-Excessive smoking at normal temperatures
- Strong oil discoloration
- A rancid smell
- Excessive foaming around the frying food
•Oil darkens with use because the oil and food molecules burn when
subjected to high/prolonged heat.The more you use an oil,the more
slowly it will pour.Its viscosity changes because of changes to the
TIPS FOR OIL USE AND STORAGE
oil’s molecular structure.When smoke appears on the oils’surface
before the temperature reaches 375 degrees F,your oil will no longer
deep-fry effectively.
•When frying foods with strong flavor and/or aroma like fish,use the
oil only once.
•Also,use the oil only once when frying fresh or frozen chicken.A
great deal of moisture is released when frying the chicken,this
breaks down the oil easily and can cause the oil to foam and lower
the smoke point.
•Filtering the oil with a cooking oil filter or fine-mesh strainer can help
keep it fresher.Although storing oil in a refrigerator may extend the
life of the oil,this should n ev e r be d o ne.The process of chilling oil
then bringing the oil to room temperature causes excessive
splattering during the heat up process.
•Store the covered oil in a cool dark place,for up to three months.Also
check the oil before using for color,smell or excessive foaming.
Discard the oil if it shows any of these qualities.
TIPS FOR OIL USE AND STORAGE (CONT)
Chicken Strips 375° F 5 to 8
Chicken pieces, bone-in 340° F 20 to 25
Fish, Battered 375° F 4 to 5
French fries, frozen Follow directions on package
Fritters 375° F 2 to 4
Onion Rings 375° F 3 to 5
Shrimp, breaded 340° F 3 to 5
The frying times in this chart are a guide and should be adjusted to suit
the different quantities or thickness of food and to suit your own taste.
FRYING TIME AND TEMPERATURE
FOOD TEMP. SETTING TIME (MINUTES)
CZF600CN.02.CN.OM1 (Visual) 08.10.2002 01.35pm Page 12
Page 8

APPLE FRITTERS
3 cups all-purpose flour 4 tablespoons cooking oil
2 teaspoons baking powder 1 teaspoon vanilla extract
1
⁄2 teaspoon salt Juice of 1 orange (1⁄3 cup)
1 cup sugar 1 cup chopped apple
1 egg,lightly beaten
Preheat oil to 375° F. Combine flour,baking powder,salt and sugar; set aside.Combine egg,cooking
oil and vanilla.Combine dry and liquid ingredients and stir to blend thoroughly.Add orange juice
and apple and mix well.Drop from teaspoon into hot oil.(Basket should already be lowered into oil.)
Fry about 2 minutes or until crisp and very brown.Remove from fat and drain.Dust with powdered
sugar or a mixture of granulated sugar and cinnamon;serve at once.
BEER BATTER FOR FISH OR CHICKEN
2 eggs (separated)
1
⁄4 teaspoon ground black pepper
1 tablespoon oil or butter 11⁄
3 cup all-purpose flour
1 teaspoon salt
3
⁄4 cup flat beer
Preheat oil to 360° F. Beat egg yolks with oil/butter,salt and pepper.Alternately add the beer and
flour to mixture.Beat ingredients well and refrigerate for 3 to 12 hours.When you are ready to use
mixture,carefully fold in 2 stiffly beaten egg whites. Pat fish or boneless chicken breasts.Coat lightly
with flour then dip into beer batter.Place fish in hot oil (basket should already be lowered) and fry
for 3 minutes or until golden brown.Fr y chicken 5 to 8 minutes or until brown and fully cooked.
DEEP FRIED CHICKEN
1 fryer chicken (21⁄2 lbs.),cut up
1
⁄4 teaspoon salt
11⁄2 cup all-purpose flour 11⁄4 cup milk
1 teaspoon seasoned salt
Preheat oil to 360° F. Combine flour and seasonings.Dip chicken pieces in flour,then milk,then flour
again.Fr y for 20 minutes or until golden brown and done.
Fryer not operating
Oil spills over
Food Greasy or not crisp
Unpleasant smell
Control Panel Assembly
not seated
Not turned on
Not plugged in
Outlet not energized
Over heat device activated
Oil Reservoir over filled
Too much water in food
Food batches too large
Food batches too large
Oil temperature too low
Using wrong type of oil
Oil not fresh
Reinstall Control Panel
Assembly
Push Start
Insert plug into outlet
Check fuses or circuit breaker
Unplug unit and allow to
cool. Then press the “Red”
reset button on back of
Control Panel
Remove excess oil
(when cool)
Dry food with towel
Use less food in basket
Use less food in basket
Increase oil temperature
Use good vegetable oil
(See Tips for Oil Use)
Replace oil
TROUBLE SHOOTING
PROBLEM CAUSE SOLUTION
RECIPES
CZF600CN.02.CN.OM1 (Visual) 08.10.2002 01.35pm Page 14
Page 9

RECIPES
FRENCH-FRIED SHRIMP
2 pounds fresh or frozen shrimp in shells1⁄4 teaspoon pepper
3
⁄4 cup flour 1 beaten egg
1
⁄3 cup yellow cornmeal
3
⁄4 cup cold water
1
⁄2 teaspoon salt 2 tablespoons oil
1
⁄2 teaspoon sugar
Thaw shrimp if frozen.Peel shrimp,leaving the last few sections before the tails and the tails intact.
Devein shrimp.Rinse shrimp,pat dry.Set aside.
Stir together flour,cornmeal,sugar,salt and pepper.Make a well in the center. Combine egg,cold
water and the 2 tablespoons oil;add to dry ingredients.Beat with a rotary beater till smooth.Dip
shrimp into batter.Fry shrimp a few at a time for 2 to 3 minutes or till golden brown. Remove and
drain.
FRIED ONION RINGS
3
⁄4
cup flour 1 tablespoon oil
2
⁄3 cup milk
1
⁄4 teaspoon salt
1 egg 4 medium yellow or white onions;
sliced 1⁄4
-inch thick
In a bowl combine flour,milk,egg,1 tablespoon oil and 1⁄4 teaspoon salt.
Beat until smooth.Separate onions into rings. Using a fork,dip onion rings into batter;drain off
excess batter.Fry onion rings,a few at a time for 2 to 3 minutes or till golden.Remove and drain.
CHICKEN KIEV
4 whole boneless,skinless chicken breasts 1 stick butter or margarine
1 tablespoon chopped onion
1
⁄2
cup flour
1 tablespoon chopped parsley 1 egg,beaten
1
1
⁄2 teaspoon salt 1 cup fine,dry bread crumbs
Preheat oil to 360° F. Place chicken breasts between two pieces of plastic wrap.Pound with wooden
mallet to flatten to 1⁄4-inch thick.Remove plastic.Combine onion,parsley and salt and sprinkle on
chicken.Cut butter into 8 pieces.Place a piece of butter on seasoned chicken toward one end. Roll
as jelly roll,starting at end with butter,tucking in sides of meat. Press to seal well.Secure with
toothpicks.Dust with flour,dip in beaten egg,then roll in bread crumbs.Chill rolls of chicken
thoroughly (at least one hour).Place rolled chicken in a single layer in fry basket.Lower and cook 5
minutes or until brown.To test for doneness,remove a piece of chicken from the oil.When fork can
be inserted with ease,chicken is done.
HUSH PUPPIES
13⁄4 cup cornmeal
1
⁄2 teaspoon garlic salt
1
⁄2 cup all purpose flour
1
⁄2 cup chopped onion
3
⁄
4 teaspoon baking soda 1 cup buttermilk
1
⁄2 teaspoon salt 1 egg
1 teaspoon sugar
Preheat oil to 375° F. Sift together cornmeal, flour,baking soda, salt,sugar and garlic salt.Add
onions.Combine egg and buttermilk,then add to dry ingredients,stirr ing until mixture is moist.Drop
batter by teaspoonfuls into deep hot oil,(basket should already be lowered) frying only a few at a
time.Turn hush puppies once and cook until golden brown.Remove and drain on paper towels.
QUICK DOUGHNUTS
Refrigerated can of biscuits
1
⁄
2 cup sugar
2 tablespoons ground cinnamon
Preheat oil to 375° F.Take each biscuit and flatten slightly with palm of hand.With finger,punch
holes in center of each biscuit to shape into doughnuts.Fry 2 minutes,turning once.Remove from
fat and drain on paper towels.Roll doughnut in mixture of cinnamon and sugar.Serve warm.
RECIPES
CZF600CN.02.CN.OM1 (Visual) 08.10.2002 01.35pm Page 16
Page 10

NOTES NOTES
CZF600CN.02.CN.OM1 (Visual) 08.10.2002 01.35pm Page 18
Page 11

Rival Two (2) Year Full Warranty
Rival warrants for TWO (2) FULL YEARS from the original date of purchase, to repair or, if repairs are not
commercially applicable, to replace without charge (parts and labor) any supplied or manufactured part of this
appliance which, upon inspection, by an authorized service center, proves to have failed in normal use due to
defects in material or workmanship, or, at its option, to replace the unit. If the product can not be reasonably
repaired the consumer may elect a free replacement or a refund.
Operations under conditions other than those recommended or at voltages other than the voltage indicated
on the unit, or any attempts by unauthorized personnel to service the unit or modify it, will render the
guarantee void.
Rival shall not be liable for any personal injury, property damage, or any incidental or consequential damages
of any kind, resulting from defects, malfunctions, misuse, improper installation or operation of the product.
RIVAL EXPRESSLY DISCLAIMS ALL RESPONSIBILITY FOR CONSEQUENTIAL DAMAGES OR INCIDENTAL LOSSES
FOR BREACH OF EXPRESS OR IMPLIED WARRANTIES CAUSED BY USE OF THIS PRODUCT. SOME STATES DO
NOT ALLOW THE EXCLUSION OR LIMITATION OF INCIDENTAL OR CONSEQUENTIAL DAMAGE.
The provisions of this warranty are in addition to and not a modification of or subtraction from the statutory
warranties and other rights and remedies contained in any applicable legislation and to the extent that any
such provision purports to disclaim, exclude, or limit any such statutory warranties or other rights or
remedies, such provisions shall be deemed to be amended to the extent necessary to comply therewith.
If a fault should develop during the 2-year full warranty, then return it to an authorized service station. To
obtain this warranty service visit:
www.rivalproducts.com
CZF600CN.02.CN.OM1 (Visual) 08.10.2002 01.35pm Page 20
 Loading...