

Risco WL X312, WL T312 Installation Instructions Manual
Two Way Wireless PIR Outdoor Detector
WL X312
Installation Instructions
2 Installation Instructions

Installation Instructions 3
Table of Contents
Installation .....................................................................................................................................4
Introduction ...................................................................................................................................4
Mounting ........................................................................................................................................4
Mounting Considerations ...........................................................................................................4
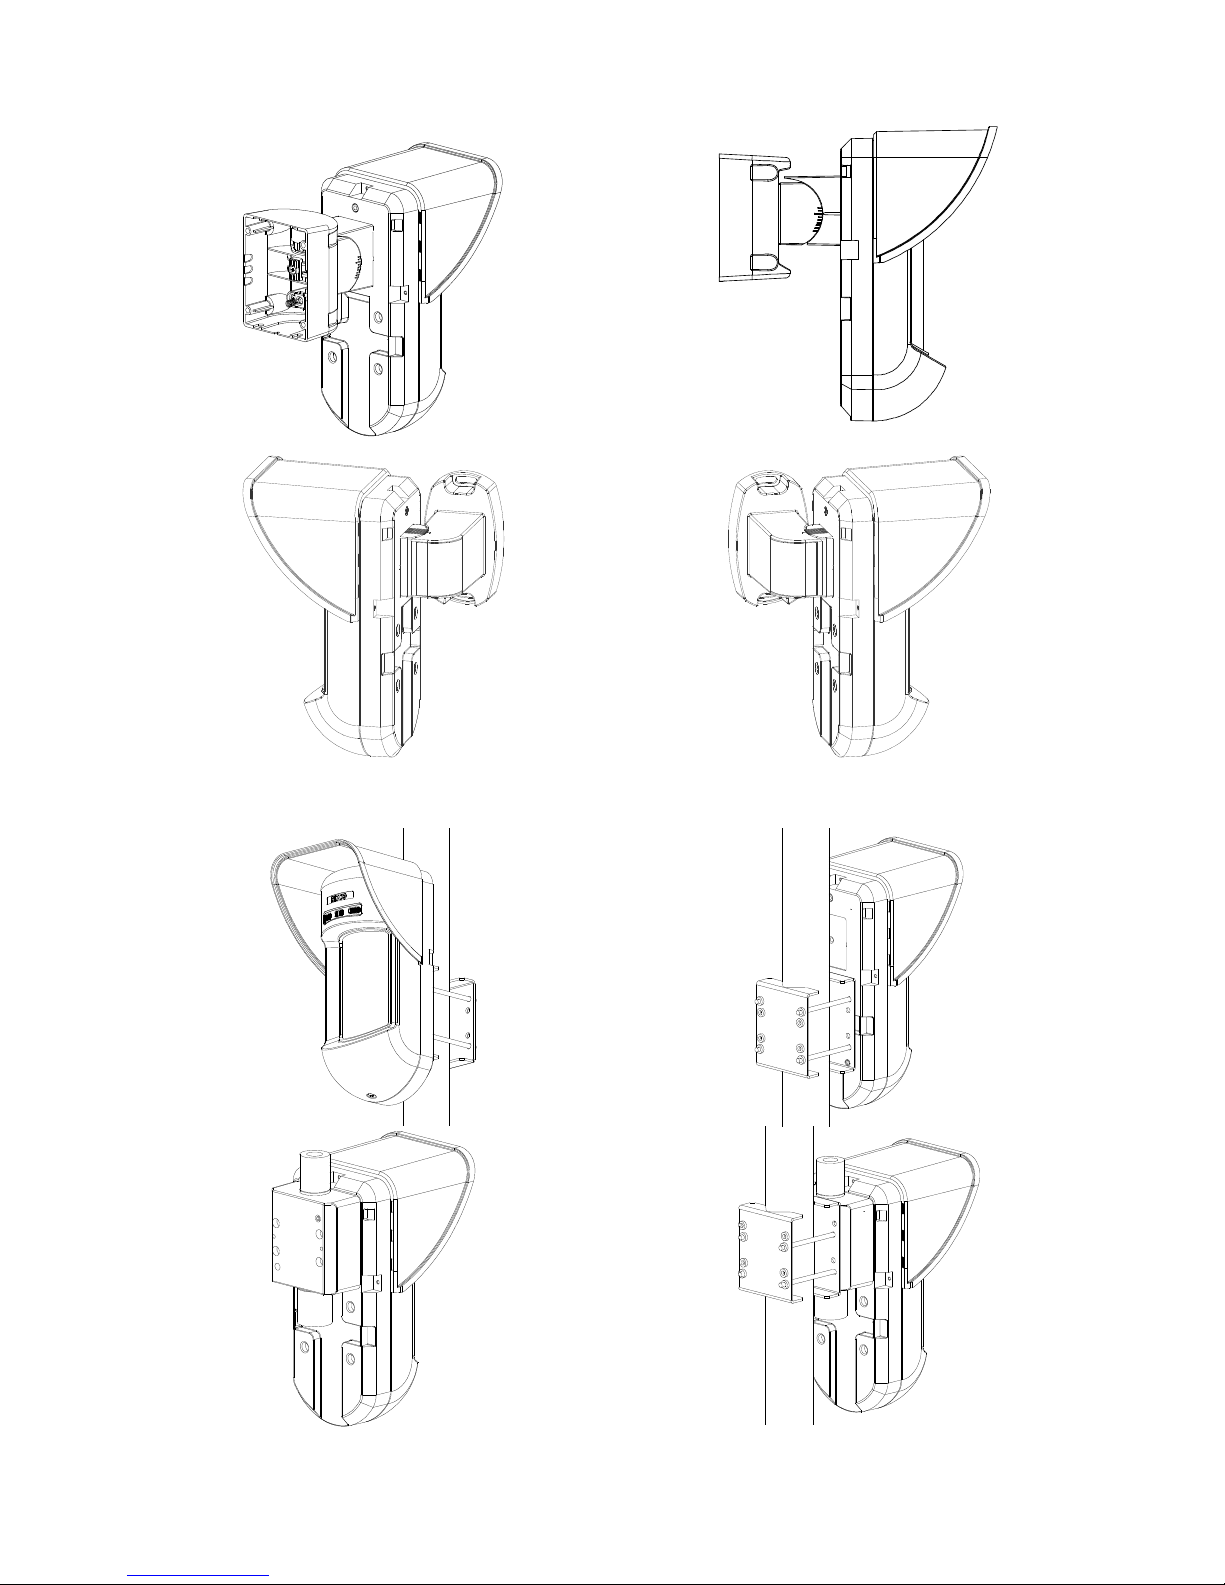
Wall Mount Installation ...............................................................................................................6
Flat Mounting..............................................................................................................................6
45° angle Mounting (Left side mounting) ..................................................................................6
Changing Back Tamper position................................................................................................7
Back Tamper Terminal Wiring.....................................................................................................7
Configuration Parameters ...........................................................................................................7
Detection Length Adjustment .....................................................................................................8
Walk test.........................................................................................................................................9
LEDs Display .................................................................................................................................9
Operational Modes........................................................................................................................9
Transmitter/Receiver Communication link setup.....................................................................9
Standard Swivel Installation (Optional) ...................................................................................10
Wall Mounting...........................................................................................................................10
Replacing Lenses .......................................................................................................................12
Technical Specification..............................................................................................................13
Ordering Information..................................................................................................................13
Accessory Kits ............................................................................................................................13
4 Installation Instructions
Installation
Introduction
RISCO Group's WL X312 is a unique detector with signal processing based on two Passive Infrared
(PIR) channels. The WL X312 has an adjustable detection range. The detector is compatible with
all RISCO Group Wireless and Hybrid systems.
The following instructions describe the installation of the WL X312.
Mounting
Mounting Considerations
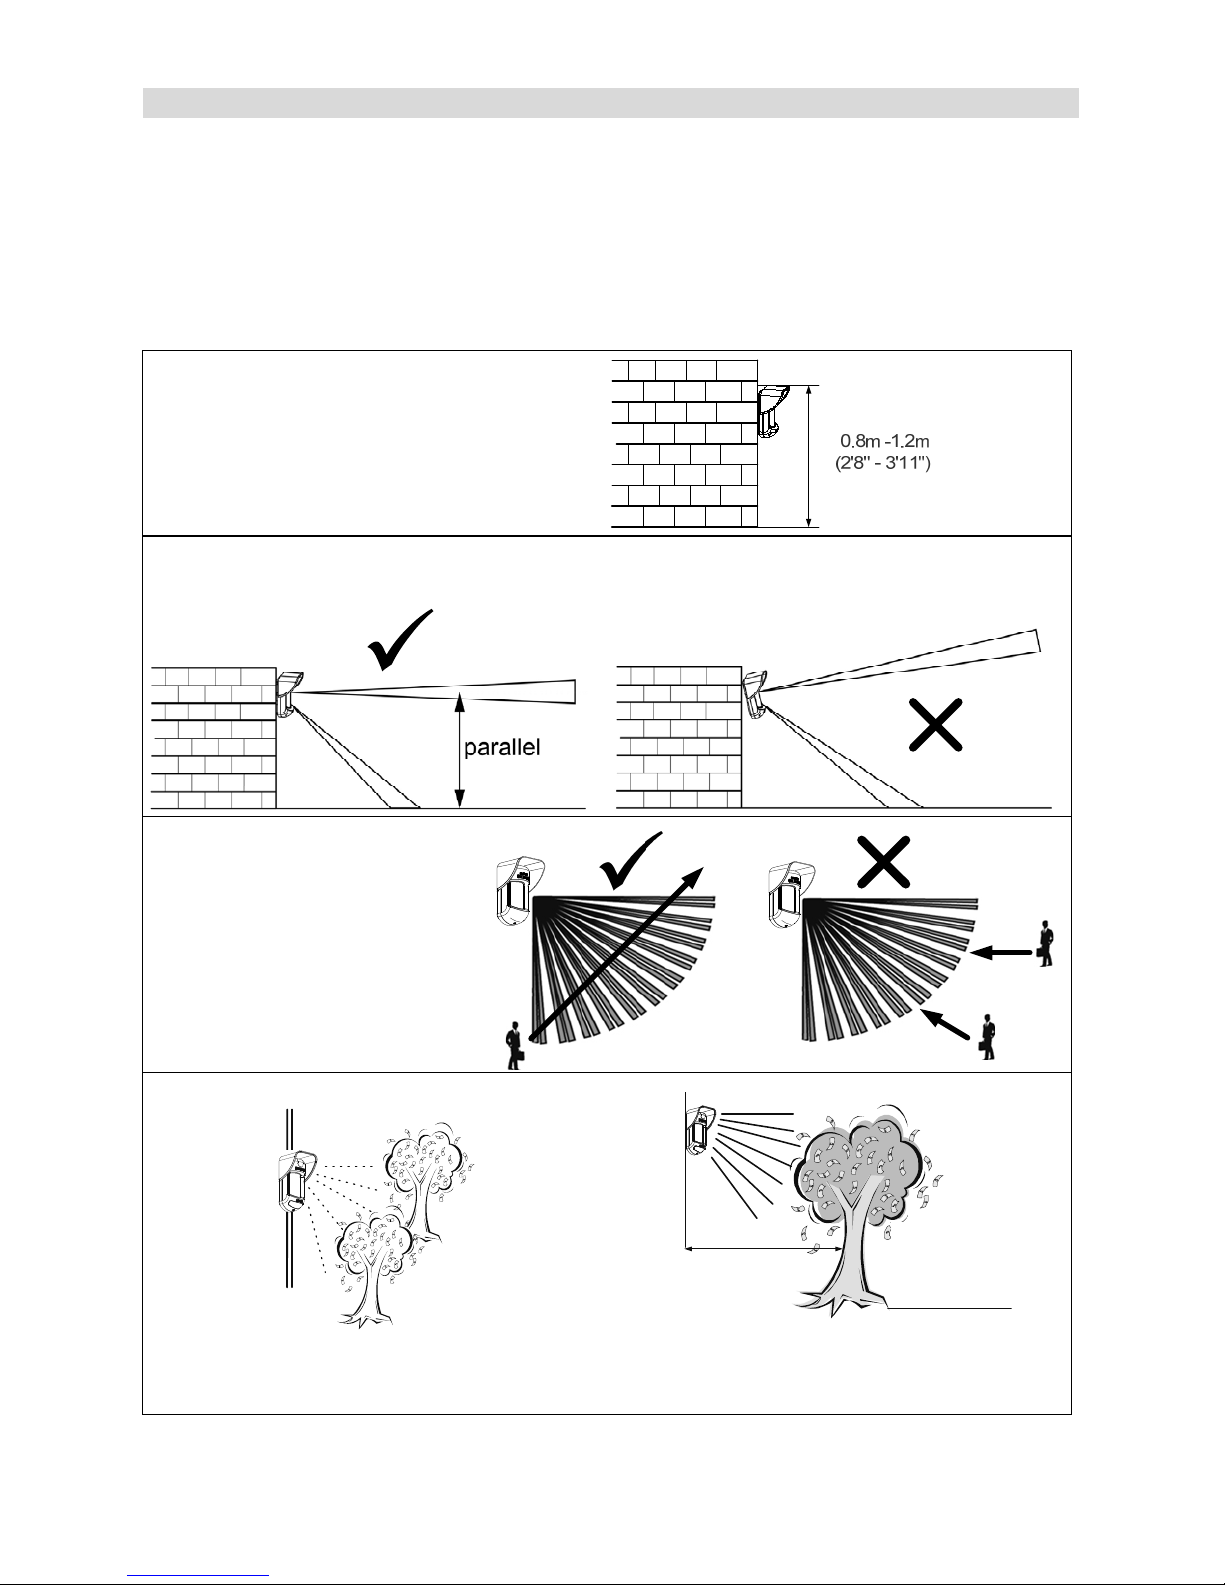
1. Installation Height: 0.8m - 1.2m
(2'8" – 3'11")
Typical Installation Height: 1m (3'3")
2. To ensure maximum operational reliability, install the detector perpendicular to the ground so
that the upper detection area is parallel to the ground.
3. For optimum detection,
select a location that is likely
to intercept an intruder
moving across the coverage
pattern.
4. Avoid pointing the detector to moving
objects (swaying trees, bushes etc.)
Out of
Detection Range
With moving objects
keep distance of
minimum 5 meters (16')
5m (16')
5. Ensure any objects do not obstruct the field
of view. Pay attention to growing trees or
bushes, plants with big moving leaves etc.
Installation Instructions 5
Installing the WL X312 detector in challenging situations
In the following situations, rapid and significant infrared radiation changes can happen in both
PIR channels together, resulting in false alarms and therefore care should be taken.
1. Situations in which metal and/or glass objects measuring over 70cm (2’4”) in height from the
ground are in the field of view of the detector (cars, metal gates, shutters, metal walls,
windows, etc.)
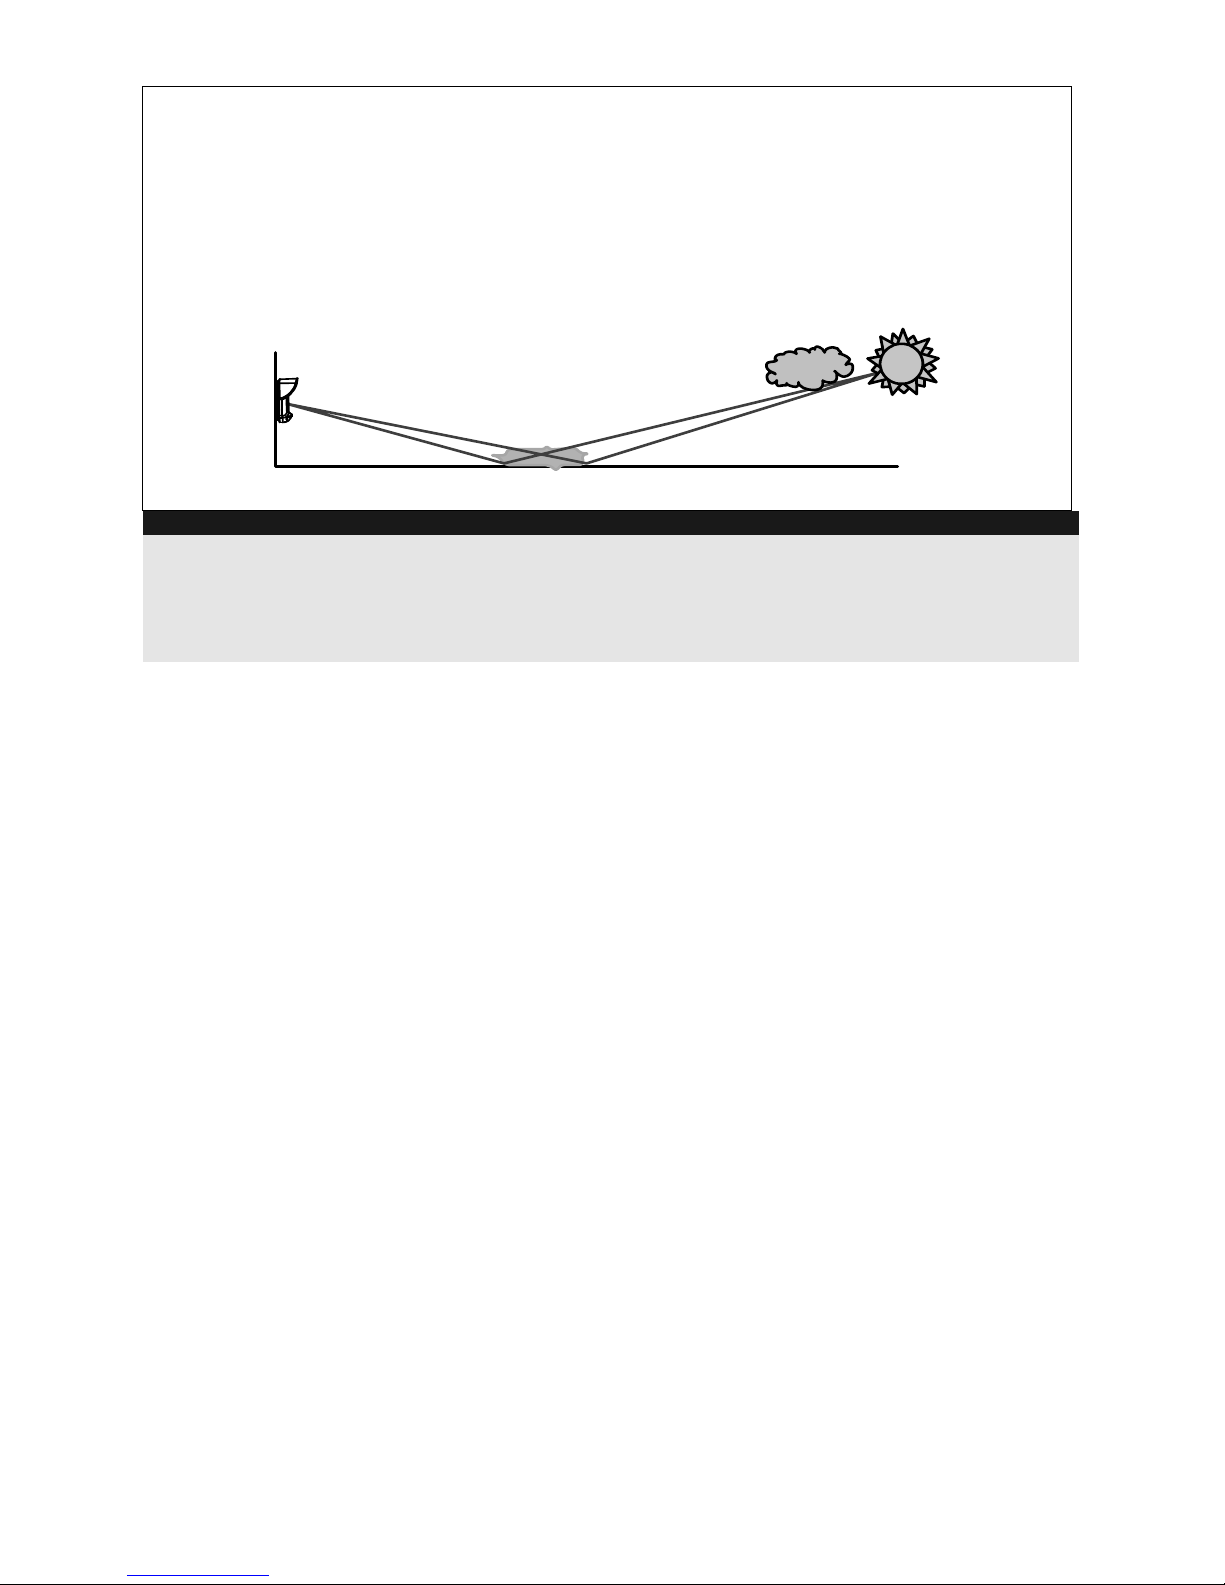
2. Situations in which a reflective surface on the ground larger than 1m (3’4”) in diameter may
cause reflection into the detector’s lens. Examples of a reflective surface on the ground are a
puddle, wet road or car park, smooth concrete or asphalt surface, swimming pool, etc.
Water Reflection
NOTES:
1. Please note that any outdoor PIR detector will require reduction in range to a shorter distance than the car,
metal object or surface reflection (so that these objects won’t be protected) in order to eliminate false alarms.
2. For full 15m (50’) coverage in the above situations, it is highly recommended to install the wired WatchOUT
DT, the only outdoor detector with 2 PIR channels and 2 Microwave channels.
3. Wireless WatchOUT detectors include high quality Silicon filters on the PIR sensors for blocking out white light
interferences. These filters are not intended to block infrared thermal radiation.
 Loading...