

Risco VUpoint RVCM61H03 Quick Manual
VUpoint
Pan/Tilt Indoor
P2P IP Camera
Model: RVCM61H03
Quick Guide
EN
FR ES IT
2
Language Page
3
6
9
12
EN
FR
ES
IT
3
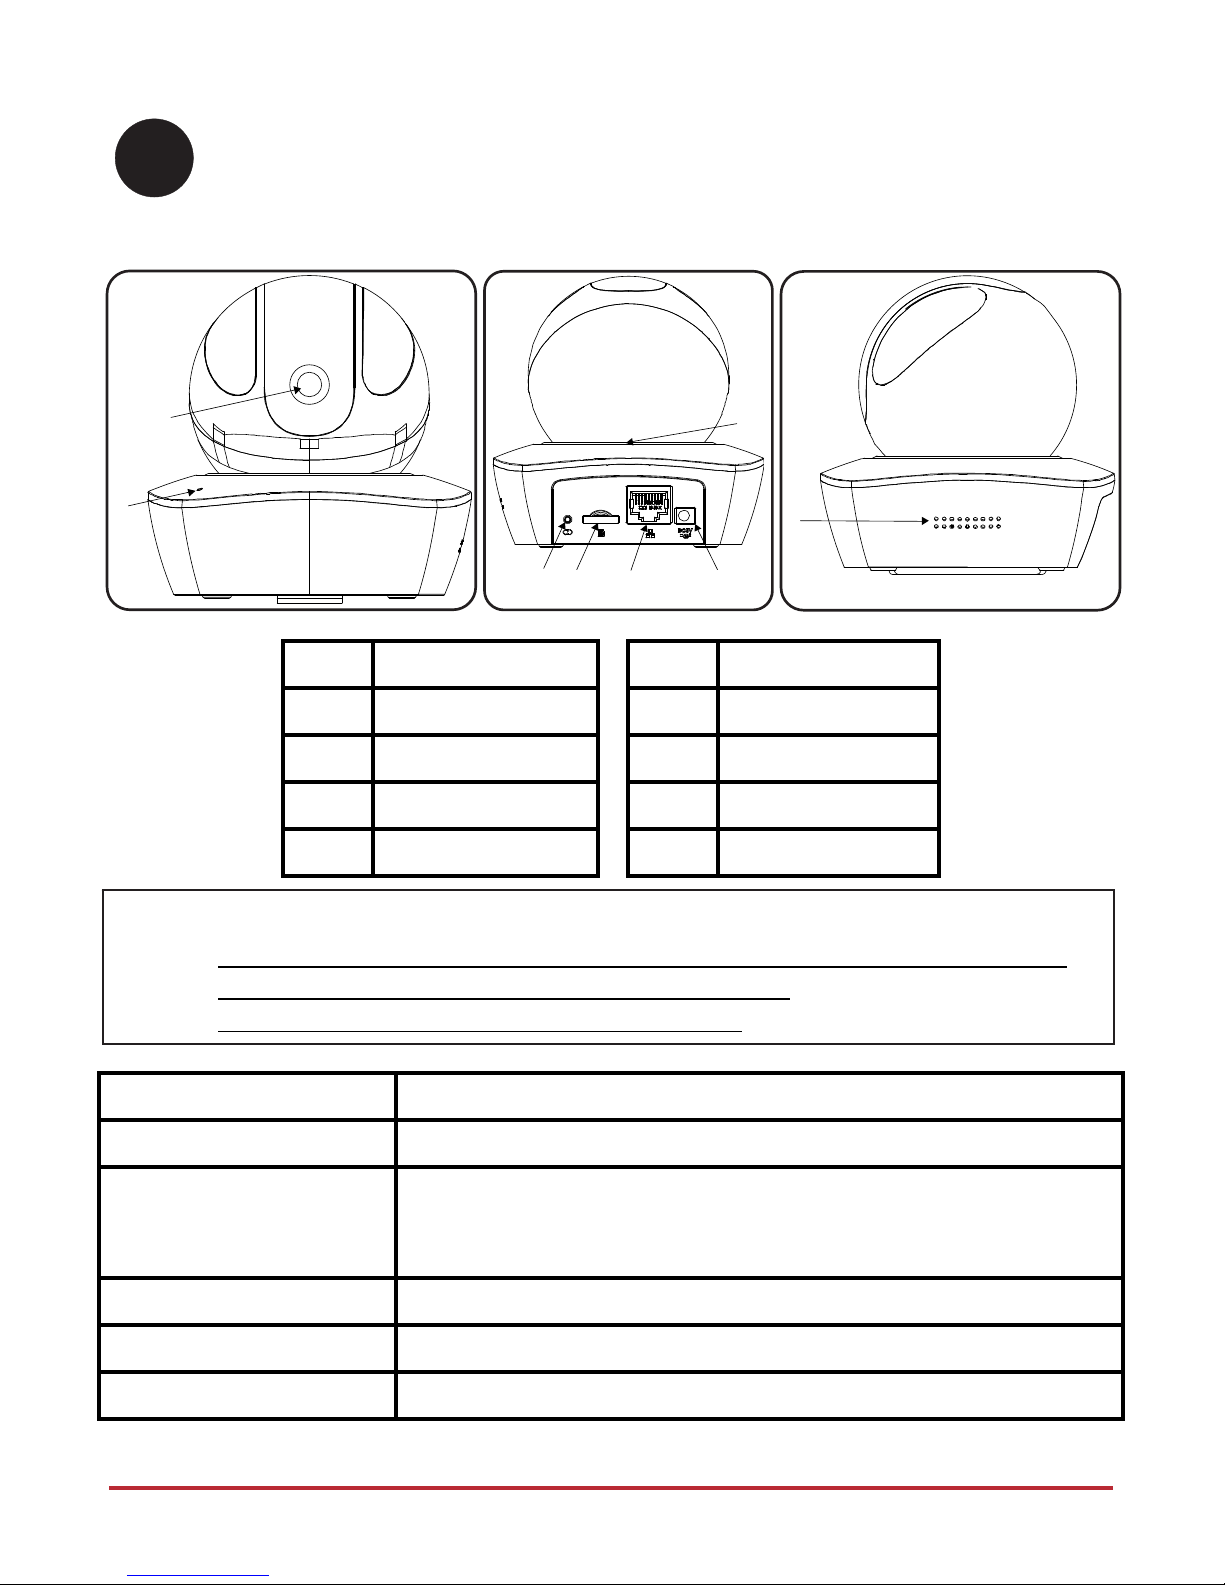
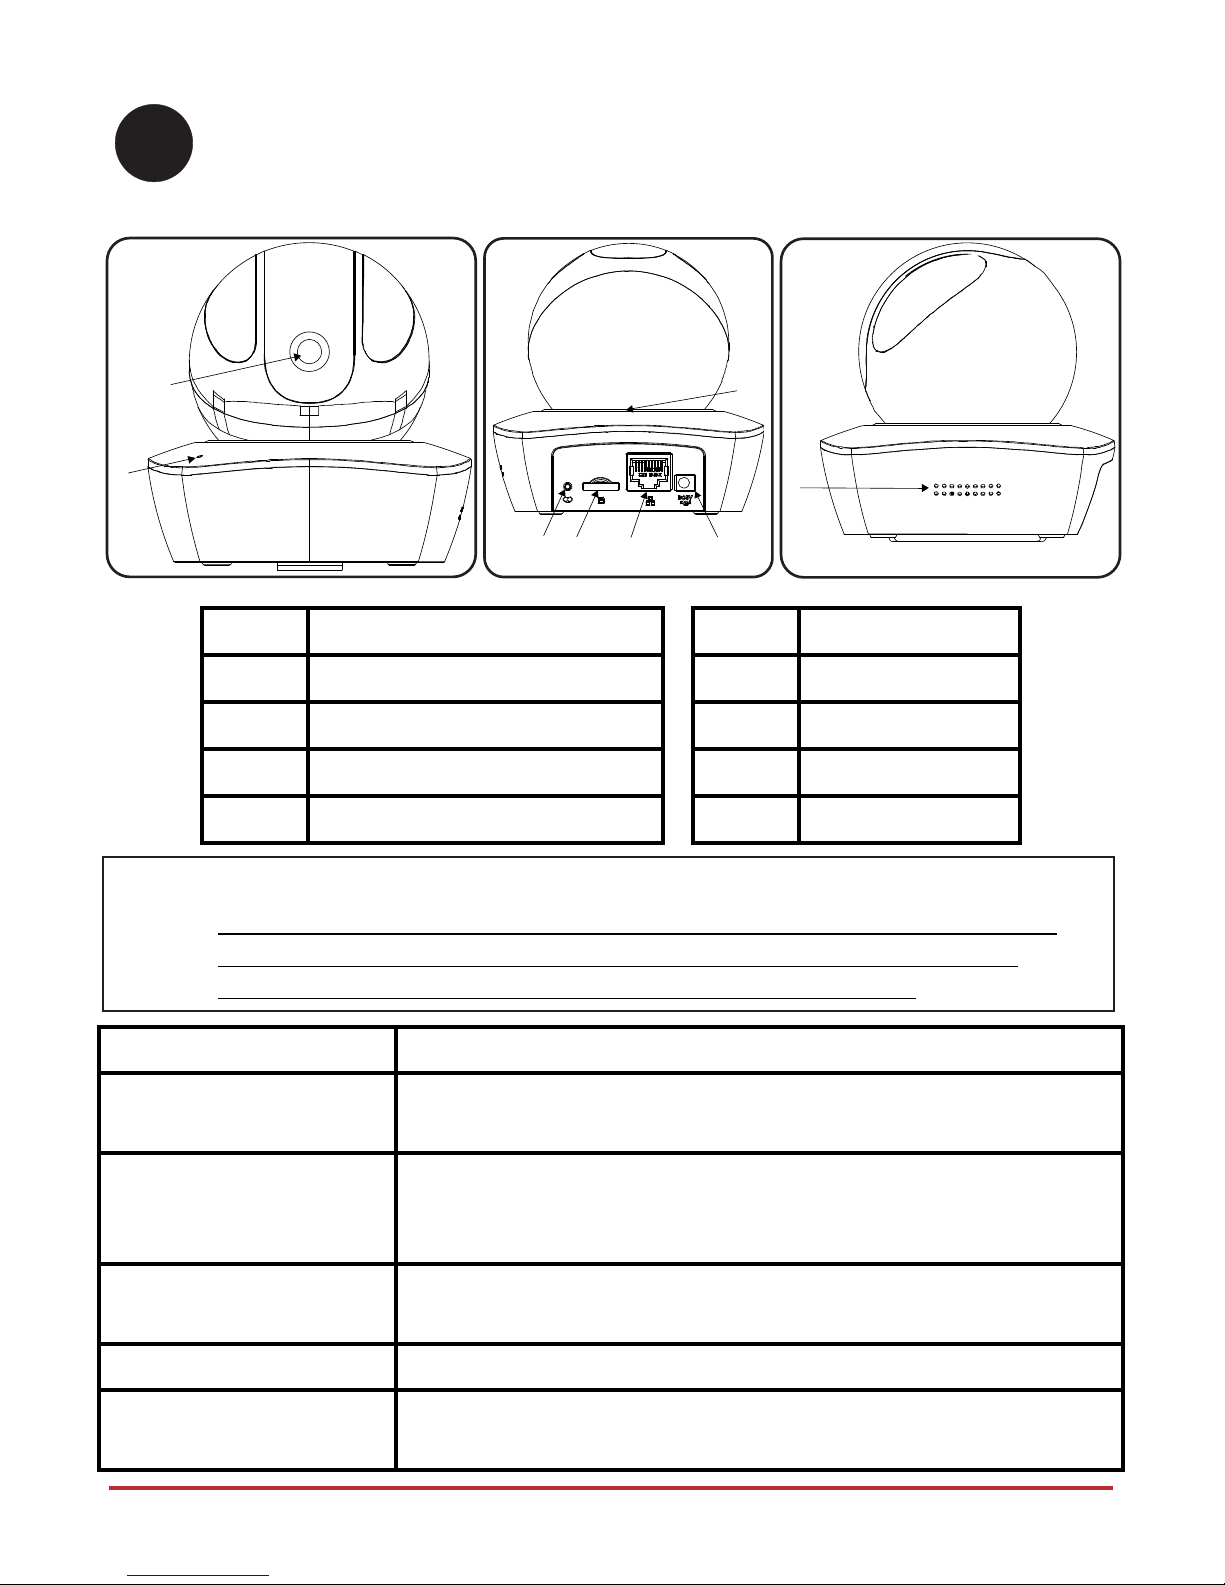
IP Camera Components
Label Description
Label Description
1
Lens
5
Ethernet port
2
Microphone
6
Power port
3
Reset/WPS button
7
Indicator light
4
Micro SD card slot
8
Speaker
Indication Status
Red light normally on Booting
Green light slow flashing
IP Camera is not connected to the RISCO Cloud. Please check for
internet connection and try to connect again by rebooting the IP
Camera.
Blue light normally on IP Camera is successfully connected to the RISCO Cloud.
Blue light flashing Device upgrade
Red light slow flashing SD Card malfunction or external hardware alarm
EN
1
2
3 6
5
4
7
8
Note:
• For reset (used to return the camera settings to factory default mode), long press
the Reset/WPS button for 8 seconds; the light turns off
• For WPS (Wi-Fi Protected Setup), one quick press
4
Defining IP Camera Settings
Step 1
Connect one end of the network cable (LAN) to the camera Ethernet port and the other side to
your router.
Step 2
Log into the Installer Administration application (www.riscocloud.com/installer) and enter
your Installer Admin user name and password.
NOTE – It is recommended to use Google Chrome or Mozilla Firefox to log into the Installer
Administration application.
Step 3
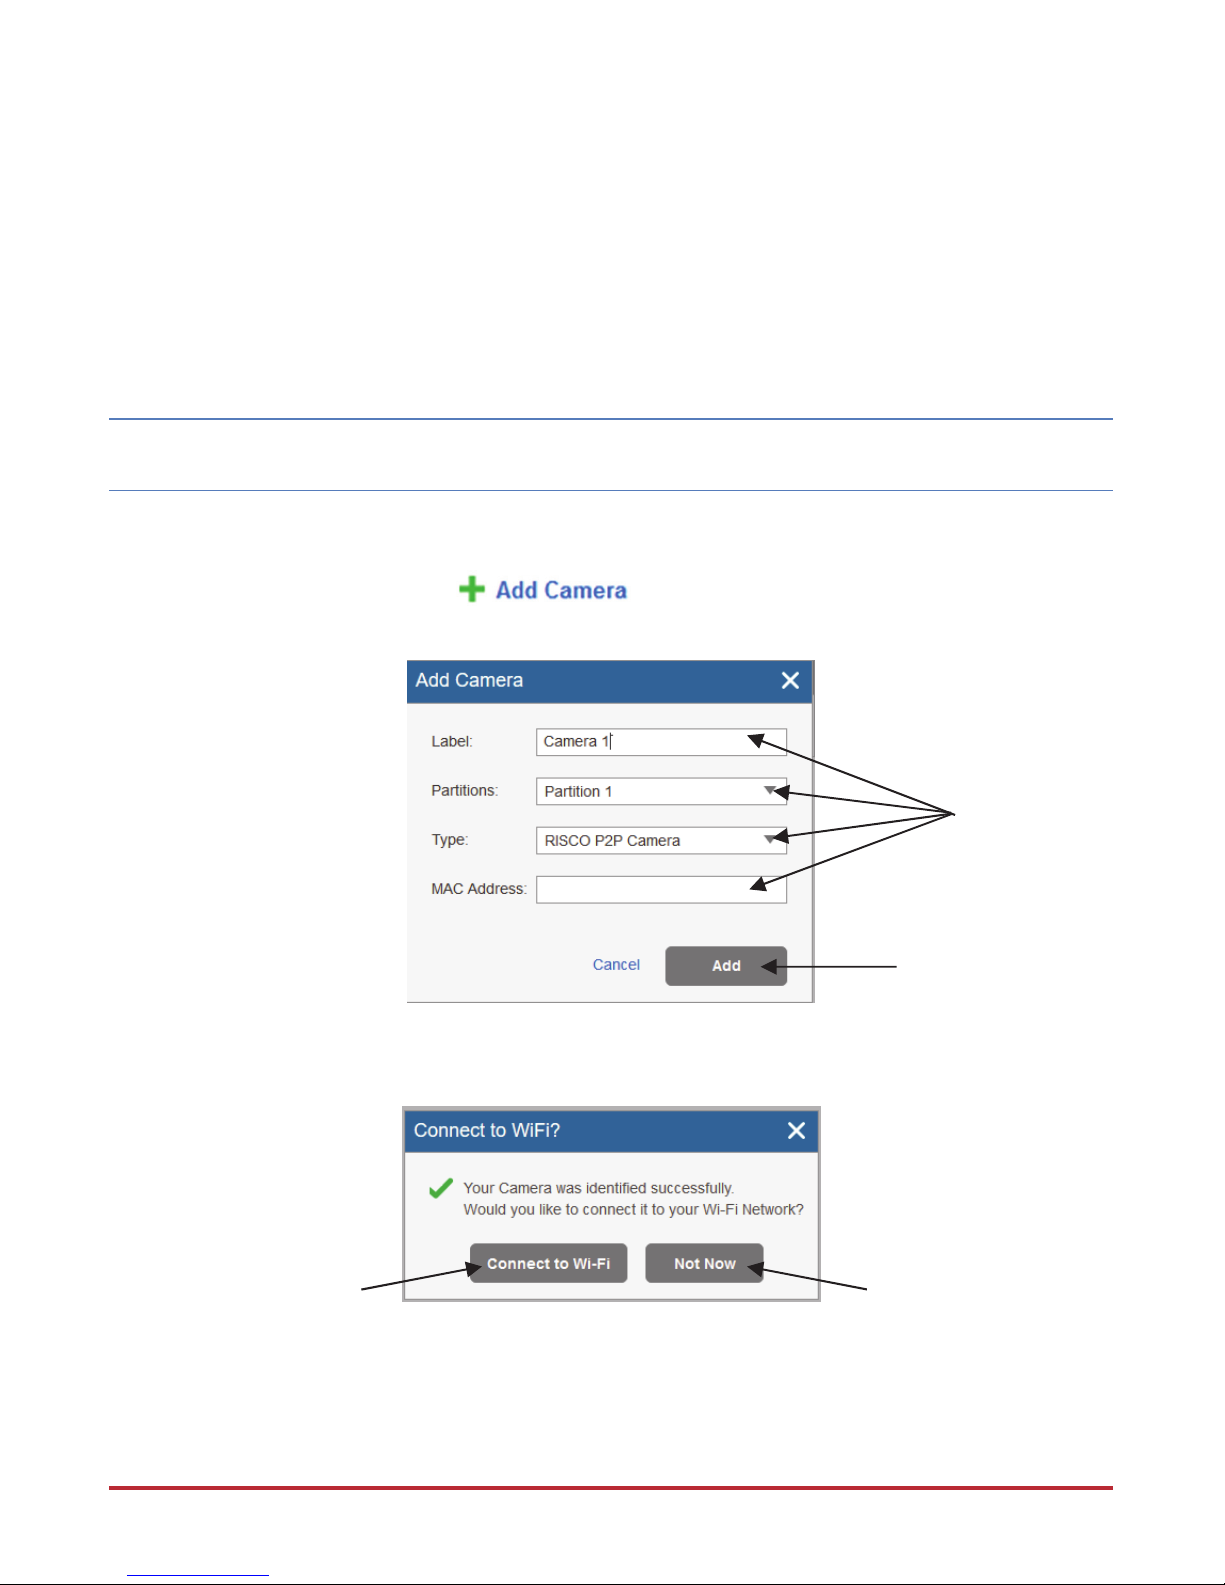
Once logged in, click Control Panels List → select the desired control panel →
click Network Cameras → click and then enter the definitions into the
provided fields.
Step 4
Select one of the following options:
Define
Camera
Settings
Click when done
Click for Wi-Fi
network connection
(go to step 5)
Click to maintain
IP Camera
connection using a
LAN network
connection
(go to step 7)
5
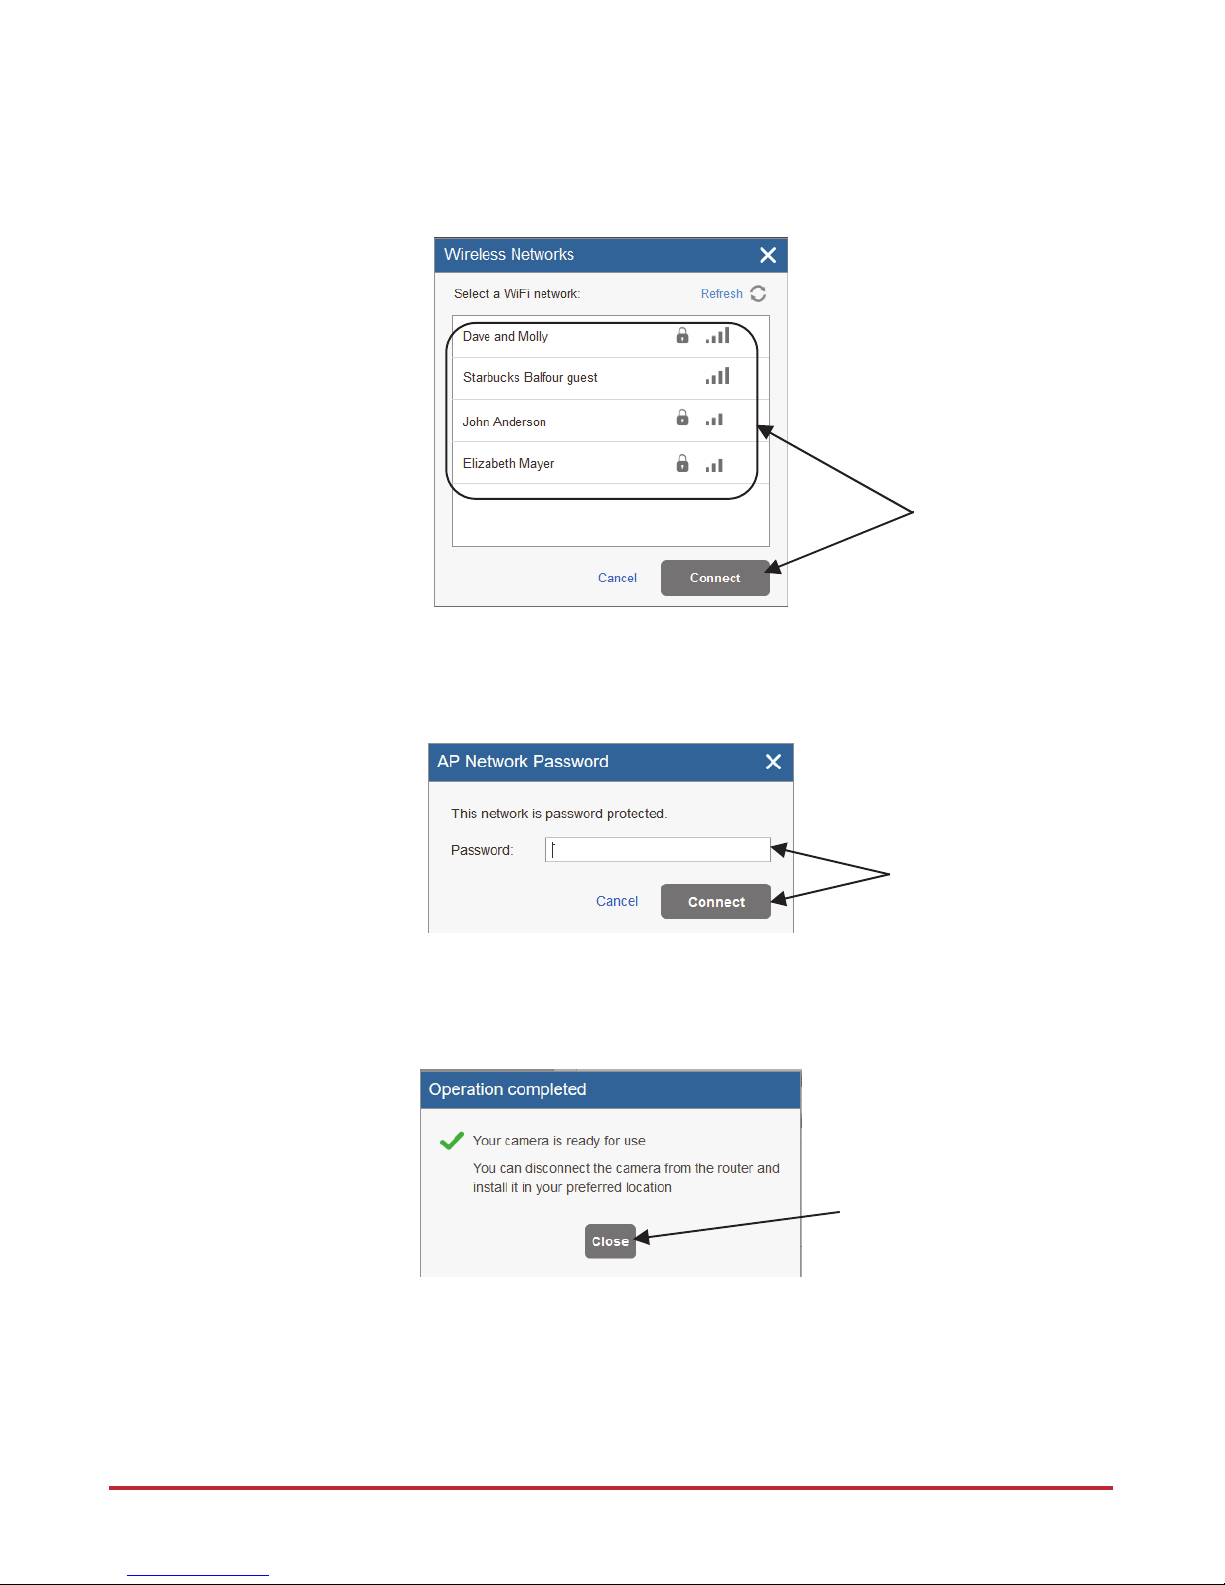
Step 5
If you selected the “Connect to Wi-Fi” option, select a wireless network from the available list
and click Connect.
Step 6
If your network is password protected, enter a password into the displayed password screen
and then click Connect.
Step 7
Once this message is displayed, click Close. The defined IP camera is displayed in the IP
Cameras page.
Make your
selection and
then click
Connect
Enter the
Network Password
and click Connect
Click Close
6
Composants de la caméra IP
Libellé Description
Libellé Description
1
Objectif
5
Port Ethernet
2
Microphone
6
Port d'alimentation
3
Bouton de réinitialisation/WPS
7
Indicateur LED
4
Logement pour carte Micro SD
8
Haut-parleur
Indication État
Voyant rouge allumé
normalement
Démarrage en cours
Voyant vert clignotant
lentement
La caméra IP n'est pas connectée au RISCO Cloud. Vérifiez la
connexion Internet et essayez de vous reconnecter en
redémarrant la caméra IP.
Voyant bleu allumé
normalement
La caméra IP a bien été connectée au RISCO Cloud.
Voyant bleu clignotant Mise à niveau de la caméra
Voyant rouge clignotant
lentement
Dysfonctionnement de la carte SD ou alarme matérielle externe
FR
1
2
3 6
5
4
7
8
Remarques :
• Pour réinitialiser la caméra (c.-à-d. rétablir ses paramètres par défaut), appuyez
sur le bouton de réinitialisation/WPS pendant 8 secondes ; le voyant s'éteint
• Pour activer le WPS (Wi-Fi Protected Setup), appuyez rapidement
 Loading...