

Risco VUpoint RVCM11P09 Quick Manual

VUpoint
Cube
P2P PoE Network Camera
Model: RVCM11P09
Quick Guide
EN
FR ES IT
2
Language Page
3
5
7
9
EN
FR
ES
IT
3
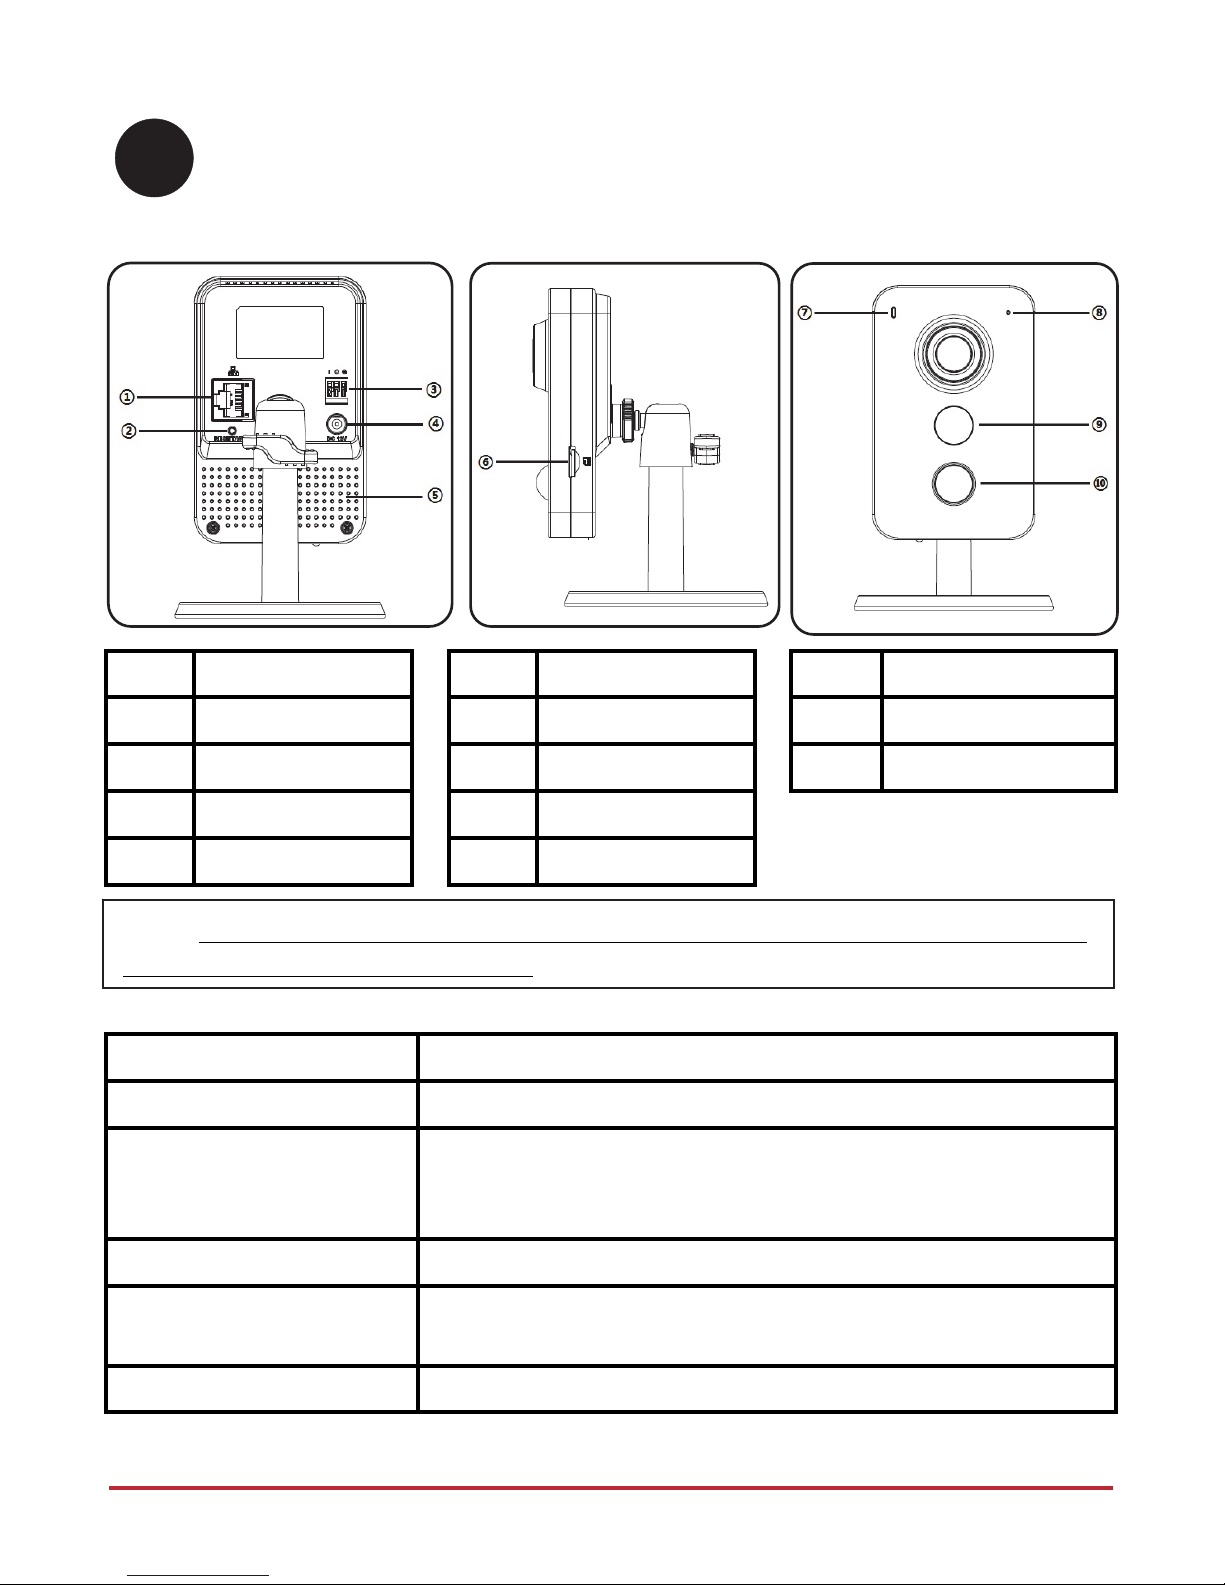
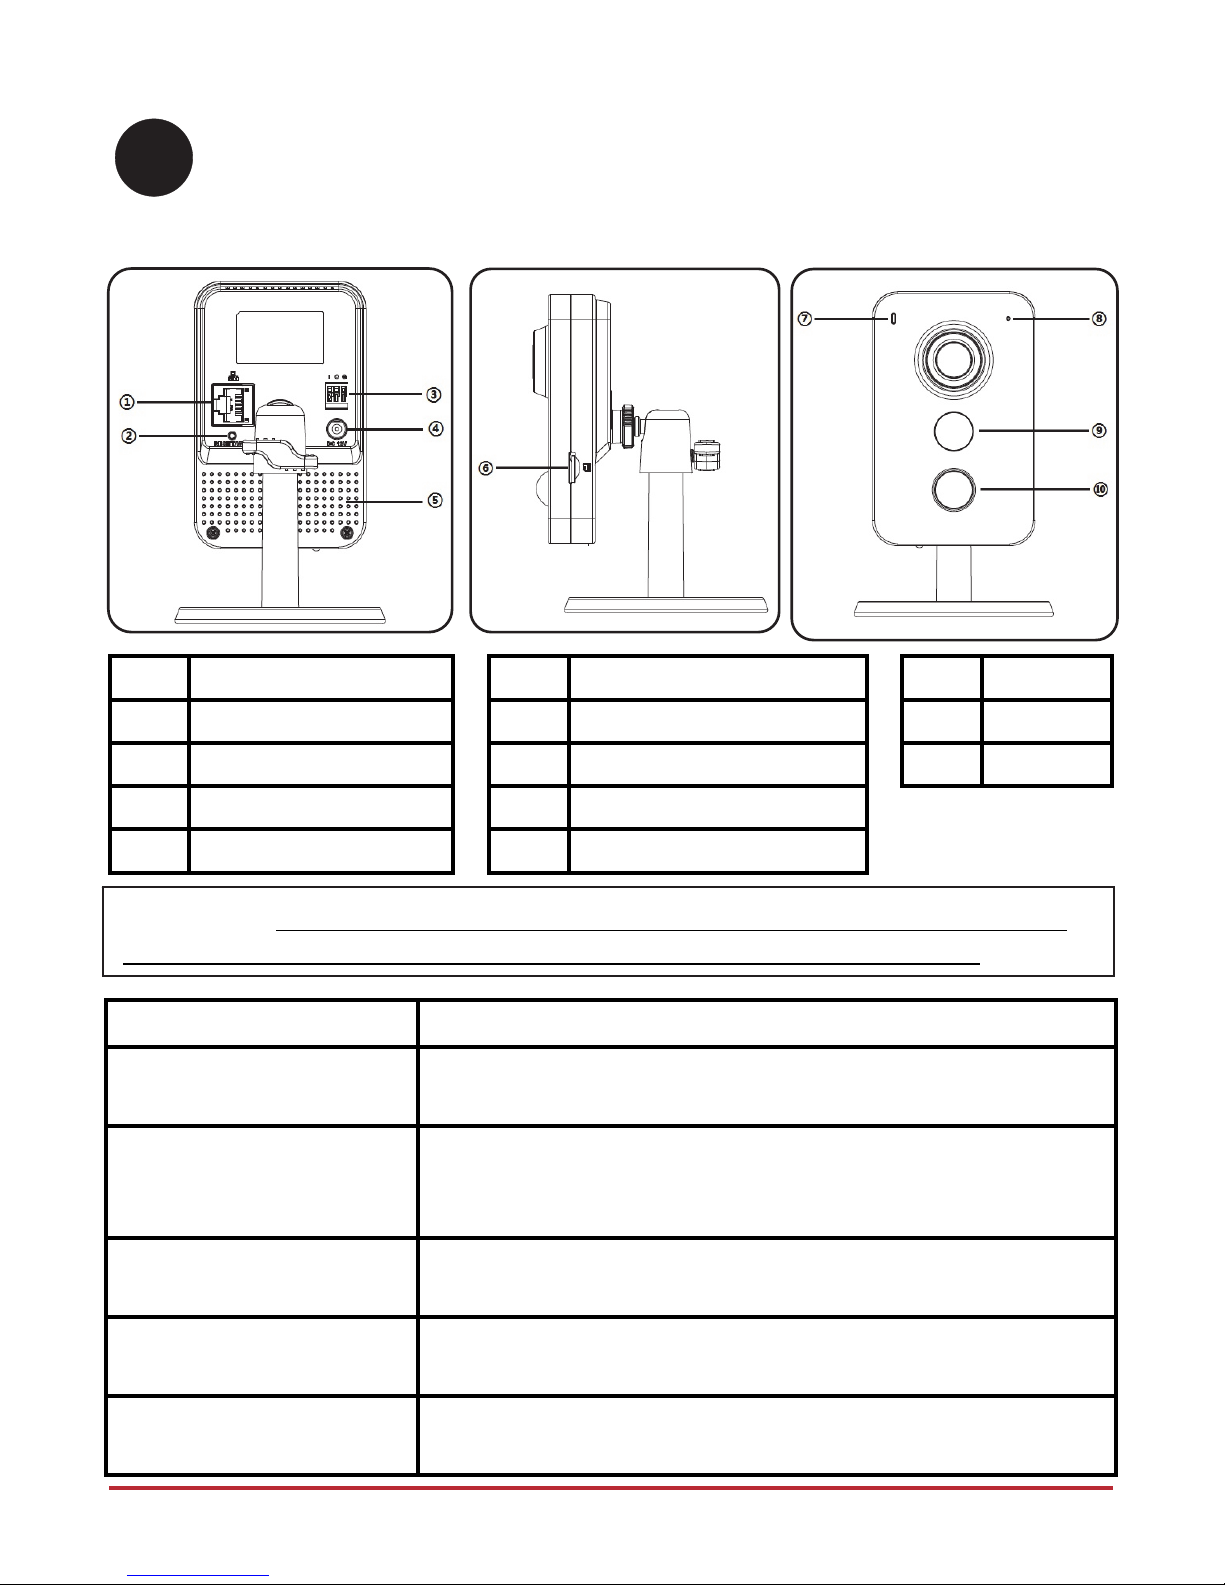
Cube PoE Network Camera Components
Label Description
Label Description Label Description
1
Network port
5
Built-in speaker
9
IR LED
2
Reset button
6
Micro SD card slot
10
PIR
3
Alarm input/output
7
Indicator light
4
Power port
8
Built-in MIC
Indication Status
Red light normally on Booting
Green light slow flashing
IP Camera is not connected to the RISCO Cloud. Please check
for internet connection and try to connect again by rebooting the
IP Camera
Green light normally on IP Camera is successfully connected to the RISCO Cloud
Red and green lights flash
alternately
Device upgrade
Red light slow flashing SD Card malfunction or external hardware alarm
EN
Note: For reset (used to return the camera settings to factory default mode), long press the
Reset for 10 seconds; the light turns off
4
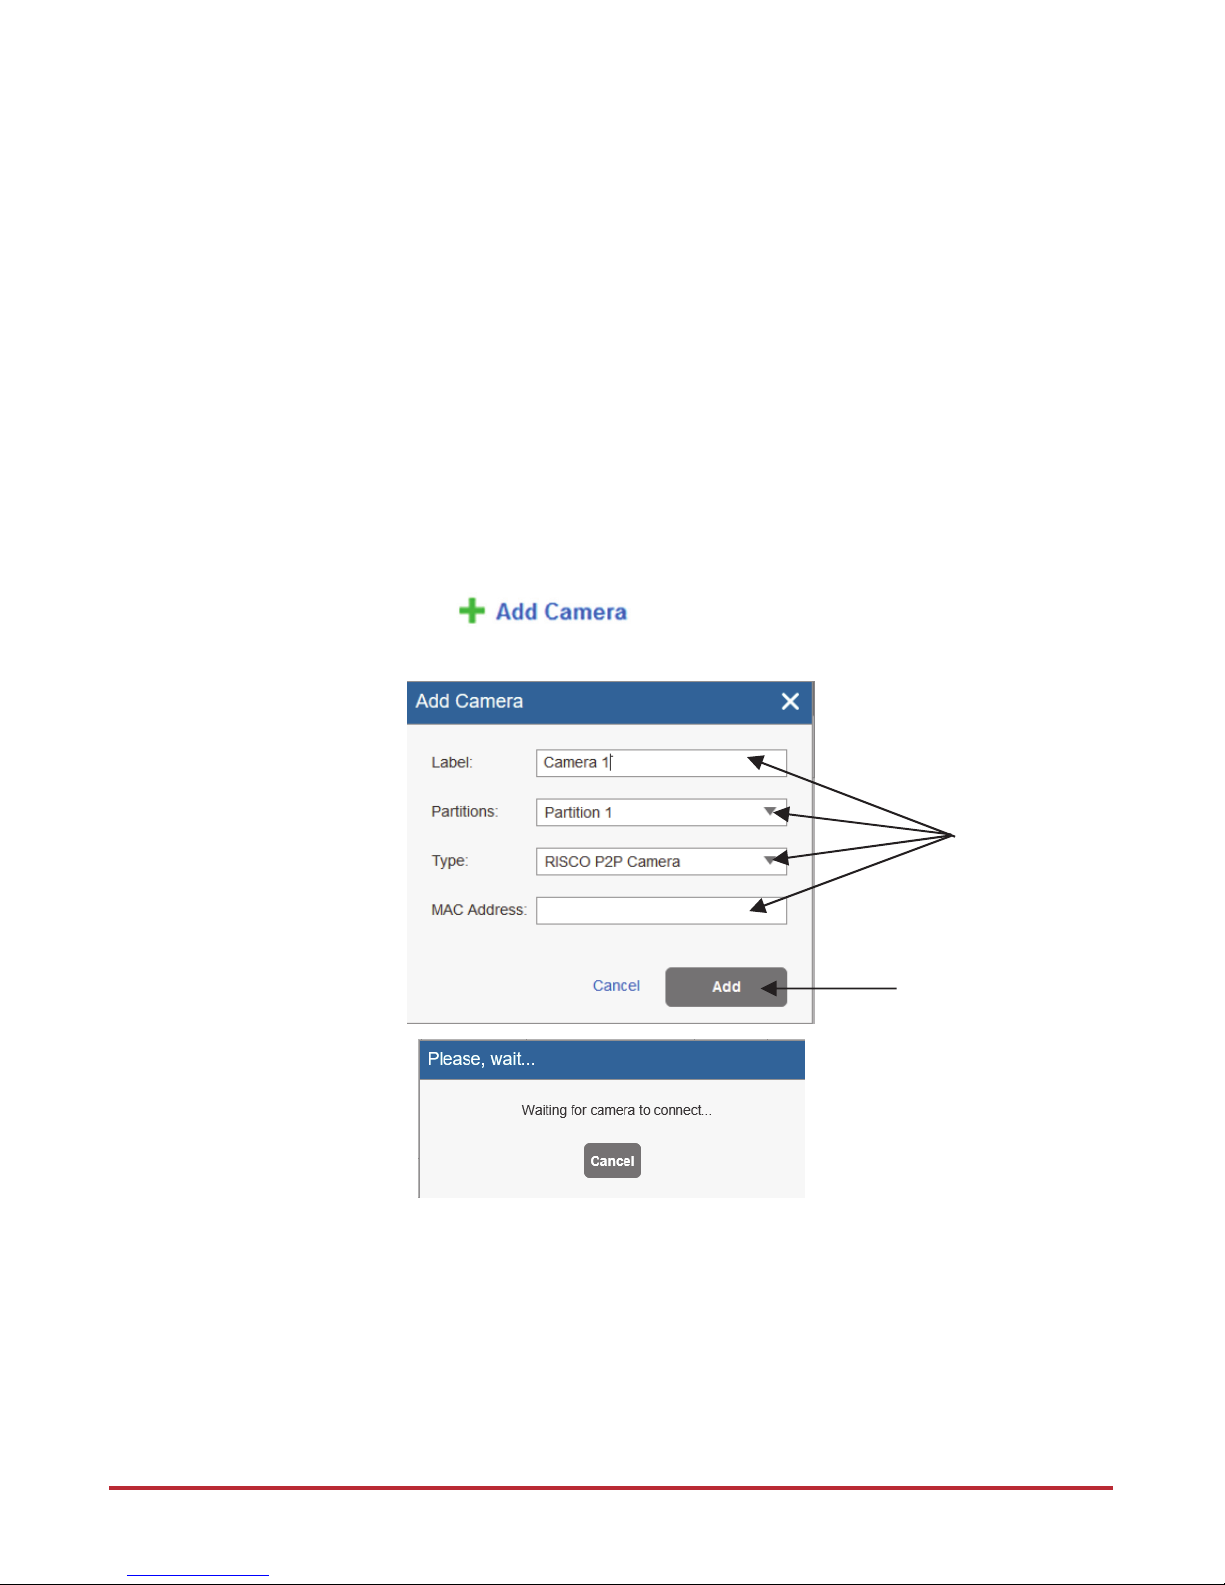
Defining IP Camera Settings
Step 1
Your PoE supported camera can be used without electrical connection by using only the
Ethernet cable. To achieve this, connect one end of the Ethernet cable (LAN) to the camera
Ethernet port and the other side to:
1. A PoE injector that is connected to your network or
2. To a PoE supported router or switch.
Alternatively, your IP camera can also be powered by a RISCO supplied 12V DC adaptor.
Step 2
Log into the Installer Administration at www.riscocloud.com/installer.
Step 3
Once logged in, click Control Panels List → select the desired control panel →
click Network Cameras → click and then fill the required fields as shown in
the example below.
Step 4
Once the “camera is ready for use” message is displayed, click OK. The defined IP camera is
displayed in the IP Cameras page and ready for use.
Define
Camera
Settings
Click when done
Please wait for
camera to connect
5
Composants de la caméra IP PoE Cube
Libellé Description
Libellé Description Libellé Description
1
Port réseau
5
Haut-parleur intégré
9
LED IR
2
Bouton de réinitialisation
6
Logement pour carte Micro SD
10
Capteur IRP
3
Entrée/sortie d'alarme
7
Indicateur LED
4
Port d'alimentation
8
Microphone intégré
Indication État
Voyant rouge allumé
normalement
Démarrage en cours
Voyant vert clignotant
lentement
La caméra IP n'est pas connectée au RISCO Cloud. Vérifiez la
connexion Internet et essayez de vous reconnecter en
redémarrant la caméra IP.
Voyant vert allumé
normalement
La caméra IP a bien été connectée au RISCO Cloud.
Voyants rouge et vert
clignotant en alternance
Mise à niveau de la caméra
Voyant rouge clignotant
lentement
Dysfonctionnement de la carte SD ou alarme matérielle externe
FR
Remarque : pour réinitialiser la caméra (c'est-à-dire rétablir ses paramètres par défaut),
appuyez sur le bouton de réinitialisation pendant 10 secondes ; le voyant s'éteint.
 Loading...