

Risco RWX73M User Manual
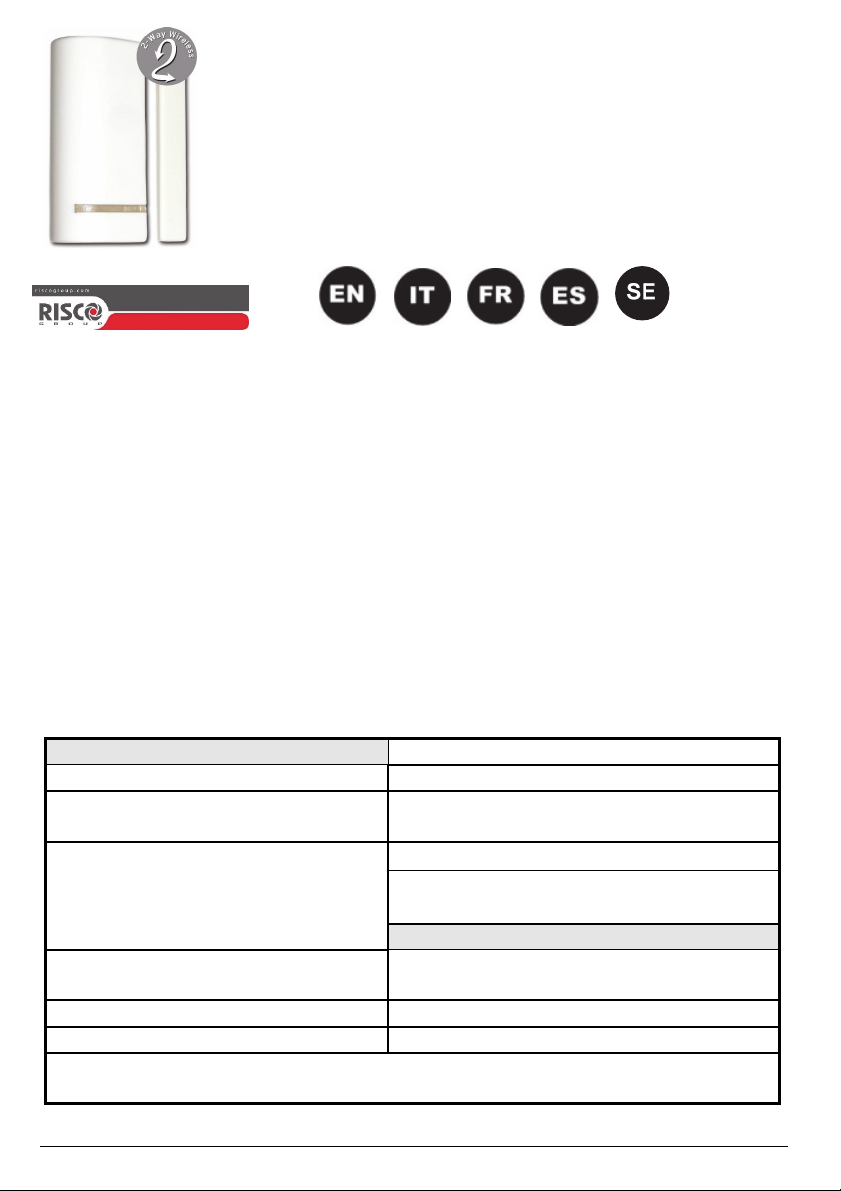
2-Way Wireless
Magnetic Door/Window
Contact with Shutter
Model:
RWX73M
CONTACTING RISCO GROUP
ITALY: Tel: +39-02-66590054
E-mail: support-it@riscogroup.com
AUSTRALIA: Tel: +1800-991-542
E-mail: support-au@riscogroup.com
CHINA: (Hu) Tel: +86-21-52390066
E-mail: support-cn@riscogroup.com
SPAIN: Tel: +34-91-490-2133
E-mail: support-es@riscogroup.com
ISRAEL: Tel: +972-3-963-7777
E-mail: support@riscogroup.com
TECHNICAL SPECIFICATION
ELECTRICAL
Battery Type:CR123 3V Lithium Battery Low battery: 2.6 V
Current Consumption:
11µA standby, 40 mA max
Frequency:
RWX73M86800B 868.65 MHz White
RWX73M8BR00B 868.65 MHz Brown
RWX73M43300B 433.92 MHz White
Dead Time (HOLD ON): 2.5 minutes
Supervision Transmission: 0-255 minutes Storage temperature: -20°C—60°C (-4°F—140°F)
Modulation type: ASK RF immunity: According to EN50130-4
Specifications are subject to change without prior notice.
Should any questions arise please contact your supplier.
USA: Tel: +1-631-719-4400
E-mail: support-usa@riscogroup.com
UK: Tel: +44-(0)-161-655-5500
E-mail: support-uk@riscogroup.com
FRANCE: Tel: +33-164-73-28-50
E-mail: support-fr@riscogroup.com
BELGIUM: Tel: +32-2522-7622
E-mail: support-be@riscogroup.com
Battery Life: 3 years typical
Contact Size: 32 x 35 x 72 mm (1.3 x 1.4 x 2.8 in.)
Magnet Size:16 x 11 x 72 mm (0.6 x 0.44 x 2.8 in.)
ENVIRONMENTAL
Operating temperature:
-10°C—55°C (14°F—131°F)
1
2
Optional | En option | Opzionale | Opcional |Tillval
Magnet spacers | Entretoises aimant | Distanziali per magneti |
Espaciadores de magnéticos | Distanser magnet
• RAX73MSB000A (x 10): brown | marron | marrone | marron |(brun
• RAX73MS0000A (x 10): white | blanc | bianco | blanco |vit
Transmitter spacers | Entretoises transmetteur | Distanziali per trasmettitori |
Espaciadores de magnéticos | Distanser sändare
• RAX73XSB000A (x 10): brown | marron | marrone | marron |(brun
• RAX73XS0000A (x 10): white | blanc | bianco | blanco |vit
Figure 7 Figure 8
NOTE: Pour être en conformité avec la norme NF&A2P, seule la troisième option de câblage
(DEOL) est autorisée.
3
GENERAL DESCRIPTION
The RWX73M is a 2-way supervised transmitter that combines the Magnetic/Door
Contact (against opening doors and windows) with an additional universal input or shutter. The
RWX73M operates with RISCO’s 2-way wireless systems.
MAIN FEATURES
• Communication: Bi-directional
• Range: Up to 300 m (1,000 ft.) range line of sight
• Supervision: Up to 255 minutes
• Selective input termination :
NO, NC, DEOL, Shutter
• Selective input response: 10 / 500ms
• Tamper protection: Back + cover
OPERATING MODE
The RWX73M reports events from IN2 and from the magnetic reed switch. In normal operation
mode, an alarm is sent when the input or magnet are triggered. When restored, it transmits a
restoral message.
NOTE: If configured as Roller Shutter, the magnetic reed switch will not function.
INSTALLATION
Step 1: Transmitter-to-Receiver Communication Setup
The RWX73M must identify itself to the system's receiver by writing its coded message into the
receiver's address memory. This registration is performed either by entering the RWX73M’s 11digit serial code number or by performing the following RF allocation steps:
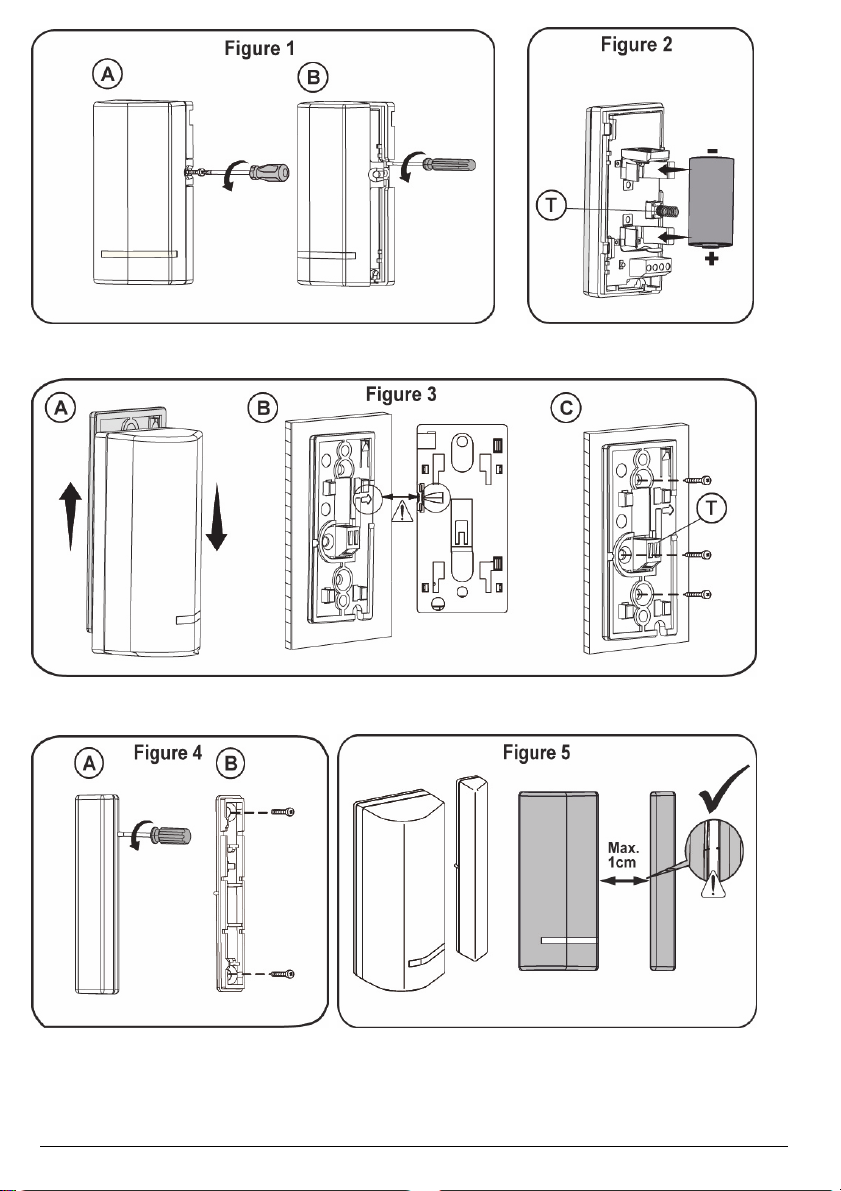
1. Remove the front cover (Fig 1).
2. Set the main unit to Learn mode.
3. Remove battery from the insulation material and reinsert it into the transmitter, paying
attention to the polarity (Fig. 2).
4. Send a write message by pressing the front tamper switch (without detaching back bracket) for at
least 3 seconds until panel recognition displays (Fig. 2).
NOTE: Wait at least 1 minute before closing the front cover.
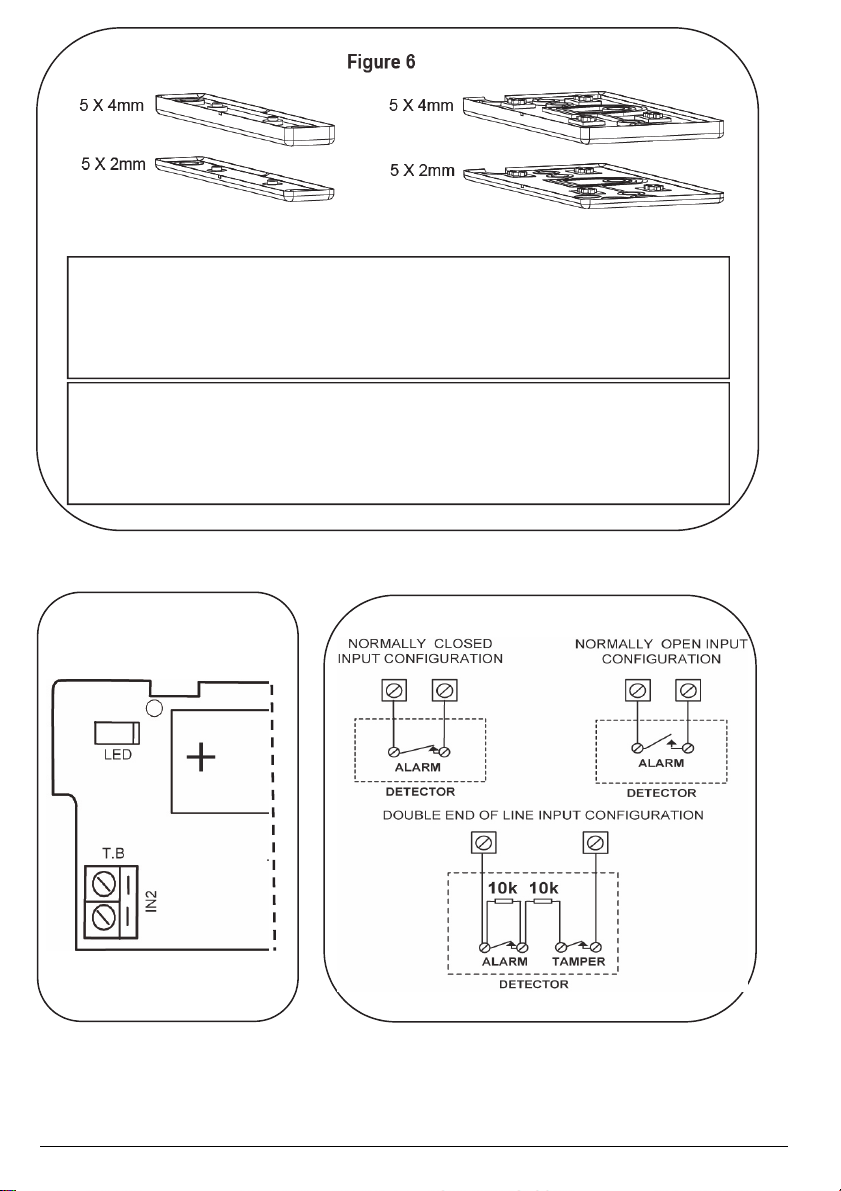
Step 2: Input Wiring
Use the diagrams for appropriate input termination wiring. For DEOL termination connect two
10K Ohm resistors (supplied). See Figure 8.
Step 3: Selecting the Mounting Location
1. Select a location for best communication quality and near the intended wired detector. It’s
recommended to place the unit at the highest possible position.
2. Temporarily attach the unit to this point using two-sided adhesive tape.
3. Generate an alarm signal (by momentarily opening or closing the input terminals) and verify
that the receiver has received the signal. If the alarm signal is not detected, reposition the
transmitter and try again.
Step 4: Mounting (Fig. 3—Fig. 6)
1. Detach back of transmitter from the back bracket (Fig. 3A). At mounting location note the
alignment marks for both components (Fig. 3B), and then install accordingly using 2 mounting
screws and back tamper screw (Fig 3C).
LED INDICATION
• Upon successful learning: short
flash sequence
• Normal operation: brief light upon
transmission
• Low battery: short flash sequence
during transmission
4
2. Detach magnet casing (Fig. 4A) and install with mounting screws (Fig 4B).
3. Optionally, mount spacer(s) for transmitter and/or magnet as required
(Fig. 6), positioned between the back bracket and the mounting surface.
NOTES:
• It’s best to mount the transmitter on the non-moving part (door/window frame), and the
magnet on the moving part.
• Spacers are purchased separately (Figure 6).
• The mark on the magnet's case must be aligned with the mark on the transmitter's case (Fig. 5).
• For installations on wood or alloy, the maximum distance for normal operation is 10 mm (1
cm), while for metal ferromagnetic materials (such
as iron) it is 5 mm (Fig. 5).
Step 5: Defining Parameters
These parameters can be defined for RWX73M:
Parameter Option
Supervision Yes/No
LED Enable Yes/No
Magnet Enable/Disable
Alarm Hold On/Off
Termination IN 2: NO/NC/DEOL/Shutter
Response 10ms / 500ms
Anti-sabotage magnet -Shutter Pulse
* If defined
EN 50131-2-6 Grade 2 Environmental Class II
01—16*
DESCRIZIONE GENERALE
RWX73M è un trasmettitore bidirezionale che include un magnete per controllare
porte/finestre e in più un ingresso esterno in serie per controllare un contatto magnetico o un
contatto a filo per tapparelle tramite un conteggio impulsi selezionabile integrato. RWX73M
funziona con i sistemi radio bidirezionali di RISCO Group.
CARATTERISTICHE PRINCIPALI
• Comunicazione: Bidirezionale
• Portata radio: fino a 300 metri in aria libera
• Supervisione: fino a 255 minuti
• Terminazione selezionabile per l’ingresso
esterno: NO, NC, DEOL, 1msec. (tapparella)
• Tempo di apertura ingresso: 10 o 500ms
• Protezione tamper: apertura e rimozione
MODO DI FUNZIONAMENTO
RWX73M trasmette gli eventi generati dall’IN2 e dal contatto reed. Nella normale modalità di
funzionamento l’allarme viene trasmesso quando il magnete o l’ingresso vengono attivati.
Quando entrambi vengono ripristinati viene trasmessa una segnalazione di ripristino (Figure 7).
NOTA: configurando l’ingresso per contatti a filo per tapparella il reed interno verrà disabilitato.
INDICATORE LED
• Registrazione riuscita: sequenza di brevi
lampeggi
• Normale funzionamento: breve
accensione ad ogni trasmissione
• Batteria scarica: sequenza di brevi
lampeggi durante la trasmissione
5
 Loading...