

Page 1
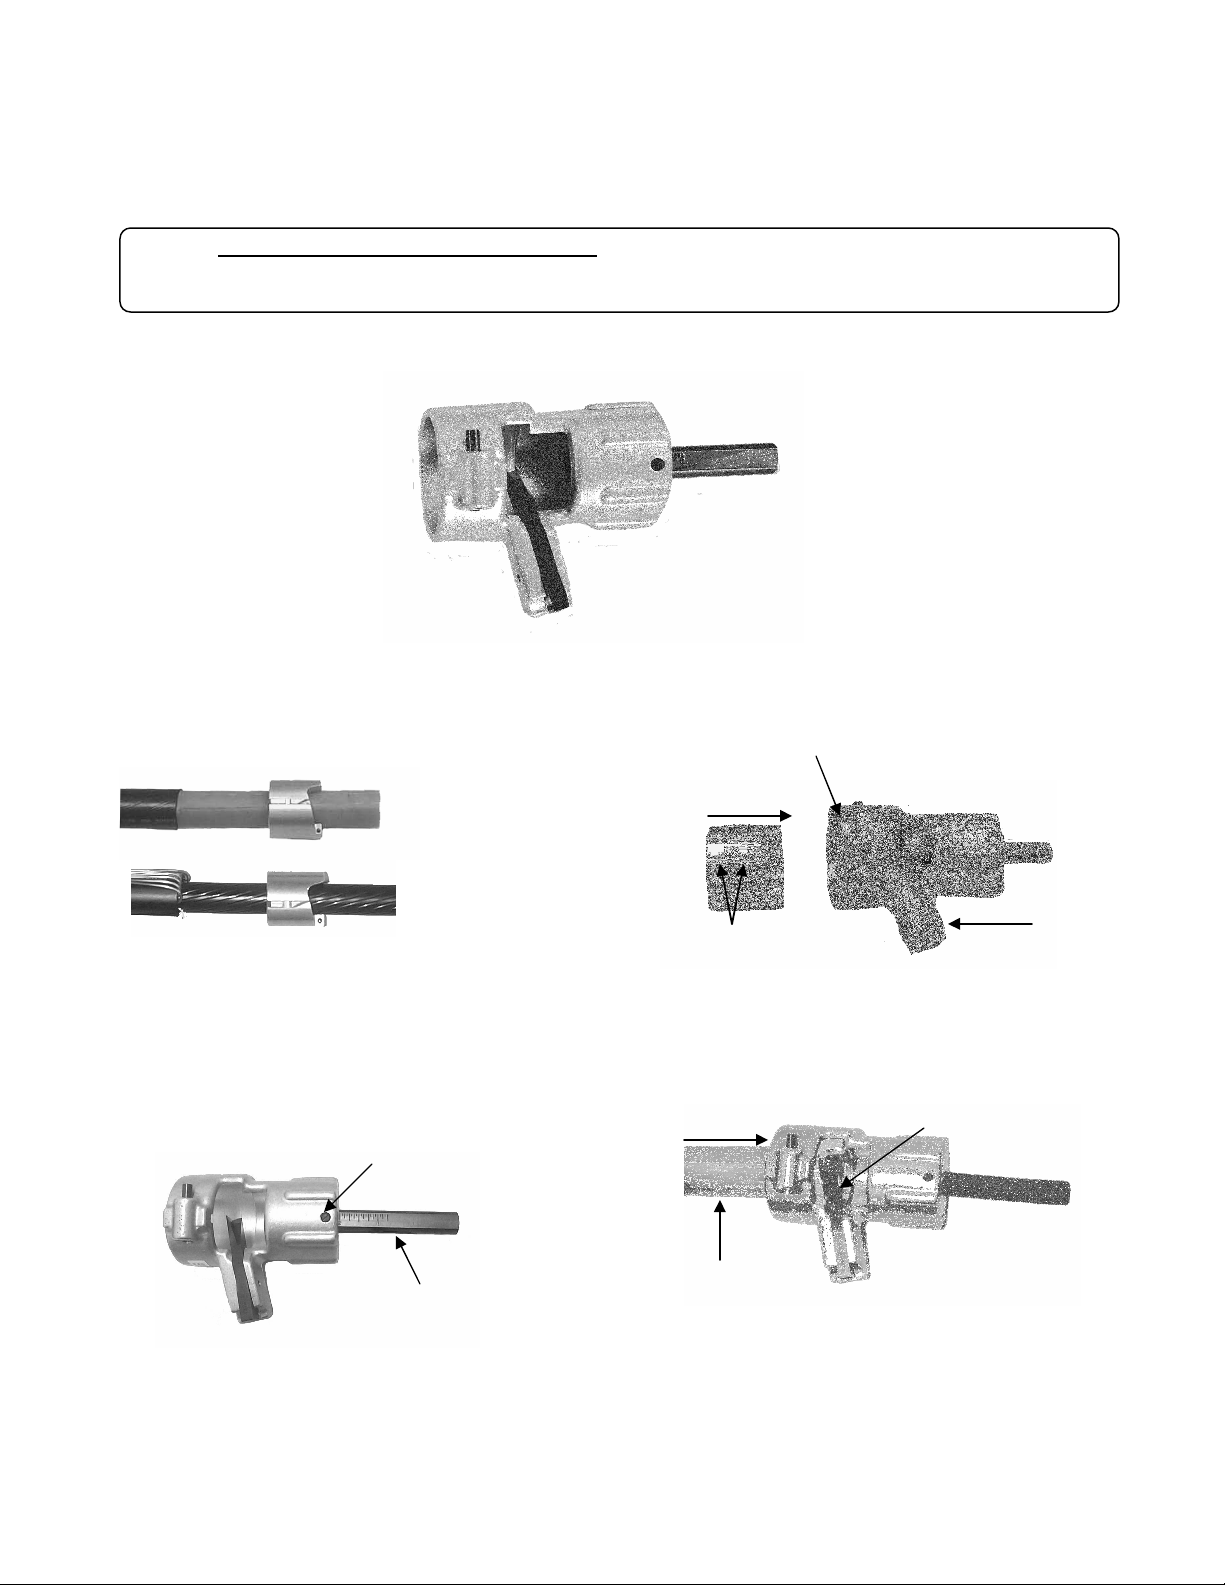
WS6
ADJUSTABLE END STRIPPER
Warning
when using tools. This tool is not to be used for purposes other than intended. Please read and understand instructions before using
this tool.
! This tool is not protected against electrical shock! Always use OSHA/ANSIor other industry approved eye protection
Note: This tool is a manually operated cutting device for polyethylene, (XLPE)cross link polyethylene, and (EPR)
ethylene propylene rubber insulation on 15KV to 46KV cables with .900”(22.86mm) to 2.030”(52.07mm) in
diameter.
OPERATING INSTRUCTIONS
For best results, the end of the cable to be stripped should be cut straight and square using a
hack-saw or curved jaw cable cutters.
Fig. 1A
SLOT
Fig. 1B
Fig. 1
Step 1. (Fig 1) Check the bushing by sliding it over
polyethylene insulation (Fig 1A) or semi-con over EPR
insulation (Fig. 1B). The bushing should fit snugly and
still rotate easily on the cable. We recommend the use of
lubricant be used on the semi-con over EPR cable.
SET SCREW
GRADUATED
STOP BAR
Fig. 3
Step 3. (Fig. 3) To adjust the stop bar for desired length of
conductor exposure, loosen set screw located on the end of
the tool body directly above the stop bar. Adjust the stop
bar to the desired length of insulation to be stripped and
tighten the set screw.
PRESS
RIB
Fig. 2
Step 2. (Fig. 2) To insert the bushing into the WS6, line up rib on
the bushing with the slot on the WS6 housing. Raise the cutting
blade by depressing outer end and insert the bushing until it locks
into place.
BLADE CUTTING
EDGE
CABLE
Fig. 4
Step 4. (Fig. 4) To strip the insulation, insert the cable into the
WS6 until it comes in contact with cutting edge of the blade.
Always check the blade position with respect to the conductor,
before stripping the insulation.
CUTTING
BLADE
Page 2
Instructions for WS6 - Part 2
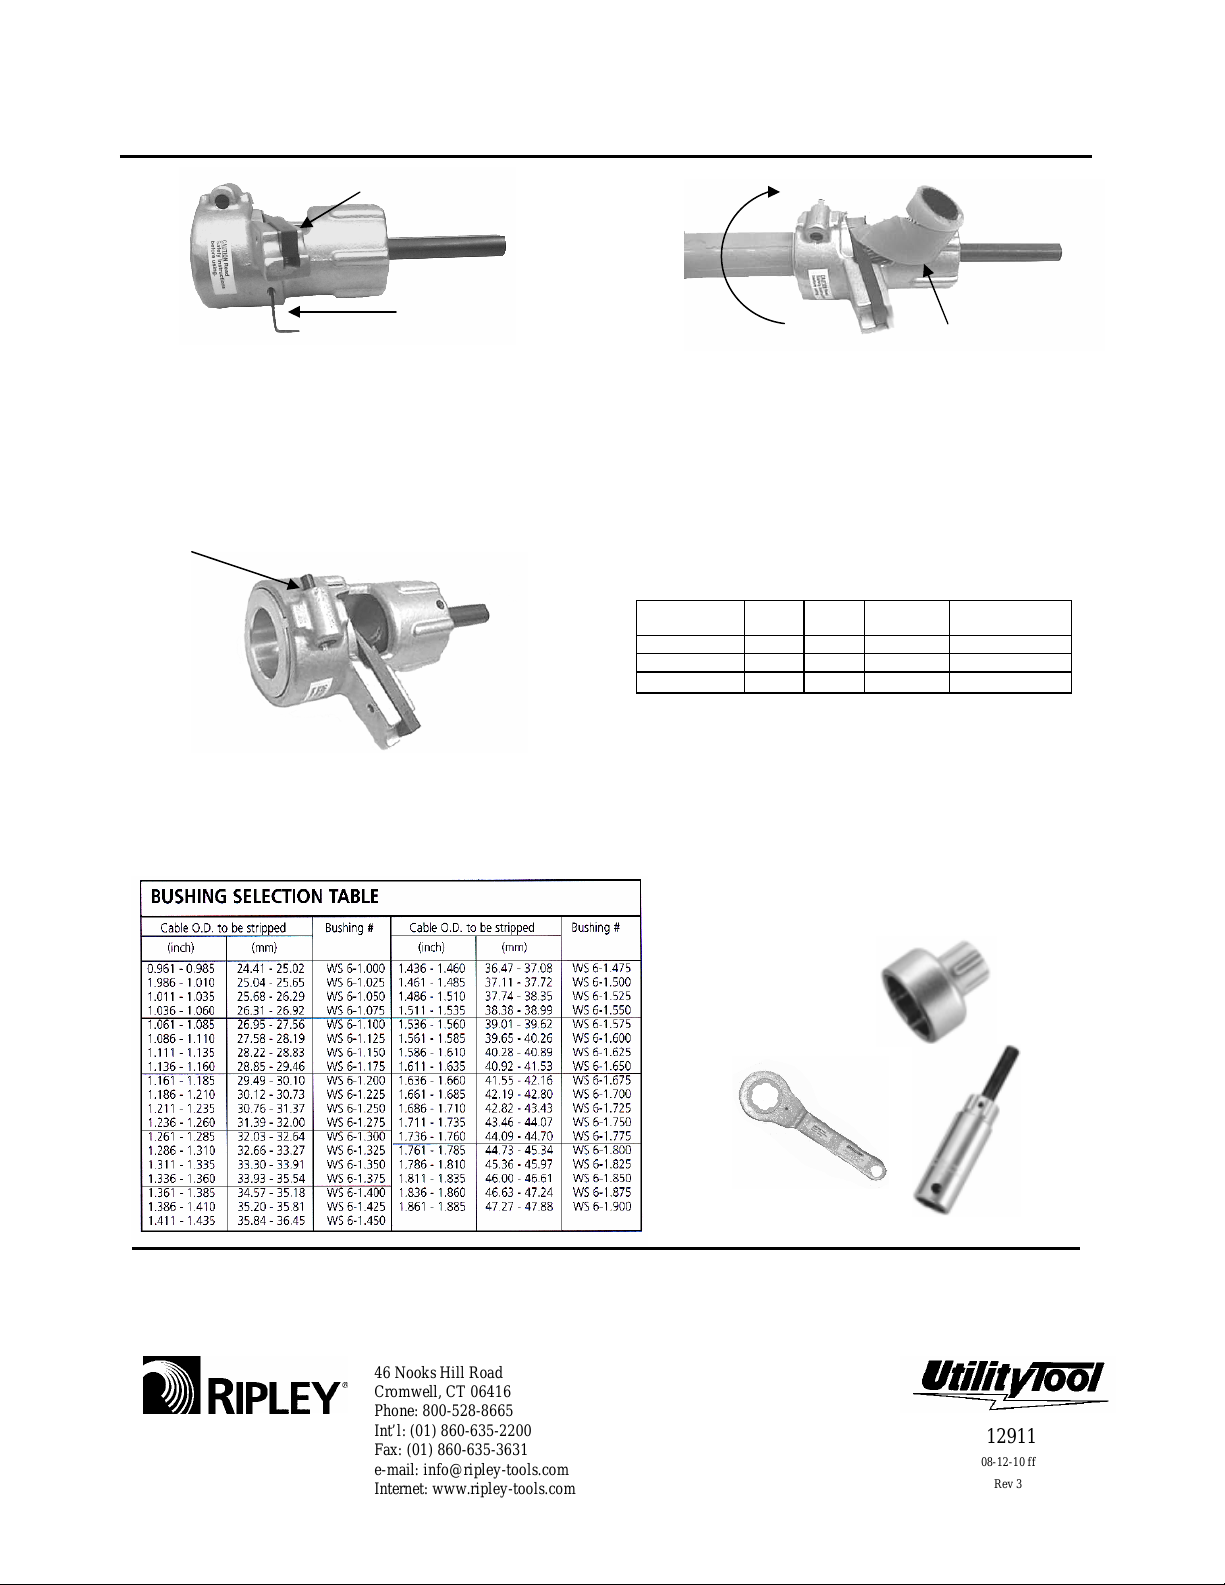
TOOL BLADE
1/16” HEX
WRENCH
Fig. 5
Fig. 6
STRIPPED INSULATION
CURL
Step 5. (Fig. 5) Before stripping the insulation, adjust the
blade edge to 1/64”(.39mm)-1/32”(.79mm) above the
conductor surface by inserting the provided hex wrench
through the hole located beneath the tool blade.
LOCK
RELEASE PIN
Fig. 7
Fig. 7
(Fig. 7) To remove the bushing, depress the lock
release pin on the housing and slide the bushing out.
Step 6. (Fig. 6) Rotate the tool clockwise around the cable to
remove the insulation. Insulation will peel off until the cable
conductor reaches the stop bar. The blade will automatically
sever the insulation cleanly at the end of the cut.
REPLACEMENT PARTS
Model Part # Blade Blade Part # Rotating Stop Bar
Part #
WS 6 12900 CB 8-2 12903 12928
WS 6 with WA 1 12917 CB 8-2 12903 12928
WS 6 with WA 3 12918 CB 8-2 12903 N/A
Notes
•Stop bar removal allows infinite stripping of insulation
•Rotating stop bar permits a stripping length of 2
7/16”(61.9mm)
•WA1 adapter permits the use of the SW2 ratchet wrench
•WA3 adapter allows strip lengths up to 5 1/2”(139.7mm),
SW2 can also be used with WA3 for extra leverage
WA1
Adapter
SW2
Ratchet Wrench
WA3
Adapter
WARRANTY: The Ripley Company warrants that our line of tools are free of defect and fully operable at the
time of shipment. The warranty is limited to the repair or replacement of any product which proves to be
defective in material or workmanship, under normal use and service.
46 Nooks Hill Road
Cromwell, CT 06416
Phone: 800-528-8665
Int’l: (01) 860-635-2200
Fax: (01) 860-635-3631
e-mail: info@ripley-tools.com
Internet: www.ripley-tools.com
12911
08-12-10 ff
Rev 3
 Loading...