

RIOTEC RIOSCAN iLS6302JS, RIOSCAN iLS6302NS, RIOSCAN iLS6302LS, RIOSCAN iLS6302KS Quick Manual
Page 1
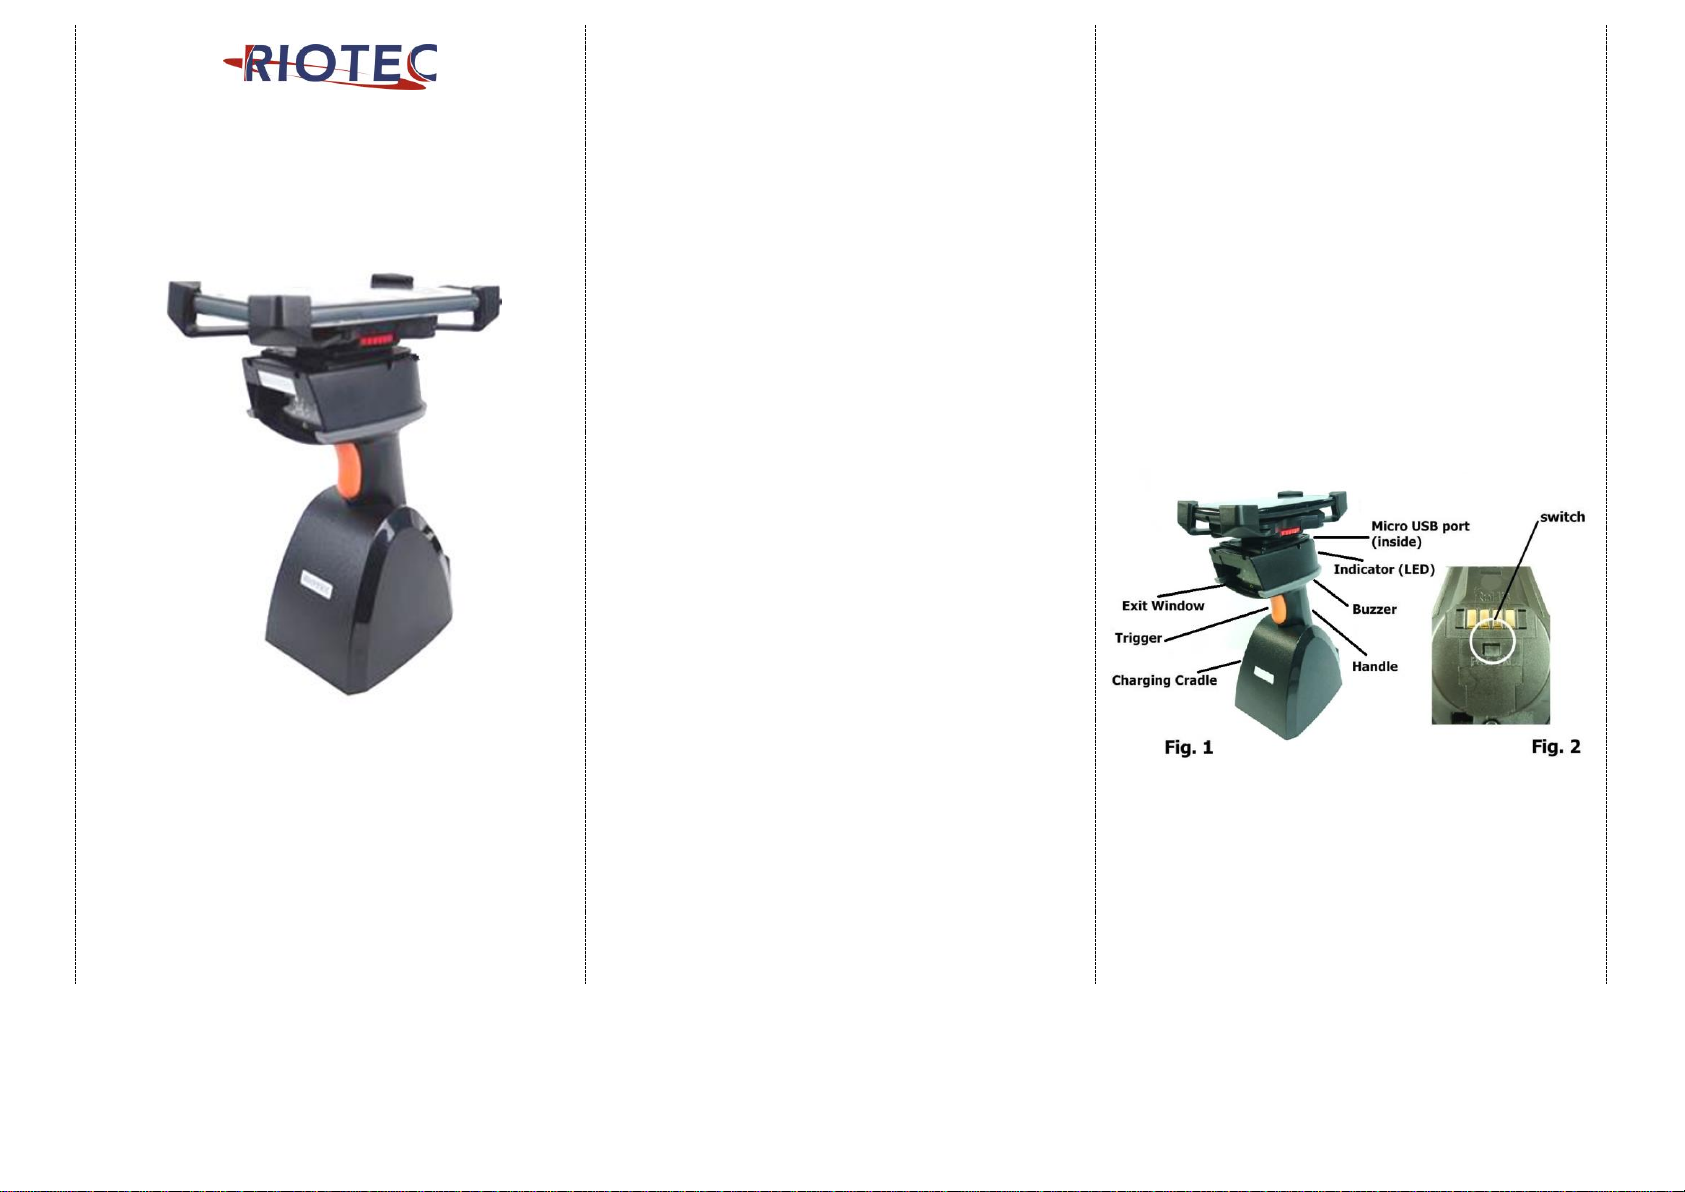
RIOSCAN 2D barcode scanner
Quick Guide
M o del no.:
i L S6302JS
i L S6302KS
i L S6302LS
i L S6302NS
Introduction
Designed primarily for smartphone, the scanner is a 2D
barcode scanner that allows you to scan various barcoded
items and send data to smartphone.
Its in-built ZEBRA engine allows you to reliably read 2D
barcodes on various shapes and is a great space-saver for
busy or limited workspaces.
It supports not only iOS devices through Bluetooth
communication, but also Android OTG devices through USB
cable
Delivery content
* Bluetooth Barcode scanner x 1
* Charging cradle x 1
* Holder for smartphone x 1
* USB cable x 1
* Quick Guide instructions x 1
Limited Warranty
Riotec provides a one year limited warranty.
This warranty does not cover any product which has been subject
to improper use, neglect or unauthorized repair or installation.
This warranty does not cover consumable parts. (Cables &
batteries are consumables.)
Safety instructions
* Never look into the laser beam and never point it at people
or animals. Laser radiation can seriously damage your
eyes.(for iLS6302KS)
* Do not point the laser beam at mirrors or other reflective
surfaces. The uncontrolled, reflected beam may strike
people or animals. (for iLS6302KS)
* Don’t put scanner in places excessively high temperatures,
such as expose under direct sunlight.
* Don’t use scanner in extremely humid area or drastic
temperature change
* The rechargeable battery is permanently built into the
product and cannot be replaced.
* Never damage the rechargeable battery. Damaging the
casing of the rechargeable battery might cause an
explosion or a fire!
Charging:
1. Switch on and charge the scanner for 3~4 hours before first
usage as shown on Fig.2. Please shift the switch of the scanner
to C mode (Charging mode) to charge.
2. The On and Off switch is located at the bottom of the handle.
You may use a fine and thin stick, then carefully press into it until
you hear a low clicking sound.
3. When you want to charge the smartphone & scanner, please use
smartphone original USB power adapter.
4. The cradle functions as a charger for the scanner. Even if the
scanner’s battery is full, the cradle will continue to supply power
to the scanner. We suggest removing the scanner from the cradle
when fully charged.
5. When you charge the scanner with the smartphone, please enter
Wired OTG mode & switch to “C- Charging mode”.
1
Page 2

Scanner supports BT communication mode (for iOS and
Android) and wired OTG communication mode (For Android
OTG devices only/ For wired mode, you must shift the scanner’s
switch to “O”; followed by scanning the code of Wired OTG
communication mode if you are shifting back from BT).
*Scan the following codes to switch in between the modes. It is crucial to
scan the Clean memory data code on (Page 4 third column) before
switching from Bluetooth Communication to Wired OTG communication.
Bluetooth communication
Wired OTG communication mode
(default)
Operating elements
* Please switch ON and charge scanner for 3~4 hours for the
first usage.
How to Connect to Smartphone via BT
1. Make sure the default is BT mode (Page 2 at the top of
1st column) & your device has BT HID or SPP profile.
2. Scan the code of Bluetooth communication mode.
3. Turn off Power-Saving mode on your smartphone/tablet
4. Then, choose HID or SPP profile and scan the following 2
settings codes before connecting to smartphone/tablet.
(Either A1 A2 or B1 B2)
If you don’t know which profile to choose for your device,
try HID first, then, SPP (SPP requires a specific driver).
HID profile
SPP profile
A1
Demo
B1
A2
Demo
B2
Demo
4. Please complete the connection procedures as the above
image.
5. After the devices are paired, the screen will show
“Connected” beside the Bluetooth device that appears
with an “R” followed by a series of alpha numerical
number, and usually with a “Keyboard” icon.
5. Before using WordPad file or an appropriate APP, please
set keyboard language of the device to US English. You
may proceed to scan the barcodes and the barcode
encrypted data will show on the cursor side. If the data
cannot be transferred to the smartphone/tablet, please scan
the “Reset Configuration to Defaults” setting codes (Page
3, column 1).
1. Click on “Settings”
2. Click “General”
3. Click “Bluetooth”
4. Turn it ON, and search the
Devices
5. Select “Rxxxxxx” to connect
6. When it shows “Connected”
means connection is ready.
(example: pairing with iPhone)
Trigger / Power ON
Button
(For iOS Device ONLY)
Press the trigger for 4~5
seconds to raise and
lower soft-Keyboard
Exit
Window
Micro USB port
Use Micro USB cable to
connect to smartphone.
Charging
cradle
Indicator
(LED)
2
Page 3
Notes 1:
* This product complies with Bluetooth standards. The device that is used
with this product must support the same SPP or HID standard. We cannot
guarantee a connection before the product has been tested for Bluetooth
devices with other profiles.
* The communication speed and range of the product may vary due to
obstacles and radio interference between the product and device.
Condition on the host device may also effect the communication speed
and range of the scanner.
Note 2:
* When the battery power is too low, the Orange LED will flash and
beep once. Scanner should be charged immediately. If the scanner
shuts down, it is recommended to charge the scanner fully before
turning it on.
Reset Configuration to Defaults
(scan from A1 to A2 for HID profile or B1 to B3 for SPP profile)
HID profile
SPP profile
A1
B1
B2
Demo
A2
Demo
B3
Demo
How to Connect to Smartphone via OTG cable
1. Make sure you scan the barcode for wired OTG
communication mode (Page 2, left column, on the top), and
that your Android device supports OTG functionality.
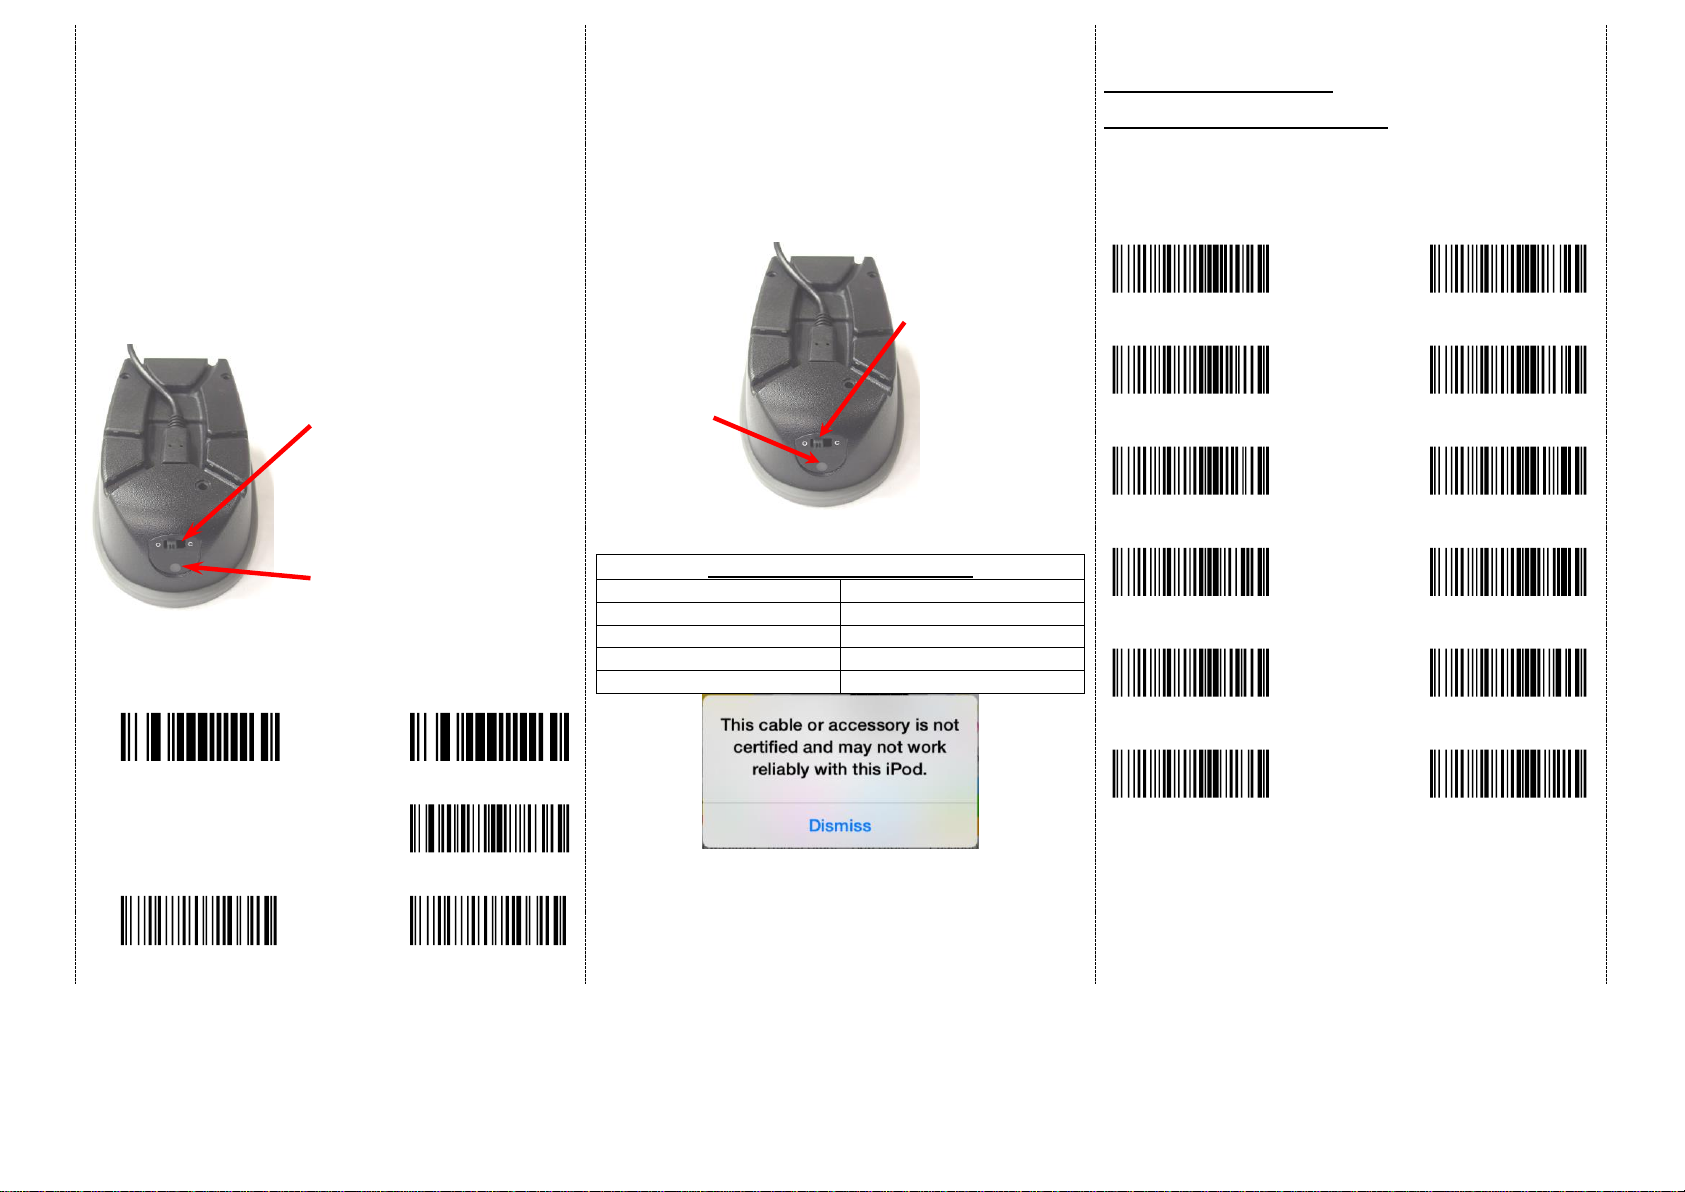
2. The Scanner must be in ”O” (OPERATION MODE) (see below)
3. Connect the scanner to Android device through micro USB cable.
4. If the scanner had been connected through Bluetooth and entered
to Data Storage Mode, make sure to scan on the Clean memory
data code in order to change from Bluetooth to wired connection.
5. Open the smartphone or mobile device App, so the scanned data
can be sent to the App directly, and you are all set to go.
After the scanner connects to your iOS device and is inserted into the
cradle, it may display the above message.
If this happens, remove and reinsert device into cradle.
LED Indicator Information
Orange LED ON
Full charged
Orange LED Flashing
Charging / Low battery
Red LED ON
Offline / out of service
Green LED ON
Good read
Orange LED ON
Good read (Batch mode)
Keyboard Country
(Wired OTG mode only)
Scan the appropriate country code as below to program the keyboard
layout for your country or language. As a general rule, the following
characters are supported, but need special care for countries other
than the United States: @ | $ # { } [ ] = / ‘ \ < > ~
Demo
Demo
USA
(Original setting)
Italian
Demo
Demo
Norway
France
Demo
www.tec-it.com
Germany
Vietnam
Demo
Demo
Sweden
Spain
Demo
Demo
Denmark
Portugal
Demo
Demo
Switzerland
Hungary
Switch to left:
“O” (Operation mode)
(data transmission)
Switch to right:
“C” (Charging mode)
Indicator (LED)
Please check the
“LED Indicator
Information”
Before entering BT mode, you
must switch to right “C”
(Charging mode) first.
Then, cradle can supply
power to iOS / Android device
(through micro USB cable) &
scanner simultaneously.
Indicator (LED)
Please check the “LED
Indicator Information”
3
Page 4
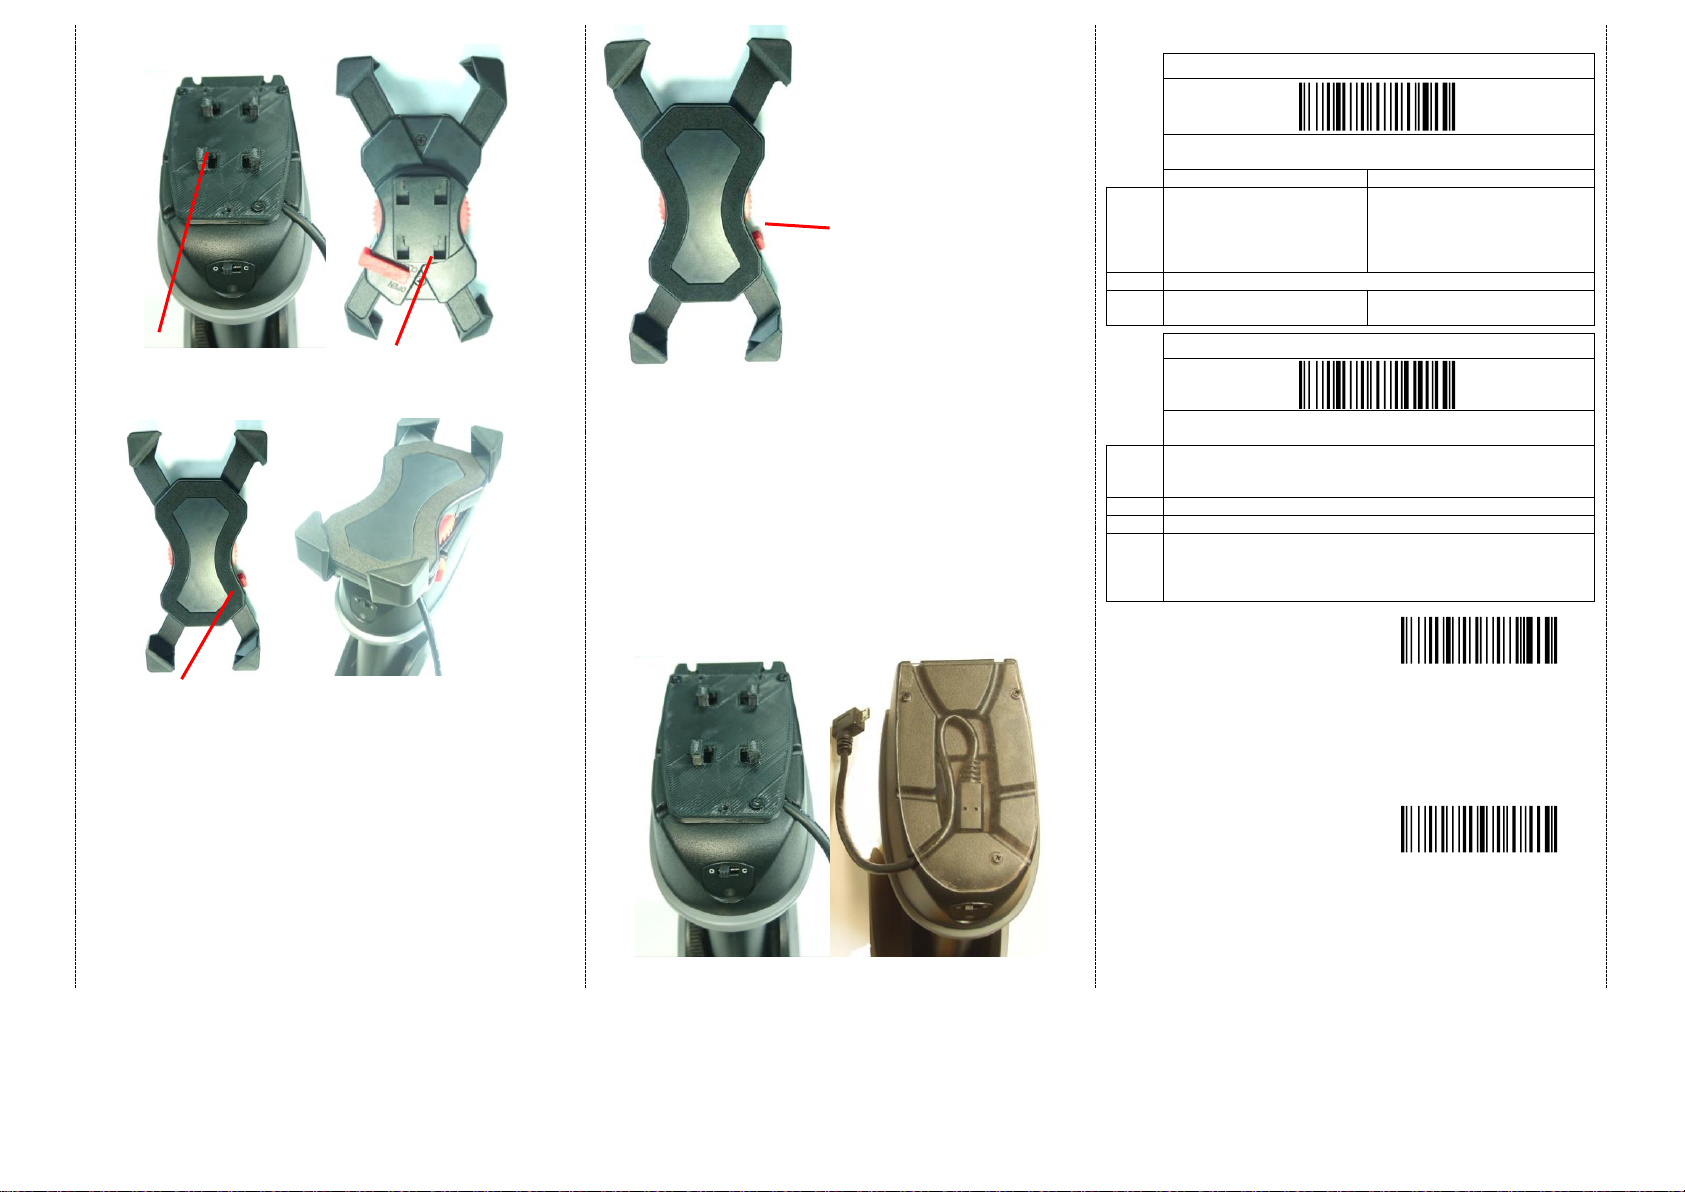
1. Set the mobile device holder by having the side of open and close
red switch on the right side of the scanner as presented on the
above image.
2. CAUTION: Please do not pull or press on any of the 4 extensions
or legs of the holder, for it can unbalance and disrupt the normal
functionality of the holder’s 4 extensions.
3. Place the mobile device holder lightly on the top of the base, so
the 4 elevated studs fit into the 4 holes of the holder.
4. Press the holder to the scanner firmly and draw back very
carefully until you hear a low clicking sound.
5. To separate the holder from the scanner: Press on the holder
towards the scanner firmly, then push it forward carefully.
6. IMPORTANT: We do not recommend the repetitive action of
detaching and reattaching the holder.
7. Place the smartphone onto holder (Recommendation: use
mobile device less than 14.5 cm in length), plug the micro usb to
the mobile device, then close in the extensions.
8. Push in the tiny rectangular switch at the bottom of the handle,
then switch the scanner to Operation mode, now it can scan
directly to the mobile’s APP. The user may choose to connect
through Bluetooth as well (Please review the different ways of
connection at page 2 and 3, for a more detail explanation).
There are two operating modes on the scanner
1.Data Transmission Mode (Default)
Demo
It is a necessary to scan “Clean Memory Data” when
switching between these two modes.
Within Bluetooth radio range
Beyond Bluetooth radio range
Data
read
Transmit data to
smartphone/tablet directly
Save data in scanner’s memory,
scanner will transmit data to
smartphone/tablet automatically
after getting back to Bluetooth
radio range.
Enter Data Storage mode
LED
Green/ Orange LED flashes,
followed by 3 beeps.
2. Data Storage mode (Batch Mode)
Demo
It is a necessary to scan “Clean Memory Data” when
switching between these two modes.
Data
read
Save data directly to scanner’s memory. It will transmit data to
smartphone/tablet after you scan the Transmit memory data
code. To delete data, please scan the Clean Memory Data code.
Enter Data Transmission mode
LED
Green/ Orange LED flashes followed by 3 beeps.
Always Clean Memory Data before switching to Data Transmission
Mode.
Otherwise Red/ Orange LED will flash with one long beep sounds
and will not switch modes.
A. Data Transmission mode
(Default)
1. When you are out of BT signal range,
the data you scan will be saved to
memory. Once you are back within
range, the data will be sent to
smartphone/tablet automatically.
B. Data Storage mode(Batch mode)
1. Data Storage mode (Batch mode):
When you scan the barcodes, the data
will be saved directly to scanner’s
memory. After you scan the
“Transmit memory data” code
(above right), the data will be sent to
smartphone/tablet.
2. Before you can continue to scan or
switch modes, you must first delete
the data stored in the memory. To do
this, scan the “Clean Memory Data”
code.
Demo
Transmit memory data
Green/Orange LED flashes
followed by 3 beeps
The barcode data which is stored
in the memory will be sent to
smartphone/tablet directly.
(under Batch mode, within
Bluetooth service range)
Demo
*Clean Memory Data
Green/Orange LED flashes
followed by 3 beeps.
The barcode data which is stored
in the memory will be deleted. You
can then switch modes.
Holder’s back with 4 holes to
lock up with the scanner
4 Elevated Studs to fit into the
4 holes of the Holder’s back.
Holder’s front side: Make sure the red switch is on the right
side (exactly as this picture shows), when fitting the 4 holes
of the holder to the 4 studs of the scanner
1. Holder’s front side: In order to
shrink or spread the 4
extensions, shift and Hold the
red switch to Open while you
rotate the wheel either way,
2. Do not pull or push the 4
extensions, nor extend the
wheel across the limit, for it
can disrupt the balance and
functionality of the holder.
3. Use mobile device less than
14.5 cm in length.
4
Page 5
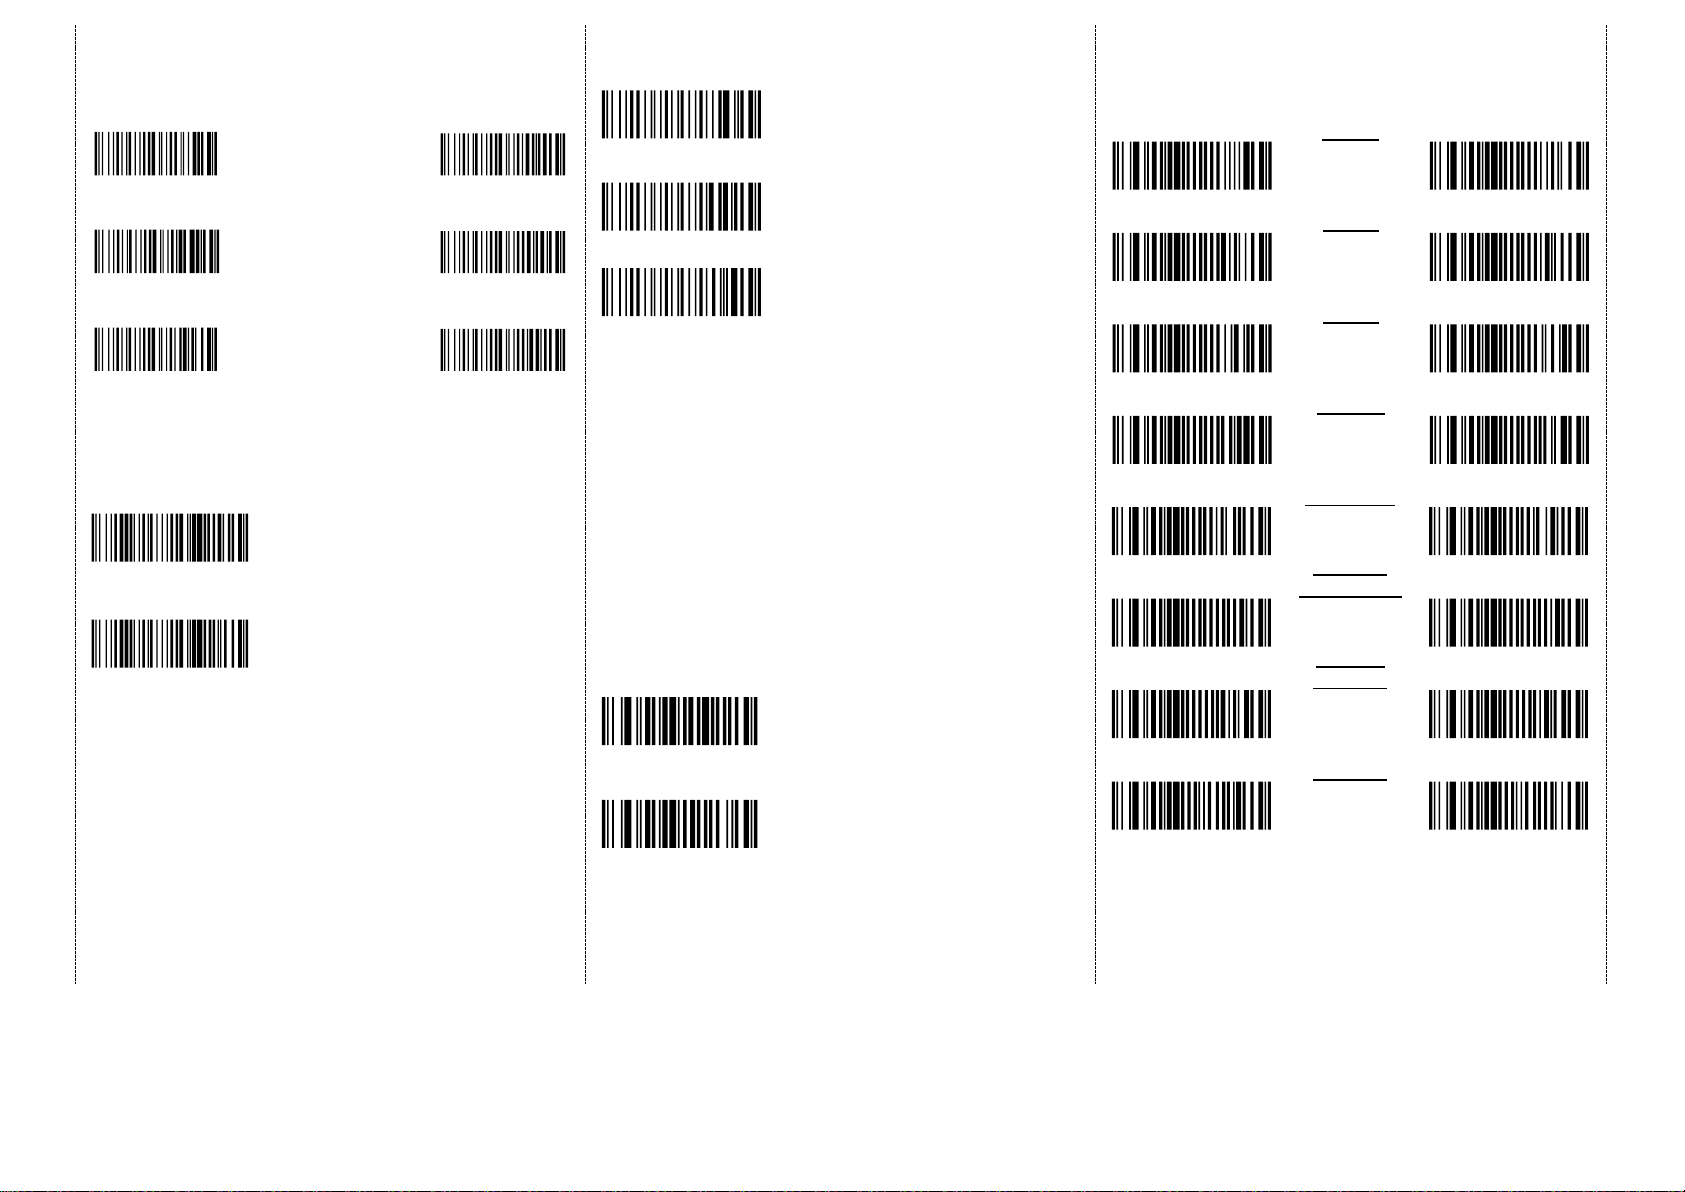
Transmission Speed
Transmission speed is dependent on your device. In order not to lose
data, please choose the correct speed. Middle-speed is the Default.
Demo
Demo
High-speed
Ultra Slow-speed
Transmission
1 transmission
Demo
Middle-speed
Ultra Slow-speed
Transmission
(Default)
2 transmission
Demo
Slow-speed
Ultra Slow-speed
Transmission
3 transmission
Power-saving Mode
Demo
Power-saving mode OFF
Demo
Power-saving mode ON (Default):
Enter power-saving mode after one
minute inactivity. This function
conserves battery power. When you
press the "SCAN/Power ON" button, it
will wake up and begin to scan.
*When charging, the scanner will not enter power-saving
mode automatically.
Battery information
When you scan this setting
code, scanner will output the battery
information to device.
Demo
Output battery information
automatically – Enable
will send data to device
every 30 seconds.
Demo
Output battery information
automatically – Disable.
The output format of battery information is as below:
For example: %^4^%
%^NUMBER^% Number is from 0~4.
4 means 80%~100%
3 means 55%~80%
2 means 30%~55%
1 means 10%~30%
0 means under 10% -- When output reads “0”, it means low
battery power and device should be charged immediately.
Redundancy Level
This scanner offers two levels of decode redundancy. Select
higher redundancy levels for decreasing levels of bar code quality.
As redundancy levels increase, the decoder’s aggressiveness
decreases.
Select the redundancy level appropriate for the bar code quality.
Redundancy Level 1
barcode must be read twice
successfully before being decoded
Demo
Redundancy Level 2
barcode must be read three times
successfully before being decoded
1D Symbologies -1
ENABLE
UPC-A
DISABLE
Demo
ENABLE
UPC-E
DISABLE
Demo
ENABLE
EAN-8
DISABLE
ENABLE
EAN-13
DISABLE
Demo
ENABLE
CODABAR
DISABLE
Demo
ENABLE
Code 39
FULL ASCII
DISABLE
ENABLE
Trioptic
Code 39
DISABLE
Demo
Demo
Code 32 -ENABLE
Code 32
DISABLE
5
Page 6
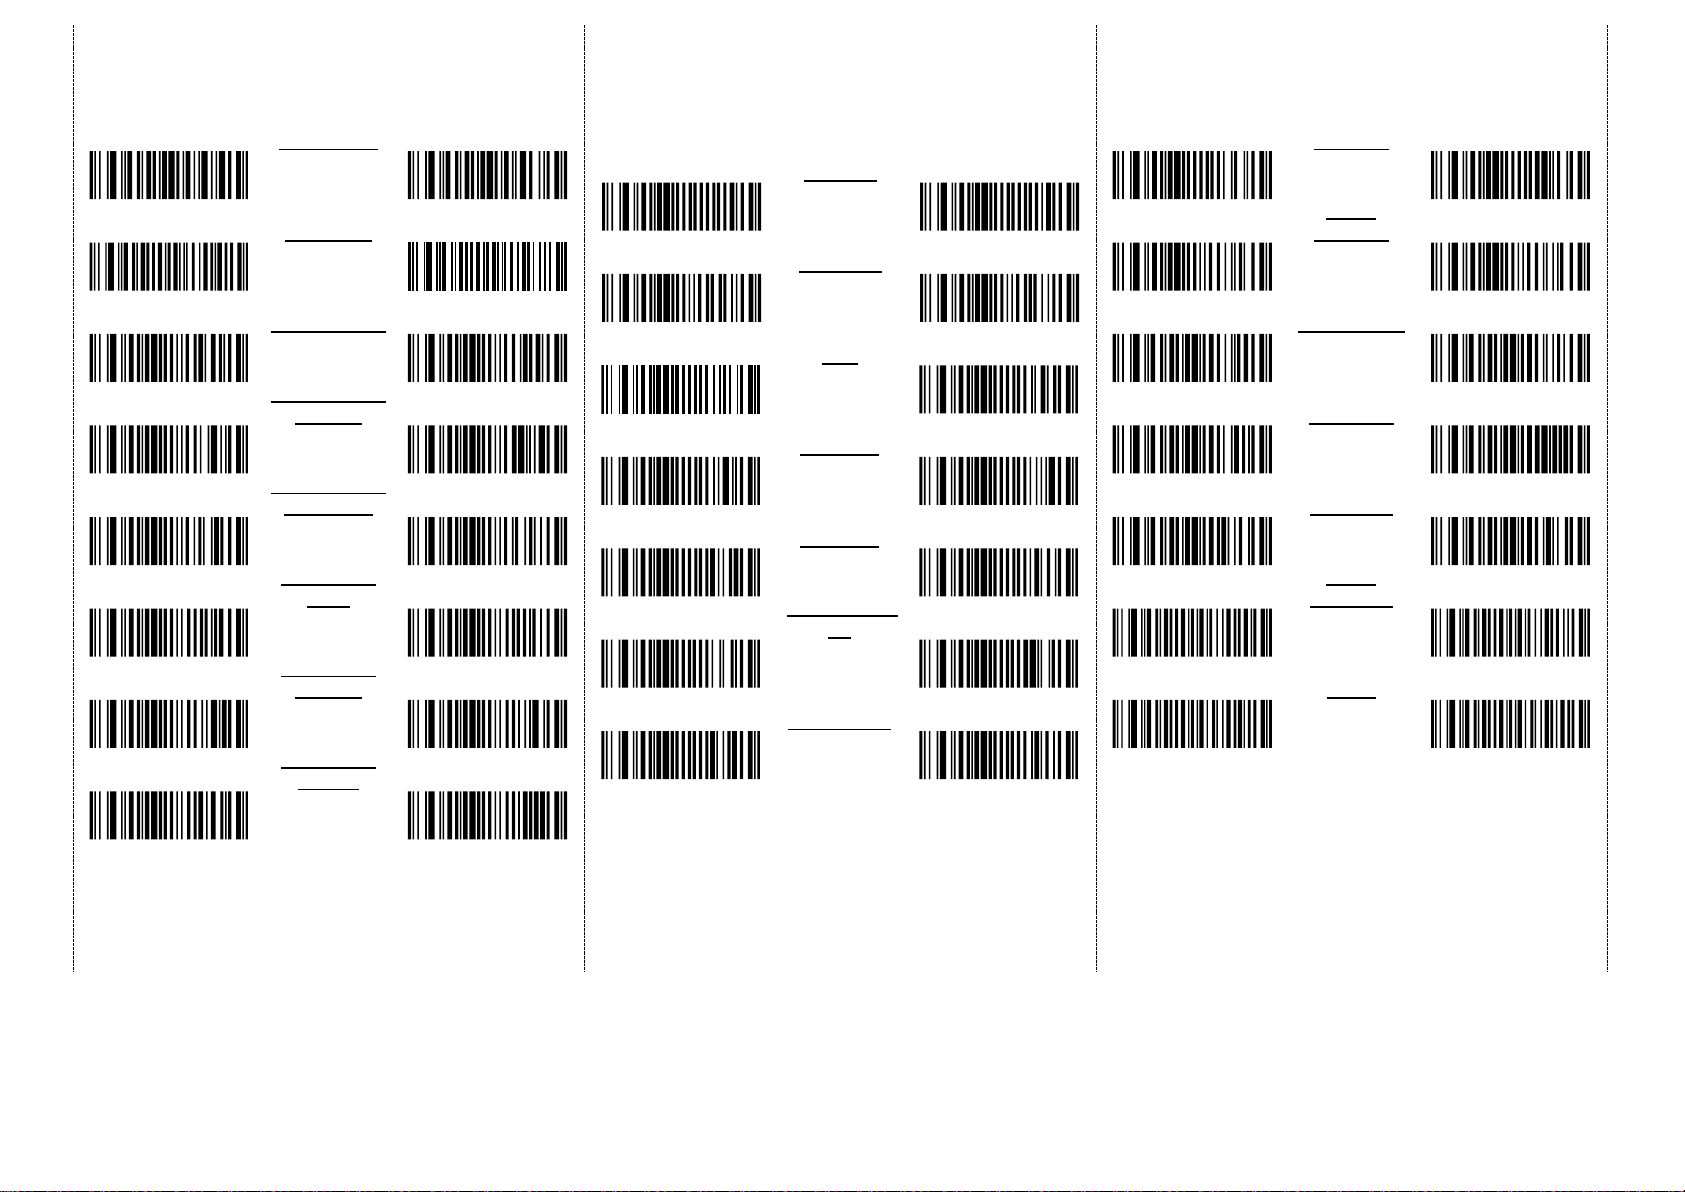
1D Symbologies -2
ENABLE
Chinese 25
DISABLE
Demo
ENABLE
Matrix 25
DISABLE
Demo
ENABLE
GS1 DataBar
DISABLE
Demo
ENABLE
GS1 DataBar
Limited
DISABLE
Demo
Demo
ENABLE
GS1 DataBar
Expanded
DISABLE
Demo
Demo
ENABLE
Composite
CC-C
DISABLE
Demo
ENABLE
Composite
CC-A/B
DISABLE
www.tec-it.com
ENABLE
Composite
TLC 39
DISABLE
Demo
Demo
1D Symbologies -3
ENABLE
Code 39
DISABLE
ENABLE
ISBT 128
DISABLE
www.tec-it.com
ENABLE
MSI
DISABLE
Demo
ENABLE
CODE 93
DISABLE
ENABLE
CODE 11
DISABLE
Demo
ENABLE
Interleaved
25
DISABLE
ENABLE
Discrete 25
DISABLE
Demo
2D Symbologies
ENABLE
PDF 417
DISABLE
ENABLE
Micro
PDF 417
DISABLE
Demo
ENABLE
Data Matrix
DISABLE
ENABLE
Maxicode
DISABLE
ENABLE
QR CODE
DISABLE
Demo
Demo
ENABLE
Micro
QR CODE
DISABLE
ENABLE
Aztec
DISABLE
Quick guide is subject to change without notice.
R_180831_01
6
 Loading...