

Page 1

Laser Barcode Scanner
Model no.
LS6000B,LS6000Z
QUICK GUIDE
Page 2
INTRODUCTION
LS6000B / LS6000Z laser barcode scanners series have incorporated the latest
wireless blue-tooth / Zig-bee technology. The technology provides customer with
the freedom of mobility, with long communication range from the charging
cradle.
The bar code scanner requires establishing communications with its charging
cradle (built-in dongle). After communications have been established between
the scanner and charging cradle, futures bar code scans will be transmitted from
the scanner to the cradle and from the cradle to the host.
For power supply, the charging cradle of LS6000B / LS6000Z also works as a
battery charger for the scanner. Users can plug in 5V DC power adaptor for
power charge of the scanner.
Package of LS6000B / LS6000Z series should contain:
1. LS6000B or LS6000Z Laser Barcode Scanner
(Rechargeable Li-Ion battery pack inside)
2. Charging Cradle with USB cable & DC plug
3. Power Adaptor (5V/1A)
4. User’s Manual
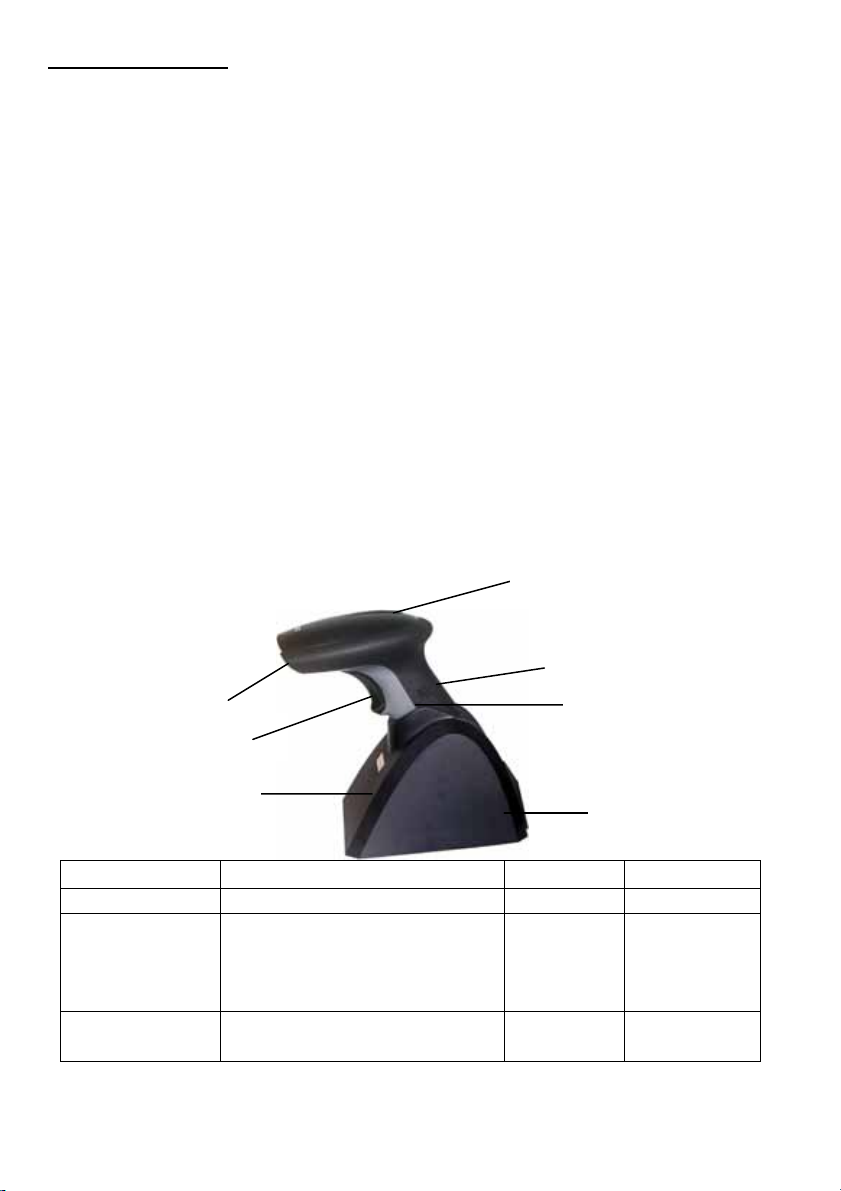
3 indicators (LED)
Buzzer
Exit Window
Trigger
Charging
Charging Cradle
Handle
USB Zig-bee dongle
RED BLUE ORANGE
ON Not read Good read
Sleeping mold (If scanner
Continual ON
not in use, will automatic
switch to sleeping mode
Low power
after 30 min.)
Blinking
Wireless connection not
linked
Charging
2
USB dongle
Page 3
INSTALLATION
t
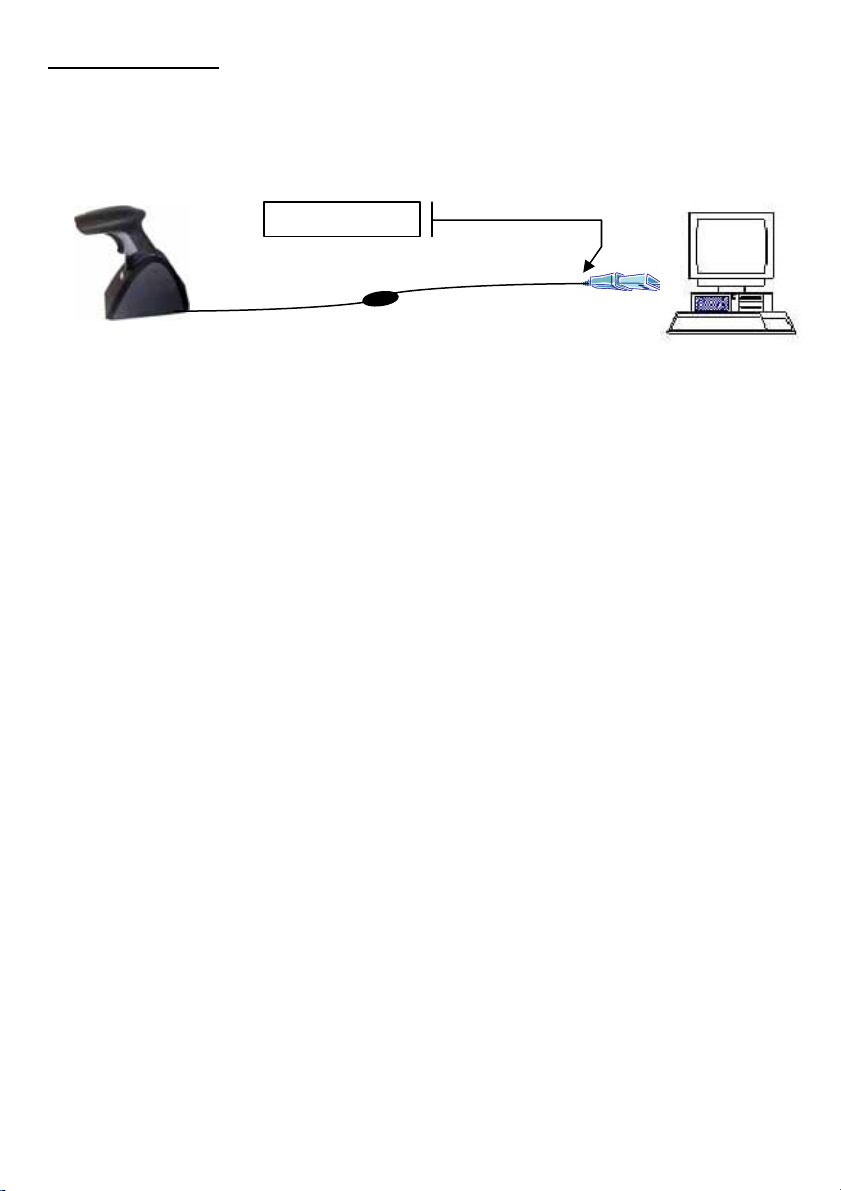
Insert the plug on the free end of the Communications Cable into the
appropriate connector on the host as below described:
USB Connection
Connectwith hos
(RS232 data format)
1. Install the software “PL-2303 Driver Installer.exe” to the host system
for LS6000B / LS6000Z series.
2. Connect scanner cradle to the USB port on the host system.
3. Go to My Computer Æ One click right button of mouse Æ Administrate
Æ Device Administrator Æ Connect Port (COM and LPT).
4. Choose Prolific USB-to-Serial Com Port, and see identify COM number,
ex. COM 5.
5. Go to START Æ Programs Æ Accessories Æ Communications Æ
Hyper Terminal.
Detail set up on the Hyper Terminal, please see at the Figure 1 to Figure 3.
3
Page 4

Figure 1
N
Figure 2
Step 1: key-in a file name
Step 2: select the first
Step 3: press OK
o need to key-in
Figure 3
Step 1: key-in the identify
Step 1: key-in the identify
COM number, ex.
COM number
COM 5
Step 2: press OK
Step 2: press OK
Row 1: key-in “9600”
Row 2: key-in “8”
Row 3: key-in “none”
Row 4: key-in “1”
Row 5: key-in “none”
Press OK
4
Page 5

6. Start to aim the scanner at a bar code, you may see data shown on the hyper
terminal.
Reset Configuration to Defaults
If you are unsure of the scanner configuration or have scanned the incorrect codes,
please scan the “Reset Configuration to Defaults” barcode. This will reset the
scanner to its factory settings.
LS 6000B or LS6000Z
Tip
Do not hold the scanner directly over a barcode at 90˚. Scanning light bounces
directly back into the scanner from the barcode label is known as specular reflection
which will create a "dead zone" where decoding is difficult. Practice a few times to
find what range of angles works best.
Maintenance
Cleaning the scan window is the only maintenance required. A dirty window may
affect scanning accuracy.
Wipe the scanner window gently with a lens tissue or other material suitable for
cleaning optical material.
Do not spray water or other cleaning liquids directly onto the window.
5
Page 6

Federal Communications Commission (FCC) Statement
15.21
You are cautioned that changes or modifications not expressly approved
by the part responsible for compliance could void the user’s authority to
operate the equipment.
15.105(b)
This equipment has been tested and found to comply with the limits for a
Class B digital device, pursuant to part 15 of the FCC rules. These limits
are designed to provide reasonable protection against harmful
interference in a residential installation. This equipment generates, uses
and can radiate radio frequency energy and, if not installed and used in
accordance with the instructions, may cause harmful interference to radio
communications. However, there is no guarantee that interference will
not occur in a particular installation. If this equipment does cause
harmful interference to radio or television reception, which can be
determined by turning the equipment off and on, the user is encouraged
to try to correct the interference by one or more of the following
measures:
-Reorient or relocate the receiving antenna.
-Increase the separation between the equipment and receiver.
-Connect the equipment into an outlet on a circuit different from that to
which the receiver is connected.
-Consult the dealer or an experienced radio/TV technician for help.
Operation is subject to the following two conditions:
6
Page 7

1) this device may not cause interference interference and
2) this device must accept any interference, including interference that
may cause undesired operation of the device.
FCC RF Radiation Exposure Statement:
This equipment complies with FCC radiation exposure limits set forth for
an uncontrolled environment. End users must follow the specific
operating instructions for satisfying RF exposure compliance. This
transmitter must not be co-located or operating in conjunction with any
other antenna or transmitter.
7
 Loading...