

Page 1

Programming Quick Guide
-DC9257L: Docking Scanner
-DC9267L: Wearable Scanner
Docking Scanner:
Gently tap the trigger are a at the mid dle of s canner, to e nable the
scanner(for reading ba rcode)
Wearable Scanner:
Pre ss the r ing trigger to enable t he scan ner.
Up Side
Lower Side
The touch sensor area is around middle of the scanner as drawing shown.
Installation
They are Plug &Play USB (HID) devices. When plugged into your Android
OTG devices, it can be recognized as barcode scanner and begin to scan
the barcode. Before using scanner, make sure the smartphone or tablet
is fully charged. Open your APP, they can work as a keyboard input.
Reset Configuration to Default
(scan from 1 to 3)
1
3
2
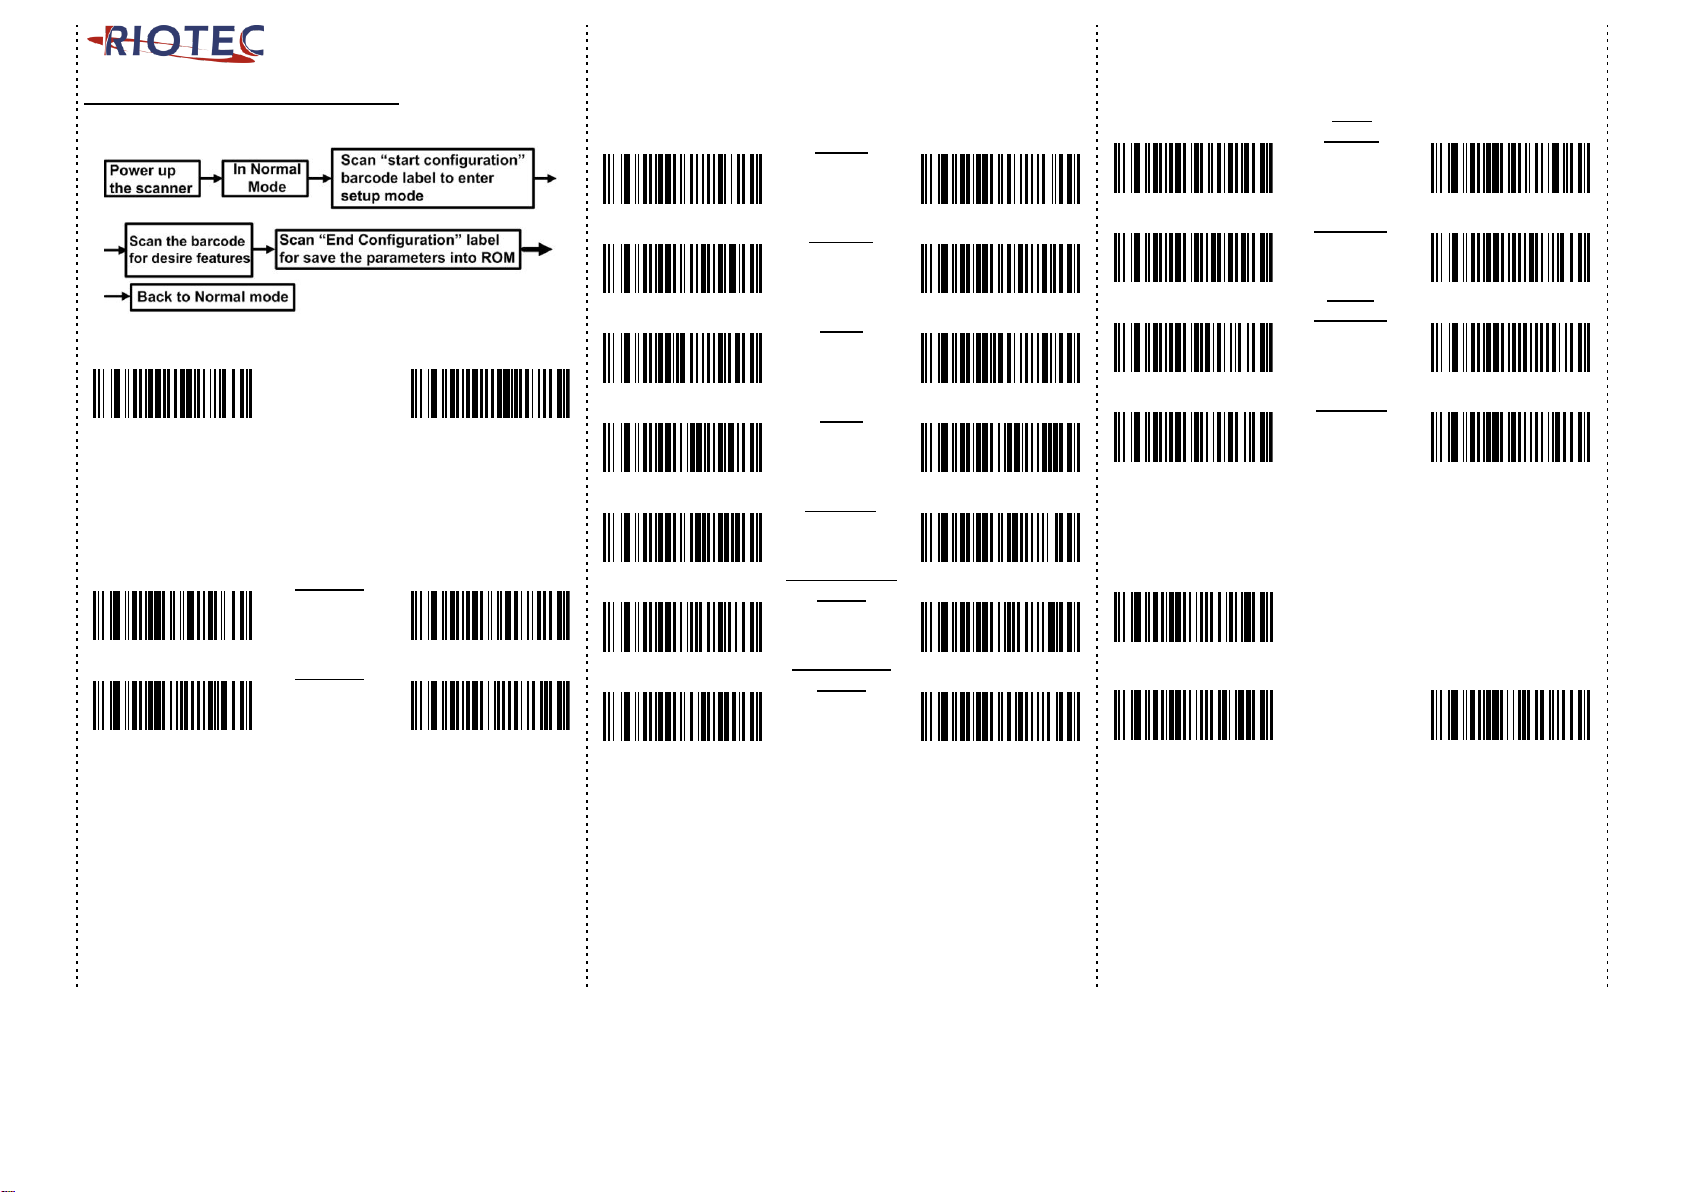
Barcode Configuration Method:
(Flow chart for setup procedure :)
Start
Configuration
End
Configuration
Keyboard Country (For USB HID only)
Scan the appropriate country code as below to program the keyboard
layout for your country or language. As a general rule, the following
characters are supported, but need special care for countries other
than the United States: @ | $ # { } [ ] = / ‘ \ < > ~
USA
Japan
Denmark
Finland
France
UK
Italy
Norway
Turkey F
Turkey Q
Keyboard Country (For USB HID only)
Scan the appropriate country code as below to program the keyboard
layout for your country or language. As a general rule, the following
characters are supported, but need special care for countries other
than the United States: @ | $ # { } [ ] = / ‘ \ < > ~
Belgium
Spain
Germany
Austria
Russia
Sweden
Portugal
1D Symbologies – 1
ENABLE
UPC-E
DISABLE
ENABLE
UPC-A
DISABLE
ENABLE
Code 128
DISABLE
ENABLE
GS1-128
UCC/EAN-128
DISABLE
Trigger
Area
1
Page 2
Barcode Configuration Method:
(Flow chart for setup procedure :)
Start
Configuration
End
Configuration
1D Symbologies – 2
ENABLE
Code 39
DISABLE
ENABLE
Code 93
DISABLE
1D Symbologies – 3
ENABLE
EAN-8
DISABLE
ENABLE
EAN-13
DISABLE
ENABLE
ISSN
DISABLE
ENABLE
ISBN
DISABLE
ENABLE
Codabar
DISABLE
ENABLE
GS1-Databar
(RSS)
DISABLE
ENABLE
Interleaved
2 of 5
DISABLE
2D Symbologies
ENABLE
Data
Matrix
DISABLE
ENABLE
QR Code
DISABLE
ENABLE
Micro
QR Code
DISABLE
ENABLE
PDF 417
DISABLE
Inter-Keystroke Delay (For USB HID only)
This parameter specifies the delay between emulated keystrokes.
No Delay
Short Delay
(20ms)
Long Delay
(40ms)
2
Page 3

How to put trigger cable into plastic buckle:
1.plastic wire buckle of DC9267A
2.press the plastic buckle and pull backward
3. release the lock
4.make sure the lock is released
5.put trigger cable into plastic buckle
6.push plastic buckle to make it locked.
Information in this document is subject to change without notice.
For more information, please visit:
www.riotec.com.tw
R_180717_01
3
 Loading...