

Page 1
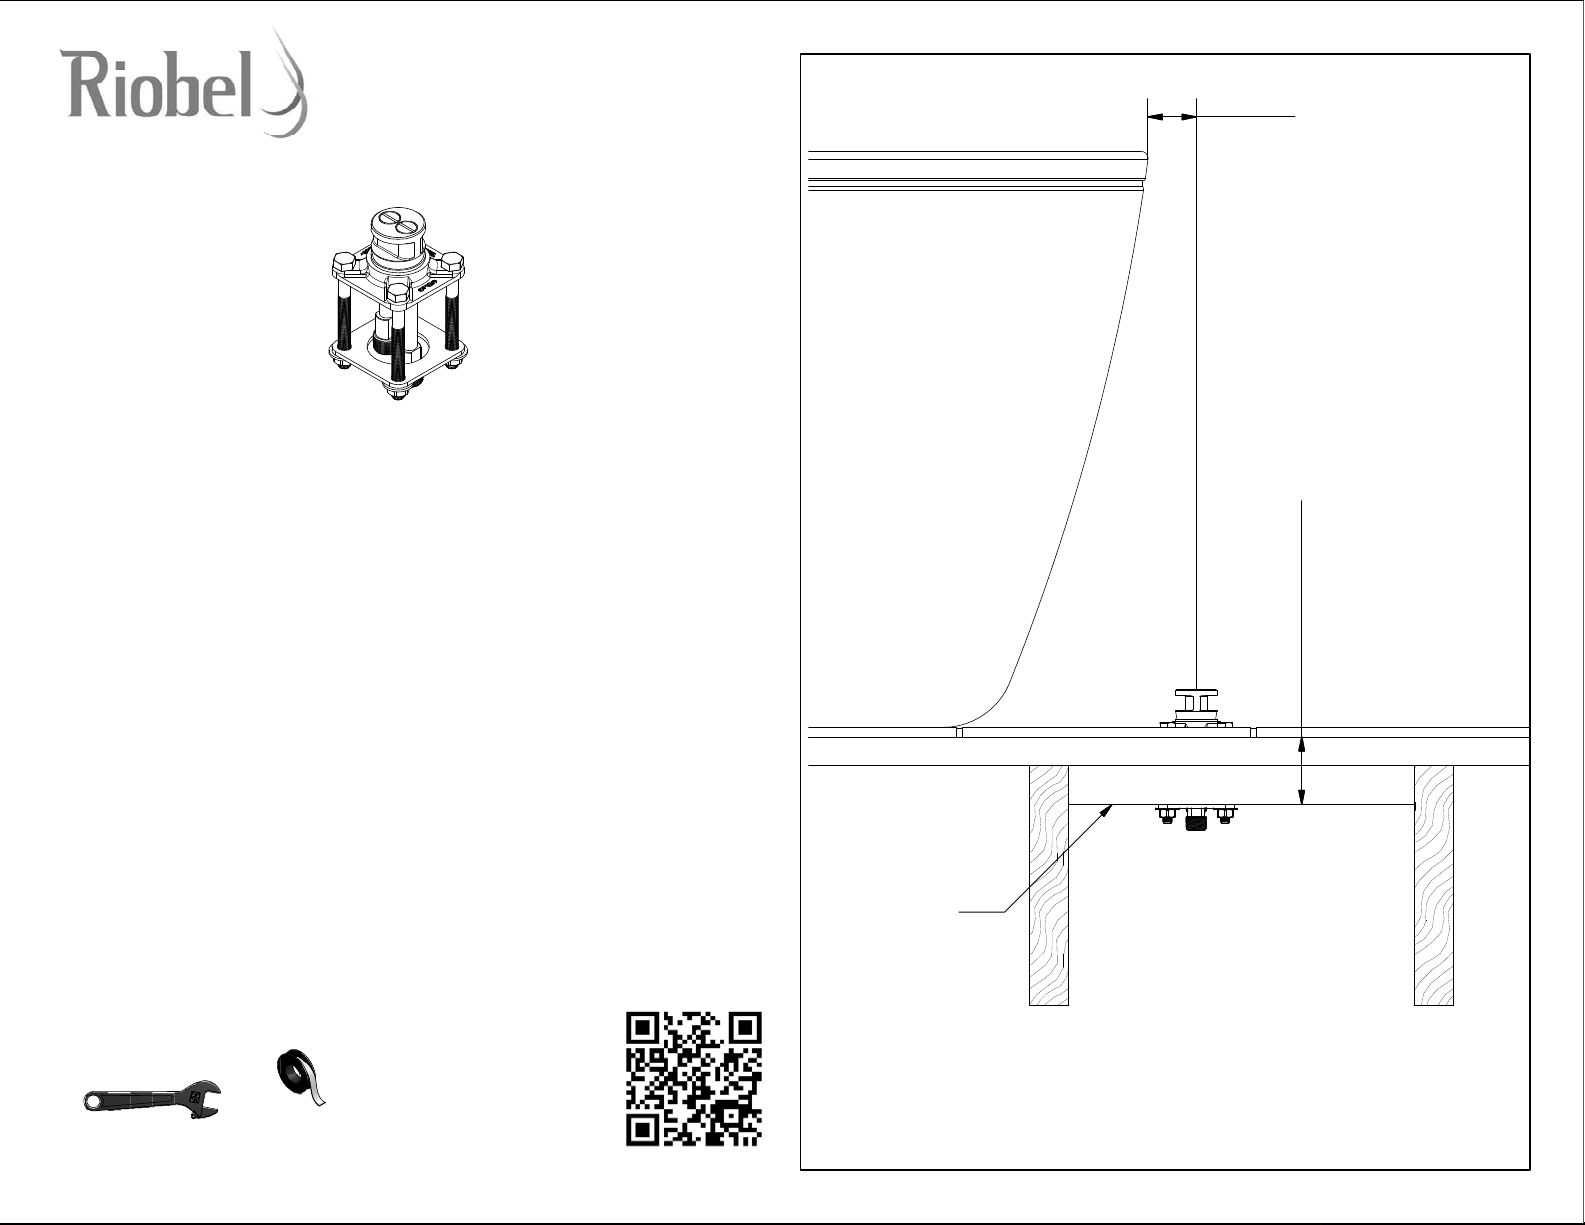
Installation guide / Guide d'installation / Guía de Instalación
Before initiating the installation:
Read all instructions.
Purge the water supply system before connecting it to the faucet.
4 (101 mm)
Note for xx37 models:
Depending of the area, the installation of an ''on demand'' water heater may not be
recommended with th is sy s t e m.
Avant de commencer l'instal lation:
Lire toutes les instructions.
Purger votre système d'alimentation d'eau avant d'effectuer le branchement au robinet.
Note pour les modèles xx37:
Selon la région, l' i nstallation de ce système est déconseillée avec un chauffe-eau ''sur
demande''.
Antes de iniciar la instalación:
Lea todas las instrucciones.
Es necesario purgar previamente su sistema de alimentación de agua p ara efectuar la
conexión del grifo.
Nota para los modelos xx37:
Según la región, la instalación de este sistema es desaconsejada con un calentador de agua
"a petición"
Note for xx37 models :
Depending of the area, the installation of an ''on demand'' water heater may not be
recommended with th is sy s t e m.
Tools and equipment requested / Outils et matériels requis / Herramientas y material
requerido de instalación
REINFORCEMENT
RENFORT
REFUERZO
]
m
m
3
6
[
2
/
1
2
X
A
M
WHITE
BLANC
BLANCO
GUI-33-37-39-Rough Rev02 2015-04
riobel.ca
USA / QC : 1.866.473.8442 - ONT :1.888.287.5354
Page 2
1
2
3
4
TUB - BAIN - BAÑO
5
TUB - BAIN - BAÑO
TUB - BAIN - BAÑO
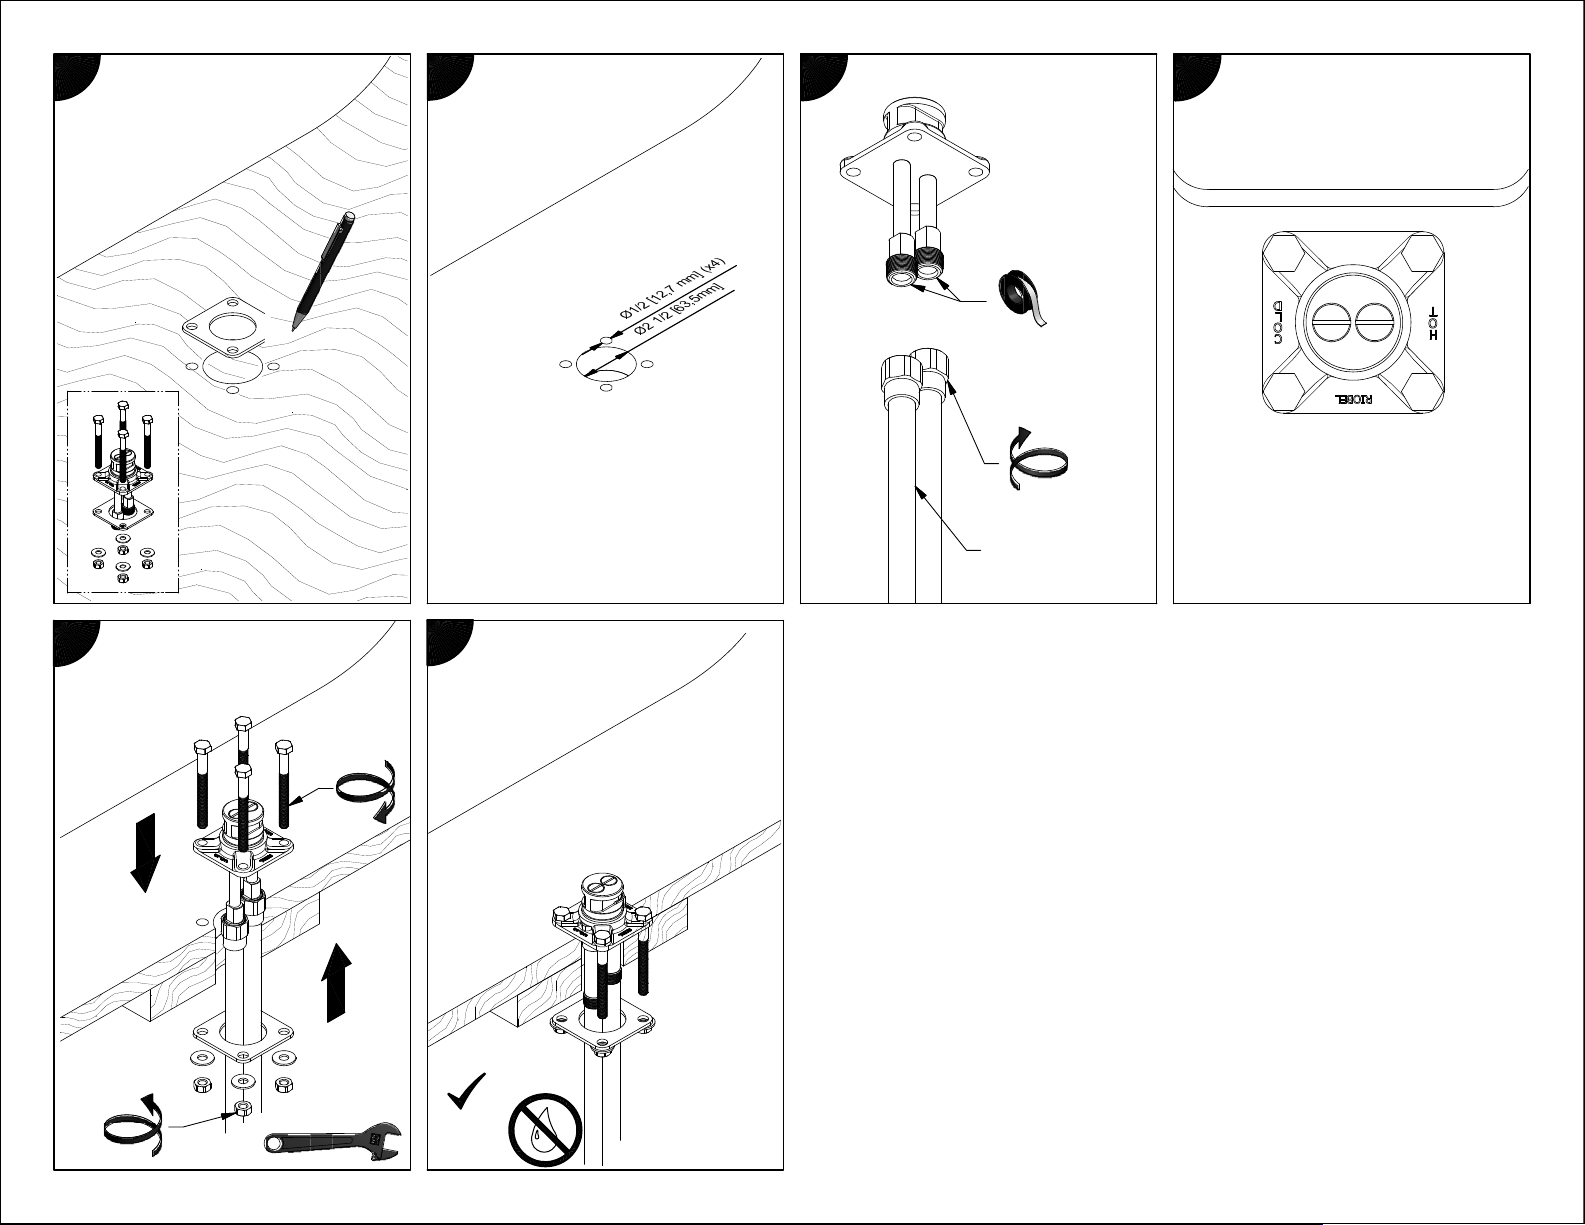
- DRILL A 2½" [63.5mm] HOLE (MA XI MUM
DIAMETER) AND 4 x 1/2" [12.7mm] HOLES.
- PERCER UN TROU D'UN DIA. MAXIMAL DE
2 1/2" [63.5mm] ET 4 TROUS DE 1/2" [12.7mm].
- PERFORE UN ORIFICO CON UN DIÁMETRO
MÁXIMO DE 2 1/2" [63.5mm] Y 4 ORIFICIOS
DE 1/2" [12.7mm].
6
TUB - BAIN - BAÑO
15-20 TURNS
15-20 TOURS
VUELTAS
15-20
PIPE 5" MINIMUM
TUYAU 5" MINIMUM
TUBO 5" MÍNIMO
TUB - BAIN - BAÑO
CHECK
VÉRIFIER
VERIFICAR
Page 3
Installation guide / Guide d'installation / Guía de instalación
1
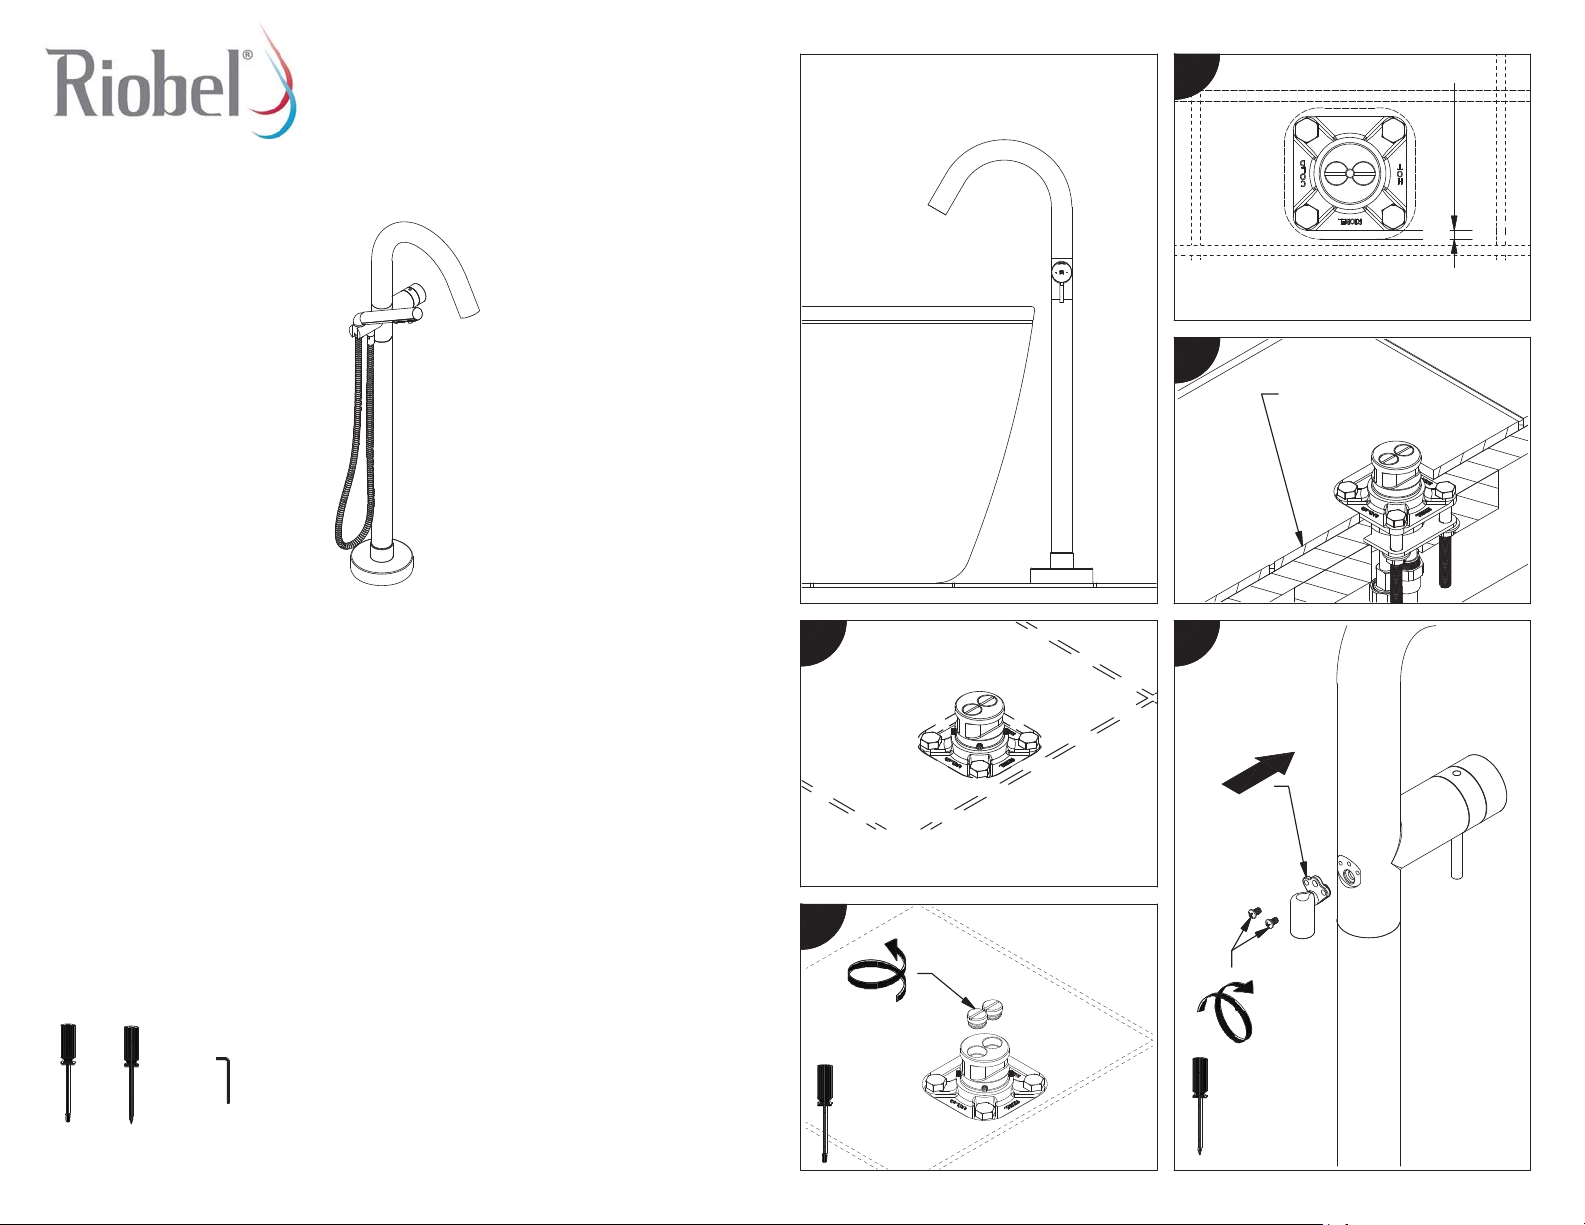
DO NOT EXCEED 1/4" [5 mm]
NE PAS EXCEDER 1/4" [5 mm]
*
NO SUPEREN EL 1/4" [5mm]
2
TUB - BAIN - BAÑO
FINISHED FLOOR
PLANCHER FINI
PISO TERMINADO
*
MAX : 1/4 [5 mm]
Before beginning the installation:
Read all instructions.
Purge the water supply system before connecting it to the faucet.
Avant de commencer l'installation:
Lire toutes les instructions.
Purger votre système d’alimentation d'eau avant d’effectuer le branchement au
robinet.
Antes de iniciar la instalación:
Lea todas las instrucciones.
Es necesario purgar previamente su sistema de al imentación de agua para efectuar
la conexión del grifo.
Tools and equipment required / Outils et matériel requis / Herramientas y
material requerido para instalación
GUI-39L-Trim Rev01 2018-01
:
53
CLOSE WATER SUPPLY
FERMER LES ALIMENTATIONS D'EAU
CIERRE EL SUMINISTRO DE AGUA
4
USA / QC : 1.866.473.8442 - ONT :1.888.287.5354
Page 4
6A
6B
9
PA39
MMRD39
MMSQ39
10
6C
EQ39
7
8
2
O
Ñ
A
B
N
I
A
B
-
1
B
U
T
H
C
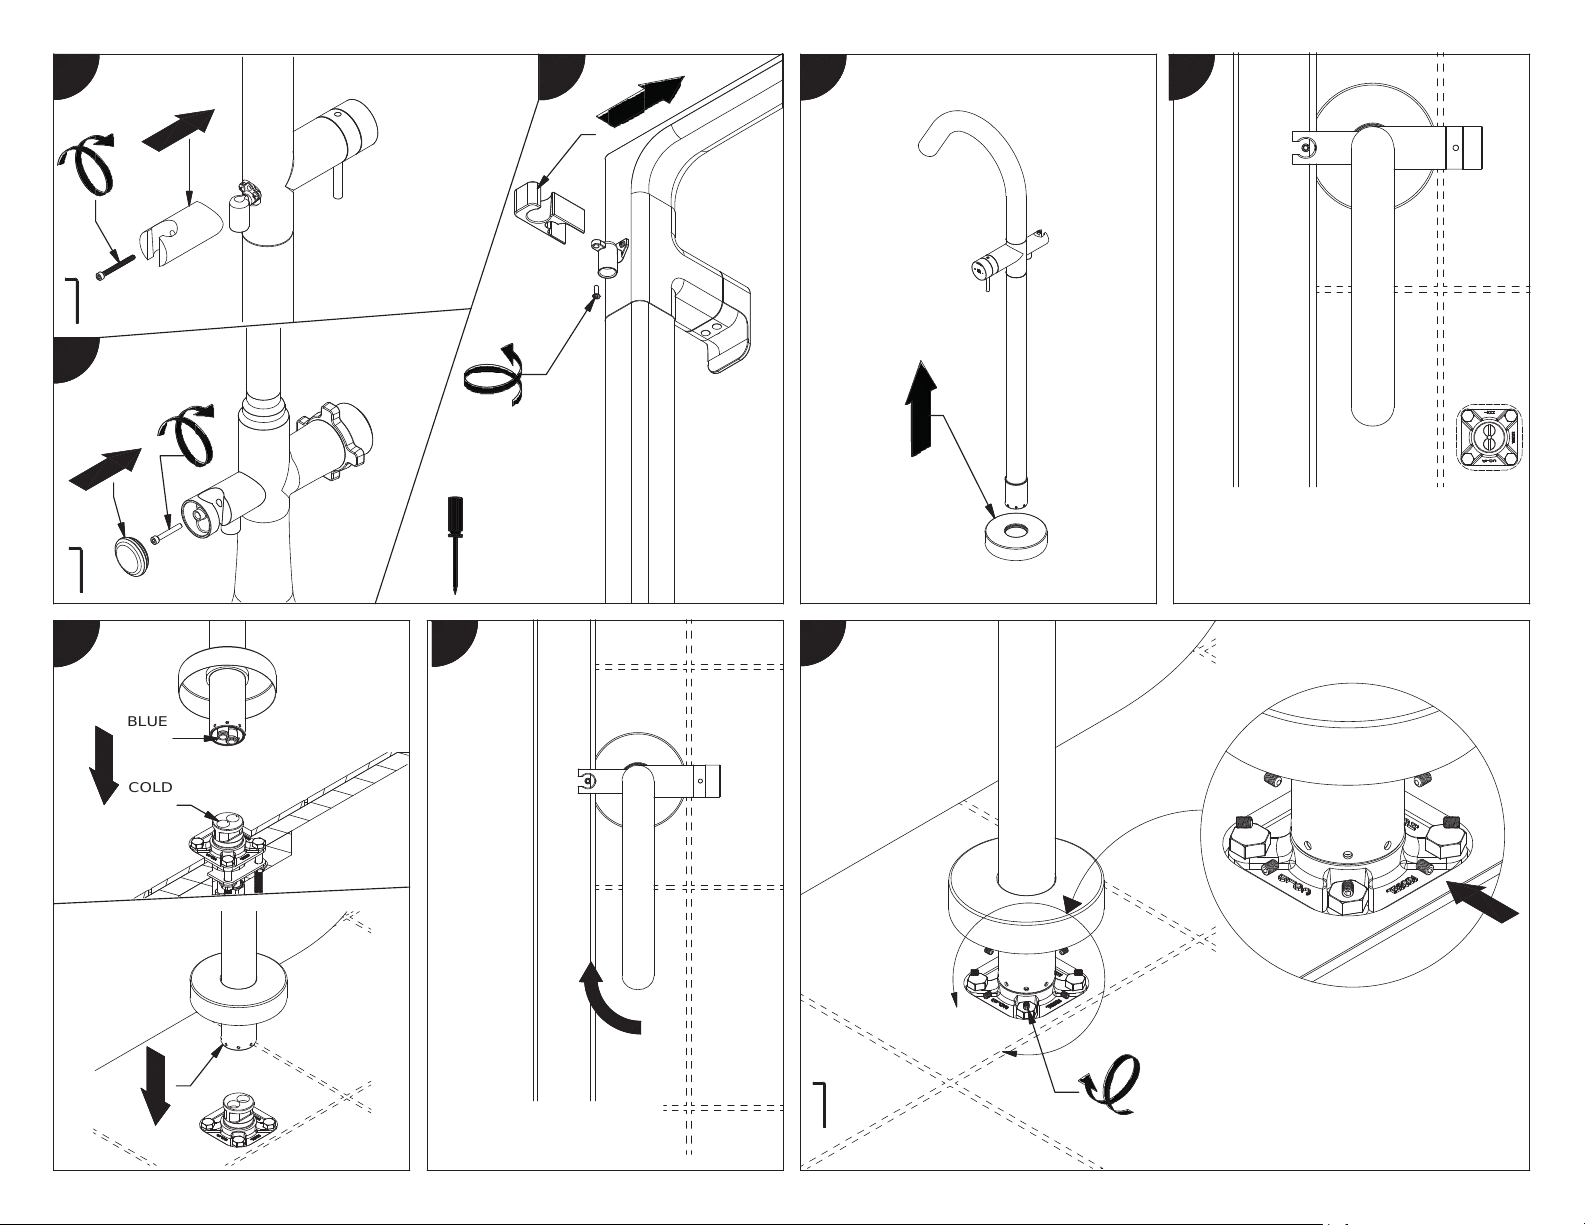
POSITION THE SPOUT PARALLEL TO THE
BATH, POINTING TOWARD COLD WATER
PLACEZ LE BEC PARALLÈLE AU BAIN, EN
DIRECTION DE L'EAU FROIDE
COLOQUE EL CAÑO PARALELO AL BAÑO,
APUNTADO HACIA EL AGUA FRÍA
11
BLUE
BLEU
AZUL
COLD
FROID
FRIO
O
Ñ
A
B
N
I
A
B
B
U
T
90°
ROTATE THE FAUCET BY 90°
PIVOTER LE ROBINET DE 90°
GIRAR EL GRIFO DE 90 GRAD OS
8x
Page 5
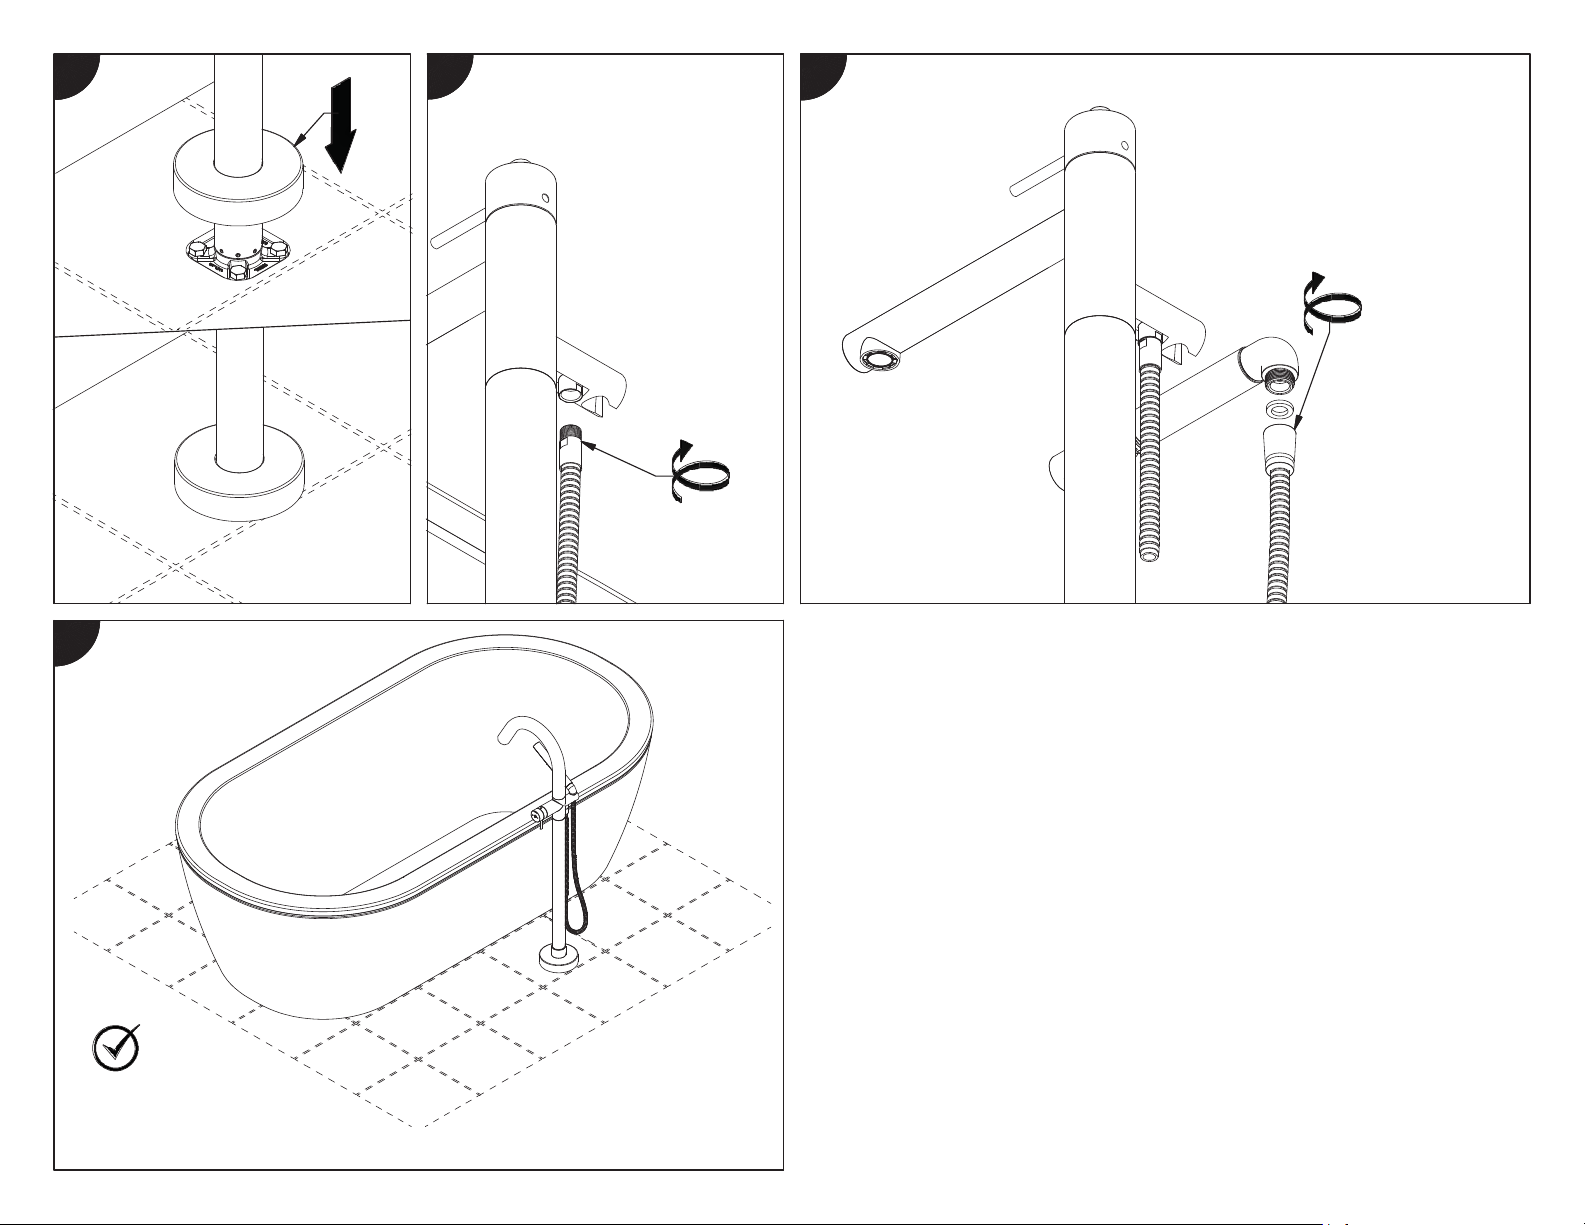
12
15
13
14
OPEN WATER SUPPLY
OUVRIR LES ALIMENTATIONS D'EAU
ABRA EL SUMINISTRO DE AGUA
 Loading...