


2100
Digital Indicato
r
Operator Manual
For use with Software Versions 2.0 and above
2100-602-240

Rinstrum - 2100 Digital Indicator Operator Manual Rev 2.4
Page 2
Copyright
All Rights Reserved. No part of this document may be copied,
reproduced, republished, uploaded, posted, transmitted, distributed,
stored in or introduced into a retrieval system in any form, or by any
means (electronic, mechanical, photocopying, recording or
otherwise) whatsoever without prior written
permission of Rinstrum Pty Ltd.
Disclaimer
Rinstrum Pty Ltd reserves the right to make changes to the
products contained in this manual in order to improve design,
performance or reliability.
The information in this manual is believed to be accurate in all
respects at the time of publication, but is subject to change without
notice. Rinstrum Pty Ltd assumes no responsibility for any errors or
omissions and disclaims responsibility for any consequences
resulting from the use of the information provided herein.
“Everything should be made as simple as possible, but not
simpler.”
- Albert Einstein -

Rinstrum - 2100 Digital Indicator Operator Manual Rev 2.4
Page 3
Table of Contents
1. INTRODUCTION .......................................................... 4
1.1. Approvals ............................................................ 4
1.2. Features.............................................................. 4
1.3. rin-SMART Software Options.............................. 4
1.4. Manuals .............................................................. 4
2. SAFETY........................................................................ 5
2.1. Operating Environment ....................................... 5
2.2. Electrical Safety .................................................. 5
2.3. Cleaning.............................................................. 5
3. BASIC OPERATION .................................................... 6
3.1. User Interface Display and Controls.................... 6
3.2. Keypad Buttons................................................... 6
3.3. Annunciators ....................................................... 7
4. BASIC WEIGHING ....................................................... 8
4.1. Normal Weighing ................................................ 8
4.2. Using Tare .......................................................... 8
5. SPECIAL FUNCTIONS ................................................ 9
5.1. Units Switching (kg / lb)....................................... 9
5.2. Counting.............................................................. 9
5.3. Hold .................................................................. 10
5.4. Peak Hold ......................................................... 10
5.5. Live Weight ....................................................... 11
5.6. Showing Totals ................................................. 12
5.7. Batching............................................................ 12
5.8. Setting Target Weights ..................................... 13
6. ERROR MESSAGES.................................................. 14
7. BATTERY OPERATION............................................. 14
8. DIAGNOSTIC ERRORS ............................................. 15

Rinstrum - 2100 Digital Indicator Operator Manual Rev 2.4
Page 4
1. Introduction
The 2100 is a precision digital indicator using the latest
Sigma-Delta A/D technology to ensure fast and accurate
weight readings.
1.1. Approvals
• NSC S403 approval (6000 divisions at 1µV/division).
• NMI TC6033 approval (6000 divisions at 1µV/division).
• C-tick approved and CE approved.
1.2. Features
• 27mm alpha-numeric LCD display (LED back-lighting).
• Checkweighing, kg/lb switching, totalising, intelligent
batching, counting, live weight, hold/peak hold functions.
• Real time clock and calendar.
• Soft Power On/Off for inactivity auto power down.
1.3. rin-SMART Software Options
• 0224 (SERIAL) Enable RS-232 serial communications
• 0225 (SETP) Enable setpoint output
1.4. Manuals
For more information on the 2100 refer to the 2100
Reference Manual and 2100 Quick Start Manual
(available free of charge from www.rinstrum.com
).

Rinstrum - 2100 Digital Indicator Operator Manual Rev 2.4
Page 5
2. Safety
2.1. Operating Environment
• Operating Temperature: –10 to 50°C
• Humidity: <90% non-condensing
• Operating Voltage: Shown on rear label
2.2. Electrical Safety
• For your protection all mains electrical hardware must be
rated to the environmental conditions of use.
• The mains electrical outlet must be of protection earth
contact.
• Pluggable equipment must be installed near an easily
accessible power socket outlet. A permanently
connected supply must have a readily accessible
disconnect device.
• To avoid the possibility of electric shock or damage to the
instrument, always switch off or isolate the instrument
from the power supply before maintenance is carried out.
2.3. Cleaning
• To maintain the instrument, never use harsh abrasive
cleaners or solvents. Wipe the instrument with a soft
cloth slightly dampened with either methylated spirits or
warm soapy water.

Rinstrum - 2100 Digital Indicator Operator Manual Rev 2.4
Page 6
3. Basic Operation
3.1. User Interface Display and Controls
3.2. Keypad Buttons
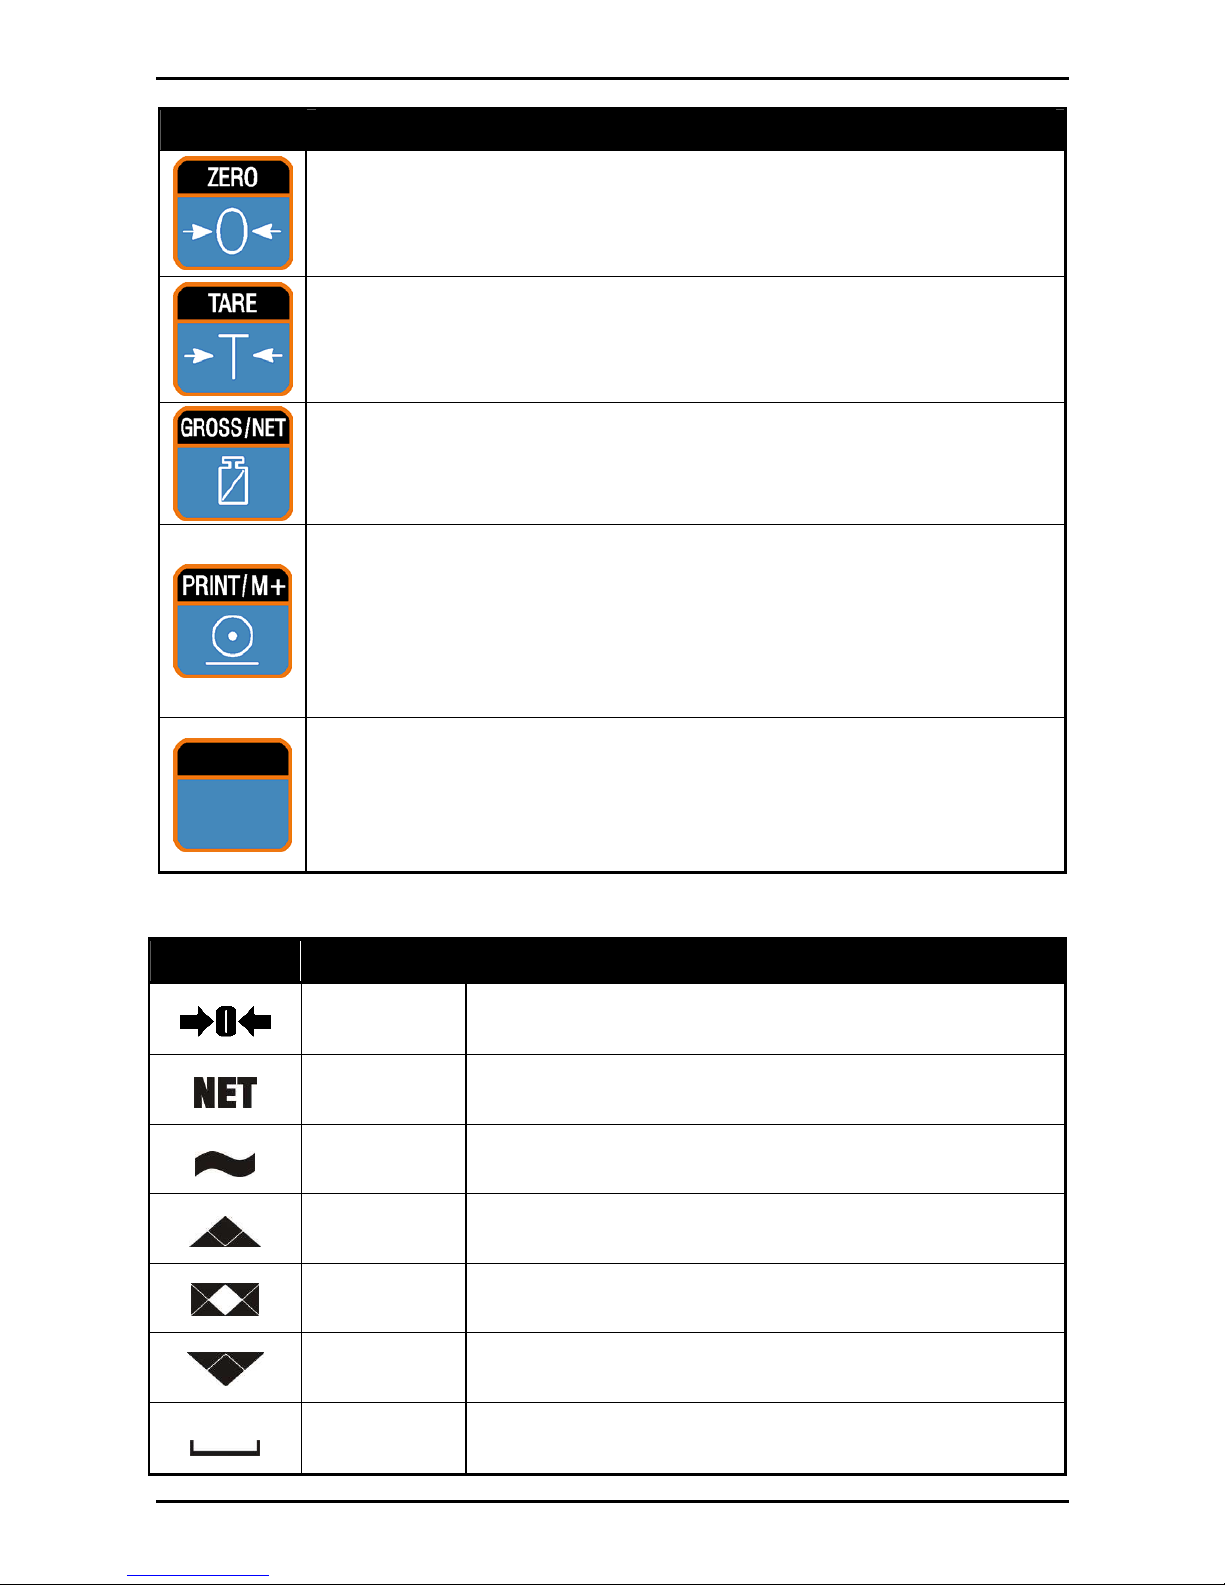
Key Description
POWER: The Power key is used to turn the
instrument ON and OFF.
• To Turn Instrument OFF: Press and hold the
<POWER> key for three seconds (until the
display blanks).
• Operator Menu Setup: Press and hold the
<POWER> and <ZERO> keys for two
seconds.
• Software Options: Press and hold the
<POWER> and <FUNCTION> keys for two
seconds.
Rinstrum - 2100 Digital Indicator Operator Manual Rev 2.4
Page 7
Key Description
ZERO: The Zero key sets the display weight to
gross zero, providing the weight is within the zero
range of the instrument (Tare weight is cleared).
TARE: The Tare key temporarily sets the weight
on the instrument to be displayed as zero. Refer to
Using Tare page 8 for more information.
GROSS/NET: The Gross/Net key toggles the
weight display between the Gross and the Net
weight.
PRINT/M+: The Print/M+ key sends data to the
attached peripheral device. M+ indicates the
instrument has a memory (ie. each printed weight
is automatically added to the internal Total
Weight).
FUNCTION: This key is programmable to suit
customer requirements. A key label identifying the
special function will be attached. (Refer to page 9
for information on Special Functions).
3.3. Annunciators
Symbol Name Description
ZERO
Lit when the displayed reading is within
± ¼ of a division of true zero.
NET
Lit when the display reading represents
NET weight.
MOTION
Lit when the displayed reading is not
stable.
OVER
Lit when the weight is over setpoint
target.
PASS
Lit when the weight is between under
and over setpoint targets.
UNDER
Lit when the weight is under the
setpoint target.
ZERO
BAND
Lit when the displayed weight is within
the zero dead band setting.

Rinstrum - 2100 Digital Indicator Operator Manual Rev 2.4
Page 8
4. Basic Weighing
4.1. Normal Weighing
• Ensure instrument is On and zero annunciator is lit.
• Place your item on the weigh platform.
• Read the weight display.
4.2. Using Tare
• Indictor displays zero with zero annunciator lit.
• Place the container on the weigh platform.
• Press the <TARE> key.
• Indicator will show the displayed zero weight and net
annunciator will be lit.
• Fill container to required weight.
• Press the <GROSS/NET> key to toggle
between the net weight and total weight.

Rinstrum - 2100 Digital Indicator Operator Manual Rev 2.4
Page 9
5. Special Functions
5.1. Units Switching (kg / lb)
• Press the <UNITS> key to switch the display
between kilograms and pounds.
Note: Printing and serial communications will use the units
displayed (either kg or lb), but calibration weights and
targets, etc., must be entered in the primary display units
of the indicator.
5.2. Counting
• Place the container on the weigh platform and
press <TARE> if required.
• Place the sample pieces to be counted on the weigh
platform.
• Press and hold the <COUNT> key for two
seconds. The default number of pieces in the
sample will be displayed.
• Use the <GROSS/NET> and <PRINT/M+>
keys to alter the number of pieces.
• Press <COUNT>. The current sample will be
stored against the entered pieces. The letter p
(for pieces) displays when in counts display.
• Press the <COUNT> key to toggle between the weight
display and the counts display.
Rinstrum - 2100 Digital Indicator Operator Manual Rev 2.4
Page 10
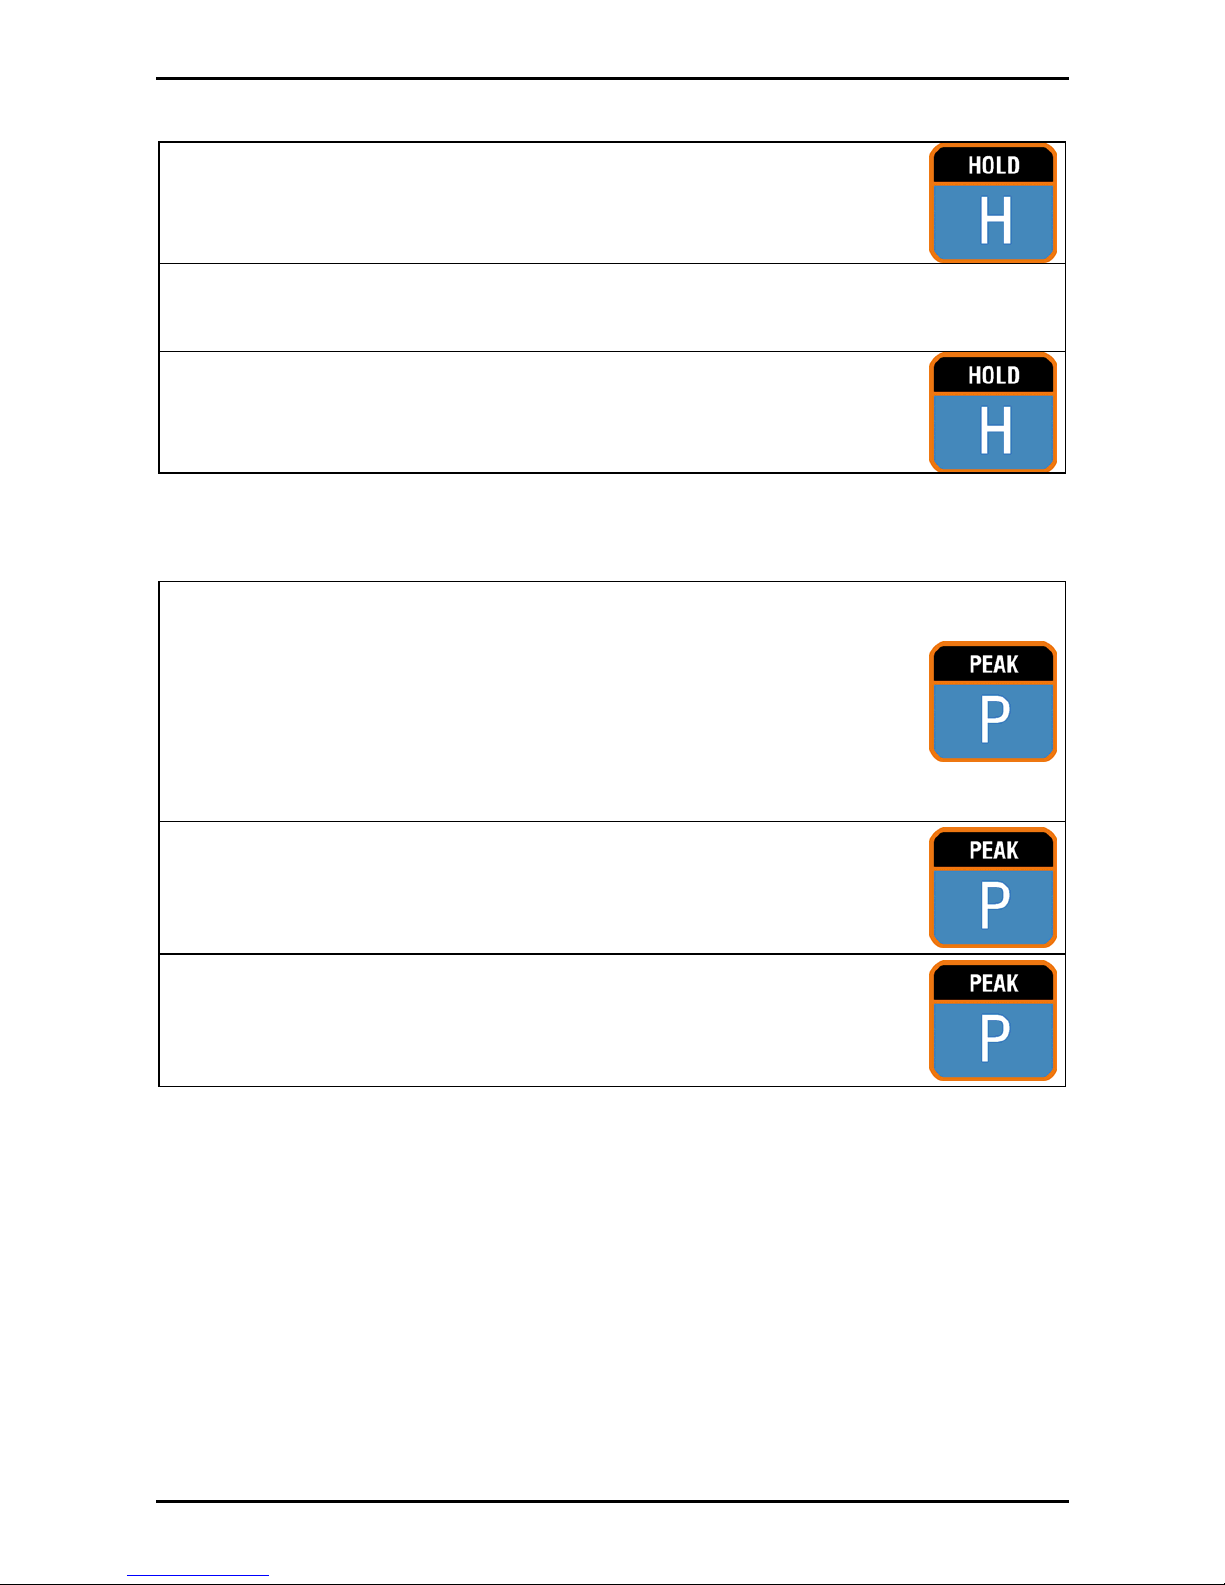
5.3. Hold
• Press the <HOLD> key to hold the displayed
weight at its current weight.
• The displayed Units will flash to indicate that the
reading is held.
• Press the <HOLD> key again to release the
weight reading and return the display to
normal weighing.
5.4. Peak Hold
• Press the <PEAK> hold key to hold the largest
absolute weight (either positive or negative).
The 2100 compares the current weight
reading with the stored peak and updates the
peak reading whenever a larger weight is
detected.
• Press the <PEAK> key to toggle between the
current weight and the peak weight.
• Press and hold the <PEAK> key for two
seconds to clear the peak value and reset
back to zero.

Rinstrum - 2100 Digital Indicator Operator Manual Rev 2.4
Page 11
5.5. Live Weight
• Move the animal onto the weigh platform.
• Press and hold the <LIVE WT> key for two
seconds.
• ‘- - - - - -‘ is displayed until a reliable weight reading has
been acquired.
• Once a weight has been determined the 2100 beeps to
indicate how reliable the reading is.
-A single beep indicates that the sample is too
unreliable and has been discarded.
-A double beep indicates that the sample is reliable but
is made up of many averages.
-A triple beep indicates that the sample was taken as a
result of no motion and is very reliable.
• Press the <LIVE WT> key to force the 2100 to
take another reading if required.
• Once the animal is removed, the 2100 automatically
clears the previous reading ready for the next animal
and displays '- - - - - -' once more.
• Press and hold the <LIVE WT> key for two
seconds to return the indicator to normal
weighing.
• In normal weighing the Live Weight key operates exactly
like a manual <HOLD> key. Press the key once to hold
a weight and again to release it.
Rinstrum - 2100 Digital Indicator Operator Manual Rev 2.4
Page 12
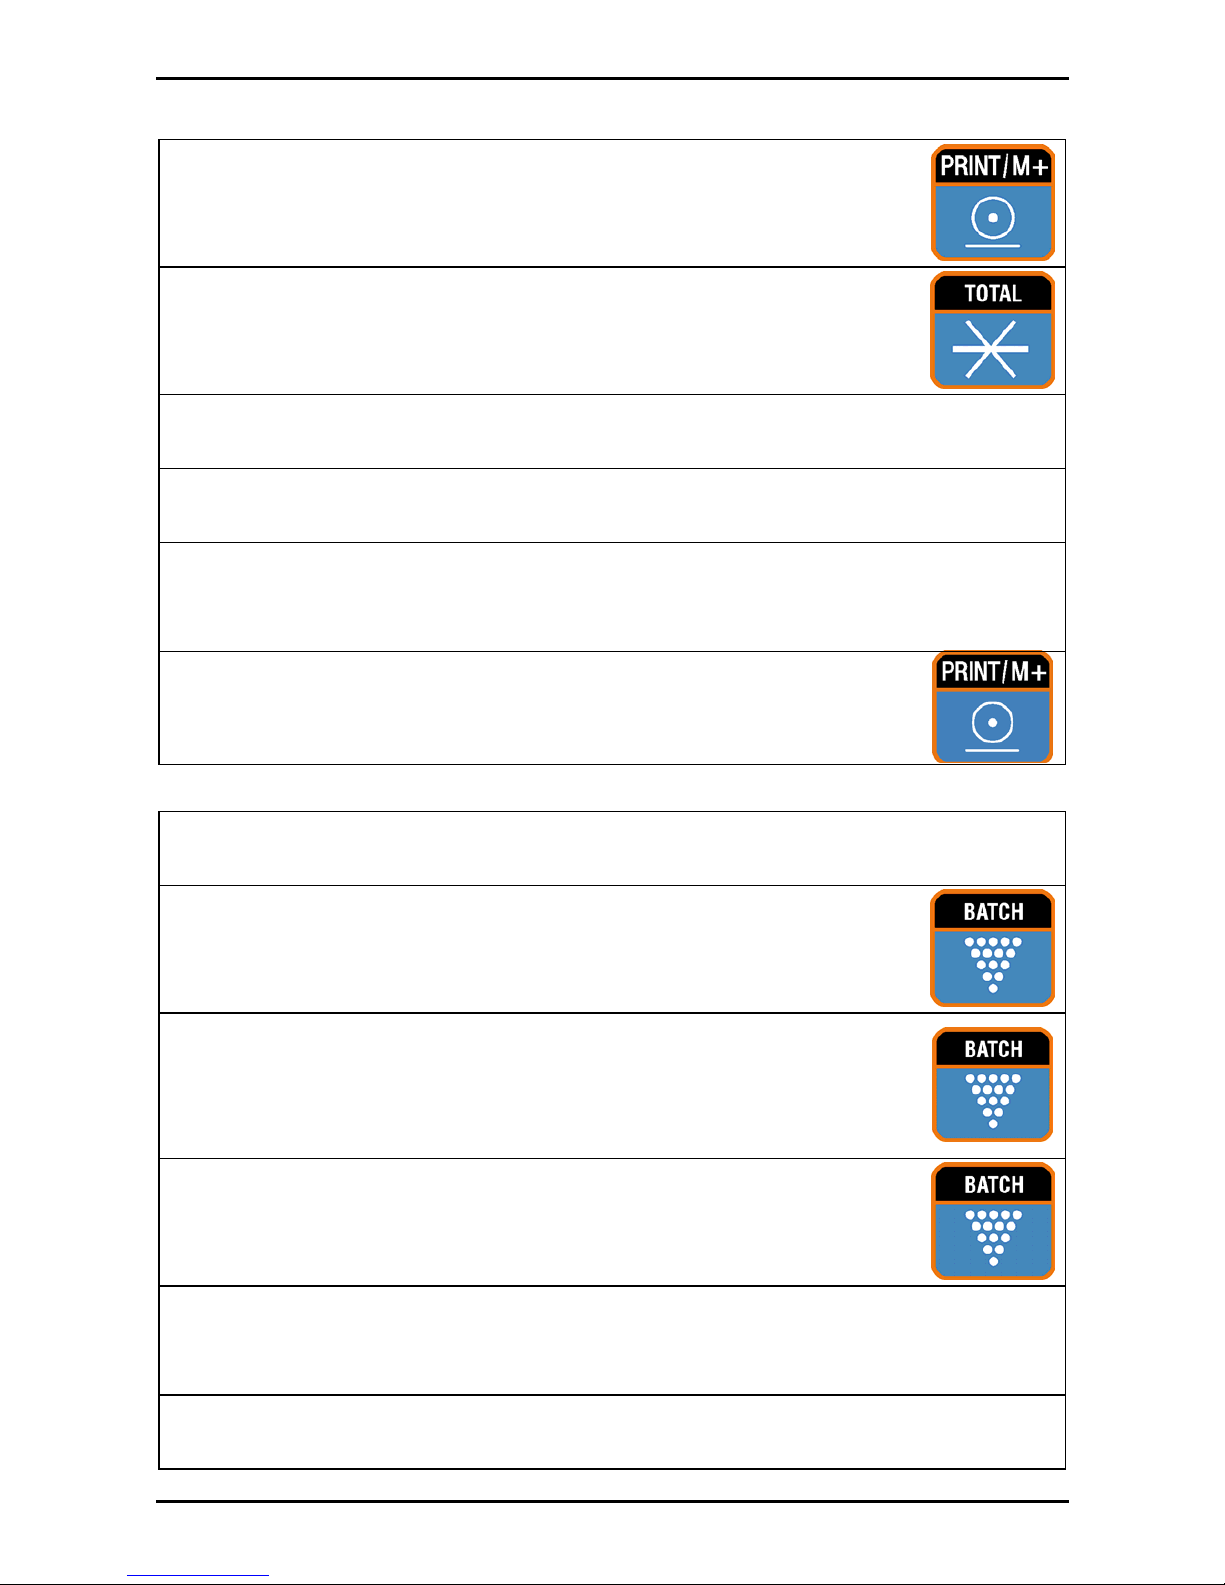
5.6. Showing Totals
• The <PRINT/M+> key is used not only to print the
current weight but also to add that weight to the
current total.
• When the <TOTAL> key is pressed the 2100
displays count followed by the number of items
in the total.
• After this the 2100 displays TOTAL followed by the current
total weight.
• If counting is active QTY is also displayed along with the
total quantity of items in the total.
• If the total weight is too large to display in six digits, the
weight is shown in two sections labelled with the upper six
digits displayed before the lower six digits.
• Press and hold the <PRINT/M+> key to cause the
total accumulated weight to be printed and then
cleared.
5.7. Batching
• The 2100 operates a two speed single material filling
sequence with an optional dump to weight or time.
• Press the <BATCH> key to start the single
material operation.
• During operation press the <BATCH> key to
Pause batching and again to re-start batching.
While paused the 2100 will display PAUSE on
the display.
• Press and hold the <BATCH> key for two
seconds to abort the batch.
• While a batch is running (or paused) all keyboard keys other
that the batch key are blocked (ie. Zero, Tare, Gross/Net,
Print/M+).
• If the 2100 has printing enabled there will be a standard
batch print ticket automatically generated for each batch.
Rinstrum - 2100 Digital Indicator Operator Manual Rev 2.4
Page 13
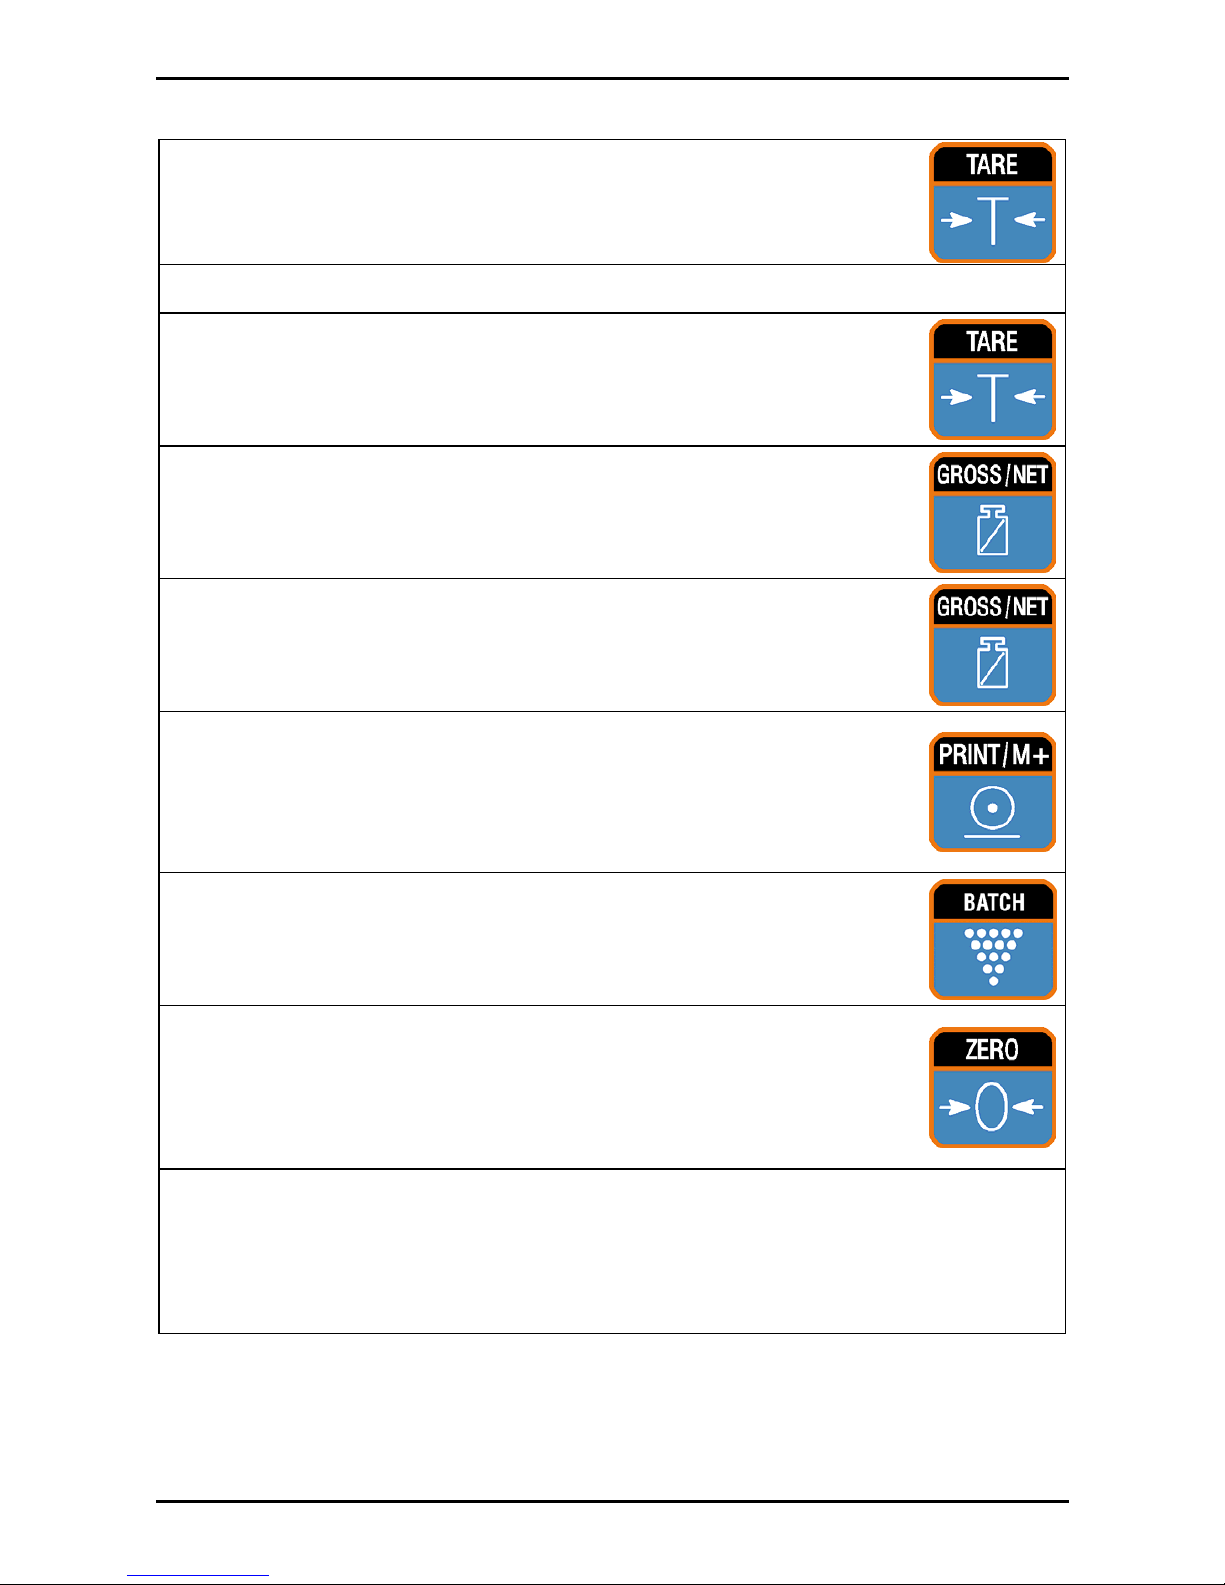
5.8. Setting Target Weights
• Press and hold the <TARE> key for two
seconds to enter the material target weights.
• The 2100 displays TARG A.
• Press the <TARE> key to step through the
available targets, flight and hysteresis options.
• Press the <GROSS/NET> key to select an
option to change. The digit to change will be
flashing.
• Press the <GROSS/NET> key to move the
flashing digit.
• Press the <PRINT/M+> key to change the
flashing digit. The left-most digit can be
changed from 0 to 9 or to ‘–‘ which is for
entering negative targets.
• Press the <BATCH> key to save the settings.
• To return to normal weighing, press the
<ZERO> key. An alternate method is to press
the <TARE> key to select - End - and then
press the <GROSS/NET> key.
Note: Two Speed Feeder
TARG A = Target Batch Weight
TARG B = Preliminary Batch Weight

Rinstrum - 2100 Digital Indicator Operator Manual Rev 2.4
Page 14
6. Error Messages
Error Description
(U - - - - - -)
The weight reading is below the
normal weighing range.
(O - - - - - -)
The weight reading is above the
maximum capacity of the equipment.
(ZERO)
(ERROR)
The weight is outside the zero range
tolerance setting. See Note below.
(STABLE)
(ERROR)
The scale motion has prevented a
zero, tare or print operation from
occurring. See Note below.
(QA)
(DUE)
Quality assurance testing is due.
Press any key to clear this warning for
one hour.
Note: The ZERO and STABLE error messages are
accompanied by a series of long beeps. The messages
repeat until a key is pressed.
7. Battery Operation
BAT is flashed on the auxiliary display if the battery voltage
falls below 11V. If the battery voltage falls below 10.5V the
instrument automatically powers down.

Rinstrum - 2100 Digital Indicator Operator Manual Rev 2.4
Page 15
8. Diagnostic Errors
Error Description Action
E0001
Power supply voltage too low. Check
supply
E0002
Power supply voltage too high. Check scale
/ cables
E0004
Load cell excitation voltage too low.
(8 volts for up to 8 x 350 ohm load
cells)
Check scale
/ supply
E0008
Load cell excitation voltage too high.
(8 volts for up to 8 x 350 ohm load
cells)
Check scale
/ supply
E0010
Temperature outside limits.
(–10 to +50°C ambient)
Check
location
E0020
Scale build incorrect.
(100 to 30000 grads).
Fix up scale
build
E0100
Digital setup information lost. Re-enter
setup
E0200
Calibration information lost. Re-calibrate
E0300
All setup information lost. Enter setup
and
calibrate
E0400
Factory information lost. (FATAL) Service
E0800
EEPROM memory chip failed. (FATAL) Service
E2000
ADC out of range. Possible load cell or
cable damage.
Check load
cell cable
E4000
Battery backed RAM data lost. Re-enter
setup
E8000
FLASH program memory incorrect.
(FATAL)
Service
The E type error messages are additive. For example, E0005
(0001 + 0004) would indicate that both Excitation and Power Supply
Voltage are low. The numbers add in hexadecimal as follows:
1 - 2 - 3 - 4 - 5 - 6 - 7 - 8 - 9 - A - B - C - D - E - F
(For example, 2 + 4 = 6, or 4 + 8 = C)

 Loading...