

Page 1
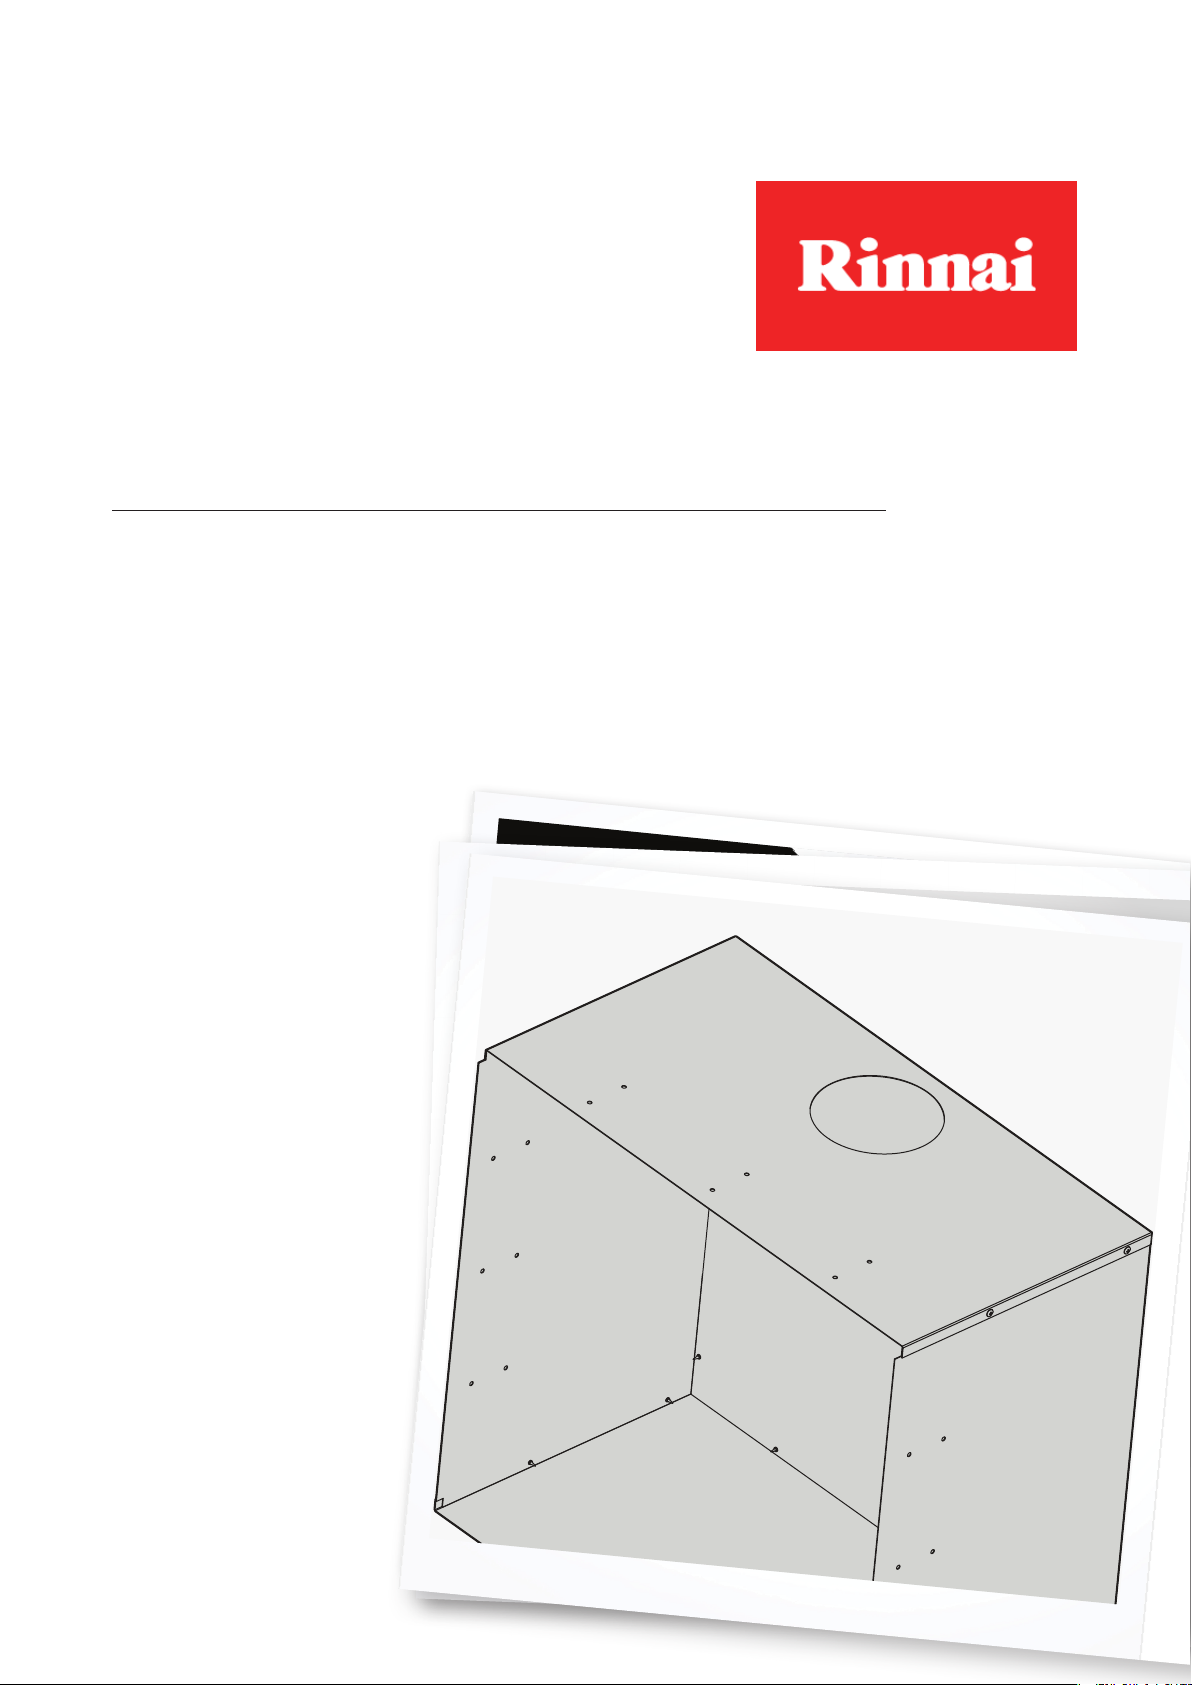
Zero clearance box assembly
RIBF2 Slimre 252 /
Compact 2
Page 2
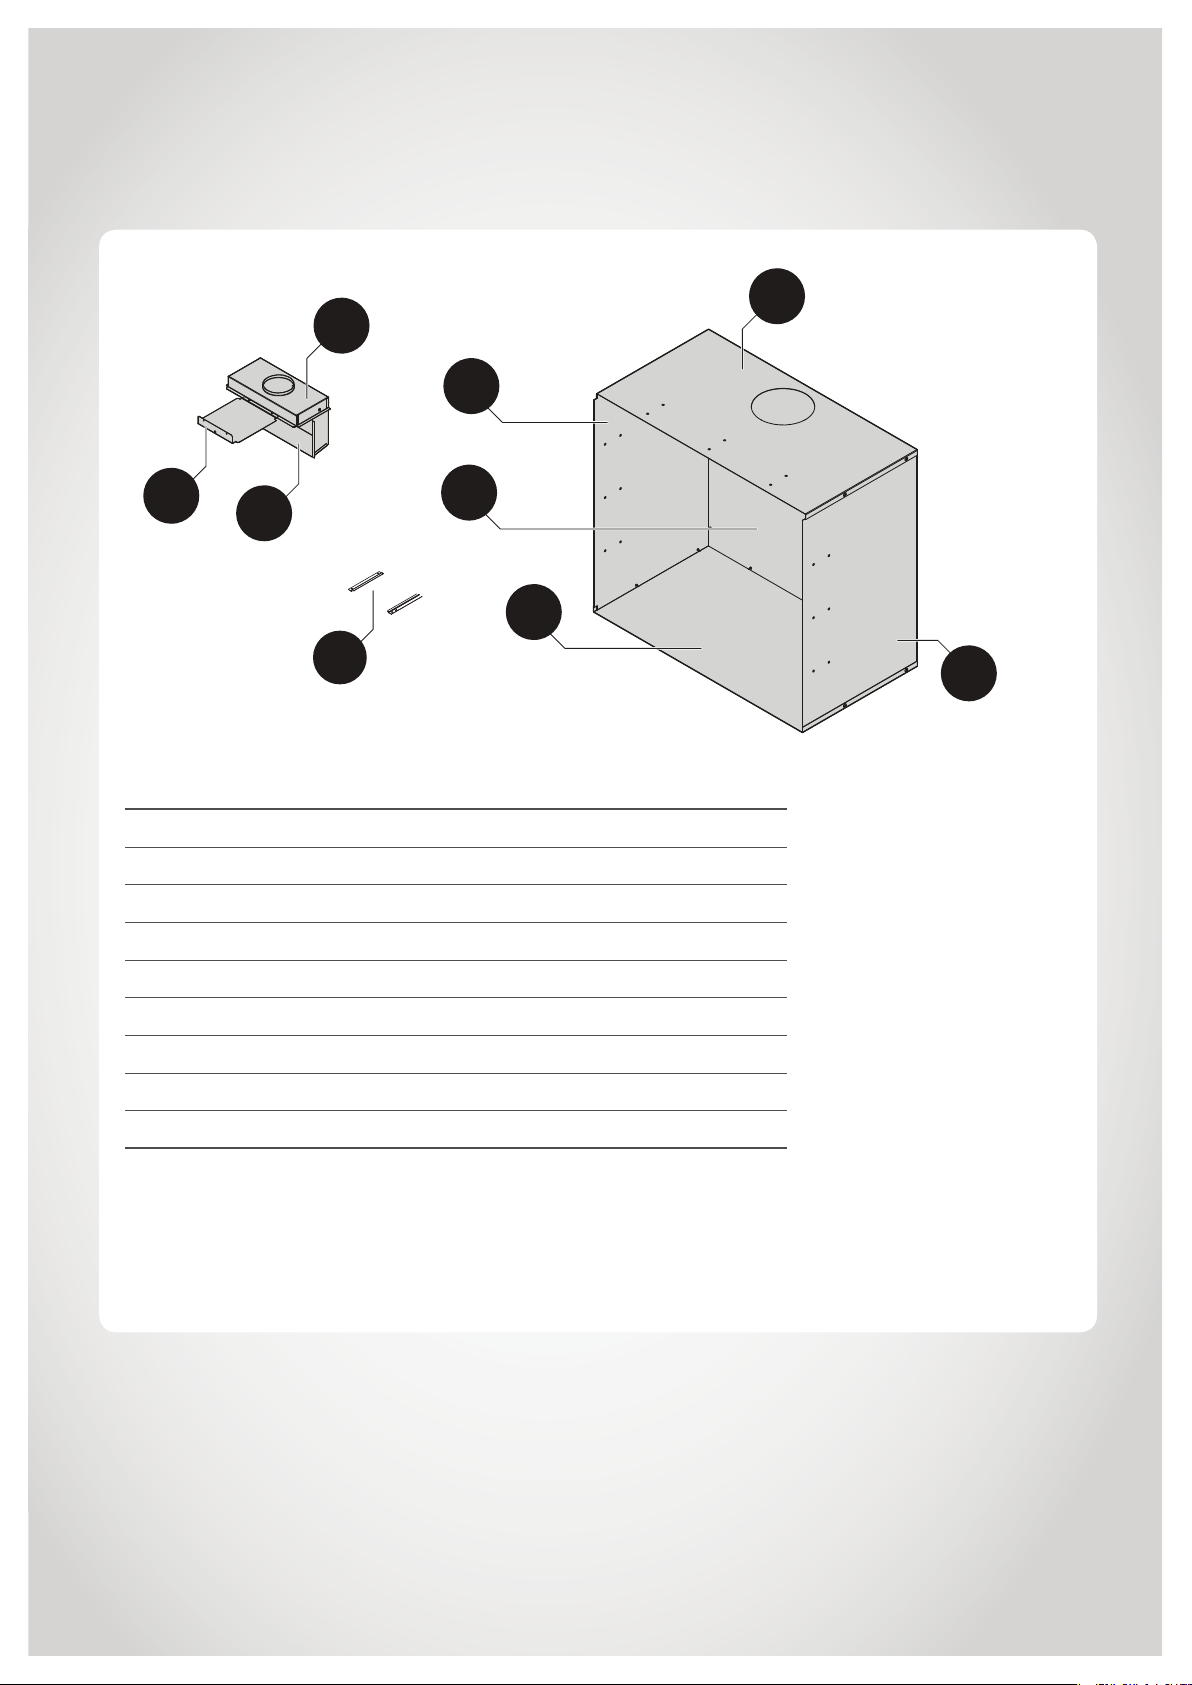
Kit components
1
7
4
3
2
8
Item Description
1 Flue adaptor upper*
2 Flue adaptor lower*
3 Flue adaptor guide plate*
4 Zero clearance box top panel
5 Zero clearance box base panel
6 Zero clearance box rear panel
7 Zero clearance box side panels
6
5
7
8 Flue guide rails (not required for the zero clearance box assembly)**
- Packet assembly screws, rivets, and grommet
* The flue adaptor, once assembled, connects to the top of the heater
engine—for further information, refer to the ‘Zero clearance
installation’ page of the installation guide.
** The flue guide rails are attached to the top of the heater engine.
2 | RIBF2 Slimre 252 / Compact 2 Zero Clearance Box Assembly: 11824-B 02-12
Page 3
Installation
Before installation
• Unpack the assembly and
check for damage—DO NOT
install any damaged items
• Check all components have
been supplied
• Read these instructions to
get an overview of the steps
required before starting the
assembly
Failure to follow these instructions
could cause a malfunction of
the appliance. This could result
in serious injury and property
damage.
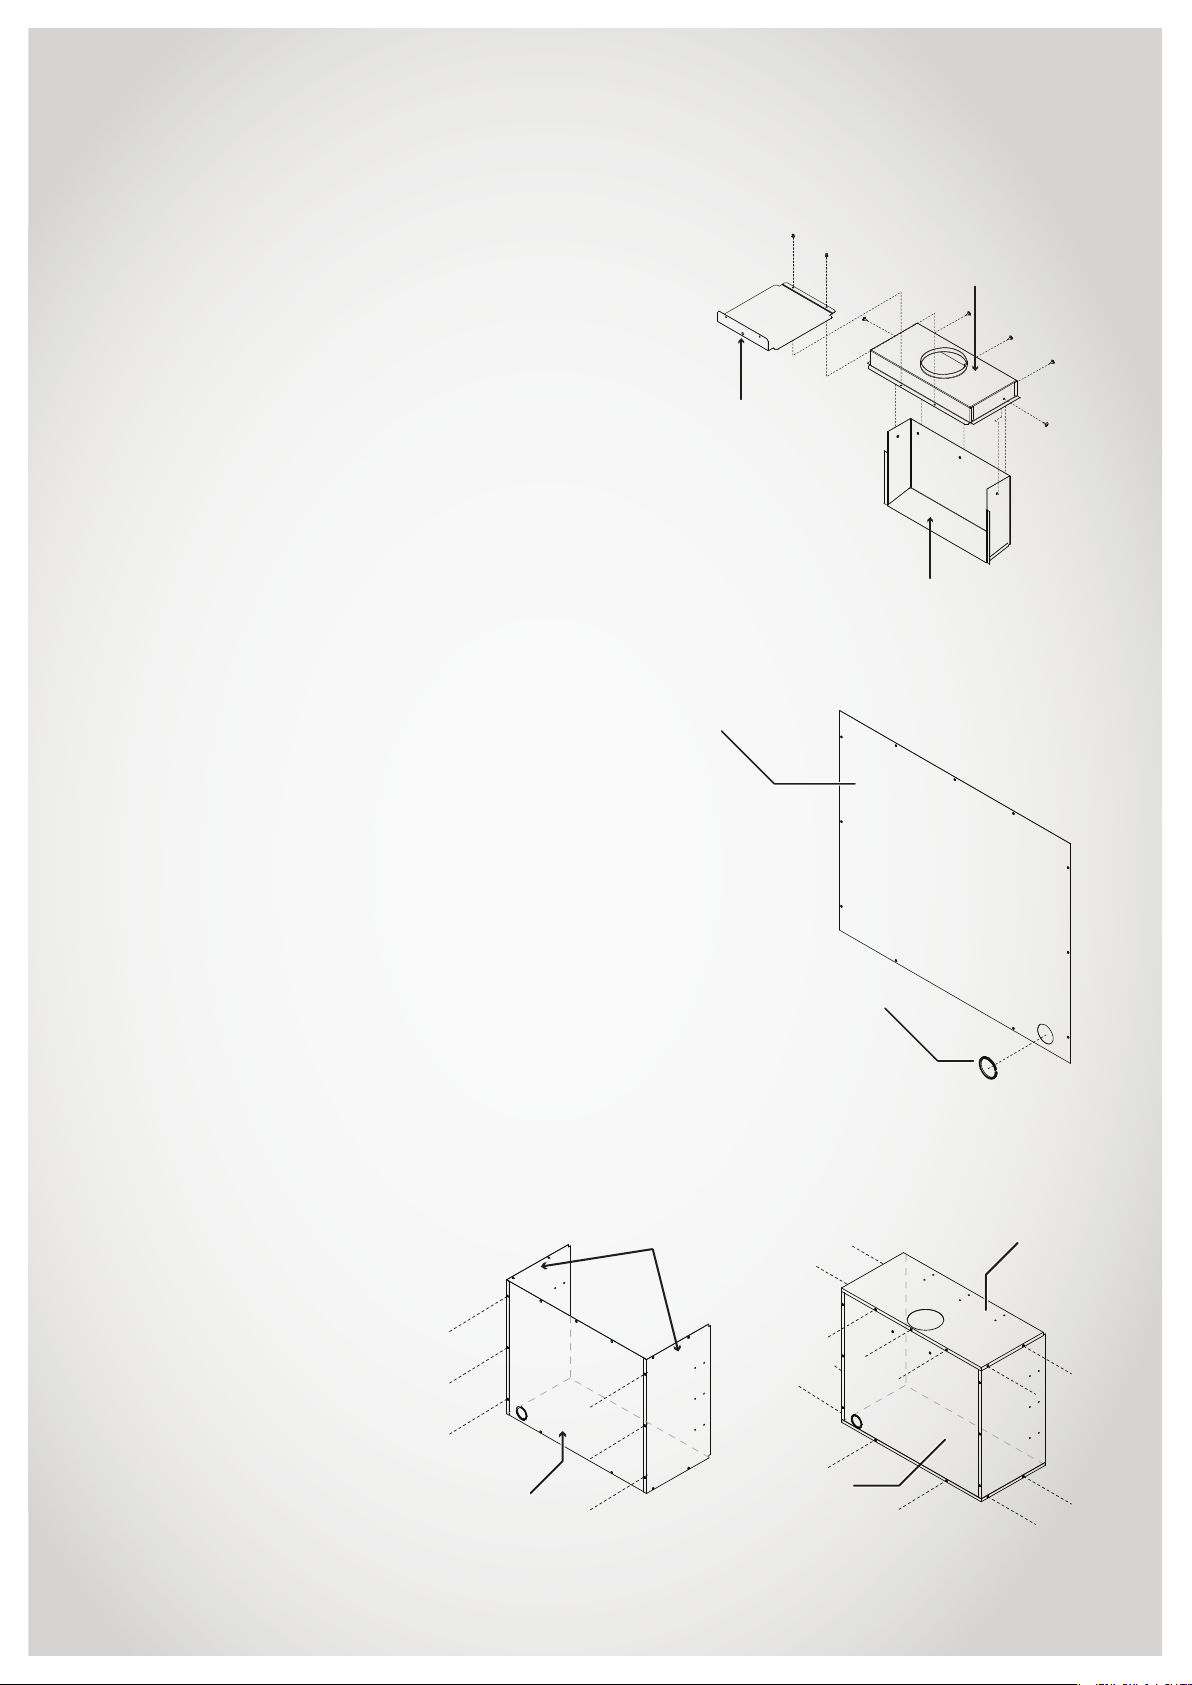
Assemble the flue adaptor
Assemble the upper and lower
sections of the flue adaptor using
the five screws supplied, then
attach the guide plate and RIVET
FROM THE UNDERSIDE with the
two pop-rivets supplied.
Guide plate
When attaching the guide,
rivet from the underside.
The flue adaptor, once
assembled, connects to the top
of the heater engine. Refer to
the installation guide for further
information.
Rear panel
Flue adaptor
upper sectiom
Flue adaptor
lower section
Assemble the flue adaptor
Set aside—flue adaptor assembly
connects to the top of the heater
engine.
Fit plastic grommet
Fit the plastic grommet into the
gas and electrical access hole of
the back panel.
Assemble zero clearance box
1. Attach the side panels to the
rear panel and secure with the
six screws supplied.
2. Attach the top panel to the
rear panel, aligning the flue
outlet hole to the rear, and
secure with the three screws
supplied.
3. Secure the top panel to the
side panels with the four
screws supplied.
4. Attach base panel to the rear
panel and secure with the two
screws supplied.
5. Secure base panel to the side
panels with the four screws
supplied.
Rear panel
Side panels
Plastic grommet
Fit plastic grommet
Top panel
Base panel
Assemble zero clearance box
RIBF2 Slimre 252 / Compact 2 Zero Clearance Box Assembly: 11824-B 02-12 | 3
Page 4

For more information call:
Rinnai Australia Pty Ltd:
1300 555 545
Rinnai New Zealand Ltd: 0800 RINNAI (0800 746 624)
 Loading...