

Rinnai RBOX06LW Installation Manual
B064440 1 03_114 RBOX06LW IM Issue 3 080319
Installation Manual
RBOX06LW RECESS BOX
(PREPAINTED)
GENERAL INFORMATION
This Recess Box ts these Rinnai Water Heater models.
INFINITY 12 REU-AM1220WD
INFINITY 16 REU-AM1620WD
INFINITY 20 REU-AM2024WD
INFINITY 26 REU-AM2626WD
INFINITY 26 Touch REU-AM2626WDL
INSTALLATION METHOD
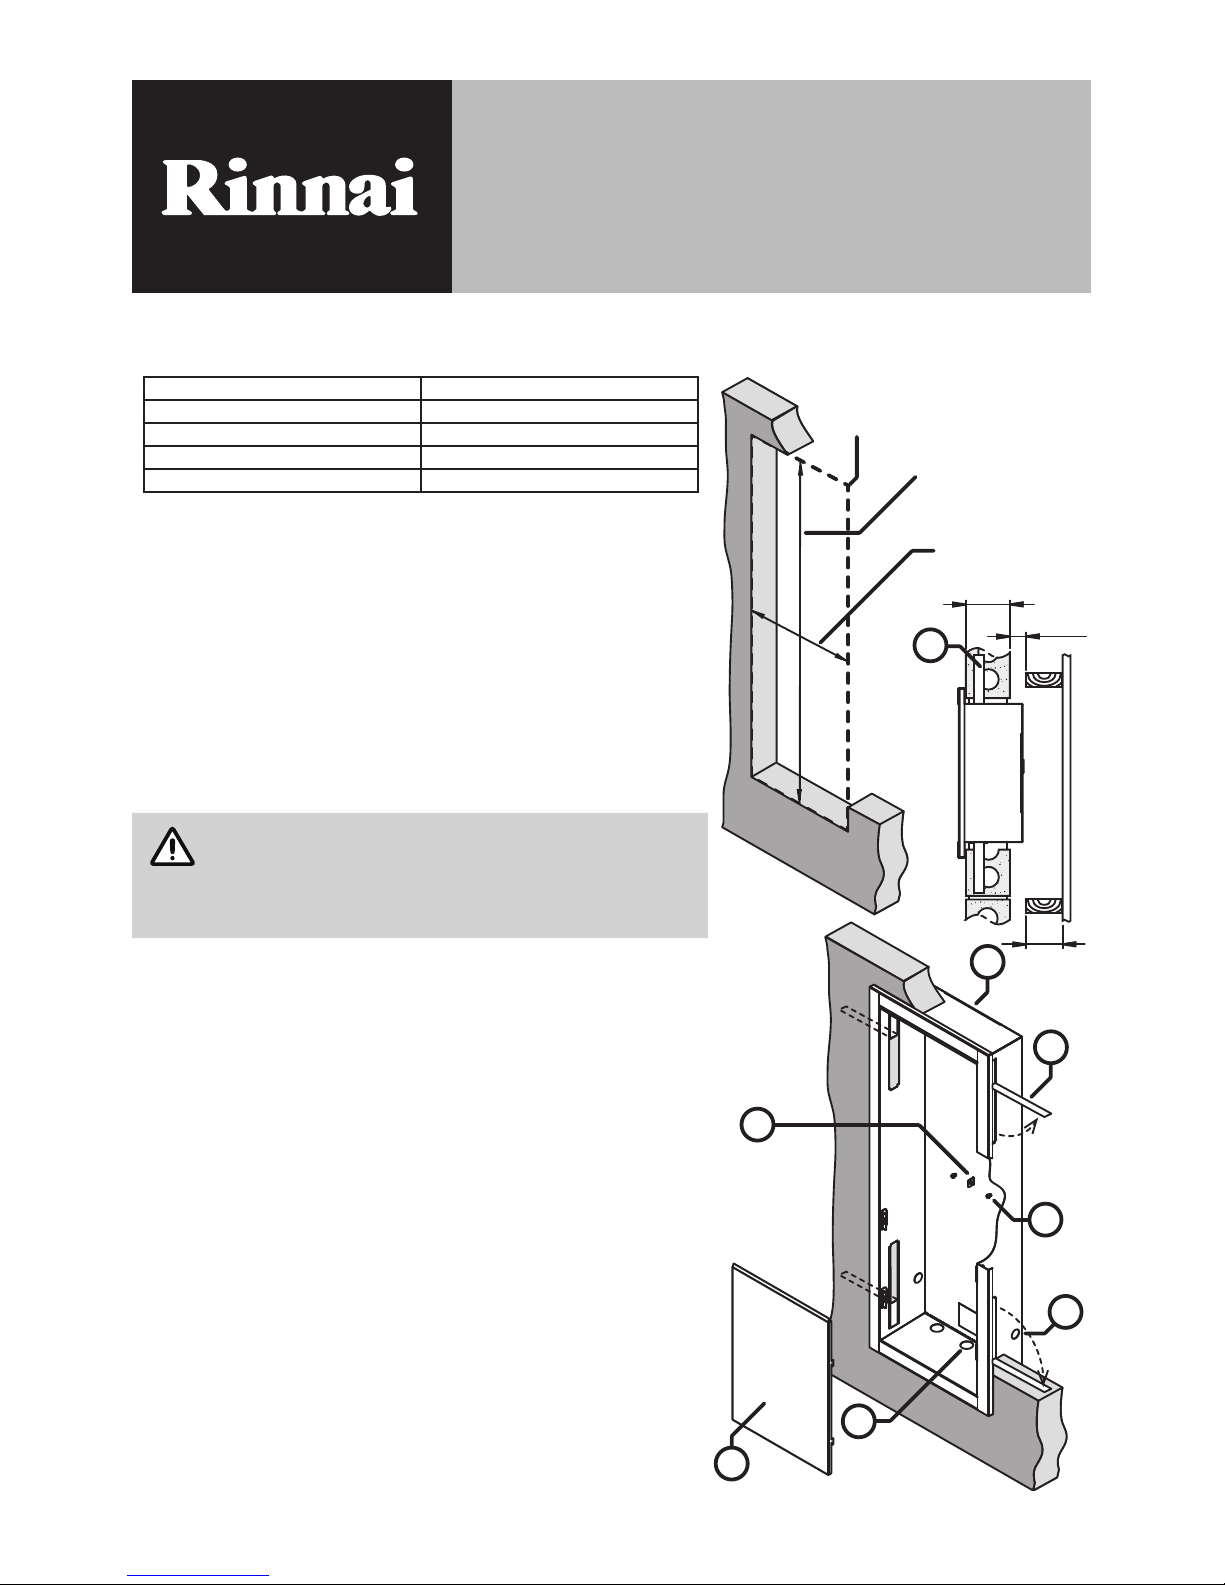
1. Preparation of opening in brickwork:
Height 1030–1050mm, width 382–412mm and depth 150mm.
The box can either be tted as the brickwork is being laid using
the fold out brick ties (A) to secure the box, or in an existing
wall. For an existing wall, provide an opening in the brickwork
to the above dimensions and x the box in place by drilling
holes in the sides and xing in position with suitable ushheaded masonry anchors.
2. The gas, cold water inlet and hot water outlet pipes can be
brought through the pipe entry holes panel of the box (B) in
the bottom.
IMPORTANT
The Rinnai water heater serial number and model
number on the data plate located on the left hand side
of the appliance, MUST be copied to the sticker on
the inside of the access panel (C). The serial number
is needed for any warranty or service work.
3. The Rinnai water heater can now be mounted in the recess
box via the top and bottom heater securing points.
Slide the Rinnai upper water heater stainless steel mounting
bracket through the top of securing slot (D) by guiding the
mounting bracket through the slot cut-out on the top of the
recess box.
Lower the unit so that the keyhole slots in the lower stainless
steel mounting bracket are securely resting on the two bottom
threaded studs E and over the padlock tab (F).
Hold the Rinnai water heater in place and t the two 5mm nuts
to each of the threaded studs (E) so that the bottom mounting
bracket on the water heater is held rmly to the back panel of
the box.
4. Make the gas and water connections to the water heater. On
completion check for gas escapes and water leaks.
5. Use silicone to seal the pipe entry holes and seal between
the bottom, side and back panels to ensure that no water can
enter the wall cavity. The bottom panel of the box is designed
with a 2° slope towards the front allowing any water that enters
the enclosure to drain out.
6. To help reduce the risk of theft or damage, attach the supplied
padlock to the padlock tab (F) as required.
E
A
B
D
G
F
C
A
110
~
40
=
90
Height 1030 ~ 1050
Width 382 ~ 412
Opening
Top
View
B064440 2 03_114 RBOX06LW IM Issue 3 080319
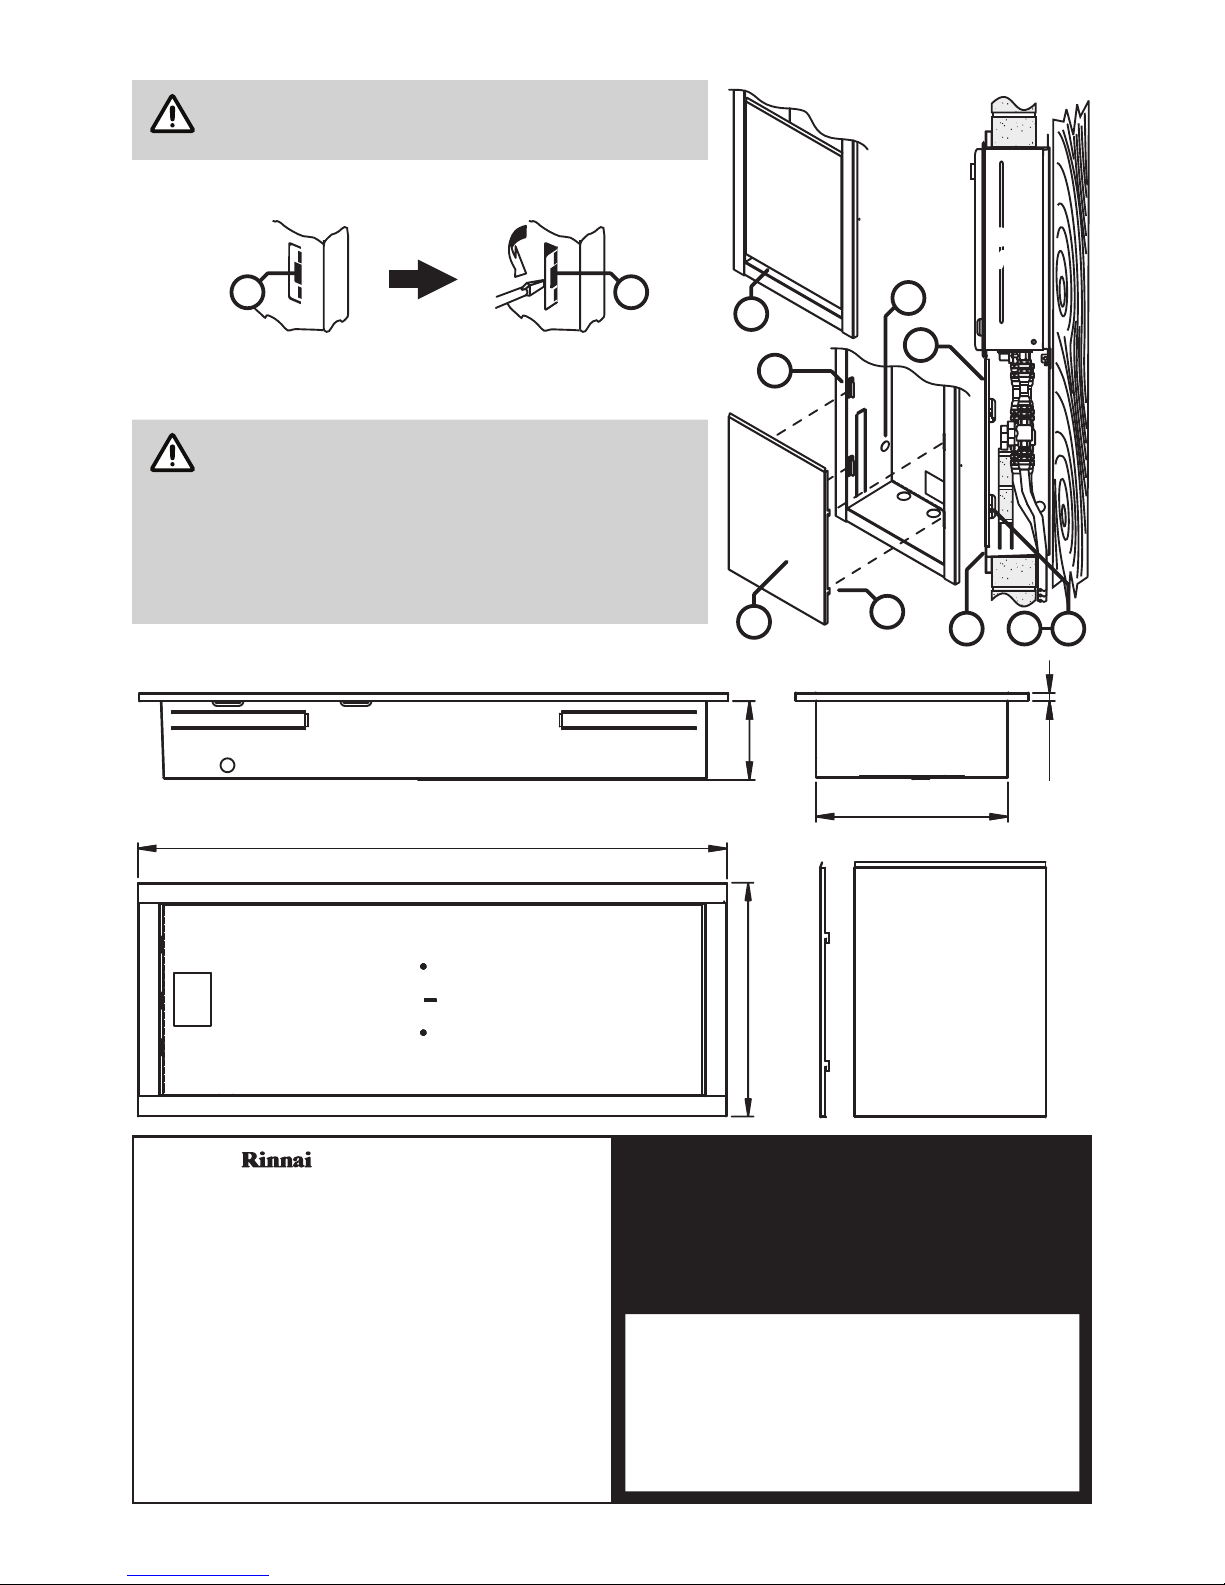
CAUTION
TAKE CARE TO AVOID CONTACT WITH THE
EDGES OF THE RETAINING SLOT TABS,
WHICH MAY BE SHARP!
7. Using a screwdriver, bend the four access panel retaining slot
tabs (I) out at 90°.
8. Align and insert the four hooked tabs (J) of the access panel
(C) into the retaining slot (I) of the box, then gently tabs push
down to secure, noting that a gap (H) is retained for drainage.
NOTE
Electrical cable access holes (G) are provided on
both the left and right sides of the recess box to allow
for the installation of a weatherproof electrical outlet
on the inside of the box.
It is the installers responsibility to ensure that all such
wiring shall be in accordance with the current issue of
AS/NZS 3000 and all Local Regulations and Municipal
Building Codes including local OH&S requirements.
If you require any further information, please contact Rinnai.
90°
I
I
I
J
Side
View
C
C
H
I
J
H
G
Rinnai has a Service and Spare Parts network with personnel
who are fully trained and equipped to give the best service on
your Rinnai appliance. If your appliance requires service,
please call our National Help Line. Rinnai recommends that this
appliance be serviced at least every 2 years.
With our policy of continuous improvement, we reserve the
right to change, or discontinue at any time, specifications or
designs without notice.
Australia Pty. Ltd.
ABN 74 005 138 769
100 Atlantic Drive
Keysborough, Victoria 3173
P.O. Box 460
Braeside, Victoria 3195
AU45204
Product Sales & Service National Help Line
Tel: 1300 555 545* Fax: 1300 555 655
*
Monday to Friday, 8.00am to 5.30pm EST
For further information visit www.rinnai.com.au
or email enquiry@rinnai.com.au
150
1105
438
Front
View
Left
View
Access
Panel
(Spare part:
92096519)
360
Top
View
15
 Loading...