

Rinnai RBOX02F, RBOX05 Installation Instructions Manual
RBOX05 - Fully Recessed / RBOX05 & RBOX02F - Semi Recessed
This recess box is compatible with the following Rinnai water heaters models:
REU-KM3237WD
REU-KM2635WD
1 E&TG 03-114 RBOX05 Issue 1 12/02/10
INSTALLATION METHOD
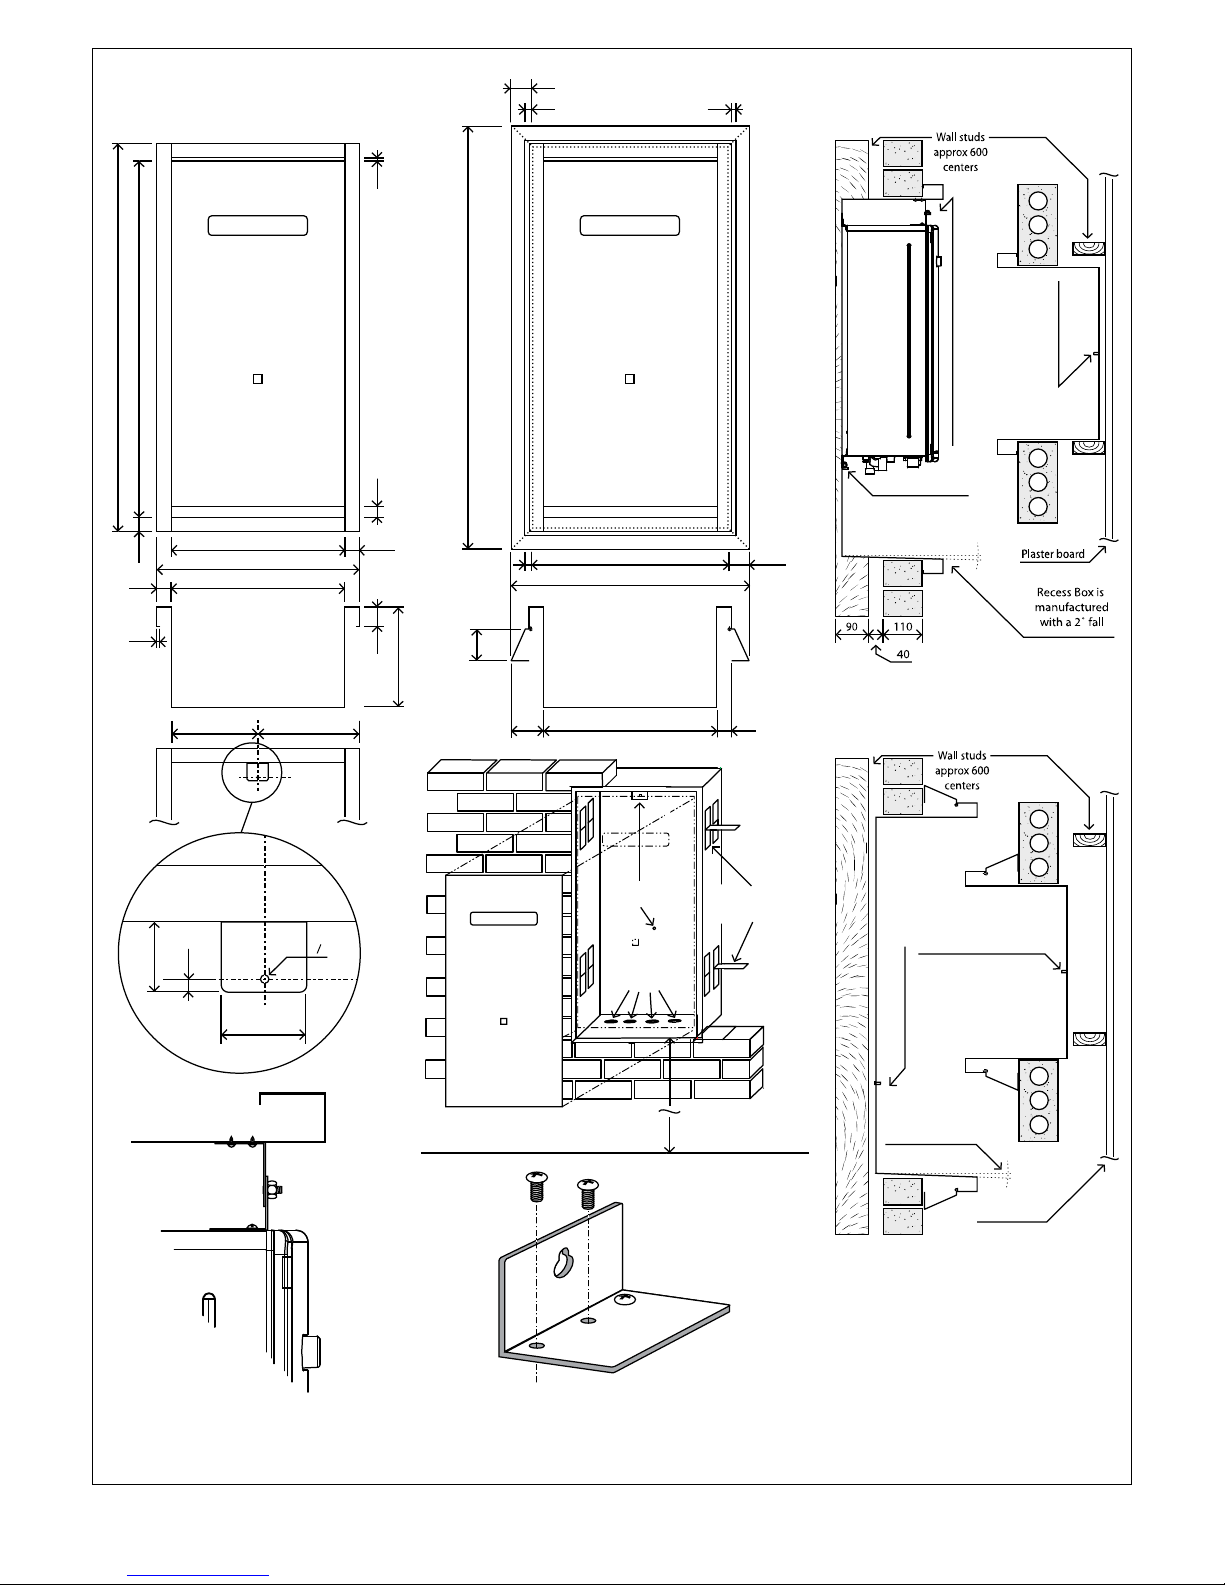
1 Prepare opening in brickwork. Brick opening – Heig ht 1020~1050mm, Width 495~530 mm, minimum depth for Recessed
230mm, minimum depth for Semi-Recessed 140mm.
(If the depth is less than 140mm the box is to be installed with the semi-recessed frame RBOX02F).
The Rinnai Recessed box can either be fitted as the brickwork is being laid using the fold out brick ties to secure the
box, or
in an existing installation, cut an opening in the brickwork and fix the box by drilling holes in the sides and fix in
position with suitable flush headed masonry anchors.
2 Semi-Recessed installation using (RBOX02F). Assemble the frame components with screws supplied, utilising the pre-
drilled holes located in each corner of the frame components. Slide the assembled frame onto the recess box from the
rear and secure to the outer frame flange with screws supplied, utilising the pre-drilled holes 2 of each are located on
each side.
3 The gas, cold water inlet and hot water outlet pipes can be brought through the pipe entry holes in the bottom panel of
the box.
4 IMPORTANT – The Rinnai water heater serial number
and model number on the data plate located on the left
hand side of the appliance, MUST
be copied to the sticker on the inside of the access panel. You will need to
know the serial number for any warranty or service work.
5 Secure the bracket with the 5mm stud inside the top of the recess box. Facing the stud to the front of the recces box.
6 Each recess box is supplied with a right-angle bracket that has 3 small holes on the horizontal t ab and a key-way on th e
vertical tab. This bracket is to attach the appliance to the 5mm stud in the top of the recess box. Remove the three
screws located on the top of the water heater and use these to fix the bracket to the top of the water heater.
7 Hang the water heater on the top bracke t over the stud in the top of the re cess box and secu re with a suit able fastener.
8 Ensure the lower bracket is located on the 5mm stud on the back panel of the recess box and secure with a suitable
fastener.
14 Ensure the warning sticker on the front panel is visible when the appliance is installed.
If you require further information, please call the Rinnai Customer Care Centre
1300 555 545
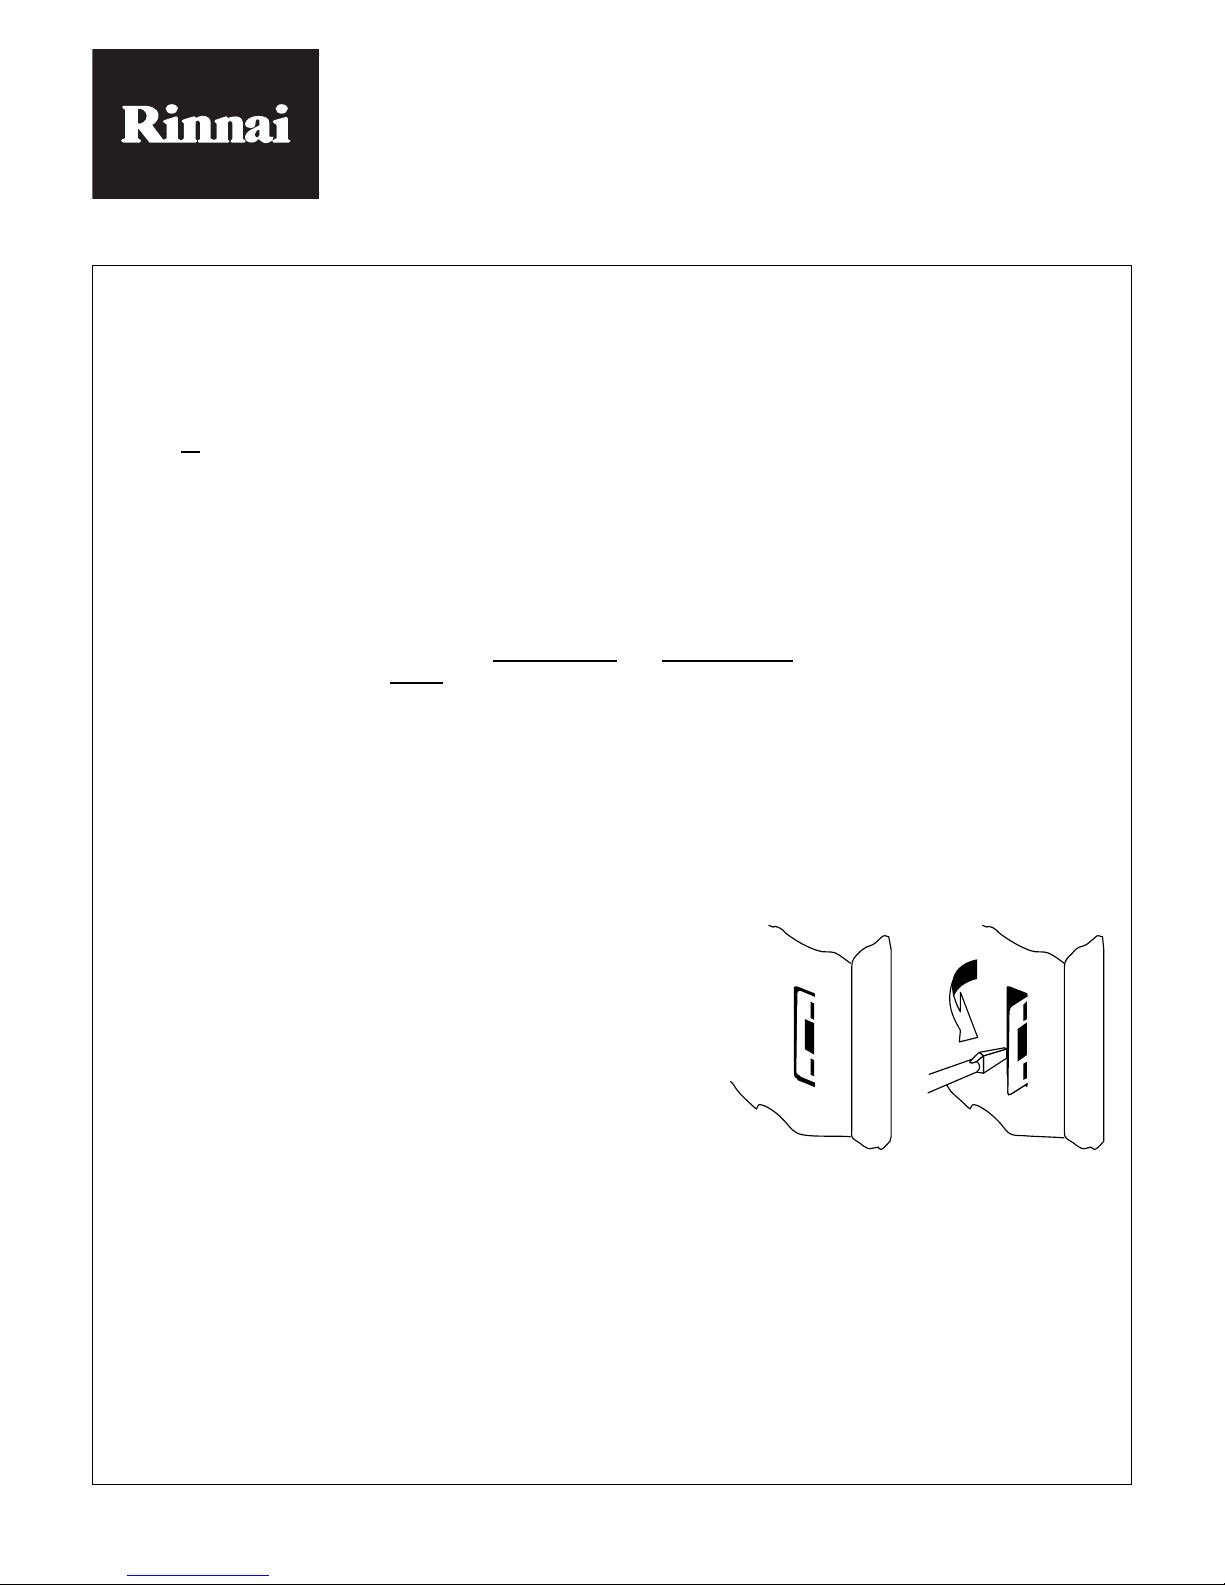
9 When fitting the front access panel use a screw driver to bend out
the tab retaining slots to 90° as shown in Fig. 1.
10 An approved weatherproof electrical GPO can be fitted either inside
the recess box, or can be fitted adjacent to with the power lead
brought through the gap at the bottom of the access cover.
11 Follow the Testing and Commissioning Procedure contained in the
General Installation Instructions situated in the pouch behind the
front panel of the water heater unit.
12 Seal all gaps inside the recess box with Silicon Sealant to prevent
water from entering the wall cavity.
13 Tighten nuts to secure the appliance.
Fig 1.
90°
2 E&TG 03-114 RBOX05 Issue 1 12/02/10
DIMENSIONS & INSTALLATION DIAGRAMS
Rinnai Australia Pty. Ltd.
ABN 74 005 138 769
10 to 11 Walker St Braeside, Victoria, 3195
Ø 5 mm mounting s tud
Pipe Entry Holes
490
490
40
30
40
570
1020
285245
1100
1200
10
40
550 60
670
20
40
10
55
285
10
10
50
60
06
40
49090
90
Secure hot water
heater to the 5mm
studs.
Fold out brick ties to suit.
Front tie for Recessed,
rear tie for Semi-recessed.
Approximately 1m
above finished
ground level.
Recess Box
Semi-recess Box
Semi-Recess BoxRecess Box
Ø 5 mm mou nting stud
Plaster Board
Recess Box is
manufactured
with a 2° fall
Mounting brackets, upper bracket has Ø 5 stud
and is secured to lower bracket with a nut.
Ø 5 mounting stud
Ø 5 stud nut
 Loading...