

Rinnai INBUILT ROYALE - ETR Customer Operation & Installation Manual
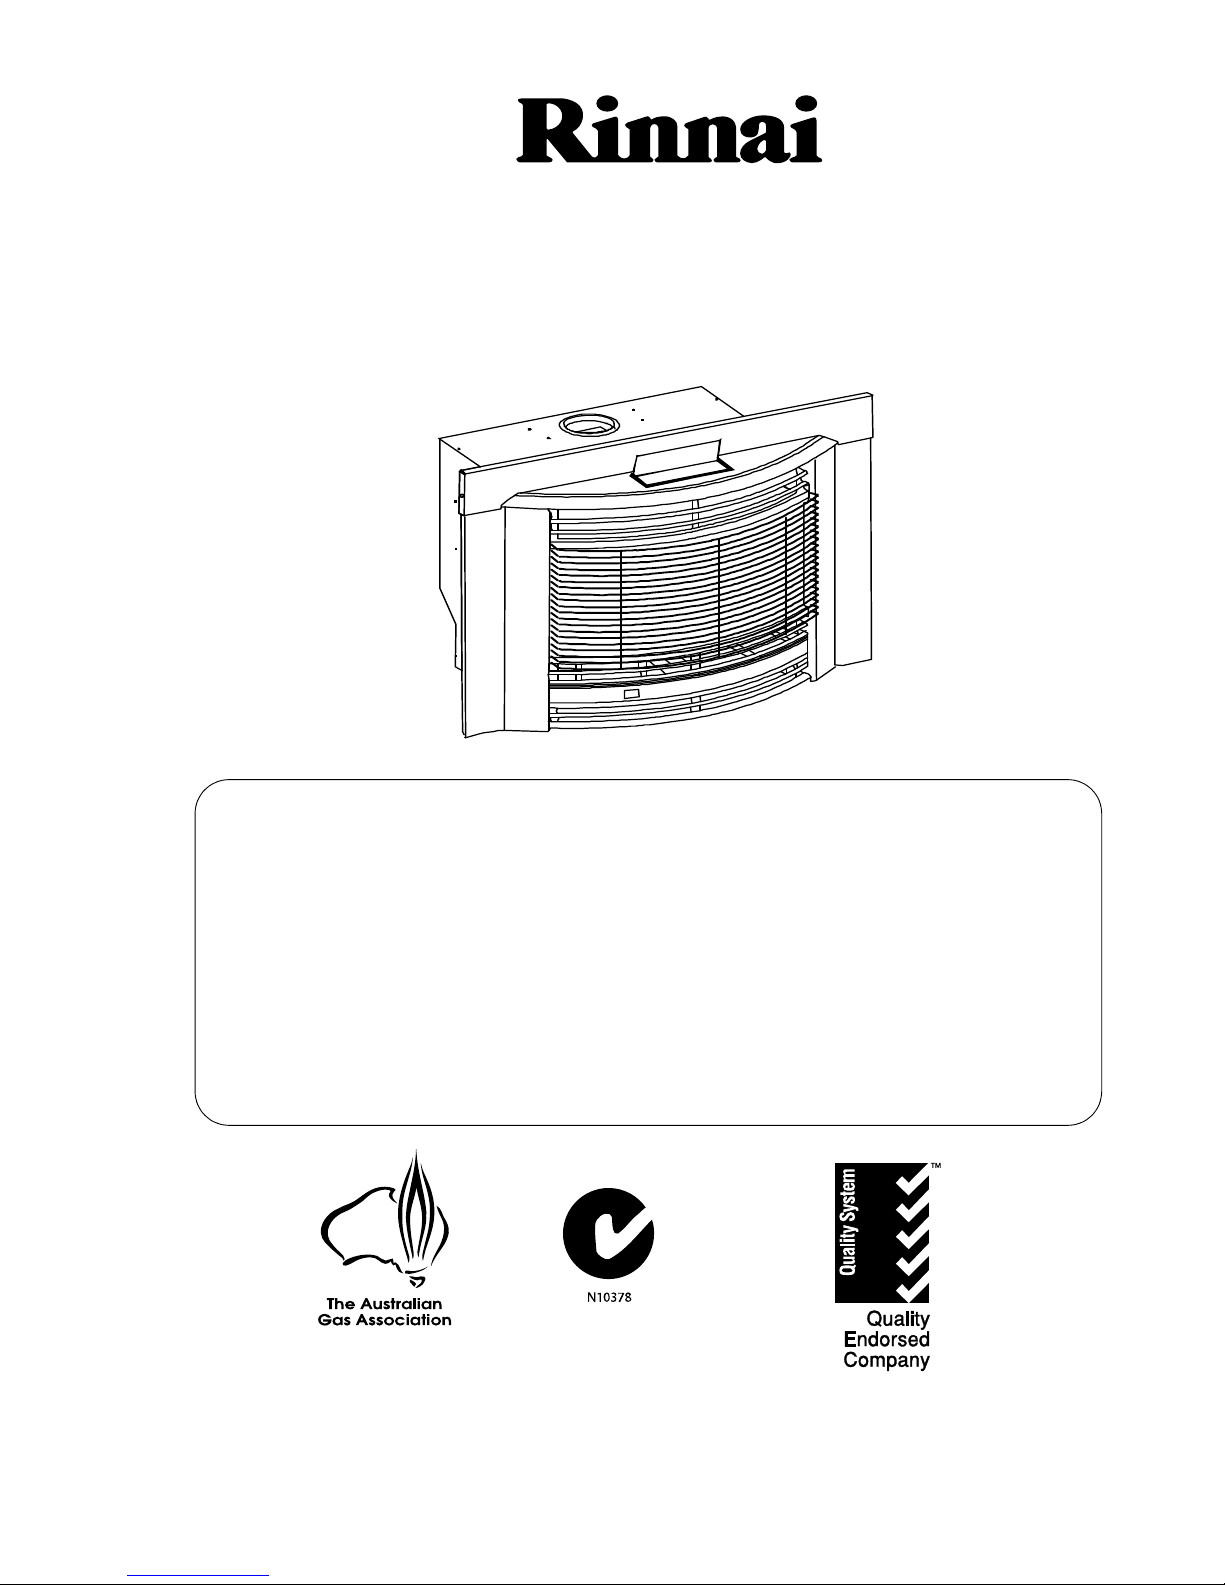
INBUILT ROYALE - ETR
FLAME FIRE
Customer Operation & Installation Manual
This appliance shall be installed in accordance with:
• Manufacturers Installation Instructions
• Local Gas Fitting Regulations
• Municipal Building Codes
• Installation code AS/NZS 5601 ‘Gas Installations’
• Any other local relevant Statutory Regulation
Installation & Service must be performed by an authorised person.
This heater is NOT designed to be built directly into a combustible opening.
For combustible opening installations, a Rinnai zero clearance kit must be used
and is available from your gas appliance retailer.
INSTALLER: PLEASE LEAVE THIS MANUAL WITH THE END USER AFTER INSTALLATION
END USER: RETAIN THIS MANUAL FOR FUTURE REFERENCE
All Rinnai gas products are
A.G.A. certified
ISO 9001 Lic 4983
SAI Global
Inbuilt Royale - ETR - ii - Issue 4 ©Rinnai
WARNING
IMPROPER INSTALLATION, ADJUSTMENT, ALTERATION, SERVICE OR
MAINTAINENANCE CAN CAUSE PROPERTY DAMAGE, PERSONAL INJURY OR
LOSS OF LIFE.
INSTALLATION AND SERVICE MUST BE PERFORMED BY AN AUTHORISED
PERSON.
This manual applies to the IB35 ETR only:
Inbuilt Royale ETR - NG/LPG
Table of Contents
CUSTOMER INFORMATION - CONTROL PANEL .................................................. 1
CUSTOMER INFORMATION - SETTING THE CLOCK ........................................... 4
OPERATING THE TIMERS ...................................................................................... 5
CUSTOMER INFORMATION - SAFETY POINTS....................................................6
CUSTOMER INFORMATION - ERROR CODES...................................................... 9
CUSTOMER INFORMATION - TROUBLE SHOOTING ......................................... 10
CUSTOMER INFORMATION - IMPORTANT POINTS........................................... 12
CUSTOMER INFORMATION - SPECIFICATIONS ................................................ 13
INSTALLERS INFORMATION - LOCATION .......................................................... 14
TECHNICAL SPECIFICATION ............................................................................... 15
INSTALLATION INTO MASONRY FIREPLACE & CHIMNEY ................................ 17
INSTALLATION IN TO A COMBUSTIBLE OPENING ............................................20
INSTALLERS INFORMATION - LOG INSTALLATION........................................... 24
INSTALLERS INFORMATION - WIRING DIAGRAM.............................................. 26
INSTALLATION / COMMISSIONING CHECKLIST ................................................ 27
CUSTOMER INFORMATION - CONTACTS........................................................... 29
Inbuilt Royale - ETR - 1 - Issue 4 ©Rinnai
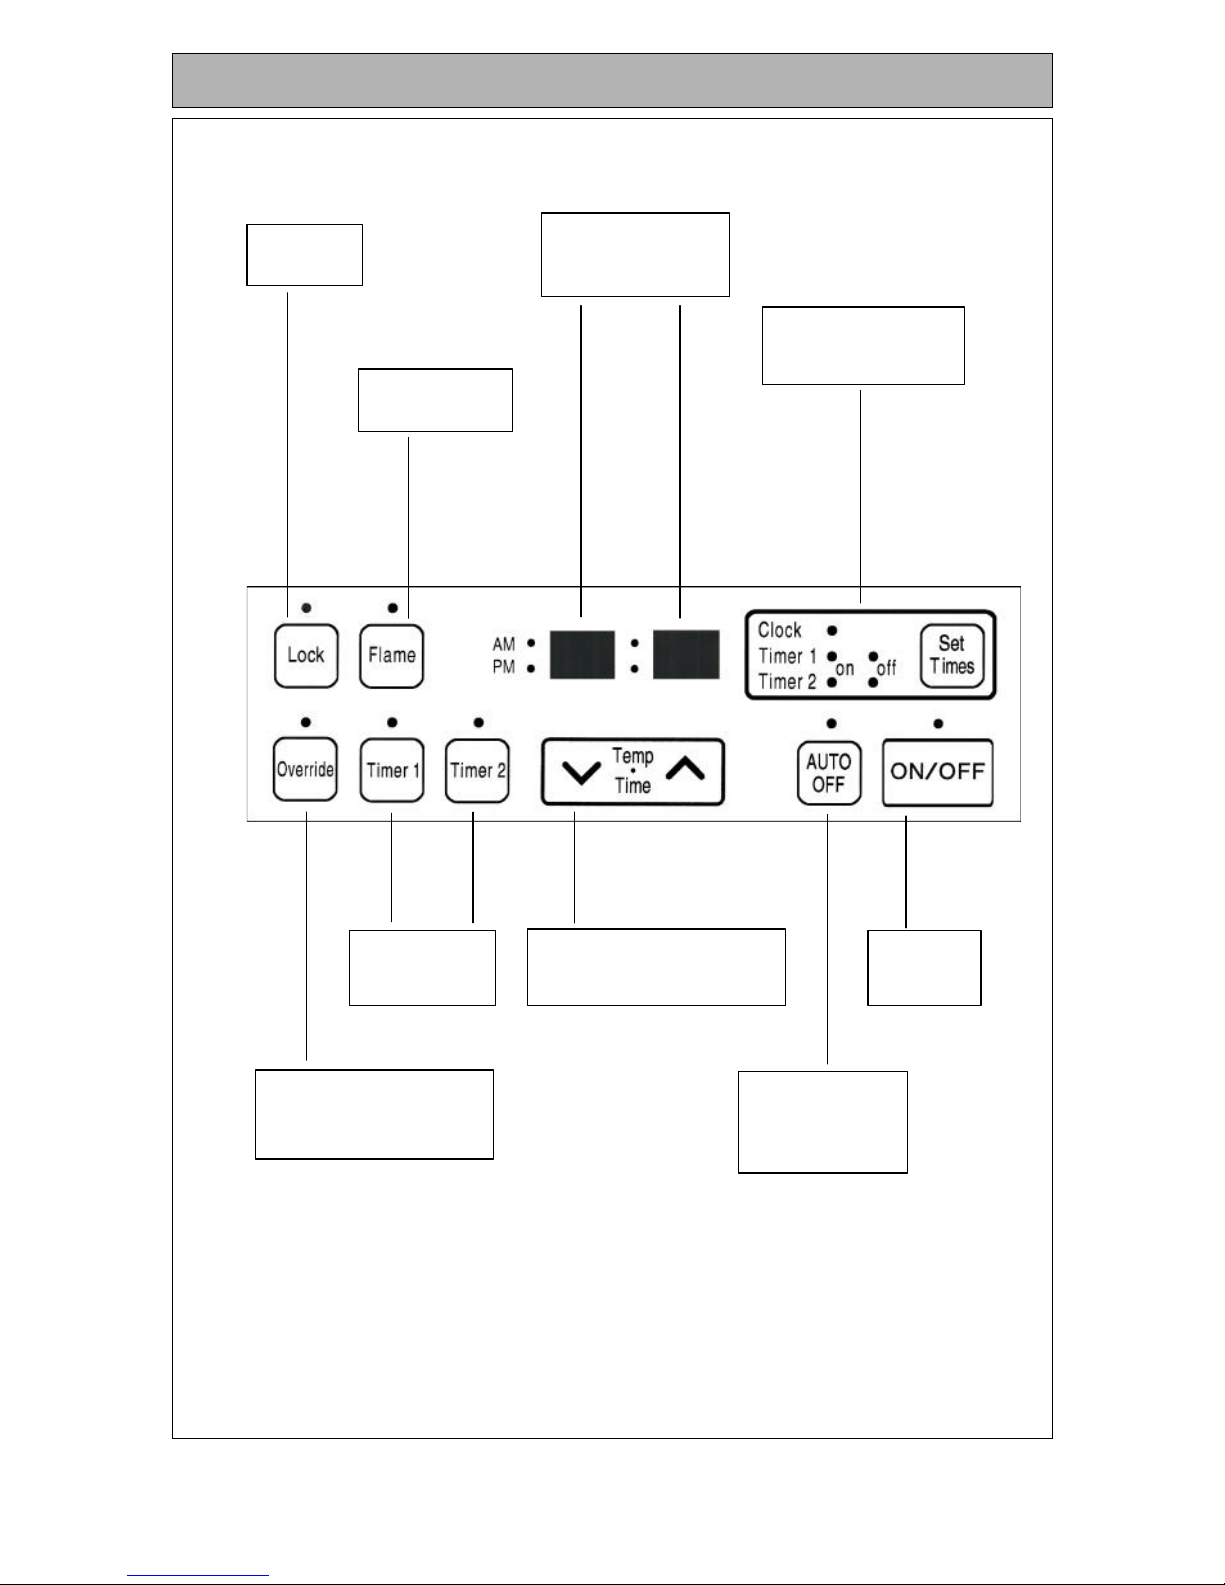
LOCK Button
Indicates lock
function
TIMER Indicator
Indicates that TIMER 1
or TIMER 2 has been
selected to operate.
TIME / TEMP Adjustment
Increases or decreases the temperature
setting as well as changing
hours or minutes.
ON/OFF Button
Main Switch for
turning ON/OFF.
TIME/TEMP Display
Shows either the time of day,
temperatures or coded error
messages.
CLOCK ADJUSTMENT AND
TIMER INDICATORS
Indicates that clock or dual timer
programme is being set.
OVERRIDE
Temporarily changes operation from
ON to OFF or OFF to ON, until next
programmed setting is reached.
AUTO OFF
When ON, Thermostat
turns heat down to OFF.
When OFF, Thermostat
turns heat down to LOW.
Flame Function
Med /High heat setting
and overides thermostat
(Pilot only)
CUSTOMER INFORMATION - CONTROL PANEL

Issue 4
Royale - Inbuilt - ETR - 2 - Issue 4 - ©Rinnai
IMPORTANT: You must read and
understand these instructions fully
before operating the heater.
• To Open the Control Panel
Lift lightly in the centre of the lid. The control panel
lid will then open backward to an angle.
• To turn the unit ‘ON’
Press the ON/OFF button to operate the heater.
The ON indicator will glow green. The spark
generator will be heard before the burner ignites
and the ON indicator glows red, indicating that the
heater is alight.
When the heater warms up, the fan will
automatically start.
Note: Initially at turning ‘ON’ only the
front and middle burner, low, will ignite.
After 8 minutes middle burner, high and
rear burner, high will ignite. This will
occur each time the appliance is
switched on.
If the heater does not ignite on initial use,
this may be due to air remaining in the
gas supply line. The spark generator will
only continue for 15 seconds. After this it
will be necessary to press the ON/OFF
button OFF, then ON again.
If the appliance fails to ignite after 4 attempts,
contact Rinnai as a service call may be required.
• To turn the unit ‘OFF’
Simply press the ON/OFF button to switch off the
heater. The ON indicator light will go out. The Fan
will continue to operate for several minutes after
the burner has gone out in order to cool the
appliance. Do not unplug the appliance while the
fan is running.
• Room Temperature Adjustment
The room temperature and pre-set temperatures
can only be displayed and adjusted when the
heater is running.
Press the “” button to increase the temperature
setting or “” button to decrease the temperature
setting.
The temperatures can be preset to:
a) [L] low (about 10°C)
b) [16°C] to [26°C] in 1°C steps
c) [H] (continuously high)
When the 'Set' temperature is lower than
the current room temperature at time of
ignition, only the front burner will ignite
on the low setting. If the 'Auto Off'
function has been selected, the heater
will revert to pilots only operation after a
short time period. When ever the pilots
are lit the ON indicator will glow red.
•Lock
The lock function will help to prevent accidental
operation as well as small children from altering
the controls. To operate the lock simply press the
LOCK button. The function is activated
immediately and the LOCK indicator will glow.
To Deactivate the LOCK simply press the LOCK
button for 3 seconds and the LOCK indicator will
go out. The LOCK can be deactivated at any time
in this way.
During normal operation the LOCK may be
activated and all controls, other than the OFF
switch, will be locked. Deactivating the LOCK
releases the controls. If the LOCK is activated
whilst the heater is turned OFF, then all functions
will be locked. If the heater is turned OFF while the
LOCK is activated, it cannot be turned ON again
until the LOCK is deactivated.
•Flame
To operate the Flame function, simply press the
FLAME button. This function will automatically
override the thermostat and set the heater to a
default Medium / High heat setting for full visual
flame effect.
• Auto Off
To operate the AUTO OFF function, simply press
the AUTO OFF button.
When the AUTO OFF function is selected, the
indicator light will illuminate and the thermostat
will turn the burners down to the OFF heat setting
when the selected temperature is reached.
When the AUTO OFF function is not selected, the
indicator light will go OFF and the thermostat will
turn the burners down to the LOW heat setting
when the selected temperature is reached.
• Override
This function is intended to be used to manually
override the current operation of the heater. For
example; if the heater is in standby mode (i.e.
between finishing time and starting time of a
Timer) and the OVERRIDE button is selected,
then the heater will begin to operate and heat the
room.
To operate the OVERRIDE simply press the
OVERRIDE button. The OVERRIDE indictor will
flash.
To manually deactivate the OVERRIDE simply
press the OVERRIDE button again. The
OVERRIDE indicator will go out, and the heater
will return to standby mode.
The heater will continue to operate on OVERRIDE
until the OVERRIDE button is pressed again, or
one of the Timers takes over the operation of the
appliance. This means that the OVERRIDE mode
will automatically drop out if a programmed
starting time is reached.
The appliance will then return to operating at
times programmed into the Timer(s).
CUSTOMER INFORMATION - OPERATION

Royale - Inbuilt - ETR - 3 - Issue 4 - ©Rinnai
Remote Control
The Remote Control will not turn the heater ON if Timer(s) have been selected.
To manually operate when Timer(s) are not selected, simply press the ON or OFF button.
To alter the temperature at anytime while the heater is operating, simply press the or button.
Some fluorescent lights may interfere with the transmission of remote control signals, in this case
changing the position from which you are operating the remote control may help.
Avoid getting the remote control wet, or dropping it.
The remote control works within 5 metres and at an angle of 40° to the receiver which is located on the
lower front edge of the heater.
Only use the battery type specified (CR2032).
Remove the battery if control is not going to be used for a long period. This will help avoid damage from
leaking batteries.
If the Timer(s) have been selected, and the heater is in standby mode, and the OFF button on
the Remote Control is pressed, the Timer(s) will be deactivated.
ON BUTTON
Operates the heater
manually.
TO REPLACE
BATTERY
Simply open the back of
the remote control and
replace Lithium battery.
TYPE: CR 2032
BATTERY
Power source
for operating
remote control
OFF BUTTON
Stops heater
manually.
TEMPERATURE
ADJUSTMENT
Increases or decreases
the temperature setting.
CUSTOMER INFORMATION - OPERATION

Inbuilt Royale - ETR - 4 - Issue 4 - ©Rinnai
Setting the Clock
When the appliance is first plugged in or after a power failure, the digital display with show
--:--
As an example, let’s set the clock to 10:35 am;
Press the SET TIMES button once, the Clock indicator will flash.
Press and hold the “” button; the minutes will begin to change first then the time will change
by whole hours.
Release the button when AM 10:00 shows on the Digital Display. Confirm that you have
selected AM, a small indictor on the left hand side of the Digital Display indicates the AM
setting.
Press and hold the “” button again, release the button when AM 10:35 shows. If you go past
AM 10:35, then the “” button can be used to change the time settings in reverse.
Press the Timer Set button five times to lock in and complete setting the time. The Clock and
Timer indicators will go out. A small indicator on the Digital Display will flash to show that the
Clock is operating.
Programming the ON / OFF Timers
Before programming the Timers you must ensure that the clock has been set to the
correct time.
As an example, let’s program Timer 1 to heat the room by 7:10 am and finish at 9:00 am.
Press the Set Times button twice. The Digital Display will show AM 6:00. Timer 1 indicator will
flash.
Press the “” button until AM 7:00 appears, release the button, then press it again until AM
7:10 appears. (Press the “” button if you go past AM 9:00).
Press the Set Times button three times to lock in the program time. The Digital Display will
show the current time. A small indicator on the Digital Display will flash to shown that the
display has returned to the clock.
Timer 2 is programmed in the same way, remember to ensure that the Timer 2 indicator
is flashing when you program in the desired setting. The Timers can be programmed
to operate for any two periods in any 24 hours.
Turn to the next page to operate the dual timer. The programmed time must be selected
and locked-in within one minute of the On Timer indicators flashing otherwise the
programmed times will not be retained in the system memory.
CUSTOMER INFORMATION - SETTING THE CLOCK

Issue 4
Inbuilt Royale - ETR - 5 - Issue 4 - ©Rinnai
Operating the Timers
Before operating the Timer(s), the clock time must be correct and a starting time and finishing
time for the Timer(s) must be programmed. See page 5. The two Timers operate in the same
way. This heater does not commence operation at the programmed starting time. It will
attempt to heat a room by the programmed starting time. See Pre-heat, for further
explanation.
To select the Timer(s) to commence heating.
Check the time shown on the Digital Display is correct.
Check the ON and OFF times, for both Timers if necessary.
Press the ON/OFF button to operate the heater. The ON indicator will glow green and the
heater will being to operate.
Select the desired temperature setting.
Press the Timer 1 and/or Timer 2 button(s). The timer indicator(s) will glow and the heater will
remain on standby until one hour prior to the time programmed into the selected Timer(s) is
reached. When this time is reached, the Timer indicator will flash and the heater will operate.
The ON indicator glows red when the heater commences operation. Actual start time will
depend on temperature selected and current room temperature. (see pre-heat for further
details).
Set and Forget Operation
Your heater can be operated to alternate between Timers automatically during cold weather
by selecting Timer 1 and Timer 2 together. Both Timer indicators will glow. The appliance will
remain on standby at intervals between the programmed finishing and starting times of each
Timer. While the heater is operating during programmed intervals the Timer indicator will
flash.
If there is a power failure, the system memory will retain the Timer programs, and the
clock will stop at the time the power goes off. The clock will start again when the power
comes back on, but the time will be slow by the duration of the power failure. To set the
clock to the correct time after the power has come back on, simply follow the
instructions on page 4.
Preheat
This function operates automatically in conjunction with either of the timers. When a timer is
selected, the heater may operate anywhere within an hour prior to the programmed starting
time of the timer.
The preheat function will attempt to preheat the room by the programmed ON time
This function is called pre-heat due to the way it operates. The room temperature is sensed
one hour before reaching the programmed time of either timer.
The temperature differential at the time of sensing the room governs how long before the
program ON time the microcomputer will operate the heater and ignite the burner.
OPERATING THE TIMERS
Inbuilt Royale - ETR - 6 - Issue 4 - ©Rinnai
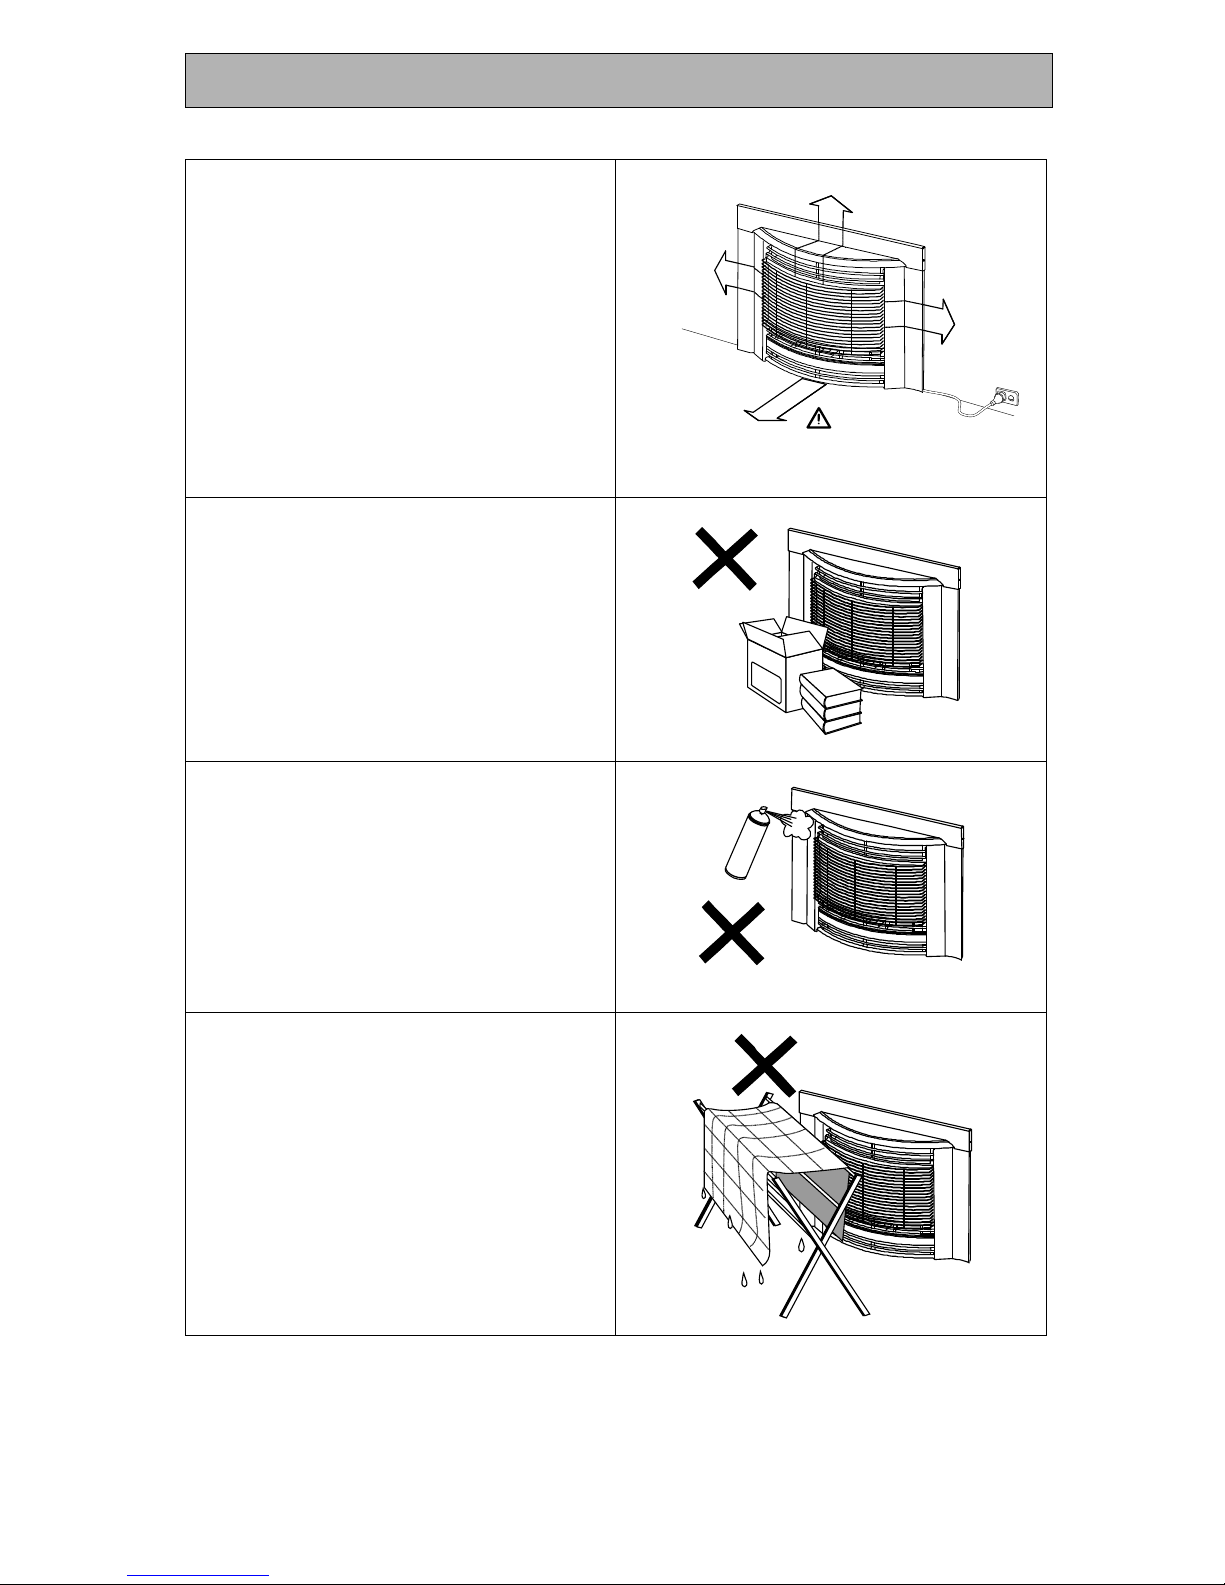
Clearances must be maintained.
Do not restrict the warm air discharge by
placing articles in front of the heater.
Do not spray aerosols whilst the heater
is operating. Most aerosols contain
butane gas, which can be a fire hazard if
used near the heater when it is in use.
This appliance must not be used for any
purpose other than heating.
Note that side and vertical
clearances are measured
from the edge of the glass.
min. 300mm
min. 300mm
min. 300mm
min. 1000mm
CUSTOMER INFORMATION - SAFETY POINTS

Issue 4
Inbuilt Royale - ETR - 7 - Issue 4 - ©Rinnai
Do not allow anyone to post articles
through the louvres.
Do not allow young children or the infirm
to sleep directly in front of the heater.
Young children should be supervised at
all times. Hand or body contact with the
louvres must be avoided.
Do not allow curtains or other flammable
or combustible materials to come into
contact with the heater.
Do not place containers of liquid on top
of the heater. Liquid spillage can cause
extensive damage to the appliance.
CUSTOMER INFORMATION - SAFETY POINTS
Inbuilt Royale - ETR - 8 - Issue 4 - ©Rinnai
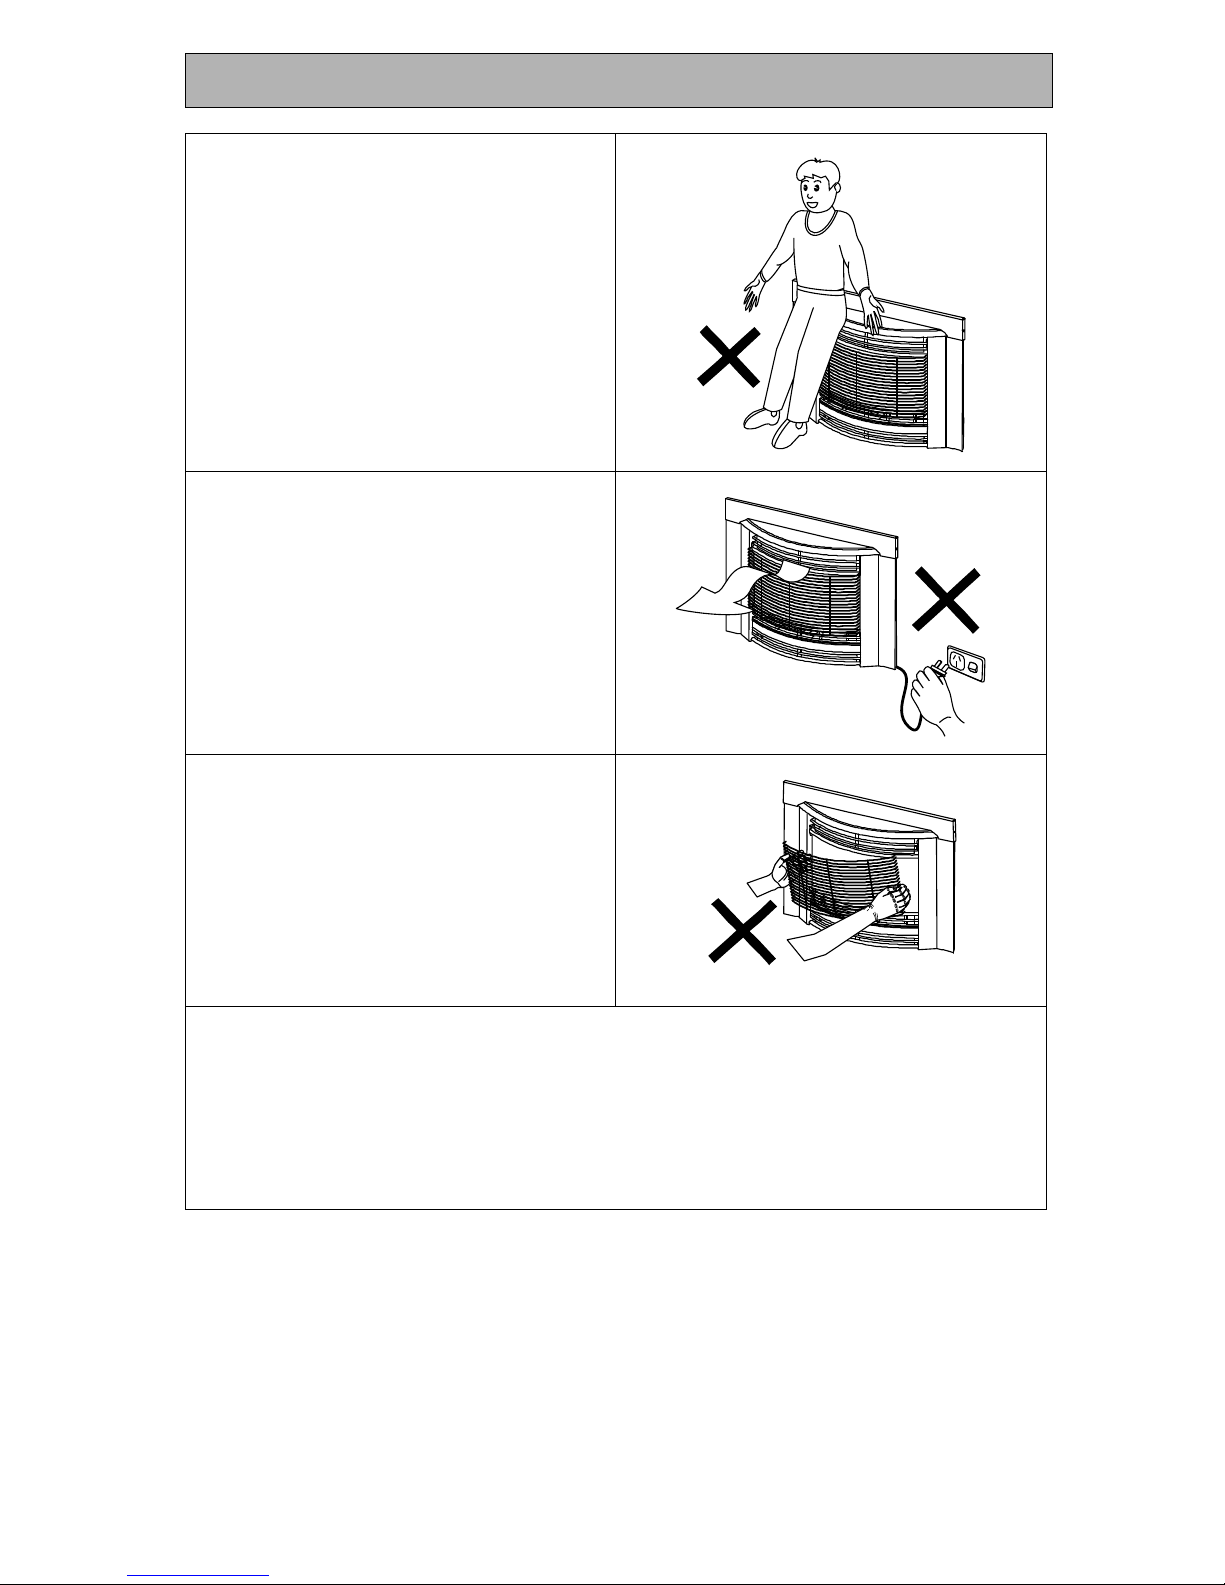
Do not allow anyone to sit on or lean
against the appliance.
Do not unplug the heater while it is in
operation or while the fans are still
cycling.
Do not turn the heater off by unplugging
it from the wall.
Do not remove the Dress Guard.
The dress guard is fitted to this appliance
to reduce the risk of fire or injury from
burns and no part of it should be
permanently removed.
For protection of children or the infirm, a
secondary guard is recommended.
DO NOT CONNECT TO AN LPG GAS CYLINDER INDOORS.
DO NOT PLACE ARTICLES ON OR AGAINST THIS APPLIANCE.
DO NOT USE OR STORE FLAMMABLE MATERIALS NEAR THIS APPLIANCE.
DO NOT SPRAY AEROSOLS IN THE VICINITY OF THIS APPLIANCE WHILE IT
IS IN OPERATION.
CUSTOMER INFORMATION - SAFETY POINTS
 Loading...