

Page 1
This appliance shall be installed and operated in
accordance with:
•
Current AS/NZS 5601 'Gas Installations'
•
Any other local relevant Statutory Regulations
Do not operate this appliance before reading these instructions
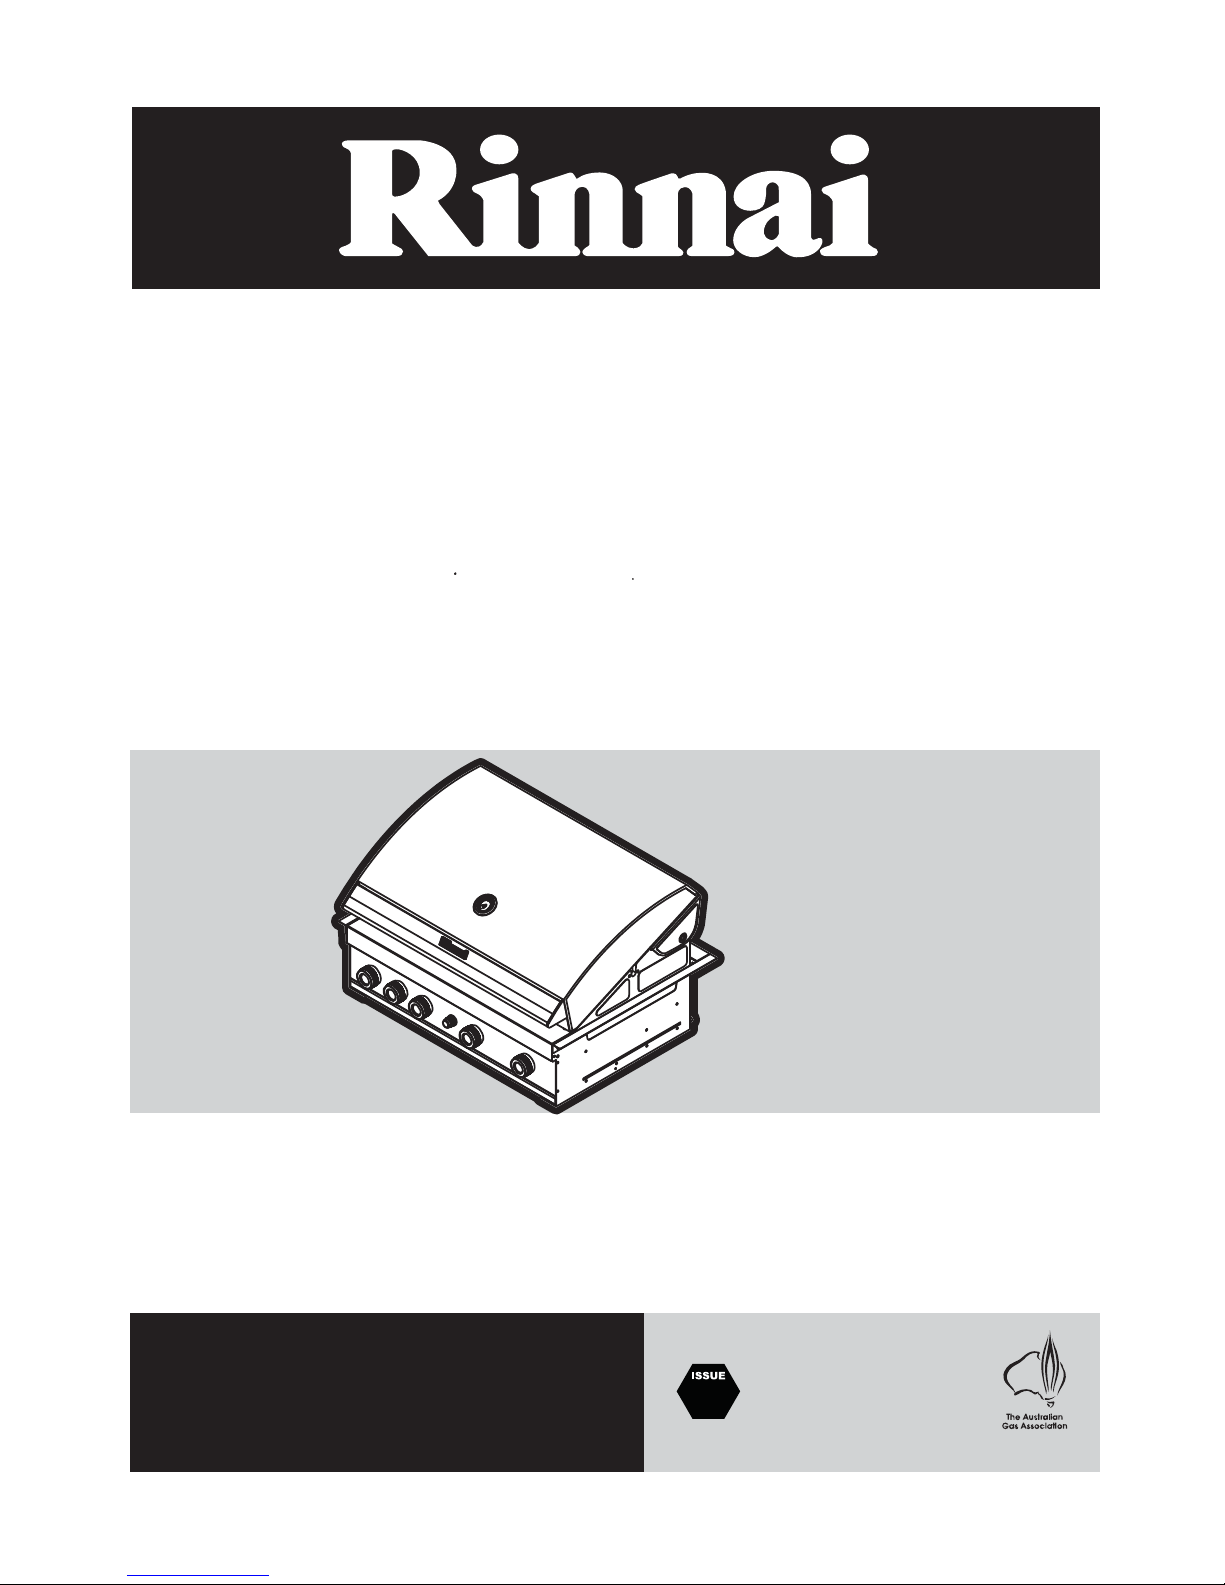
Gas Barbecue
Assembly Instructions
and Operation Manual
For Models:
GT104BHB
GT104BHS
•
These instructions
All Rinnai gas products
are A.G.A. certified.
1
Page 2

Rinnai Australia i GT104BHBN/L & GT104BHSN/L OIM
Congratulations on the purchase of your
Rinnai Gas Barbecue.
We trust you will have many years of enjoyment from your appliance.
THIS MANUAL CONTAINS IMPORTANT INFORMATION FOR SAFE AND
ENJOYABLE COOKING. READ CAREFULLY BEFORE PROCEEDING WITH
ASSEMBLY, INSTALLATION AND OPERATION OF YOUR NEW BARBECUE AND
GAIN A FULL UNDERSTANDING OF THE APPLIANCE.
Page 3

Rinnai Australia - 1 - GT104BHBN/L & GT104BHSN/L OIM
PLEASE RECORD THE FOLLOWING INFORMATION FOR YOUR OWN RECORDS:
Your Retailer:
Name:
Address:
Telephone Number:
Serial Number:
Model Number:
Date of Purchase: / /
WARNING ................................................................................................................................................. 2
SAFETY INFORMATION ..........................................................................................................................3
CLEARANCES AND LOCATION ..............................................................................................................7
ASSEMBLY ...............................................................................................................................................8
BARBECUE ASSEMBLY / INSTALLATION ..............................................................................................................................8
TESTING ................................................................................................................................................. 10
BURNERS ...............................................................................................................................................................................10
MAIN BURNERS .....................................................................................................................................................................10
IGNITION SYSTEMS ...............................................................................................................................................................10
BURNER IGNITION AND OPERATION ..................................................................................................................................11
CLEANING AND MAINTENANCE .......................................................................................................... 12
HOW TO USE ......................................................................................................................................... 15
BURNER IGNITION AND OPERATION .................................................................................................................................16
MANUAL BURNER IGNITION .................................................................................................................................................16
COOKING ................................................................................................................................................ 17
COOKING WITH THE HOOD UP .............................................................................. ... ... ........................................................17
COOKING WITH THE HOOD DOWN ....................................................... .................................... ... .......................................17
ROTISSERIE COOKING (where applicable) ...........................................................................................................................19
COOKING WITH THE BACK BURNER ..................................................................................................................................20
STORAGE ...............................................................................................................................................................................20
TROUBLE SHOOTING ........................................................................................................................... 21
SPECIFICATIONS ................................................................................................................................... 23
PARTS AND EXPLODED DIAGRAMS ................................................................................................... 24
WARRANTY ............................................................................................................................................ 28
CONTACT INFORMATION ..................................................................................................................... 30
TABLE OF CONTENTS
Page 4
Rinnai Australia - 2 - GT104BHBN/L & GT104BHSN/L OIM
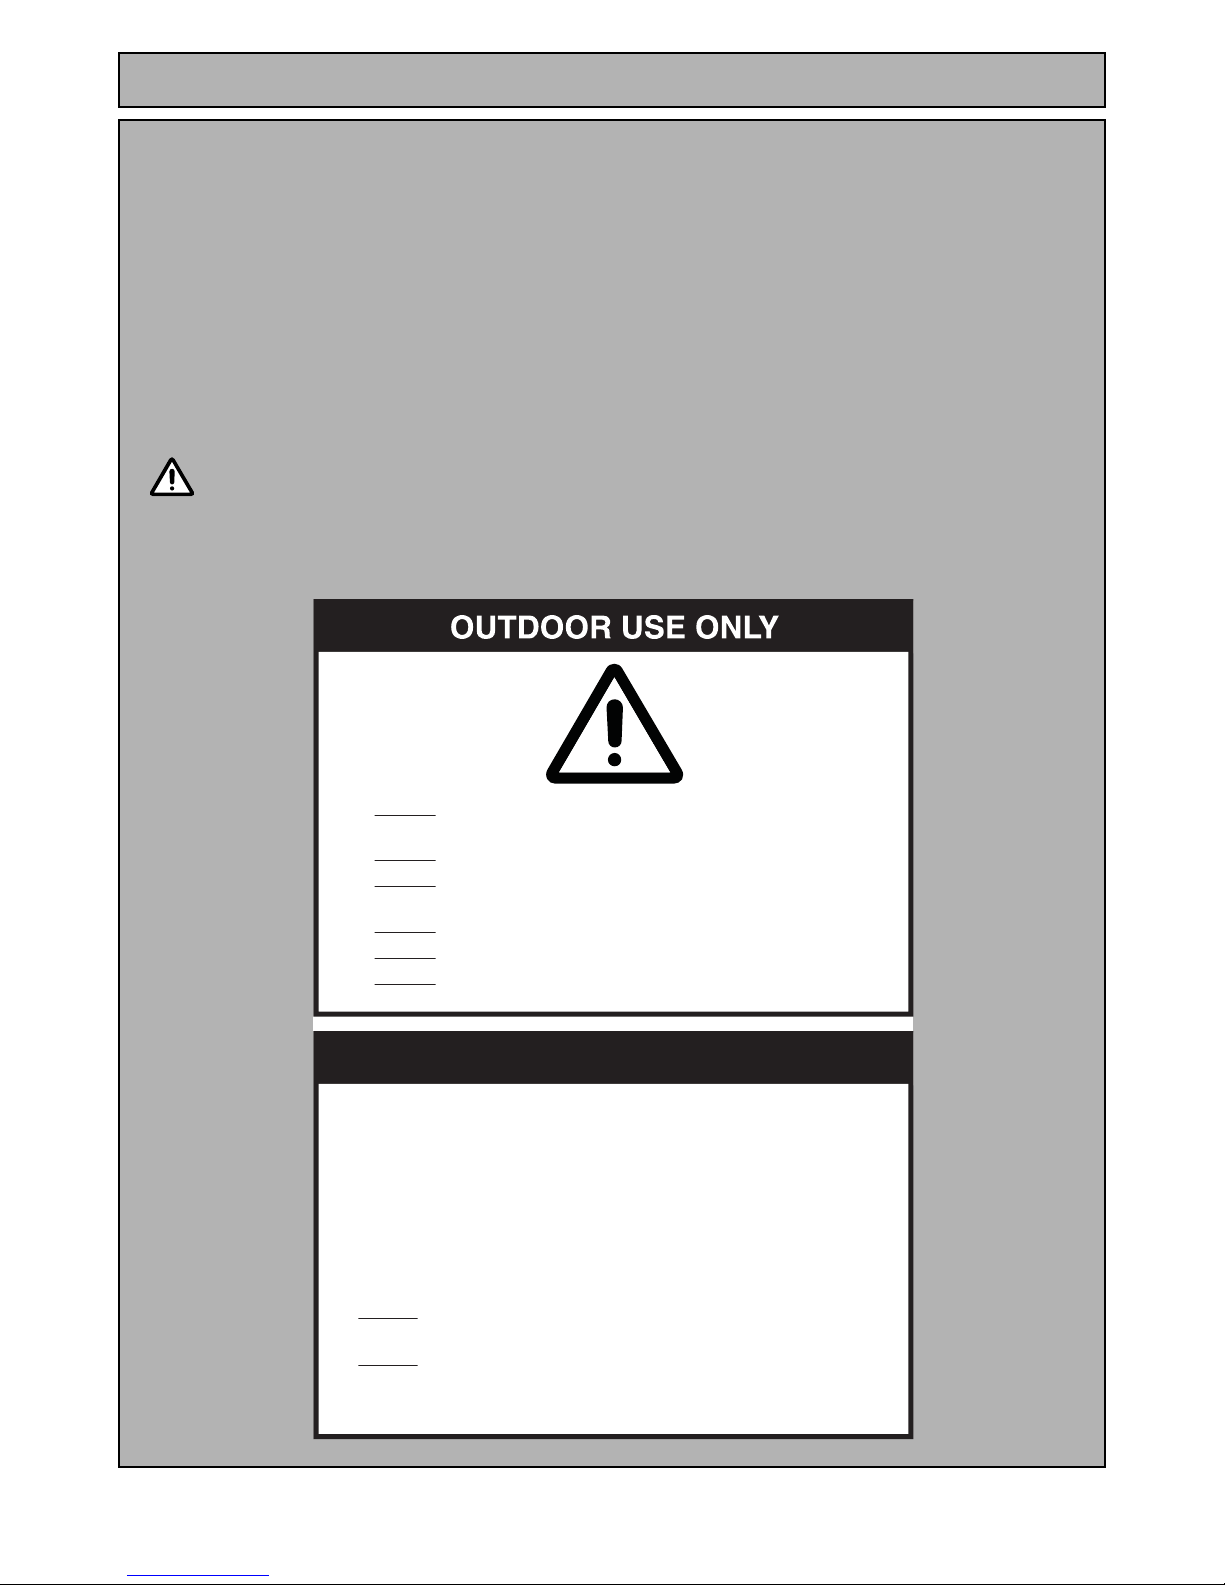
WARNING
© Copyright Rinnai Australia Pty Ltd ABN 74 005 138 769
All rights reserved
Produced by Rinnai Australia Engineering & Technical Group
03/09/14 - Issue 1.
No part of this manual may be copied without permission from Rinnai Australia Pty Ltd.
Rinnai Australia reserves the right to make modifications and change specifications without notice.
• Read these instructions carefully before operation and retain for future reference.
• Illustrations may vary from Barbecue contained in carton.
• Failure to comply with these instructions may result in fire or explosion which could cause
property damage, serious bodily injury or death.
WARNING
OPERATE THIS APPLIANCE BEFORE READING THE
INSTRUCTION BOOKLET
PLACE ARTICLES ON OR AGAINST THIS APPLIANCE
STORE CHEMICALS OR FLAMMABLE MATERIALS, OR
SPRAY AEROSOLS NEAR THIS APPLIANCE
OPERATE THE APPLIANCE INDOORS
OPERATE IN AN ENCLOSED AREA
OPERATE THIS APPLIANCE BEFORE LEAK CHECKING
HOSES AND GAS CYLINDER CONNECTIONS
DO NOT
DO NOT
DO NOT
DO NOT
DO NOT
DO NOT
FOR YOUR SAFETY
1. SHUT OFF GAS TO THE APPLIANCE AND AT THE SOURCE IF POSSIBLE.
2. EXTINGUISH ANY OPEN FLAME.
3. OPEN THE HOOD.
4. PERFORM GAS LEAK TEST PROCEDURE.
5. IF '!3ODOUR CONTINUES, IMMEDIATELY CALL YOUR GAS SUPPLIER.
IF YOU SMELL GAS:
STORAGE:
1. DO NOT STORE OR USE PETROL OR OTHER FLAMMABLE VAPOURS
AND LIQUIDS IN THE VICINITY OF THIS OR ANY OTHER APPLIANCE.
2. DO NOT STORE GAS CYLINDERS THAT ARE NOT CONNECTED FOR
USE IN THE VICINITY OF THIS APPLIANCE.
3. ONLY TO BE USED OUTDOORS$/./453%).$//23.
Page 5
Rinnai Australia - 3 - GT104BHBN/L & GT104BHSN/L OIM
SAFETY INFORMATION
FAILURE TO COMPLY WITH THESE INSTRUCTIONS COULD RESULT IN A FIRE OR
EXPLOSION WHICH COULD CAUSE SERIOUS INJURY, DEATH OR PROPERTY
DAMAGE
BEFORE USING YOUR BARBECUE
• Check that the Barbecue supplied is correct for the gas type being used. The gas type Label Propane or
Natural Gas is clearly labelled on the Barbecue.
• This is a Propane Barbecue, it MUST BE used with a Propane gas cylinder. Any other type of gas is
unsuitable and unsafe.
LOCATION
• This Barbecue is for OUTDOOR use only. Refer to page 7 for details.
•DO
NOT operate the Barbecue indoors.
•DO
NOT operate in an enclosed area or use your Barbecue in garages, porches, breezeways, or sheds.
•DO
NOT operate in an unventilated area.
• This Barbecue must be placed on a level and stable surface. Surfaces which ignite easily (such as
carpet) MUST
NOT be used.
•DO
NOT obstruct the flow of air around the Barbecue whilst in use. Refer to the “Clearances and
Location” section page 7.
• Certain materials or items when placed near the Barbecue may be affected by the radiant heat and
could be damaged. Keep these items away from your Barbecue.
• Keep Barbecue away from combustible materials. Maintain Clearances as shown on page 7.
OPERATION
•DO
NOT connect the Barbecue directly to the gas cylinder or reticulated Propane supply without a
regulator.
• Propane Barbecues MUST
always use the hose and regulator supplied.
• Inspect the gas hose at least once per year, or whenever the gas cylinder is replaced. If the hose is
cracked, cut, abraded, discoloured or damaged in any other way the Barbecue must not be used. The
hose must be replaced if damaged or
when local regulations require this. Contact your Rinnai Service
agent/stockist or local regulating authority if uncertain. Replacement must only be carried out by an
authorised person.
• Avoid any twisting of the gas hose.
•DO
NOT alter or modify any parts of the Barbecue including any of the gas components.
• IF YOU SMELL
GAS?
1. Shut off gas to the Barbecue and at the source if possible.
2. Extinguish all flames.
3. Open hood.
4. Perform gas leak check procedure as per “Leak Testing” on page 5.
DO
NOT test for gas leaks with an open flame!
5. If the odour continues, immediately call your gas supplier.
•DO
NOT light the Barbecue with the hood closed.
•DO
NOT lean over the cooking surfaces whilst lighting the Barbecue.
•DO
NOT leave your Barbecue unattended while in use.
•DO
NOT use briquettes, wood, charcoal or other solid fuels in this Barbecue.
•DO
NOT use aluminium foil to line the burner box. Using foil in this manner can block off air for
combustion and ventilation and result in a dangerous condition.
•DO
NOT smoke whilst lighting your Barbecue - As this could be an un-intentional ignition source.
• NEVER
use the two inner burners when cooking with the hood closed, use the outer burners only!
•DO
NOT heat unopened food containers as pressure build-up during heating may cause the container
to burst.
•DO
NOT move Barbecue whilst hot or in operation.
IMPORTANT
Page 6

Rinnai Australia - 4 - GT104BHBN/L & GT104BHSN/L OIM
SAFETY INFORMATION
•DO NOT allow children or the infirm to operate or handle any parts of the Barbecue.
•DO
wear appropriate clothing whilst operating the Barbecue. Some synthetic fabrics (such as Nylon)
are highly flammable and should be avoided.
•DO
use good quality insulated oven mitts when operating the Barbecue.
• If the burners go out during operation, shut the gas supply off at the so urce and tur n all burner co ntrols
to ‘OFF’. Open the hood and wait at least 5 minutes before attempting to relight.
• Should a grease fire occur and if safe to do so, attempt to shut off the gas supply at the source, turn off
all burners and remove food if possible.
STORAGE
•DO
NOT store your gas cylinder indoors. Gas cylinders must be stored outdoors in a well ventilated
area out of reach of children and must not be stored in a building, garage or any other enclosed area.
• Barbecues using bottled gas: If stored indoors, ALWAYS
disconnect and remove the gas cylinder first.
Gas cylinders must be stored outdoors in a well ventilated area out of reach of children. They MUST
NOT be stored in a building, garage or any other enclosed area or in the vicinity of this or any other
appliance.
•DO
NOT store or use petrol or other flammable vapours and liquids in the vicinity of this or any other
appliance.
•DO
NOT store empty or full spare gas cylinders under or near this or any other appliance.
GAS CYLINDER PROPANE
• This Barbecue is designed for use with a 9kg LP Gas cylinder. This cylinder should conform to
AS 2030.1. DO
NOT connect this Barbecue to a gas cylinder of different capacity.
• The Barbecue is designed for use in the vapour withdrawal mode. Therefore it is important to always
store and use the gas cylinder in an upright position.
• For storage and when refilling / exchanging cylind ers, dis connect t he hose and regulat or at the cylinder
end only. Do not disconnect the hose and regulator from the Barbecue end.
• Gas cylinders should be inspected and tested periodically in accordance with local statutory
regulations. A dented or rusty gas cylinder may be hazardous and should not be used.
•DO
NOT subject the gas cylinder to excessive heat.
• Always close the cylinder valve when the Barbecue is not in use.
• The gas cylinder should be filled by a reputable gas dealer, or exchanged at a reputable gas cylinder
exchange outlet.
• Gas cylinders should be visually inspected and re-qualified as per local requirements.
Propane Gas / Hose and Regulator
• The pressure regulator and hose assembly supplied with the appliance MUST be used.
• The pressure regulator supplied is fixed to have an outlet pressure of 2.75 kPa, any other pressure is
not suitable. The regulator and hose assembly are for bottled LP gas ONLY
.
• When the Barbecue is not in use, the hose and regulator must only be disconnected from the cylinder.
The hose and regulator must not be disconnected from the Barbecue unless it is being replaced. Such
replacement must only be carried out by an authorised person.
• Inspect the gas hose when replacing the gas cylinder, or once per year, whichever is more frequent. If
the hose is cracked, cut, abraded, discoloured or damaged in any other way, the Barbecue must not be
used. The hose must be replaced if damage d or when loca l regulation s require t his. Contact your Rinnai
Service Agent/Stockist or local regulating authority if unce rtain. Such replacement must only be carried
out by an authorised person.
• Replacement pressure regulators and hose assemblies must be those specified by Rinnai for use with
this appliance.
• Avoid any twisting of the hose.
• Keep the gas hose away from hot surfaces or dripping grease or oil.
Page 7
Rinnai Australia - 5 - GT104BHBN/L & GT104BHSN/L OIM
SAFETY INFORMATION
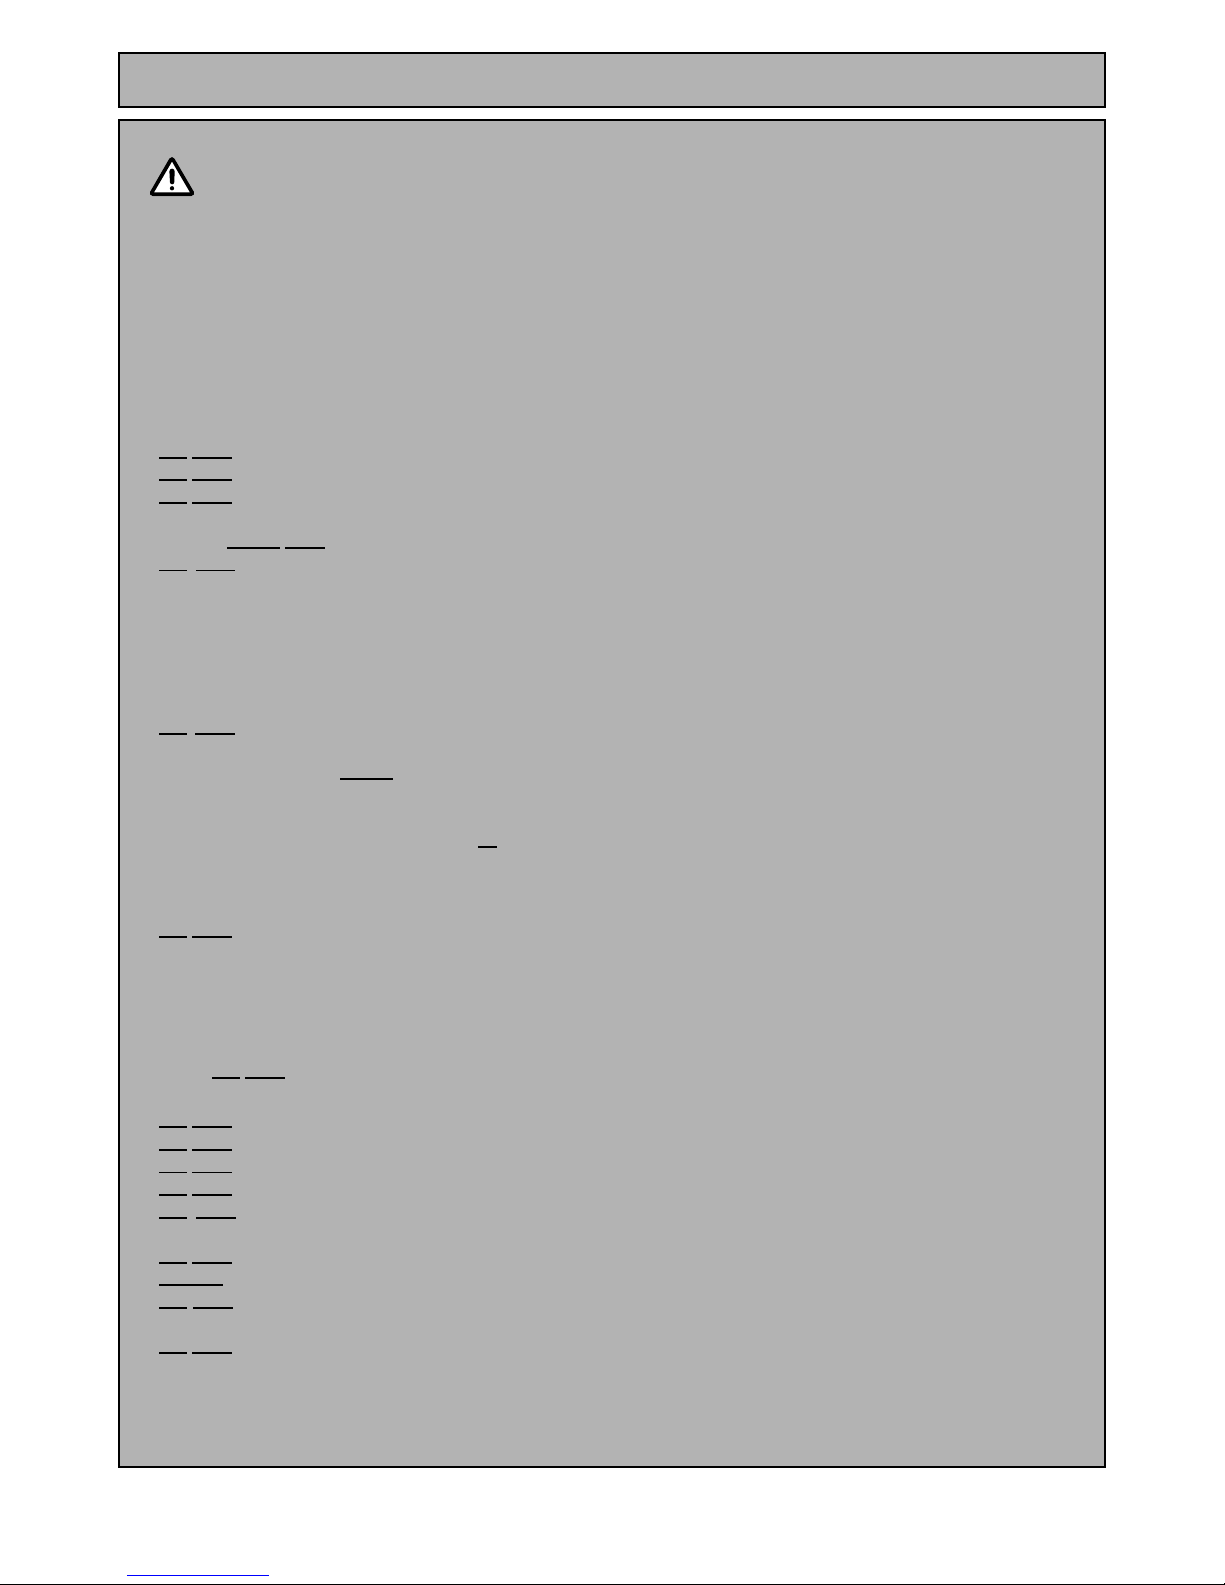
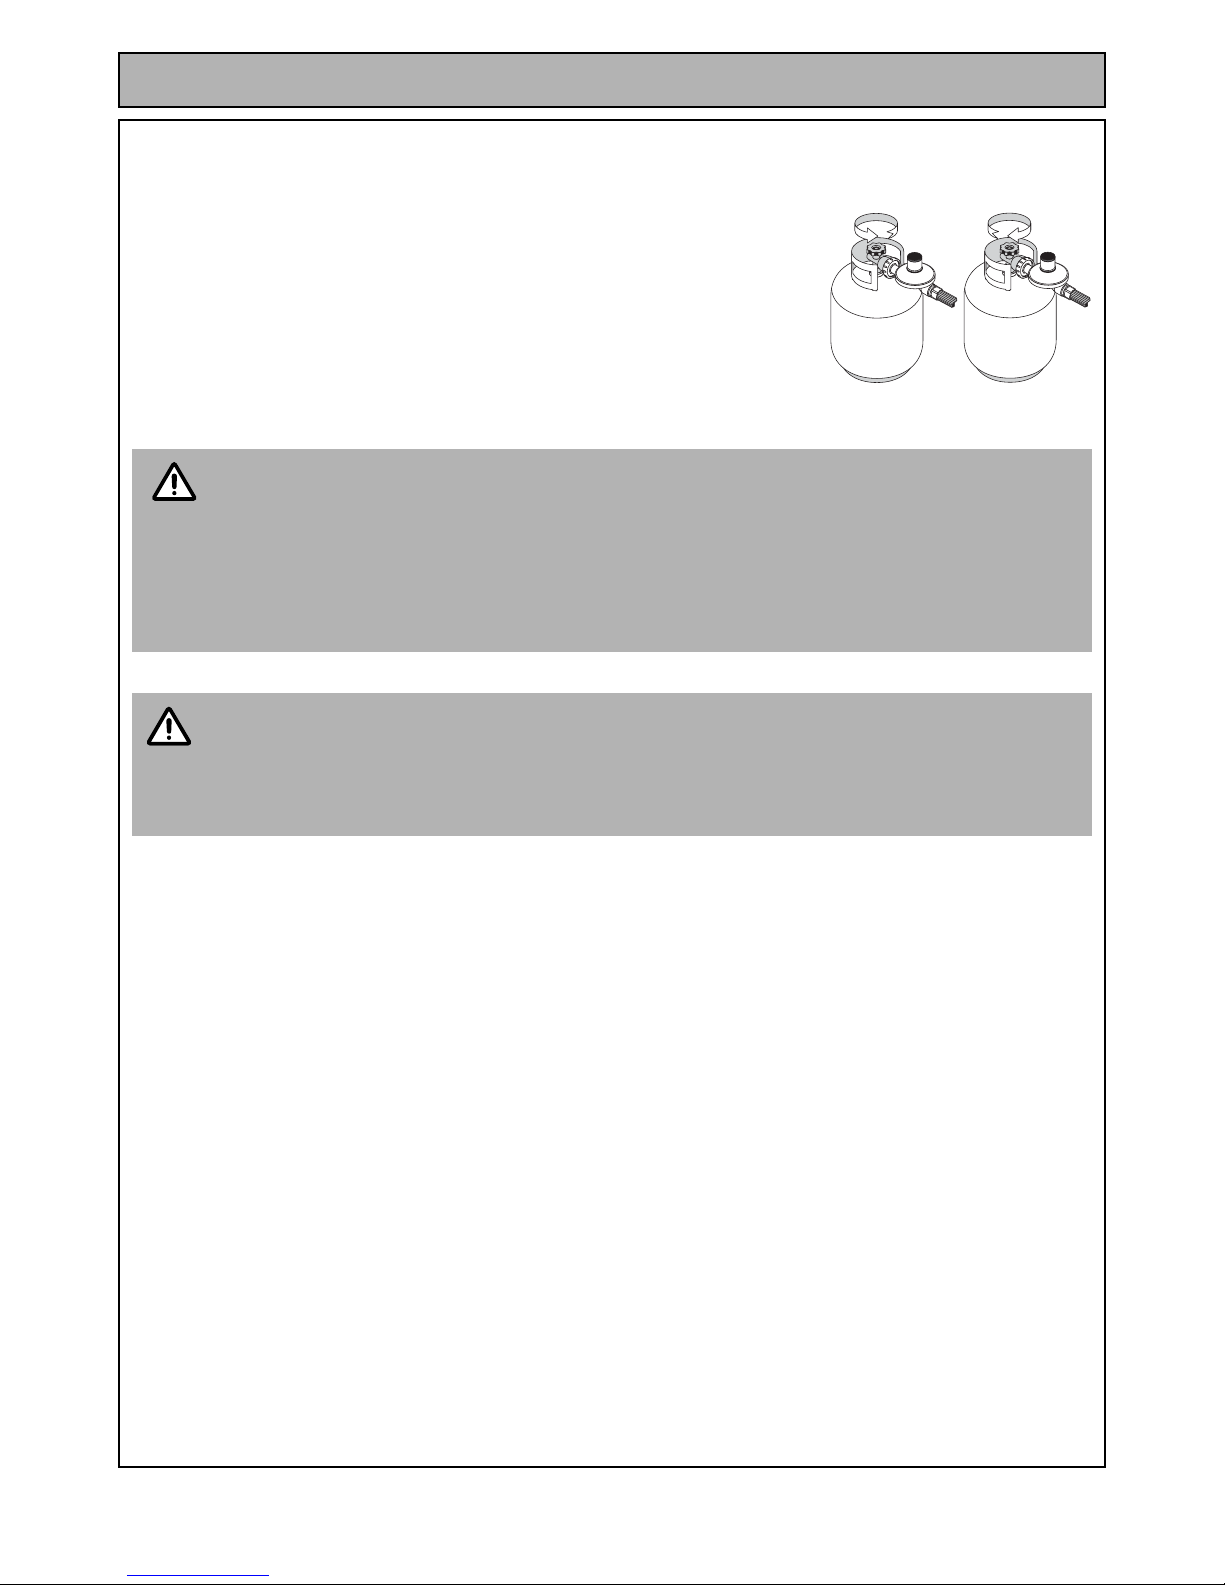
Gas Cylinder Installation
1. Familiarise yourself with the information in this manual, in particular the
items under "Safety Information" and "Gas Safety".
2. Ensure all burners are in the "OFF" position as shown.
3. Place the gas cylinder in the holder provided to secure the cylinder in
position.
4. Connect the regulator to the gas cylinder by turning the coupling nut
anticlockwise to tighten to a full s top, (left hand thread). The seal has now
engaged. An additional one half to three quarter turn is r equired to complete
the connection. Tighten by hand only. DO
NOT USE TOOLS.
The inlet connection is a POL or POLAUTO fitting which has a left
hand thread.
The user should regularly check the fitment and condition of the
rubber "O" ring seal located on the inlet connection nipple.
Leak Testing
DO NOT test for gas leaks with an open flame!
5. Make a soapy solution by mixing one part liquid detergent (such as
dishwashing liquid and (4) four parts water.
6. Open the gas valve on the cylinder by turning it anticlockwise.
7. Apply the soapy solution to all visible gas connections in the vicinity of the
cylinder and regulator and where the gas hoses attach to the fitting on the
solid Barbecue’s gas pipe and to the side shelf burner (if fitted). Gas leaks
will show as small bubbles in the soapy solution.
8. If there is a gas leak from the connection between the regulator and gas
cylinder, close the gas valve on the cylinder by turning it clockwise.
Disconnect the regulator and hose assembly from the cylinder by turning
the coupling nut clockwise to disengage. Inspect for debris inside the
cylinder fitting and fitting at the end of the regulator. Remove debris and
reconnect as per step 4 above. Retest for gas leaks.
If there are still gas leaks from the connection between the
regulator and gas cylinder or any other connec tions contact your
Rinnai Service Agent/Stockist for assistance. Leaking
connections other than the connection between the regulator
and gas cylinder must only be repaired by an authorised person.
If gas leaks are present DO
NOT operate the Barbecue.
OFF
POSITION
NOTE
WARNING
CAUTION
Gas leaks will
show as small
bubbles in the
soapy solution
Page 8
Rinnai Australia - 6 - GT104BHBN/L & GT104BHSN/L OIM
Gas Cylinder Removal - Propane.
1. Ensure that the gas cylinder valve is “OFF” befo re att emp ting to disc onne ct
gas cylinder from Barbecue. To remove the gas cylinder from the hose and
regulator follow the reverse order of the gas cylinder installation on page 5
procedure.
Also check for leaks when:
• Prior to first use
• At the beginning of each new season
• Every time the cylinder has been changed
• After maintenance has been carried out
• After prolonged storage period
DANGER - IF YOU SMELL OR HEAR THE HISS OF ESCAPING GAS FROM THE GAS CYLINDER
• KEEP CLEAR OF THE GAS CYLINDER
• TURN ALL CONTROLS ON THE BARBECUE TO “OFF”
• EXTINGUISH ANY FLAME
• REMOVE LID OR OPEN HOOD
• IF GAS ODOUR CONTINUES, IMMEDIATELY CALL YOUR GAS SUPPLIER OR FIRE
DEPARTMENT
• Before initial use, and periodically thereafter, we suggest you wash your Barbecue using a
mild soap and warm water solution. You can use a wash cloth or sponge for this process.
• DO NOT use a stiff wire brush or similar. These will scratch stainless steel and chip painted/
coated surfaces (varies by model) during the cleaning process.
• DO NOT use oven cleaners, or similar compounds as these may damage coated surfaces.
ON
OFF
WARNING
HINT
SAFETY INFORMATION
Page 9
Rinnai Australia - 7 - GT104BHBN/L & GT104BHSN/L OIM
CLEARANCES AND LOCATION
Clearances
The following minimum clearances must be maintained:
• Top 1000 mm - measured from the top of the cooking surface.
• Rear 450 mm - measured from the rear main panel.
• Sides 250 mm - measured from the oute r mo st edg e of the ba rb e cu e.
Openings around the perimeter of the appliance provide air for coolin g and combustion and must not be obstructed.
Location
This appliance shall only be used in an above ground open-air situation with natural ventilation, without stagnant
areas, where gas leakage and products of combustion are rapidly dispersed by wind and natural convection.
Any enclosure in which the appliance is used shall comply with one of the following (
see drawings below
):
1. An enclosure with walls on all sides, but at least one permanent opening at ground level and no overhead cover.
2. Within a partial enclosure that includes an overhead cover and no more than two walls.
A. both ends open.
3. Within a partial enclosure that includes an overhead cover and more than two walls, the following shall apply-
B. at least 25% of the total wall area is completely open; and
C. at least 30% of the remaining wall area is open and unrestricted.
In the case of balconies, at least 20% of the total of the side, back and front wall areas shall be and remain open
and unrestricted. .
Vehicles and Boats
The barbecue is not intended to be installed in or used on recreational vehicles and/or boats.
• This barbecue is for OUTDOOR use only.
•DO
NOT operate the barbecue indoor s.
•DO
NOT operate in an enclosed area.
•DO
NOT operate in an unventilated area.
•DO
NOT obstruct the flow of air around the barbecue whilst in use.
• This barbecue must be placed on a level and stable surface.
• Certain materials or items when placed near the barbecue may be affected by the radiant heat
and could be damaged. Keep these items away from your barbecue.
• Keep barbecue away from combustible materials.
CAUTION
Plan View
Plan View
Plan View
Plan View
Plan View
1
2
A
3
B
B
C
C
C
C
C
C
Page 10
Rinnai Australia - 8 - GT104BHBN/L & GT104BHSN/L OIM
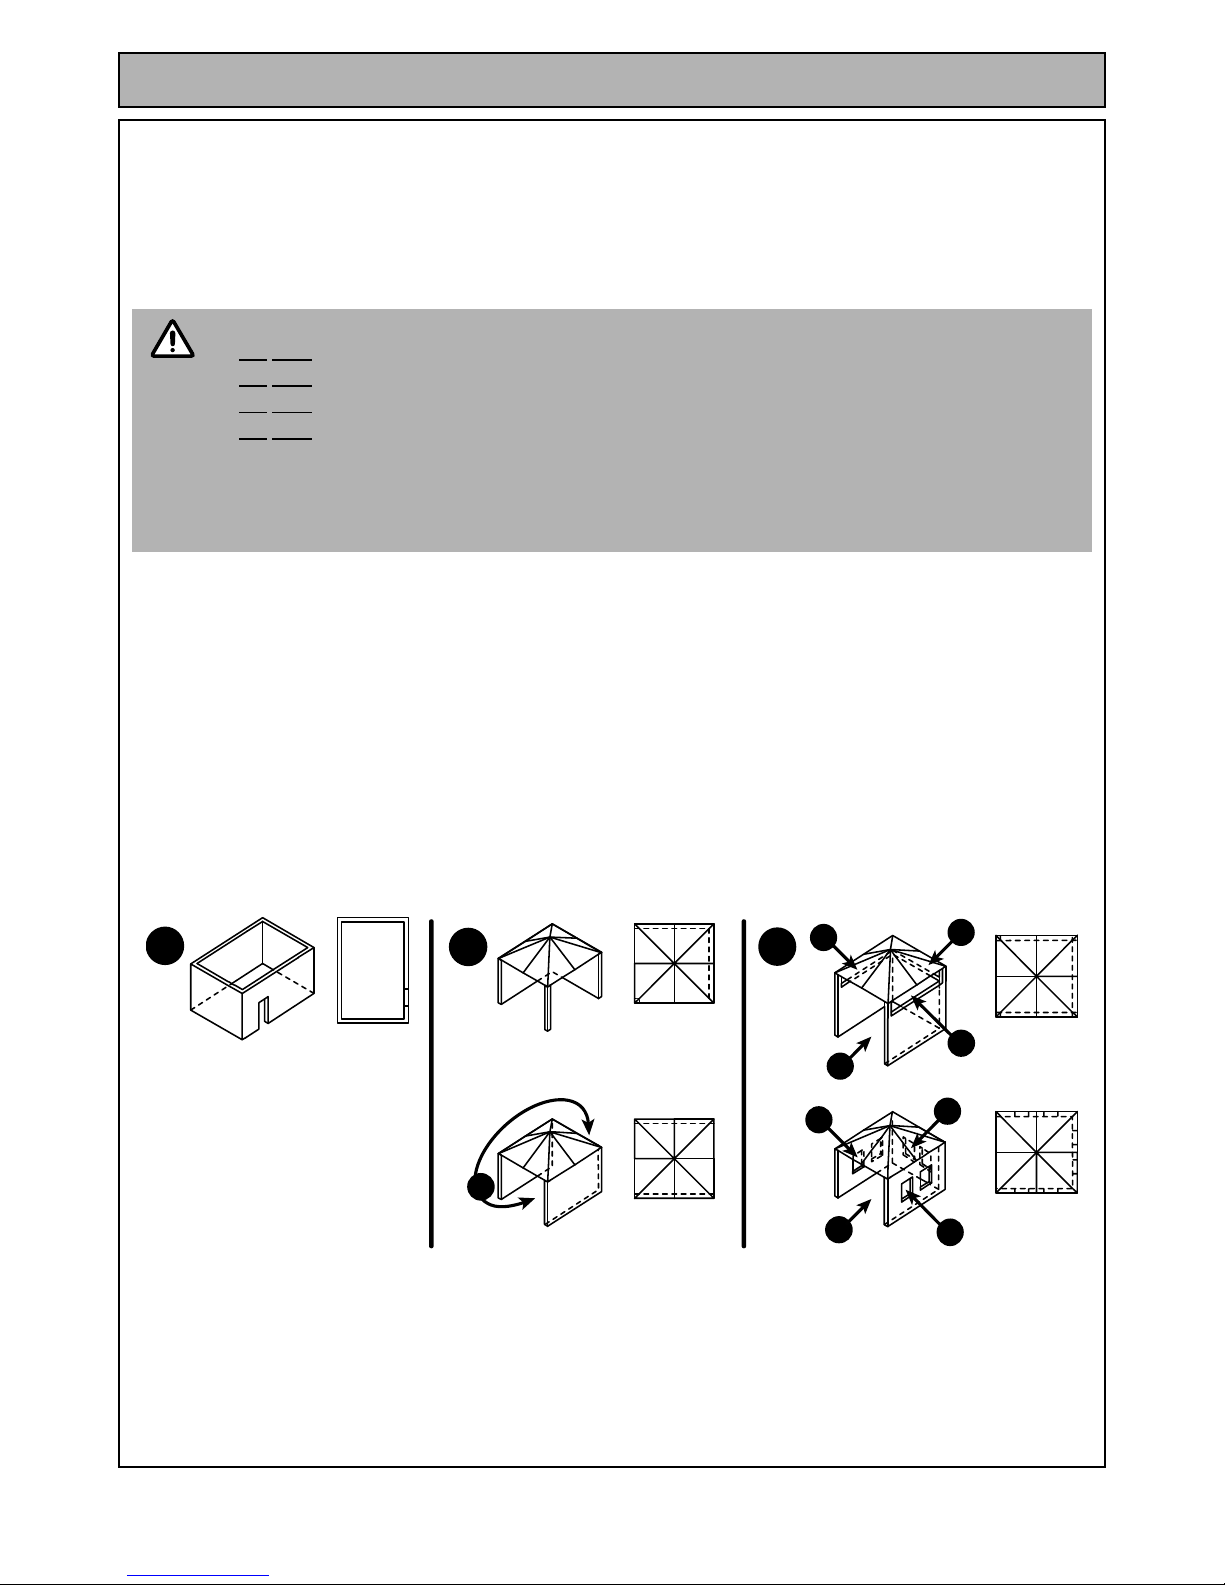
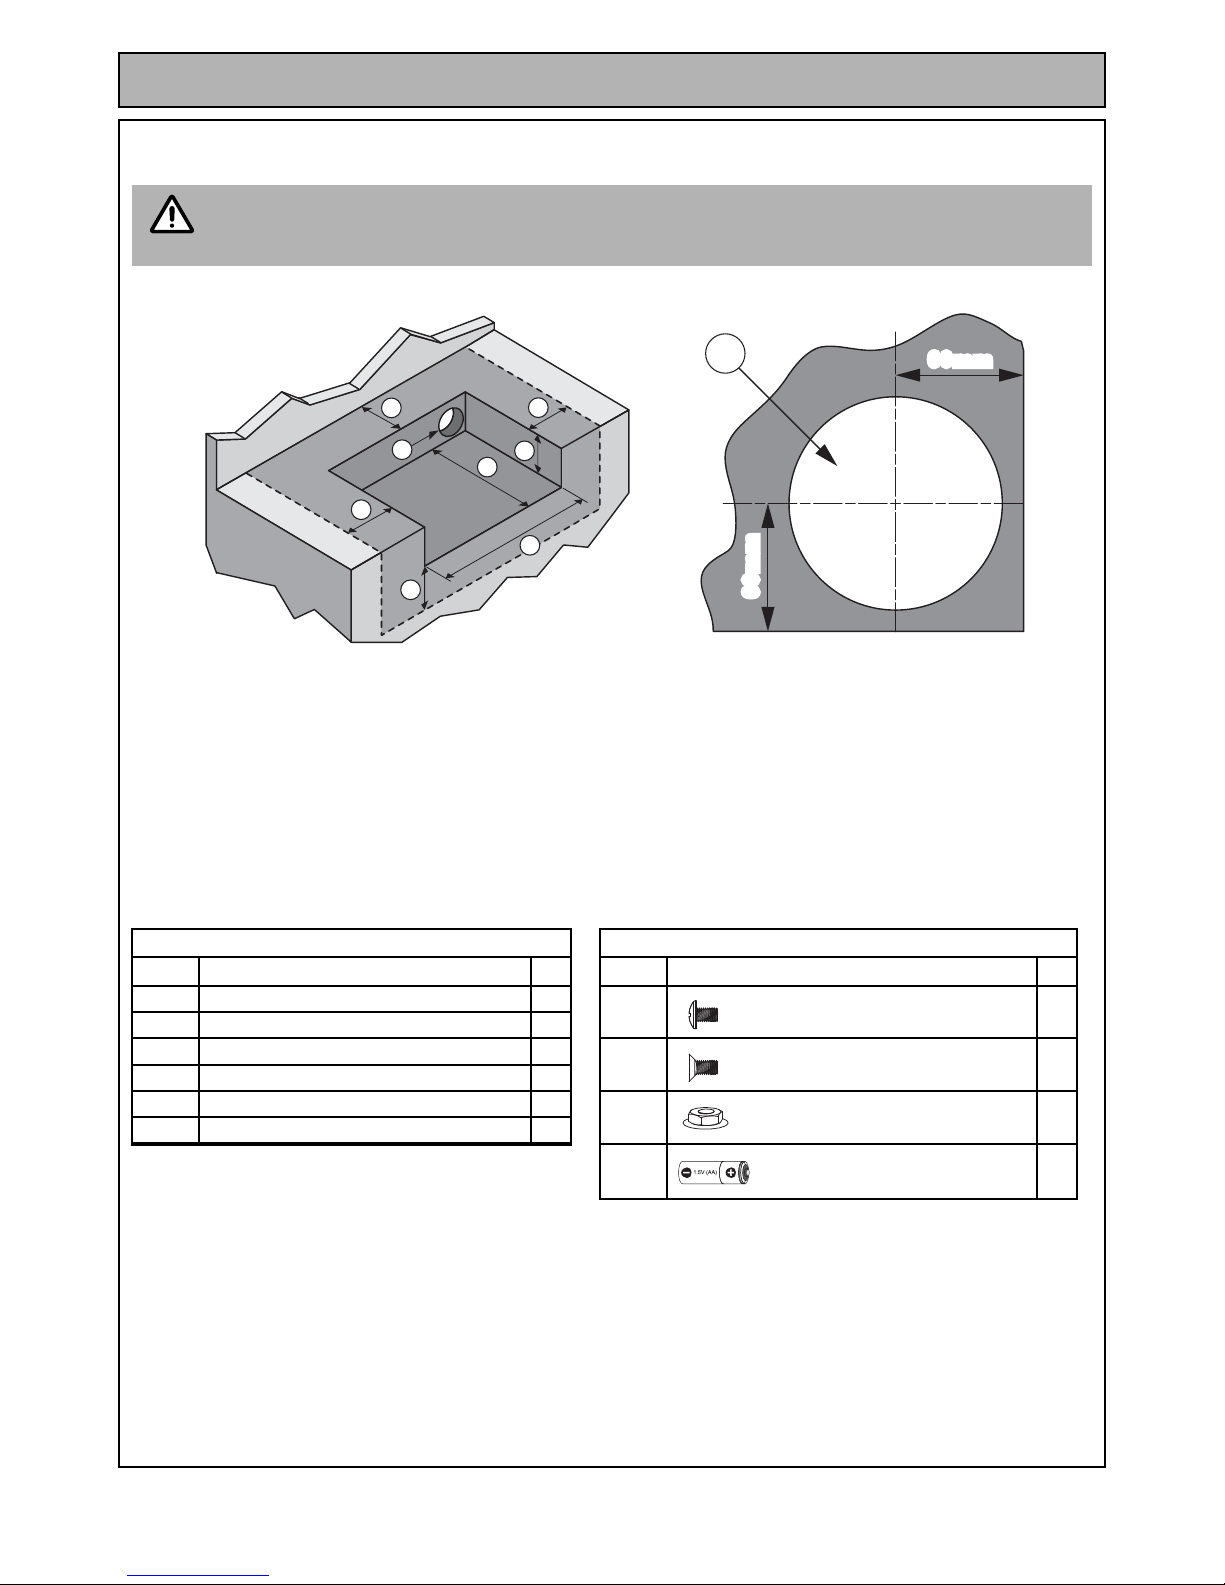
ASSEMBLY
BARBECUE ASSEMBLY / INSTALLATION
Building of non combustible structure / opening
List of Assembly Components and Hardware
This Barbecue is suitable for installation into ‘non combustible’ (masonry) structures only. This
Barbecue must not be installed into combustible structures, such as structures made from wood,
plasterboard, particle board etc. Structure must be constructed in a ccordance with AS/NZS 560 1.
Opening Dimensions
A. 225mm Minimum
B. 590mm Minimum
C. 830mm - 840mm
D. 450mm Minimum to combustible and 150mm to non-combustible clearance.
E. 250mm Minimum non-combustible clearance.
F. 100mm Minimum Diameter.
ASSEMBLY COMPONENTS HARDWARE
Part No. Description Qty Part No. Description Qty
A. Barbecue Head 1
a. Phillips Head Screw 1/4"x3/8" 4
30. Grease Tray Bracket 1
31. Grease Tray 1
b. Countersunk Flat Head Screw 1/4"x3/8" 6
37. Trim Bracket-Left 1
38. Trim Bracket-Right 1
c. Flange Nut 1/4" 6
39. Trim Bracket-Rear 1
d. Battery 1
For full Hardware Pack refer to Hardware Pack Table page 27.
IMPORTANT
B
A
D
E
E
E
C
F
F
60mm
60mm
60mm
60mm
Page 11

Rinnai Australia - 9 - GT104BHBN/L & GT104BHSN/L OIM
ASSEMBLY
Assembly Method
Step 1. Install the Trim Bracket-Left (37) with Screw (a. x1), Insert Screws (b. x3) from the inside of the burner
box through both the side of the Barbecue Head (A) and the Trim Bracket, then attach and tighten
Flange Nuts (c. x3). Repeat the procedure for Trim Bracket-Right (38). Install the Trim Bracket-Rear
(39) with Screws (a. x2).
Step 2). Insert the Grease Tray (30 / 31) into the gap at the base of the Barbecue Head (A).
• Connect the Gas Cylinder in accordance with “Gas Cylinder Inst allation” on page 5.
• Before attempting to use the Barbecue, ensure to leak test the connections in accordance with
“Leak Testing” on page 5.
• When gas cylinders are located in an enclosed space ventilation must comply with AS 4557.
a. (x4)
b. (x4)
c. (x4)
39
38
37
a.
a.
a.
a.
c.
c.
b.
A
(GT104BHB - Stainless Steel)
(GT104BHS - Stainless Steel)
(GT104BHB - Stainless Steel)
(GT104BHS - Stainless Steel)
(GT104BHB - Stainless Steel)
(GT104BHS - Stainless Steel)
Gas Line
31
Gas Line
30
Hole to allow regulator
access to gas cylinder
will need to be 100mm
or greater!
NOTE
Page 12

Rinnai Australia - 10 - GT104BHBN/L & GT104BHSN/L OIM
TESTING
BURNERS
Testing Ignition System
1. Ensure that the hot plate, grill plates and trivets are removed.
2. Ensure all burner controls are in the 'OFF' position and the gas supply on the cylinder is shut off.
3. Main burners and back burner, push the button on the ignition module, clicking should be heard and a blue
spark should be visible between the electrode tips and burner tube.
4. If no spark is seen or heard at all, refer to “TROUBLE SHOOTING” on page 21.
The burners and associated componentry of this appliance are delivered fully assembled from
the factory, however it may be necessary to check the burner and ignition systems for correct
positioning and operation.
The following sections describe how to check burners a nd ignition system for correct positionin g
and operation.
To ensure the continued safe operation of this appliance Rinnai recommends that t he burner and
ignition systems are checked regularly and in particular:
• At the beginning of each Barbecue season.
• After the cooking surfaces and burner components have been cleaned.
• Whenever the burners are removed and re-inserted.
• When the barbecue is moved between locations.
• After extended use.
MAIN BURNERS
When fitted correctly the venturi of the main burners are located over
the end of the injectors. The non-venturi end of the burners are locked
into place by a securing screw.
For removal see “Cleaning burner tubes” on page 14.
IGNITION SYSTEMS
Electronic Ignition
The main and back burner are ignited by the battery operated push
button electronic ignition, the control button is on the control panel.
Battery Installation
The electronic ignition is located between the main burner control
knobs. Unscrew the ignition cap / button and insert the negative end of
the AA battery ‘provided’ into the ignition socket then replace the
ignition cap / button.
Make sure the Gas is turned ‘OFF’ at the cylinder! (Refer to page 3).
NOTE
Main burners are secured
at non-venturi end via
securing screws x4
(1 each per burner)
Venturi end.
Ignition Socket
Ignition
Cap / Button
WARNING
Page 13

Rinnai Australia - 11 - GT104BHBN/L & GT104BHSN/L OIM
TESTING
BURNER IGNITION AND OPERATION
•DO NOT light the barbecue with the hood closed.
•DO
NOT lean over the cooking surfaces whilst lighting the Barbecue.
•DO
NOT move the barbecue whilst hot or in operation.
• If burners go out during operation, close the gas supply at the source and turn all burner
controls to ‘OFF’. Open the hood and wait at least 5 minutes before attempting to relight.
1. Turn gas ‘ON’ at the cylinder by opening the gas valve on at the
cylinder and turning it anticlockwise.
Main and Back Burners
Step 1. Push and turn the main burner control knob to the ‘HI’ position.
Step 2). Press and hold the ignition button on the control panel.
Step 3). The burner should light within 5 seconds.
Step 4). Release the ignition button.
Step 5). Repeat to check all Main Burners and Back Burner.
Step 6). The burner will should ignite on the first click.
In all cases if any burner fails to light after three at tempts,
turn all control knobs to 'OFF', ensure that all hoods are
opened and wait 5 minutes. Then repeat the lighting
procedure. If a flame can not be achieved on any individu al
burner, check that burner for obstructions.
If ignition can still not be achieved refer to “TROUBLE
SHOOTING” on page 21.
2. Checking Burner Flame:
Main Burners
Check each burner individually, with a 'HIGH' flame established the
burner flame is approximately 2cm tall and emanating around the
perimeter of the burner tube, the flame should be generally 'blue' in
appearance.
3. If a burner flame cannot be achieved, perform the Ignition System Tests on page 10. If ignition system is
satisfactory and a burner flame can still not be established contact Rinnai.
ABNORMAL FLAME CHARACTERISTICS
Main Burners
Excessive yellow flame, irregular size or wafty flame, 'popping' of the flame,
sooting, black smoke, hissing sounds or other abnormal noises may indicate
incorrect assembly or a defect.
WARNING
HI / IGNITION
POSITION
CLICK !
Burner Tube
Burner Tube
Sparker is located
under Burmer Tube
Spark Gap 4-5mm
Spark Electrode Tip Spark Receiver
WARNING
WARNING
Page 14

Rinnai Australia - 12 - GT104BHBN/L & GT104BHSN/L OIM
CLEANING AND MAINTENANCE
Burner tube inspection and cleaning should take place especially in late summer or early autumn when spiders and
wasps are most active or when the Barbecue has not been used for an extended period.
Inspection and cleaning procedure is as follows:
1. Turn all burner valves to the full ‘OFF’ position.
2. Turn the LP gas cylinder valve to the full ‘OFF’ position.
3. Remove hot plate, grill and warning rack.
4. Remove burners as shown below.
5. Check and clean burner / venturi tubes for insects and insect nests. A clogged tube can lead to a fire beneath
the barbecue.
Option 1). Bend a stiff wire or wire coat hanger into a small hook as shown and run the hook through the
burner tube and inside the burner several times to remove debris.
Option 2).Use a bottle brush with a flexible handle and run the brush through the burner tube and inside the
burner several times to remove any debris.
Option 3).Use an air hose to force air through each burner tube. The forced air should pass debris or
obstructions through the burner and out the ports.
6. Clean the ou tside of the burner tubes by using a mild house ho ld deter gen t and dishwa sh ing br ush. To remove
stubborn deposits and wash the inside of the burner tubes, immerse the burner tubes in water mixed with a
small amount of mild household detergent for an extended period of time (for example, overnight).
• Spiders and small insects can occasionally spin webs or make nests in the burner tubes and
ports. These can lead to gas flow obstruction which could result in poor combustion or, at
worst, a fire in and around the burner tubes.
• This type of fire is known as 'flash back' and can cause serious damage to your Barbecue and
create an unsafe operating condition for the user.
• Obstructed burner tubes and ports are the most common cause of 'flash back'.
• It is important that burner tubes are inspected and cleaned frequently to prevent ‘flash back’.
• Although an obstructed burner tube is not the only cause of ‘flash back’ it is the most common
cause and frequent inspection and cleaning of the burner tube is necessary.
CAUTION
Main burner
securing screws x4
(1 each per burner)
To remove main burner
push towards the back
then lift upwards
Page 15

Rinnai Australia - 13 - GT104BHBN/L & GT104BHSN/L OIM
CLEANING AND MAINTENANCE
After immersing, any deposits remaining on the outside can then be removed by using a dishwashing brush. If
stubborn deposits still remain, steel wool or a wire brush can be used, however, these are more likely to leave
scratches and are not recommended.
7. Inspect each burner for damage (cracks or holes) and if such damage is found, order and install a new burner.
After installation, check to ensure that the gas valve orifices are correctly placed inside the ends of the burner
tubes. Also check the position of your spark electrode.
8. Replace burners by following the reverse of the ‘burner removal’ procedure (Step 4).
9. Check the ignition system, burner operation and replace the heat shields, hot plate and grill plates in
accordance with “Assembly and Testing” section.
General
Before initial use, and periodically, wash your cooking plates in a mild soap and warm water solution. You can use
a wash cloth or vegetable brush to clean your cooking plates. After washing ensure that the plates are thoroughly
dry before returning them to the Barbecue. It is recommended the cooking plates be coated with a thin layer of
cooking oil on a regular basis to prevent rusting. Slight rusting ca n be remove d with a scrubbing b rush befo re use.
Regular cleaning and maintenance will result in reliable and safe operation whiles also prolonging the life of your
barbecue.
It is recommended that the cleaning and mainte nance routin e in this chapter be carried out prior to each b arbecue
season or more frequently if required.
If used in coastal areas or areas with high atmospheric moisture content the resulting rain, mist, salt spray etc. may
adversely affect any exposed parts. Frequent cleaning and drying is recommended to minimise exposure and will
avoid material breakdown.
Cleaning the hot plate and grill
Using the 'HIGH' setting on the main burners after cooking will burn much of the food residue from the plates and
grills after cooking is over. It is recommended the hot plate and grill are cleaned before the first use and after every
subsequent use. Use a suitable mild household detergent and a soft textured cleaning cloth or dishwashing brush.
DO
NOT use appliance on ‘HIGH’ for extended duration as this could discolour stainless steel.
Rinse and dry burners thoroughly on both the inside and outside before refitting to Barbecue.
For safe operation ensure the gas valve
assembly orifice is inside the burner tube
before using your Barbecue). If the orifice
is not inside the burner tube, lighting the
burner may cause an explosion and/or fire
resulting in serious bodily injury and / or
property damage.
• Ensure BOTH the burner controls and gas cylinder valve ar e 'OFF' and le t Barbecue cool before
attempting any cleaning or maintenance.
•DO
NOT use oven cleaner to clean any barbecue components.
•DO
NOT use a water pressure machine.
• The use of 'steel wool', wire brushes or other abrasives are not recommended for cleaning as
these will leave scratches. Such scratch e s are no t co vere d un d e r wa rran ty.
•DO
NOT pour cold water over any hot surfaces for cleaning purposes.
IMPORTANT
IMPORTANT
Orifice
Burner Tube
Fig. 1
Gas Valve Assembly
CAUTION
Page 16

Rinnai Australia - 14 - GT104BHBN/L & GT104BHSN/L OIM
CLEANING AND MAINTENANCE
To remove stubborn deposits, submerse the hot plate and grill plates in water mixed with a small amount of suitable
mild household detergent for an extended period of time (for example, overnight). After immersing, any remaining
deposits can then be removed using a cloth or brush. Rinse and dry thoroughly before refitting to barbecue.
Cleaning the heat shields and Grease Tray
Periodic cleaning is recommended to prevent buildup of food residue. The cleaning method is the same as
described for the hot plate and grill.
Cleaning the Barbecue cabinet and exterior surfaces
Before initial use, and periodically, thereafter, we suggest you wash your Barbecue using a mild soap and warm
water solution. You can use a w ash cloth or sponge for this pr ocess. DO NOT use a stiff wire brush or similar.
These will scratch stainless steel and chip pained surfaces (varies by model) during the cleaning process.
Cleaning the interior of the Barbecue body
Rinnai recommend occasional cleaning of the interior of the Barbecue body, as follows:
1. Remove and clean the hot plate, grill, warming rack, grease tray and burners.
2. Clean the interior panels and cooking tray surfaces using a mild household detergent or cleaner and soft
textured cleaning cloth. DO NOT use paint thinners or similar solvent for cleaning.
3. Replace burners, hotplate, grill and Grease Tray.
4. Reconnect to gas, performing the checks in accordance with the “SAFETY INFORMATION” on page 4.
Cleaning burner tubes
Burner tube inspection and cleaning should take place especially in late summer or early autumn when spiders and
wasps are most active or when the barbecue has not been used for an extended period.
Care for Stainless Steel surface
The stainless steel over time will be affected by ‘tea staining’ (the brown discolouration of some stainless steel).
Tea staining can be reduced by washing the surface with mild detergent and warm water. This should then be
followed by rinsing with clean cold water. We recommend the surface then be wiped dry with a clean cloth.
After drying coat with a light film of oil such as a 50/50 mix of baby oil and methylated spirits. There are also
proprietary products available from your local retailer such as Viva® stainless steel wipes.
Maintenance / Cleaning the Grease Tray
To reduce the chance of fire, the grease draining tray should be visually inspected before each Barbecue use.
Remove any grease and wash grease tray and receptacle with a mild soap and warm water solution.
• The Grease Tray may be lined with foil for easy cleaning. DO NOT use “Kitty Litter” or similar
products as this may lead to fat fires. Clean the grease tray regularly.
• FAT FIRES ARE NOT COVERED BY WARRANTY.
• Contents of grease draining tray may be very hot during cooking.
• Allow to cool completely before disposing of the contents.
• After continuous use. Fat and/or cooking juices may build up. To avoid any flare-ups, it is
recommended that the grease tray be emptied regularly.
NOTE
Page 17

Rinnai Australia - 15 - GT104BHBN/L & GT104BHSN/L OIM
HOW TO USE
BEFORE USING THIS BARBECUE FOR THE FIRST TIME AND AT THE BEGINNING OF EACH
BARBECUE SEASON ENSURE THAT YOU:
1. Read this manual carefully, especially the information included in the “SAFETY
INFORMATION” section and be careful to observe all other warnings and other safety
Information within this manual.
2. Locate the barbecue in accordance with the information in the “Clearances and Location”
section. Avoid strong winds as these will drastically reduce the cooking efficiency.
3. Check for burner obstructions and check burner positioning as explained in the “ASSEMBLY
& TESTING” sections.
4. Check gas cylinder and ensure it is full (if fitted).
5. Check for gas leaks as explained in the “SAFETY INFORMATION” section.
6. Check ignition system and burner operation as explained in the “ASSEMBLY & TESTING”
page 8, and page 10.
BURNING OFF
Before cooking on your Barbecue for the first time, burn off using moderate heat to remove any
residual oils used during manufacture.
During the ‘Burning Off’ procedure operate the two outer main burners on ‘LOW’ and keep the
hood closed for approximately 10 minutes. Then open the hood and allow to cool. Remove and
wash the hot plate and grills with a suitable mild detergent and allow to dry before replacing.
ABNORMAL FLAME CHARACTERISTICS
Main Burners
Excessive yellow flame, irregular size or wafty flame, 'popping' of
the flame, sooting, black smoke, hissing sounds or other ab normal
noises may indicate incorrect assembly or a defect.
Refer to the “TROUBLE SHOOTING” on page 21 for more
information.
GREASE TRAY(S)
Fat, juices and food scrapings collect in the
Grease Tray (31) and Burner Box (A), pull out
the Grease Tray Bracket (30) and inspect and
clean the Grease Tray and Burner Box regularly
and DO
NOT allow these cooking residues to
build up as they can become a fire hazard.
IMPORTANT
WARNING
31
30
A
Page 18

Rinnai Australia - 16 - GT104BHBN/L & GT104BHSN/L OIM
HOW TO USE
BURNER IGNITION AND OPERATION
•DO NOT light the Barbecue with the hood closed.
•DO
NOT lean over the cooking surfaces whilst lighting the Barbecue.
•DO
NOT move the Barbecue whilst hot or in operation.
• If burners go out during operation, close the gas supply at the source and turn all burner
controls to ‘OFF’. Open the hood and wait at least 5 minutes before attempting to relight.
1. Turn gas ‘ON’ at the cylinder by opening the gas valve on at the
cylinder and turning it anticlockwise.
Step 1).Push and turn the main burner control knob to the ‘HI’
position.
Step 2).Press an d ho ld the igni tio n butt on on th e co ntr o l panel.
Step 3).The burner should light within 5 seconds.
Step 4).Release the ignition button.
In all cases if any burner fails to light after three attempts, turn all control knobs to 'OFF', ensure
that all hoods are opened and wait 5 minutes. Then repeat the lighting procedure. If a flame can
not be achieved on any individual burner, check the burner for obstruction s.
If ignition can still not be achieved refer to “TROUBLE SHOOTING” on page 21.
5. If a burner flame cannot be achieved, perform the Ignition System Tests on page 10. If ignition system is
satisfactory and a burner flame can still not be established contact Rinnai.
MANUAL BURNER IGNITION
If the ignition system is unable to produce a spark at the electrodes your Barbecue burners can be lit carefully with
a match as detailed below.
• Manual Ignition should only be performed on a temporary basis whilst waiting for the service
and/or repair to the Ignition System(s) to take place.
• Keep your face and body at a safe distance from the manual lighting.
• When using a match for manual ignition, ensure that the match is ignited and placed at the
ignition point before attempting to turn on any gas.
• When manually igniting main burners, ignite the main burner under grill plate using the manual
lighting stick as shown below.
WARNING
Turn Burner ‘ON’ first
Push Ignition
Button
Main Burner
Rotisserie/
Back Burner
Burner
Burner
Burner
POSITION
HI/Ignition
OFF
POSITION
WARNING
CAUTION
MANUAL LIGHTING STICK
WITH LIT SAFETY MATCH
Page 19

Rinnai Australia - 17 - GT104BHBN/L & GT104BHSN/L OIM
COOKING
BURNER SETTINGS
HIGH - This setting is for searing foods or for burning food residue off from the hot plate and grill. The 'HIGH'
setting is rarely used for extended cooking.
MEDIUM - (Midway). This setting is for grilling and for cooking burgers and vegetables.
LOW - This setting is for cook ing lean or thin cuts of meats, poultry or fish. This is also the recommended
setting used for hood down cooking.
The required burner settings will also be influenced by the outside air temperature and wind.
COOKING WITH THE HOOD UP
Cooking with the hood in the open position is best suited for the traditional Barbecue style of cooking.
Preheating For Cooking With The Hood Open
Cooking Tips
A little cooking fat or oil on the hot plate or grill will prevent food from sticking during cooking.
During cooking, fat and scrapings will drip through to the Grease Tray. Do not allow excess fat and scrapings to
build up.
Fats and juices that drip from the food being cooked onto the hot surfaces beneath may cause 'flare ups'. Flare ups
impart a distinct taste to the food being cooked and are desirable within reason. If flare ups are excessive turn the
burners down a little or remove the fatty food.
COOKING WITH THE HOOD DOWN
Cooking with the hood in the closed position creates an 'oven' style effect by retaining the heat evenly in the
enclosed space. This is especially suitable for large cuts of meat and poultry. The hood temperature gauge is a
guide to the temperature under the hood.
Before cooking it is best to pre-heat the hot plate and grill. With the
hood open run all the main burners on 'HIGH' for approximately 10
minutes.
Never use the two inner burners when cooking with the
hood closed, use the outer burners only!
After the plates have been pre-heated open the hood and commence
cooking, using the low and medium flame setting to control the heat.
Preheating For Cooking With The Hood Down
It is best to pre-heat the barbecue before cooking. Operate the two
outer main burners on ‘HIGH’ until desired cooking temperature is
reached.
Never use the two inner burners when cooking with the
hood closed, use the outer burners only!
Once the required preheat temperature has been reached use two
outer burners between 'LOW' and 'HI' to maintain the desired cooking
temperature.
Natural Convection Cooking
For the best results during convection cooking, use only the outer burners and leave the centre burner(s) in the
‘OFF’ position. This creates an even circulation of heat around the food and prevents hot spots from forming directly
beneath the food which may lead to drying out or burning.
HI FOR
PREHEAT
Preheat plates
with hood down
for 10 minutes
H
O
O
D
C
L
O
S
E
D
OUTER MAIN
BURNER ONLY!
CAUTION
H
O
O
D
C
L
O
S
E
D
OUTER MAIN
BURNER ONLY!
HI FOR
PREHEAT
LOW FOR
COOKING
CAUTION
Page 20

Rinnai Australia - 18 - GT104BHBN/L & GT104BHSN/L OIM
COOKING
Suggested Cooking Temperatures
Raw meat and poultry can contain harmful bacteria that can cause food poiso ning. It is important to cook the meat
to the correct temperature to ensu re the se bact eria ar e destroyed. A meat thermometer probe displays the exact
temperature inside the meat or poultry so you can be su re it is cooked all the way through. Suggested temperatures
for ‘cooked’ meats are shown below:
Using the Warming Rack
The warming rack can be used to keep foods that have already been cooked warm.
Cooking with the hood in the closed position helps to cook food more quickly than in conventional Barbecues with
a simple lid.
The hood (when closed) helps to retain the heat more evenly and conserves energy.
High direct heat when the hood is down may result in burnt food, or damage to painted surfaces.
Remove the grill plate and position the hotplate in the centre of the Barbecue.
When roasting in your Barbecue, food should be positioned over the centre burners either on a roasting rack with
the cooking pan underneath, or directly in the cooking pan.
Use a maximum of three (3) burners at low settings. If too hot, turn ‘OFF’ one burner and modu late the 2 lit burners
for the desired cooking temperature.
The heat from the selected burners circulates gently th roughout the Barbecue, cooking the me at or poultry witho ut
any direct flame touching it. This method greatly reduces flare-ups when cooking extra fatty cuts, because there is
no direct flame to ignite the fats and juices that drip during cooking.
Flare-Ups
The fats and juices that drip from the meat may cause flare-ups. Since flare-ups impart the distinctive taste and
colour of food cooked over an open flame, they should be expected and encour aged within re ason. Neverthele ss,
uncontrolled flaring can result in a ruined meal.
• If burners fail to light or go out during operation close gas supply at source, and turn all burner
controls ‘OFF’.
• Open hood and wait 5 minutes before re-attempting to light (ensure accumulated gas fumes
have cleared).
• Should a grease fire occur, attempt to close gas supply at source, turn ‘OFF’ all burners and
remove food if possible.
• Keep the ventilation openings of the cylinder enclosure free and clear from debris.
• The hood must be in the open position for lighting.
• DO NOT smoke when attempting to ignite Barbecue.
• DO NOT move Barbecue while in operation.
Fish 65°C
Minced Meats, Sausages 71°C
Chicken, Turkey, Duck Breast 77°C Whole / Bone 82°C
Pork Medium 71°C Well Done 77°C
Beef, Veal, Lamb Medium Rare 63°C Medium 71°C Well Done 77°C
•
•
• Never use any burner or combination of burners on ‘HI’ for extended perio ds when cooking with
the hood closed. Exceeding 250°C for extended periods with the hood closed may damage the
Barbecue.
CAUTION
IMPORTANT
Page 21

Rinnai Australia - 19 - GT104BHBN/L & GT104BHSN/L OIM
COOKING
ROTISSERIE COOKING (where applicable)
Rotisserie is available as an optional extra from your place of purchase.
Safety Points
Loading the Spit Rods
- Rotisserie Cooking
• Rotisserie cooking produces foods that are moist, flavoursome and appealing. The rotating food self bastes.
Although the rotisserie is best for larger pieces of meat or poultry, most cuts can be used if prepared properly.
• The balancing of the food requires the most attention in rotisserie cooking. The rotisserie must turn evenly
otherwise the stopping and starting action will cause the food to cook unevenly and possibly burn the heavier
side. Refer to the diagram above. The easiest foods to balance are those of uniform shape and texture. To test
if the food is balanced correctly when secured, place the ends of the rotisserie skewer loosely in the palm o f
your hands. Give the spit a quarter turn and if there is no tendency to roll and it is stable give it another quarter
turn. It should rest without turning in each of these positions. It can be attached to the Barbecue.
• When using poultry, truss the bird tightly so that wings and drumsticks are close to the body of the bird. The
cavity of the bird can be stuffed prior to this, if you wish. Pull the neck skin down and using a small skewer fix to
the back of the bird. Push the rotisserie skewer thro ugh lengthwise, catching the bird in the for k of the wishbone.
Centre the meat and tighten the holding forks. Test the balance as described above.
• A rolled piece of meat only requires the rotisserie skewer to be inserted through the centr e of the length of meat,
then secured and balanced using the forks.
For meats which are un-boned, it is best to secure the rotisserie skewer diagonally through the meaty
sections. If protruding bones or wings brown too quickly, cover with pieces of foil.
• Refer to page 17 ‘Cooking with the hood down’, and the ‘Natural Convection Cooking method.
• DO NOT operate a damaged rotisserie.
• DO NOT use rotisserie in poor weather
conditions.
• DO NOT leave rotisserie on Barbecue when
not in use.
• Avoid contact with hot surfaces.
• Always load rotisserie to Barbecue before
switching motor ‘ON’.
• Always turn rotisserie ‘OFF’ before removing
from Barbecue.
Always locate the food portion(s) so that it is balanced and centered onto the spit rod.
DO NOT loading the spit rod so that it is off centre and out of balance as this will damage the
rotisserie motor.
Using butcher string to secure loose portions will also prevent the an out of balance load.
CAUTION
IMPORTANT
OUTER
BURNER LOW
OUTER
BURNER LOW
CENTRE
BURNER OFF
CENTRE
BURNER OFF
Page 22

Rinnai Australia - 20 - GT104BHBN/L & GT104BHSN/L OIM
COOKING
COOKING WITH THE BACK BURNER
Setting up the Barbecue
• Remove all the cooking plates from the Barbecue. Place either an oven proof cooking pan or disposable
aluminium foil dish on top of the burners under the food bein g coo ked, so that it ca tches an y d rips from the food
above. The drippings can be used to make gravies and other sauces to accompany the cooked meat. Ensure
burners under the grease tray are NOT lit.
• Once the Barbecue has been set up, using the outer burners only, pre-heat the Barbecue according to the
instructions. Close the hood when you start to cook. Refer to page17 ‘Cooking with the hood down’, and the
‘Natural Convection Cooking method.
• For foods with little fat you may wish to cook them directly over lit burners to given a charred effect. This should
only be done towards the end of the cooking for no longer than the time required to given the desire visual
effect. DO NOT attempt this with fatty foods as this will cause flare-ups and excessive smoke.
Cooking
• Refer to page 17 ‘Cooking with the hood down’, and the ‘Natural Convection Cooking method.
• Sear /seal meat with the back burner for 10-15 minutes. (Optional)
• Turn ‘OFF’ the back burner, cook 90% cooking time using the indirect method.
• Turn ‘OFF’ the main burners, crisp off with the back burner, 10-15 minutes.
• This will vary according to the type and weight of food you are cooking. However as a guide the cooking times
on the rotisserie are similar to conventional oven cooking.
STORAGE
• We recommended that exposure to the elements be minimised whilst the Barbecue is in storage.
• It is also recommended that the Barbecue cover is always used.
These precautions will protect your Barbecue and prolong the life of your Barbecue.
DO NOT move the Barbecue while it is still HOT.
DO
NOT fit the cover to the Barbecue while it is still HOT.
DO
NOT store your gas cylinder indoors. Gas cylinders must be stored outdoors in a well
ventilated area out of reach of children and must not be store d in a building, ga rage or any other
enclosed area.
DO
NOT store or use petrol or other flammable vapours and liquids in the vicinity of this or any
other appliance.
Barbecues using bottled gas: If store indoors, ALWAYS disconnect and remove the gas cylinder
first. Gas cylinders must be stored outdoors in a well ventilated area out of reach of children.
They MUST
NOT be stored in a building, garage or any other enclosed area or in the vicinity of
this or any other appliance.
WARNING
Page 23

Rinnai Australia - 21 - GT104BHBN/L & GT104BHSN/L OIM
TROUBLE SHOOTING
Use the following chart to help determine whether a service call is required, however if you are unsure about the
way your barbecue is operating, contact Rinnai or your local agent.
Service and Spare Parts
Rinnai has a Service and Spare Parts network with personnel who are fully trained and equipped to give the best
service on your Rinnai appliance.
If your barbecue requires service, please call our Help Line number which is located on the back page of this
instruction booklet.
Rinnai recommends that this appliance be serviced by an authorised person every 2 years.
Burner(s) will not ignite using the igniter:
Possible Cause Remedy
Gas cylinder valve is not 'ON' Turn gas cylinder valve 'ON'.
Cylinder is empty. Replace with a 'full' gas cylinder.
Igniter is not working. Check ignition system (page 8).
If problem persists Contact Rinnai.
Gas Injector has blockage. Contact Rinnai.
Burner flame is erratic:
Excessive yellow flame, irregular size of f lame across the burner, ‘popping’ of the fl ame, sooting,
abnormal noises and hissing sounds may indicate incorrect assembly or that the appliance may
need servicing. If the following checks do not rectify the problem contact Rinnai.
Burner is incorrectly fitted to the barbecue. Fit burner in accordance with the “Cleaning burner
tubes” on page (14).
Burner is dirty or blocked. Clean the burner accordance with the “Cleaning bu rne r
tubes” on page (14).
Gas cylinder is empty. Replace with a ‘full’ cylinder.
Regulator is faulty. Contact Rinnai.
Injector is partially blocked. Contact Rinnai.
Gas is leaking from hose or connections:
Hose has deteriorated Contact Rinnai.
Gas valve is faulty Contact Rinnai.
Threads are damaged Contact Rinnai.
Other Problems:
Control knobs hard to turn Contact Rinnai.
DO NOT modify this appliance.
All other repairs and servicing shall be carried out only by authorised personnel.
DO
NOT carry out any service work other than that mentioned in the “Trouble Shooting” table.
Should a flash back fire occur in or around the burner tubes, follow the instructions below.
Failure to comply with these instructions could result in a fire or explosion that could cause
serious bodily injury, death, or property damage.
Shut ‘OFF’ gas supply to the gas Barbecue.Turn the control knobs to ‘OFF’ position.
Open the Barbecue hood. Put out any flame with a fire extinguisher.
Once the Barbecue has cooled down, clean the burner tubes and burners according to the
cleaning instructions in this manual.
NOTE
WARNING
Page 24

Rinnai Australia - 22 - GT104BHBN/L & GT104BHSN/L OIM
TROUBLE SHOOTING
If the Barbecue fails to Light
1. Turn gas ‘OFF’ at source and turn burner control kno bs to ‘OFF’. Wait at least five (5) minutes for gas to clear,
then retry .
2. If your Barbecue still fails to light, check gas supply and connections.
3. Repeat lighting procedure. If your Barbecue still fails to operate, turn the gas ‘OFF’ at source, turn the control
knobs to ‘OFF’, then check the following:
• Misalignment of burner tubes over orifices
Correction: Reposition burner tubes over orifices.(Refer to page13).
• Plugged injector
Correction: Contact Rinnai.
• Obstruction in burner tubes
Correction: Follow the burner tube cleaning procedure on page 14 of this ‘Owners Operation’ manual.
• Misalignment of igniter on burner
Correction: Check for proper position of the sparker as shown on page 13. The gap between the spark
electrode tip and spark receiver should be approximately 4-5 mm. Adjust if necessary. With the gas supply
closed and all control knobs set to ‘OFF’ press the electronic igniter cap and check for the presence of a spark
at the electrode.
• Disconnected electronic ignition wires
Correction: Inspect the igniter junction box found behind the control panel. Connect loose electronic wires to
junction box and try to light the Barbecue.
• Weak AA battery
Correction: Unscrew the igniter cap and replace the battery.
• If burners fail to light or go out during operation close gas supply at source, and turn all gas
valves ‘OFF’. Open hood and wait 5 minutes before re-attempting to light (this allows
accumulated gas fumes to clear.
• Should grease fire occur, close gas supply at source, turn ‘OFF’ all burners and remove food
until fire is out.
• KEEP THE VENTILATION OPENINGS OF THE CYLINDER ENCLOSURE FREE AND CLEAR
FROM DEBRIS.
WARNING
Ignition Socket
Ignition
Cap / Button
Page 25

Rinnai Australia - 23 - GT104BHBN/L & GT104BHSN/L OIM
SPECIFICATIONS
Note: Rinnai reserves the right to change specifications without notice.
CONVERSION
Contact your Rinnai service agent or stockist for details. (Refer to back cover for contact details).
To be installed only by an authorised person.
Dimensions
Height mm
Width mm Depth mm
Weight
(KG)
Models Hood Open Hood Closed Hood Open
Hood
Closed
GT104BHB
GT104BHS
1.555 1180 1580 706 616 40.2
Gas
Burners
Model
Main Burner Side Burne
r
Back Burner Total Input
Propane
2.75 kPa
NG
1 kPa
Propane
2.75 kPa
NG
1 kPa
Propane
2.75 kPa
NG
1 kPa
Propane
2.75 kPaNG1 kPa
Jet
mm
Total
input
Mj/h
Jet
mm
Total
input
Mj/h
Jet
mm
Total
input
Mj/h
Jet
mm
Total
input
Mj/h
Jet
mm
Total
input
Mj/h
Jet
mm
Total
input
Mj/h
Mj/h Mj/h
GT104BHB
GT104BHS
1.15 68 1.95 68
N/A N/A N/A N/A
1.00 13 3x0.90 10 81 78
Gas Regulator
LPG Grand Hall model 7060 regulator and hose assembly (AGA 5087)
NG Bromic model 980L regulator and hose assembly (AGA 5087)
General
Note: Rinnai reserves the right to change specifications, instructions and make modifications without notice.
Item Description, (where applicable depending on model).
Fire Box One piece press formed steel Vitreous Enamel coated or high temperature painted.
Panels Powder coated mild steel or Stainless Steel.
Precision folded and pressed, bolted or welded assembly.
Main Burner Bunsen type burner - fabricated Stainless Steel, single venturi.
Back Burner Surface type burner - fabricated precession pressed mild steel vitreous enamel coated,
single venturi.
Hood Stainless Steel or Vitreous Enamel coated
Cooking Hardware Grill Plate semi solid slotted / Integrill® Cast Iron Plate 200mm x 447mm. Enamel coated
Hot Plate, solid ‘High Rim’ / Plancha
®
Cast Iron Plate 200mm x 447mm. Enamel coated
Cooking temperature Maximum rated sustained cooking temperature - Hood Down 250°C
Ignition Main Burners – Push button electronic 1.5V DC – ‘AA’ Battery
Back Burner – Push button electronic 1.5V DC – ‘AA’ Battery
Page 26

Rinnai Australia - 24 - GT104BHBN/L & GT104BHSN/L
GT104BHB
7a
7b
16
7c
7d
3b
3a
22a
PARTS AND EXPLODED DIAGRAMS
Page 27

Rinnai Australia - 25 - GT104BHBN/L & GT104BHSN/L OIM
Updated: 22/6/16
Supercedes: 22/06/12
GT104BHB
Drawing No Description RA Part Supplier Ref
1 HOOD PHB BHB PIHB 93094074
P0014742FJ
2 TEMP GAUGE PHB BHB PIHB 93094011 P00601471B
3 Lid Handle1
P00212008D
3a Lid Handle2
P00213051M
3b Badge P00415006C
4 Lid Handle Seat (Left)
P00307071E
5 Lid Handle Seat (Right)
P00308071E
6 Lid Rubber Pad
P05518002I
7a Bowl Panel, Left P00761164A
7b Bowl Panel, Right P00762154A
7c Bowl Pane Set-Front P0076303GA
7d Bowl Panel Set-Rear P0076019GA
8 GASCOCK ROTIS GT 93094015 P03239011A
9 Bowl Grease Shield
P06901030B
10 BURNER ASSY ROTIS GT 93094090 P02007072A
11 Wind Shield - Rear Burner P069060824
12 GRILL PLATE GT 93094024
P01615052H
13 Bowl Wind Shield P0074805UA
14 ELECTRODE MAIN PHB BHB PIHB 93094050
P02609055A
15 IGN WIRE SET GT 93094044
P02615184A
16 BURNER MAIN PHB BHB PIHB 93094082 P02008084B
17 Aluminum tube- Rear Burner P03717065B
18 ELECTRODE ROTIS GT 93094046 P02614025A
19 Upper control Panel P0291562FI
20 FACIA BHB 93094020 P02915722E
21 Gas Valve Heat Shield P0300819DG
22 GASCOCK MAIN LP GT 93094086 P03239010A
22a ORIFICE ROTIS GT 93094092 P06531014A
23 Manifold-AU P05006162A
24 Gas Valve Heat Shield Bracket P03327107A
25 KNOB CONTROL MAIN GT 93094008 P03443045U
25a KNOB CONTROL ROTIS GT 93094006 P03443045X
27 Heat Shield- Rear Burner P06905080B
28 IGN ELECTRIC GT 93094042 P02502265C
29 Grease Tray Handle
P00213039M
30 Grease Tray Holder Bracket
P03327111D
31 TRAY DRAIN GT 93094054 P02717837D
32 HOT PLATE GT 93094088 P05701050H
33 REGULATOR LP PHB BHB PHS NHS 93094078 P03601046A
34 ADAPTOR REG BHB PHS 93094002 P03906002A
35 Warming Rack P01516030K
37 Bowl support bracket- Left
P075140614
38 Bowl support bracket- Right
P075140624
39 Bowl support bracket- Rear
P075150264
Not on drawing ORIFICE MAIN LP GT 93094084 P06517051A
Not on drawing HARDWARE PACK BHB 93094064 P06003175A
PARTS AND EXPLODED DIAGRAMS
Page 28

Rinnai Australia - 26 - BBQ Owner’s Operation Manual
GT104BHS
16
3b
3a
22a
PARTS AND EXPLODED DIAGRAMS
Page 29

Rinnai Australia - 27 - GT104BHBN/L & GT104BHSN/L OIM
GT104BHS
g
GT104BHB / BHS
Updated: 22/6/16
Supercedes: 22/06/12
GT104BHS
Drawing No
Description RA Part Supplier Ref
1 HOOD PHS BHS PIHS 93094072 P0014742EA
2 TEMP GAUGE PHS BHS PIHS 93094013 P00601477B
3 Lid Handle1 P00213047B
3a Lid Handle2 P00213051D
3b Badge P00415006C
4 Lid Handle Seat (Left) P00307071E
5 Lid Handle Seat (Right) P00308071E
6 Lid Rubber Pad
P05518002I
7 Bowl Assembly P00713986C
8 GASCOCK ROTIS GT 93094015 P03239011A
9 Bowl Grease Shield P06901030C
10 BURNER ASSY ROTIS GT 93094090 P02007072A
11 Wind Shield - Rear Burner P06906082C
12 GRILL PLATE GT 93094024
P01615052H
13 Bowl Wind Shield P0074808RC
14 ELECTRODE MAIN PHS BHS PIHS 93094052 P02609055K
15 IGN WIRE SET GT 93094044
P02615184A
16 BURNER MAIN PHS BHS PIHS 93094080 P02008084A
17 Aluminum tube- Rear Burner P03717065B
18 ELECTRODE ROTIS GT 93094046 P02614025A
19 Upper control Panel P0291562FS
20 FASCIA BHS 93094016 P029156416
21 Gas Valve Heat Shield P0300819DG
22 GASCOCK MAIN LP GT 93094086 P03239010A
Not on drawing ORIFICE MAIN LP GT 93094084 P06517051A
22a ORIFICE ROTIS GT 93094092 P06531014A
23 Manifold-AU P05006162A
24 Gas Valve Heat Shield Bracket P03327107A
25 KNOB CONTROL MAIN GT 93094008 P03443045U
25a KNOB CONTROL ROTIS GT 93094006 P03443045X
27 Heat Shield- Rear Burner P06905080C
28 IGN ELECTRIC GT 93094042 P02502265C
29 Grease Tray Handle P00213039B
30 Grease Tray Holder Bracket P03327111D
31 TRAY DRAIN GT 93094054 P02717837D
32 HOT PLATE GT 93094088 P05701050H
33 REGULATOR LP PHB BHB PHS NHS 93094078 P03601046A
34 ADAPTOR REG BHB PHS 93094002 P03906002A
35 Warming Rack P01516030J
37 Bowl support bracket- Left P07514061A
38 Bowl support bracket- Right P07514062A
39 Bowl support bracket- Rear P07515026A
Not on drawing HARDWARE PACK BHS 93094062 P06003172A
GT104BHB / BHS
HARDWARE PACK - GT104BHB / GT104BHS
Description and Part No.’s QTY
Phillips Head Screw 1/4" x 3/8”
GT104PHB
a.
GT104PHS
*S/S S112G04061
4
Countersunk Flat Head Screw 1/4" x 3/8”
GT104PHB
b.
GT104PHS
*S/S S142G04061
6
Flange Nut 1/4"
GT104PHB
c.
GT104PHS
*S/S S313G04081
6
d.
AA Battery 1
*Note: Black = Mild steel, black finished.
S/S = Stainless Steel.
PARTS AND EXPLODED DIAGRAMS
Page 30

Rinnai Australia - 28 - GT104BHBN/L & GT104BHSN/L OIM
Warranty Terms
The benefits to the consumer given by this warranty are in addition to all other rights and remedies of the consumer
under a law in relation to the goods or services to which the warranty relates.
Our goods come with guarantees that cannot be excluded under the Australian Consumer Law. You are entitled
to a replacement or refund for a major failure and for compensation for any other reasonably foreseeable loss or
damage. You are also entitled to have the goods repaired or replaced if the goods fail to be a of acceptable quality
and the failure does not amount to a major failure.
Given installation and application is in accordance with the manufacturer’s specifications and instructions as
published at the date of installation, Rinnai will repair or replace goods free of charge in the event of defects arising
from faulty materials and/or workmanship in accordance with the Warranty Terms in Table 1 and definitions:
Warranty Conditions and Warranty Exclusions stated in this document.
Rinnai is responsible for reasonable costs associated with legitimate warranty claims, including call-out of an
authorised Rinnai service provider to inspect the faulty product.
Rinnai is not responsible for:
a) costs for tradespeople that are not authorised Rinnai service providers; or
b) any costs, including call-out costs for an authorised Rinnai service provider, associated with a product
which is determined upon inspection not to be covered by this warranty.
The consumer will be reimbursed by Rinnai for any reasonable costs associated with making a legitimate warranty
claim against Rinnai which are not otherwise sp ec ified ab ov e.
Enquiries relating to Warranty claims for Rinnai products or services must be made by contacting Rinnai Australia.
Contact details are on the back of this document.
Warranty Conditions
1. This warranty applies to products, which are manufacture d on or a fter the date of publication of this warranty but
before the next date of publication of this warranty.
2. All terms of this warranty are effective from date of pur chase of the appliance(s) and the attending service person
reserves the right to verify this date by requesting proof of purchase. Where the date of purchase is not known,
this warranty will commence 2 months after the date of manufacture. The date of manufacture is stated on the
data plate of the appliance.
3. Appliances must be installed, used, maintained and serviced in accordance with this ‘Owners Operation’ manual
and local regulations.
4. Appliances must only be used for domestic purposes.
5. The warranty applies only to the components supplied by Rinnai. It does not apply to components supplied by
others, such as isolating valves and pipe work, but not limited to these.
6. Any inspection, service, repair or replacement activities associated with warranty on Rinnai products must be
authorised by Rinnai Australia before commencement.
7. Where the appliance has not been sited in accordance with the installation instructions or installed such that
normal service access is difficult, a service charge will apply. If, at the discretion of the attending service person,
access is deemed dangerous, service will be refused. Any work required to gain reasonable access to the
appliance will be chargeable by the attending service person.
8. Where a failed component is replaced under warranty, the balance of the original appliance warranty will remain
effective. The replacement part or appliance does not carry a new warranty.
9. Rinnai reserve the right to transfer functional components from defective appliances if they are suitable.
10.Rinnai reserve the right to have the product returned to the factory for inspection.
TABLE 1
Model Parts and Labour Warranty
GT Series 2 Years
WARRANTY
Page 31

Rinnai Australia - 29 - GT104BHBN/L & GT104BHSN/L OIM
Warranty Exclusions
No warranties except those implied and that by law cannot be excluded are given by Rinnai in respect of Goods
supplied. Where it is lawful to do so, the liability of Rinnai for a breach of a condition or warranty is limited to the
repair or replacement of the Goods, the supply of equivalent Goods, the payment of the cost of repairing or
replacing the Goods or acquiring equivalent Goods as determined by Rinnai.
The following exclusions may cause the warranty to become void and will result in a service charge and cost of
parts (if required):
1. Usage other than domestic purposes, such as in cafes, restaurants, commercial eateries and other usage
patterns above and beyond that of a typical family, but not limited to these.
2. Accidental damage and acts of God.
3. Failure due to abuse or misuse, improper maintenance, failure to maintain or improper storage.
4. Discolouration of metallic components due to heat.
5. Wear, general deterioration and corrosion as a result of improper storage, extreme weather or extreme local
atmospheric conditions.
6. Paint loss and any associated light corrosion of exposed metal as a result of normal use (typically caused by
scratching, impact or movement).
7. Failure due to incorrect or un authorised installations.
8. Failure or damage caused by alterations, service or repair work carried out by persons other than Rinnai service
persons or service agents.
9. Where it is found that there is no fault with the appliance and the issue is related to the install ation or is due to the
failure of gas supply.
10.Labour costs incurred due to a Rinnai service person or service agent performing checks which should have
been carried out by the customer in accordance with the Customer Instructions and where no fault is found.
(Code ID: RA 07.12_MAY - 09.05.12)
WARRANTY
Page 32

Rinnai Australia 30 TSD 14-025, OIM 2014 GT104BHB & GT104BHS Issue 2 - 22/6/16
Head Office
100 Atlantic Drive,
Keysborough, Victoria 3173
P.O. Box 460
Tel: (03) 9271 6625
Fax: (03) 9271 6622
National Help Line
Tel: 1300 555 545* Fax: 1300 555 655*
Spare Parts & Technical Info
Tel: 1300 366 388* Fax: 1300 300 141*
*Cost of a local call Higher from mobile or public phones.
Australia Pty. Ltd.
ABN 74 005 138 769
Internet: www.rinnai.com.au E-mail: enquiry@rinnai.com.au
123 45678 90123 4
Part No. P80140346A
Braeside, Victoria 3195
CONTACT INFORMATION
 Loading...