

Rinnai 650, 750 Installation Instruction
Rinnai - RNZ 12921-A (01:17) 1 RDV600/700ER Infill Panel - SR16-305 - Issue 1 Aug.2017
650 / 750 INFILL PANEL INSTALLATION INSTRUCTION
Kit Contents: Model: 650 - R2453
• Bracket side mount masonry x 2
• Screw 8x10 THPSZ Phil AB Zinc x 4
• Screw 8x 5/8 Mush Head 33611923 x 2
• Infill Panel R600 Galaxy x 1
• Instruction Infill Panel x 1
Kit Contents: Model: 750 - R2452
• Bracket side mount masonry x 2
• Screw 8x10 THPSZ Phil AB Zinc x 4
• Screw 8x 5/8 Mush Head 33611923 x 2
• Infill Panel R700 Galaxy x 1
• Instruction Infill Panel x 1
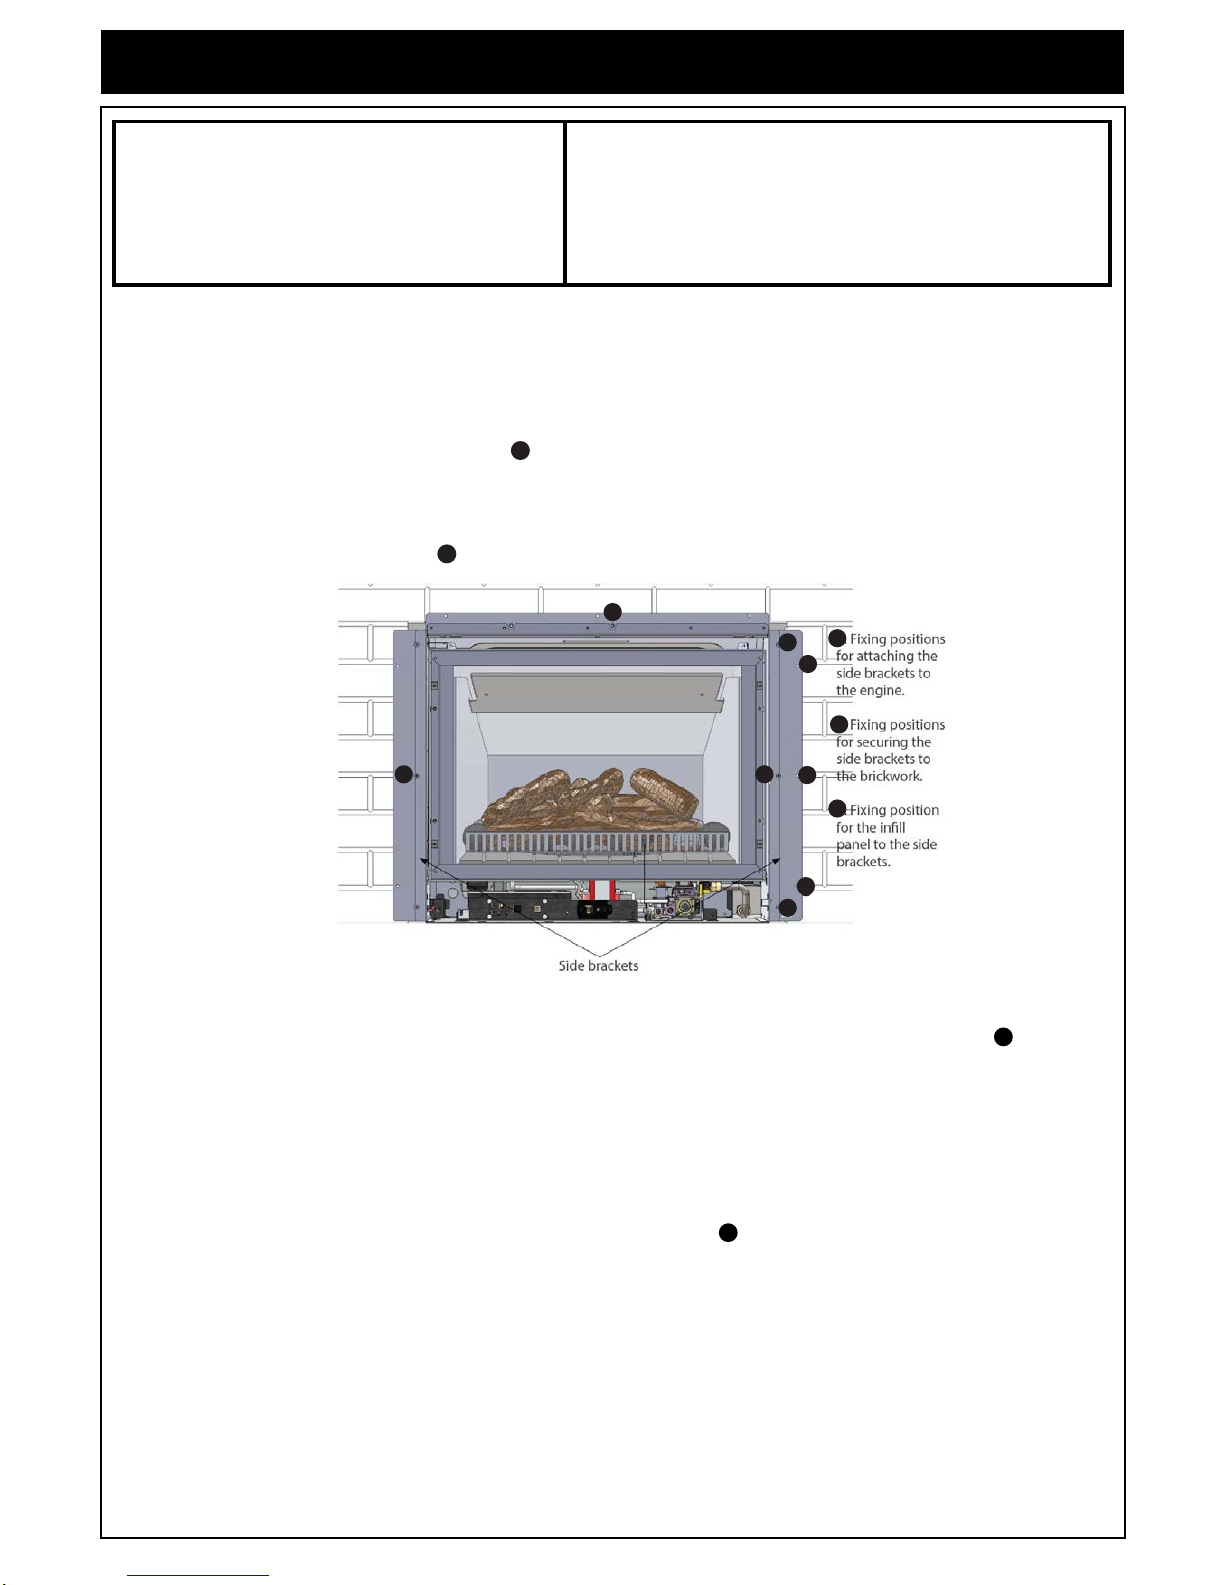
1. Position the Unit
• Place the unit in front of the enclosure.
2. Attach the two Infill Panel side brackets
• Attached the side brackets (included with the panel), with the screws provided, to the engine, using
the top and bottom fixing positions.
3. Slide the unit into the enclosure
• Slide the unit into the enclosure. Secure the side brackets, using the three (3) outer screw
positions on each bracket, to the brickwork using suitable fasteners (not provided).
4. Attach the Infill Panel
• Attach the infill panel to the side brackets using the middle screw position on either side .
Refer to images above, and also on the next page.
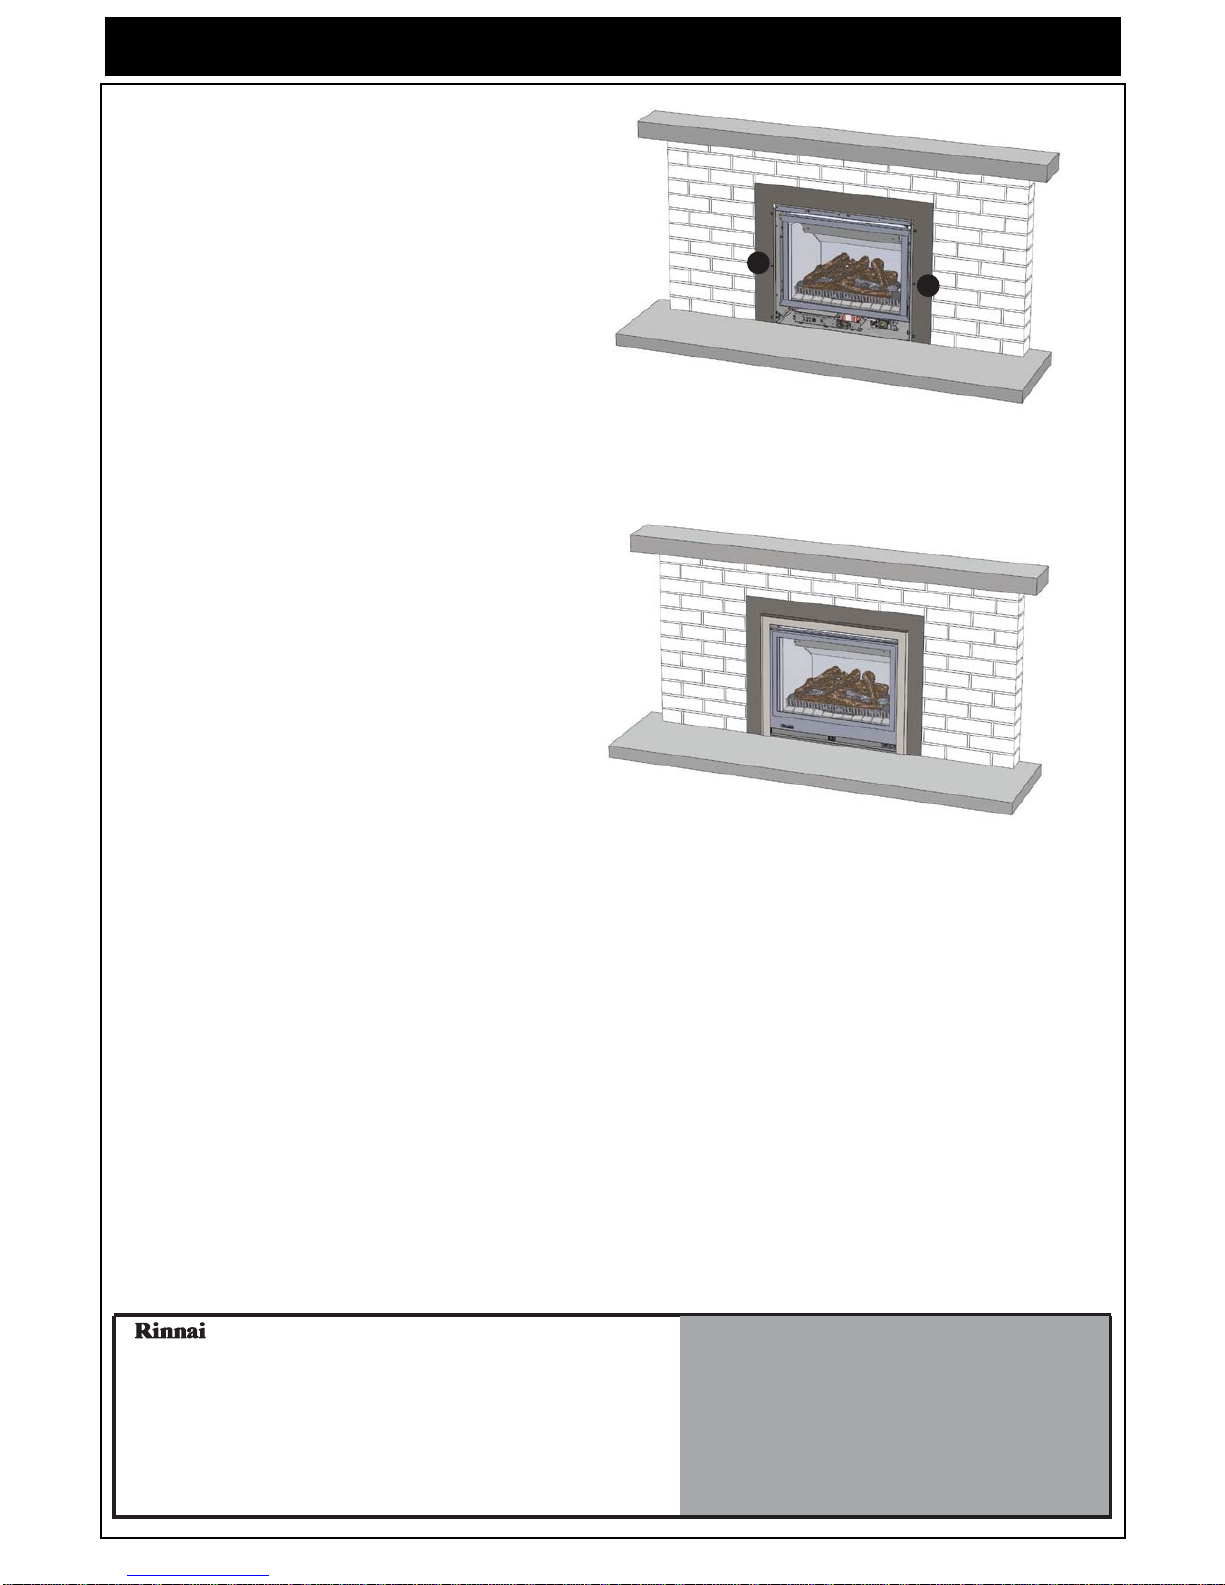
5. Attach the 3-sided Frame
• To install the 3-sided frame, position in front of the Engine and connect the CAT5 cable to the frame.
• Slide the two top frame hangers into the corresponding frame slots on the unit and push the lower
section into the recess of the Engine.
• Secure the top section, using the two (2) screws provided , via the three U-shaped fixing positions
on the frame.
• Secure the lower section in place using the two bottom side screws. Refer image on the next page.
a
b
a
a
a
cc
c
b
b
b
b
d
c
d
Rinnai - RNZ 12921-A (01:17) 2 RDV600/700ER Infill Panel - SR16-305 - Issue 1 Aug.2017
650 / 750 INFILL PANEL INSTALLATION INSTRUCTION
6. Infill Panel Installed
7. 3-Sided Frame & Fascia Installed
c
c
Head Office
100 Atlantic Drive,
Keysborough, Victoria 3173
P.O. Box 460
Braeside, Victoria 3195
Tel: (03) 9271 6625
Fax: (03) 9271 6622
National Help Line
Tel: 1300 555 545*
Fax: 1300 555 655*
*Cost of a local call Higher from mobile or public phones.
Hot Water Service Line Tel: 1800 000 340
Australia Pty. Ltd.
ABN 74 005 138 769
Internet: www.rinnai.com.au E-mail: enquiry@rinnai.com.au
 Loading...