

Precaution
Thank you for purchasing this digital instrument.For perfect operation and security,please
read the manual carefully and keep it for future reference.
Safety Precautions
CAUTION
RISK OF ELECTRIC SHOCK
DO NOT OPEN
The lightning flash with arrowhead symbol within an equilateral triangle is in
tended to alert the user to the presence of uninsulated dangerous voltage
within the product s enclosure that may be of sufficient magnitude to constitute a
risk of electric shock to persons.
The exclamation point within an equilateral triangle is intended to alert the user
to the presence of important operating and maintenance(servicing) instructions in
the literature accompanying the product.
Important Safety Instructions
1) Read these instructions.
2) Keep these instructions.
3) Heed all warnings.
4) Follow all instructions.
5) Do not use this apparatus near water.
6) Clean only with dry cloth.
7) Do not block any ventilation openings,install in accordance with the manufacturer s instructions.
8) Do not install near any heat sources such as radiators, heat registers,stoves,or other apparatus (including am
plifiers) that produce heat.
9) Do not defeat the safety purpose of the polarized or grounding-type plug.A polarized plug hase two blades
with one wider than the other.A grounding type plug has two blades and a third grounding prong.The wide blade
or the third prong are provided for your safety,if the provided plug does not fit into your outlet.consult an elec
trician for replacement of the obsolete outlet.
10) Protect the power cord from being walked on or pinched particularly at plugs.convenience receptacles,and
the point where they exit from the apparatus.
11) Only use attachments/accessories specified by the manufacturer.
12) Use only with the cart,stand,tripod,bracket,or table specified by the manufacturer,or sold with the
apparatus.When a cart is used,use caution when moving the cart/apparatus combination to avoid injury from
tip-over (Figure 1).
13) Unplug this apparatus during lightning storms or when unused for a long periods fo time.
14) Refer all servicing to qualified service personnel.Servicing is required when the apparatus has been dam
aged in any way,such as power-supply cord or plug is damaged,liquid has been spilled or objects have fallen
into the apparatus,the apparatus has been exposed to rain or moisture,does not operate normally,or has been
dropped.
(Figure 1)
WARNING:To reduce the risk of fire or electric shock,do not expose this apparatus to rain or moisture.
CAUTION:Apparatus shall not be exposed to dripping or splashing and no objects filled with
liquids,such as vases,shall be placed on the apparatus.

Thanks For Using Our Digital Piano
Your digital piano is a high-quality digital piano with 88 standard
touch sensitivity keyboard and combines the most advanced PCM
tone generation technology. This digital piano lets you record your
performances and Registration settings to a USB Disk. Each user
song lets you record up to sixteen independent tracks. In order to
obtain maximum performance and enjoyment, please read this
manual thoroughly while trying out the various features described.

Contents
Panel Control
Connectors
Using DC Power Jack
Using Headphones
Using Foot Pedals
Using MIDI IN/OUT Jack
Using Line IN/OUT Jack
Using MIDI Thru/In/Out Jack
Using Line In/Out Jack
USB-MIDI/USB AUDIO
Basic Operation
Standby/On Switch
Adjust the Volume
Demo Play
Voices
Dual Mode
Mixer
Playing Portable Grand Piano
Transpose
Tune
Tempo/Tap
Metronome
Touch
One Touch Setting
User Edit
Effect
Function
Split Voice Pan
Dual Voice Pan
Main Voice Octave
Split Voice Octave
Dual Voice Octave
Arpeggio
Midi In
Midi Out
Local
Reverb Type
Main voice Reverb Level
Split Voice Reverb Level
Dual Voice Reverb Level
Chorus Type
Split voice Chorus Level
............................................
Selecting a Voice
Keymode
............................................
...........................................
. ..........................................
Main Voice Pan
Main voice Chorus Level
................................
....................................
...................
.......................
.......................
............
.............
................
.............
............................
..................................
.......................
..................................
.........................
..................................
..........................................
......................................
.. ...................................
...................................
...................................
.......................
.....................................
........................................
...........................
...........................
...........................
......................
......................
......................
.....................................
.....................................
.....................................
..........................................
................................
.............
.............
.............
...............................
.............
.............
.......
.......
2
Dual voice Chorus Level
3
Pedal1 Control
3
Pedal2 Control
3
Main voice Track
3
Split voice Track
5
Dual voice Track
5
USB Speed
5
Play Mood
5
Left/right Hand
6
Auto Power Off
7
Auto Accompaniment
7
Selecting a Style
7
8
9
10
11
12
12
13
15
16
16
17
17
18
19
22
24
27
28
29
30
31
32
33
34
35
36
37
38
39
40
41
42
43
Start the Style
Stop the Style
Fade
Adding Fill-In
Adjusting the Accompaniment
Volume
User rhythm recording
Registration Memory
Load
Freeze Function
Saving the Registration Data
to USB Disk
Song Recording
Multi Track Recording
Delete Song
USB File Button
USB Volume
Chord Dictionary
Selecting the Chord Type
Exiting the Chord Dictionary
Teaching Function
3 Steps of Learning Feature
Factory Set
Appendix
Voice List
Style List
Percussion Voice List
MIDI Implementation Chart
Specifications
............................................
........................................
...........................................
Store
...........................................
Quick Recording
Selecting the Chord Root
Left/Right Hand
.......................................
Assemble Draft
.............................
.............................
...........................
..................................
..................................
...........................
...........................
..............................
..............................
..............................
...........................
..... ............ ................
..............................
.................................
................................
....................................
.....................................
.....................................
..............................
............................
...............
..........................
..........................
...................
..........................
....................
....................
..........................
..................
..........................
..........................
..............
. .............
........
........................
..........................
..........
...................
..........
44
45
46
48
49
50
51
52
53
54
55
56
57
58
59
59
60
60
61
61
61
62
62
64
64
66
68
68
68
69
69
69
69
70
70
70
73
74
74
77
79
80
81
82
DC 12V
ACC.
VOLUME
TRANS.
TUNE
BASS
TREBLE
TEMPO/ TAP
FILLIN 1
STORE/ BANK
MASTER
VOLUME
FADE
SYNCHRO
INTRO
METRONOME
DATACONTROL
NUMBER
MIXER
KEYMODE
ENDING
START
STOP
FILLIN 2
VARIATIO N
O.T.S
FUNCTION
ENTER
TG8862
VOICE PIANO
ORGAN GUITAR
BASS
USERVOICE
STYLE
8BEAT
BALLAD
DANCE
DISCO
USERSTYLE
M1
M2
M3
M4
M5
1 2 3 4 5
6 7 8 9 0
DUAL
GRANDPIANO
FREEZE
TOUCH
DEMO/ LEARN
CHORD
DICTIONARY
USEREDIT
REVERB
CHORUS
USBFILE
RECORD
PLAY/ LOAD
SAVETO
MULTI
DELETE
STORE / BANK
DATACONTROL
NUMBER
VOICE PIANO
ORGAN
GUITAR
BASS
USER VOICE
STYLE
8BEAT
BALLAD
DANCE
DISCO
USER STYLE
M1 M2 M3 M4 M5
1 2 3 4 5
6 7 8 9 0
DUAL
GRAND PIANO
FREEZE
TOUCH
DEMO / LEARN
CHORD
DICTIONARY
USER EDIT
REVERB
CHORUS
USB FILE
RECORD
PLAY/ LOAD
SAVETO
MULTI
DELETE
+
-
I
I
I
I
I
I
I
I
I
I
I
I
I
I
I
I
I
I
I
I
I
I
I
I
I
I
I
I
I
I
I
I
I
I
I
I
I
I
I
I
I
I
I
I
I
I
I
I
I
I
I
I
I
I
I
I
I
I
I
I
I
I
I
I
I
I
I
I
I
I
I
I
I
I
I
I
I
I
I
I
I
I
I
I
I
I
I
I
I
I
I
I
I
I
I
I
I
I
I
I
I
I
I
I
I
I
I
I
I
I
ACC.
VOLUME
TRANS.
TUNE
BASS
TREBLE
TEMPO / TAP
FILL IN 1
MASTER
VOLUME
FADE
SYNCHRO
INTRO
METRONOME
MIXER
KEYMODE
ENDING
START
STOP
FILL IN 2
VARIAT IO N
O.T.S
FUNCTION
ENTER
+
-
I
I
I
I
I
I
I
I
I
I
I
I
I
I
I
I
I
I
I
I
I
I
I
I
I
I
I
I
I
I
I
I
I
I
I
I
I
I
I
I
I
I
I
I
I
I
I
I
I
I
I
I
I
I
I
I
I
I
I
I
I
I
I
I
I
I
I
I
I
I
I
I
I
I
I
I
I
I
I
I
I
I
I
I
I
I
I
I
I
I
I
I
I
I
I
I
I
I
I
I
I
I
I
I
I
I
I
I
I
I
LINE OUT
LR
LINE IN
MIDI INMIDI OUT
MIDI THRU
PEDAL
USB TO HOST
DC 12V
LINE OUT
LR
LINE IN
MIDI IN
MIDI OUT
MIDI THRU
PEDAL
USB TO HOST
LINE IN
MIDI IN
MIDI THRU
USB TO HOST
CHORUS
SAVETO
REVERB
PLAY/ LOAD
DELETE
32
RECORD
USER EDIT
MULTI
CHORD
USB FILE
DICTIONARY
21
24 25 26 27 28
23
22
20
GRAND PIANO
DUAL
USER VOICE
BASS
GUITAR
ORGAN
VOICE
DC 12V
LINE OUT
39 40 41
LINE IN
DC 12V
38
MIDI IN
MIDI OUT
MIDI THRU
35 36 37
34
USB TO HOST
PEDAL
16
FUNCTION
KEYMODE
MIXER
TRANS.
METRONOME
TEMPO / TAP
4 5 6 7 8 9
FADE
USER STYLE
DISCO
DANCE
BALLAD
8 BEAT
18
TUNE
31
DEMO / LEARN
30
TOUCH
FREEZE
29
STORE / BANK
19
DATACONTROL
17
ENTER
O.T.S
FILL IN 2
VARIAT IO N
FILL IN 1
START
INTRO
ENDING
10 11 12 13 14 15
33
3
I
I
USBTO DEVICE
CHORUS
SAVETO
REVERB
PLAY/ LOAD
DELETE
RECORD
USEREDIT
MULTI
CHORD
USBFILE
DICTIONARY
GRANDPIANO
DEMO/ LEARN
TOUCH
FREEZE
NUMBER
M5
USERSTYLE
USERVOICE
M4
BASS
DISCO
M3
DANCE
M2
ORGAN
BALLAD
M1
8BEAT
VOICE
STORE/ BANK
DATACONTROL
ENTER
FUNCTION
KEYMODE
MIXER
FILLIN 2
VARIATION
TUNE
TRANS.
FILLIN 1
STOP
START
METRONOME
INTRO
ENDING
TEMPO/ TAP
FADE
SYNCHRO
TREBLE
I
I
I
I
I
I
I
I
I
I
ACC.
VOLUME
I
I
I
I
I
MASTER
I
I
I
I
I
TREBLE
I
I
I
BASS
I
I
I
2
I
I
ACC.
VOLUME
MASTER
VOLUME
1
42
1
2
1

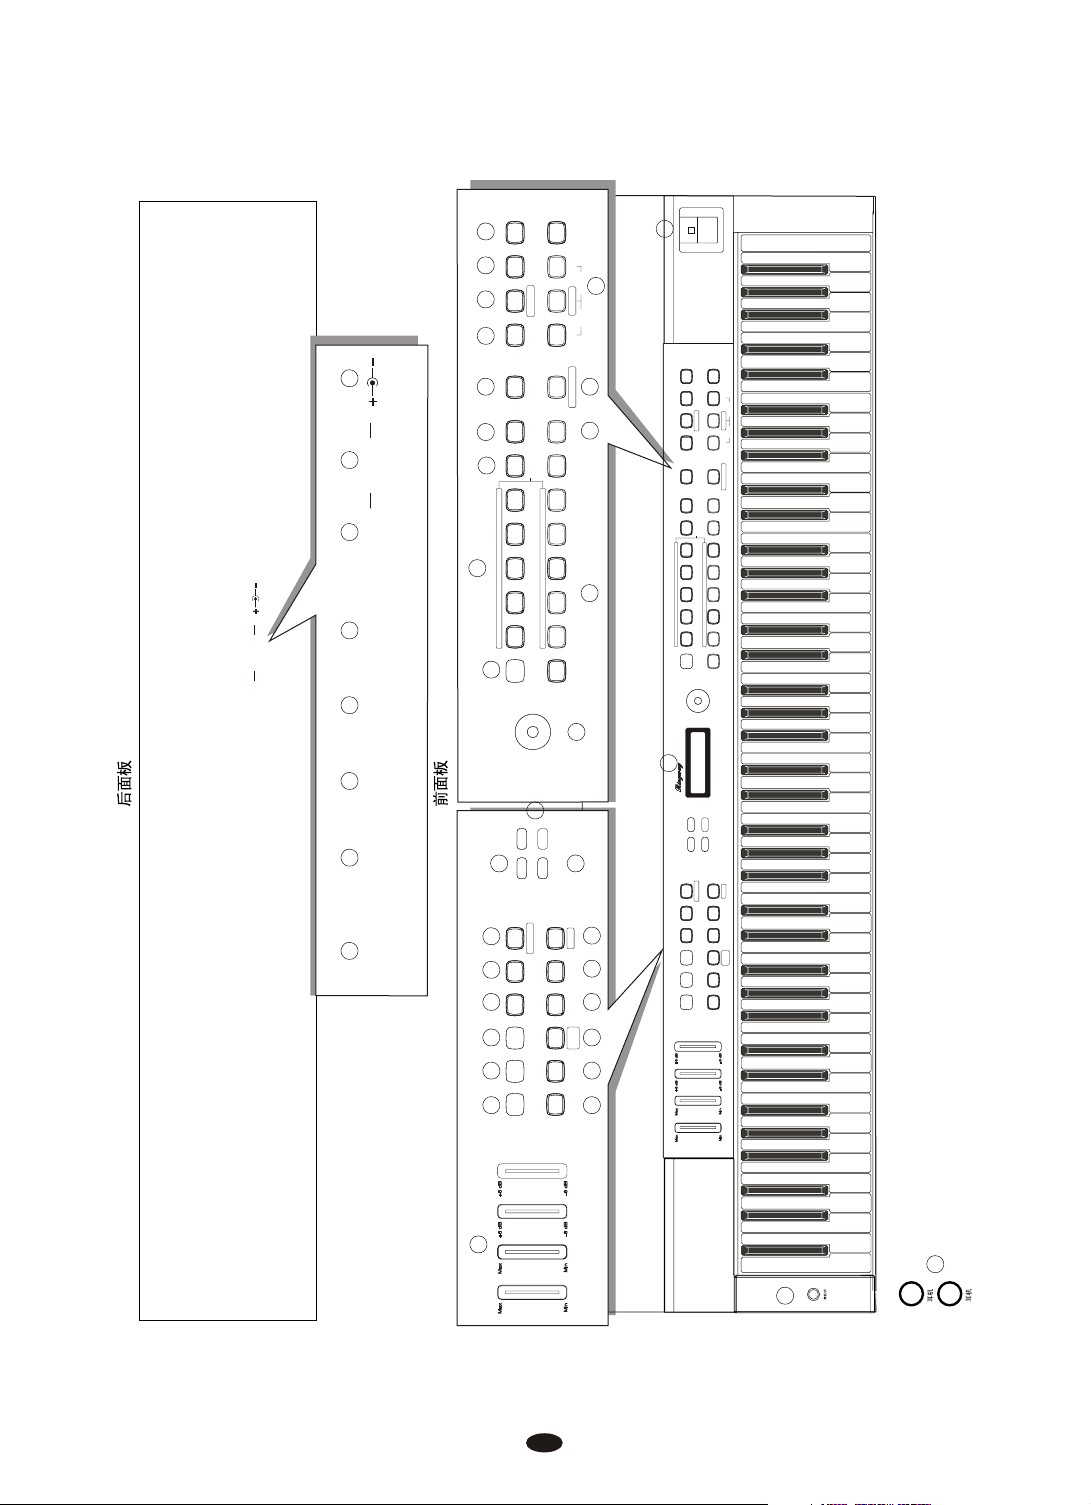
Panel Contents
Top Panel
1. STANDBY/ON
2. MASTER VOLUME
ACC.VOLUME
BASS/TREBLE
3. LCD DISPLAY
4. [FADE] Button
5. [TEMPO/TAP] Button
6. [METRONOME] Button
7. [TRANS./TUNE] Button
8. [MIXER] Button
9. [KEYMODE] Button
10. [SYNCHRO] Button
11. [INTRO/ENDING] Button
12. [START/STOP] Button
24. [GRAND PIANO] Button
25. [CHORD DICTIONARY] Button
26. [USER EDIT] Button
27. [REVERB] Button
28. [CHORUS] Knob
29. [STORE/BANK] Buttons
[M1~M5] Button
[FREEZE] Button
30. [TOUCH] Buttons
31. [DEMO/LEARN] Button
32. [USB FILE] Button
[RECORD] Button
[PLAY/LOAD] Button
[SAVE TO] Button
33.USB TO DEVICE
13. [FILL IN 1] Button
14. [FILL IN 2/VARIATION] Button
15. [O.T.S] Button
16. [FUNCTION] Button
17. [ENTER] Button
18. [+/ -] Button
19. [DATA CONTROL] Button
20. [VOICE/STYLE] Button
21. VOICE and STYLE SELECT/
Number 0~9 Button
22. [NUMBER ] Button
23. [DUAL ] Button
Rear
Panel
34
. PEDAL Jack
35. USB TO HOST Jack
36. MIDI THRU Jack
37. MIDI OUT Jack
38. MIDI IN Jack
39. LINE OUT Jack
40. LINE IN JACK
LINE OUT(R/L)
41. DC 12V Jack
42. PHONES Jack
2
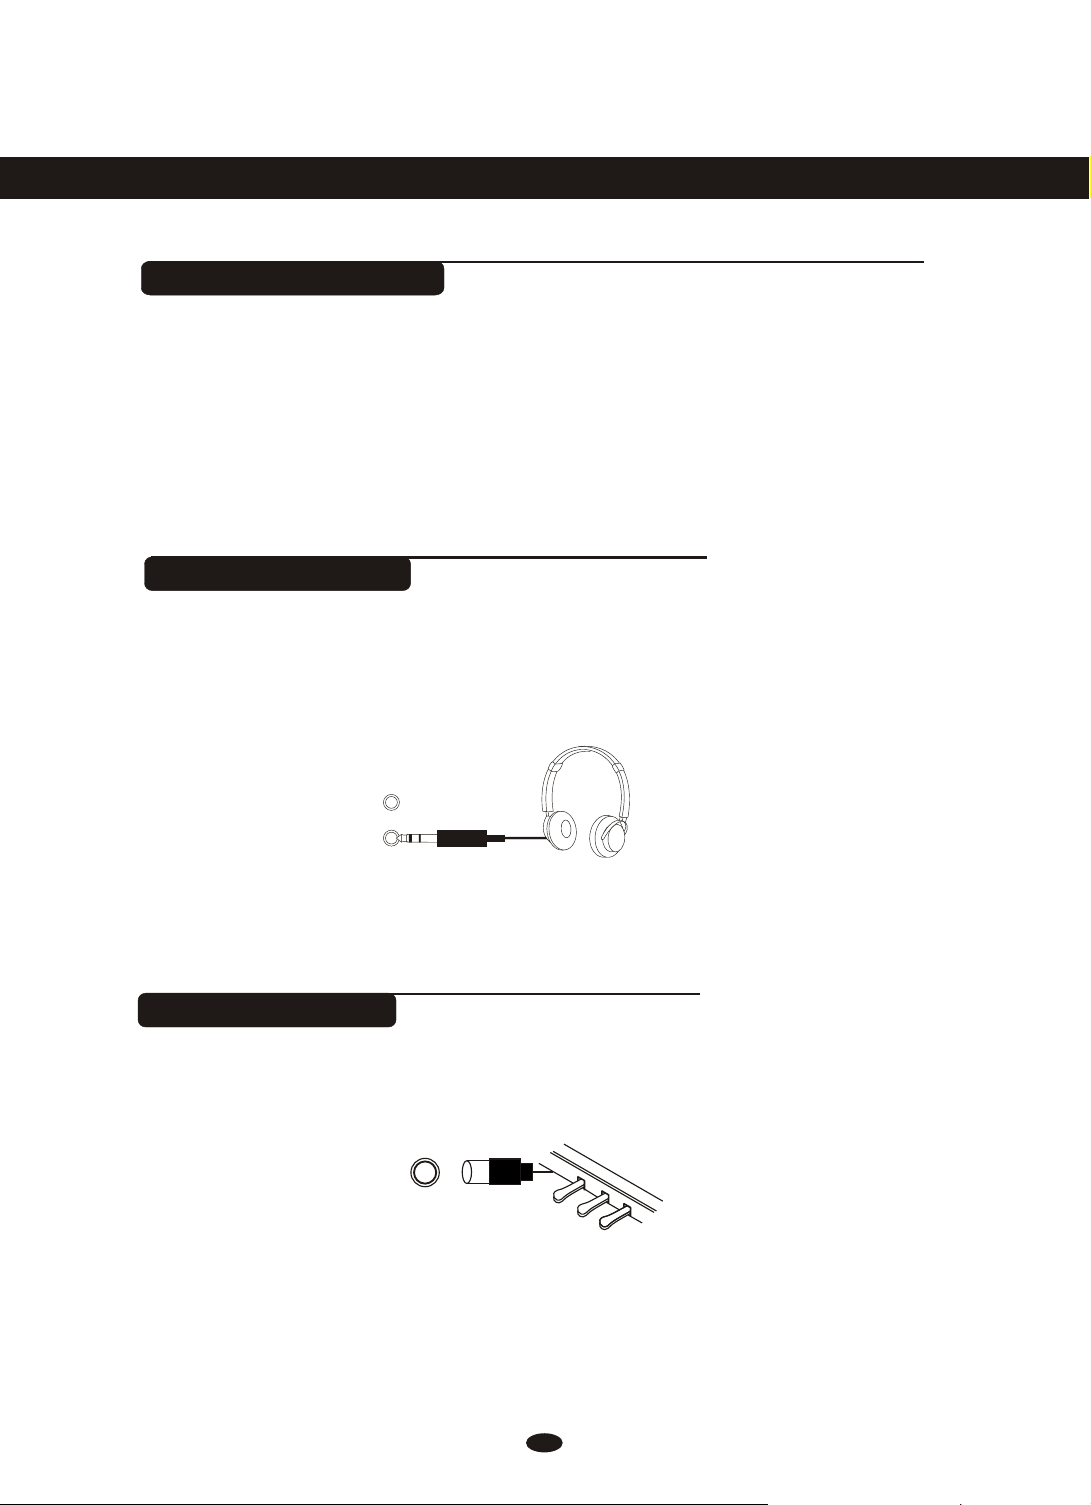
Connectors
Using DC Power Jack
Plug the DC output cable from the provided power adapter into DC IN jack in the
bottom panel of your instrument, then plug the AC cable of your power adapter into
the AC power socket. Please confirm your country’s Mains voltage is compatible
with the supplied power adaptor. Most of the world’s electrical supply is 220v or
240v 50Hz - Some countries such as the USA are on 110v / 60Hz.
Using Headphones
Two sets of standard stereo headphones can be plugged in here for private
practice or late-night playing. The internal speaker system is automatically shut
off when a pair of headphones is plugged into PHONES jacks.
PHONES 2
PHONES 1
Using Foot Pedals
Connect the plug of the foot pedal unit to the pedal jack on the rear panel.
3
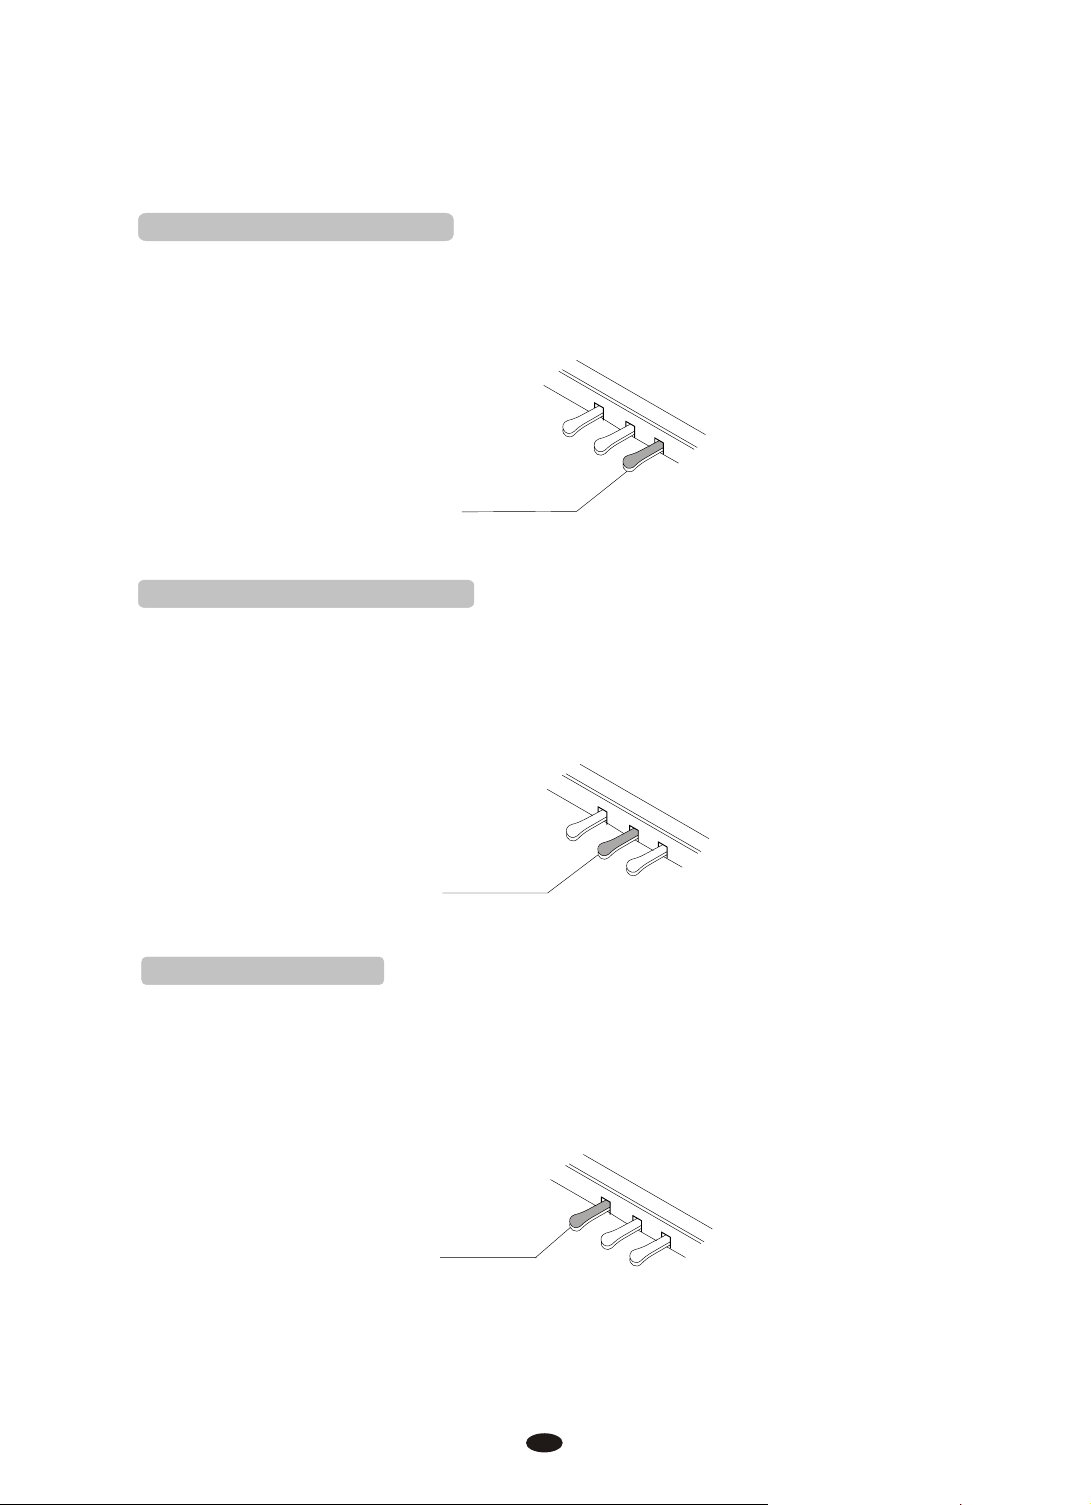
1. Damper Pedal (Right)
It performs the same function as the damper pedal on an actual acoustic piano,
letting you sustain the sound of the voices even after releasing your fingers from
the keys.
SUSTAIN
2. Sostenuto Pedal (Center)
If you play a note or chord on the keyboard and press the sostenuto pedal while
the notes are held, those notes will be sustained as long as the pedal is held, but
all subsequently played notes will not be sustained.
SOSTENUTO
3. Soft Pedal (Left)
The Soft Pedal controls the sound volume. Press the pedal to decrease the
output sound volume.
SOFT
4
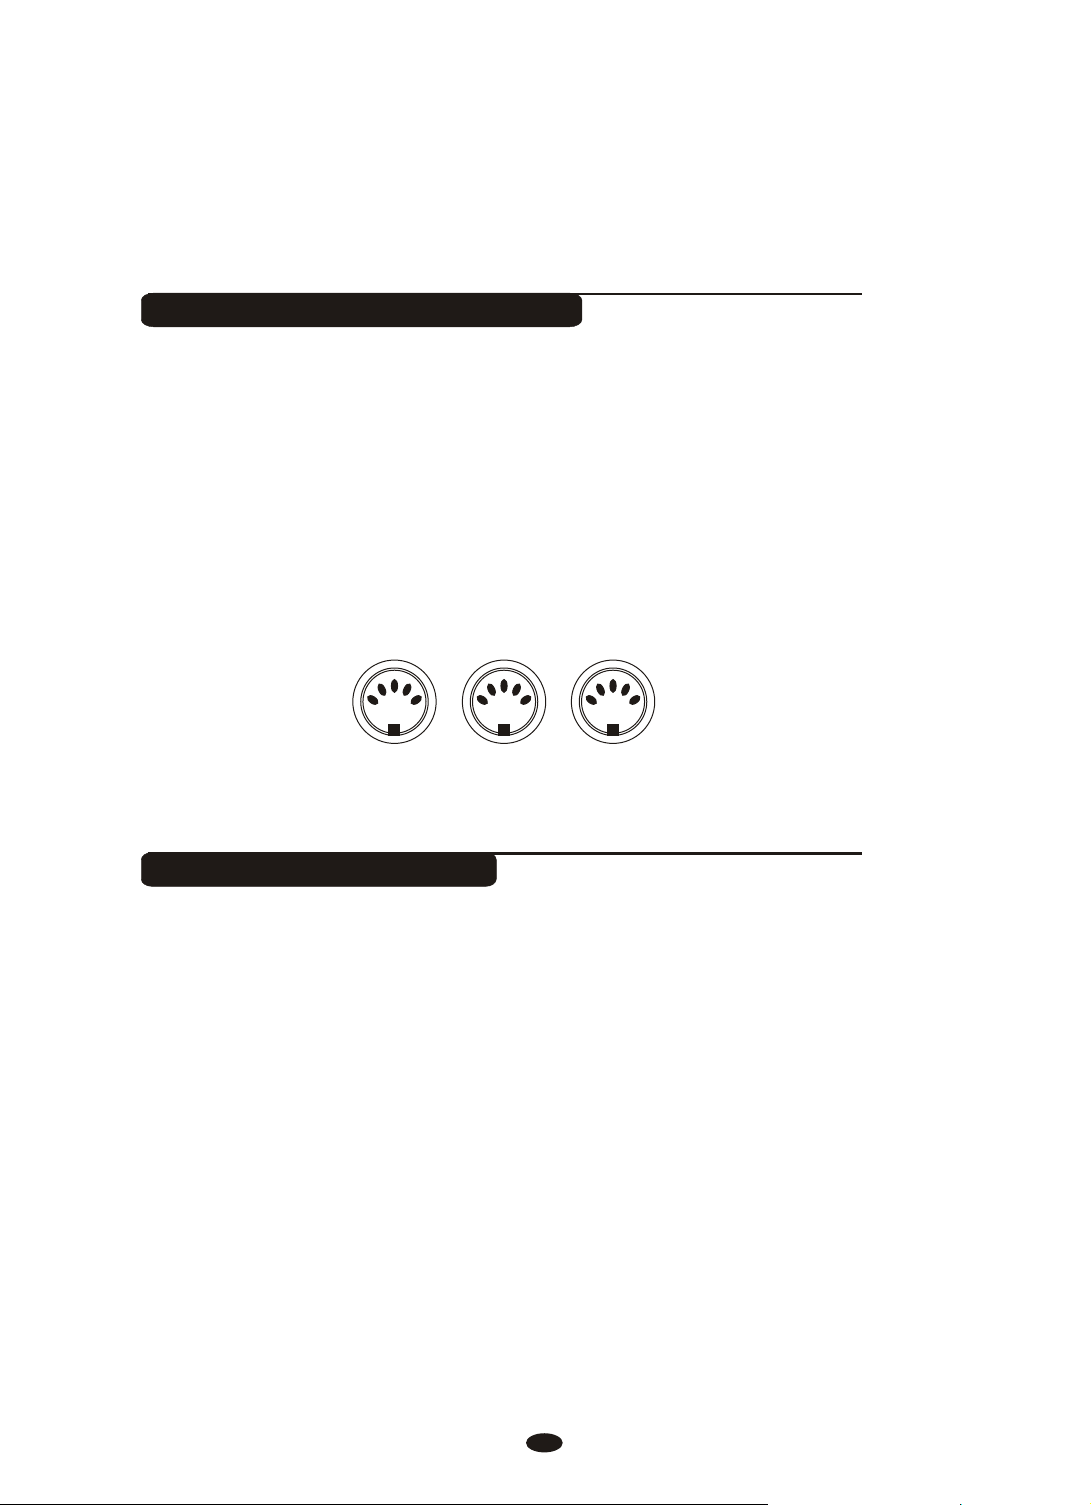
Using MIDI THRU/IN/OUT Jack
MIDI IN
MIDI OUT
MIDI THRU
The Midi In connector receives the Midi data from an external Midi device.
The Midi Out connector transmits Midi data generated by the instrument to
other Midi instruments.
The Midi THRU connector retransmits any data from the Midi In directly to
other Midi devices.
Using Line IN/OUT Jack
The audio output from other sound system connected to the LINE IN jack on
the bottom panel can be mixed with the sound of the unit. This function is
convenient when you want to play along with a favourite song.
The Line out jack can be used to deliver the output of the piano to a keyboard
amplifier, stereo sound system, mixing console or tape recorder.
5
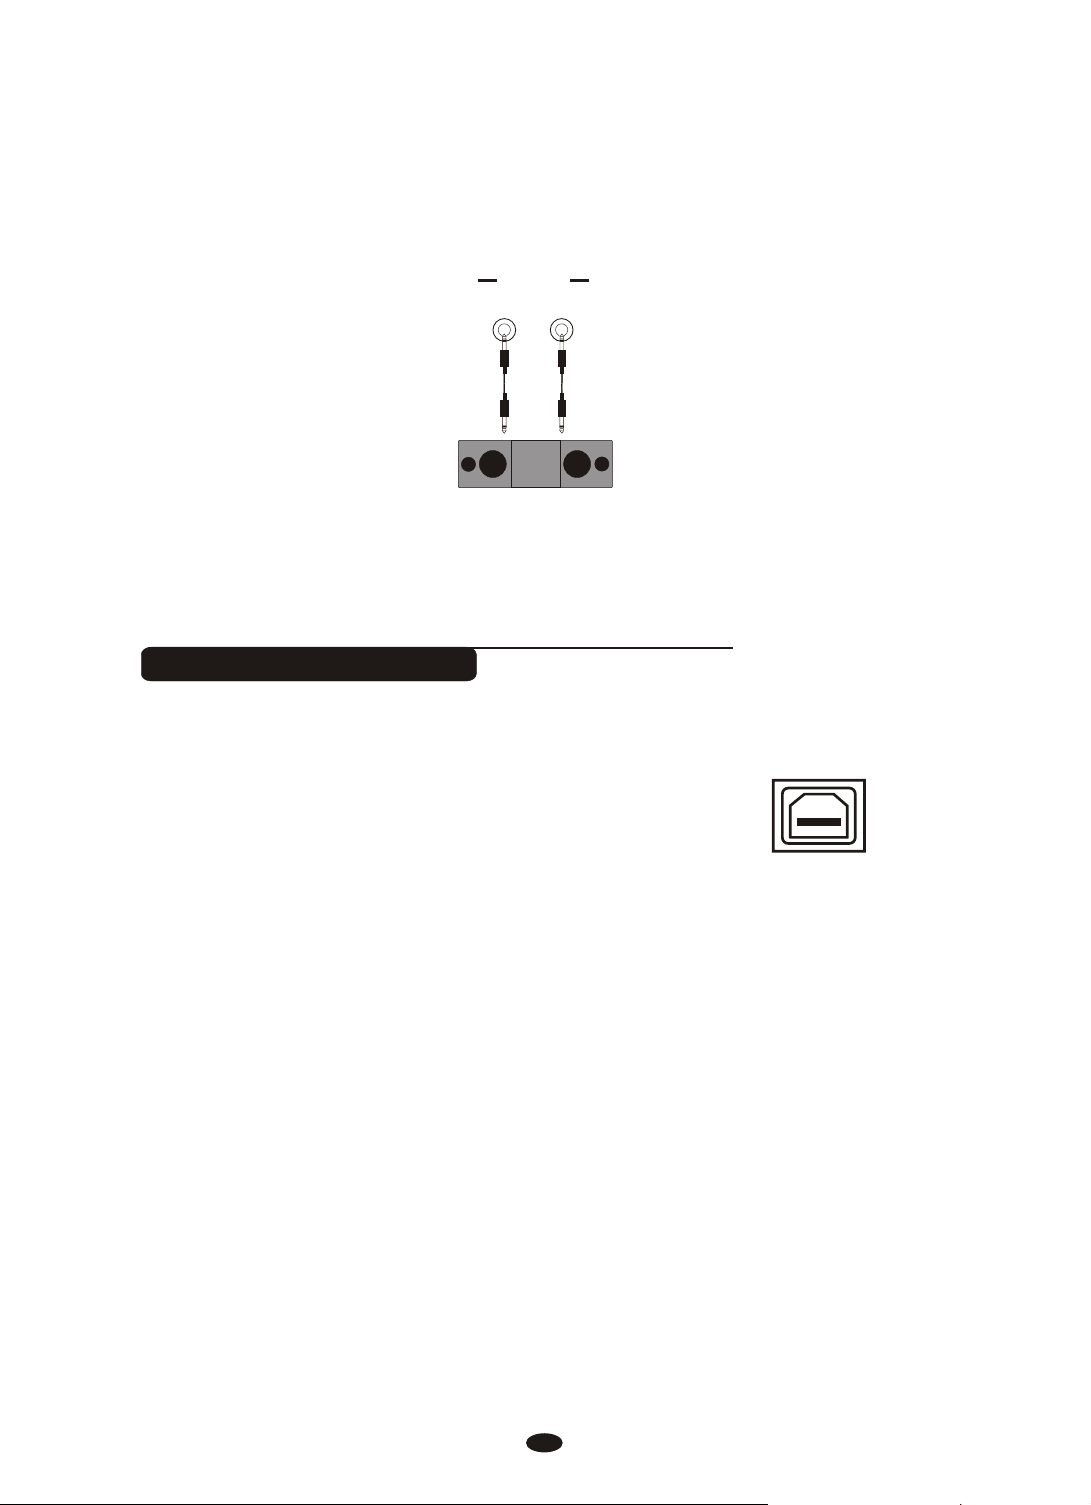
USB-MIDI/USB AUDIO
USB
TO HOST
LINE OUT
LR
This product allows the transfer of MIDI over USB.
USB
There is a specific way in which the MIDI signals are
TO HOST
routed for maximum flexibility. In a standard Digital
Piano, the built-in keyboard sends MIDI signals to the
internal sound bank as well as the 5-pin MIDI output.
In this digital piano, the keyboard not noly sends MIDI
to the internal sound bank (just like normal) but also
sends MIDI simultaneously to the internal MIDI
connection which hooks up inside the device to the
Audio Interface.
It is the Audio Interface that controls the USB-MIDI.
USB AUDIO interface is a digital audio interface. By USB cable, you can digitally
transfer intact audio signals of PC to
or use it for accompany
when you play this instrument; likewise, you can transfer
this instrument, and enjoy it on this instrument
intact audio signals of the instrument to PC to record and edit music.
6
Basic Operation
ACC.
VOLUME
BASS
TREBLE
MASTER
VOLUME
I
I
I
I
I
I
I
I
I
I
I
I
I
I
I
I
I
I
I
I
I
I
I
I
I
I
I
I
I
I
I
I
I
I
I
I
I
I
I
I
I
I
I
I
I
I
I
I
I
I
I
I
I
I
I
I
I
I
I
I
I
I
I
I
I
I
I
I
I
I
I
I
I
I
I
I
I
I
I
I
I
I
I
I
I
I
I
I
I
I
I
I
I
I
I
I
I
I
I
I
I
I
I
I
I
I
I
I
I
I
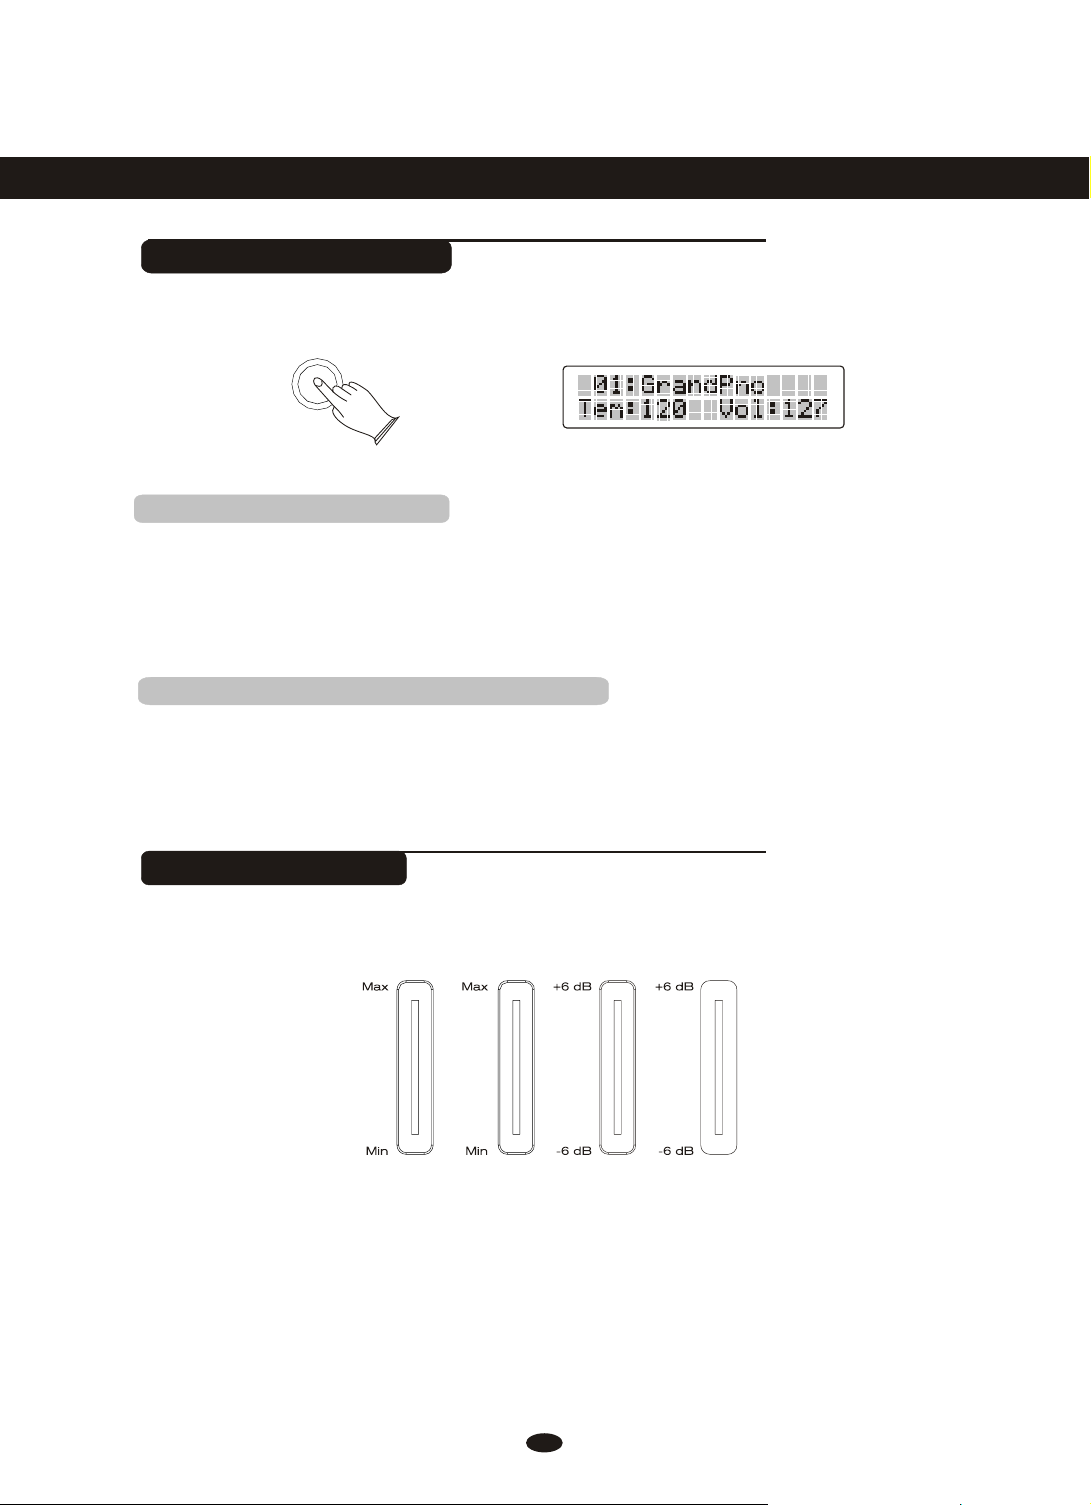
STANDBY/ON Switch
Turn the power on by pressing the [STANDBY/ON] switch, the panel LCD display
will light.
STANDBY/ON
1.AUTO STANDBY
This product will switch off automatically in 30 minutes after no any operation
on it. In this case, press the [standby/on] button to off mode, and press the
[STANDBY/ON] button again to turn the power switch on.
2.Deactivate the AUTO STANDBY function
Hold the first white key and first black key on the left
side of the keyboard at the same time and then turn on
the unit to deactivate the AUTO STANDBY function.
Adjust the Volume
Use [MASTER VOLUME] control to adjust the volume to your desired level.
I
MASTER
I
ACC.
VOLUME
I
I
I
7
I
I
I
TREBLE
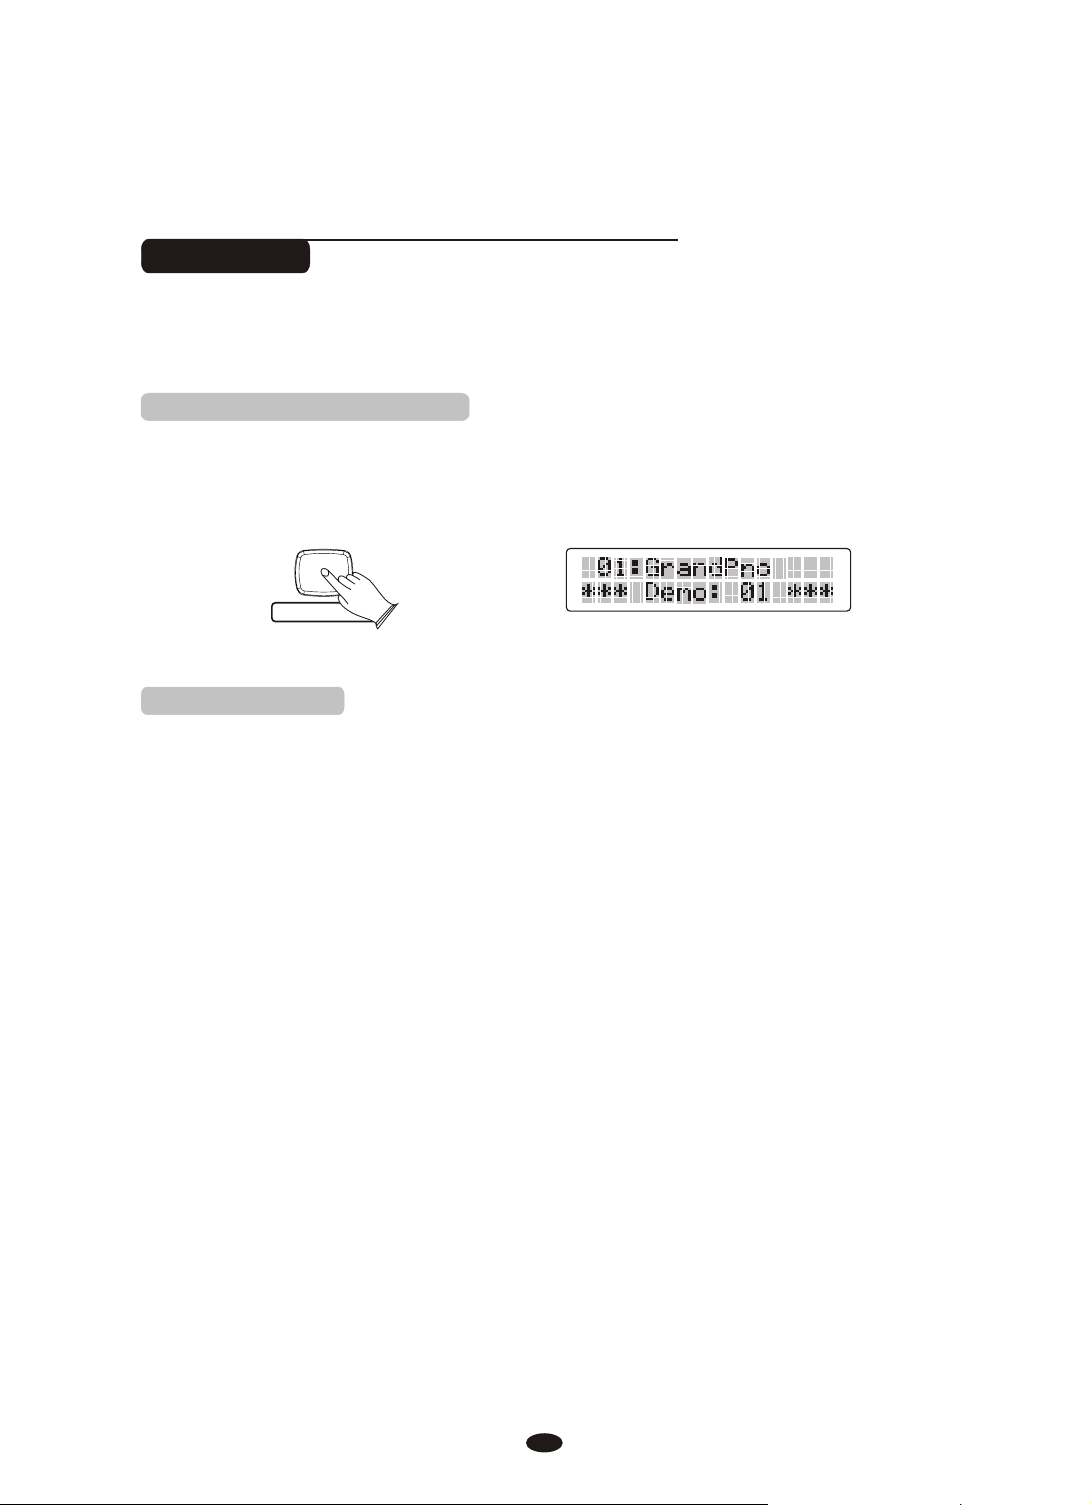
Demo Play
DEMO / LEARN
There are 16 demo songs that you can play individually. Here's how you can
select and play the demo songs .
1. Listen to the Demo Song
Press [DEMO/LEARN] button to play the demo songs in sequence. Use [+/-]
buttons or [DATA CONTROL] knob to select the number of the song you want to
play.
2. Stop Playing
Press [DEMO/LEARN] button again to stop playing.
8
Voices
PIANO
PIANO
8 BEAT
8 BEAT
1 2 3 4 5
1 2 3 4 5
6
6
NUMBER
NUMBER
ORGAN
ORGAN
GUITAR
GUITAR
BASS
BASS
USER VOICE
USER VOICE
BALLAD
BALLAD
DANCE
DANCE
DISCO
DISCO
USER STYLE
USER STYLE
7
7
8
8
9
9
0
0
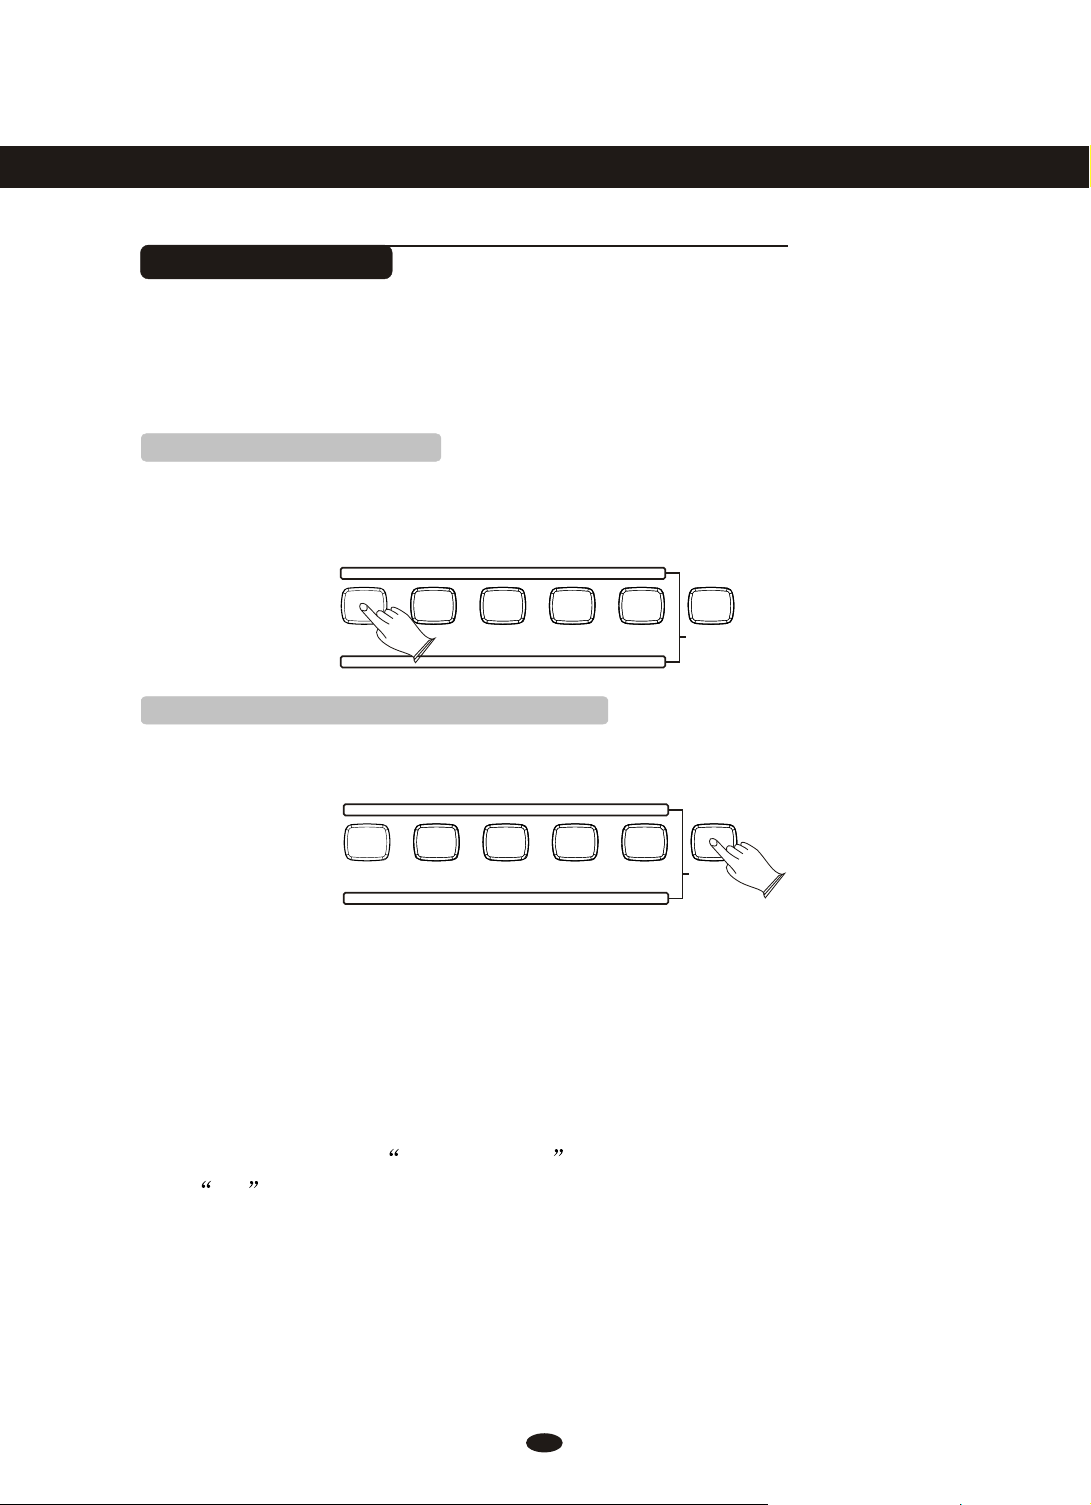
Selecting a Voice
Your instrument has 479 voices,include 128(01-128) GM standard voices.
You can use the voice button on the panel, use
[DATA CONTROL] knob
to select voice.
1.Selecting Voice Directly
When the [VOICE/STYLE] button is unlighted, means your piano is in Voice
mode, now you can use the voice button on the panel to select voice directly, the
first row of buttons below as the direct sound.
8 BEAT
BALLAD
GUITAR
2.Use Number Button and [+/-] Buttons
Press the [NUMBER] button, the indicator light color is red. Now you can use
number 0~9 or [+/-] Buttons to select voice.
[+] / [-] buttons or
USER VOICE
USER STYLE
NUMBER
NUMBER
8 BEAT
ORGAN
BALLAD
GUITAR
USER VOICE
USER STYLE
Voice 01~09 :press number 0 first, then press 1~9
Voice 10~99 : press two numeric buttons directly, for example: to select 99
press the number 9 button and then the number 9 to select the
sound.
Voice 100~479: press the number Press 1 to 4 of a button and hold it until
the number appears on the display, then you can enter the tens
and ones digits.
For example: to select 123 Sea Shore press number 1 button and hold it
until 1_ appears, then press the number 2 and the number 3 buttons to select
the sound.
You also can press the [+/- ] buttons until the desired voice appears on the display.
9
DUAL
3.Use Data Control Knob
In the Voice Mode, clockwise or counterclockwise rotation [DATA CONTROL],
can quickly select the Voice.
Clockwise rotation is increasing rapidly, counterclockwise rotation for the rapid
decline.
NOTE
When [VOICE/STYLE] button is unlighted, it meams the current selection
in VOICE mode .
When [VOICE/STYLE] button is lighted, it meams the current selection in
STYLE mode .
When [NUMBER] button is unlighted, it meams the current selection in
direct VOICE or STYLE mode.
When [NUMBER] button is lighted, it meams the current selection in
NUMBER SELECT mode .
Dual Mode
In dual mode two voices may be played simultaneously, each at selected volumes.
press [DUAL] button and the
select the second voice.No operation in 4 seconds, the display will be returned to
the Main Voice mode.
To adjust the volume of the Dual Voice, please refer to D.Volume in MIXER
function. P11
Press [DUAL] button again
indicator is flashing, then press the voice button to
to exit.
10
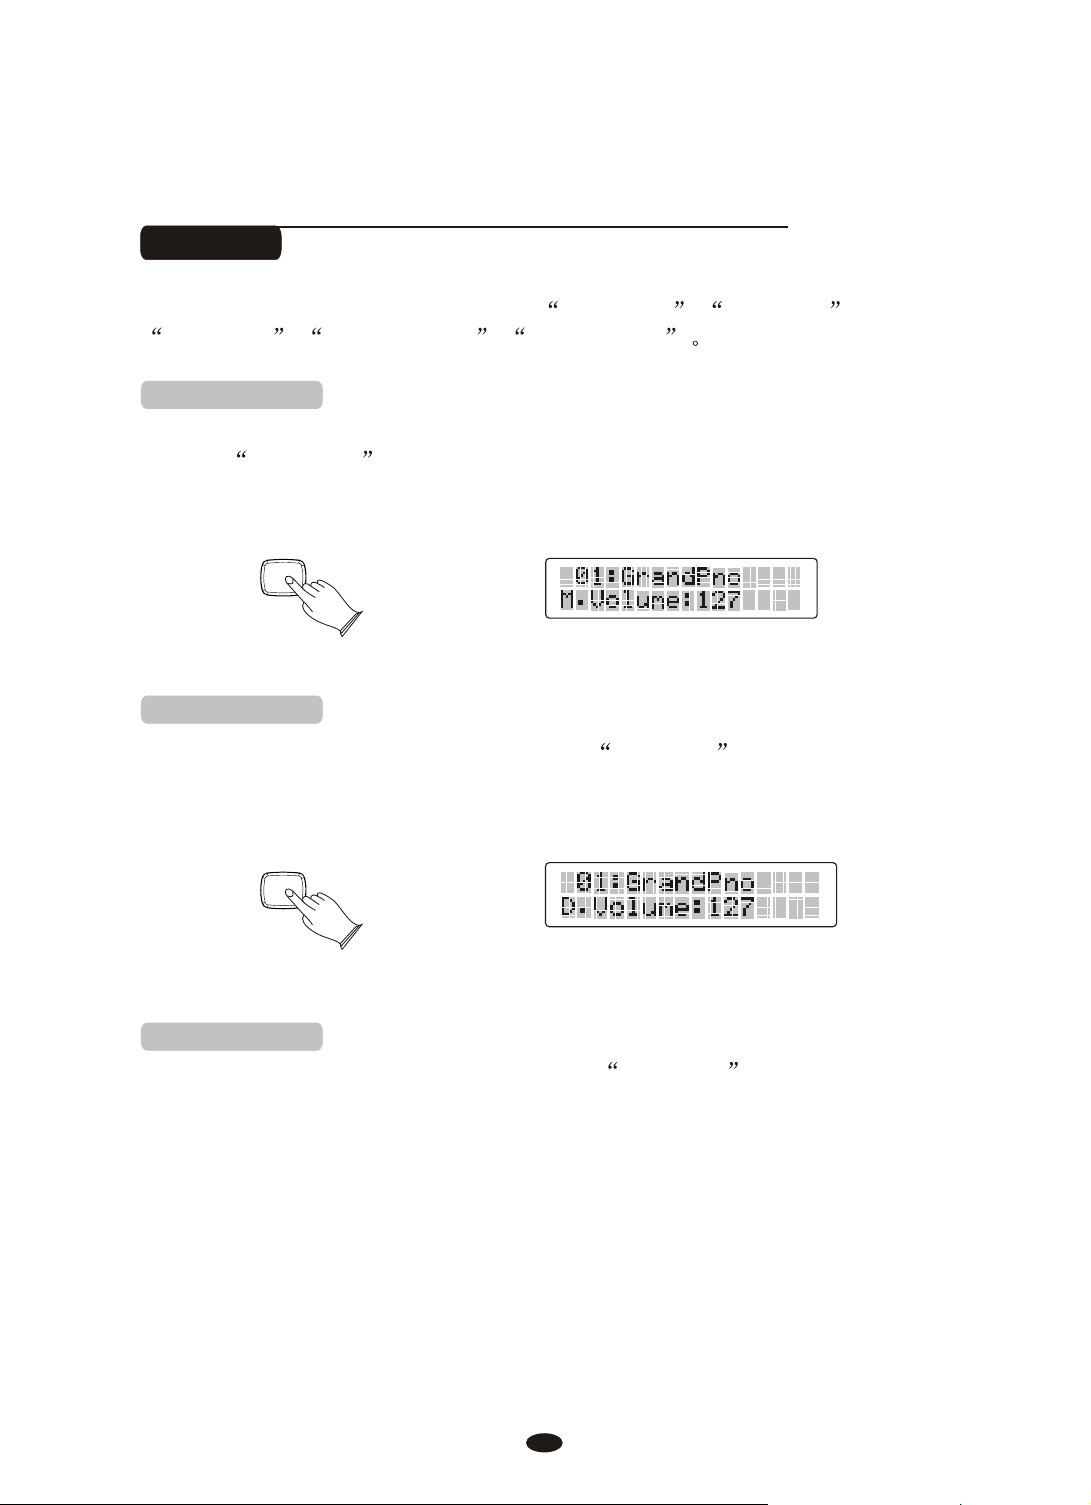
Mixer
MIXER
MIXER
Press [MIXER]button ,you can select MM.Volume , S.Volume ,
D.Volume , Metro Volume , USB Volume
1. M.Volume
When not in Dual mode or Split mode, press the [MIXER] button repeatedly
to select
.Volume , then use [Data Control] knob
to set the Main Volume. Range: 00~127. Default: 127.
2. S.Volume
[+/-] Buttons or
ress the [MIXER] button repeatedly to select S.Volume , indicator
P
is flashing, then use [Data Control] knob to set the main
[+/-] Buttons or
the
volume. Range: 00~127. Default: 127.
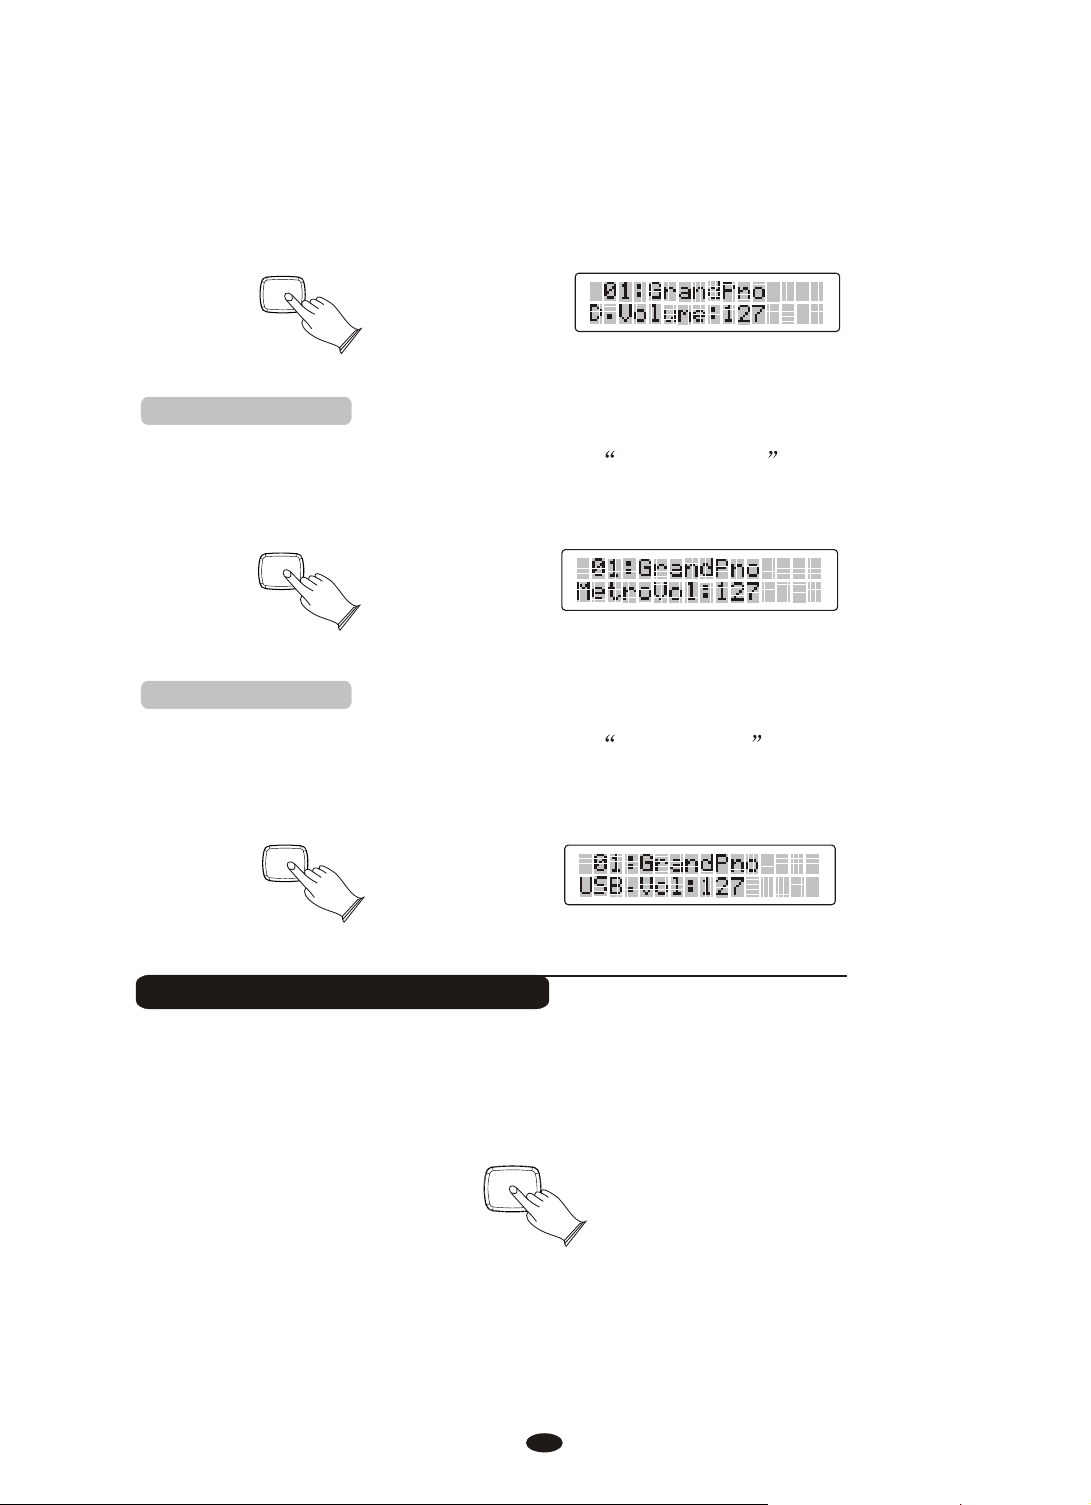
3. D.Volume
ress the [MIXER] button Repeatedly to select D.Volume , indicator
P
is flashing, then use [Data Control] knob to set the Main
[+/-] Buttons or
the
Volume. Range: 00~127. Default: 127.
11
MIXER
MIXER
MIXER
GRAND PIANO
4. Metro Volume
Press the [MIXER] button Repeatedly to select Metro.Volume , then use
Buttons or
[Data Control] knob to set the Main Volume. Range: 00~127.
Default: 100.
MIXER
5. USB Volume
Press the [MIXER] button Repeatedly to select USB Volume , then use
Buttons or
[Data Control] knob to set the Main Volume. Range: 00~127.
[+/-]
Default: 100.
MIXER
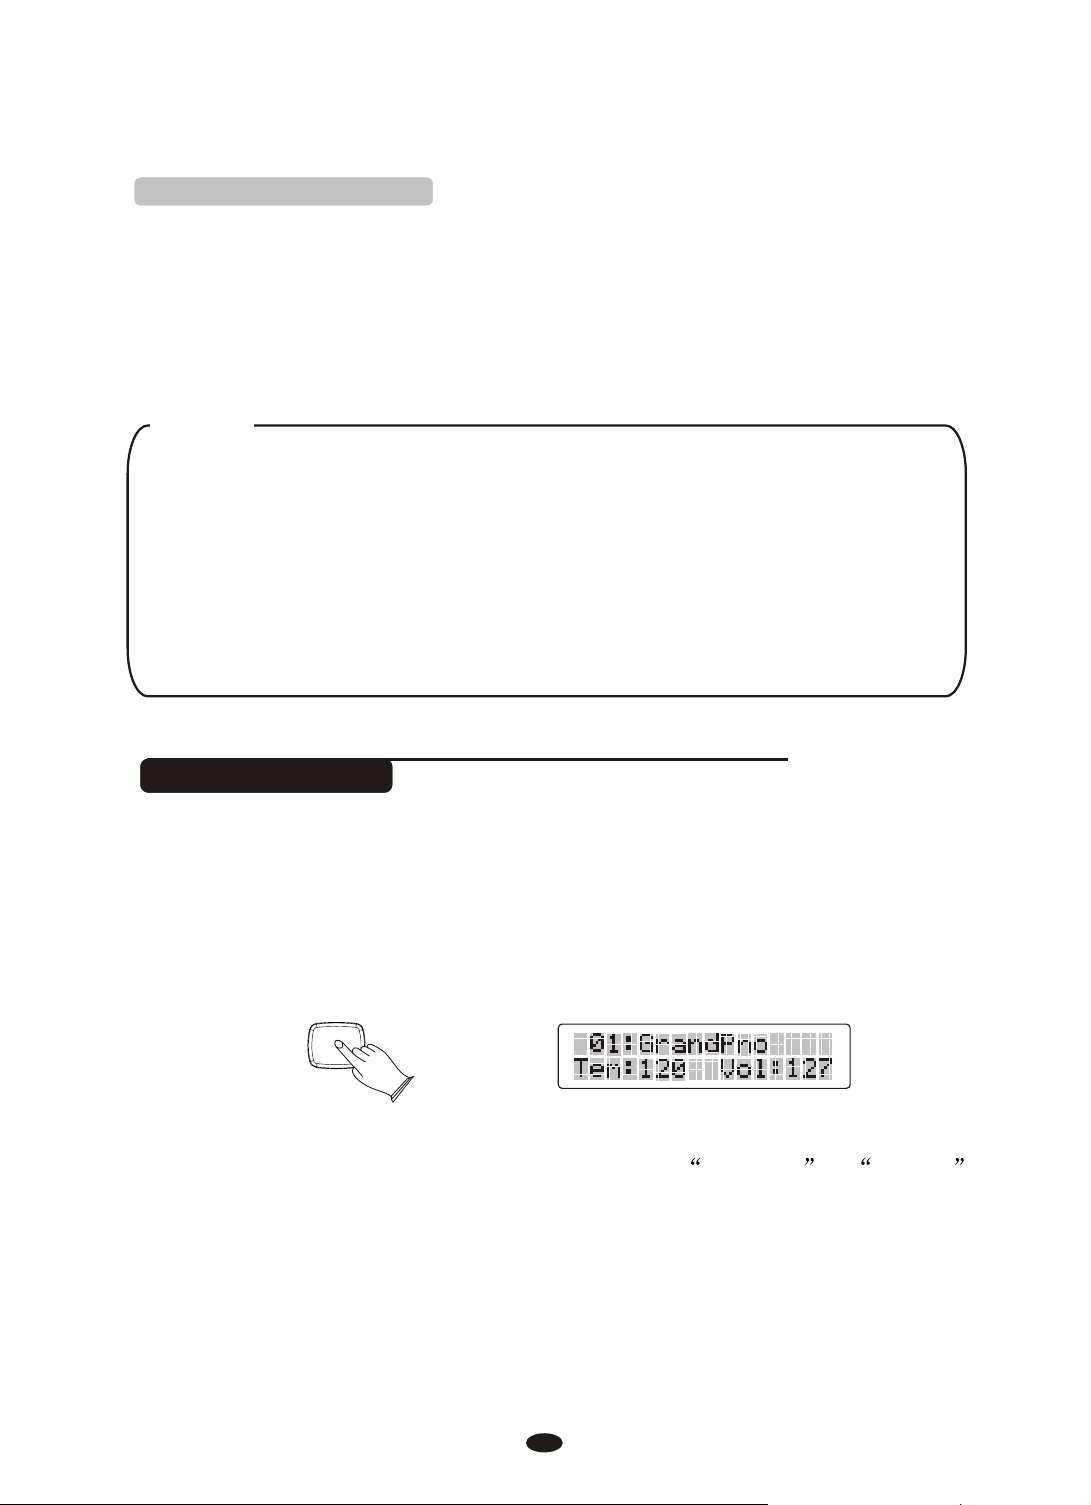
Playing Portable Grand Piano
[+/-]
Press [GRAND PIANO] button.
This convenient function lets you instantly call up the Grand Piano voice.
12
Keymode
KEYMODE
KEYMODE
KEYMODE
You can adjust the chord, pianist, harmony, split piont, twin by pressing
[KEYMODE]button.
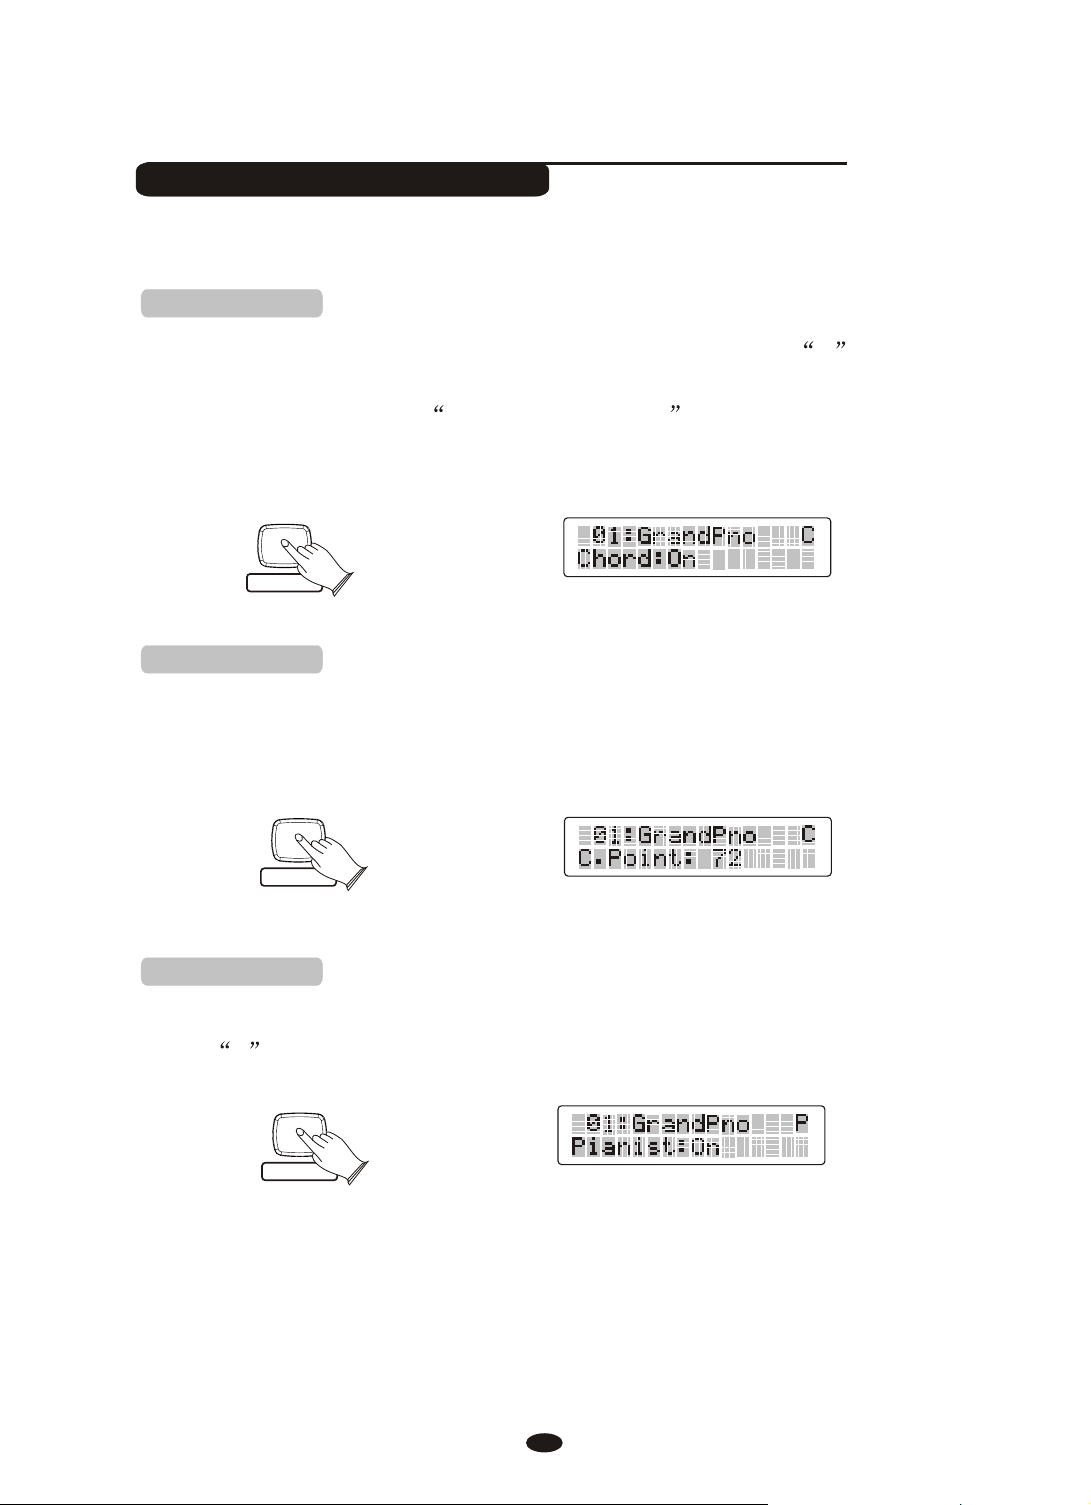
1. Chord mode
Press [KEYMODE] button, select chord mode, LCD will display C symbol in
the upper right corner of the screen. The specified left-hand section
of the keyboard becomes the Auto Accompaniment section, and chords played
in this section are automatically detected and used as a basis for fully automatic
accompaniment with the selected style.
2. Chord point
Select Normal mode at first,and then hold down the [KEYMODE] button until the
display shows "C.Point", then use the [+/-] buttons or turn the data to set chord
point. Range:00~87.
(left 34 keys)
3. Pianist mode
Press the [KEYMODE] button repeatedly to select keyboard mode, LCD will
display P symbol in the upper right corner of the screen.
13
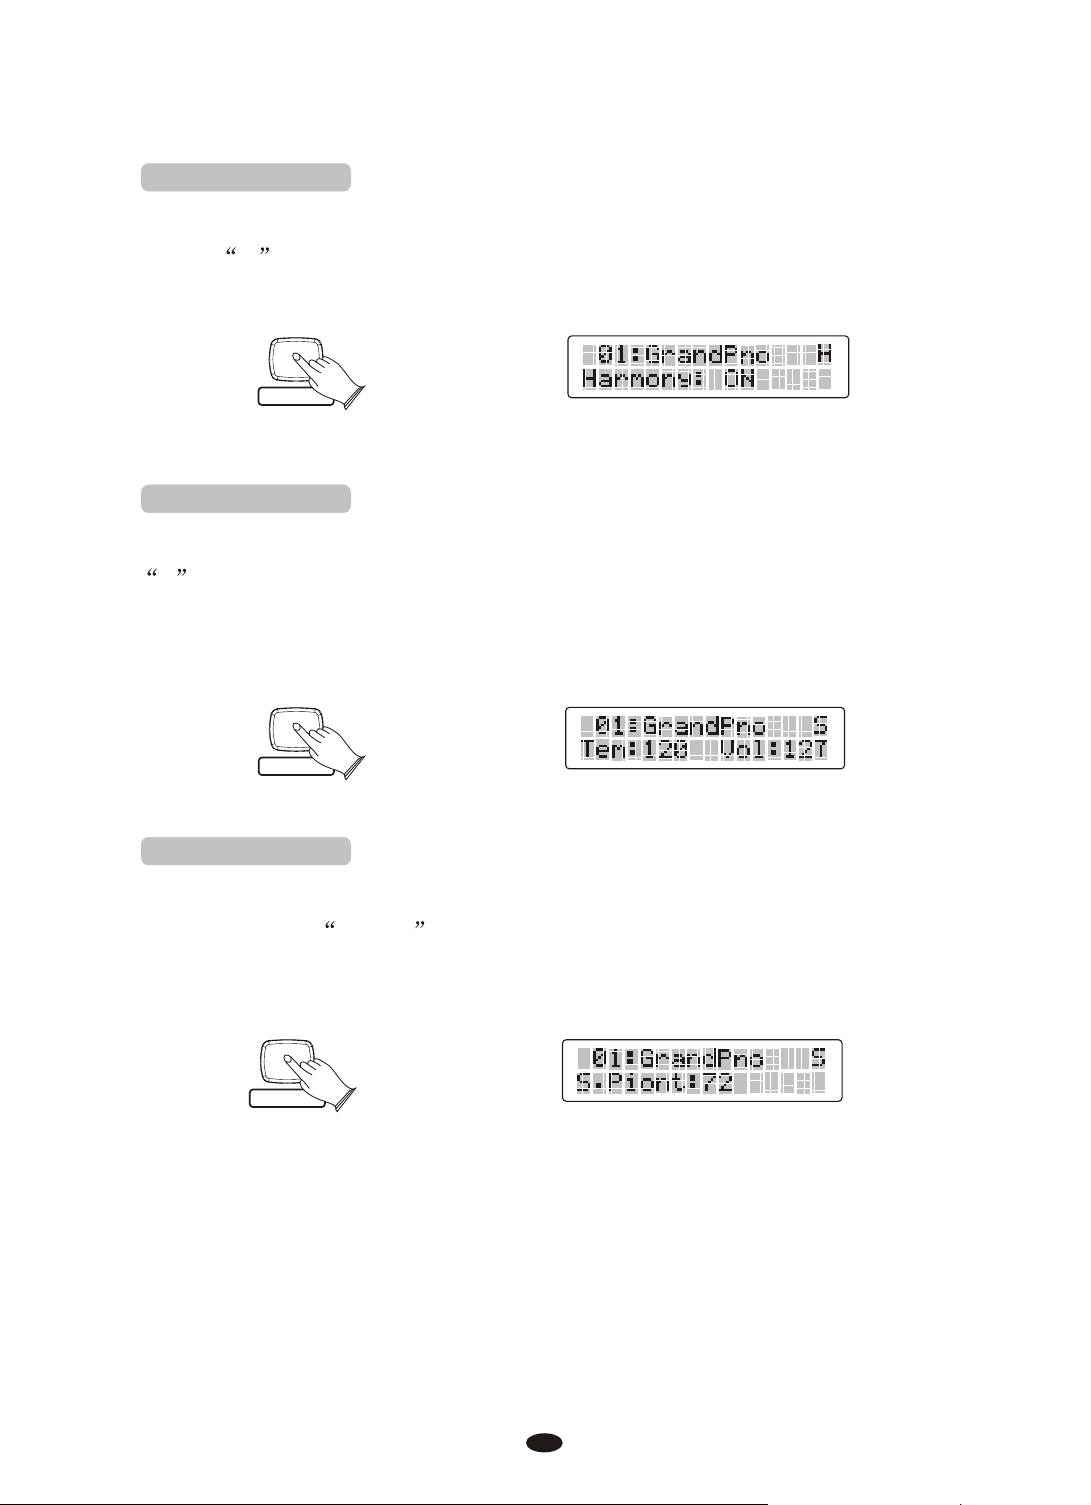
4. Harmony mode
KEYMODE
KEYMODE
KEYMODE
Press the [KEYMODE] button repeatedly to select harmony mode, LCD will
display H symbol in the upper right corner of the screen.
5. Split mode
Press the [KEYMODE] button repeatedly to select split mode, LCD will display
S symbol in the upper right corner of the screen, your keyboard will be split
into sctions which means different voices can be played with the left and right
hands at the sanme time.
6. Split point
Select harmony mode at first,and then hold down the [KEYMODE] button until
the display shows S.Point , then use the [+/-] buttons or turn the data to set
split point. Range:00~87.
14
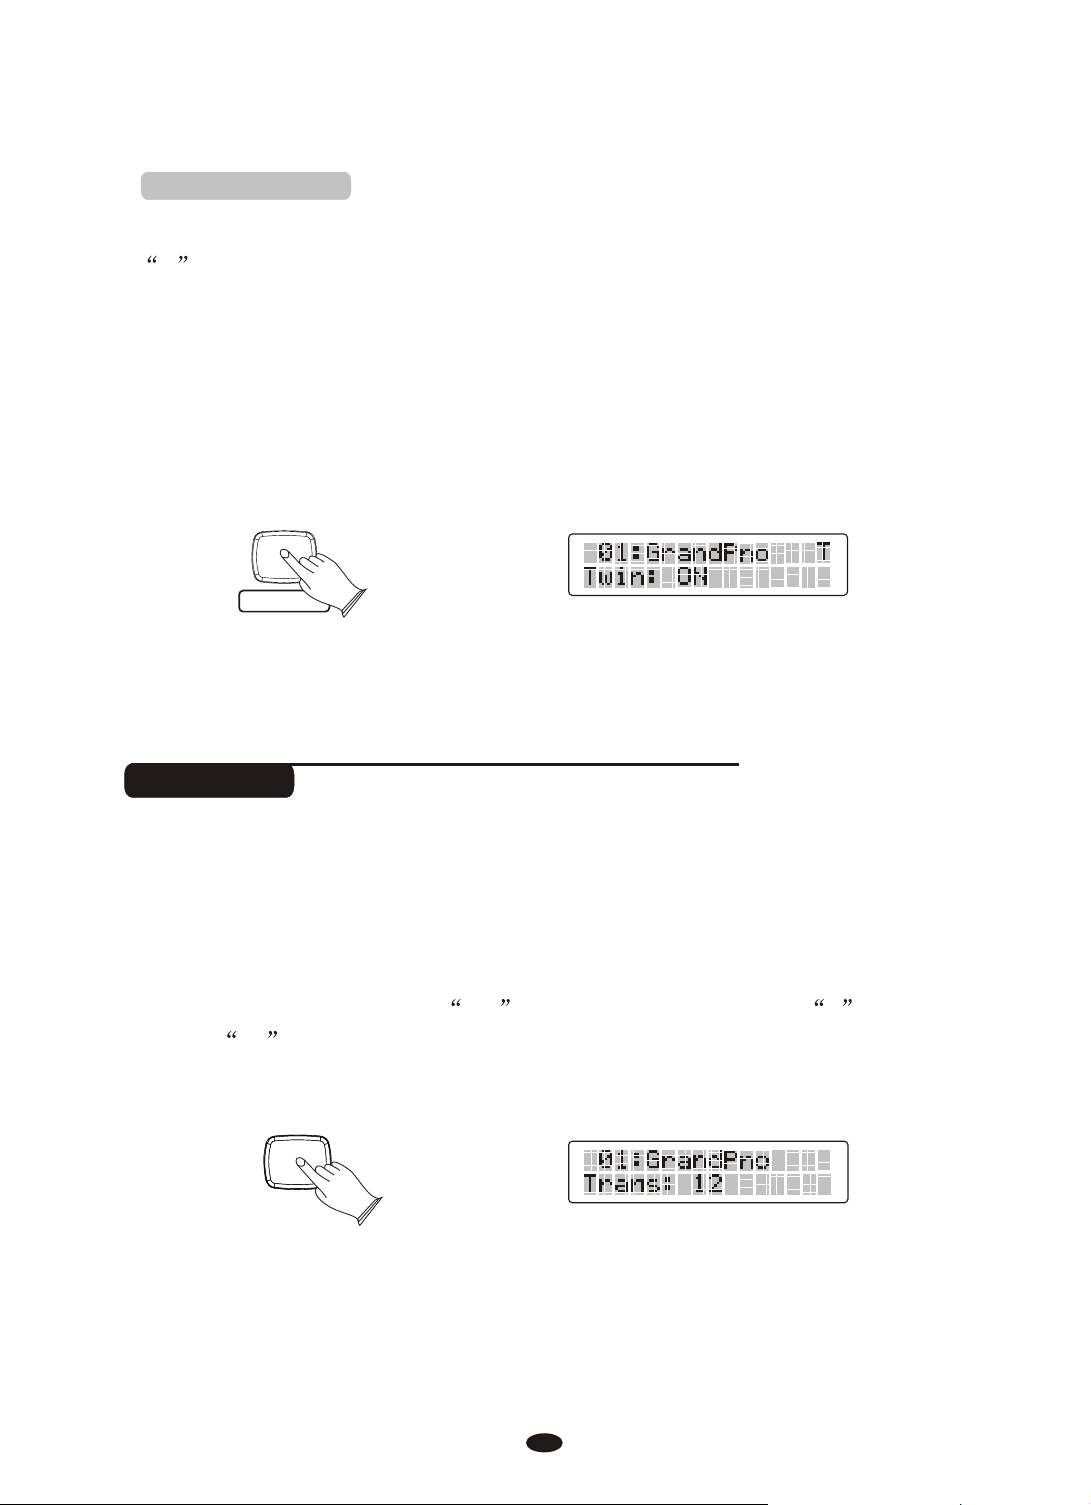
7. Twin mode
KEYMODE
TRANS.
TUNE
Press the [KEYMODE] button repeatedly to select twin mode, LCD will display
T symbol in the upper right corner of the screen, the keyboard will be separated
into two play areas.
Right: from C3 to C7
#
Left: from A-1 to C3
Transpose
The Transpose function allows you to change the pitch of the instrument in semitone
steps, up to a maximum setting of 12 semitones (a maximum of one octave up or down).
Press [ Use [+/- ] buttons to transpose up or down as required.
TRANS./TUNE] button ,
The transposition range is from -12 (down one octave) through 0 (normal
pitch) to 12 (up one octave).
15
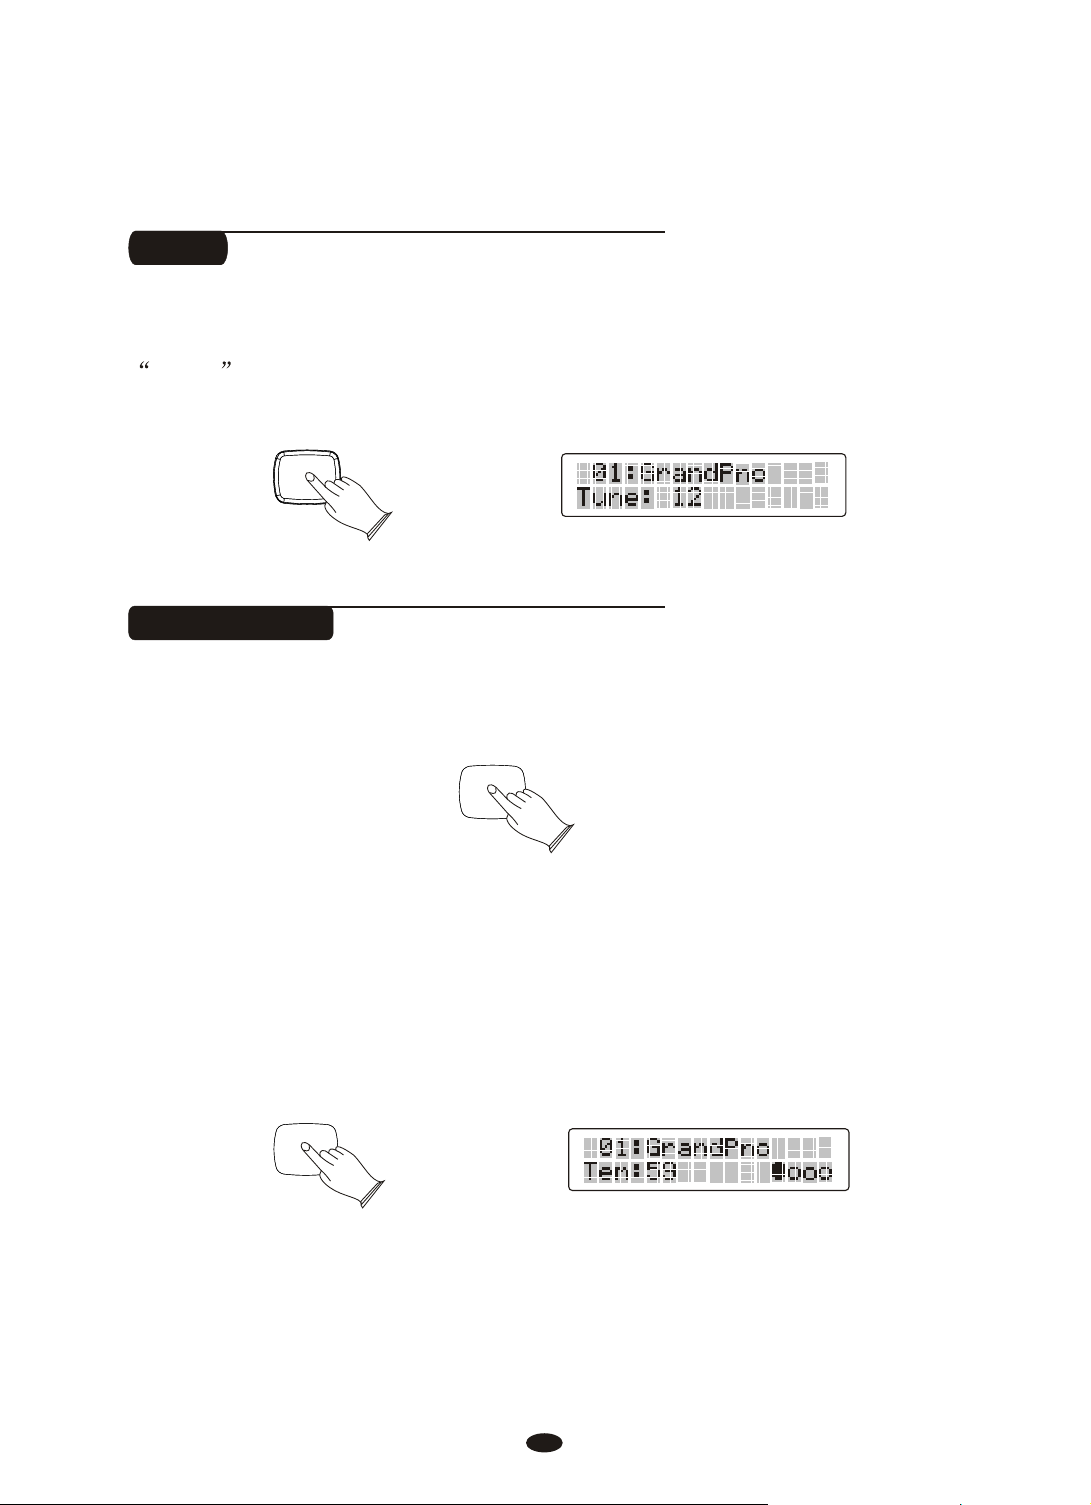
Tune
TEMPO / TAP
TEMPO / TAP
TRANS.
TUNE
The function makes it possible to tune the pitch of your imstrument to match
other instruments.Press [ ] button repeatedly, LCD will display
TRANS./TUNE
TUNE , use [+/-] buttons to set Tune value:-64-63.
Tempo/Tap
Press the [TEMPO/TAP] button, use[+/-] buttons or [DATA CONTROL] knob to
decrease or increase the tempo, metronome and styles. Range: 20-280.
If you want to set the tempo before starting rhythm, you have to tap the button
4 times, automatic accompaniment of percussion can start automatically according
to the speed of your keys.
Tap on the button 2 times while rhythm is playing, the rhythm tempo are set as
your desired speed.
TEMPO / TAP
16
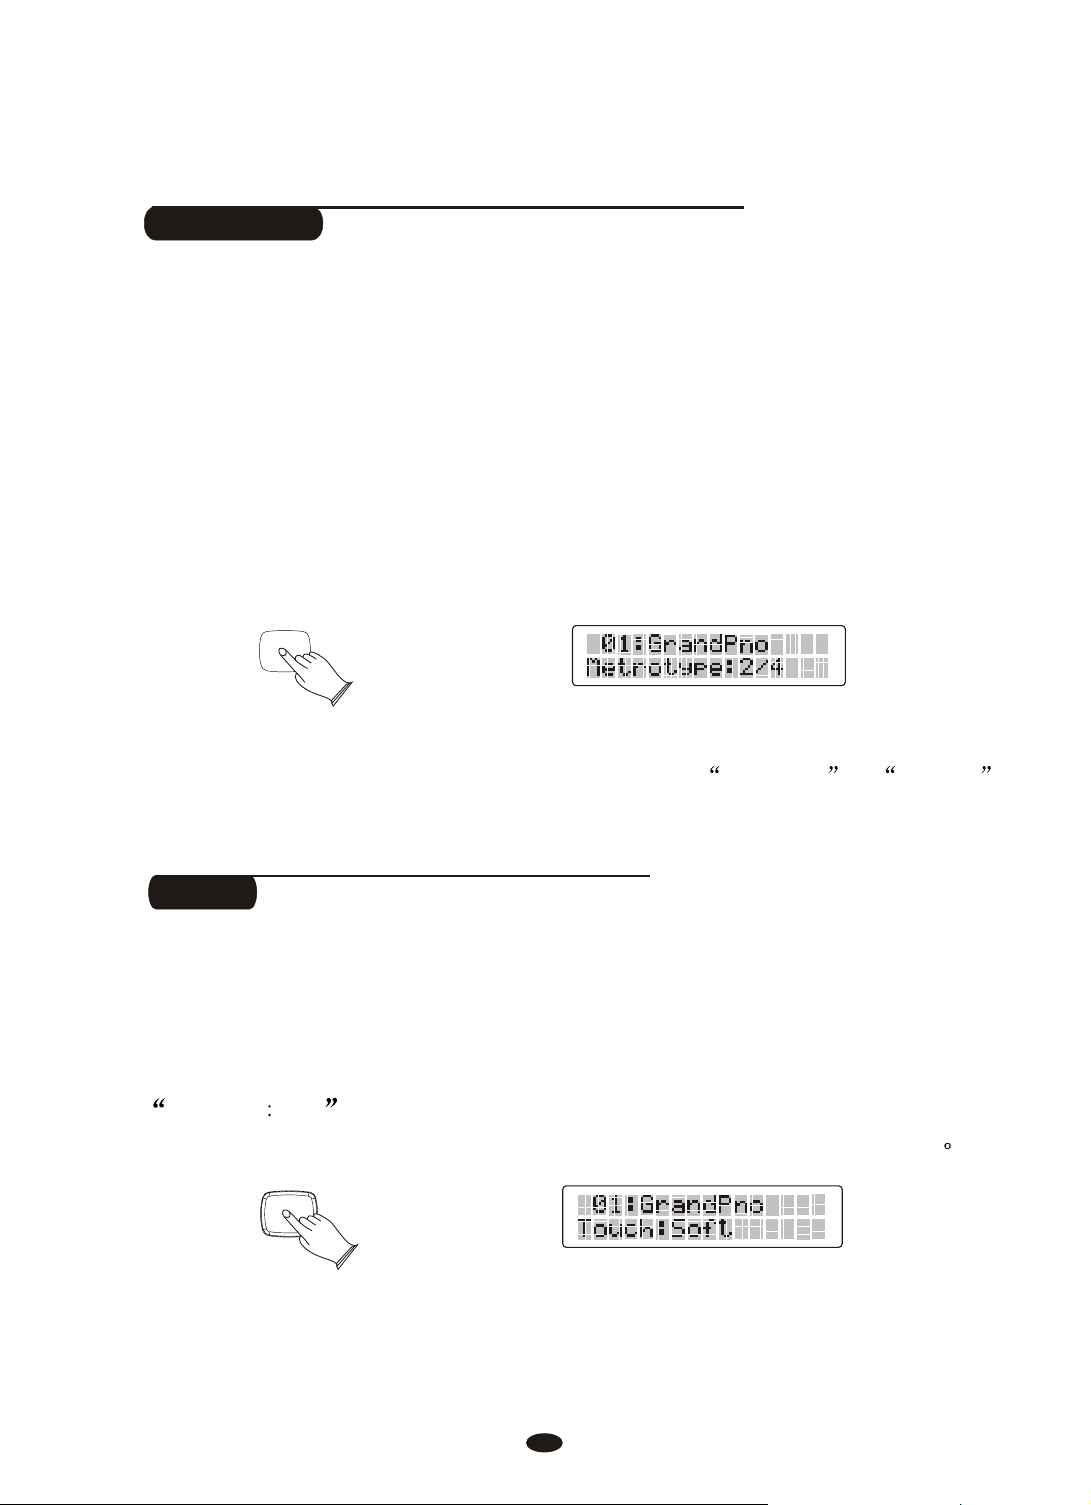
Metronome
METRONOME
TOUCH
Metronome is a convenient feature for practice, and it can also provide a solid
rhythmic guide when recording.
The metronome sound is alternately turned on and turned off by pressing
[METRONOME] button.
Hold the [METRONOME] button to enter the page for selecting the time signature.
Then use the [+] and [-] buttons or the [DATA CONTROL] knob to select your
desired time signature.
Time signature: 2/2,1/4, 2/4, 3/4, 4/4, 5/4,6/4, 3/8, 6/8, 7/8,9/8,12/8. 4/4
To adjust the volume of the e, please refer to Metro.Vol in MIXER
Metronom
(Default: )
function. P12
Touch
The touch function provides three different types of keyboard touch sensitivity
that can be selected to match different playing styles.When turn on the piano, the
touch sensitivity default is open.
Press [TOUCH] button, the button indicator is unlighted, LCD will display
FixTouch 100 . Then
lighted, use [+/-] button to select 3 type of touch sensitivity:
Press [TOUCH] button again, the button indicator is
Normal, Hard, Soft
17
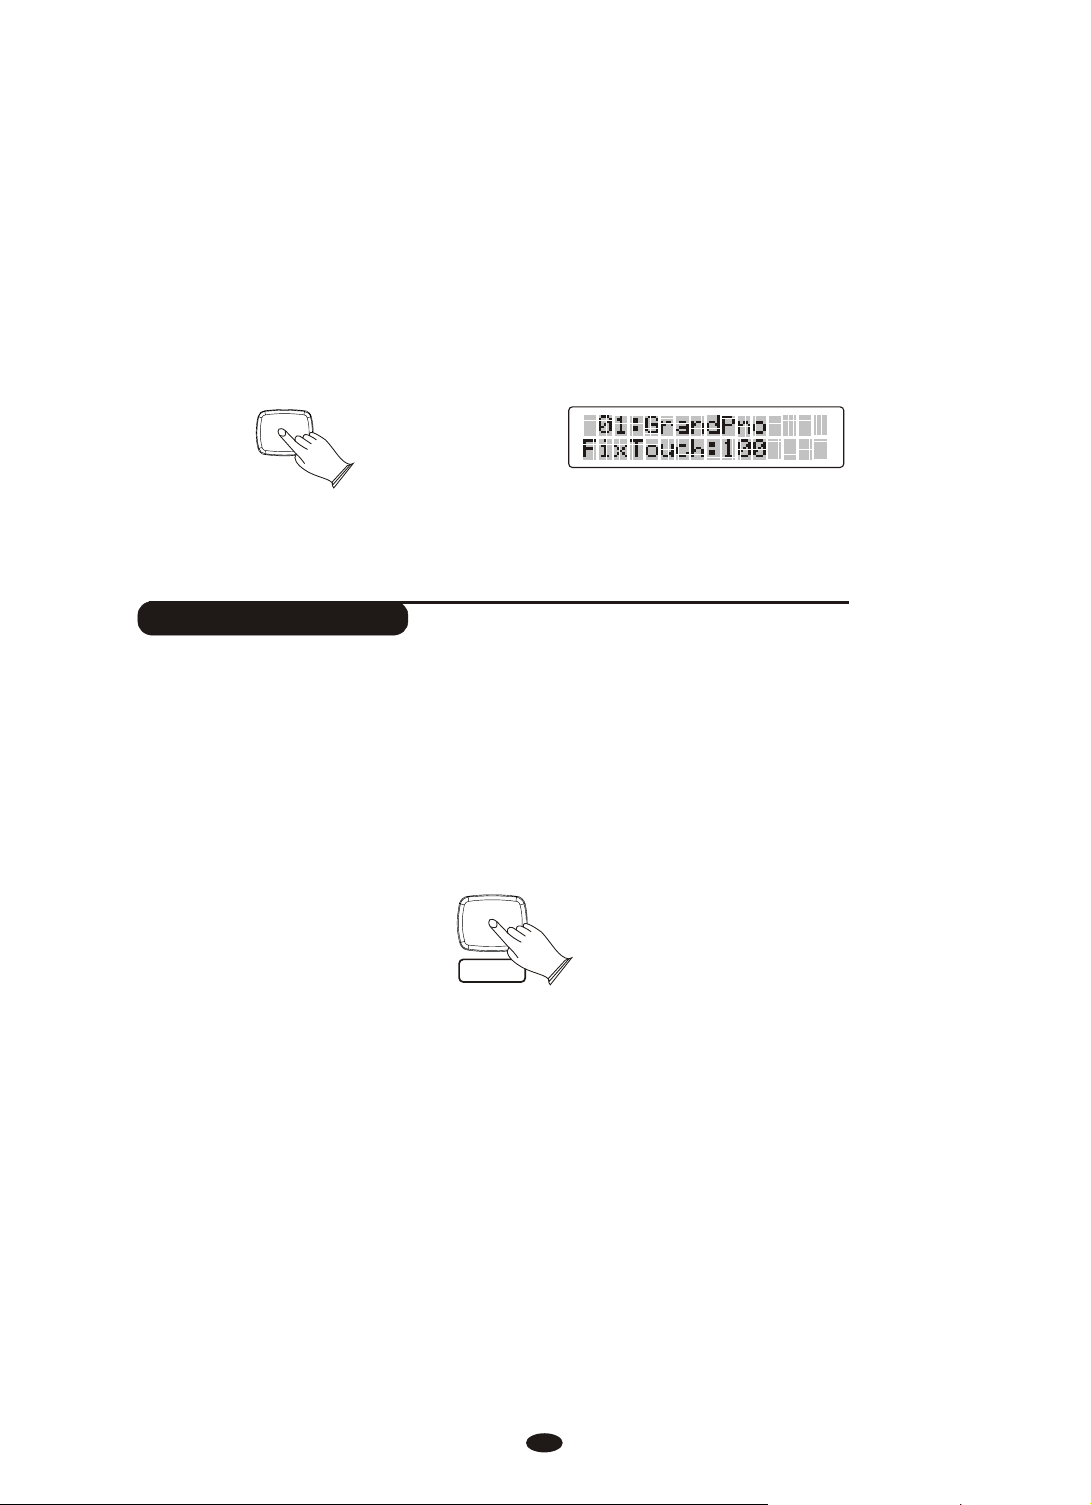
When touch sensitivity is off, Y use [+/-] buttons
TOUCH
O.T.S
or to select the value of Fixtouch volume.
[DATA CONTROL] knob Range:00~127.
the indicator is unlighted. ou can
Default: 100.
One Touch Setting
This function is actually a convenient feature which automatically selects a
suitable voice for you when you select a style.
(such as voice, effect, Tempo, etc.) that match the selected style can be recalled
with just a single button [O.T.S].
Press [O.T.S] button repeatedly can turn on or turn off One Touch Setting.
In addition, various panel settings
18
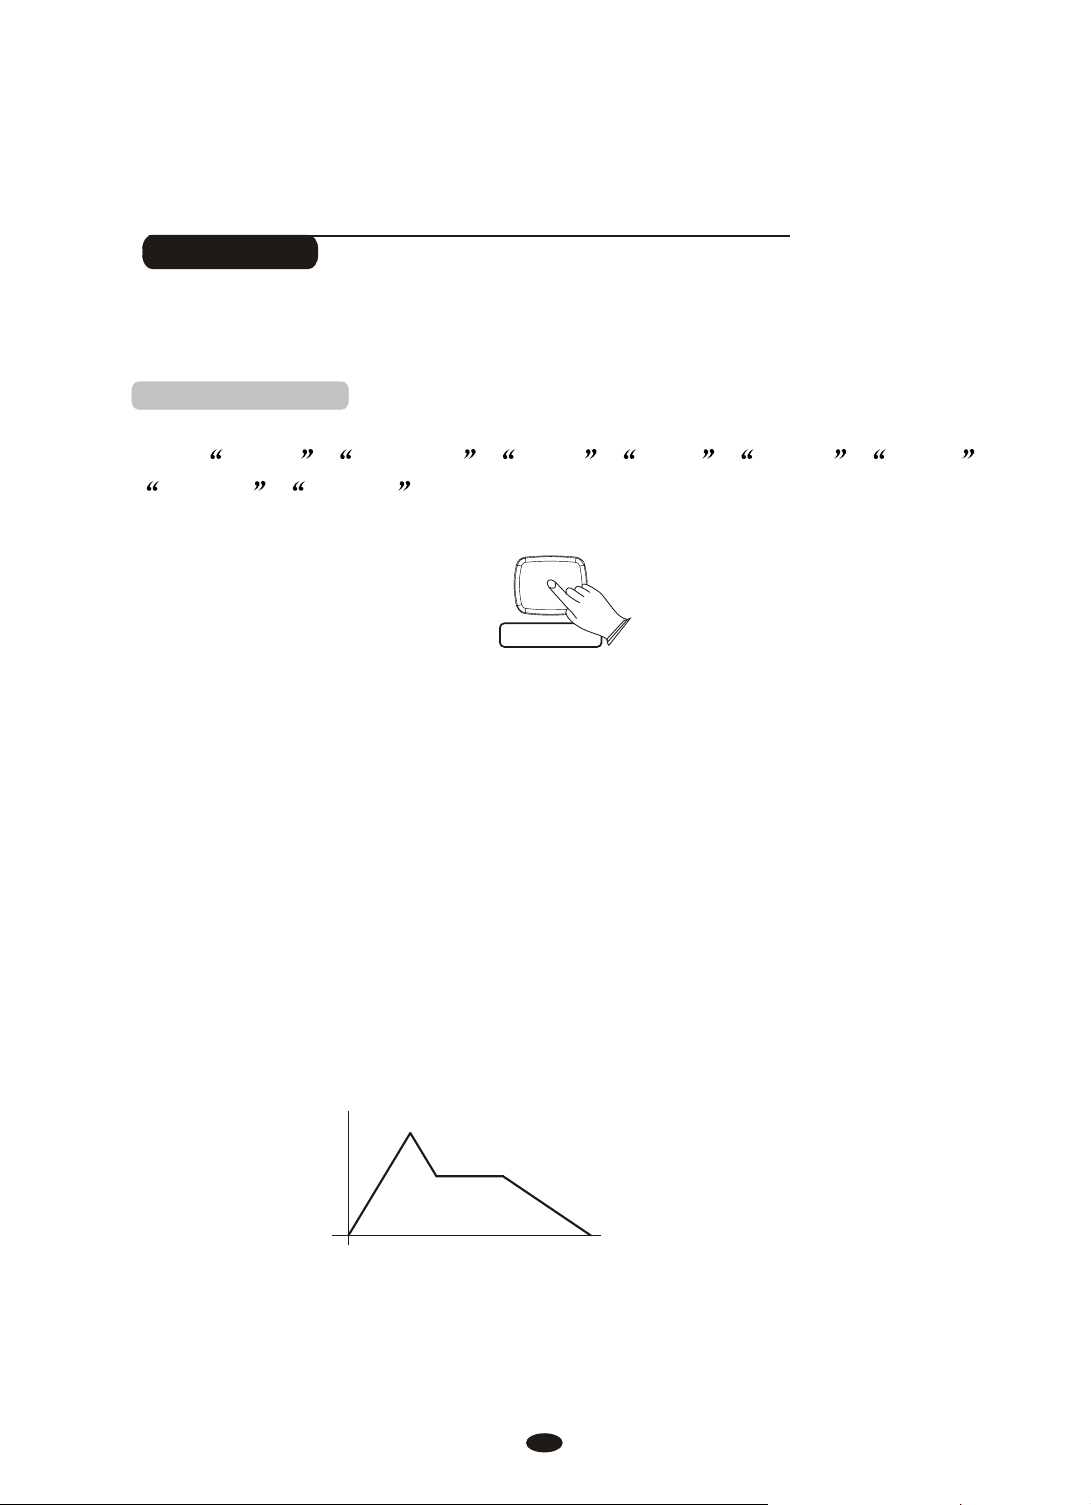
User Edit
USER EDIT
Press [USER EDIT] button to edit the voice that you want, then save the voice to
the voice bank, So that you can easily use it.
1.User voice Contrl
Select the voice you want to edit and then press
select
Cut Off , Resonance , Attack , Decay , Release , Vibrate ,
Vibdepth , Vibdelay ,then use [+/-] buttons to set these parameters.
Cut Off: Is the control parameter to control the variation of audio and change the
filter range of the filter, which may produce the overtone's variation of the sound.
Range: 00~127. The default value is the median 64 without any effect. (Hint: Similar
to a treble knob on a Hi-Fi system.)
[USER EDIT] button repeatedly to
Resonance: Sets the volume of the overtone on Cutoff Frequency. Higher resonance
value produces higher volume of the overtone near the Cutoff Frequency.
Range: 00~127. The default value is the median 64 without any effect. (Hint: Similar
in effect to singing into your hands and making the size of your cupped hands bigger
and smaller.)
The parameters of Envelope' s variations are as follows:
Decay
ttack
A
Release
19

Attack: How quickly the sound is produced after playing the note. Higher Attack
value numbers indicated in the LCD, cause the note to build up to full volume,
more slowly. (Like an Accordion) Lower Attack value numbers in the LCD screen,
produces faster key response. (Like a bell or gong or piano or jazz organ). The
sound is immediate.
Decay: Sets how quickly the sound produced dies away whilst holding the note
down. Guitars, bells, and other plink type sounds have a quick decay. Whereas a
slow decay or even zero decay would be an organ-like effect. If the key is held
down the sound will be produced for the entire time that the key is held down.
Release: The release time is how long the sound continues after the note is let go.
(Hint a Trumpet has a short release time, meaning the sound produced stops
immediately, but a gong has a very long release. After the strike of the gong, the
sound carries on for many seconds before fading away.
Vibr
ate: Sets the speed of the vibrato effect. The higher values produce faster vibrato
speeds. Range: 00~127. The default value is the middle value of 64 without any
effect.
Vibd
epth: Sets the intensity of the vibrato effect. The higher values produce strong
vibrato effects. Range: 00~127. The default value is the middle value of 64 without
any effect.
Vibdelay: set the delay time of the vibrato effect and higher value produces longer
delay time. Range: 00~127. The default value is the middle value of 64 without
any effect.
20
2.Save User Voice
USER EDIT
Your piano contains 1 banks for saving User Voice. You can modify the voice's
Envelope, Vibrato and Filter parameters and then save this New sound or
edited Sound to the User Voice Bank.
Select a voice as the user voice and then press
indicator is lighted, y .
Hold down [ so that you
can save the edited voice to the desired User Voice Bank.
NOTE
You can only save the VOICE data ( Envelope, Vibrato and Filter
settings) to User Voice Banks. Other functions such as Dual Voice,
Split Mode and so on, are not sound edits and cannot be stored here.
USER EDIT] button, LCD will display Save Ok
ou can modify the voice's parameters
[USER EDIT] button, the buttons
3.Load User Voice
Press [USER EDIT] button directly to load the desired user voice.
21
Effect
REVERB
CHORUS
This function allows you to perform the overall sound in a realistic style.
1. Reverb
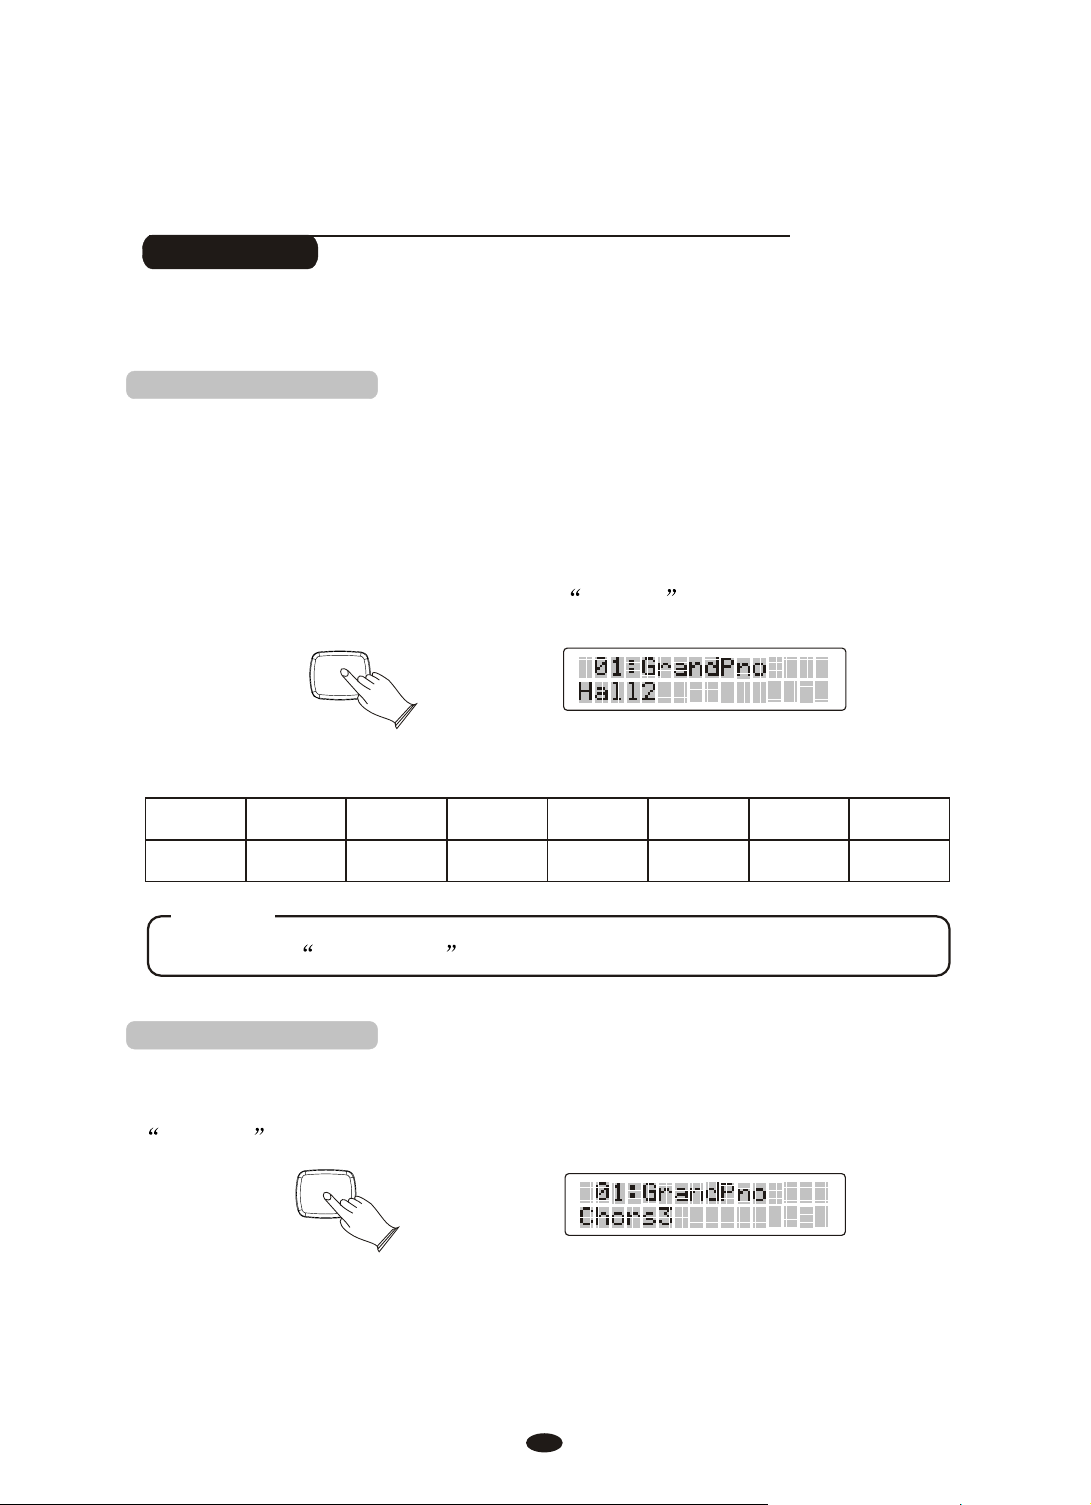
The [REVERB] button selects a number of digital reverb effects that you can
use for extra depth and expressive power.
Press [REVERB] button can turn off or turn on the reverb effect.
Press [REVERB] button, use knob to select reverb
type. No reverb is produced when you select Rev Off . Default type: Hall2.
REVERB
The reverb types in the list below can be selected from the reverb display.
1 2 3 4 5 6 7 8
[+/-] button or [DATA CONTROL]
Hall1 Hall2 Room1 Room2 Room3 Stage1 Stage2 Plate
NOTE
Reference: Reverb Type in function menu. P37
2.Chorus
Shimmering, broadening effect. Press [CHORUS] button,
[DATA CONTROL]
knob to
ChorsOff , and the indicator is off.
CHORUS
select chorus type. No chorus is produced when you select
Default type: Chorus3.
use
[+/-] button or
22
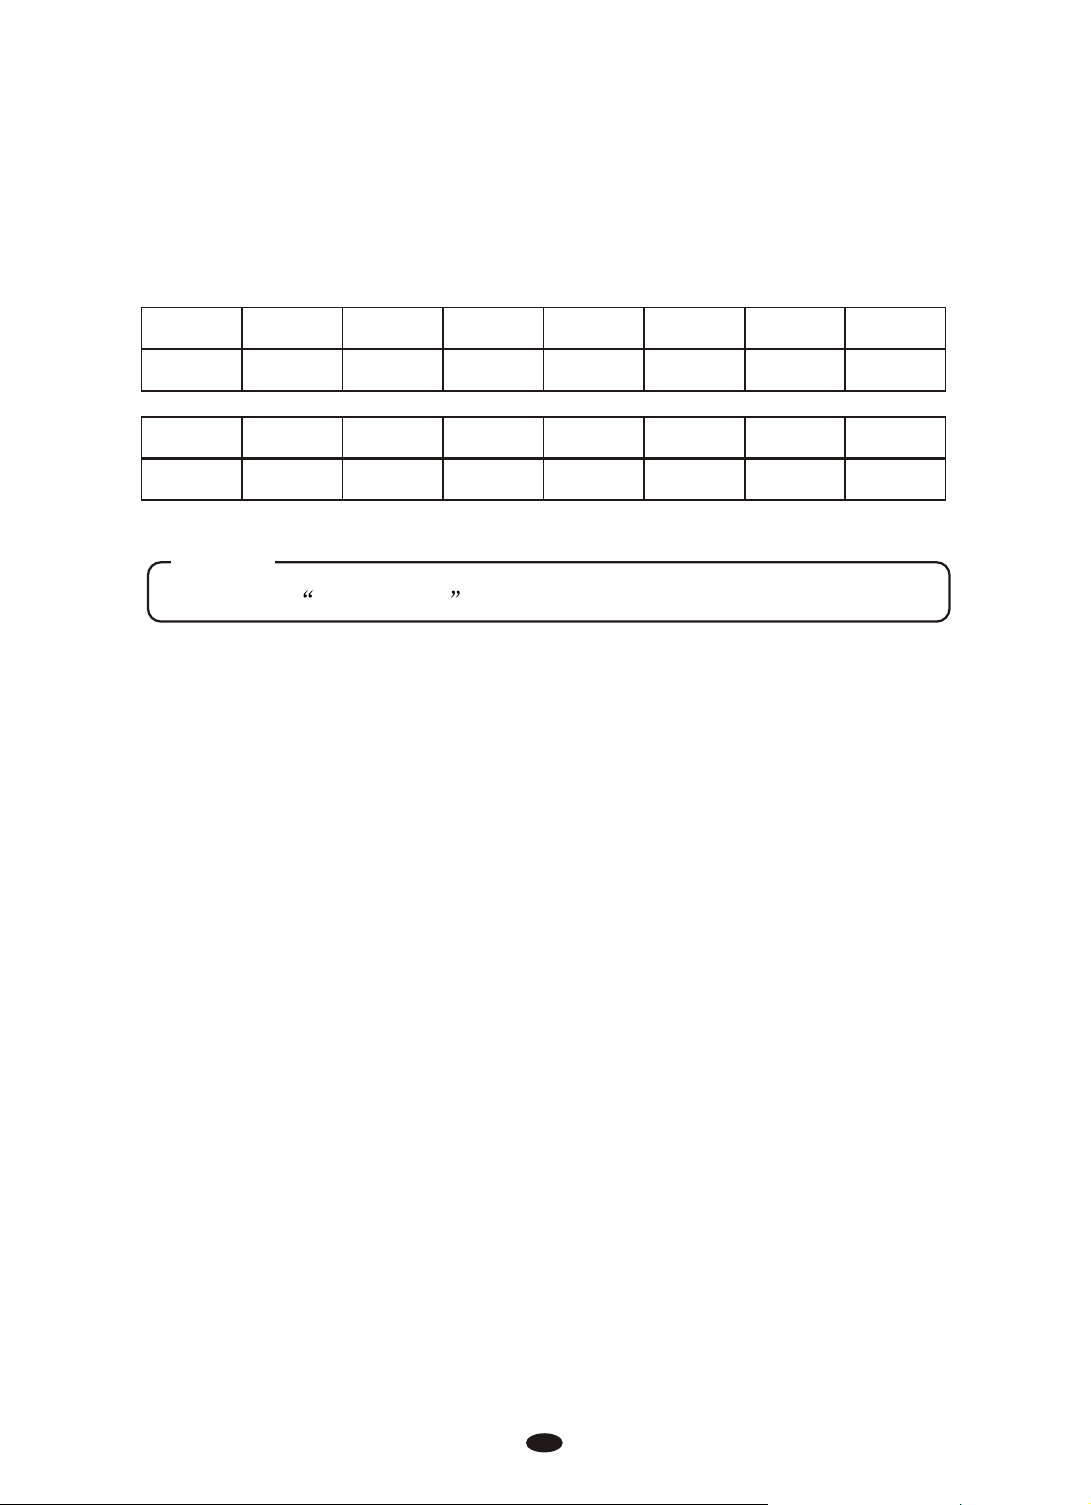
The chorus types in the list below can be selected from the chorus display.
1 2 3 4 5 6 7 8
Chorus1 Chorus2 Chorus3 Chorus4 Feedback Flanger1 ShrtDelay ShrtDlFb
9 10 11 12 1 3 14
Flanger2 Flanger3 Celeste1 Celeste2 Celeste3 Celeste4
NOTE
Reference: Chorus Type in function menu. P41
23

Funtion
Repeatedly press the [ ] button the function to call up the, see the table
function
below:
Funtion type LCD display Range Default
00
00
00
00
00
00
Performance?
Main.Pan
SplitPan
Dual.Pan
Main.Oct.
SpiltOct.
Dual.Oct.
Main.Pan?
SplitPan?
Dual.Pan?
Main.Oct?
SpiltOct?
Dual.Oct?
-64~63
-64~63
-64~63
-2~2
-2~2
-2~2
Arpeggio
MIDI In
MIDI Out
Local
Arpeggio?
MIDI In?
MIDI Out?
Local?
24
01,02,OFF
ON/OFF
01~16,OFF
ON/OFF
OFF
ON
ON
ON

Funtion type LCD display Range Default
Effect?
Rev.Type
M.RevVol
S.RevVol
D.RevVol
Chr.Type
M.ChrVol
S.ChrVol
D.ChrVol
Rev.Type?
M.RevVol?
S.RevVol?
D.RevVol?
Chr.Type?
M.ChrVol?
S.ChrVol?
D.ChrVol?
Hall1,Hall2,Room1,
Room2,Room3,Stage1,
Stage2,Plate
00~127
00~127
00~127
Chorus1,Chorus
Chorus3,Chorus4,
Feedback,Flanger1,
ShrtDely,ShrtDlFb,
Flanger2,Flanger3,
Celeste1,Celeste2,
Celeste3,Celeste4
00~127
00~127
00~127
Hall2
32
32
32
Chorus3
32
32
32
Pedal Assign?
Pedal 1
Pedal 2
Pedal 1?
Pedal 2?
Pd1-Fill In1,Pd1-Fill In2,
Pd1-Tap,Pd1-MemoryUp,
Pd1-Play,Pd1-Null,Pd1-Soft,
Pd1-sost,Pd1-StartStop
Pd2-Fill In1,Pd2-Fill In2,
Pd2-Tap,Pd2-MemoryUp,
Pd2-Play,Pd2-Null,Pd1-Soft,
Pd2-sost,Pd2-StartStop
25
Pd1-Soft
Pd2-Null

Funtion type LCD display Range Default
Usb.Function?
Learn?
Other.Func?
M.RecTrk
S.RecTrk
D.RecTrk
USBSpeed
PlayMode
Grading
LearnHand
Auto Power Off
M.RecTrk?
S.RecTrk?
D.RecTrk?
USBSpeed?
PlayMode?
Grading?
LearnHand?
Auto Power Off?
01~16,OFF
01~16,OFF
01~16,OFF
50~200
Single,Chain,Random
ON/OFF
Left/Right
SLEEPMODE:20Min/
30Min/40Min/50Min/
60Min/OFF
01
02
03
100
Chain
ON
Right
30Min
NOTE
Press [FUNCTION] button, If 5 seconds without any operation, the piano will
automatically exit the menu.
26

Main Voice Pan
FUNCTION
FUNCTION
FUNCTION
ENTER
ENTER
ENTER
+
+
+
-
-
-
Press the [FUNCTION] button, LCD will display
FUNCTION
ENTER
Performance?
Press [ENTER] button to confirm, LCD will display
FUNCTION
Press [ENTER] button to confirm, use [+/-] buttons or
CONTROL] knob
to set the main voice pan value.
Main.Pan?
the [DATA
Press the [+] and [-] buttons simultaneously to restore the default
value:00.
27

Split Voice Pan
FUNCTION
ENTER
+
-
FUNCTION
ENTER
+
-
FUNCTION
ENTER
+
-
FUNCTION
ENTER
+
-
Press the [FUNCTION] button, LCD will display
FUNCTION
ENTER
Press [ENTER] button to confirm, LCD will display
FUNCTION
se [+/-] buttons or to select
U the [DATA CONTROL] knob SpiltPan?
Performance?
Main.Pan?
Press [ENTER] button to confirm, use [+/-] buttons or
CONTROL] knob
to set the split voice pan value.
the [DATA
Press the [+] and [-] buttons simultaneously to restore the default
value:00.
28

Dual Voice Pan
FUNCTION
ENTER
+
-
FUNCTION
ENTER
+
-
FUNCTION
ENTER
+
-
FUNCTION
ENTER
+
-
Press the [FUNCTION] button, LCD will display
FUNCTION
ENTER
Press [ENTER] button to confirm, LCD will display
FUNCTION
se [+/-] buttons or to select
U the [DATA CONTROL] knob SpiltPan?
Performance?
Main.Pan?
Press [ENTER] button to confirm, use [+/-] buttons or
CONTROL] knob
to set the dual voice pan value.
the [DATA
Press the [+] and [-] buttons simultaneously to restore the default
value:00.
29

Main Voice Octave
FUNCTION
ENTER
+
-
FUNCTION
ENTER
+
-
FUNCTION
ENTER
+
-
FUNCTION
ENTER
+
-
Press the [FUNCTION] button, LCD will display
FUNCTION
ENTER
Press [ENTER] button to confirm, LCD will display
FUNCTION
se [+/-] buttons or to select Main Oct
U the [DATA CONTROL] knob ?
Performance?
Main.Pan?
Press [ENTER] button to confirm, use [+/-] buttons or
CONTROL] knob
to set the main voice octave value.
the [DATA
Press the [+] and [-] buttons simultaneously to restore the default
value:00.
30

Split Voice Octave
FUNCTION
ENTER
+
-
FUNCTION
ENTER
+
-
FUNCTION
ENTER
+
-
FUNCTION
ENTER
+
-
Press the [FUNCTION] button, LCD will display
FUNCTION
ENTER
Press [ENTER] button to confirm, LCD will display
FUNCTION
se [+/-] buttons or to select
U the [DATA CONTROL] knob Spilt.Oct?
Performance?
Main.Pan?
Press [ENTER] button to confirm, use [+/-] buttons or
CONTROL] knob
to set the Split voice octave value.
the [DATA
Press the [+] and [-] buttons simultaneously to restore the default
value:00.
31

Dual Voice Octave
FUNCTION
ENTER
+
-
FUNCTION
ENTER
+
-
FUNCTION
ENTER
+
-
FUNCTION
ENTER
+
-
Press the [FUNCTION] button, LCD will display
FUNCTION
ENTER
Press [ENTER] button to confirm, LCD will display
FUNCTION
se [+/-] buttons or to select Dual
U the [DATA CONTROL] knob Oct?
Performance?
Main.Pan?
Press [ENTER] button to confirm, use [+/-] buttons or
CONTROL] knob
to set the dual voice octave value.
the [DATA
Press the [+] and [-] buttons simultaneously to restore the default
value:00.
32

Arpeggio
FUNCTION
ENTER
+
-
FUNCTION
ENTER
+
-
FUNCTION
ENTER
+
-
FUNCTION
ENTER
+
-
Press the [FUNCTION] button, LCD will display
FUNCTION
ENTER
Performance?
Press [ENTER] button to confirm, LCD will display
FUNCTION
U the [DATA CONTROL] knob
se [+/-] buttons or to select
Press [ENTER] button to confirm, use [+/-] buttons or
CONTROL] knob OFF , 01 , 02
to select .
Main.Pan?
Arpeggio?
the [DATA
01~ Press and hold down one key or a plurality of keys , you will hear a
continuous and from low to high.
02~ Press and hold down one key or a plurality of keys , you will hear a
continuous and from high to low .
OFF~ The Arpeggio is off.
33

Midi In
FUNCTION
ENTER
+
-
FUNCTION
ENTER
+
-
FUNCTION
ENTER
+
-
FUNCTION
ENTER
+
-
Press the [FUNCTION] button, LCD will display
FUNCTION
ENTER
Press [ENTER] button to confirm, LCD will display
FUNCTION
U the [DATA CONTROL] knob ?
se [+/-] buttons or to select Midi In
Performance?
Main.Pan?
Press [ENTER] button to confirm, use [+/-] buttons or
CONTROL] knob ON , OFF
to select .
34
the [DATA

Midi Out
FUNCTION
ENTER
+
-
FUNCTION
ENTER
+
-
FUNCTION
ENTER
+
-
FUNCTION
ENTER
+
-
Press the [FUNCTION] button, LCD will display
FUNCTION
ENTER
Press [ENTER] button to confirm, LCD will display
FUNCTION
U the [DATA CONTROL] knob ?
se [+/-] buttons or to select Midi Out
Performance?
Main.Pan?
Press [ENTER] button to confirm, use [+/-] buttons or
CONTROL] knob ,OFF
to select1~16 .
35
the [DATA

Local
FUNCTION
ENTER
+
-
FUNCTION
ENTER
+
-
FUNCTION
ENTER
+
-
FUNCTION
ENTER
+
-
Press the [FUNCTION] button, LCD will display
FUNCTION
ENTER
Press [ENTER] button to confirm, LCD will display
FUNCTION
U the [DATA CONTROL] knob ?
se [+/-] buttons or to select Local
Performance?
Main.Pan?
Press [ENTER] button to confirm, use [+/-] buttons or
CONTROL] knob , OFF
to select ON .
36
the [DATA

Reverb Type
FUNCTION
ENTER
+
-
FUNCTION
ENTER
+
-
FUNCTION
ENTER
+
-
Press the [FUNCTION] button repeatedly, LCD will display Effect
FUNCTION
ENTER
Press [ENTER] button to confirm, LCD will display Rev.Type
FUNCTION
Press [ENTER] button to confirm, use [+/-] buttons or
to select 8 reverb type:
knob Hall1, Hall2, Room1, Room2, Room3,
?
the [DATA CONTROL]
Stage1, Stage2, Plate
?
Press the [+] and [-] buttons simultaneously to restore the default
reverb type: .
Hall2
37

Main voice Reverb Level
FUNCTION
ENTER
+
-
FUNCTION
ENTER
+
-
FUNCTION
FUNCTION
ENTER
ENTER
+
+
-
-
Press the [FUNCTION] button repeatedly, LCD will display Effect
FUNCTION
ENTER
?
Press [ENTER] button to confirm, LCD will display Rev.Type?
FUNCTION
Use [+/-] buttons or the [DATA CONTROL] knob to select M.RevVol?
Press [ENTER] button to confirm, use [+/-] buttons or the [DATA CONTROL]
knob to set main voice reverb level value.
Press the [+] and [-] buttons simultaneously to restore the default
value:32.
38

Split Voice Reverb Level
FUNCTION
ENTER
+
-
FUNCTION
ENTER
+
-
FUNCTION
FUNCTION
ENTER
ENTER
+
+
-
-
Press the [FUNCTION] button repeatedly, LCD will display Effect
FUNCTION
ENTER
?
Press [ENTER] button to confirm, LCD will display Rev.Type?
FUNCTION
Use [+/-] buttons or the [DATA CONTROL] knob to select S.RevVol?
Press [ENTER] button to confirm, use [+/-] buttons or the [DATA CONTROL]
knob to set split voice reverb level value.
Press the [+] and [-] buttons simultaneously to restore the default
value:32.
39

Dual Voice Reverb Level
FUNCTION
ENTER
+
-
FUNCTION
ENTER
+
-
FUNCTION
FUNCTION
ENTER
ENTER
+
+
-
-
Press the [FUNCTION] button repeatedly, LCD will display Effect
FUNCTION
ENTER
?
Press [ENTER] button to confirm, LCD will display Rev.Type?
FUNCTION
Use [+/-] buttons or the [DATA CONTROL] knob to select D.RevVol?
Press [ENTER] button to confirm, use [+/-] buttons or the [DATA CONTROL]
knob to set dual voice reverb level value.
Press the [+] and [-] buttons simultaneously to restore the default
value:32.
40

Chorus Type
FUNCTION
ENTER
+
-
FUNCTION
ENTER
+
-
FUNCTION
FUNCTION
ENTER
ENTER
+
+
-
-
Press the [FUNCTION] button repeatedly, LCD will display Effect
FUNCTION
ENTER
?
Press [ENTER] button to confirm, LCD will display Rev.Type?
FUNCTION
Use [+/-] buttons or the [DATA CONTROL] knob to select Chr.Type?
Press [ENTER] button to confirm, use [+/-] buttons or the [DATA CONTROL]
knob to select 14 chorus types.
Press the [+] and [-] buttons simultaneously to restore the default
reverb type:Chorus3.
41

Main voice Chorus Level
FUNCTION
ENTER
+
-
FUNCTION
ENTER
+
-
FUNCTION
FUNCTION
ENTER
ENTER
+
+
-
-
Press the [FUNCTION] button repeatedly, LCD will display Effect
FUNCTION
ENTER
?
Press [ENTER] button to confirm, LCD will display Rev.Type?
FUNCTION
Use [+/-] buttons or the [DATA CONTROL] knob to select M.ChrVol?
Press [ENTER] button to confirm, use [+/-] buttons or the [DATA CONTROL]
knob to set main voice reverb level value.
Press the [+] and [-] buttons simultaneously to restore the default
value:32.
42

Split voice Chorus Level
FUNCTION
ENTER
+
-
FUNCTION
ENTER
+
-
FUNCTION
FUNCTION
ENTER
ENTER
+
+
-
-
Press the [FUNCTION] button repeatedly, LCD will display Effect
FUNCTION
ENTER
?
Press [ENTER] button to confirm, LCD will display Rev.Type?
FUNCTION
Use [+/-] buttons or the [DATA CONTROL] knob to select S.ChrVol?
Press [ENTER] button to confirm, use [+/-] buttons or the [DATA CONTROL]
knob to set main voice reverb level value.
Press the [+] and [-] buttons simultaneously to restore the default
value:32.
43

Dual voice Chorus Level
FUNCTION
ENTER
+
-
FUNCTION
ENTER
+
-
FUNCTION
FUNCTION
ENTER
ENTER
+
+
-
-
Press the [FUNCTION] button repeatedly, LCD will display Effect
FUNCTION
ENTER
?
Press [ENTER] button to confirm, LCD will display Rev.Type?
FUNCTION
Use [+/-] buttons or the [DATA CONTROL] knob to select D.ChrVol?
Press [ENTER] button to confirm, use [+/-] buttons or the [DATA CONTROL]
knob to set dual voice reverb level value.
Press the [+] and [-] buttons simultaneously to restore the default
value:32.
44

Pedal1 Control
FUNCTION
ENTER
+
-
FUNCTION
ENTER
+
-
FUNCTION
ENTER
+
-
Press the [FUNCTION] button repeatedly, LCD will display
FUNCTION
ENTER
Pedal Assign?
Press [ENTER] button to confirm, LCD will display Pedal 1?
FUNCTION
Press [ENTER] button to confirm, use [+/-] buttons or the [DATA CONTROL]
knob to select
Pd1-Fill In1 , Pd1-Fill In2 , Pd1-Tap ,
Pd1-MemoryUp , Pd1-Play , Pd1-Null , Pd1-Soft , Pd1-sost ,
Pd1-StartStop
Pd1-Null------The switch will not control any function.
Pd1-Soft-----Pd1-Sos------If you play a note or chord on the keyboard and press the sostenuto
pedal while the notes are held, those notes will be sustained as long as the pedal
is held, but all subsequently played notes will not be sustained.
Pd1-StrtStop------This function correspond to the [START] button on the panel.
45

Switches the rhythm on/off whenever you press the Left Foot-switch.
FUNCTION
ENTER
+
-
FUNCTION
ENTER
+
-
Pd1-Fil1l------This function correspond to the [FILL IN] button on the panel. Let
you add dynamic variations and breaks in the rhythm of the accompaniment.
Pd1-Fil12------This function correspond to the [FILL IN] button on the panel. Let
you add dynamic variations and breaks in the rhythm of the accompaniment.
Pd1-Tap----
Pd1-Play------USB MIDI Play
Pd1-MemoryUp------Anytime you store to a REGISTRATION MEMORY button,
all settings previously stored in that button will be erased and replaced by the new
settings.
Pedal2 Control
Press the [FUNCTION] button repeatedly, LCD will display
FUNCTION
Pedal Assign?
Press [ENTER] button to confirm, LCD will display Pedal 2?
46

Press [ENTER] button to confirm, use [+/-] buttons or the [DATA CONTROL]
FUNCTION
ENTER
+
-
knob to select
Pd2-Fill In1 , Pd2-Fill In2 , Pd2-Tap ,
Pd2-MemoryUp , Pd2-Play , Pd2-Null , Pd2-Soft , Pd2-sost ,
Pd2-StartStop
Pd1-Null------The switch will not control any function.
Pd1-Soft-----Pd1-Sos------If you play a note or chord on the keyboard and press the sostenuto
pedal while the notes are held, those notes will be sustained as long as the pedal
is held, but all subsequently played notes will not be sustained.
Pd1-StrtStop------This function correspond to the [START] button on the panel.
Switches the rhythm on/off whenever you press the Left Foot-switch.
Pd1-Fil1l------This function correspond to the [FILL IN] button on the panel. Let
you add dynamic variations and breaks in the rhythm of the accompaniment.
Pd1-Fil12------This function correspond to the [FILL IN] button on the panel. Let
you add dynamic variations and breaks in the rhythm of the accompaniment.
Pd1-Tap----
Pd1-Play------USB MIDI Play
Pd1-MemoryUp------Anytime you store to a REGISTRATION MEMORY button,
all settings previously stored in that button will be erased and replaced by the new
settings.
47

Main voice Track
FUNCTION
ENTER
+
-
FUNCTION
ENTER
+
-
FUNCTION
ENTER
+
-
Press the [FUNCTION] button repeatedly, LCD will display
FUNCTION
ENTER
Usb.Function?
Press [ENTER] button to confirm, LCD will display M.RecTrk?
FUNCTION
Press [ENTER] button to confirm, use [+/-] buttons or the [DATA CONTROL]
knob to select main voice track 01~16 and Off.
Press the [+] and [-] buttons simultaneously to restore the default
main voice track: 01.
48

Split voice Track
FUNCTION
ENTER
+
-
FUNCTION
FUNCTION
ENTER
ENTER
+
+
-
-
FUNCTION
ENTER
+
-
Press the [FUNCTION] button repeatedly, LCD will display
FUNCTION
ENTER
Usb.Function?
Press [ENTER] button to confirm, LCD will display M.RecTrk?
FUNCTION
Use [+/-] buttons or the [DATA CONTROL] knob to select S.RecTrk?
FUNCTION
ENTER
Press [ENTER] button to confirm, use [+/-] buttons or the [DATA CONTROL]
knob to select split voice track 01~16 and Off.
Press the [+] and [-] buttons simultaneously to restore the default
main voice track: 02.
49

Dual voice Track
FUNCTION
ENTER
+
-
FUNCTION
ENTER
+
-
FUNCTION
ENTER
+
-
FUNCTION
ENTER
+
-
Press the [FUNCTION] button repeatedly, LCD will display
FUNCTION
ENTER
Usb.Function?
Press [ENTER] button to confirm, LCD will display M.RecTrk?
FUNCTION
Use [+/-] buttons or the [DATA CONTROL] knob to select D.RecTrk?
FUNCTION
ENTER
Press [ENTER] button to confirm, use [+/-] buttons or the [DATA CONTROL]
knob to select dual voice track 01~16 and Off.
Press the [+] and [-] buttons simultaneously to restore the default
main voice track: 03.
50

USB Speed
FUNCTION
ENTER
+
-
FUNCTION
ENTER
+
-
FUNCTION
FUNCTION
ENTER
ENTER
+
+
-
-
Press the [FUNCTION] button repeatedly, LCD will display
FUNCTION
ENTER
Usb.Function?
Press [ENTER] button to confirm, LCD will display M.RecTrk?
FUNCTION
Use [+/-] buttons or the [DATA CONTROL] knob to select USBSpeed?
FUNCTION
ENTER
Press [ENTER] button to confirm, use [+/-] buttons or the [DATA CONTROL]
knob to select USB speed.
Press the [+] and [-] buttons simultaneously to restore the default
value: 100.
51

Play Mood
FUNCTION
ENTER
+
-
FUNCTION
ENTER
+
-
FUNCTION
FUNCTION
ENTER
ENTER
+
+
-
-
Press the [FUNCTION] button repeatedly, LCD will display
FUNCTION
ENTER
Usb.Function?
Press [ENTER] button to confirm, LCD will display M.RecTrk?
FUNCTION
Use [+/-] buttons or the [DATA CONTROL] knob to select PlayMode?
FUNCTION
ENTER
Press [ENTER] button to confirm, use [+/-] buttons or the [DATA CONTROL]
knob to select the play mode: .
Single,Chain,Random
Press the [+] and [-] buttons simultaneously to restore the default
playmode: .
Chain
52

Single------ Single play
FUNCTION
ENTER
+
-
FUNCTION
ENTER
+
-
FUNCTION
ENTER
+
-
Chain------Order play
Random------Then play
Left/right Hand
Press the [FUNCTION] button repeatedly, LCD will display Learn?
FUNCTION
ENTER
Press [ENTER] button to confirm, LCD will display ?
FUNCTION
LearnHand
Use [+/-] buttons or the [DATA CONTROL] knob to select Left
Right .
FUNCTION
ENTER
Left Left Hand.
Right Right Hand.
53

Auto Power Off
FUNCTION
ENTER
+
-
FUNCTION
ENTER
+
-
FUNCTION
ENTER
+
-
Press the [FUNCTION] button repeatedly, LCD will display Other Func
FUNCTION
ENTER
Press [ENTER] button to confirm, LCD will display
FUNCTION
Auto Power Off?
Press [ENTER] button to confirm, use [+/-] buttons or the
[DATA CONTROL] knob to select sleep mode:
50Min, 60Min and OFF
.
20Min, 30Min, 40Min,
?
FUNCTION
ENTER
Press the [+] and [-] buttons simultaneously to restore the default
value: 30Min.
54

Auto Accompaniment
NUMBER
PIANO ORGAN GUITAR BASS USER VOICE
8 BEAT
BALLAD
DANCE
DISCO
USER STYLE
1 2 3 4 5
6 7 8 9 0
Your instrument has 203 accompaniment styles which can be used to provide
Fully-orchestrated Auto Accompaniment. When the Auto Accompaniment
function is turned on, your instrument will create fully-orchestrated rhythm, bass
and chord accompaniment based on chords you play with the left hand in the
Auto Accompaniment section of the keyboard(i.e. all keys to the left of the Auto
Accompaniment split point). The right-hand section of the keyboard is available
for normal playing.
The default Auto Accompaniment split
point is the F2 key. The Auto
#
Auto Accompaniment
Auto Accompaniment
Normal
Accompaniment section of the keyboard
Consists of all keys to its left .
Left hand fingering
specifies the auto
accompaniment chords.
The right hand plays normally
Selecting a Style
Press [VOICE/STYLE] button, the
on the panel, use to select the style.
[+] / [-] buttons or [DATA CONTROL] knob
1.Selecting Voice Directly
When the [VOICE/STYLE] button is lighted, means your piano is in Style
mode, now you can use the voice button on the panel to select voice directly, the
second row of buttons below as the direct style.
indicator is lighted, you can use the voice button
2.Use Number Button and [+/-] Buttons
Press the [NUMBER] button, the indicator light color is red. Now you can use
number 0~9 or [+/-] Buttons to select style.
55

Style 01~09 :press number 0 first, then press 1~9
Style 10~99 : press two numeric buttons directly, for example: to select 99,
press the number 9 button and then the number 9 to select the
sound.
Style 100~203: press the number 1 to 2 of a button and hold it until the number
appears on the display, then you can enter the tens and ones digits.
For example: to select 123 Sea Shore press number 1 button
and hold it until 1_ appears, then press the number 2 and the
number 3 buttons to select the sound.
You also can press the [+/- ] buttons until the desired voice appears on the display.
3.Use Data Control Knob
In the Style Mode, clockwise or counterclockwise rotation [DATA CONTROL],
can quickly select the Style.
Clockwise rotation is increasing rapidly, counterclockwise rotation for the rapid
decline.
NOTE
When [VOICE/STYLE] button is unlighted, it meams the current selection
in VOICE mode .
When [VOICE/STYLE] button is lighted, it meams the current selection in
STYLE mode .
When [NUMBER] button is unlighted, it meams the current selection in
direct VOICE or STYLE mode.
When [NUMBER] button is lighted, it meams the current selection in
NUMBER SELECT mode .
56

Start the Stlyle
START
STOP
FILL IN 2
VARIATION
SYNCHRO
INTRO
ENDING
START
STOP
FILL IN 1
Press [VOICE/STYLE] button, the
on the panel, use to select the style.
[+] / [-] buttons or [DATA CONTROL] knob
indicator is lighted, you can use the voice button
1. Start Immediately
Press [START/STOP] button to start the style.
2. Turn the Chord Function On
Reference: Chord in Keymood function. P13
The left hand section of the keyboard becomes the Auto Accompaniment section,
and chords played in this section are automatically detected and used as a basis
of for fully automatic accompaniment with the selected style.
3. Using Synchro Start
Press the [SYNCHRO] button to enter the sync start waiting mode, then the
accompaniment will start when you play the first chord on the Auto Accompaniment
section of the keyboard.
START
SYNCHRO
STOP
FILL IN 1
FILL IN 2
VAR IAT IO N
57

4.Starting the Accompaniment With an Introduction
FILL IN 2
VARIATION
SYNCHRO
INTRO
ENDING
START
STOP
FILL IN 1
Any of your instrument accompaniment patterns can be started with an appropriate
introduction by pressing the [INTRO/ENDING] button directly.
If you press the [SYNCHRO] button and then press the [INTRO/ENDING] button,
the accompaniment will start from the introduction as soon as a chord is detected
in the Auto Accompaniment section of the keyboard.
START
SYNCHRO
INTRO
ENDING
FILL IN 1
VARIATION
5. Using Fill In Start
Press the [SYNCHRO] button and then press the [FILL IN 1] or
[FILL 2/VARIATION] button, the accompaniment will start from Fill In as soon
as a chord is detected in the Auto Accompaniment section of the keyboard.
Stop the Style
You can do this in one of three ways.
a. Stop Immediately
The accompaniment can be stopped at any time by pressing the [START/STOP]
button.
b. Ending Stop
Press the [INTRO/EDNING] button, the style stops after the ending section is
finished.
58

FILL IN 2
VAR IAT ION
SYNCHRO
INTRO
ENDING
START
START
STOP
FILL IN 1
FADE
SYNCHRO
ENDING
STOP
FILL IN 1
FILL IN 2
VAR IAT ION
c. Pressing the [SYNCHRO] Button
This immediately stops style and automatically enables Sync Start, letting you
re-start the style by simply playing a chord or key in the auto accompaniment area
of the keyboard.
Fade
Press [FADE] button makes rhythm fade up when starting
the rhythm.
While rhythm is playing, press [FADE] button to make
rhythm fade away.
Adding Fill-In
Press the [FILL IN 1] button at any time while the accompaniment is playing to
add a one-measurefill-in.
When the accompaniment is playing, press [FILL 2 /VARIATION] button, fill-in
accompaniment will immediately start playing, continuing with the
FILL 2/ VARIATION Section. FILL 2/VARIATION
button when the style is playing, the selected FILL pattern repeats continuously
until button is released.
Hold down the [FILL IN 1] or [ ]
59

Adjusting the Accompaniment Volume
USER VOICE
USER STYLE
USER EDIT
Use the ACC. VOLUME Control to adjust the Accompaniment volume.
User rhythm recording
Save User Style
Press [EDIT] button and [USER STYLE] button at the same time, the LCD will
display StyleRec , then press one key to start record.The [START/STOP]
button indicator is light, there is 2 section rhythm cycle performance. At the same
time start the rhythm, can be arbitrarily added percussion. Press [START/STOP]
button to stop the recording.
Press the [START/STOP] button to play the recording.
At this time,press and hold down the [USER STYLE] button to save the
recorded user style, the LCD will display Save Ok .
Load User Style
Press the [USER STYLE] button, indicator is light, You can load the current
recorded user rhythm.
60

Registration Memory
STORE / BANK
STORE / BANK
STORE / BANK
STORE / BANKM1M1
M2
M2
M3
M3
M4
M4
M5
M5
The piano can store 5 groups x 6 banks of panel settings. By pressing the
corresponding
memory button, you can recall these settings rapidly. You can preset the panel settings to suit
to your performance and store them to the registration memory positions.
Store
a.Press
b.H
current panel settings are stored in the memory.
[STORE/BANK] button repeatedly to select 1MmryBank~6MmryBank
STORE / BANK
old down the [STORE/BANK] button, and then Press the [M1-M5] button, the
Load
a.Pressb.[STORE/BANK] button repeatedly to select 1MmryBank~6MmryBank
Press the [M1-M6] buttons, can recall the information you have stored. The LCD
displays the panel position number.settings as well as memory
61

NOTE
FREEZE
Anytime you store to a REGISTRATION MEMORY button, all
settings previously stored in that button will be erased and
replaced by the new settings.
Freeze Function
Press the [FREEZE] button to turn ON/OFF the freeze function and its icon.
When the freeze function is ON, the memory settings can be recalled with the
exception of any accompaniment settings. You can use the registration memory
function without affecting the accompaniment.
Saving the Registration Data to USB Disk
Insert the USB Disk into the USB terminal.
Press the [SAVE TO] button simultaneously, a message xxREGSTxxx
(xx indicates this file's sequence Num in UDisk. xxx indicates registration file
number ) appears, indicating your Registration Memory Settings are saved to USB
Disk, with 8 Registrations stored to a single file.
62

Use Registration Data from USB
USB FILE
USB FILE
RECORD
RECORD
MULTI
MULTI
PLAY / LOAD
PLAY / LOAD
SAVE TO
SAVE TO
DELETE
DELETE
Insert the USB Disk into the USB terminal. Use
to select REG file, then press [PLAY/LOAD] button, display shows
knob
[+/-] button or [DATA CONTORL]
Load OK! .
30 Registrations will be loaded to the memory store on the panel. You
can recall the information you have loaded by pressing M1-M5.
Delete REG File from USB
Insert the USB Disk into the USB terminal. Use buttons or [DATA CONTROL]
knob to select REG file you want to delete, then press the [RECORD]
button and press [PLAY/LOAD] button simultaneously. LCD shows:
[+/ -]
Press [+] button to delete the file.
Press [-] button to cancel.
63

Song Recording
USB FILE RECORD
MULTI
PLAY / LOAD SAVE TO
DELETE
This digital piano lets you record your performances and Registration settings
to a USB Disk. Each user song lets you record up to sixteen independent tracks.
These include not only the voices for the keyboard performance, but also the auto
accompaniment parts.
It provides two different ways to record: Quick Recording and Multi Track
Recording.
(All the recording data will be saved automatically as MIDI Format 0 File
to your USB Disk).
Quick Recording
1. Insert the USB Disk into the USB Terminal
2. Start Recording
Press the [RECORD] button to start recording.
(The first one measures are tempo prompt only. It cannot record any data).
64

3. Stop Recording
USB FILE RECORD
MULTI
PLAY / LOAD SAVE TO
DELETE
Press [RECORD] button again to stop recording.
Recording stops and your performance is written to the song. The song to
which your performance is recorded is automatically named xxxSONG_xxx
(xxx indicates this file's sequence Num in UDisk. xxx indicates the recording file
number). You can edit the song as desired by computer or midi edit soft.
Quick Recording automatically makes track assignments as below:
Track 1--------- Main Voice
Track 2--------- Split Voice
Track 3--------- Dual Voice
You also can use accompaniment styles to record. The accompaniment style
will be recorded on track9-track16.
The quick recording method is different from the multi recording method. In
quick recording mode, track4-track8 are not allowed to record. but for multi
recording, the recorded data is recorded on tracks 1-16.
If you wish to re-record a user song that was originally recorded by the easy
recording method, please use Multi Track Recording.
65

Multi Track Recording
USB FILE RECORD
MULTI
PLAY / LOAD
SAVE TO
DELETE
Multi track recording provides two ways to record.
Use Auto Track Assignment.
Select Tracks by Yourself.
1. Use Auto Track Assignment.
a. Insert the USB Disk Into the USB Terminal
b. Press the [RECORD] button to start recording.
(The first one measures are tempo prompt only. It cannot record any data).
Quick Recording automatically makes track assignments as below:
Track 1--------- Main Voice
Track 2--------- Split Voice
Track 3--------- Dual Voice
c. Press [RECORD] button again to stop recording.
Recording stops and your performance is written to the song. The song to
which your performance is recorded is automatically named xxxSONG_ xxx
( xxx indicates the song file number. SONG_xxx is the song's name).
PLAY / LOAD
d. Hold down [USB FILE] button ,then press [RECORD] button
Recording.
When the recording is finished, the recording file will be saved as a
SAVE TO
to start
new file named 002 SONG_001
f.
Use the same operation as Step d to record more tracks. The name of
the new file will be saved in sequence.
66

NOTE
USB FILE RECORD
MULTI
PLAY / LOAD SAVE TO
DELETE
If you want to record new files based on the pre-recorded multitrack file, the new recording will begin with the first track. All
the tracks of the pre-recorded multi-track file will follow the
newly-recorded tracks in sequence.
2. Select Tracks by Yourself
a. Insert the USB Disk Into the USB Terminal
b. Press the [RECORD] button to start recording.
(The first one measures are tempo prompt only. It cannot record any data).
Quick Recording automatically makes track assignments as below:
Track 1--------- Main Voice
Track 2--------- Split Voice
Track 3--------- Dual Voice
c. Press [RECORD] button again to stop recording.
Recording stops and your performance is written to the song. The song to
which your performance is recorded is automatically named xxxSONG_ xxx
( xxx indicates the song file number. SONG_xxx is the song's name).
d. Press [FUNCTION] button, use [+] or [-] button to select
25M.RecTr ,
then press [ENTER] button, use [+] or [-] button to select Tracks (01-16,Off).
Default : 01R. RecTrk------ to select the Main Voice track (01-16, OFF)
02L. RecTrk------ to select the Split Voice track (01-16, OFF)
03D. RecTrk------ to select the Dual Voice track (01-16, OFF)
67

If you record Main Voice only, please turn off the Split Track and Dual Track.
USB FILE RECORD
MULTI
PLAY / LOAD SAVE TO
DELETE
Hold down the [USB FILE] button ,then press [RECORD] button, when the
e.
recording is finished, the recording file will be saved as a new file named
002 SONG_001
f Use the same operation as Step d and Step e to record more tracks. The
.
name of the new file will be saved in sequence.
Delete Song
Insert the USB Disk into the USB terminal. Use [+] and [-] buttons to select
xxxSONGxxx file you want to delete, then hold down the [RECORD] button
and press [PLAY/LOAD] button. LCD shows:
Press [+] button to delete the file.
Press [-] button to cancel.
USB Files Button
Use this button you can switch to USB mode immediately even the keyboard is in any of
other mode.
Insert the USB Disk into the USB socket. Press [USB FILES] button, if your disk is locked or
no supported files in it, the display will show Not Ready .
USB Volume
Reference: USB Volume in function menu. P16
68

Chord Dictionary
CHORD
DICTIONARY
The Chord Dictionary function allows you to look up chords. When you want to
quickly learn how to play a certain chord, the Dictionary function will help you
to look up the individual note of the chord.
Press the [CHORD DICTIONARY] button, the LED will display Chord:C in
the top row. ( C is the chord Root and the chord type ). The LED will display
C1 E1 G1 in the buttom row. ( C1 E1 G1 is the chord Root and the chord type ).
Selecting the Chord Root
Press the root note of the Chord you want to look up. This needs to be in the
Chord Root section C3~B3 of the keyboard. For examle:
C#/Db D#/Eb
C
D
F#/GbGG#/AbAA#/Bb
E
F
B
Selecting the Chord Type
After pressing the Chord Root, select the Chord Type you want to look up in the
Chord Type section C4~B5 of the keyboard. The Chord Type includes Major
Triad, Minor Triad and Seventh Chord. Then the LCD will display the Chord
Type and key position you currently want to look up. If you press the correct
key as the notes shown on the LCD, the chord will start.
m(9)
7(9)m
M(9)
mM7
M6
M7 M
M
7b5m
m
7
6m
7
Exiting the Chord Dictionary
Press the [CHORD DICTIONARY] Button again to exit the function.
69

Teaching Function
DEMO / LEARN
Your instrument has an intellective teach function which can lead a beginner
learn how to play a song.
Left/Right Hand
Hold down the [DEMO/LEARN] button,the LCDwill display
then press the [PLAY/LOAD]button, the
[PLAY/LOAD]button indicator is flashing. You can playing the song at the same
time.After the song,use the [+/-] button to select other songs that you want.
Range: 01~55.
The defult song learning is Right
Reference: Left/right Hand in function menu. P53
DEMO / LEARN
the
[DEMO/LEARN] button and
Song 01
3 Steps of Learning Feature
There are three teaching steps for you to learn from playing the songs step by step.
Learn 1:
Hold down the [DEMO/LEARN] button, the LCD will display
P repeatedly Learn1 01 ,
ress the [DEMO/LEARN] button , the LCD will display
press the [PLAY/LOAD]button , the
[PLAY/LOAD] button indicator is flashing. Now w
key on the keyboard contineously, the teaching song will be played note by note.
It will be easy for you to learn.
the
[DEMO/LEARN] button and
hen you press any one
70
Song 01 .

DEMO / LEARN
DEMO / LEARN
Press the [PLAY/LOAD]button again to stop the learning song mode or use [+/-]
buttonto select other learning song. Range: 01~80.
Learn 2:
Hold down the [DEMO/LEARN] button, the LCD will display
P repeatedly Learn2 01 ,
ress the [DEMO/LEARN] button , the LCD will display
press the [PLAY/LOAD]button , the
[PLAY/LOAD] button indicator is flashing. Now t
the
[DEMO/LEARN] button and
he teaching song will
Song 01 .
not go on until you press the correct key on the keyboard.You can learn how to
play a song in a very short time.
DEMO / LEARN
Press the [PLAY/LOAD]button again to stop the learning song mode or use [+/-]
buttonto select other learning song. Range: 01~80.
Learn 3:
Hold down the [DEMO/LEARN] button, the LCD will display
P repeatedly Learn2 01 ,
ress the [DEMO/LEARN] button , the LCD will display
press the [PLAY/LOAD]button , the [PLAY/LOAD]
button indicator is flashing. Now y
[DEMO/LEARN] button and
the
ou can play the song with the instrument play.
Song 01 .
You can play this song by yourself.
71

DEMO / LEARN
DEMO / LEARN
Press the [PLAY/LOAD]button again to stop the learning song mode or use [+/-]
buttonto select other learning song. Range: 01~80.
Press and hold down the [DEMO/LEARN] button to exit the Teaching Function.
DEMO / LEARN
72

Factory Set
+
-
1. Turn off the power.
STANDBY/ON
2. Hold down [+] and [-] buttons, then turn the power on, it can restore all
internal settings to factory set.
STANDBY/ON
73

Voice List
PROGRAM CHANGE
PROGRAM CHANGE
PROGRAM CHANGE
Appendix
NO
PROGRAM CHANGE
.
BANK
VOICE NAME
NO
PROGRAM CHANGE
.
BANK
VOICE NAME
NO
PROGRAM CHANGE
.
BANK
VOICE NAME
74
AcPiano1
AcPiano2
AcPiano3
AcPiano4
BritePno
El Grand Piano 1
HonkyTonk Piano 1
HonkyTonk 2
Electric piano 1
Electric piano 2
ElecPiano3
ElecPiano4
ElecPiano5
ElecPiano6
DetunedEP1
DetunedEP2
Harpsichord
Harpsichord2
Harpsichord3
Harpsichord4
CoupledHarpsichord
Clavi1
Clavinet2
Clavinet3
Clavinet4

NO
PROGRAM CHANGE
PROGRAM CHANGE
PROGRAM CHANGE
.
PROGRAM CHANGE
BANK
VOICE NAME
Celesta
Celesta 2
Celesta 3
Glocken1
Glocken2
Music Box
Vibraphone
Vibes 1
Vibes 2
Marimba 1
Marimba 2
Xylophone 1
Xylophone 2
Tubular Bells
ChurchBell
TubeBell
Dulcimer
Drawbar Organ
DetunedOrgan 1
DetunedOrgan 2
Percussive Organ
Rock Organ
ElecOrgan1
ElecOrgan2
ElecOrgan3
ElecOrgan4
Church Organ 1
ChurchOrgan 2
PipeOrgan1
PipeOrgan2
PipeOrgan3
Reed Organ
Accordion
ItalianAccordion
Accordion_MT
Harmonica1
Harmonica2
HarmoPan
Tango Accordion
Nylon Guitar
Ukulele
Guitar1
Steel Guitar 1
Mandolin
StringGuitar
Guitar2
Jazz Guitar
HawaiianGuitar
ElecGuitar1
ElecGuitar2
Clean Guitar
ChorusedGuitar
Muted Guitar
FunkGuitar
PROGRAM CHANGE
NO
.
BANK
VOICE NAME
Overdriven Guitar
Distortion Guitar
FeedbackGuitar1
Guitar Harmonics
GuitarFeedback2 2
Acoustic Bass 1
Acou Bass 2
Acou Bass 3
Finger Bass
ElecBass 1
ElecBass 2
Pick Bass
Fretless Bass 1
Fretless 2
Fretless 3
Slap Bass 1
Slap Bass 2
Slap Bass 3
Slap Bass 4
Synth Bass 1
Synth Bass 2
SynthBass 3
SynthBass 4
SynthBass 5
SynthBass 6
SynthBass 7
SynthBass 8
Violin1
Violin2
Violin3
SlowViolin
Viola
Cello 1
Cello 2
Cello 3
Contrabass 1
ContraBass_MT
Tremolo Strings
DoctorSolo
Pizzicato Strings1
Pizzicato 2
Orchestral Harp 1
Harp 1
Harp 2
Timpani 1
Timpani 2
Strings Ensemble 1
Strings Ensemble 2
OrchestralPad
StringSection1
StringSection2
StringSection3
Synth Strings 1
Synth Strings 2
PROGRAM CHANGE
NO
.
BANK
VOICE NAME
SynthStrings3
Choir Aahs
Chorale
Voice Oohs
SoundTrack
Synth Voice
FunnyVox
Orchestra Hit1
OrchestraHit 2
Trumpet 1
Trumpet 2
Trumpet
3
Trombone 1
Trombone 2
Trombone
3
Tuba
Tuba
2
BrassSection
BrassSection
Muted Trumpet
French Horn 1
FrenchHorns 2
FrenchHorns
Brass Section
Brass2
Synth Brass 1
Synth Brass
SynthBrass 3
SynthBrass
SynthBrass
SynthBrass
SynthBrass
SynthBrass
Soprano Sax
Alto Sax
Tenor Sax
Baritone Sax
Sax1
Sax2
Sax3
Sax4
Oboe
Oboe
Oboe2001
English Horn
English Horn
Bassoon
Bassoon
Clarinet
Clarinet 2
Clarinet
Piccolo 1
Piccolo 2
Piccolo 3
1
2
3
2
4
5
6
7
8
1
2
1
2
1
2
1
3
75

NO
PROGRAM CHANGE
PROGRAM CHANGE
PROGRAM CHANGE
PROGRAM CHANGE
.
BANK
Flute 1
VOICE NAME
Flute 2
Flute 3
BreathPipe
Recorder1
Recorder 2
Pan Flute
Sho
PanPipes
Blown Bottle1
Bottle Bottle2
Shakuhachi
Shakuhachi 2
Whistle 1
Whistle 2
Whistle 3
Ocarina
Lead 1 (Square)
Sine Wave
Square Wave
Lead 3 (Sawtooth)
DeepSnare
Lead 5 (Calliope)
Lead 7 (Chiff)
Lead 8 (Charang)
Lead 10(Voice)
Lead 12 (Fifth)
Lead 13 (Bass+Lead)
Pad 1 (New Age)
Pad 3 (Warm)
Pad 4 (Polysynth)
Pad 5 (Choir)
Pad 6 (Bowed)
Pad7(Metallic)
Pad 9 (Halo)
Pad 10 (Sweep)
Fx 1 (Rain)
IceRain_MT
Fx 2 (Soundrack)
Fx 3 (Crystal)
Fx 4 (Atmosphere)
Fx6(Brightness)
Fx 7 (Goblins)
Fx 8 (Echoes)
EchoPan
Fantasy1
Fantasy2
Sitar
Sitar_MT
Banjo
Shamisen
Koto1
Koto2
NO
PROGRAM CHANGE
.
BANK
VOICE NAME
Koto_MT
Kalimba
Bagpipe
Fiddle
Shanai
BreathPipe
Tinkle Bell
EchoBell
WindBell
WaterBell
JungleTune
BellSinger
WarmBell
Agogo
SynMallet
MelodicTom
Steel Drums
Woodblock
ElecPerc 1
ElecPerc 2
Taiko Drum
TaikoRim
ConcertBassDrum
Taiko_MT
Melodic Tom1
MeloTom2
Synth Drum
808Tom 808
Reverse Cymbal
Cymbal
GuitarNoise
StringSlap
GtrCutNoise
Breath Noise
FluteKeyClick
Glasses
Triangle
Seashore
Rain
Thunder
Wind
Stream
Bubble
Atmosphere
Bird Tweet
Dog
HorseGallop
Bird 2
BirdTweet
Telephone 1
Telephone 2
Telephone 3
DoorCreaking
DoorSlam
Scratch
NO
PROGRAM CHANGE
.
BANK
VOICE NAME
WindChimes
Helicopter
BurstNoise
CarEngine
CarStop
CarPass
CarCrash
Siren
Train
JetPlane
Starship
OneNoteJam
Applause
Laughing
Screaming
Punch
HeartBeat
FootSteps
SchoolDaze
Gunshot1
MachineGun
LazerGun
Explosion
JungleTune
Bangdi
Erhu 1
Erhu 2
Pipa 1
Pipa 2
Liuqin
Zhongruan
Guzheng 1
Guzheng 2
Yangqin
Banhu
Suona
SuonaHigh
LuShen
Hulusi
Xiao
Guqin
Matouqin
Reed
Standard
Standrd2
Room
Power
Eletroni
Synth
Dance
Jazz
Brush
Classic
Sino
Effect
76

Style List
.
NO
8 Beat
16 Beat
Ballad
Dance
Disco
STYLE NAME
8Bt_Mdrn
MrsyBeat
SurfPop
8Beat1
8Beat2
8Beat3
Ballrock
60sRock
HardRock
ShufRock
80sRock
Slrock1
Slrock2
16Beat1
16Beat2
16Beat3
16Beat4
16Beat5
PopShuf
GuitrPop
JazzRock
SwngFunk
PopRock
60Rock2
70
70Ties
Surfrock
PnoBalad
LoveSong
68Modern
68SlowRk
ShowBld
PopBalad
16BtBld
Ballad1
Ballad2
Ballad3
Rap
DancePop
House
SwingHse
ClubDnce
ClubLatn
Garage
TechnoPop
Dance8Bt
HipHop
ChillOut
Cumbia
Dance
Techno1
Techno2
70sDisco
.
NO
STYLE NAME
LatnDsco
DiscoPop
DscParty
DscFever
NYDisco
Disco1
Disco2
Disco3
Disco4
Swing&Jazz
BBFast
80
BBMid
BBBallad
JazzClub
Swing
JzBallad
Dixie
Ratime
Stride
MdrnJazz
DixiePop
Jazzwals
RagtimeP
Swing
Ulligull
R&B
Soul
DtrtPop
Rhtmblus
68soul
Twist
RockRollP
BgieWgie
68Blues
34Gospel
GsplShuf
Germwalz
Gospel
Gypsi
Rocknrol
Rockrol2
R&B
TwistPop
Country
Ctry8Bt
CtryPop
CtrySwng
Ctry2Bt2
CtryBld
Bluegras
CtryWlzP
Cntryrok
Cntrywlz
Country1
Country2
Country3
Latin
.
NO
Ballroom
Traditional
STYLE NAME
Merengue
Bosanova
PopBossa
MamboPop
SalsaPop
Beguine1
Beguine2
Reggae
SwngRega
Baroque
Bigband
Boogie1
Boogie2
Latin
Macarena
Mambo
Sacrific
Salsa
DancBand
EglshWlz
Foxtrot1
Foxtrot2
Slowfox
QvkFxtrt
QvkStep
Tango1
Tango2
Tango3
Tango4
TangoHb
Pasodobl
Samba1
Samba2
Samba3
Sambarok
Dscsamba
ChaCha1
Chacha2
Chacha3
Chacha4
Jive
Rhumba1
Rhumba2
VnsWaltz
Carib1
Charlstn
Cingen98
Fastbos
Rave1
Rave2
Reggea
24March
March
68March1
68March2
77

NO
Waltz
Piano
Sino
.
STYLE NAME
24Polka
68Polka
Polka1 1
Polka2
Tarntela
SirtakiP
SctsReel
Hawai1
Hawai2
Mariachi
Hollywd
Merenque
Motown1
Mus58
Oriental
Pasodobl
Schlager
Sirtaki1
SwngWltz
JazzWltz
Waltz
FrnchWlz
MordnWlz
Slwaltz
Trawltz1
Trawltz2
Vienwltz
Pno8bt1
Pno8bt2
Pnobald
Pnowalz1
Pnowalz2
Yaozu
Zangzu
Xiaoqu
Xinjiang
Errenzan
Jiangsu1
Jiangsu2
Minzu
Shanbei
JingJu1
JingJu2
NO
.
STYLE NAME
NO
.
STYLE NAME
78

Percussion Voice List
Note
Note#
Standard(0) Room(8)
C
24
#C
25
D
26
#D
27
E
28
F
29
#F
30
G
31
#G
32
A
33
34
#A
B
35
36
C
37
#C
38
D
39
#D
40
E
41
F
42
#F
43
G
44
#G
45
A
#A
46
47
B
48
C
49
#C
50
D
51
#D
E
52
F
53
#F
54
G
55
#G
56
A
57
#A
58
59
B
C
60
#C
61
D
62
63
#D
64
E
65
F
#F
66
67
G
#G
68
A
69
#A
70
B
71
72
C
73
#C
74
D
#D
75
76
E
F
77
#F
78
G
79
#G
80
A
81
#A
82
B
83
C
84
Seq Click H
Brush Tap
Brush Swirl L
Brush Slap
Brush Swirl H
Snare Roll
Castanet
Snare L
Sticks
Bass Drum L
Open Rim Shot
Bass Drum M
Bass Drum H
Side Stick
Snare M
Hand Clap
Snare H
Floor Tom L
Hi-Hat Closed
Floor Tom H
Hi-Hat Pedal
Low Tom
Hi-Hat Open
Mid Tom L
Mid Tom H
Crash Cymbal 1
High Tom
Ride Cymbal 1
Chinese Cymbal
Ride Cymbal Cup
Tambourine
Splash Cymbal
CowBell
Crash Cymbal 2
Vibraslap
Ride Cymbal 2
Bongo H
Bongo L
Conga H Mute
Conga H Open
Conga L
Timbale H
Timbale L
Agogo H
Agogo L
Cabasa
Maracas
Samba Whistle H
Samba Whistle L
Cuiro Short
Cuiro Long
Claves
Wood Block H
Wood Block L
Guica Mute
Guica Open
Triangle Mute
Triangle Open
Shaker
Jingle Bell
Bell Tree
SD Room L
SD Room H
Room Tom 1
Room Tom 2
Room Tom 3
Room Tom 4
Room Tom 5
Room Tom 6
Power(16)
SD Elec M
BD Rock
SD Rock
SD Rock Rim
Rock Tom 1
Rock Tom 2
Rock Tom 3
Rock Tom 4
Rock Tom 5
Rock Tom 6
Electronic(24)
Rever se Cymbal
Hi-Q
Snare L
BD Rock
BD Rock 2
SD Elec M
SD Elec H
ETom 1
ETom2
E Tom 3
E Tom 4
ETom5
E Tom 6
Scratch Push
Scratch Pull
Synth(25)
Rever se Cymbal
Hi-Q
SD Elec H2
BD Analog 1L
BD Analog 1H
Analog Side Stick
SD Analog 1H
SD Analog 1L
Analog Tom 1
Analog HH Closed1
Analog Tom 2
Analog HH Closed2
Analog Tom 3
Analog HH 1Open
Analog Tom 4
Analog Tom 5
Analog Cymbal
Analog Tom 6
Analog Cowbell
Analog Conga H
Analog Conga M
Analog Conga L
Analog Maracas
Analog Claves
Scratch Push
Scratch Pull
Snare Jazz
BD Jazz
SD Jazz L
SD Jazz H
Jazz(32)
Brush(40)
Brush Slap L
BD Jazz
Brush Slap H
Brush Tap
Brush Tom 1
Brush Tom 2
Brush Tom 3
Brush Tom 4
Brush Tom 5
Brush Tom 6
Classic(48)
Bass Drun L3
Gran Casa
Gran Casa Mute
Marching SD M
Marching SD H
Hand Cym.L Open
Hand Cym.L Closed
Hand Cym.H Open
Hand Cym.H Closed
Sono(151)
1
2
3
4
Low
Med
Hi
Low
Med
Hi
Med
Hi
Low
Effects(152)
High-Q
Slap
Scratch Push
Scratch Pull
Sticks
Square Click
Mtrnm .Click
Mtrnm. Bell
Gt.FretNoiz
Gt.CutNoise
Gt.CutNoise
String Slap
Fl.KeyClick
Laughing
Low
Screaming
Hi
Punch
Heart Beat
Low
Footste ps 1
Footsteps 2
Applause
Hi
Door Creaking
Door
Scratch
Wind Chimes
Car-Engine
Car-Stop
Car-Pass
Car-Crash
Siren
Train
Jetplane
Helicopter
Starship
Gun Shot
Machine Gun
Laser gun
Explosion
Dog
HorseGallop
Bird
Rain
Thunder
Wind
Seashore
Stream
BuBBle
Standrd2(1)
Snare H Soft 2
Open Rim Shot 2
Bass Drum H 2
Snare 12
Snare H Hard 2
Dance(26)
Dance 1
Dance Kick
Dance 2
Dance 3
Dance Snare 1
Dance 4
Dance Snare 2
Dance Tom 1
Dance Hita 1
Dance Tom 2
Dance Hita 2
Dance Tom 3
Dance Hita 3
Dance Tom 4
Dance Cha 1
Dance Ling
Dance Cha 2
Dance 5
Dance 6
Dance 7
Dance 8
Dance 9
Dance 10
Dance 11
Dance 12
Dance 13
Dance 14
Dance Ps3
79

MIDI Implementation Chart
Function Transmitted Recognized Remarks
Basic Default
Channel Changed
Mode Default
Messages
Altered
Note
Number :True voice
Velocity Note ON
Note OFF
Affter Key's
Pitch Bender
Control Change 0,32
Programe
Change : True
System Exclusive
System : Song Position
: Song Select
Common : Tune
Aux : Local on/off
: All Notes Off
Messages : Active Sense
: Reset
1
5
6
7
10
11
64
65
66
67
80,81
91,93
100,101
120
121
122
(*1)
(*1)
Mode 3
X
********
0~127
********
O 9nH,v=1~127
O 9nH,v=0 or 8nh
X
X
O
X
X
O
O
O
X
O
X
O
O
O
O
O
O
X
O
O 0-127
0-127
X
X
X
X
O
O
X
X
1-16CH
1-16CH
Mode 3
X
X
0~127
0~127
O 9nH,v=1~127
O 9nH,v=0 or 8nh
X
O
O
O
O
O
O
O
O
O
O
O
O
O
O
O(*2)
O
O
O
O 0-127
0-127
O
X
X
X
O
O
O
O
Bank Select
Modulation
Portamento time
Data Entry
Volume
Pan
Expression
Sustain
Portamento
Sostenuto
Soft pedal
DSP TYPE
DSP DEPTH
RPN LSB,MSB
All sound off
Reset all Controllers
Local control
Mode1:OMNI ON,POLY Mode2:OMNI ON,MONO O: Yes
Mode3:OMNI OFF,POLY Mode4:OMNI OFF,MONO X: NO
*1: Main voice track (01-16).Default: 01
Split voice track (01-16).Default: 02
Dual voice track (01-16).Default: 03
Percussion track (01-16).Default: 10
*2: Registered parameter number:
#0: Pitch sensivity
#1: Fine tuning cents
#2: Coarse tuning in half-tones
80

Specifications
81

Assemble Draft
C
A
C
E
B
E
D
A
C
E
B
G
F
TG8862
G
A:
B:
C:
E:
F:
G:
X6
X4
X6
X4
X6
X6
X6
M6X16
M6X25
M4X16
ST3.9X20D:
d=4
M6X55
Turn the adjustable Pedal Board support,until it is in firm contact with the floor.
Before moving the piano to a new
location, always remember to raise
the level of the Pedal Board support
so that it is not touching the floor.
Once the piano is in place, you can
adjust it so it is in firm contact with
the floor again.
82
10505874V1.0

FCC STATEMENT
1. This device complies with Part 15 of the FCC Rules. Operation is subject to the following two
conditions:
(1) This device may not cause harmful interference.
(2) This device must accept any interference received, including interference that may cause
undesired operation.
2. Changes or modifications not expressly approved by the party responsible for compliance could
void the user's authority to operate the equipment.
NOTE: This equipment has been tested and found to comply with the limits for a Class B digital
device, pursuant to Part 15 of the FCC Rules. These limits are designed to provide reasonable
protection against harmful interference in a residential installation.
This equipment generates uses and can radiate radio frequency energy and, if not installed and
used in accordance with the instructions, may cause harmful interference to radio communications.
However, there is no guarantee that interference will not occur in a particular installation. If this
equipment does cause harmful interference to radio or television reception, which can be
determined by turning the equipment off and on, the user is encouraged to try to correct the
interference by one or more of the following measures:
Reorient or relocate the receiving antenna.
Increase the separation between the equipment and receiver.
Connect the equipment into an outlet on a circuit different from that to which the receiver is
connected.
Consult the dealer or an experienced radio/TV technician for help.

 Loading...