


Precaution
Thank you for purchasing this digital instrument.For perfect operation and
read the manual carefully and keep it for future
Safety
Precautions
security,please
reference.
CAUTION
RISK OF ELECTRIC
DO NOT
OPEN
SHOCK
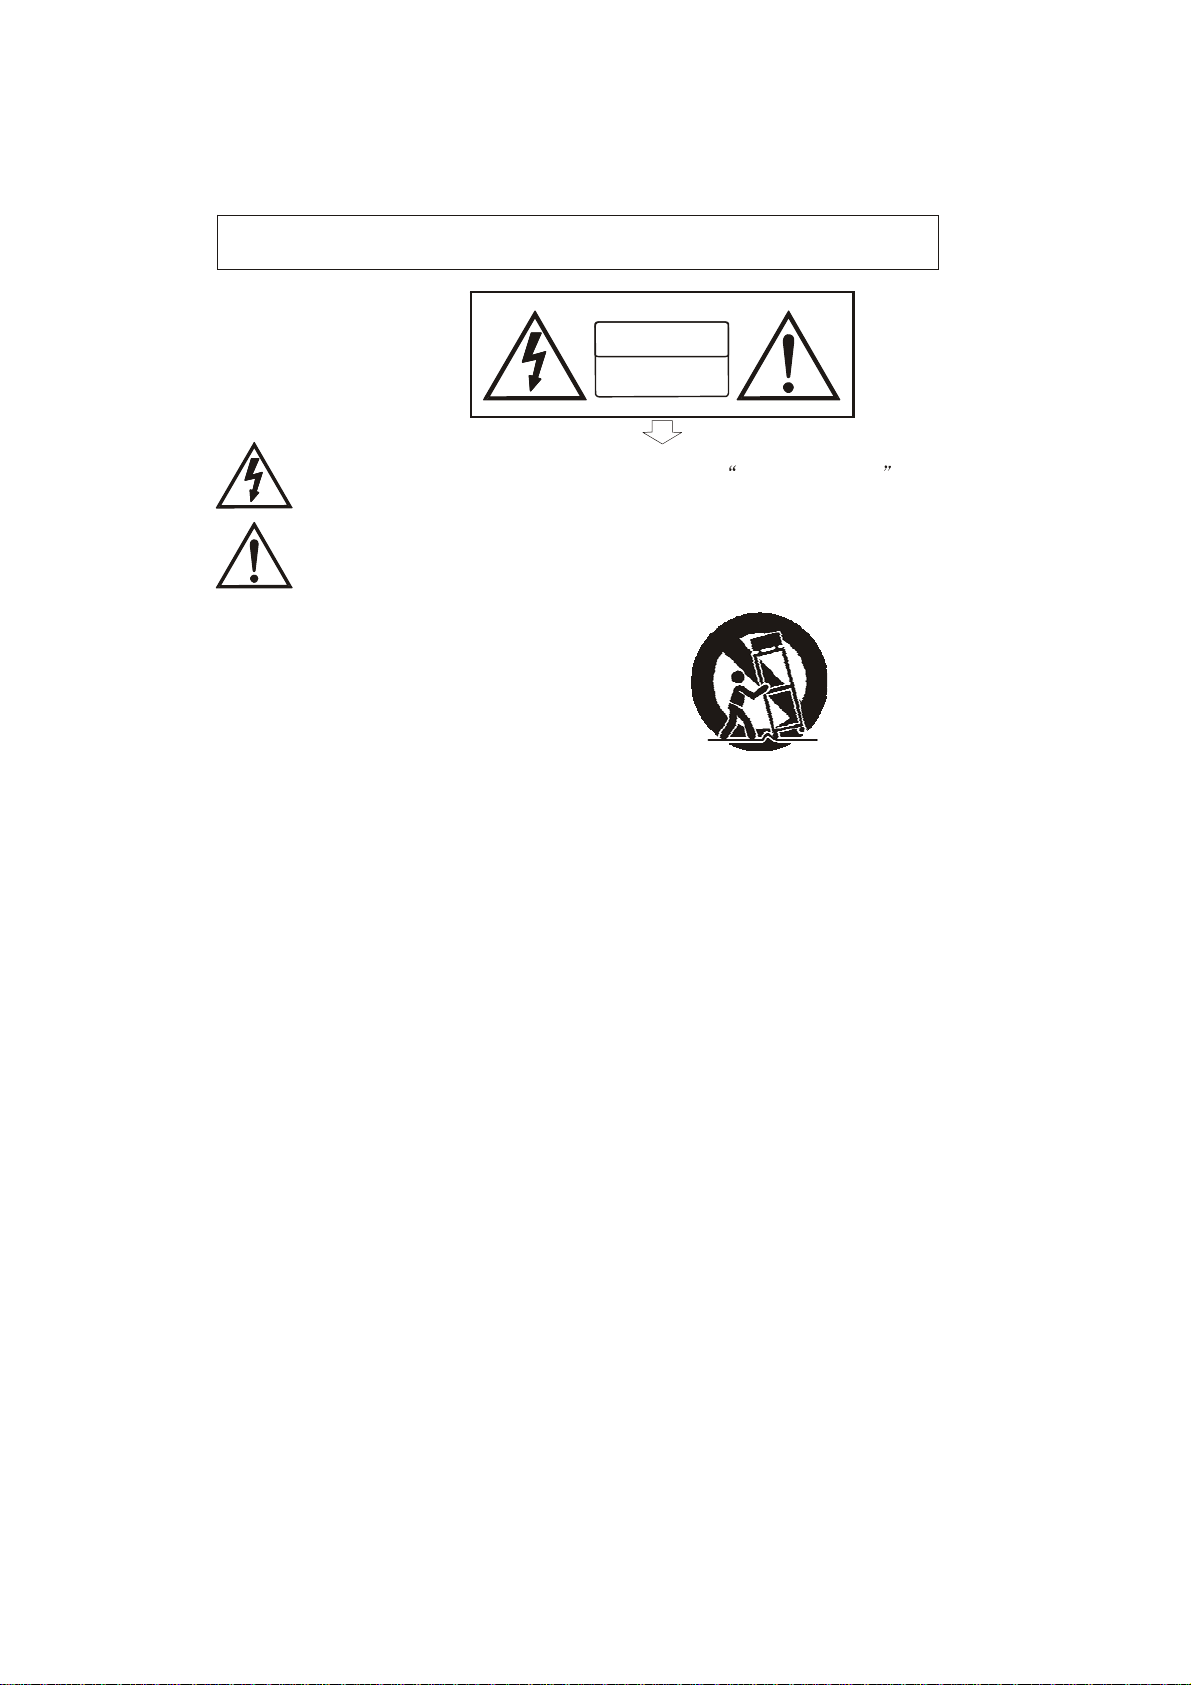
The lightning flash with arrowhead symbol within an equilateral triangle is
tended to alert the user to the presence of uninsulated dangerous
within the product s enclosure that may be of sufficient magnitude to constitute
risk of electric shock to
The exclamation point within an equilateral triangle is intended to alert the
to the presence of important operating and maintenance(servicing) instructions in
the literature accompanying the
persons.
product.
voltage
in
user
Important Safety
1) Read these instructions.
2) Keep these instructions.
3) Heed all warnings.
4) Follow all instructions.
5) Do not use this apparatus near water.
6) Clean only with dry cloth.
7) Do not block any ventilation openings,install in accordance with the manufacturer s instructions.
8) Do not install near any heat sources such as radiators, heat registers,stoves,or other apparatus (including am
plifiers) that produce heat.
9) Do not defeat the safety purpose of the polarized or grounding-type plug.A polarized plug hase two blades
with one wider than the other.A grounding type plug has two blades and a third grounding prong.The wide blade
or the third prong are provided for your safety,if the provided plug does not fit into your outlet.consult an elec
trician for replacement of the obsolete outlet.
10) Protect the power cord from being walked on or pinched particularly at plugs.convenience receptacles,and
the point where they exit from the apparatus.
11) Only use attachments/accessories specified by the manufacturer.
12) Use only with the cart,stand,tripod,bracket,or table specified by the manufacturer,or sold with the
apparatus.When a cart is used,use caution when moving the cart/apparatus combination to avoid injury from
tip-over (Figure 1).
13) Unplug this apparatus during lightning storms or when unused for a long periods fo time.
14) Refer all servicing to qualified service personnel.Servicing is required when the apparatus has been dam
aged in any way,such as power-supply cord or plug is damaged,liquid has been spilled or objects have fallen
into the apparatus,the apparatus has been exposed to rain or moisture,does not operate normally,or has been
dropped.
Instructions
(Figure 1)
WARNING:To reduce the risk of fire or electric shock,do not expose this apparatus to rain or
moisture.
CAUTION:Apparatus shall not be exposed to dripping or splashing and no objects filled with
liquids,such as vases,shall be placed on the apparatus.
a

FCC warning statement
15.19 Labelling requirements.
This device complies with part 15 of the FCC Rules. Operation is subject to the
following two conditions: (1) This device may not cause harmful interference,
and (2) this device must accept any interference received, including interference
that may cause undesired operation.
15.21 Information to user.
Any Changes or modifications not expressly approved by the party responsible
for compliance could void the user's authority to operate the equipment.
15.105 Information to the user.
Note: This equipment has been tested and found to comply with the limits for a
Class B digital device, pursuant to part 15of the FCC Rules. These limits are
designed to provide reasonable protection against harmful interference in a
residential installation. This equipment generates uses and can radiate radio
frequency energy and, if not installed and used in accordance with the
instructions, may cause harmful interference to radio communications. However,
there is no guarantee that interference will not occur in a particular installation.
If this equipment does cause harmful interference to radio or television reception,
which can be determined by turning the equipment off and on, the user is
encouraged to try to correct the interference by one or more of the following
measures:
-Reorient or relocate the receiving antenna.
-Increase the separation between the equipment and receiver .
-Connect the equipment into an outlet on a circuit different from that to which
the receiver is connected.
-Consult the dealer or an experienced radio/TV technician for help.

Thanks For Using Our Digital Piano
Your digital piano is a high-quality digital piano with 88 standard
touch sensitivity keyboard and combines the most advanced PCM
tone generation technology. This digital piano lets you record your
performances and Registration settings to a USB Disk. Each user
song lets you record up to sixteen independent tracks. In order to
obtain maximum performance and enjoyment, please read this
manual thoroughly while trying out the various features described.
Contents
Panel Control
Connectors
Using AC Power Jack
Using Headphones
Using Foot Pedals
Using MIDI IN/OUT Jack
Using Line IN/OUT Jack
Using USB-MIDI
Basic Operation
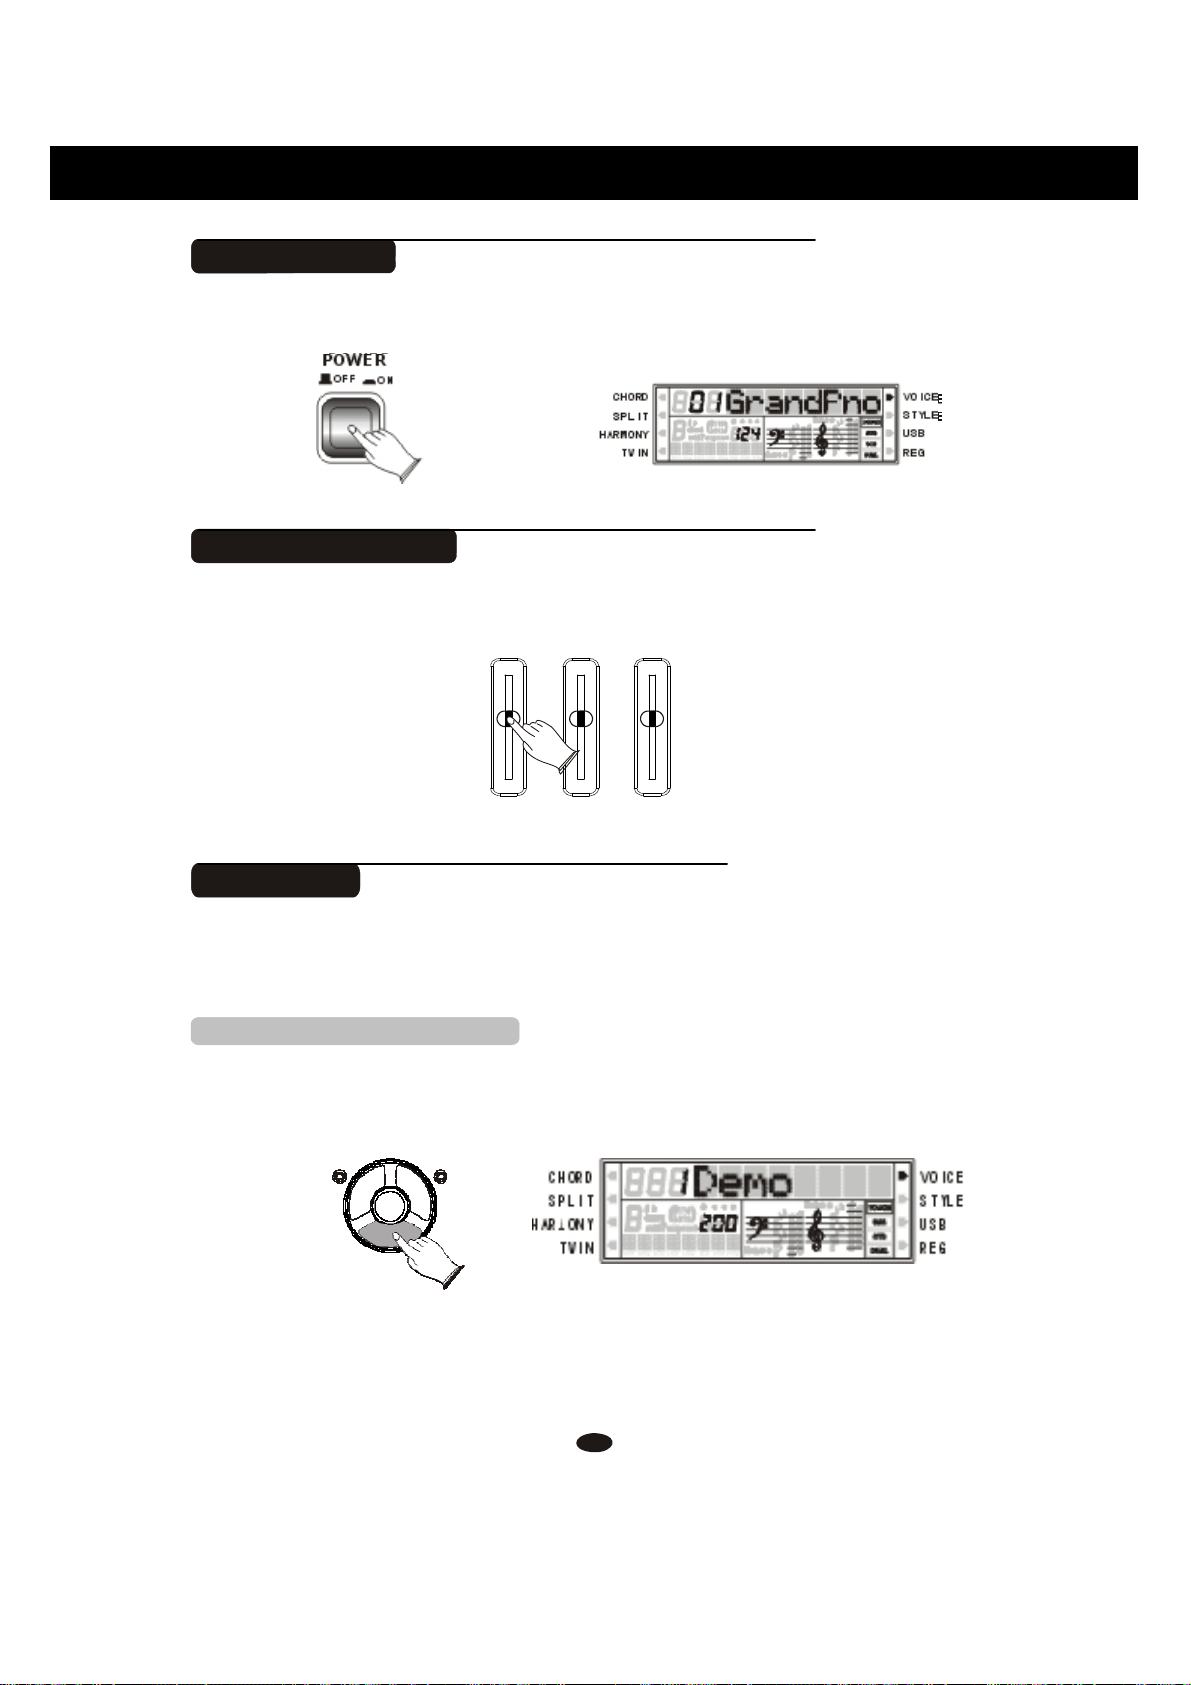
Power Switch
Adjust the Volume
Demo Play
Tempo
Tap/Tempo
Transpose
............................................
Tune
Reverb
Adjusting Reverb Depth
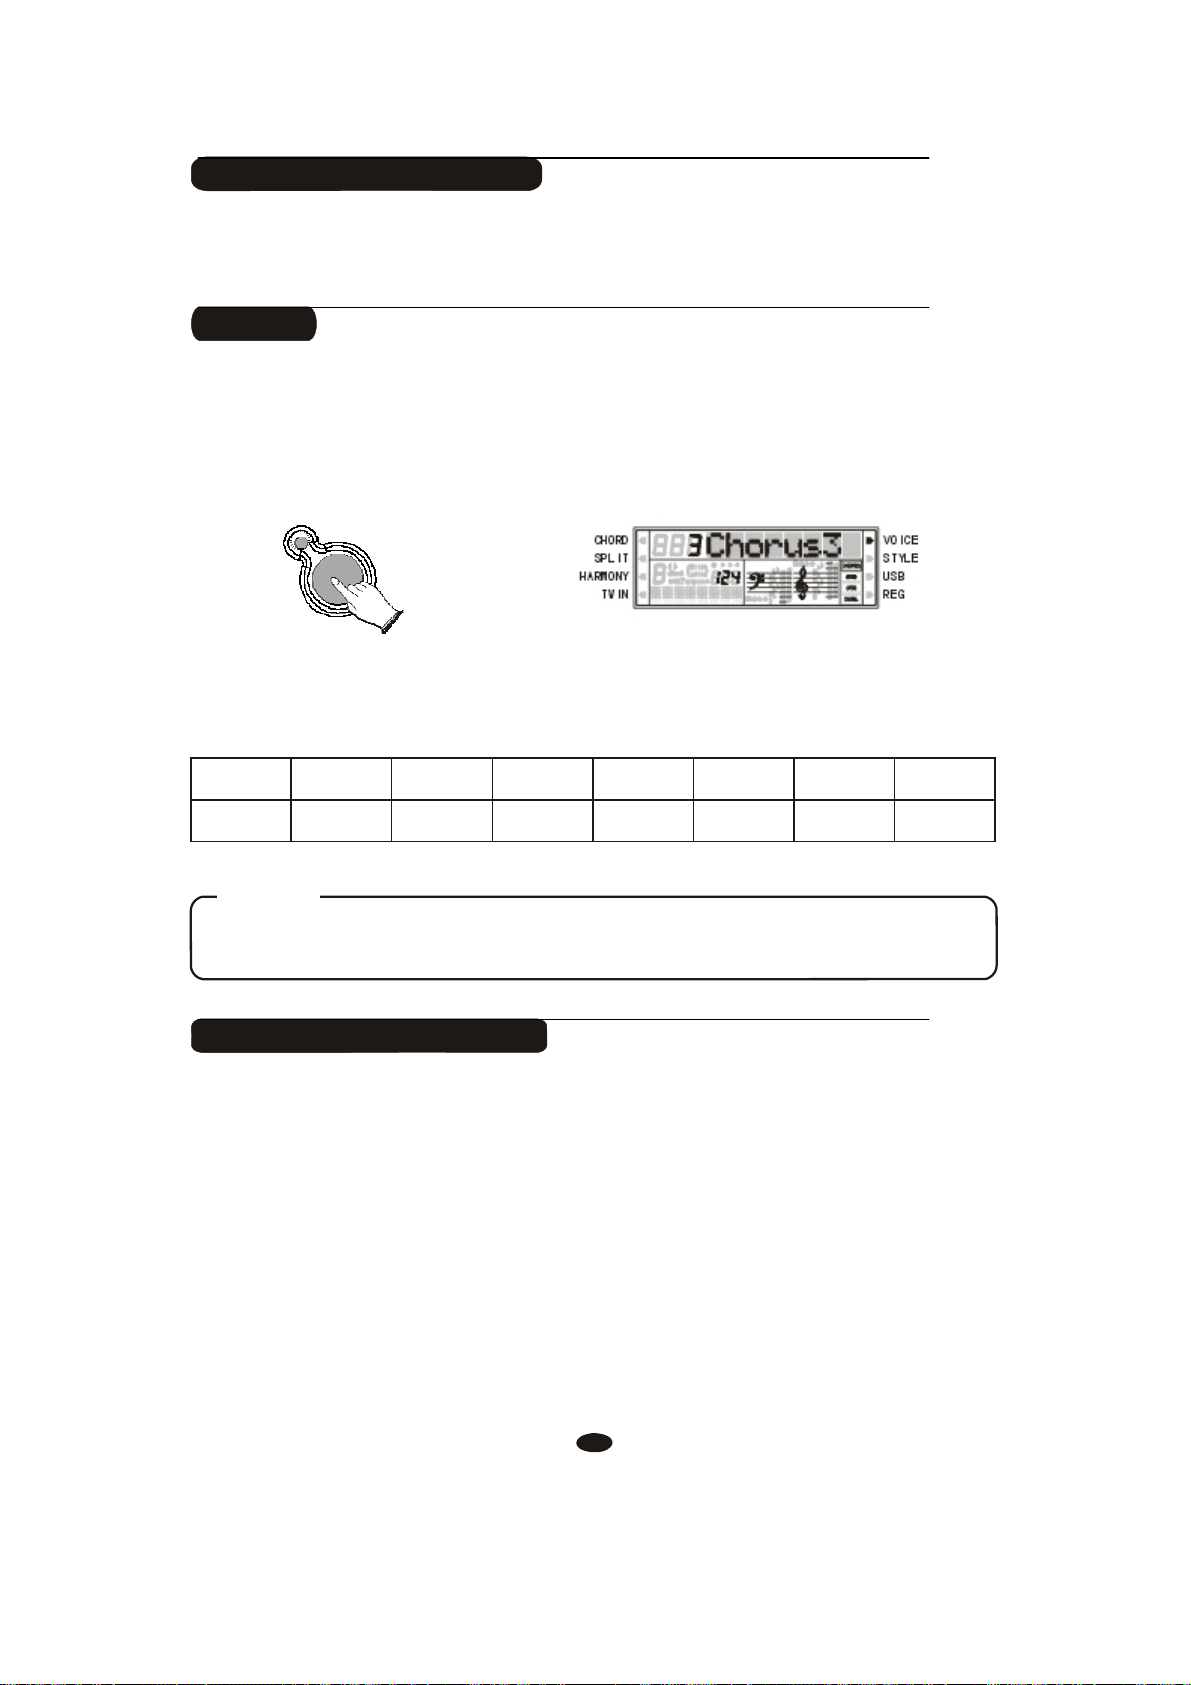
Chorus
Adjusting Chorus Depth
Sustain
Touch
Function
Voices
Selecting a Voice
Dual Mode
Split Mode
Adjusting Keyboard Volume
............................................
................................
....................................
...................
.......................
....................... 5
............ 6
............. 7
........................ 7
............................ 8
..............................
........................
.................................. 8
.........................................10
...................................
....................................
........................................
..............12
.......................................12
...............
.......................................13
........................................14
......................................
..........................
..................................23
..................................24
....................................................
Playing Portable Grand Piano
....................................................26
One Touch Setting
Twin Mode
Auto Accompaniment
Using Auto Accompaniment
(Only Rhythm Track)
Using Auto Accompaniment
(All Tracks)
..................................
..................................
........................
...................
..................
3
Auto Accompaniment Control
...................................................
4
4
4
8
8
10
10
11
11
12
15
22
22
25
26
26
27
27
Straight Start
Synchro Start
30
Starting the Accompaniment with an
Introduction
Adding Fill-In
Stopping the Accompaniment
Variation
Registration Memory
Song Recording
Factory Set
Appendix
...........................................
Fade
Harmony
Chord Function
User Style
Memorizing the Settings
Recalling the Settings
Saving the Registration Data to
USB Disk
Use Registration Data from USB
...................................................
Quick Recording
Multi Track Recording
Delete Song
File Button
Filter Button
Adjusting Song's Volume
Voice List
Style List
Percussion Voice List
MIDI Implementation Chart
Specifications
Assembly Instructions
28
...............................
..............................
................................ 30
............................. 31
....... 31
....................................
.....................................
........................... 32
..................................
...................
..............
..................
...................................
...........................
.........................
................
................................
..................................
...............................
.............
...................................
......................................
................................... 49
................................... 50
.................. 51
........
.............................
.................
30
30
31
32
32
35
37
37
38
38
39
40
40
42
45
46
46
47
48
49
52
53
54
1
1
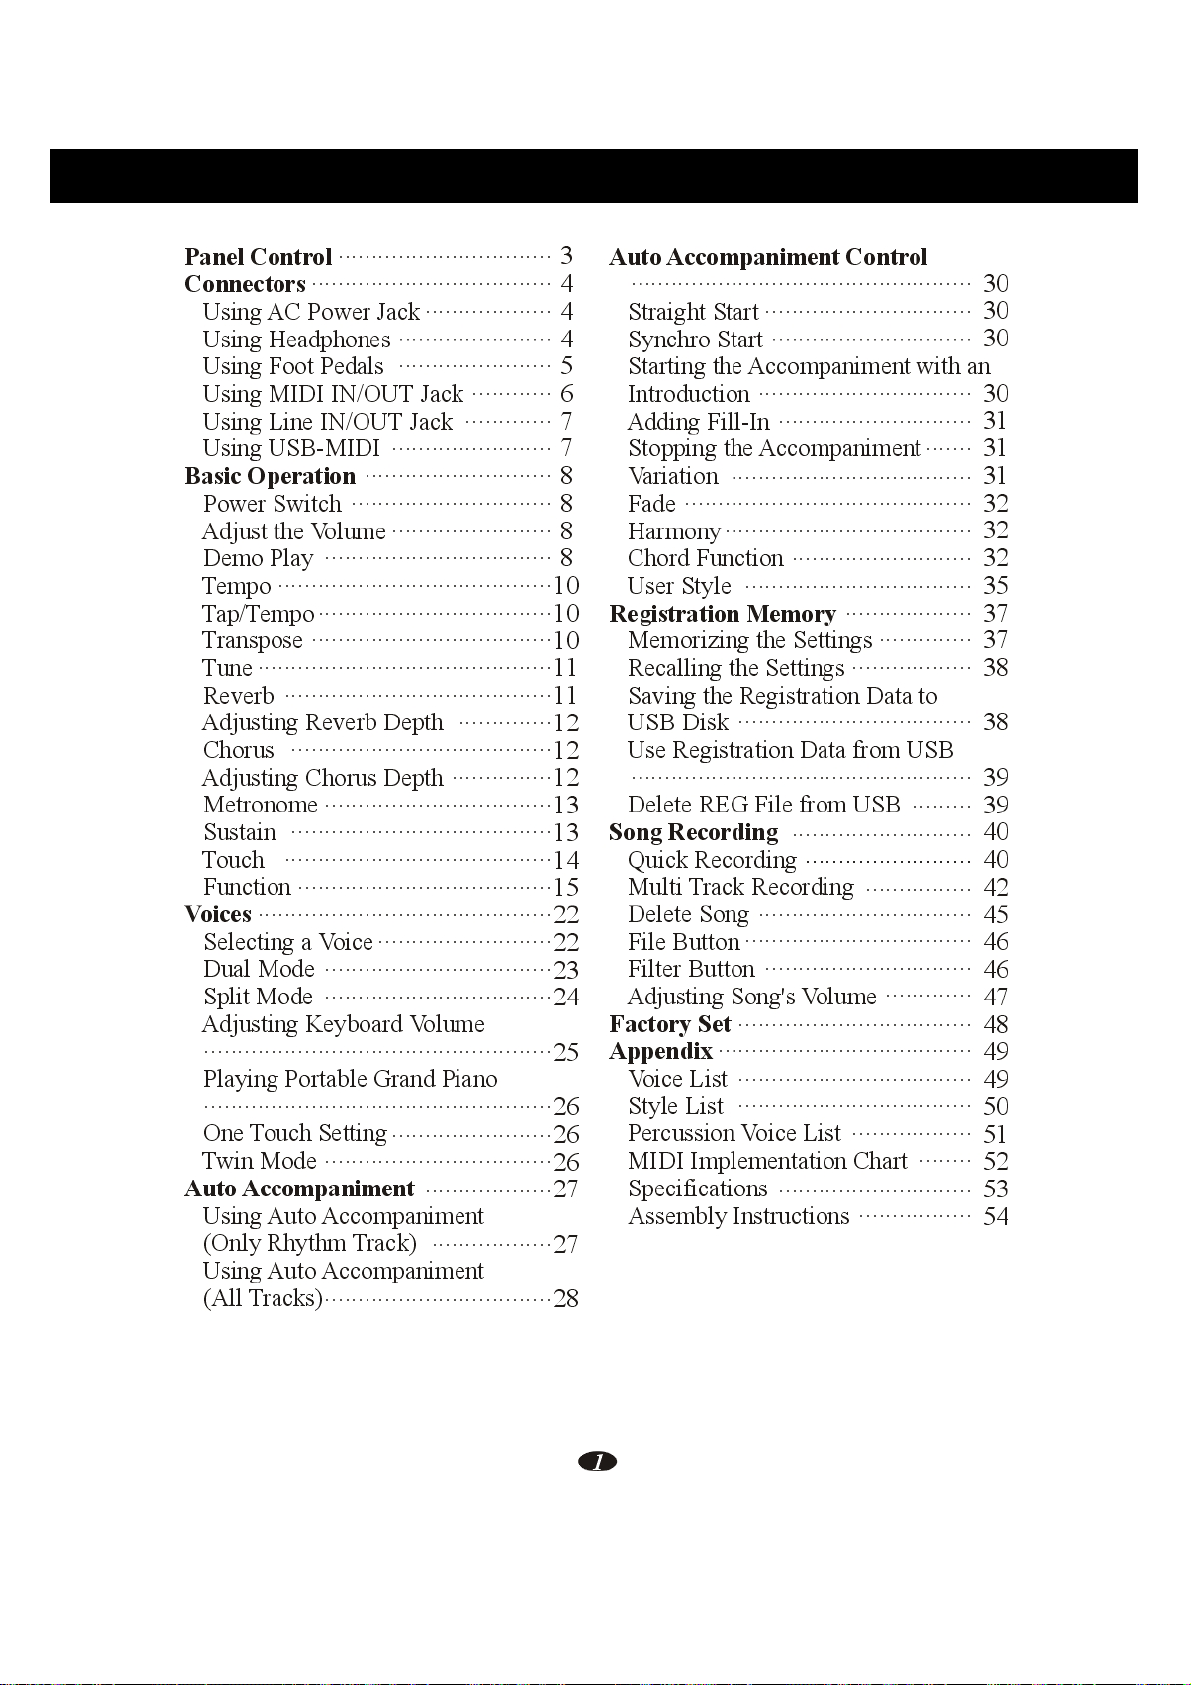
Panel Contents
1. POWER
27. [TOUCH] Button
2. VOLUME CONTROLS
MASTER VOLUME
RHYTHM
BASS/CHORD
3. MULTI DISPLAY
4. [ TRANS ] Button
5. [ TUNE ] Button
6. [ KB.VOL ] Button
7. [ TEMPO ] Button
8. [TAP/TEMPO] Button
9. [O.T.S] Button
10. [METRO] Button
11. [REVERB] Button
12. [CHORUS] Button
13. [SUSTAIN] Button
14. [CHORD] Button
15. [FADE] Button
28. [VOICE] Button
29. [STYLE] Button
30. [GRAND PIANO] Button
31. Number Buttons [0]-[9]
[+] and [-] Buttons
32. [LEFT] Button
33. [RIGHT] Button
34. [DEMO] Button
35. [STORE/BANK] Button
36. [SAVE] Button
37. [M1-M6] Button
38. [FILE] Button
39. [RECORD] Button
40. [PLAY/LOAD] Button
41. [TRACK] Button
42. [FILTER] Button
43. [USB.VOL] Button
16. [SYNCHRO] Button
17. [START/STOP] Button
18. [INTRO/ENDING] Button
19. [FILL IN] Button
20. [VARIATION] Button
21. [SPLIT] Button
22. [HARMONY] Button
23. [DUAL] Button
24. [TWIN] Button
25. [FUNCTION] Button
26. [ENTER] Button
44. [USB]
Rear Panel
45. [MIDI OUT] Jack
46. [MIDI IN] Jack
47. [PEDAL] Jack
48. [USB] Jack
49. [LINE OUT] Jack
50. [LINE IN] Jack
51. [POWER] Jack
52. [PHONES1] Jack
[PHONES2] Jack
3
Connectors
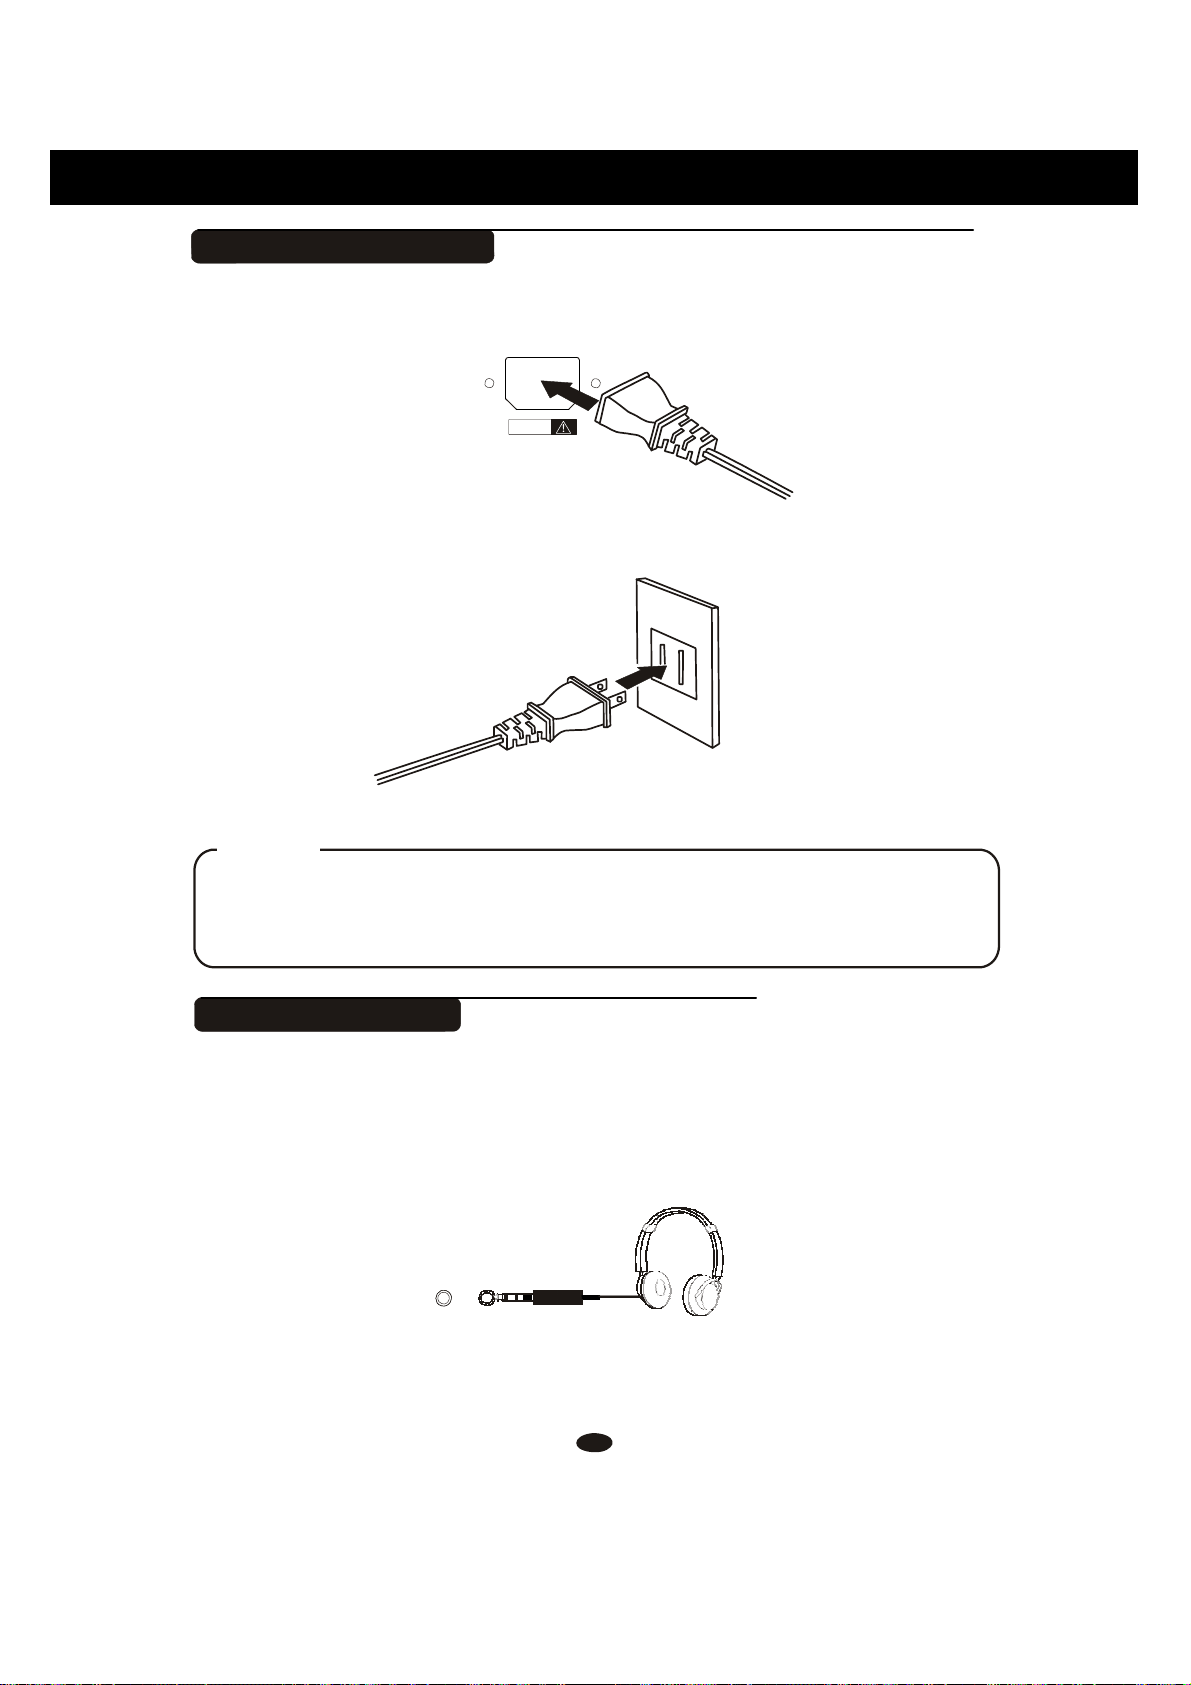
Using AC Power Jack
Connect the power cable to the AC power jack on the rear panel of the piano
body.
Plug the power cable into an AC power outlet.
Caution
1.Ensure the piano is turned off when connecting and disconnecting the power.
2.Turn the volume switch to reach the minimum level before turning on
the power
Using Headphones
Two sets of standard stereo headphones can be plugged in here for private
practice or late-night playing. The internal speaker system is automatically shut
off when a pair of headphones is plugged into PHONES jacks.
PHONES 1 PHONES 2
AC
POWER
CAUTION
4
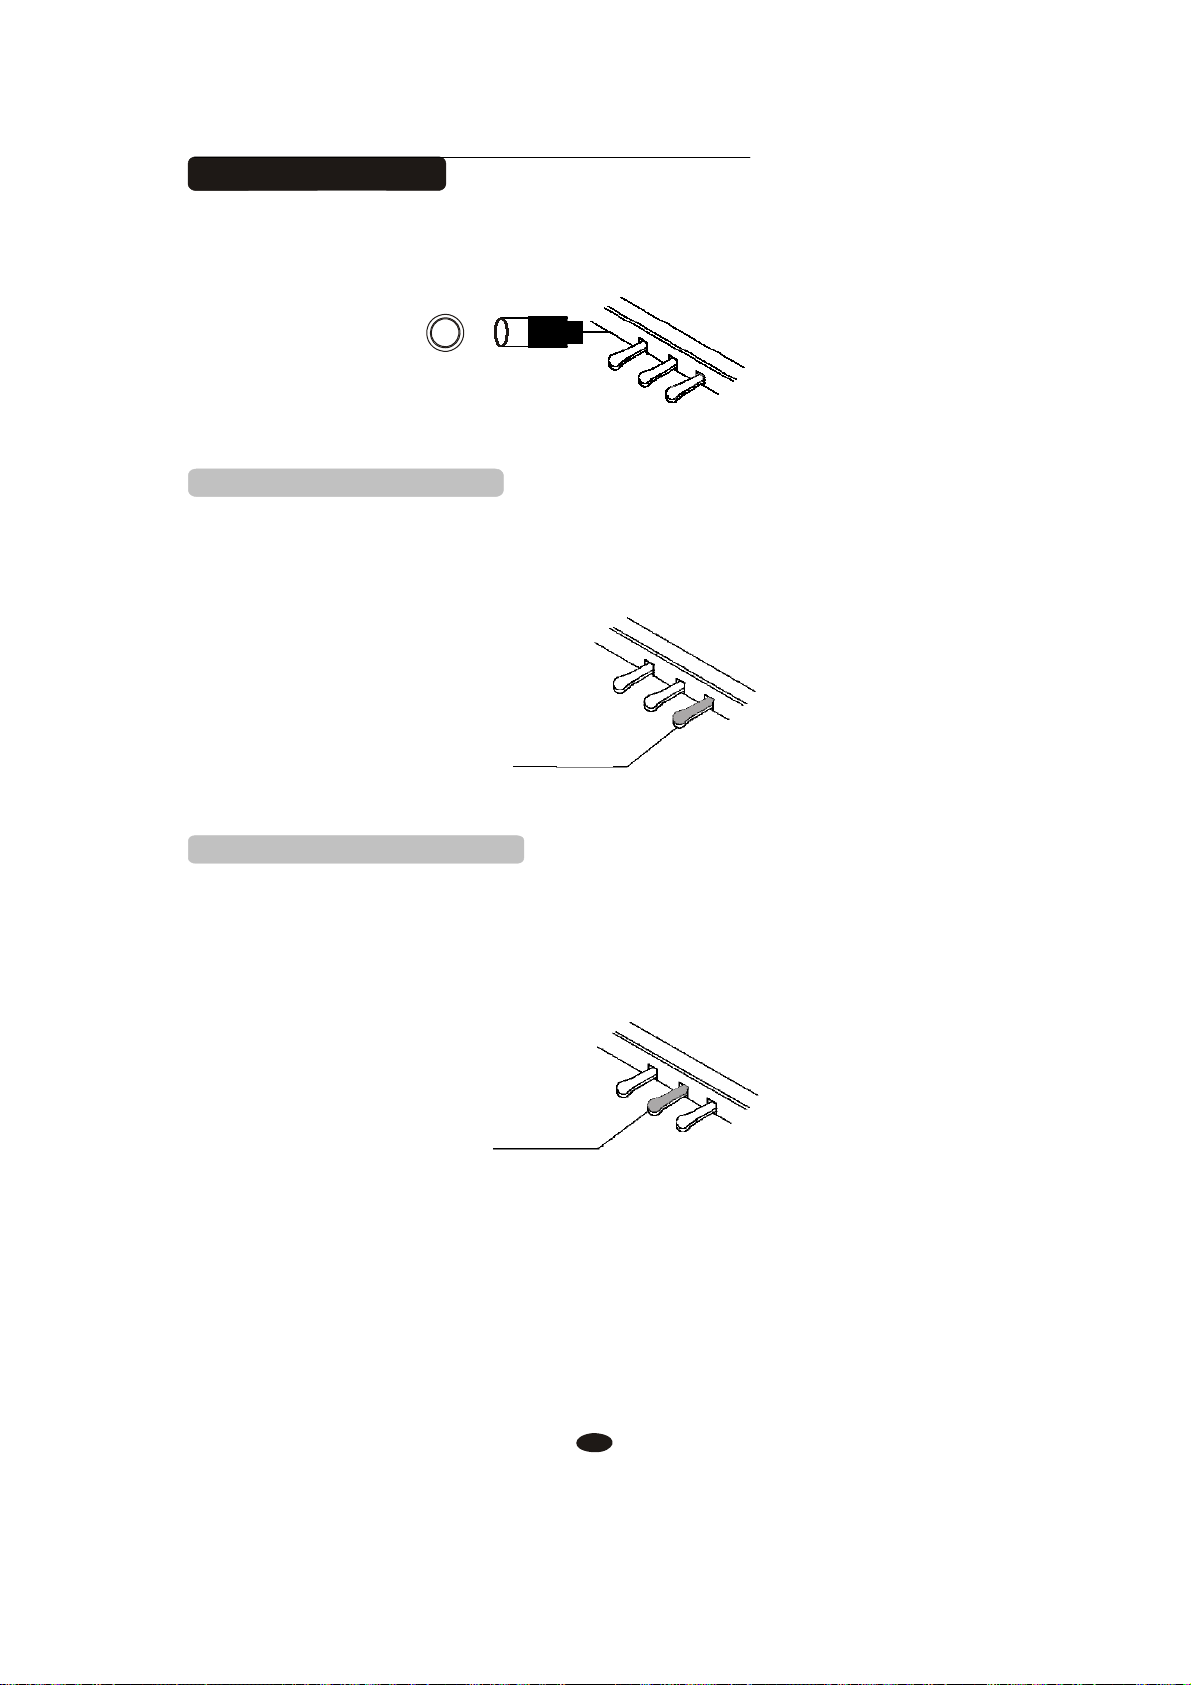
Using Foot Pedals
Connect the plug of the foot pedal unit to the pedal jack on the rear panel.
1. Damper Pedal (Right)
It performs the same function as the damper pedal on an actual acoustic piano,
letting you sustain the sound of the voices even after releasing your fingers from
the keys.
SUSTAIN
2. Sostenuto Pedal (Center)
If you play a note or chord on the keyboard and press the sostenuto pedal while
the notes are held, those notes will be sustained as long as the pedal is held, but
all subsequently played notes will not be sustained.
SOSTENUTO
5
3. Soft Pedal (Left)
The Soft Pedal controls the sound volume. Press the pedal to decrease the
output sound volume.
SO
FT
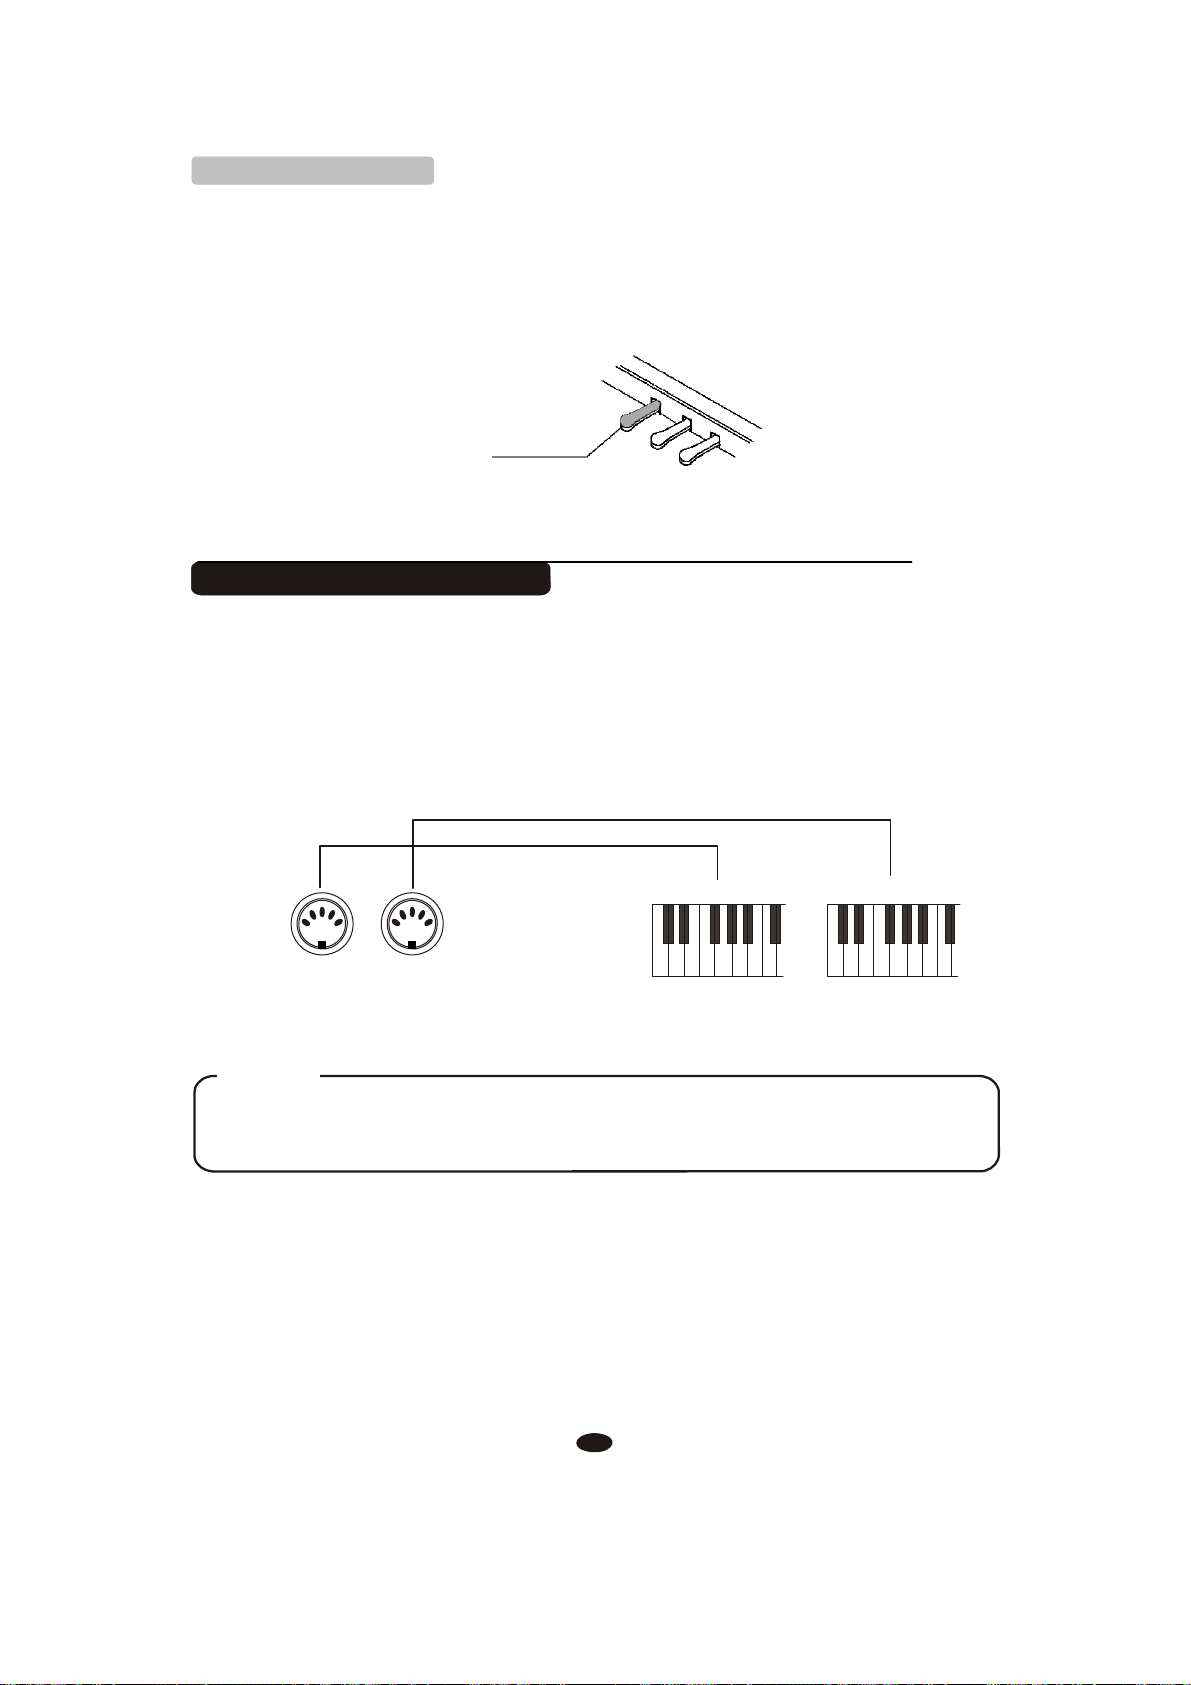
Using MIDI IN/OUT Jack
MIDI (Musical Instrument Digital Interface) is a world-standard communication interface which allows electronic musical instruments to communicate with
each other, by sending and receiving compatible note, program change and other
types of MIDI data.
MIDI OUT MIDI IN
MIDI IN MIDI
OUT
NOTE
MIDI IN Receives MIDI data from another MIDI device.
MIDI OUT Transmits MIDI data to another MIDI device.
6
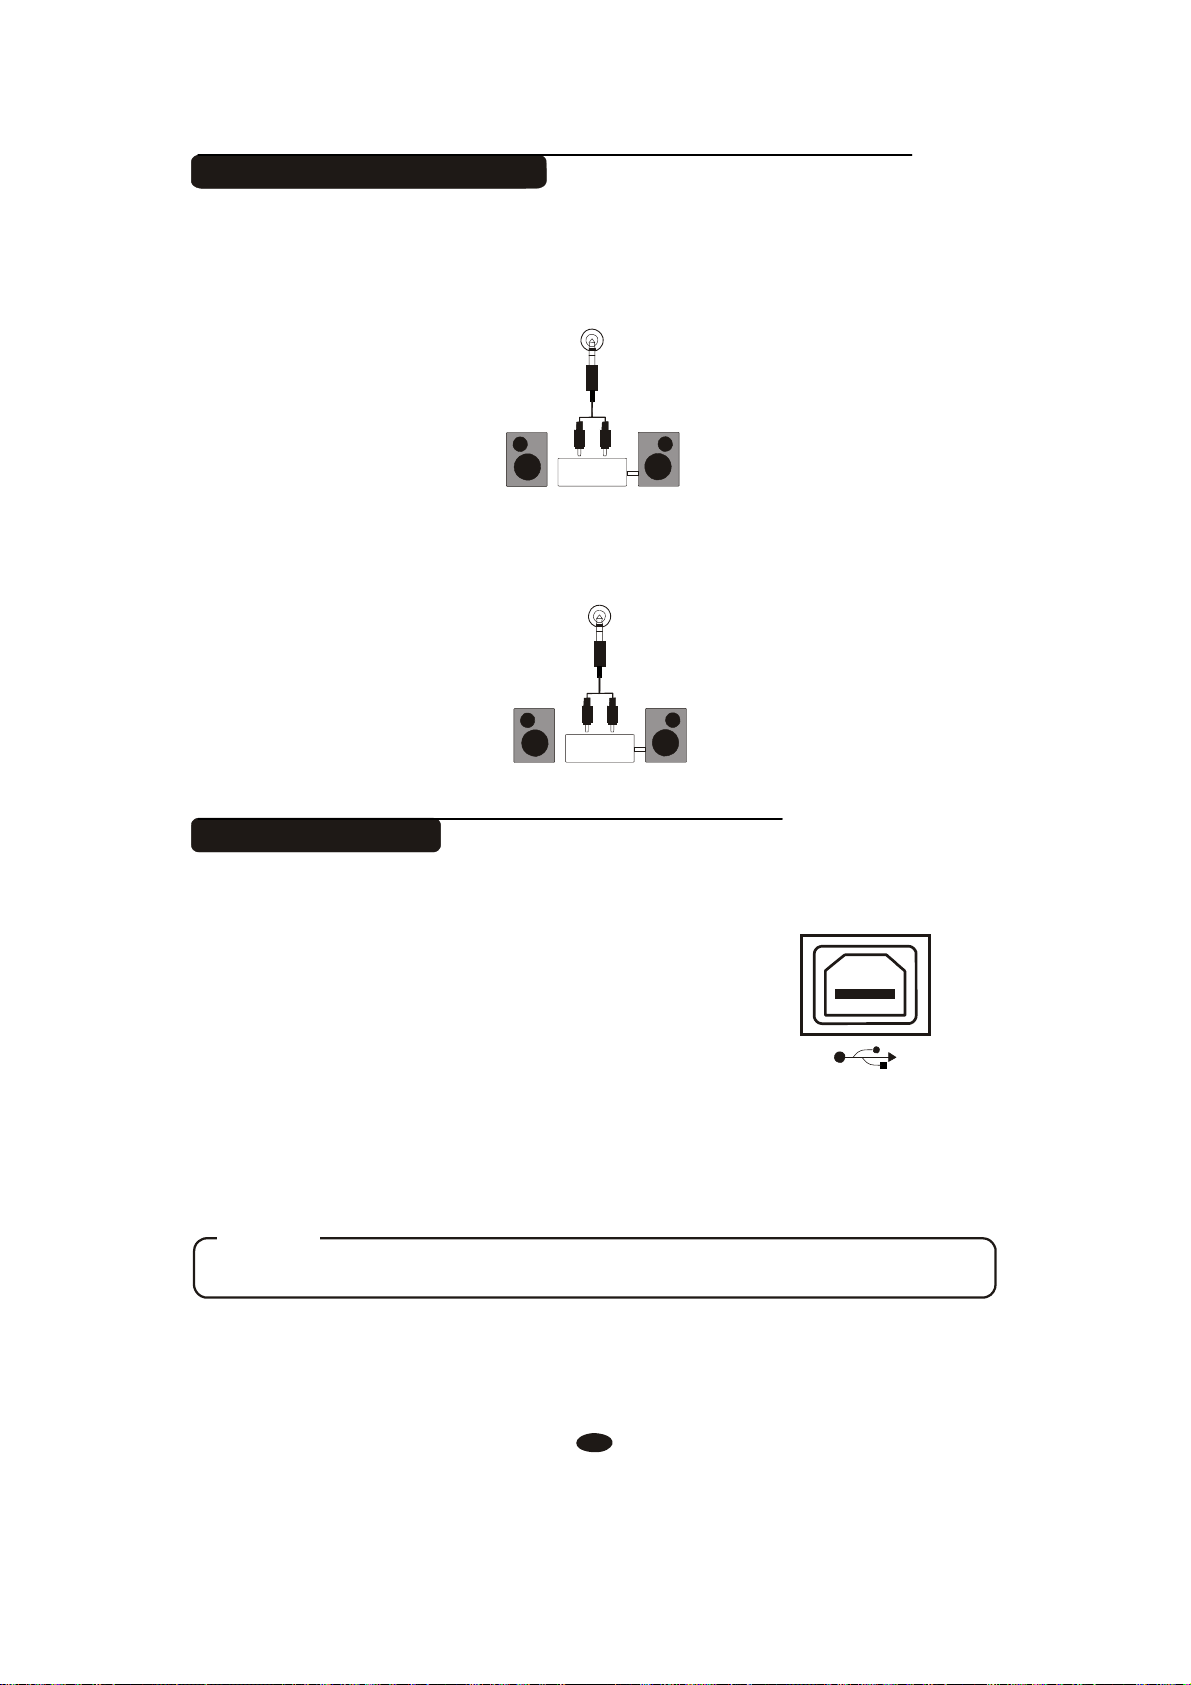
Using Line IN/OUT Jack
The audio output from other sound system connected to the LINE IN jack on
the rear panel can be mixed with the sound of the unit. This function is convenient
when you want to play along with a favourite song.
LINE IN
Stereo
System
The Line out jack can be used to deliver the output of the piano to a keyboard
amplifier, stereo sound system, mixing console or tape recorder.
LINE
OUT
Stereo
Using USB-MIDI
This product allows the transfer of MIDI over USB.
There is a specific way in which the MIDI signals are
routed for maximum flexibility. In a standard Digital
Piano, the built-in keyboard sends MIDI signals to the
internal sound bank as well as the 5-pin MIDI output.
In this digital piano, the keyboard not noly sends MIDI
to the internal sound bank (just like normal) but also
sends MIDI simultaneously to the internal MIDI
connection which hooks up inside the device to the
Audio Interface.
It is the Audio Interface that controls the USB-MIDI.
System
USB
NOTE
USB DISK Can not be used while using USB-MIDI Function
7
X
X
X
Basic Operation
Power Switch
Turn the power on by pressing the [POWER] switch, the panel LCD display
will light.
POWER
Adjust the Volume
Use [MASTER VOLUME] control to adjust the volume to your desired level.
Demo Play
There are 3 preset piano songs that you can play individually. Here's how you
can select and play the demo songs .
1. Listen to the Demo Song
OFF ON
RHY1 RHY2 BASS CRD1 CRD2 PAD PHR1
PHR2
MASTER
VOLUME
A
í
M
°
II
II
II
II
II
II
II
II
II
II
II
II
II
II
II
II
II
II
II II
II II II II II
II II
MIN
RHYTHM
A
í
M
°
II
II
II
II
II
II
II
II
II
II
II
II
II
II
II
II
II
II
II II
II II II II II
II II
MIN
BASS/
A
í
M
°
II
II
II
II
II
II
II
II
II
II
II
II
II
II
II
II
II
II
II II
II II II II II
II II
MIN
CHORD
Press [DEMO] button to play the demo songs in sequence. Use [+] and [-]
buttons or number [1-3] to select the number of the song you want to play.
LEFT
DEMO
RIIGHT
RHY1 RHY2 BASS CRD1 CRD2 PAD PHR1
PHR2
8
X
X
X
2. Stop Playing
Press [DEMO] button again to stop playing.
LEFT
RIIGHT
DEMO
RHY1 RHY2 BASS CRD1 CRD2 PAD PHR1
PHR2
3. Adjust Demo Song's Volume
Each song has two tracks performance (left hand and right hand). You can use
[RHYTHM] control to adjust left hand volume, and use [BASS/CHORD] control
to adjust right hand volume.
MASTER
VOLUME
A
í
M
°
II
II
II
II
II
II
II
II
II
II
II
II
II
II
II
II
II
II
II II
II II II II II
II II
MIN
RHYTHM
A
í
M
°
II
II
II
II
II
II
II
II
II
II
II
II
II
II
II
II
II
II
II II
II II II II II
II II
MIN
BASS/
A
í
M
°
II
II
II
II
II
II
II
II
II
II
II
II
II
II
II
II
II
II
II II
II II II II II
II II
MIN
CHORD
While the demo song is playing, you can deactivate the corresponding track by
pressing the [LEFT] or [RIGHT] button.
LEFT
RIIGHT
4. Adjust the Tempo of the Demo Song
DEMO
RHY1 RHY2 BASS CRD1 CRD2 PAD PHR1
PHR2
When a demo song is playing, you can adjust its tempo by pressing the
[TEMPO / ] buttons.
TEMPO
RHY1 RHY2 BASS CRD1 CRD2 PAD PHR1
Tempo Value
PHR2
9
Tempo
Press the [TEMPO ] or [TEMPO ] button to decrease or increase the tempo
of songs, metronome and styles.
Range: 20-280.
Press [TEMPO ] and [TEMPO ] button simultaneously to reset the tempo
to default value.
TEMPO
Tap/Tempo
This function allows you to set the rhythm tempo by tapping in tempo on
[TAP/TEMPO] button. Tap on the button 2 times while rhythm is playing, The
rhythm tempo are set as your desired speed.
If you want to set the tempo before starting rhythm, you have to tap the button
4 times.
TAP/TEMPO
RHY1 RHY2 BASS CRD1 CRD2 PAD PHR1
RHY1 RHY2 BASS CRD1 CRD2 PAD PHR1
TAP/TEMPO
PHR2
TEMPO
PHR2
Transpose
The Transpose function allows you to change the pitch of the instrument in
semitone steps, up to a maximum setting of 12 semitones (a maximum of one
octave up or down).
TRANS
RHY1 RHY2 BASS CRD1 CRD2 PAD PHR1
PHR2
10
Use [TRANS / ] button to transpose up or down as required. The transposition
range is from -12 (down one octave) through 0 (normal pitch) to 12
(up one octave).
TRANS
RHY1 RHY2 BASS CRD1 CRD2 PAD PHR1
PHR2
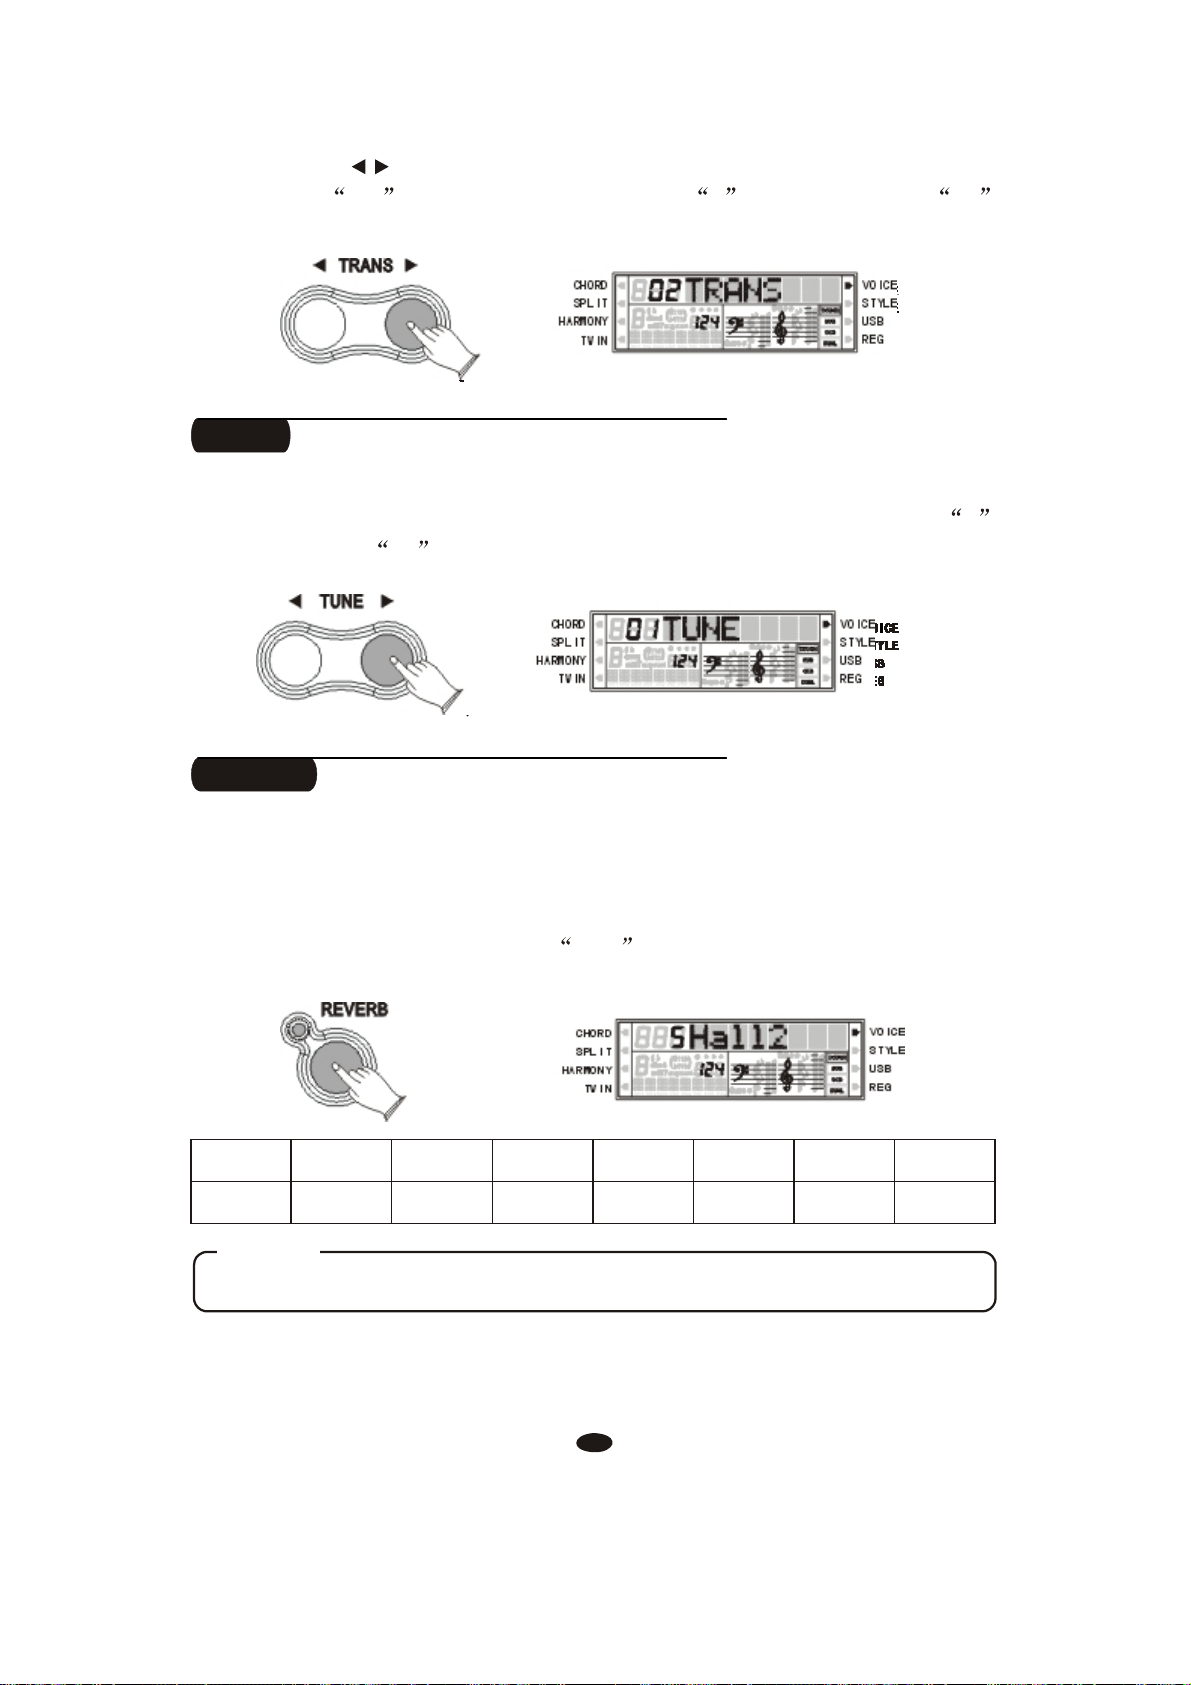
Tune
This function makes it possible to tune the pitch of your instrument to match
other instruments. The tune range is from -64(down one semitone) through 0
(normal pitch) to 63 (up one semitone).
TUNE
RHY1 RHY2 BASS CRD1 CRD2 PAD PHR1
PHR2
Reverb
The [REVERB] button selects a number of digital reverb effects that you can
use for extra depth and expressive power.
Press [REVERB] button, use [+] and [-] buttons to select reverb type. No
reverb is produced when you select OFF , and the indicator is off.
REVERB
1
RHY1 RHY2 BASS CRD1 CRD2 PAD PHR1
2
3 4 5 6 7
PHR2
8
Room1 Room2 Room3 Hall1 Hall2 Plate Delay PanDelay
NOTE
Press [REVERB] button repeatedly to turn on or turn off the reverb effect.
11
Adjusting Reverb Depth
Reference: F2 Reverb and Chorus Depth(P.16).
Chorus
Shimmering, broadening effect. Press [CHORUS] button, use [+] and [-]
buttons to select chorus type. No chorus is produced when you select 'OFF', and
the indicator is off.
CHORUS
RHY1 RHY2 BASS CRD1 CRD2 PAD PHR1
PHR2
The chorus types in the list below can be selected from the chorus display.
1
2
3 4 5 6 7
8
Chorus1 Chorus2 Chorus3 Chorus4 Feedback Flanger ShtDelay FbDelay
NOTE
Press [CHORUS] button repeatedly to turn on or turn off the chorus effect.
Adjusting Chorus Depth
Reference: F2 Reverb and Chorus Depth(P.16).
12
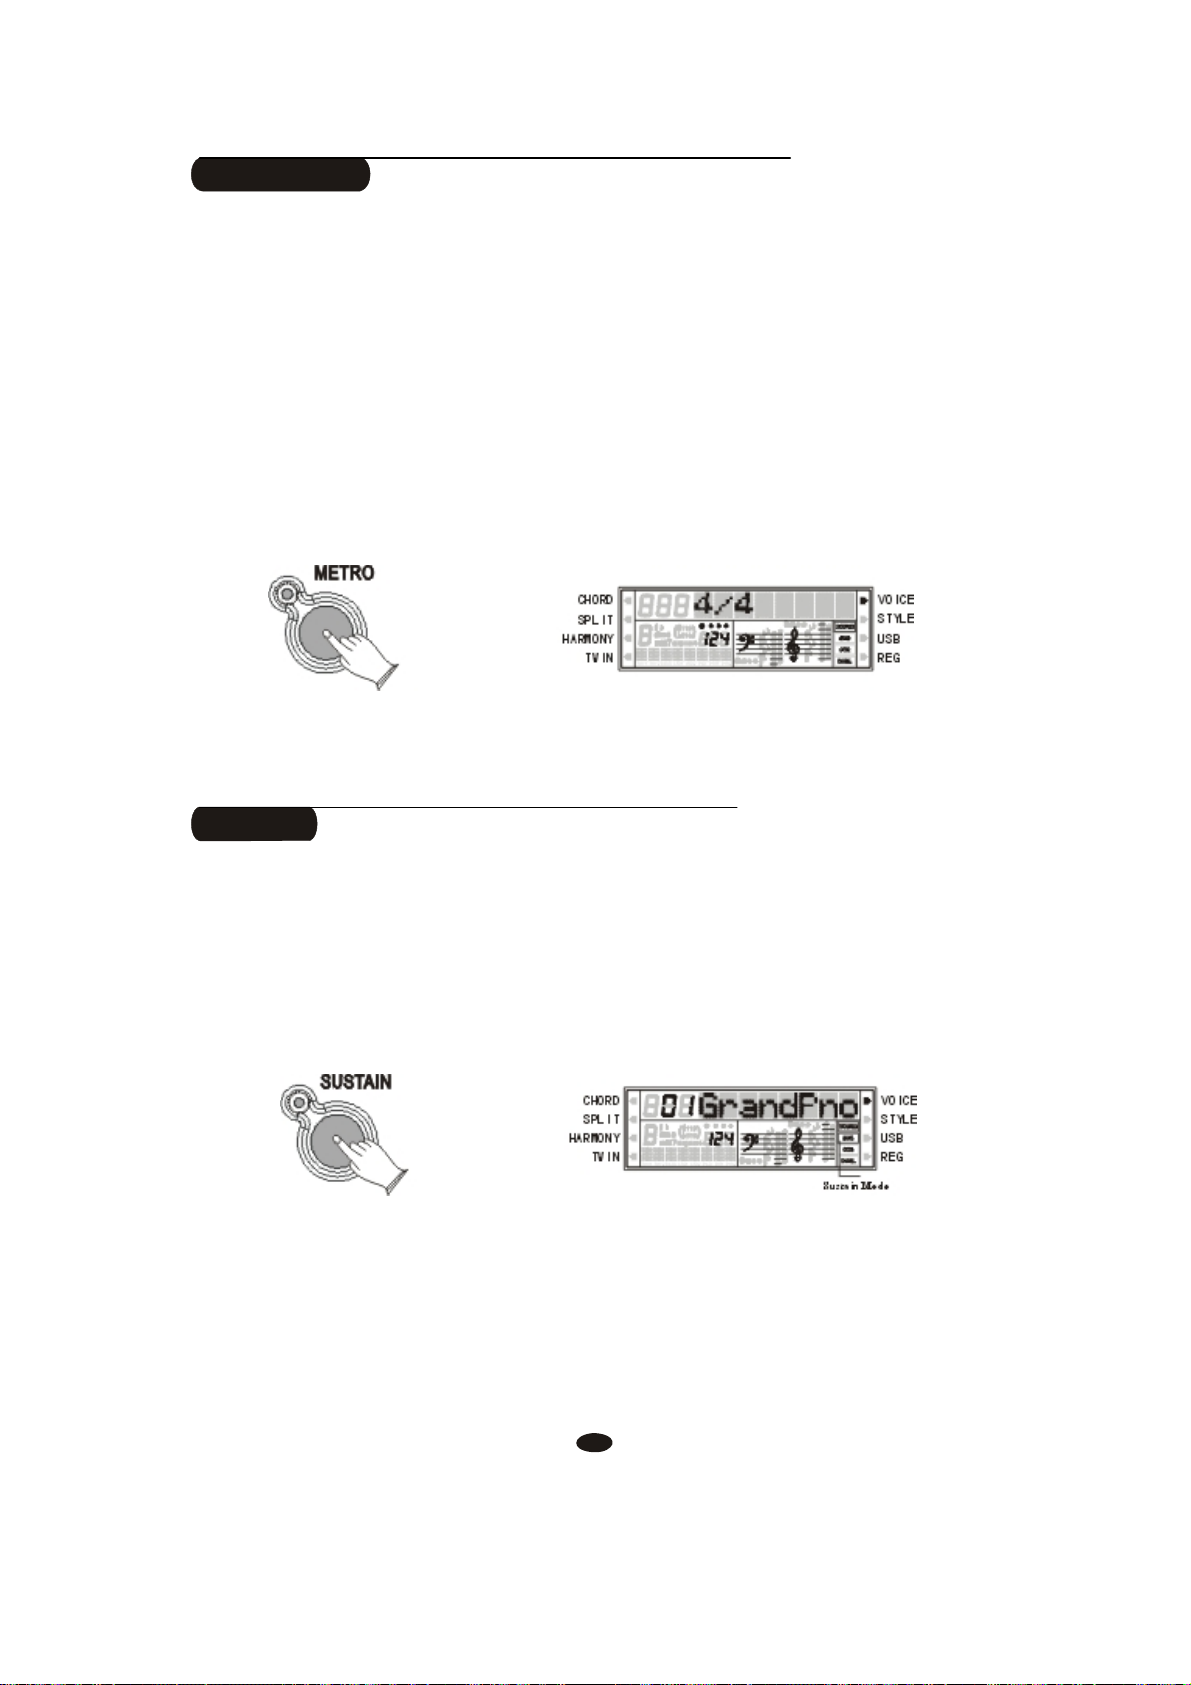
Metronome
Metronome is a convenient feature for practice, and it can also provide a solid
rhythmic guide when recording.
The metronome sound is alternately turned on and turned off by pressing
[METRO] button.
The time signature of the metronome can be set by using [+] and [-] buttons
while turning on the metronome function.
Time signature: 1/4, 2/4, 3/4, 4/4, 6/4, 3/8, 6/8, 9/8.
METRO
RHY1 RHY2 BASS CRD1 CRD2 PAD PHR1
PHR2
To set the tempo of metronome, please see the details in TEMPO section(P.10).
Sustain
Press [SUSTAIN] button so that its icon appears to turn sustain on. It can be
used as a damper pedal. Turning sustain on to sustain notes after the keys are
released.
Press [SUSTAIN] button again to turn sustain off.
SUSTAIN
RHY1 RHY2 BASS CRD1 CRD2 PAD PHR1
PHR2
Sustain Mode
13
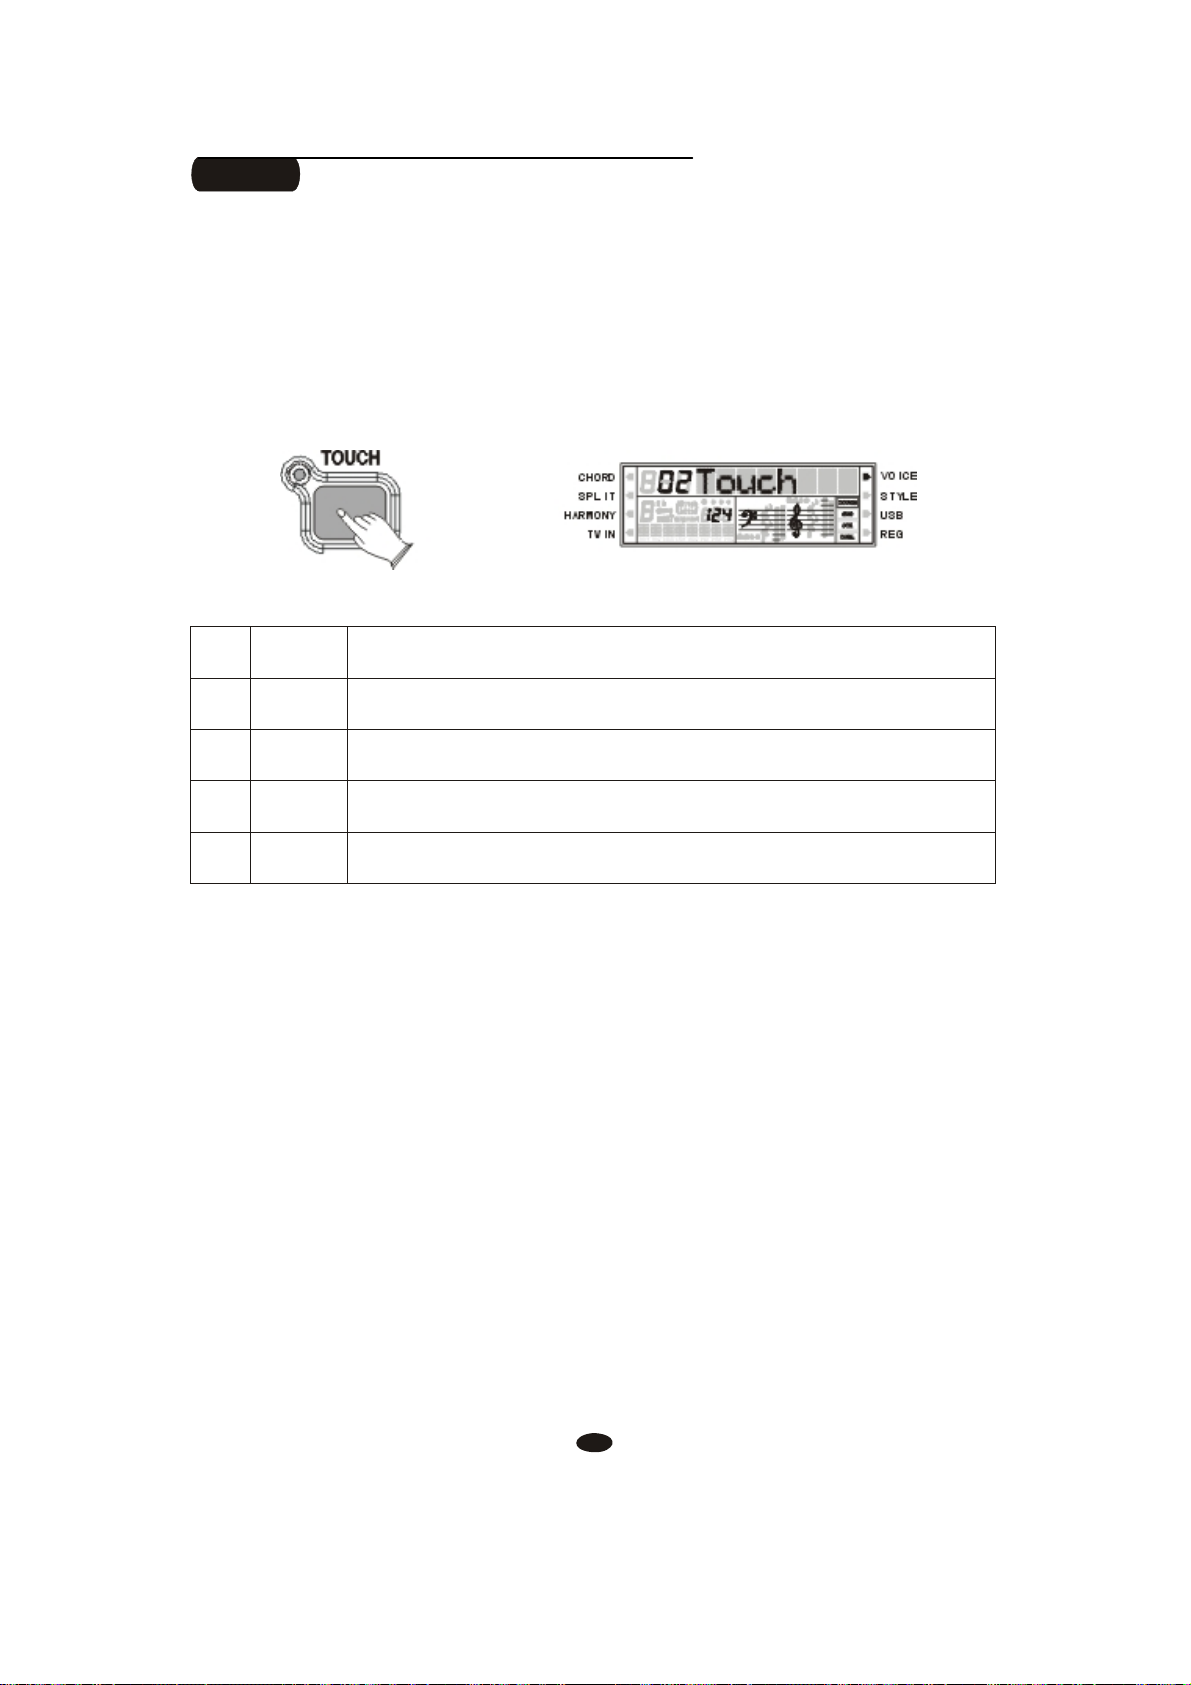
Touch
The touch function provides four different types of keyboard touch sensitivity
that can be selected to match different playing styles.
Press the [TOUCH] button, use [+] and [-] buttons to select the touch sensitivity
type in the range of 00 to 03. Default: 02 .
Soft
TOUCH
RHY1 RHY2 BASS CRD1 CRD2 PAD PHR1
PHR2
Description
means that regardless of how hard you play, the keyboard will transmit a velocity
value of 100.
is defined as a curve which makes it easier to play quietly. The curve generates
lower velocities for the same force
is defined as a curve which will be mid-way between the other two.
is defined as a curve which makes it easier to play loudly. The curve generates
higher velocities for the same force.
No Name
00 Fixed
01 Hard
02 Normal
03
14

Function
The [FUNCTION] button provides access to a range of functions that give
your instrument extraordinary versatility. The functions are categorized in groups
as follows:
................................................................................
1
FF1
......................................................
2
FF2
...........................................................................
3
FF3
.........................................................
4
FF4
............................................
5
FF5
...................................................................
6
FF6
.....................................................................
7
FF7
MIDI Reception and Transmission
Reverb and Chorus Depth
Split and Chord Point
Local Control
Auto Track
Octave
Pan
Press [FUNCTION] button repeatedly to select desired function: F1 through F7
FUNCTION
1 Pan
FF1
In this function you can set the stereo position of each orchestration part to
create a board stereo image of your sound.
Press [FUNCTION] button to select M. PAN? , Use [+] and [-] buttons to
select S. PAN? and D .PAN? .
RHY1 RHY2 BASS CRD1 CRD2 PAD PHR1
PHR2
FUNCTION
RHY1 RHY2 BASS CRD1 CRD2 PAD PHR1
PHR2
15

M .PAN-------Main Voice Pan
S. PAN--------Split Voice Pan
D. PAN-------Dual Voice Pan
Press [ENTER] button to confirm, and use [+] and [-] buttons to set the pan
value: From -64(Left) to 63(Right).
ENTER
RHY1 RHY2 BASS CRD1 CRD2 PAD PHR1
PHR2
2 Reverb and Chorus Depth
FF2
In this function you can adjust the reverb and chorus depth for the selected voice.
Press [FUNCTION] button to select M. RevVo? , Use [+] and [-] buttons
to select S. RevVo? , D. RevVo? , M. ChrVo? , S. ChrVo? ,
D. ChrVo?
FUNCTION
RHY1 RHY2 BASS CRD1 CRD2 PAD PHR1
PHR2
M. RevVo?------Main Voice Reverb Depth
S. RevVo?------ Split Voice Reverb Depth
D. RevVo?------ Dual Voice Reverb Depth
M. ChrVo?------ Main Voice Chorus Depth
S. ChrVo?------- Split Voice Chorus Depth
D. ChrVo?------ Dual Voice Chorus Depth
16

Press [ENTER] button to confirm, use [+] and [-] buttons or number buttons
(0-9) to adjust the value: 00-63
ENTER
3 Octave
FF3
RHY1 RHY2 BASS CRD1 CRD2 PAD PHR1
PHR2
Press [FUNCTION] button to select M. Octav? , Use [+] and [-] buttons
to select S. Octav? and D. Octav? .
FUNCTION
RHY1 RHY2 BASS CRD1 CRD2 PAD PHR1
PHR2
M. Octav?------Main Voice Octave
S. Octav?------ Split Voice Octave
D. Octav?------ Dual Voice Octave
Press [ENTER] button to confirm, and use [+] and [-] buttons to set the octave
value: -2 to 2
ENTER
RHY1 RHY2 BASS CRD1 CRD2 PAD PHR1
PHR2
17

4 Spl i t a n d C h o r d P o i n t
FF4
In this section, you can set the split or chord point when your keyboard is in
Split or Chord mode.
Press [FUNCTION] button to select S. Point? , and use [+] and [-] buttons
to select C. Point? .
FUNCTION
RHY1 RHY2 BASS CRD1 CRD2 PAD PHR1
PHR2
S. Point?------Split Point
C. Point?------Chord Point
Press [ENTER] button to confirm, use [+] and [-] buttons or number buttons
(0-9) to set the point. Range: 00-87.
ENTER
5 MIDI Reception and Transmission
FF5
In this function, you can select MIDI reception and transmission track, and
turn on or turn off MIDI IN and MIDI OUT function.
Press [FUNCTION] button to select MIDI R0? , Use [+] and [-] buttons to
select MIDI R1 ?, MIDI S0 ?, MIDI S1 ?, MIDI S2 ?, MIDI S3 ? .
FUNCTION
RHY1 RHY2 BASS CRD1 CRD2 PAD PHR1
RHY1 RHY2 BASS CRD1 CRD2 PAD PHR1
PHR2
PHR2
18

MIDI R0------Reception Disabled
MIDI R1------Reception Enabled
MIDI S0------Transmission Off
MIDI S1------Selecting Main Voice Ch
MIDI S2------Selecting Split Voice Ch
MIDI S3------Selecting Dual Voice Ch
Press [ENTER] to confirm, and use [+] and [-] buttons to set the parameters.
ENTER
RHY1 RHY2 BASS CRD1 CRD2 PAD PHR1
PHR2
NOTE
When selecting MIDI S1-S3 mode, the transmission is enabled
automatically, and use [+/-] button or number buttons to select MIDI
channel(1-16) for which you want to specify a new transmission.
6 Local Control
FF6
In this function, you can turn on or turn off the speaker system of your piano.
Press [FUNCTION] button to select Local ?
FUNCTION
RHY1 RHY2 BASS CRD1 CRD2 PAD PHR1
PHR2
19

Press [ENTER] button to confirm, use [+] and [-] buttons to select Local on
or local off .
ENTER
RHY1 RHY2 BASS CRD1 CRD2 PAD PHR1
PHR2
Local on------ Normal operation. Keyboard and Controllers are sent
to the Sound Engine.
Local off------ There will be no sound produced by the brain's tone
generator. MIDI function can work as usual.
7 Auto Track
FF7
Here you can turn on or turn off AUTO TRACK function for recording mode.
And the setting will be saved automatically when the power is off.
Press [FUNCTION] button to select AutoTrk?
FUNCTION
RHY1 RHY2 BASS CRD1 CRD2 PAD PHR1
PHR2
20

Press [ENTER] button to confirm, and use [+] and [-] buttons to select
OnAutoTrk and OffAutoTrk .
ENTER
RHY1 RHY2 BASS CRD1 CRD2 PAD PHR1
PHR2
OnAutoTrk------when you want to record more tracks data, select
OnAutoTrk , the piano brain will assign the next track for you
automatically.
OffAutoTrk------when you want to select tracks by yourself, here
you have to select OffAutoTrk function first, then press
[TRACK] button on the panel to select the track you want.
21

Voices
Selecting a Voice
Your instrument has 128(01-128) GM standard voices. 10(129-138) different
drum percussion kits and 1 set of sound effect that you can select and play.
Press [VOICE] button, the voice mode is selected and the current voice number
and the name will display on the Message Display section.
Use [+] and [-] buttons or number buttons [0-9] to select the desired voice
according to the voice list.
NOTE
VOICE
1 2
4 5 6
7 8 9
RHY1 RHY2 BASS CRD1 CRD2 PAD PHR1
3
0
RHY1 RHY2 BASS CRD1 CRD2 PAD PHR1
-
PHR2
PHR2
When the keyboard is in Split or/and Dual mode, press [VOICE]
button repeatedly can switch Main Voice Mode and Split Voice Mode
or/and Dual Voice Mode.
22

Dual Mode
Press [DUAL] button to select layer voice mode, two voices will sound
simultaneously when you play keyboards.
1. Select Dual Voice
Press [DUAL] button, Dual Cursor is flashing, use the number [0]-[9] or [+]
and [-] buttons to select the second voice. If you don' t choose the second voice
within 4 seconds, the LCD Display will go back to the first voice mode.
2. Setting the Dual Voice Volume
Reference: Adjusting Keyboard Volume(P.25).
SPLIT
DUAL TWIN
NOTE
HARMONY
RHY1 RHY2 BASS CRD1 CRD2 PAD PHR1
PHR2
Dual Mode
To change the dual voice Pan, Octave and Reverb/Chorus Depth, please
see the details in [FUNCTION] section (P.15).
3. Exit the Dual Mode
Press [DUAL] again, the Dual Cursor turns off and the Dual mode is no
longer active.
SPLIT
DUAL
HARMONY
TWIN
RHY1 RHY2 BASS CRD1 CRD2 PAD PHR1
PHR2
23

Split Mode
Press [SPLIT] button to select split mode, your keyboard will be split into two
sections which means different voices can be played with the left and right hands
at the same time.
1. Select Split Voice
Press [SPLIT] button, the Split cursor is flashing, and the split voice will
appear in the message display for 4 seconds, and use [0-9] buttons to select the
left voice.
SPLIT
DUAL
HARMONY
TWIN
RHY1 RHY2 BASS CRD1 CRD2 PAD PHR1
Split Cursor
PHR2
2. Changing the Split Point
Reference: F4 Split and Chord Point(P.18).
3. Setting the Split Voice Volume
Reference: Adjusting Keyboard Volume(P.25).
NOTE
To change the split voice Pan, Octave and Reverb/Chorus Depth, please
see the details in [FUNCTION] section (P.15).
4. Exit the Split Mode
Press [SPLIT] again, the Split Cursor turns off and the Split mode is no
longer active.
SPLIT
DUAL
HARMONY
TWIN
RHY1 RHY2 BASS CRD1 CRD2 PAD PHR1
PHR2
24

Adjusting Keyboard Volume
Use this function can adjust the Split Voice Volume, Dual Voice Volume and
the Main Voice Volume.
1. Split Voice Volume
In Split mode, press [KB.VOL / ] button can adjust the split voice volume
while the Split Cursor is flashing.
KB.VOL
RHY1 RHY2 BASS CRD1 CRD2 PAD PHR1
PHR2
2. Dual Voice Volume
In Dual mode, press [KB.VOL / ] button can adjust the Dual voice volume
while the Dual Cursor is flashing.
KB.VOL
3. Main Voice Volume
RHY1 RHY2 BASS CRD1 CRD2 PAD PHR1
PHR2
You can adjust the main voice volume by pressing [KB.VOL / ] button when
the Dual or Split Cursor does not flash.
KB.VOL
RHY1 RHY2 BASS CRD1 CRD2 PAD PHR1
PHR2
25

Playing Portable Grand Piano
Press [GRAND PIANO] button.
This convenient function lets you instantly call up the Grand Piano voice.
GRAND
PIANO
RHY1 RHY2 BASS CRD1 CRD2 PAD PHR1
PHR2
One Touch Setting
This function is actually a convenient feature which automatically selects a
suitable voice for you when you select a style.In addition, various panel settings
(such as voice, effect, Tempo, etc.) that match the selected style can be recalled
with just a single button [O.T.S].
Press [O.T.S] button repeatedly can turn on or turn off One Touch Setting.
O.T.S
RHY1 RHY2 BASS CRD1 CRD2 PAD PHR1
PHR2
Tw in Mode
Press [TWIN] button to select Twin mode. In this mode, the keyboard will be
separated into two play areas.
Right: from
Left: from A-1 to C3
Press [TWIN] button again to exit the Twin mode.
SPLIT
DUAL
#
C3 to C7
HARMONY
TWIN
RHY1 RHY2 BASS CRD1 CRD2 PAD PHR1
Twin Cursor
PHR2
26

Auto Accompaniment
Your instrument has 100 accompaniment styles which can be used to provide
Fully-orchestrated Auto Accompanim ent. When the Auto Accom paniment
function is turned ON, this instrument creates fully-orchestrated rhythm, bass
and chord accompaniment based on chords you play with the left hand in the
Auto Accompaniment section of the keyboard(i.e. all keys to the left of the Auto
Accompaniment split point). The right-hand section of the keyboard is available
for normal playing.
The default Auto Accompaniment split
Auto Accompaniment
point is the #F2 key. The Auto
Accompaniment section of the keyboard
Consists of all keys to its left .
Left hand fingering
specifies the auto
accompaniment chords.
Using Auto Accompaniment (Only Rhythm Track)
1. Press the [STYLE] Button
STYLE
2. Selecting a Style
Using [+] and [-] buttons or number buttons [0-9].
When selecting style 100, holding the [1] button till the 1-- is displayed,
then you can enter the tens and ones digits.
1 2
4 5 6
7 8 9
3
0
-
RHY1 RHY2 BASS CRD1 CRD2 PAD PHR1
RHY1 RHY2 BASS CRD1 CRD2 PAD PHR1
Auto Accompani ment
The right hand plays normally
PHR2
PHR2
Style Cursor
Normal
27

3. Start Playing the Style
Press [START/STOP] button to start the rhythm track of the Auto
Accompaniment. Minus the bass and the chord tracks.
SYNCHRO
START/STOP
RHY1 RHY2 BASS CRD1 CRD2 PAD PHR1
PHR2
4. Stop Playing the Style
Press the [START/STOP] button again to stop the accompaniment.
Using Auto Accompaniment (All Tracks)
1. Press the [STYLE] Button
STYLE
2. Selecting a Style
Using [+] and [-] buttons or number buttons [0-9].
When selecting style 100, holding the [1] button till the 1-- is displayed,
then you can enter the tens and ones digits.
1 2
4 5 6
7 8 9
3
0
-
RHY1 RHY2 BASS CRD1 CRD2 PAD PHR1
RHY1 RHY2 BASS CRD1 CRD2 PAD PHR1
PHR2
PHR2
Style Cursor
28

3. Turn the Chord Function On
Press the [CHORD] button
The left hand section of the keyboard becomes the Auto Accompaniment
section, and chords played in this section are automatically detected and used as
a basis for fully automatic accompaniment which the selected style.
CHORD
FADE
Chord Cursor
RHY1 RHY2 BASS CRD1 CRD2 PAD PHR1
PHR2
4. Turn On the Synchronized Start
Press [SYNCHRO] button
The beat lamp will flash in time with the tempo, it's called synchronized start
standby. The auto accompaniment starts as soon as you play a chord with your
left hand.
CHORD FADE
SYNCHRO
RHY1 RHY2 BASS CRD1 CRD2 PAD PHR1
PHR2
5. Stop Playing the Style
Press the [START/STOP] button again to stop the accompaniment.
Use RHYTHM volume control to adjust the rhythm volume of the Auto
Accompaniment.
Use BASS/CHORD volume control to adjust the chord and bass volume of
the Auto Accompaniment.
29

Auto Accompaniment Control
Straight Start
The [START/STOP] button starts the selected accompaniment style immediately.
A different accompaniment style can be selected at any time while the
accompaniment is playing.
SYNCHRO
START/STOP
RHY1 RHY2 BASS CRD1 CRD2 PAD PHR1
PHR2
Synchro Start
Press the [SYNCHRO] button, then the accompaniment will start when you
play the first chord on the AUTO ACCOMPANIMENT section of the keyboard.
SYNCHRO
START/STOP
RHY1 RHY2 BASS CRD1 CRD2 PAD PHR1
PHR2
Starting the Accompaniment with an Introduction
Any of your instrument accompaniment patterns can be started with an
appropriate introduction by pressing the [INTRO/ENDING] button directly.
If you press the [SYNCHRO] button and then press the [INTRO/ENDING]
button, the accompaniment will start from the introduction as soon as a chord is
detected in the AUTO ACCOMPANIMENT section of the keyboard.
SYNCHRO START/STOP
INTRO/ENDING
RHY1 RHY2 BASS CRD1 CRD2 PAD PHR1
PHR2
30

Adding Fill-In
Press the [FILL IN] button at any time while the accompaniment is playing
to add a one-measure fill-in.
If you press the [SYNCHRO] button and then the [FILL IN] button, the
accompaniment will start from the fill-in as soon as a chord is detected in the
AUTO ACCOMPANIMENT section of the keyboard.
FILL IN
VARIATION
RHY1 RHY2 BASS CRD1 CRD2 PAD PHR1
Stopping the Accompaniment
An accompaniment progress can be stopped immediately by pressing the
[START/STOP] button and also can be stopped with an appropriate ending by
pressing the [INTRO/ENDING] button.
SYNCHRO START/STOP
INTRO/ENDING
Variation
While the style is playing, you can add variation in the rhythm/accompaniment
by pressing the [VARIATION] button. This switches between the Main A and
Main B sections automatically playing a Fill-in pattern to smoothly lead into the
FILL IN
VARIATION
RHY1 RHY2 BASS CRD1 CRD2 PAD PHR1
next section.
PHR2
PHR2
31

Fade
Press [FADE] button makes rhythm fade up when starting the rhythm.
While rhythm is playing, press [FADE] button to make rhythm fade away.
CHORD
FADE
Harmony
The harmony function features a variety of performance effect that enhance
the melodies you play when using the accompaniment styles.
Press [HARMONY] button, the Harmony Cursor appears on the display.
SPLIT
HARMONY
DUAL
TWIN
RHY1 RHY2 BASS CRD1 CRD2 PAD PHR1
Harmony Cursor
PHR2
The Harmony is derived from the chords you have played if you use Automatic
Accompaniment or turn on the Chord function.
Chord Function
Turn on this mode, the specified left-hand section of the keyboard becomes
the Auto Accompaniment section, and chords played in this section are
automatically detected and used as a basis for fully automatic accompaniment
with the selected style
CHORD
FADE
RHY1 RHY2 BASS CRD1 CRD2 PAD PHR1
PHR2
32

SINGLE Mode
SINGLE Mode fingering makes it simple to produce beautifully orchestrated
accompaniment using major , seventh , minor and minor-seventh chords by
pressing a minimum number of keys in the Auto Accompaniment section of the
keyboard . The accompaniment produced is perfectly matched to the currently
selected accompaniment style.
Major Chords
C
If you press a C key in the left-hand section of the
keyboard, for example, a C-major accompaniment will
be played. Press another key in the left hand section of
the keyboard to select a new chord. The key you press
will always determine the "root" of the chord played
(i.e. C for a C chord).
Minor Chords
Simultaneously press the root key and a black key
to its left.
Cm
C7
Seventh Chords
Simultaneously press the root key and a white key
to its left.
Minor-Seventh Chords
Simultaneously press the root key and both a white and
black key to its left.
Cm7
33
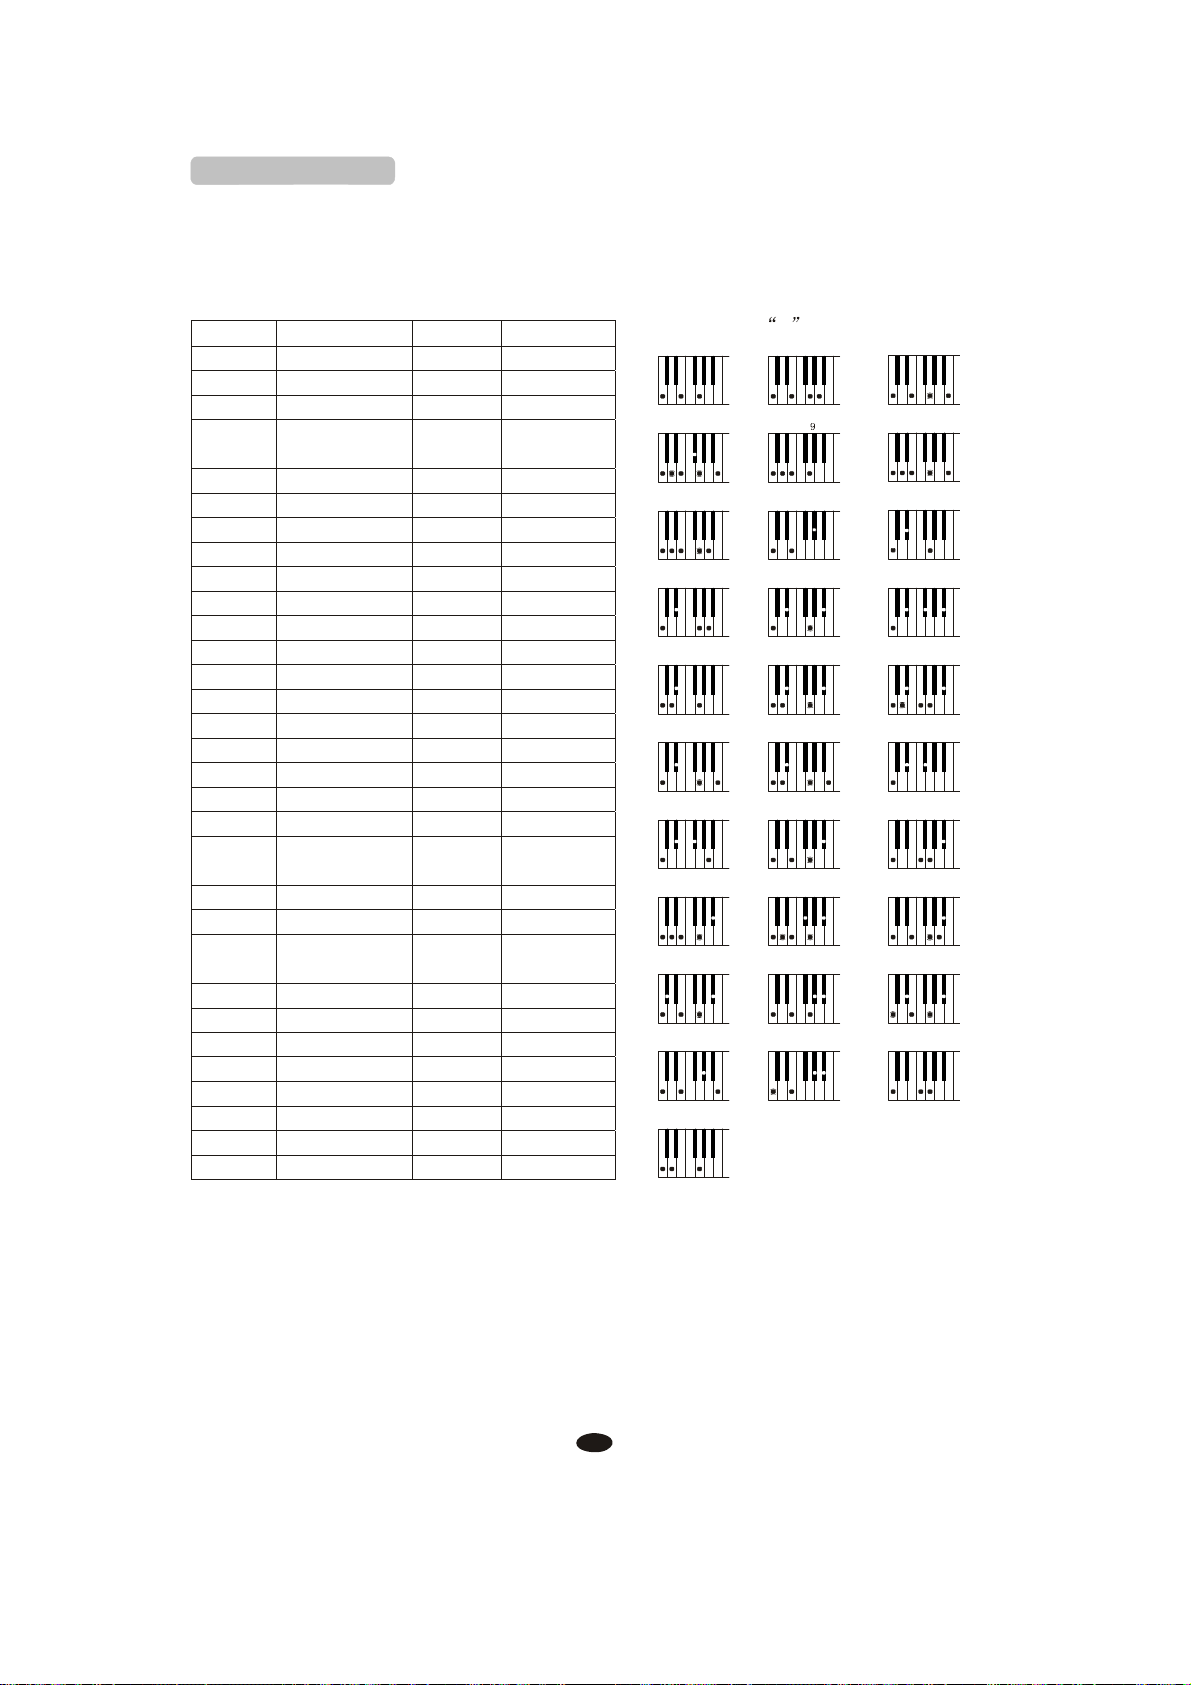
Fingered Mode
Fingered Mode is ideal if you already know how to play chords on a keyboard,
since it allows you to supply your own chords for the Auto Accompaniment feature.
The instrument will recognize the following chord type:
Name
[M]
[6]
[M7]
[M7#11]
[Madd9]
[M9]
[6
9]
[aug]
[m]
[m6]
[m7]
[m7b5]
[madd9]
[m9]
[m11]
[mM7]
[mM9]
[dim]
[dim7]
[7]
[7sus4]
[7
9]
[7#11]
[7
13]
[7b9]
[7b13]
[7#9]
[M7aug]
[7aug]
[sus4]
[1+2+5]
Normal
Voicing
1-3-5
1-(3)-5-6
1-3-(5)-7or1-(3)-5-7 CM7
#
1-(2)-3-4
- 5-7 or
1-2-3-#4-
(5)-7
1-2-3-5
1-2-3-(5)-7
1-2-3-(5)-6
1-3-#5
1-b3-5
1-b3-5-6
1- b3-(5)- b7
1- b3- b5- b7
1-2- b3-5
1-2- b3-(5)- b7
b
1-(2)-
3-4-5-( b 7)
1- b3-(5)-7
1-2- b3-(5)-7
1- b3- b5
1- b3- b5-6
1-3-(5)- b7 or
1-(3)-5-b7
1-4-(5)- b7
1-2-3-(5)- b7
1-(2)- 3-#4-5- b7 or
1-2-3-#4-(5)-b7
1-3-(5)-6- b7
1- b2-3-(5)- b7
1- 3-5- b6 - b7
#
1-
2-3-(5)- b 7
1-(3)-#5-7
1-3-#5- b7
1-4-5
1-2-5
Chord(C)
Display
C
C6
CM7#11
CMadd9
CM9
C6
9
Caug
Cm
Cm6
Cm7
b
Cm7
5
Cmadd9
Cm9
Cm11
CmM7
CmM9
Cdim
Cdim7
C7
C7sus4
C7
9
#
C7
11
C7
13
C7 b9
C7(
C7 b13
#
C79
CM7aug
C7aug
Csus4
C1+2+5
C7(
C
C6
CM7
CM7(#11)
C(9)
CM7(9)
C6(9)
Caug
Cm
Cm6
Cm7
b
Cm7
5
Cm(9)
Cm7(9)
Cm7(11)
CmM7
CmM7(9)
Cdim
Cdim7
C7
C7sus4
C7(9)
#
C7(
11)
C7(13)
b
9)
b
13
)
C7(#9)
CM7aug
C7aug
Csus4
C
Example
C
CM
CM 7
9
C 6
Cm6 Cm7 Cm7
Cmadd
CmM7 CmM9
Cdim7 C7
9
C7
B9
C7
CM7aug C7aug
C
1+2+5
#
11
9
Cm9
for
c
chords
6
CMadd CM
Caug
#
11
7
C
B13
C7
C7
7
CM
9
Cm
B
5
Cm
11
Cdim
C7sus
4
13
C7
# 9
Csus
4
The chord fingerings listed are all in root position, but other inversions can be use
with the following exceptions:6, m6, sus4, aug, dim7, 6(9), m7(11), 1+2+5.
34

User Style
This digital piano can play RINGWAY Style(*.RTY) and YAMAHA Style(*.STY).
Copy the RINGWAY Style(*.RTY) or YAMAHA Style(*.STY) from
computer to your USB Disk
Insert the USB Disk into the USB terminal.
Press [FILE] button, use [+] and [-] buttons to select RINGWAY Style
(*.RTY) or YAMAHA Style (*.STY).
FILE RECORD
PLAY/LOAD
MULTI
DELETE
Press [PLAY/LOAD] button.
RHY1 RHY2 BASS CRD1 CRD2 PAD PHR1 PHR2 RHY1 RHY2 BASS CRD1 CRD2 PAD PHR1
FILE RECORD
MULTI
DELETE
RHY1 RHY2 BASS CRD1 CRD2 PAD PHR1
PLAY/LOAD
PHR2
PHR2
35

Press [STYLE] button, use number buttons to select 101 USER Rhy .
Now the RINGWAY Style or YAMAHA Style can be used as usual by pressing
Rhythm Control buttons.
STYLE
RHY1 RHY2 BASS CRD1 CRD2 PAD PHR1
PHR2
NOTE
Some YAMAHA Styles have four variations (Main A, Main B, Main C
and Main D), only two variations (Main A and Main B) will be recognized
by your instrument.
Only one User Style can be loaded once. And the User Style will be lost
after playing MIDI file. You need to reload the User Style again when you
want to use it.
36

Registration Memory
Your instrument registration memory can be used to store six sets of voice and
auto accompaniment settings that can be recalled during you playing at the touch
of one single button.
Memorizing the Settings
1. Select the Desired Bank
Press the [STORE/BANK] button repeatedly to select the bank [1MmryBank]
-[4MmryBank].
STORE/BANK
RHY1 RHY2 BASS CRD1 CRD2 PAD PHR1
PHR2
2. Memorizing the Settings to the Preset [M1]-[M6] While Holding Down
the [STORE/BANK], Press [M1]-[M6] Button
M1 M2 M3 M4 M5
STORE/BANK
M6
RHY1 RHY2 BASS CRD1 CRD2 PAD PHR1
PHR2
NOTE
Anytime you store to a REGISTRATION MEMORY button, all
settings previously stored in that button will be erased and
replaced by the new settings.
37

Recalling the Settings
1. Select the Appropriate Registration Memory Bank
Press the [STORE/BANK] button repeatedly to select the bank [1MmryBank]-
[4MmryBank].
STORE/BANK
2. Press the Desired Registration Memory Preset [M1]-[M6] Button
The settings stored to a REGISTRATION MEMORY button can be recalled
simply by pressing the appropriate button [M1]-[M6].
M1 M2 M3 M4 M5
RHY1 RHY2 BASS CRD1 CRD2 PAD PHR1
PHR2
M6
RHY1 RHY2 BASS CRD1 CRD2 PAD PHR1
Saving the Registration Data to USB Disk
Insert the USB Disk into the USB terminal.
The USB cursor will appear on the
LCD-Display.
PHR2
USB
38

Press [SAVE] button, a message xREGSTxxx (x indicates this file's
sequence Num in UDisk. xxx indicates registration file number ) appears,
indicating your Registration Memory Settings are saved to USB Disk, with 24
Registrations stored to a single file.
SAVE
Use Registration Data from USB
RHY1 RHY2 BASS CRD1 CRD2 PAD PHR1
PHR2
USB Cursor
Insert the USB Disk into the USB terminal. Use [+] and [-] buttons to select
REG file, then press [PLAY/LOAD] button, display shows Load OK .
FILE RECORD
PLAY/LOAD
MULTI
DELETE
24 Registrations will be loaded to the memory store(4*6) on the panel. You
can recall the information you have loaded by pressing M1-M6.
Delete REG File from USB
Insert the USB Disk into the USB terminal. Use [+] and [-] buttons to select
REG file you want to delete, then hold down the [RECORD] button and
press [PLAY/LOAD] button. LCD shows:
FILE RECORD
MULTI
Press [+] button to delete the file.
Press [-] button to cancel.
DELETE
PLAY/LOAD
RHY1 RHY2 BASS CRD1 CRD2 PAD PHR1
PHR2
RHY1 RHY2 BASS CRD1 CRD2 PAD PHR1
PHR2
39

Song Recording
This digital piano lets you record your performances and Registration settings
to a USB Disk. Each user song lets you record up to sixteen independent tracks.
These include not only the voices for the keyboard performance, but also the auto
accompaniment parts.
It provides two different ways to record: Quick Recording and Multi Track
Recording.
(All the recording data will be saved automatically as MIDI Format 0 File
to your USB Disk).
Quick Recording
1. Insert the USB Disk into the USB Terminal
USB
2. Start Recording
Press the [RECORD] button to start recording.
(The first two measures are tempo prompt only. It cannot record any data).
FILE RECORD
MULTI
DELETE
PLAY/LOAD
RHY1 RHY2 BASS CRD1 CRD2 PAD PHR1
PHR2
40

3. Stop Recording
Press [RECORD] button again to stop recording.
Recording stops and your performance is written to the song. The song to
which your performance is recorded is automatically named xMUSIC xxx
(x indicates this file's sequence Num in UDisk. xxx indicates the recording file
number). You can edit the song as desired by computer or midi edit soft.
FILE RECORD
PLAY/LOAD
MULTI
DELETE
RHY1 RHY2 BASS CRD1 CRD2 PAD PHR1
PHR2
will be recorded on track9-track16.
Quick Recording automatically makes track assignments as below:
Track 1--------- Main Voice
Track 2--------- Split Voice
Track 3--------- Dual Voice
You also can use accompaniment styles to record. The accompaniment style
The quick recording method is different from the multi recording method. In
quick recording mode, track4-track8 are not allowed to record. but for multi
recording, the recorded data is recorded on tracks 1-16.
If you wish to re-record a user song that was originally recorded by the easy
recording method, please use Multi Track Recording.
41

Multi Track Recording
Multi track recording provides two ways to record:
1.Use Auto Track Assignment.
2.Select Tracks by yourself.
1. Use Auto Track Assignment
1.1 Insert the USB Disk Into the USB Terminal
USB
1.2 Turn the Auto Track On
Reference: F7 Auto Track(P.20).
1.3 Start Recording
Press the [RECORD] button to start recording.
(The first two measures are tempo prompt only. It cannot record any data).
When the recording is finished, the recording file will be saved with the name
1 MUSIC000 .
FILE RECORD
MULTI
DELETE
PLAY/LOAD
RHY1 RHY2 BASS CRD1 CRD2 PAD PHR1
PHR2
1.4 To Stop Recording by Pressing [RECORD] Button Again.
FILE RECORD
PLAY/LOAD
MULTI
DELETE
42

1.5 Hold Down the [FILE] Button, Then Press [RECORD] Button
The next track will be given automatically. The performance will be recorded
to the next track on the basic of 1 MUSIC000 .
When the recording is finished, the recording file will be saved as a new file
named 2 MUSIC001 .
FILE RECORD
PLAY/LOAD
MULTI
DELETE
1.6 Use the Same Operation as Step 5 to Record More Tracks. The Name
of the New File Will be Saved in Sequence.
RHY1 RHY2 BASS CRD1 CRD2 PAD PHR1
PHR2
1.7 To Stop Recording by Pressing [RECORD] Button Again.
FILE RECORD
PLAY/LOAD
MULTI
DELETE
2. Select Tracks by Yourself
2.1 Insert the USB Disk Into the USB Terminal
USB
43

2.2 Turn the Auto Track Off
Reference: F7 Auto Track(P .20).
2.3 Select Recording Track
Press [TRACK] button repeatedly can select three voice mode, you can use
[+] and [-] buttons to select the track(01-16) in each mode.
TRACK
FILTER
RHY1 RHY2 BASS CRD1 CRD2 PAD PHR1
PHR2
R. RecTrk------to select the Main Voice track(01-16, OFF)
L. RecTrk------to select the Split Voice track(01-16, OFF)
D. RecTrk------to select the Dual Voice track(01-16, OFF)
2.4 Start Recording
Press [RECORD] button to start recording.
(The first two measures are tempo prompt only. It cannot record any data).
When the recording is finished, the recording file will be saved with the name
1 MUSIC000 .
To Stop Recording by Pressing [RECORD] Button Again.
FILE RECORD
PLAY/LOAD
MULTI
DELETE
RHY1 RHY2 BASS CRD1 CRD2 PAD PHR1
PHR2
( Please turn the “L.RecTrk” or “D.RecTrk” off without Split or Dual voice
recording.)
44

2.5 Repeat Step 3 to Select Next Track
2.6 Hold Down the [FILE] Button, Then Press [RECORD] Button
The performance will be recorded to the desired track on the basic of
1 MUSIC000 .
When the recording is finished, the recording file will be saved as a new file
named 2 MUSIC001 .
FILE RECORD
PLAY/LOAD
MULTI
DELETE
RHY1 RHY2 BASS CRD1 CRD2 PAD PHR1
PHR2
2.7 Use the Same Operation as Step 3 and Step 6 to Record More Tracks.
The Name of the New File Will be Saved in Sequence.
2.8 To Stop Recording by Pressing [RECORD] Button Again.
Delete Song
Insert the USB Disk into the USB terminal. Use [+] and [-] buttons to select
xMUSICxxx file you want to delete, then hold down the [RECORD] button
and press [PLAY/LOAD] button. LCD shows:
FILE RECORD
PLAY/LOAD
MULTI
DELETE
RHY1 RHY2 BASS CRD1 CRD2 PAD PHR1
PHR2
Press [+] button to delete the file.
Press [-] button to cancel.
45

File Button
Use this button you can switch to USB mode immediately even the keyboard
is in any of other mode.
FILE RECORD
PLAY/LOAD
MULTI
DELETE
RHY1 RHY2 BASS CRD1 CRD2 PAD PHR1
PHR2
Filter Button
Use this function you can turn on or turn off any tracks and change the
metrono me's tempo before song playing or recording.
Press [FILTER] button repeatedly to select the track.
FILTER
USB.VOL
Use [+] and [-] buttons to select ON or OFF .
would not like to play it with other tracks, so you can press [FILTER] button to
select FLtTrk01 or FLtTrk02 , use [+] or [-] button to turn off it. Track 1
or track 2 will be closed.
1 2
4 5 6
7 8 9
3
For example: a midi file is prepare for playing, but track 1 or track 2, you
RHY1 RHY2 BASS CRD1 CRD2 PAD PHR1
PHR2
0
RHY1 RHY2 BASS CRD1 CRD2 PAD PHR1
-
PHR2
Press [FILTER] button repeatedly to select FltTmp . Use [+]
and [-] buttons to select ON or OFF .
ON:Whenever you play any songs,the tempo will be not change.
OFF:The tempo will be changed by the different songs.
NOTE
The [FILTER] button is disabled while playing or recording.
46

Adjusting Song's Volume
Press [USB.VOL] button while playing song.
FILTER
USB.VOL
Use [+] and [-] buttons or number (0-9) buttons to adjust the song's volume.
Range: 00-127 Default: 100
1 2
4 5 6
7 8 9
3
RHY1 RHY2 BASS CRD1 CRD2 PAD PHR1
PHR2
0
RHY1 RHY2 BASS CRD1 CRD2 PAD PHR1
-
PHR2
47

Factory Set
3
POWER
OFF ON
0
-
RHY1 RHY2 BASS CRD1 CRD2 PAD PHR1
PHR2
1. Turn off the power.
2. Hold down [+] and [-] buttons, then turn the power on, it can restore all
internal settings to factory set.
1 2
4 5 6
7 8 9
48

Appendix
Voice List
CHANNEL
number
CHANNEL
number
49

Style List
NO STYLE NAME
8 BEAT
01
02
03
04
05
06
07
08
09
10
11
12
13
14
15
16
17
18
19
20
21
22
23
24
25
26
27
28
29
30
31
32
33
34
8BEAT MODERN
MERSEY BEAT
SURF POP
8BEAT
60'S ROCK
HARD ROCK
ROCK SHUFFLE
80'S ROCK
16
BEAT
16 BEAT1
16 BEAT2
POP SHUFFLE
GUITAR POP
JAZZ ROCK
SWING FUNK
POP ROCK
BALLAD
PIANO BALLAD
LOVE SONG
6/8 MODERN
6/8 SLOW ROCK
SHOW BALLAD
POP BALLAD
16BEAT BALLAD
DANCE
RAP
DANCE POP
HOUSE
SWING HOUSE
CLUB DANCE
CLUB LATIN
GARAGE
TECHNO
DANCE 8BEAT
HIP HOP
CHILL OUT
DISCO
70'S DISCO
NO STYLE NAME
35 LATIN DISCO
36 DISCO
37 DISCO PARTY
38 DISCO FEVER
39 NEWYORK DISCO
NO
70
71
72
73
74
SWING&JAZZ
40 BIG BAND FAST
41 BIG BAND MID
42 BIG BAND BALLD
43 JAZZ CLUB
44 SWING
45 JAZZ BALLAD
46 DIXIE LAND
47 RAGTIME
48 STRIDE PIANO
49 MODERN JAZZ
R&B
50 SOUL
51 DETROIT POP
52 RHYTHM&BLUES
53 6/8 SOUL
54 TWIST
55 ROCK&ROLL
56 BOOGIEWOOGIE
57 6/8 BLUES
58 3/4 GOSPEL
59 GOSPEL SHUFFLE
COUNTRY
60 COUNTRY 8 BEAT
61 COUNTRY POP
62 COUNTRY SWING
63 COUNTRY 2 STEP
64 COUNTRY BALLAD
65 BLUE GRASS
66 COUNTRY WALTZ
LATIN
67 MERENGUE
68 BOSSANOVA
69 POP BOSSA
75
76
77
78
79
80
81
82
83
84
85
86
87
88
89
90
91
92
93
94
95
96
97
98
99
100 FRENCH WALTZ
101 USER STYLE
STYLE NAME
MAMBO
SALSA
BEGUINE
REGGAE
SWINGY REGGAE
BALLROOM
DANCE BAND
ENGLISH WALTZ
FOXTROT
QUICK FOXTROT
QUICKSTEP
TANGO
HABENERA TANGO
PASODOBLE
SAMBA
CHACHA
JIVE
RHUMBA
VIENNESE WALTZ
TRADITIONAL
2/4 MARCH
6/8 MARCH
2/4 POLKA
6/8 POLKA
TARANTELLA
SIRTAKI
SCOTTISH REEL
HAWAIIAN
MARIACHI
WALTZ
SWING WALTZ
JAZZ WALTZ
WALTZ
50

)
)
)
)
)
)
)
)
)
2
2
g
n
Percussion Voice List
Note
Note#
24 C
25 #C
26 D
27 #D
28 E
29 F
30 #F
31 G
32 #G
33 A
34 #A
35 B
36 C
37 #C
38 D
39 #D
40 E
41 F
42 #F
43 G
44 #G
45 A
46 #A
47 B
48 C
49 #C
50 D
51 #D
52 E
53 F
54 #F
55 G
56 #G
57 A
58 #A
59 B
60 C
61 #C
62 D
63 #D
64 E
65 F
66 #F
67 G
68 #G
69
A
70 #A
71 B
72 C
73 #C
74 D
75 #D
76 E
77 F
78 #F
79 G
80 #G
81
A
82 #A
83 B
84 C
Standard(0
Seq Click H
Brush Ta p
Brush Swirl L
Brush Slap
Brush Swirl H
Snare Roll
Castanet
Snare L
Sticks
Bass Drum L
Open Rim Shot
Bass Drum M
Bass Drum H
Side Stick
Snare M
Hand Clap
Snare H
Floor Tom L
Hi-Hat Closed
Floor Tom H
Hi-Hat Pedal
Low
Hi-Hat Open
Mid Tom L
Mid Tom H
Crash Cymbal
High Tom
Ride Cymbal 1
Chinese Cymbal
Ride Cymbal Cp
Tambourine
Splash Cymbal
CowBell
Crash Cymbal
Vibraslap
Ride Cymbal 2
Bongo H
Bongo L
Conga H Mute
Conga H Ope
Conga L
Timbale H
Timbale L
Agogo H
Agogo L
Cabasa
Maracas
Samba Whistle
Samba Whistle
Cuiro Short
Cuiro Long
Claves
Wood Block H
Wood Block L
Guica Mute
Guica Open
Triangle Mute
Triangle Open
Shaker
Jingle Bell
Bell Tree
Tom
Room(8
SD Room L
SD Room H
Room Tom 1
Room Tom 2
Room Tom 3
Room Tom 4
Room Tom 5
Room Tom 6
Power(16
SD Elec M
BD Rock
SD Rock
SD Rock Rim
Rock Tom 1
Rock Tom 2
Rock Tom 3
Rock Tom 4
Rock Tom 5
Rock Tom 6
Electronic(24
Rever se Cy mbal Rever se Cy mbal
Hi-Q
Snare L SD Elec H2
BD Rock BD Analog 1L
BD Rock 2 BD Analog 1H
SD Elec M SD Analog 1H
SD Elec H SD Analog 1L
E Tom 1 Analog Tom 1
E Tom 2 Analog Tom 2
E Tom 3 Analog Tom 3
E Tom 4 Analog Tom 4
E Tom 5 Analog Tom 5
E Tom 6 Analog Tom 6
Scratch Push Scratch Push Dance 12 Bird
Scratch Pull Scratch Pull
Synth(25
Hi-Q
Analog Side Stick
Analog HH Closed1
Analog HH Closed
Analog HH 1Open
Analog Cymb al
Analog Cowbe ll Footsteps 1
Analog Conga H Wind Chimes
Analog Conga M Car-Engine
Analog Conga L Car-Stop
Analog Maracas
Analog Claves
Dance(26
Dance 1
Dance Kick
Dance 2
Dance 3
Dance Snare 1
Dance 4
Dance Snare 2
Dance Tom 1
Dance Hita 1
Dance Tom 2
Dance Hita 2
Dance Tom 3
Dance Hita 3
Dance Tom 4
Dance Cha 1
Dance Ling Punch
Dance Cha 2
Dance 5
Dance 6
Dance 7
Dance 8
Dance 9
Dance 10
Dance 11
Dance 13
Dance 14
Dance Ps3
Jazz(32)Brush(40)Classic(48
Snare Jazz
BD Jazz
SD Jazz L
SD Jazz H
Brush Slap L
BD Jazz
Brush Slap H
Brush Tap
Brush Tom 1
Brush Tom 2
Brush Tom 3
Brush Tom 4
Brush Tom 5
Brush Tom 6
Bass Drun L3
Gran Casa
Gran Casa Mute
Marching SD M
Marching SD H
Hand Cym.L Open
Hand Cym.L Closed
Hand Cym.H Open
Hand Cym.H Closed
Drum(56
Snaer H Soft 2
Open Rim Shot 2
Bass Drum H 2
Snare L2
Snare H Hard 2
Effects(56
High-Q
Slap
Scratch Push
Scratch Pull
Sticks
Square Click
Mtrnm .Click
Mtrnm. Bell
Gt.FretNoiz
Gt.CutNoise
Gt.CutNoise
String Slap
Fl.KeyClick
Laughing
Screaming
Heart Beat
Footsteps 2
Applause
Door Creakin
Door
Scratch
Car-Pass
Car-Crash
Siren
Train
Jetplane
Helicopter
Starship
Gun Shot
Machine Gun
Lasergun
Explosion
Dog
HorseGallop
Rain
Thunder
Wind
Seashore
Stream
BuBBle
51

r
MIDI Implementation Chart
Function Transmitted Recognized Remarks
Basic
Default
Channel
Mode
Messages
Altered
Note
Number :True
Velocity Note
Note
Affter
Pitch
Control Change
Programe
Change :
System
System : Song
Common :
Aux : Local
Messages
Default
OFF
Key's
Bende
Exclusive
: Song
: All Notes
Changed
voice
True
Tune
on/off
: Active
:
Reset
ON
0,32
1
5
6
7
10
11
64
65
66
67
80,81
91,93
100,101
120
121
122
Position
Select
Off
Sense
(*1)
(*1)
Mode 3
X
********
0~127
********
O
9nH,v=1~127
O 9nH,v=0 or8nh
X
X
O
X
X
O
O
O
X
O
X
O
O
O
O
O
O
X
O
O
0-127
0-127
X
X
X
X
O
O
X
X
Mode1:OMNI ON,POLY Mode2:OMNI ON,MONO O: Yes
Mode3:OMNI OFF,POLY Mode4:OMNI OFF,MONO X: NO
*1: Main voice track (01-16).Default: 01
Split voice track (01-16).Default: 02
Dual voice track (01-16).Default: 03
Percussion track (01-16). Default: 10
*2: Registered parameter number:
#0: Pitch sensivity
#1: Fine tuning cents
#2: Coarse tuning in half-tones
1-16CH
1-16CH
Mode 3
X
X
0~127
0~127
O
9nH,v=1~127
O 9nH,v=0 or8nh
X
O
O
O
O
O
O
O
O
O
O
O
O
O
O
O(*2)
O
O
O
O
0-127
0-127
O
X
X
X
O
O
O
O
Bank
Select
Modulation
Portamento time
Data
Entry
Volume
Pan
Expression
Sustain
Portamento
Sostenuto
Soft
pedal
DSP
TYPE
DSP
DEPTH
RPN
LSB,MSB
All sound
off
Reset all
Controllers
Local
control
52

Specifications
53

Assembly Instructions
Before moving the piano to a new
location, always remember to raise
the level of the Pedal Board support
so that it is not touching the floo r.
Once the piano is in place, you can
adjust it so it is in firm contact with
the floor again.
10505413V4.0
54


 Loading...