

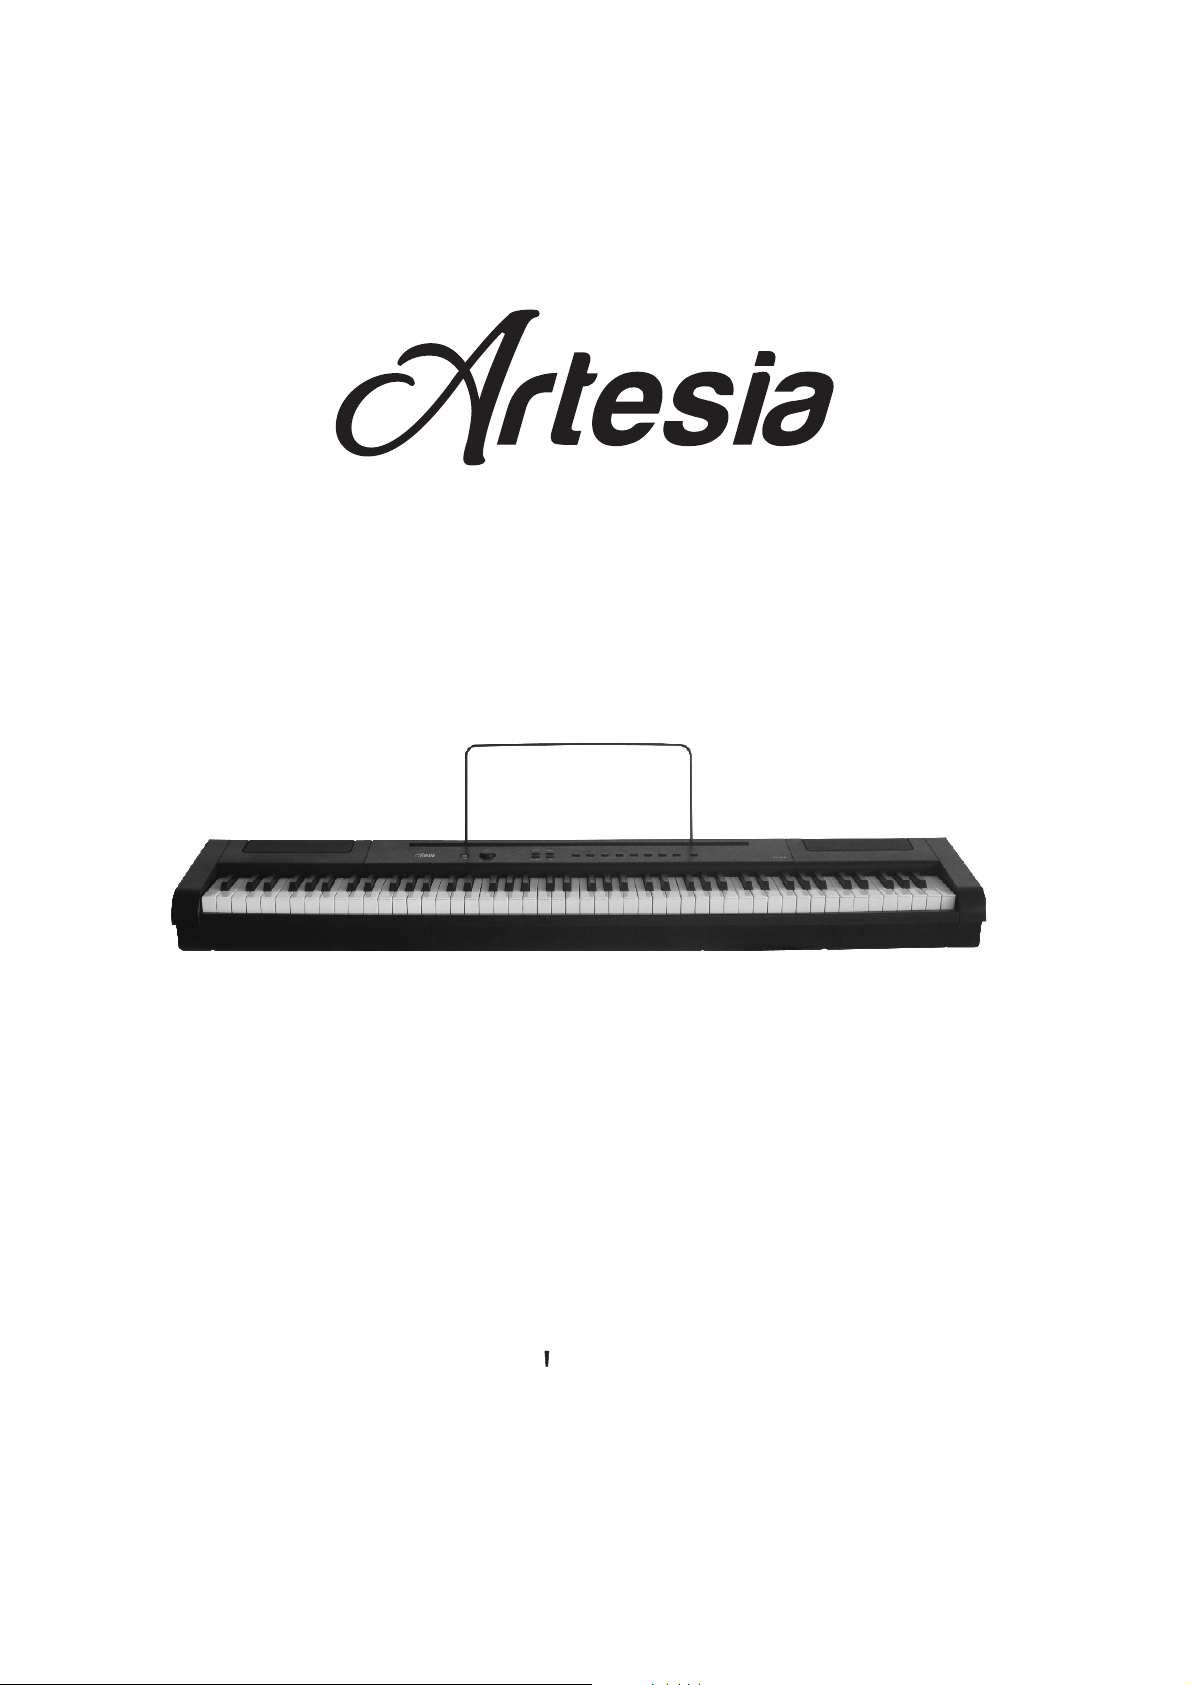
PA-88H
Owner s Manual
Virgin Musical Instruments

Precaution
Thank you fo r purchasi ng this digi tal instru ment. For corre ct operation an d safety, plea se
read the manual carefully and keep it for future reference.
Safety Precautions
CAUTION
RISK OF ELECTRIC SHOCK
DO NOT OPEN
The lightning flash with arrowhead symbol within an equilateral tr iangle is
intended to alert the user to the presence of uninsulated “dangerous voltage”
withi n the produc t's enclos ure that may be of su fficient m agnitude to constitute
a risk of elec tric sh ock.
The exclam ation poin t within an eq uilateral tri angle is int ended to ale rt the user
to the pr ese nce of impor tant op eratin g and mainte nance (ser vicing) instructions in
the lit era ture accom panying the pro duct.
Important Safety Instructions
1) Read these instructions.
2) Keep these instructions.
3) Heed all warnings.
4) Follow all instructions.
5) Do not use this apparatus near water.
6) Clean only with dry cloth.
7) Do not block any ventilation openings; install in accordance with the manufacturer's instructions.
8) Do not install near any heat sources such as radiators, heat registers, stoves, or other apparatus (including
amplifiers) that produce heat.
9) Do not defeat the safety purpose of the polarized or grounding-type plug. A polarized plug has two blades with
one wider than the other. A grounding-type plug has two blades and a third grounding prong. The wide blade
or the third prong is provided for your safety. If the provided plug does not fit into your outlet, consult an
electrician for replacement of the obsolete outlet.
10) Protect the power cord from being walked on or pinched, particularly at plugs, convenience receptacles, and
the point where they exit from the apparatus.
11) Only use attachments/accessories specified by the manufacturer.
12) Use only with the cart, stand, tripod, bracket, or table specified by the manufacturer, or sold with the apparatus.
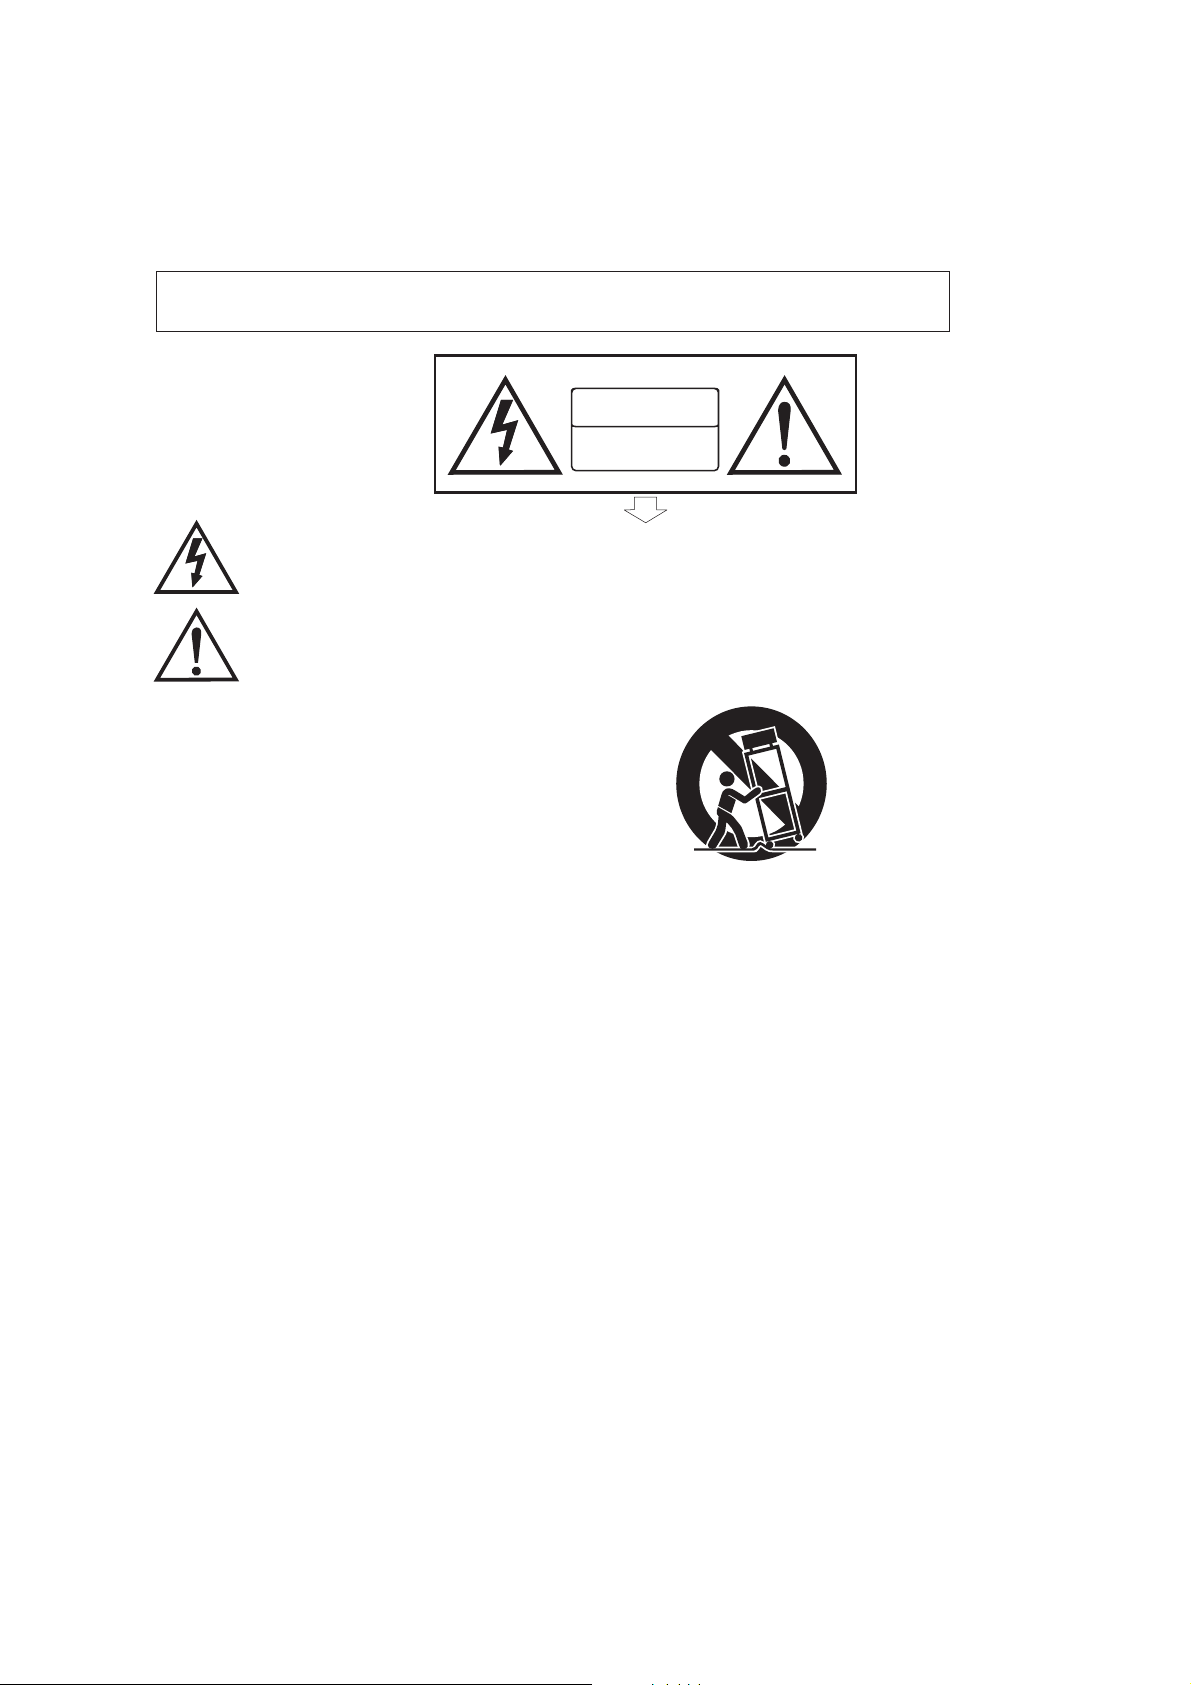
When a cart is used, use caution when moving the cart/apparatus combination to avoid injury from tip-over (Figure 1).
13) Unplug this apparatus during lightning storms or when unused for a long periods of time.
14) Refer all servicing to qualified service personnel. Servicing is required when the apparatus has been damaged
in any way, such as the power-supply cord or plug is damaged, liquid has been spilled or objects have fallen
into the apparatus, the apparatus has been exposed to rain or moisture, does not operate normally, or has been
dropped.
(Figure 1)
WARNING: To reduce the risk of fire or electric shock, do not expose this apparatus to rain or moisture.
CAUTION: Apparatus shall not be exposed to dripping or splashing, and no objects filled with liquids, such as
vases, shall be placed on the apparatus.
Always make sure all batteries are .
Always replace at the same time.
types, as this can cause overheating, or fire, or battery fluid leakage.
Remove the batteries from the instrument if it is not to be used for a long time.
WARNING: This product contains chemicals, including lead, known to the State of California to cause cancer
and birth defects or other reproductive harm. Wash hands after handling.
all of the batteries Do not combine old and new batteries, also do not mix battery
inserted the correct way around to match the +/- polarity markings

Your portable 88 note piano not only contains leading and innovative technology
but it also is developed by and for musicians of all playing levels. Featuring a
natural balanced, weighted hammer action keyboard action and an advanced
three layer acousta ridge tone generation sound technology, that will provide
you with a rich performing and playing experience.
This PA-88H offers many features and connection possibilities. To get the most
out of your instrument, please read this manual and try out the various functions
that can compliment your playing style.
Whether it is on stage, studio or home, your new portable piano is designed to
give you a lifetime of musical enjoyment.
Thank you for choosing Artesia!
Features Include:
. 88 Key Natural Balanced, weighted hammer action Keybed
. 16 Acousta Ridge sampled Instrument Voices
. DSP Functions for additional realism
. USB to Host and USB Audio Connection
. MIDI, Stereo and Mono Line Outs
. Battery Operated (6 D Cell Batteries are not included)
. Includes AC Adaptor, Sustain Pedal, Music Rack and more
FCC STATEMENT
1. This device complies with Part 15 of the FCC Rules. Operation is subject to the
following two conditions:
(1) This device may not cause harmful interference.
(2) This device must accept any interference received, including interference that
may cause undesired operation.
2. Changes or modifications not expressly approved by the party responsible for
compliance could void the user's authority to operate the equipment.
NOTE: This equipment has been tested and found to comply with the limits for a
Class B digital device, pursuant to Part 15 of the FCC Rules. These limits are
designed to provide reasonable protection against harmful interference in a
residential installation. This equipment generates uses and can radiate radio
frequency energy and, if not installed and used in accordance with the
instructions, may cause harmful interference to radio communications. However,
there is no guarantee that interference will not occur in a particular installation.
If this equipment does cause harmful interference to radio or television reception,
which can be determined by turning the equipment off and on, the user is
encouraged to try to correct the interference by one or more of the following
measures:
. Reorient or relocate the receiving antenna.
. Increase the separation between the equipment and receiver.
. Connect the equipment into an outlet on a circuit different from
that to which the receiver is connected.
. Consult the dealer or an experienced radio/TV technician for help.

Contents
Panel Control
Getting Started
Selecting a Voice
Demo Songs
Select the Demo Song
Stop ..................................................................
.........................................................
Layer Mode
To Adjust the Volume of Main Voice in Layer
........................................
Metronome
Tempo
Edit Functions
Master Tunning
Touch
..........................................................................
EQ Adjustment
MIDI Functions
MIDI Channels
MIDI Local On/Off
MIDI Panic Key
Factory Reset
Appendix
Advanced Functions keyboard Chart
Specifications
Warranty ......................................................................................
the Demo Song
Reverb and Chorus Buttons
To Adjust the Volume of the Layer Voice
........................................................................................
................................................................................
.............................................................................
...........................................................................
.................................................................................
................................................................
...................................................................................
..................................
...................................................................................
......................................................................................
...............................................................................
..........................................................................
.............................................................................
...........................................................................
......................................................................
..........................................................................
................................................................................
......................................................................................
.................................................
................................................................................
3
4
7
8
8
8
9
11
11
12
14
15
16
16
17
18
20
20
20
21
23
24
29
30
31
1
BANK
FANTASIA
E.BASS
PIANO 1 E.PIANO 1 ORGAN CLAVINET VIBES NYLON GTR STRINGS
CHOIR
E.PIANO 2 CHURCH ORGAN HARPSICHORD HARP STEEL GTR
PIANO 2
BANK
E.BASS
FANTASIA
CHOIR
E.PIANO 2 CHURCH ORGAN HARPSICHORD HARP STEEL GTR
PIANO 1 E.PIANO 1 ORGAN CLAVINET VIBES NYLON GTR STRINGS
PIANO 2
TEMPOMETRONOME
DEMO
FUNCTION
REVERB CHORUS
POWER
PHONES
L (MONO)
R
SUSTAIN
POWER
DC12V 1A
PHONES
L (MONO)
LINE OUT
R
SUSTAIN
MIDI OUT
USB TO HOST
MIDI OUT
USB TO HOST
14
8
DC12V 1A
13
12
LINE OUT
11
10
9
DEMO
VOLUME
REVERB CHORUS
TEMPOMETRONOME
POWER
VOLUME
MIN MAX
FUNCTION
POWER
MIN MAX

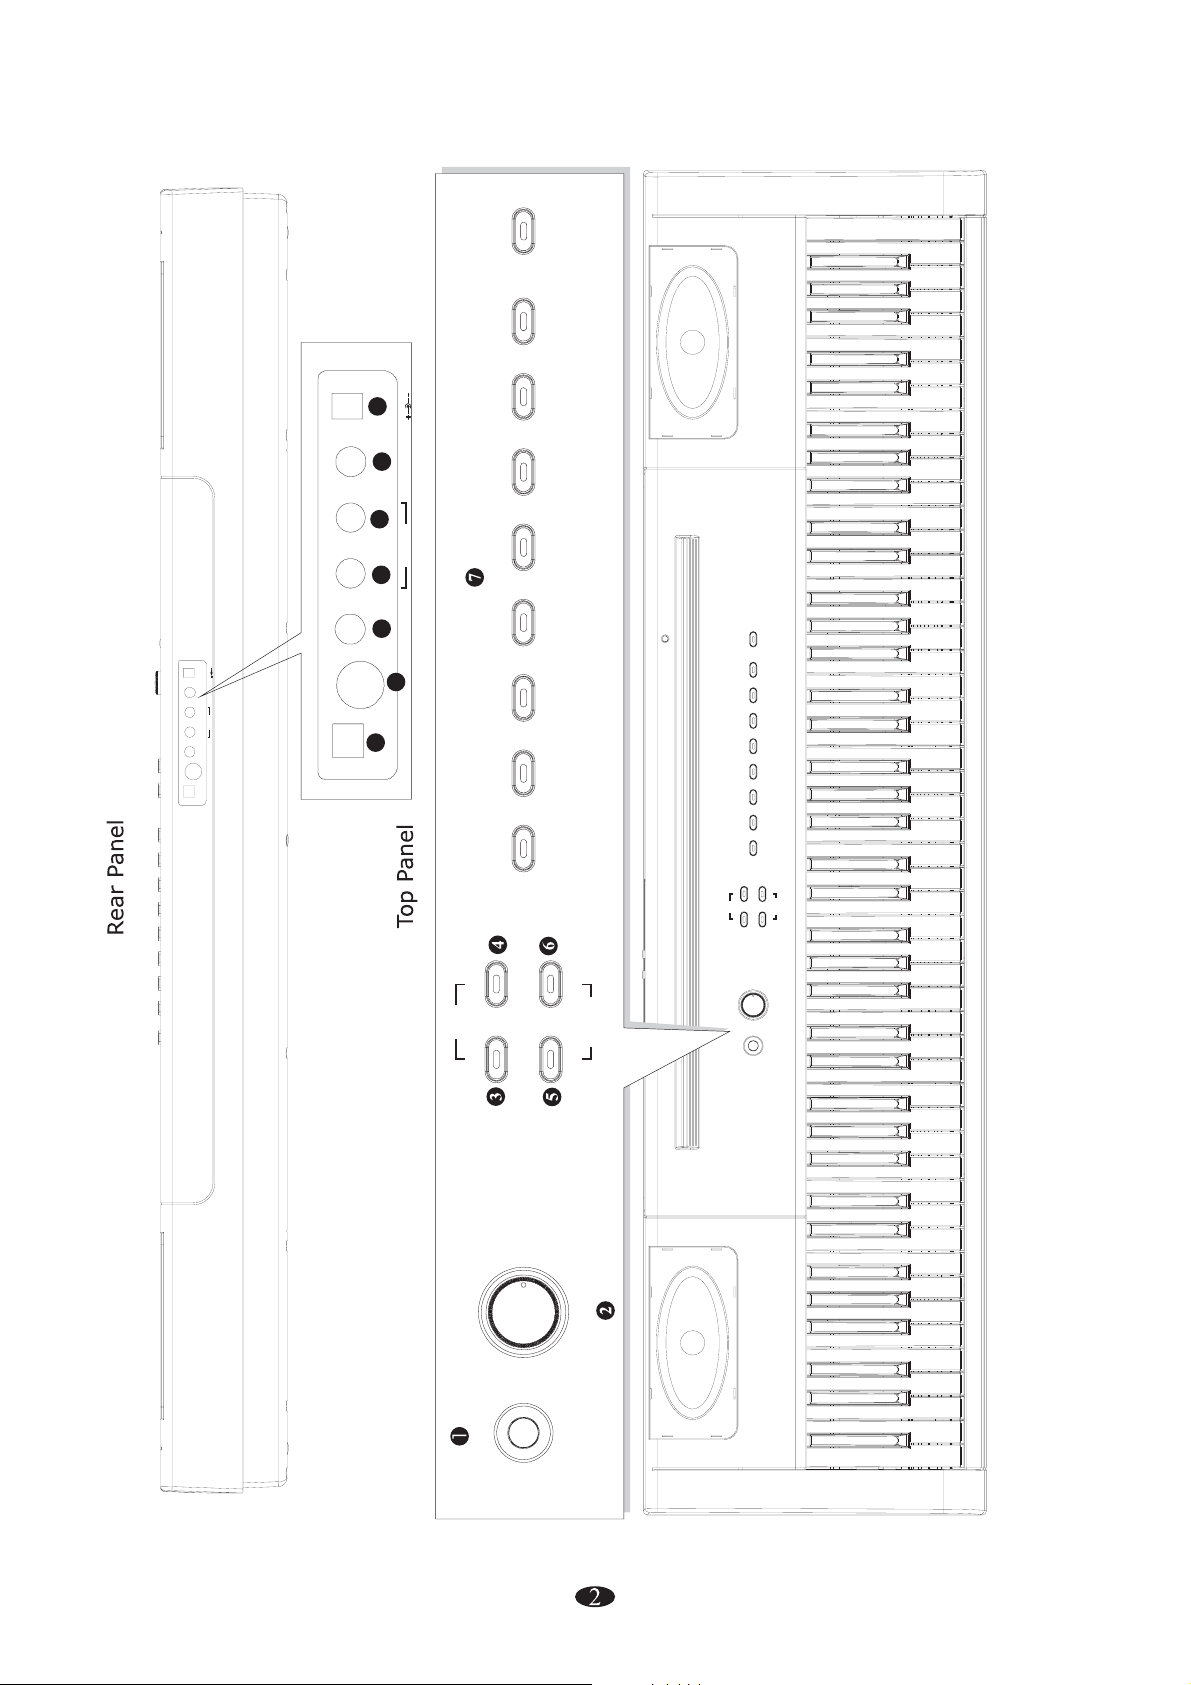
Panel Control
1
POWER
2
VOLUME
3
REVERB Button
4
CHORUS Button
5
METRONOME Button
10
SUSTAIN Jack
11
LINE OUT(R) Jack
LINE OUT(L)(MONO) Jack
12
13
PHONES Jack
14
POWER Jack
6
TEMPO Button
7
VOICES Select
8
USB TO HOST Jack
9
MIDI OUT Jack
3
Getting Started
Turn on the power
Before playing turn the power on by pressing the POWER switch, the panel LED
will turn on.
POWER
NOTE
This piano has an auto off function. If you don't engage in any operations,
the piano will turn off after 30 minutes.
Auto Power On/Off
Press the [METRONOME] and the [TEMPO] buttons together to enter th e
Function Mode.
TEMPOMETRONOME
FUNCTION
Pressi ng the C#2 pi ano key allows the user to switch auto Powe r On or Off.
While ho lding dow n the C#2 pia no key, play the C 3 Key once f or Auto
Power O n and twice for Auto Po wer Off.
TUNING
TOUCH=LOW
LOCAL ON/OFF
PANIC
CHANNEL
TIME SIG
METRO VOL
LAYER VOL
VOICE VOL
TOUCH=HIGH
TOUCH=NORMAL
AUTO POWER ON/OFF
C#2
Press the [METRONOME] and the [TEMPO] buttons together again to ex it
the Function Mode.
4

NOTE
If the AUTO OFF Func tion is on, i t means the u nit will Auto Power
Off afte r 30 minute s of inacti vity.
VOLUME
Set the Volume
Initially set the [VOLUME] about half way between the
"MIN" and "MAX" settings. You can adjust the volume
to accommodate your playing style.
MIN MAX
Using Headphones
One standard stereo headphones can be plugged in
here for private practice or late-night playing. The
internal speaker system is automatically shut off
when a pair of headphones is plugged into PHONES
jacks.
PHONES
L(MONO)
R
Using External Sound System
The Line Out jack(R) and can
Line Out jack(L)(MONO)
LINE OUT
be used to deliver the output of the piano to a keyboard
amplifier, stereo sound system, mixing console or tape
recorder.
MIDI OUT Jack
MIDI (Musical Instrument Digital Interface) is a world-standard communication interface which allows electronic musical instruments to communicate
with each other, by sending and receiving compatible note, program change
and other types of MIDI data.
This terminal transmits data from this instrument to other MIDI devices. The
transmitted data includes the note and touch velocity produced while playing
on the keyboard, as well as voice changes. Demo songs are not transmitted.
Using USB-MIDI
This piano allows the transfer of MIDI over USB. There is a specific
way in which the MIDI signals are routed for maximum flexibility.
In a standard Digital Piano, the built-in keyboard sends MIDI signals
to the internal sound bank as well as the 5-pin MIDI output. In this
digital piano, the keyboard not only sends MIDI signals to the internal
sound bank (just like normal) but also sends MIDI signals simultaneously to the
internal MIDI connection which hooks up inside the device to the Audio Interface.
It is the Audio Interface that is used to control the USB-MIDI.
USB TO HOST
5
USB Audio
The PA-88H have USB Audio.
This means that you can plug in via a USB Cable to your Laptop, Tablet, iPad,
and SmartPhone and be able to hear you device's audio through the pianos
speaker system. This is very useful for example when you are recording your
piano with your laptop and want to listen back through the pianos speakers. Or
if you are using some of the instrument voices on the Garage Band app from
your iPad, now you can hear it through the pianos' sound delivery system
instead of just the iPad's speakers or headphones.
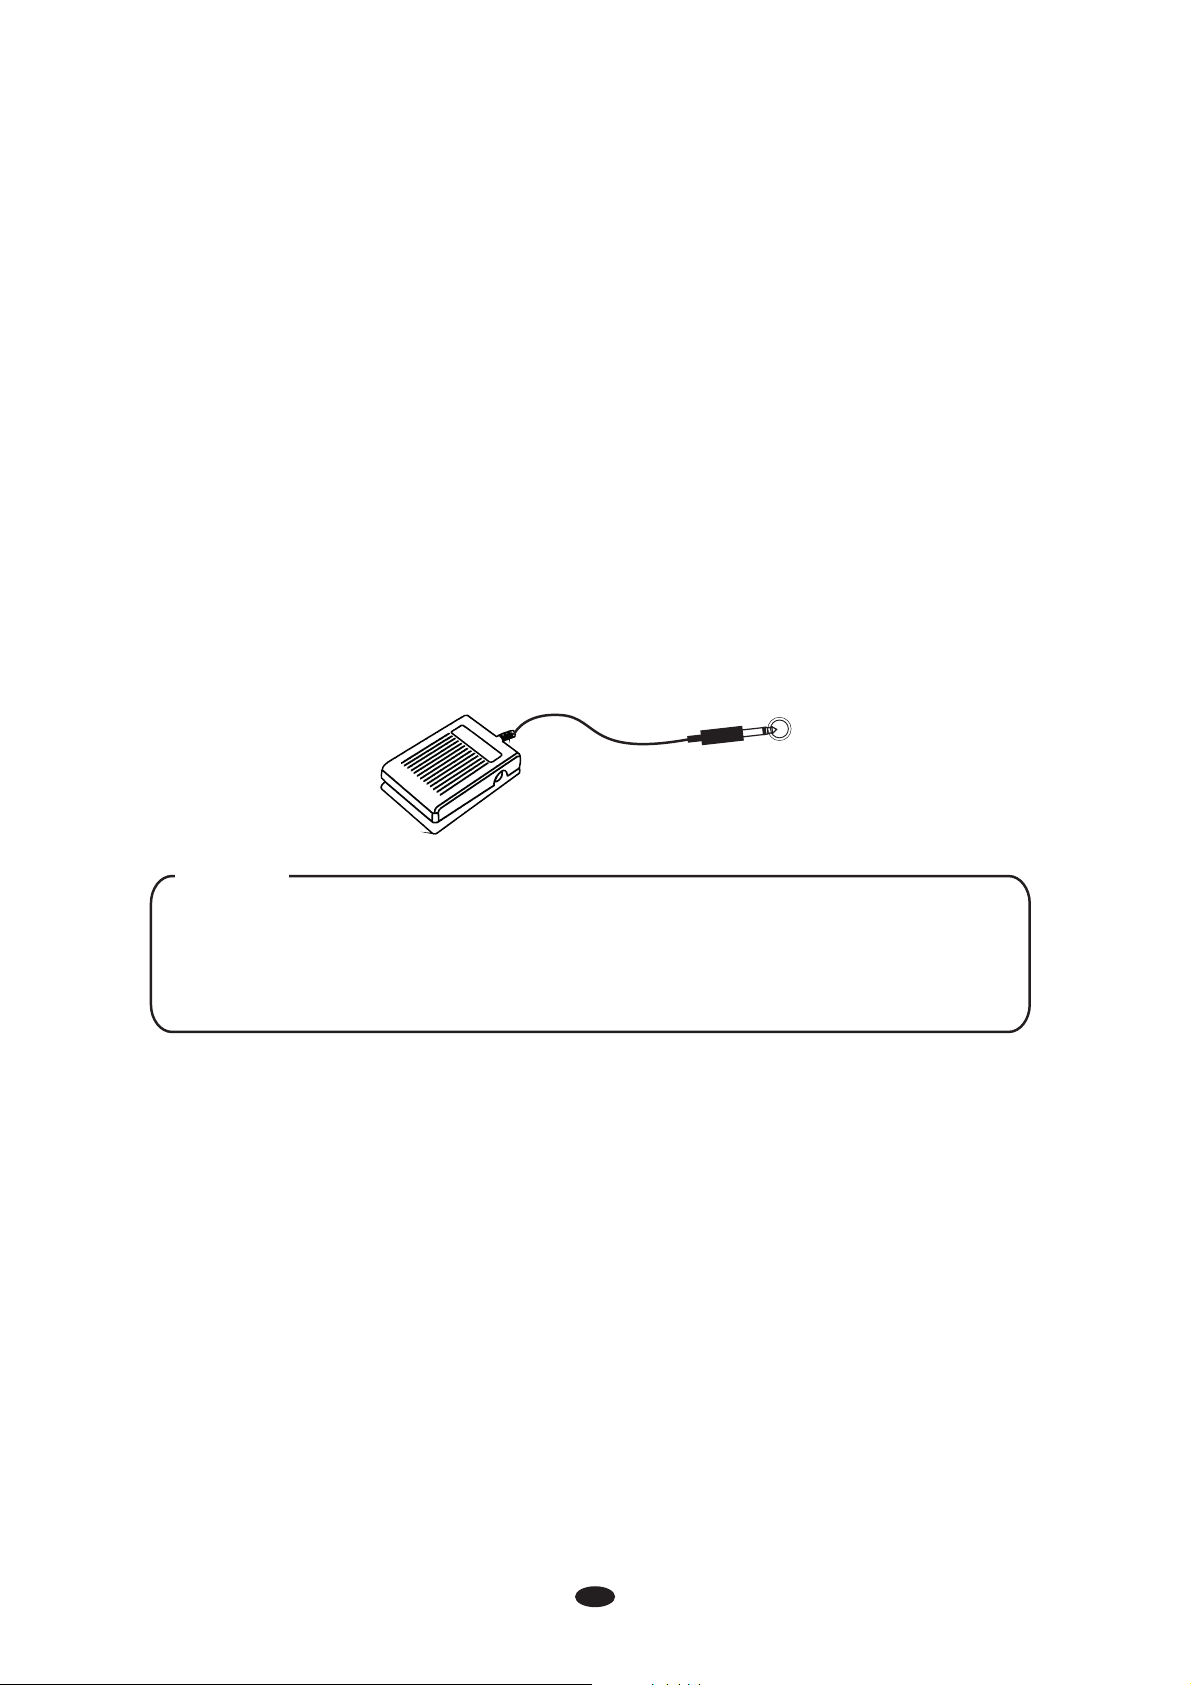
Sustain Pedal
The sustain pedal included with the PA-88H will cause piano key sounds to slowly
decay as if they were being held down. A more traditional piano style pedal may
be used also. The Sustain jack will auto-detect the polarity of any sustain pedal
that you use.
SUS TAIN
NOTE
Please make sure that the piano is turned off before connecting the pedal.
Otherwise, it may not be read by the piano correctly.
If you use different sustain pedal and you need to change the polarity for
proper operation, you will need to turn off the piano and then hold down
the foot pedal during power up.
Using the DC Power Jack
Connect the included DC power adapter to the Power Supply Jack.
Please use only the provided power adapter.
Using Battery Power
Always make sure all batteries are
+/- polarity markings
Always replace all of the batteries at the same time.
batteries, also do not mix battery types, as this can cause overheating, or fire, or
battery fluid leakage.
Remove the batteries from the instrument if it is not to be used for a long time.
.
inserted the correct way around to match the
Do not combine old and new
6
Selecting a Voice
The piano has 16 built-in voices, which include several pianos as well as other
instruments. These digitally-sampled musical instrument sounds may be selected
one at a time, layered to produce two voices at once.
To select an instrument voice (Main voice), press the appropriate Voice Select
button on the front panel.
PIANO 1 E.PIANO 1 ORGAN CLAVINET VIBES NYLON GTR STRINGS
PIANO 2
E.PIANO 2 CHURCH ORGAN HARPSICHORD HARP STEEL GTR
CHOIR
FANTASIA
E.BASS
NOTE
Press the [BANK] button and it's indicator will turn on, then when you
press an instrument select button the instrument that you hear is the
instrument listed on the bottom of the voice button.
BANK
7

Demo Songs
There are 16 demo songs in the piano. Each demo song will demonstrate a
different voice. Here's how you can select and play the demo songs.
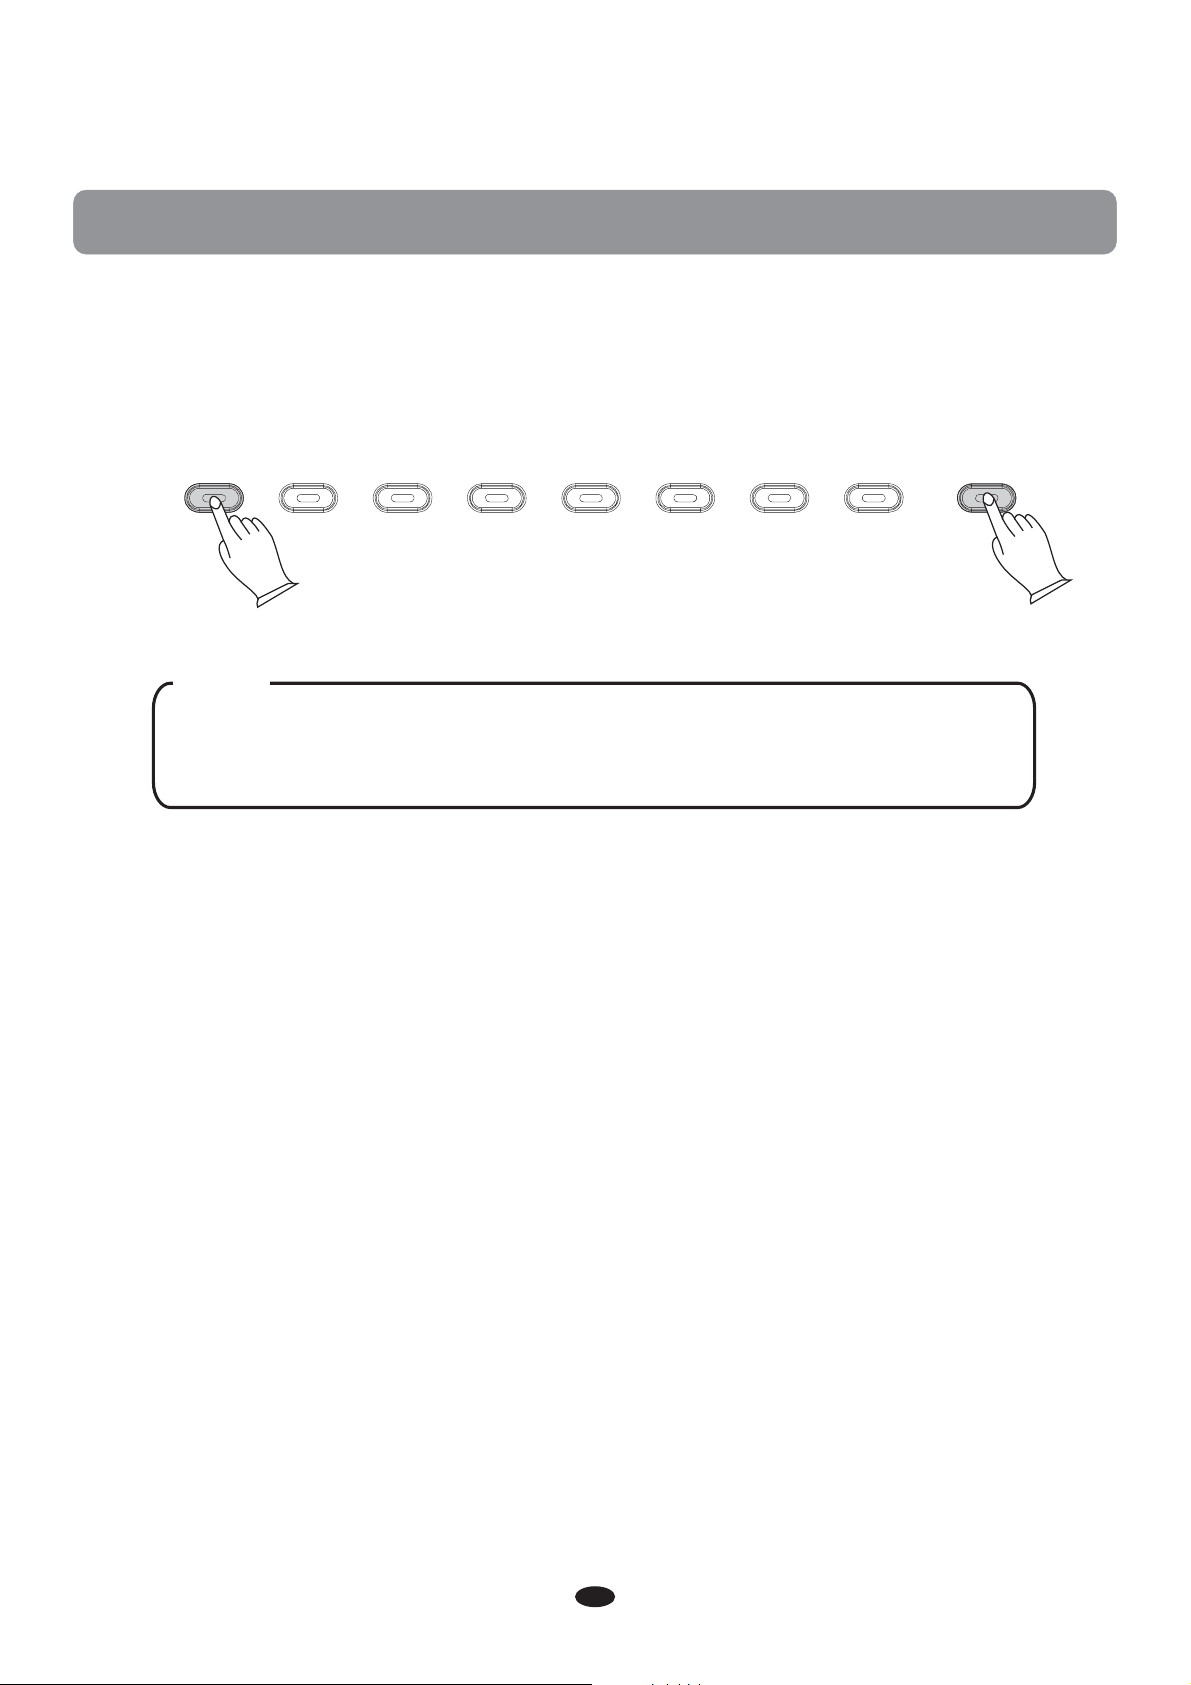
Select the Demo Song
The demo songs may be selected by pressing the [REVERB] and [CHORUS]
buttons together simultaneously. The [REVERB] button, the [CHORUS] button
and voice buttons will flash . The first demo song is the Piano.
DEMO
REVERB CHORUS
PIANO 1 E.PIANO 1 ORGAN CLAVINET VIBES NYLON GTR STRINGS
PIANO 2
E.PIANO 2 CHURCH ORGAN HARPSICHORD HARP STEEL GTR
CHOIR
FANTASIA
E.BASS
BANK
During playback, another song may be chosen by pressing a different voice select
button. You can also press the [BANK] button then press a voice button to select
a demo song in the bottom line.
Stop the Demo Song
To stop the demo song. Press the
together
again.
To replay the current song from the beginning, press the flashing voice select
button.
[REVERB] button and the [CHORUS] button
DEMO
REVERB CHORUS
8

Reverb and Chorus Buttons
The Reverb and Cho rus effects may be applie d to each voice individually
and will b e retaine d even when the power is turned off.
REVERB
CHORUS
To apply either effect, press either button. The button will light and the
effect will be heard when the piano is played.
To turn off the effect, press the button of the desired effect again and the
LED light will turn off.
Select the Depth of the Effects
1. Press and hold the effect button that you want change the depth of.
REVERB
CHORUS
2. The LED will blink. You can then release the button and press a key on the
keyboard corresponding to the setting you want for the reverb depth. It's
possible to change the setting by pressing multiple keys after each other
until the right setting is found.
C4 C5 C6 C7C3
3. Set the reverb depth by pressing a key on the keyboard to select the value.
See the Appendix for the Reverb Depth on pages 24 to 31.
9

4. Play the keyboard to hear the new setting with the sound selected.
[CHORUS]) [CHORUS])5. To exit the [REVERB]( function, press the [REVERB] (
button again.
10

Layer Mode
In Layer mode two voices may be played simultaneously, each at individual
selected volume levels.
To enter the Layer mode, press and hold the voice select button to select the
MAIN sound, then press the another voice select button that you would like to
add for the LAYER sound, and release. Both the buttons LED will remain on
while layered.
PIANO 1
E.PIANO 1
ORGAN
CLAVINET
VIBES
NYLON GTR
STRINGS
FANTASIA
BANK
PIANO 2
E.PIANO 2
CHURCH ORGAN
HARPSICHORD
HARP
STEEL GTR
CHOIR
E.BASS
To turn Layer Mode off, select a single voice button and the other Voice LED light
will turn off.
PIANO 1
PIANO 2
E.PIANO 1
E.PIANO 2
ORGAN
CHURCH ORGAN
CLAVINET
HARPSICHORD
VIBES
HARP
NYLON GTR
STEEL GTR
STRINGS
CHOIR
FANTASIA
E.BASS
BANK
To layer two sounds in different banks, press and hold simultaneously the voice
button required in the first bank and the bank button. The bank button LED will
flash and the first voice button will be lit. Once the bank button is flashing you
can remove your hands from the buttons. Next, select the layered button from
the second bank by pressing the corresponding button. Once selected this
button will blink to indicate it is from the second bank while the instrument from
the first bank stays lit. If two voices in the first and second bank, but on the
same button are selected, the buttons should merely blink. These can also be
layered by double-pressing the button in which case again the button will blink.
To Adjust the Volume of Main Voice in Layer Mode
Press the [METRONOME] and the [TEMPO] buttons together to enter Edit Mode
The LEDs for both buttons will become lit.
TEMPOMETRONOME
FUNCTION
11
,

Pressi ng C#0 acti vat es the voice volume menu.
#
C0
TUNING
TOUCH=LOW
LOCAL ON/OFF
PANIC
CHANNEL
TIME SIG
METRO VOL
LAYER VOL
VOICE VOL
TOUCH=HIGH
TOUCH=NORMAL
AUTO POWER ON/OFF
The volume can be change d in 88 note st eps from 0- 127 where C 7=127
and A-1 =0. Press ing a key will play C3 of the currently selected voice
sound at t he vo lume corresponding to the key value.
C4 C5 C6 C7
To exit the Voice Volume function, press the [METRONOME] an d [TEMPO]
buttons at the same time again.
To Adjust the Volume of the Layer Voice
Press the [METRONOME] button and the [TEMPO] button to enter Edit Mode.
TEMPOMETRONOME
FUNCTION
Press the (D 0) key activates the voice volume menu. The volume can be
changed in 88 note steps from 0-127 where C7=127 and A-1=0.
#
12

#
D0
TUNING
TOUCH=LOW
LOCAL ON/OFF
PANIC
CHANNEL
TIME SIG
METRO VOL
LAYER VOL
VOICE VOL
TOUCH=HIGH
TOUCH=NORMAL
AUTO POWER ON/OFF
Press a key wil l play C3 of th e current ly select ed layered sou nd at the
volume corresponding to the key value.
C4 C5 C6 C7
Press th e [METRON OME] and th e [TEMPO] a gain to exi t Edit mode .
13

Metronome
Press th e metrono me button t o turn the me tronome o n.
When the M etronom e button is a ctivated its L ED will
light an d you will hear the click in the headphones or
throug h the speakers.
Metronome Volume
Press the [METRONOME] and [TEMPO] buttons together to enter edit mode.
FUNCTION
TEMPOMETRONOME
Pressing F 0 activates the metronome volume menu. the volume can be changed in
#
88 note steps from 0-127 where C7=127 and A-1=0. Pressing a key will play the
metronome sound at the volume corresponding to the key value.
TUNING
TOUCH=LOW
LOCAL ON/OFF
PANIC
CHANNEL
TIME SIG
METRO VOL
LAYER VOL
VOICE VOL
#
F0
TOUCH=HIGH
TOUCH=NORMAL
AUTO POWER ON/OFF
Changing the Metronome Time Signature
Pressing the [METRONOME] and the [TEMPO] buttons allows you to change the
time signature for the metronome. When this menu is selected the metronome
starts playing at the current tempo setting. Pressing G#0 toggles through the
time signature options starting with the current setting. Default is 4/4 and the
following options are available to toggle through: 2/4, 3/4, 4/4, 5/4, 6/8, 9/8,
12/8.
TUNING
TOUCH=LOW
LOCAL ON/OFF
PANIC
CHANNEL
TIME SIG
METRO VOL
LAYER VOL
VOICE VOL
TOUCH=HIGH
TOUCH=NORMAL
AUTO POWER ON/OFF
#
G0
Press th e [METRON OME ] again to e xit Edit Mo de. and the [TEMPO] buttons
14

Tempo
The temp o of the metr onome may range fro m 20 to 280 bea ts per minute
(BPM).
TEMPOMETRONOME
FUNCTION
To change the tempo, press an d hold the bu tton for 3 se conds to change
the setting. The LED will blink to current tempo speed. If t he Metron ome
is off, no sound will be heard.
Press a key on th e keyboard to select a tempo. The LED wi ll blink to t he
new value. It is possible to make multiple changes and see the LED tempo
change a s the keys are pre ssed.
To exit, press the tempo button. The LED will stop blinking and not light.
See Appe ndix for th e value ranges .
Tempo defau lts to 120 bu t settings are retai ned when the power is turned
off. For examp le 120BPM = C 3 piano key.
15

Edit Functions
In the Edit Mode the keys on the keyboard are used for selecting the Function
to be edited. To enter the Edit Mode, press the Metronome and Tempo buttons
at the same time.
Function Key Assignments
TUNING
PANIC
CHANNEL
TIME SIG
METRO VOL
LAYER VOL
VOICE VOL
LOCAL ON/OFF
TOUCH=LOW
Please r efer to pag es 11 and 14 fo r informa tion abou t editing t he
Metronome and Layer functions.
Master Tuning
TOUCH=HIGH
TOUCH=NORMAL
AUTO POWER ON/OFF AUTO POWER ON/OFF
The piano is tuned to A440 when the power is turned on and does not r equire
tuning . However, if desi red, the tuning may be a djusted i n small inc rements
from -50 t o +50 cents ( one semit one).
To change the Master Tuning:
Press the [METRONOME] and [TEMPO] button together to enter Edit Mode.
TEMPOMETRONOME
FUNCTION
Press the Tunning key A -1 to select the Master Tuning Function. The keyboard
will now play middle C piano 1 voice (C3) on every note across the keyboard.
Playing C3=C3. Pressing any key downwards to A -1 will play C3 but change
the tuning setting proportionately to tune down by a whole semi tone.
TUNING
#
#
TOUCH=HIGH
TOUCH=NORMAL
TOUCH=LOW
LOCAL ON/OFF
PANIC
CHANNEL
TIME SIG
METRO VOL
LAYER VOL
VOICE VOL
#
A
-1
16

Pressi ng any key from C3 and up will play th e C3 note but a t tuning
settings proportionately so that its possible tune up by a whole s emi tone.
Please l isten as you proceed to determine the correct tuning setting.
C4 C5 C6 C7
Press th e [METRON OME ] and the [ TEMPO] bu ttons again to exit Edit
Mode.
Touch
The Touch Sel ect function allows the choice of 3 keyboa rd sensitivity
settin gs for diff erent playing styles: Low Sensitivity, Normal Sensitivity
and High S ensitiv ity. This a ffects th e volume of the piano as you pl ay th e
keys.
To Set the Keyboard Sensitivity
Press the Metronome and Tempo Buttons together to enter the Edit mode.
TEMPOMETRONOME
FUNCTION
Press the desired Touch Select key (F 1, G 1, A 1) to select between Low,
Normal and High Keyboard Sensitivity. When selecting F#1 low, Piano 1 C3 will
play at velocity value 30. When G#1 Normal is selected, Piano 1 C3 will play
at velocity value 70. When A#1 High is selected, Piano 1 C3 will play at
velocity value 127 and the piano will exit Function Mode automatically.
TUNING
LAYER VOL
VOICE VOL
METRO VOL
TIME SIG
###
Low
Sensitivity
LOCAL ON/OFF
PANIC
CHANNEL
Normal
Sensitivity
TOUCH=NORMAL
TOUCH=LOW
High
Sensitivity
TOUCH=HIGH
AUTO POWER ON/OFF
17

EQ Adjustment
To change the sound of your piano's amplifier you can adjust the EQ to add more
Bass or to remove some of the Treble.
To Change the Bass Response
1. Press the [METRONOME] and [TEMPO] Buttons together to enter the Function
Edit mode.
2. Press the A5 piano key activates the Bass EQ Function
#
BASS EQ
C4 C5 C7C6
#
A5
The Bass EQ can be changed by pressing white piano keys only from the A-1
piano key to D3 piano key.
Pressing the F1 Piano Key sets the Bass EQ to its center point EQ Setting.
Pressing the A-1 Piano Key will reduce the Bass response by 12dB.
Pressing the D3 Piano Key therefore increases the Bass response by 12 dB.
For Example to set the Bass EQ setting to 10 dB you would press the B2 white
piano key.
To set the BASS EQ to -8 dB you would press the E0 piano key.
For the Keyboard Chart of the piano key numbers and listings please page 29
of the Advanced Keyboard Functions.
4. Press the [METRONOME] and [TEMPO] Buttons together again to exit the
Function Mode. Then play the lower half of the piano to hear the bass response
increase for the changes that you have made in the Bass EQ settings.
To change the Treble Response
1. Press the [METRONOME] and [TEMPO] Buttons together to enter the Function
Edit Mode.
2. Press the C 6 piano key activates the Treble EQ Function.
#
18

TREBLE EQ
C4 C5 C7C6
#
C6
3. The Treble EQ can be changed by pressing white piano keys only from the
A-1 piano key to D3 piano key.
Pressing the F1 Piano Key sets the Treble EQ to its center point EQ Setting.
Pressing the A-1 Piano Key will reduce the Treble response by 12dB.
Pressing the D3 Piano Key therefore increases the Treble response by 12 dB.
For Example to set the Treble EQ setting to 10 dB you would press the B2 white
piano key.
To set the Treble EQ to -8 dB you would press the E0 piano key.
For the Keyboard Chart of the piano key numbers and listings please page 29 of
the Advanced Keyboard Functions.
4. Press the [METRONOME] and [TEMPO] Buttons together again to exit the
Function mode.
Then play the keyboard in the upper half of the piano keys to test the changes
that you made in the TREBLE EQ Setting.
NOTE
Bass and Treble EQ settings will be stored in the pianos memory
and the latest setting will be used when the piano is powered up
again.
To set the piano to its Default Settings press and hold the [REVERB] and
[CHORUS] buttons while turning the piano's power switch on.
19

MIDI Functions
MIDI Channels
MIDI Out channel values range from 1 to 16.
#
To change the MIDI Out Channel Value: While in the Edit Mode press the key
the amount of times that correspond to the MIDI Out Channel that you desire.
The MIDI Out Channel Value is identified by the amount of times that the C3
Piano Note is sounded.
The default MIDI Out channel is 1.
For example: When you press piano key one time in edit mode, you will hear
#
A0
one note C3 sound to indicate that current MIDI Out channel is 1.
#
If you press The piano key 9 times in a row while still in the Edit Mode you
A0
will hear the C3 Note being played back 10 times to denote that the new MIDI
Out channel is 10.
A0
#
A0
TUNING
TOUCH=LOW
LOCAL ON/OFF
PANIC
CHANNEL
TIME SIG
METRO VOL
LAYER VOL
VOICE VOL
TOUCH=HIGH
TOUCH=NORMAL
AUTO POWER ON/OFF
MIDI Local On/Off
Turning the Local On/Off function to Off will disconnect the keyboard from the
internal sound engine of this piano. This means you can use the piano as a MIDI
controller to control other MIDI devices (or virtual instrument software running on
20

your computer) without playing the internal sounds of this piano. You may also find
other occasions (such as when you are using MIDI sequencing software on your
computer) where it is useful to turn Local off.
Press the [METRONOME] and the [TEMPO] Buttons together to enter the edit
mode.
TEMPOMETRONOME
FUNCTION
Press the Local On/Off key (D 1) to switch local on or off. When the D 1 key is
# #
first pressed the current setting is confirmed by playing the C3 piano key once
#
D1
PANIC
#
LOCAL ON/OFF
TOUCH=NORMAL
TOUCH=LOW
TOUCH=HIGH
AUTO POWER ON/OFF
for on and twice for off. If you press the D 1 key again you will need to re-enter
your desired settings.
TUNING
METRO VOL
LAYER VOL
VOICE VOL
CHANNEL
TIME SIG
Press the [METRONOME] and the [TEMPO] Buttons again to exit the edit
mode.
MIDI Panic Key
Pressing the Panic key will send out a Reset All Controllers and All Notes
”
Off MIDI Message on ALL MIDI Channels 1 - 16. This can be especially useful
for clearing stuck notes when controlling external MIDI devices or software.
“”
To use the Panic key to send out a Reset All Controllers and All Notes
”
Off MIDI Message on ALL MIDI Channels 1 - 16:
“”“
“”“
Press the to enter Edit Mode. [METRONOME] and [TEMPO] button together
TEMPOMETRONOME
FUNCTION
21

Press the Panic Key ( ) allows the user to activate Panic, which send out
#
C1
general MIDI reset messages such as all note off, etc. Once Panic reset has
been completed, Piano will automatically exit Edit mode.
TUNING
TOUCH=LOW
LOCAL ON/OFF
PANIC
CHANNEL
TIME SIG
METRO VOL
LAYER VOL
VOICE VOL
#
C1
TOUCH=HIGH
TOUCH=NORMAL
AUTO POWER ON/OFF
22

Factory Reset
Performing a Factory Reset will clear all battery backed memory and restore
all functions to their factory default settings, just like they were when you used
this piano for the first time.
1. Turn the Power Off.
2. Hold down the [REVERB] and the [CHORUS] buttons while powering on the piano.
DEMO
REVERB CHORUS
All LEDs on the device will light while these buttons are held down. Once
this has happened, you can release the [REVERB] and [CHORUS] buttons.
When the [REVERB] and the [CHORUS] buttons are released, this piano
will return to normal operation Mode (ready-to-play). All button LEDs will
return to their default states.
This piano will now function normally and as if powered on for the first time.
23

Appendix
MIDI Implementation Chart
F u n c t i o n T r a n s m i t t e d R e c o g n i z e d R e m a r k s
Basic
Channel
Mode
Note
Number
Velocity
Note
After
Touch
Pitch Bend
Control Change
Program
Change
System Exclusive
System
Common
System
Real Time
Aux Messages
Notes
Default
Changed
Default
Messages
Altered
True voice
Note ON
Note OFF
Key's
Channels
True #
Song Position Pointer
Song Select
Tune Request
Clock
Commands
All Sounds Off*
Reset All Controllers
Local ON/OFF*
ALL Notes OFF
Active Sensing
System Reset
1-16
1-16
Mode 3
Yes
********
0~127
********
Yes
Yes
No
No
No
0-127
0-127
********
Yes*
No
No
No
No
No
Yes
Yes
Yes
Yes
No
No
1-16
1-16
Mode 3
No
No
0~127
Yes
Yes
No
No
No
0,1,5,6,7,10,11,
32,64,65,66,67,
80,81,91,93,100,
101,121
0-15
Yes*
No
No
No
No
No
Yes
Yes
Yes
Yes
Yes
Yes
*U p to 3 c ha nn el s
simultaneously
16
*The controller will recognize
and respond to GM Device
inquiries.
Master Tune supported.
Master Volume supported.
* Th e co nt ro ll er
will respond
to G M, b ut n ot
piano voices.
OMNI ON
OMNI OFF
MIDI Chan nel Modes
POLY OFF
Mode1
Mode2
24
MONO ON
Mode3
Mode4

Parameter adjusting instructions
According to choose corresponding key chart sh own below, to set the d esired
values.
A-1
A#-1
B-1
C0
C#0
D0
D#0
E0
F0
F#0
G0
G#0
Voice
Vol
0
2
4
6
8
10
12
14
16
18
20
22
Layer
Vol
0
2
4
6
8
10
12
14
16
18
20
22
Metro.
Vol
0
2
4
6
8
10
12
14
16
18
20
22
Reverb
Vol
0
2
4
6
8
10
12
14
16
18
20
22
Chorus
Vol
0
2
4
6
8
10
12
14
16
18
20
22
Tem p o
20
24
28
32
36
40
44
48
52
56
60
62
A0
A#0
B0
C1
C#1
D1
D#1
E1
F1
F#1
G1
G#1
24
26
28
30
32
34
36
38
40
42
44
46
24
26
28
30
32
34
36
38
40
42
44
46
24
26
28
30
32
34
36
38
40
42
44
46
24
26
28
30
32
34
36
38
40
42
44
46
24
26
28
30
32
34
36
38
40
42
44
46
64
66
68
70
72
74
76
80
82
84
86
88
25

A1
Voice
Vol
48
Layer
Vol
48
Metro.
Vol
48
Reverb
Vol
48
Chorus
Vol
48
Tem p o
90
A#1
B1
C2
C#2
D2
D#2
E2
F2
F#2
G2
G#2
A2
A#2
B2
50
52
54
56
58
60
62
64
66
68
70
72
74
76
50
52
54
56
58
60
62
64
66
68
70
72
74
76
50
52
54
56
58
60
62
64
66
68
70
72
74
76
50
52
54
56
58
60
62
64
66
68
70
72
74
76
50
52
54
56
58
60
62
64
66
68
70
72
74
76
92
94
96
98
100
102
104
106
108
110
112
114
116
118
C3
C#3
D3
D#3
E3
F3
F#3
G3
G#3
A3
A#3
B3
C4
78
80
81
82
83
84
85
86
87
88
89
90
91
78
80
81
82
83
84
85
86
87
88
89
90
91
78
80
81
82
83
84
85
86
87
88
89
90
91
78
80
81
82
83
84
85
86
87
88
89
90
91
78
80
81
82
83
84
85
86
87
88
89
90
91
120
122
124
126
128
130
132
134
136
138
140
142
144
26

C#4
Voice
Vol
92
Layer
Vol
92
Metro.
Vol
92
Reverb
Vol
92
Chorus
Vol
92
Tem p o
146
D4
D#4
E4
F4
F#4
G4
G#4
A4
A#4
B4
C5
C#5
D5
D#5
93
94
95
96
97
98
99
100
101
102
103
104
105
106
93
94
95
96
97
98
99
100
101
102
103
104
105
106
93
94
95
96
97
98
99
100
101
102
103
104
105
106
93
94
95
96
97
98
99
100
101
102
103
104
105
106
93
94
95
96
97
98
99
100
101
102
103
104
105
106
148
150
152
154
156
158
160
162
164
166
168
170
172
174
E5
F5
F#5
G5
G#5
A5
A#5
B5
C6
C#6
D6
D#6
E6
107
108
109
110
111
112
113
114
115
116
117
118
119
107
108
109
110
111
112
113
114
115
116
117
118
119
107
108
109
110
111
112
113
114
115
116
117
118
119
107
108
109
110
111
112
113
114
115
116
117
118
119
107
108
109
110
111
112
113
114
115
116
117
118
119
176
178
180
185
190
195
200
205
210
215
220
225
230
27

F6
Voice
Vol
120
Layer
Vol
120
Metro.
Vol
120
Reverb
Vol
120
Chorus
Vol
120
Tempo
235
F#6
G6
G#6
A6
A#6
B6
C7
121
122
123
124
125
126
127
121
122
123
124
125
126
127
121
122
123
124
125
126
127
121
122
123
124
125
126
127
121
122
123
124
125
126
127
Note:
X: No value available f or this par ticular E dit Funct ion on this key.
Resetting Value:
Metro.
Vol
100
ON
ChannelLocal
1
Tempo
120
Voice
Select
1(Grand
Piano)
Factory
Default
Tune
0
Voice
Vol
127
Layer
Vol
100
240
245
250
255
260
270
280
Auto
Power
Off
OFF
28

Advanced Functions Keyboard Chart
TREBLE EQ
C3
AUTO POWER ON/OFF
BASS EQ
TREBLE EQ
BASS EQ
TOUCH=HIGH
TOUCH=NORMAL
TOUCH=LOW
LOCAL ON/OFF
PANIC
CHANNEL
TIME SIG
METRO VOL
LAYER VOL
VOICE VOL
TUNING
C0 C1 C2
AUTO POWER ON/OFF
TOUCH=HIGH
TOUCH=NORMAL
TOUCH=LOW
LOCAL ON/OFF
PANIC
CHANNEL
TIME SIG
METRO VOL
LAYER VOL
VOICE VOL
TUNING
C4 C5 C7C6
C0 C1 C 2 C3 C4 C 5 C6 C7
29

Specifications
Keyboard:
Voice:
Polyphony:
Voice Control:
Metronome:
Pedal Response:
Effect:
Demo Songs:
88 standard-size hammer keys with touch response
16
64
Layer, Layer level, Keyboard sensitivity, Tuning
On/off, Level, Time signature
Sustain
Reverb, Chorus, Bass EQ, Treble EQ
16
MIDI & Audio:
Connectors:
Speakers:
Dimensions(W x D x H)
Weight:
Supplied Accessories:
Channels 1-16, Local On/Off; USB Audio
USB TO HOST, MIDI OUT, SUSTAIN, LINE OUT(R),
LINE OUT(L)(MONO), PHONES, DC Power
YDT816 15W/4ohm x 2
51.8x 13.3 x 5.1(inches),1315 x 337 x 130(mm)
13.5Kg
Owner's Manual, Music Rest
10506035V2.0
30

Warranty
This product, except the exterior cosmetic parts, is warranted to the original
purchaser to be free from defects in material and workmanship under normal
use as follows:
1. For a period of one year from the date of purchase, Virgin Musical
Instrument Company will pay the labor charges to repair the defective
product. After this one year period, you must pay all labor charges.
2. In addition, Virgin Musical Instrument Company will supply, at no
charge, new or rebuilt replacements for defective parts for a period of
one year from the date of purchase.
In the event repairs are needed, the original purchaser should contact
Virgin Musical Instrument Company, the parent company of Artesia Pianos,
at 888-998-9848. Virgin Musical Instrument Company will then repair
the product or return it to the VMI distribution center for repairs. Upon
completion of the repair, the unit will be returned to the music store, freight
prepaid.
This warranty will not apply to this product if it has been misused, abused,
or altered. Without limiting the foregoing, bending, dropping of unit, or visible
cracks and/or scratches are presumed to be defects resulting from misuse or
abuse.
This warranty is void if the product has been opened.
Neither this warranty nor any other warranty expressed or implied, including
implied warranties of merchantable, shall extend beyond the warranty
period.
No responsibility is assumed for any incidental or consequential damages.
Outside the US contact the original retailer where the product was
purchased for additional warranty details.
31

Virgin Musical Instrument Company Inc
P O Box 2908
La Mesa, CA 91943
PH: 619 244-0006
E-mail: info@virginmusicalinstruments.com
www.virginmusicalinstruments.com
 Loading...