

DP-7
Owner s Manual
Virgin Musical Instruments
Digital Piano
Precaution
Thank you for purchasing this digital instrument.For perfect operation and security,please read the
manual carefully and keep it for future reference.
Safety Precautions
CAUTION
RISK OF ELECTRIC SHOCK
DO NOT OPEN
The lightning flash with arrowhead symbol within an equilateral triangle is in
Tended to alert the user to the presence of uninsulated dangerous voltage
within the product s enclosure that may be of sufficient magnitude to constitute a
risk of electric shock to persons.
The exclamation point within an equilateral triangle is intended to alert the user
to the presence of important operating and maintenance(servicing) instructions in
the literature accompanying the product.
Important Safety Instructions
1) Read these instructions.
2) Keep these instructions.
3) Heed all warnings.
4) Follow all instructions.
5) Do not use this apparatus near water.
6) Clean only with dry cloth.
7) Do not block any ventilation
openings,install in accordance with the
manufacturer s instructions.
8) Do not install near any heat sources such
as radiators, heat registers,stoves,or other
apparatus (including amplifiers) that produce heat.
9) Do not defeat the safety purpose of the
polarized or grounding-type plug.A polarized
plug hase two blades
with one wider than the other.A grounding
type plug has two blades and a third
grounding prong.The wide blade
or the third prong are provided for your
safety,if the provided plug does not fit into
your outlet.consult an electrician for
replacement of the obsolete outlet.
10) Protect the power cord from being walked
on or pinched particularly at plugs.convenience
receptacles,and the point where they exit from
the apparatus.
11) Only use attachments/accessories
specified by the manufacturer.
(Figure 1)
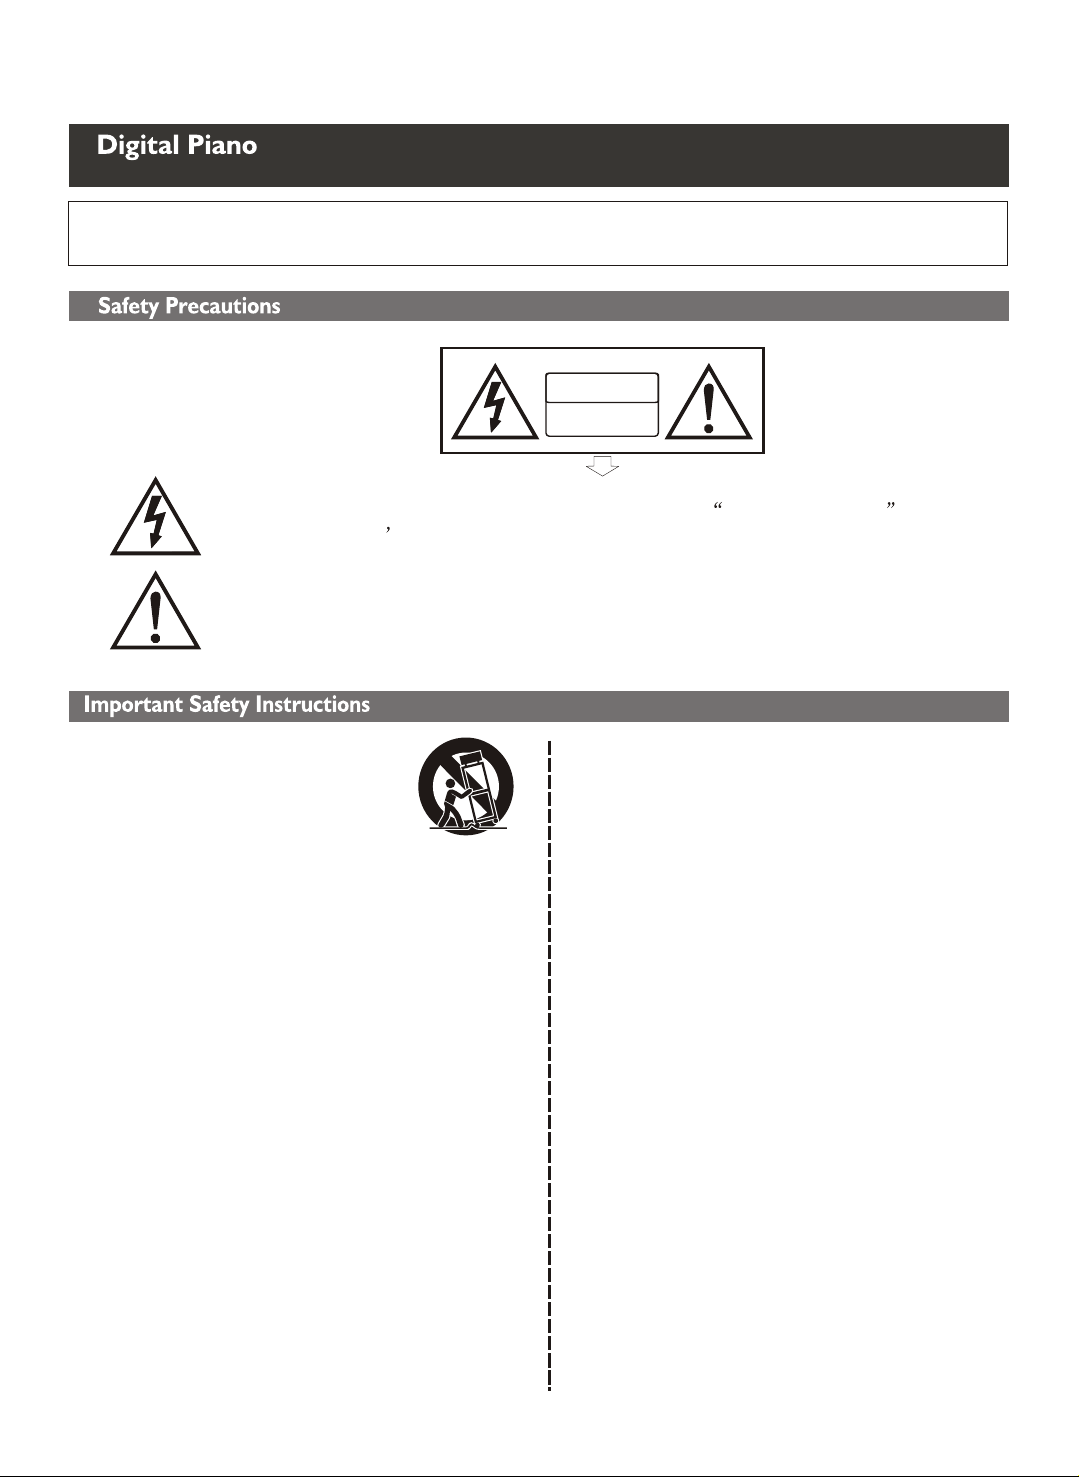
12) Use only with the cart,stand,tripod,bracket,or
table specified by the manufacturer,or sold with
the apparatus.When a cart is used,use caution
when moving the cart/apparatus combination to
avoid injury from tip-over (Figure 1).
13) Unplug this apparatus during lightning storms
or when unused for a long periods fo time.
14) Refer all servicing to qualified service
personnel.Servicing is required when the
apparatus has been damaged in any way,such as
power-supply cord or plug is damaged,liquid has
been spilled or objects have fallen into the
apparatus,the apparatus has been exposed to rain
or moisture,does not operate normally,or has been
dropped.
WARNING:To reduce the risk of fire or
electric shock,do not expose this
apparatus to rain or moisture.
CAUTION:Apparatus shall not be
exposed to dripping or splashing and no
objects filled with
liquids,such as vases,shall be placed on
the apparatus.

Thanks for using our digital piano
Your digital piano is a high-quality digital piano with 88 standard touch sensitivity
keyboard and combines the most advanced PCM tone generation technology. Your
instrument has 8 demo songs and hundreds of learning songs. Real-time record
function, and the recording data won't be lost when you turn off the power.
In order to obtain maximum performance and enjoyment, please read this manual
thoroughly while trying out the various features described.
Contents
Control Panel .................................................................................................................
Basic Operation ............................................................................................................
Turn on the Power .....................................................................................................
Adjust the Main Volume ............................................................................................
Demo songs ..............................................................................................................
Connection ................................................................................................................
Headphone ................................................................................................................
Pedal .........................................................................................................................
Line Out .....................................................................................................................
USB MIDI / USB AUDIO Jack
.................................................................................
Using DC Power Jack
..............................................................................................
MP3
...........................................................................................................................
Voices ...........................................................................................................................
Select a voice ...........................................................................................................
Layer button .............................................................................................................
Split Voice ..................................................................................................................
Effect ............................................................................................................................
Digital effect .............................................................................................................
Touch ........................................................................................................................
Transpose .................................................................................................................
Twin ...........................................................................................................................
Metronome ...............................................................................................................
Tempo/Tap ...............................................................................................................
Recording Functions .....................................................................................................
Start
Stop Recording
........................................................................................................
Play Recording ...........................................................................................................
Clear Recording ........................................................................................................
Learning Functions .......................................................................................................
Play the song
Practicing The Left Hand Of The Selected Song .......................................................
Practicing The Left Hand Of The Selected Song .......................................................
Exit the Learning Funtion
..........................................................................................
Reset ............................................................................................................................
Appendix
Voice list ...................................................................................................................
Percussion voice list .................................................................................................
Midi implementation chart ........................................................................................
Troubleshooting Hints ................................................................................................
Specifications ...........................................................................................................
Assembly instructions ...............................................................................................
...
Recording ........................................................................................................
...........................................................................................................
.......................................................................................................................
3
5
5
5
5
6
6
6
7
7
7
7
8
8
8
9
11
11
12
13
14
14
15
16
16
16
16
17
18
18
18
18
18
19
20
20
21
22
23
24
25
2
GRAND
BRIGHT
ELECTRIC
ELECTRIC
CHURCH
GUITAR
DATA CONTROL
13 14 15 16
PIANO
PIANO
PIANO 1
PIANO 2
ORGAN
STRINGS BRASS
GM VOICE RECORD
TRACK 1/
LEFT
TRACK 2/
RIGHT
PLAY LEARN
DEMO
17
MASTER VOLUME
2
CHORUS TRANSPOSE
4
MASTER VOLUME
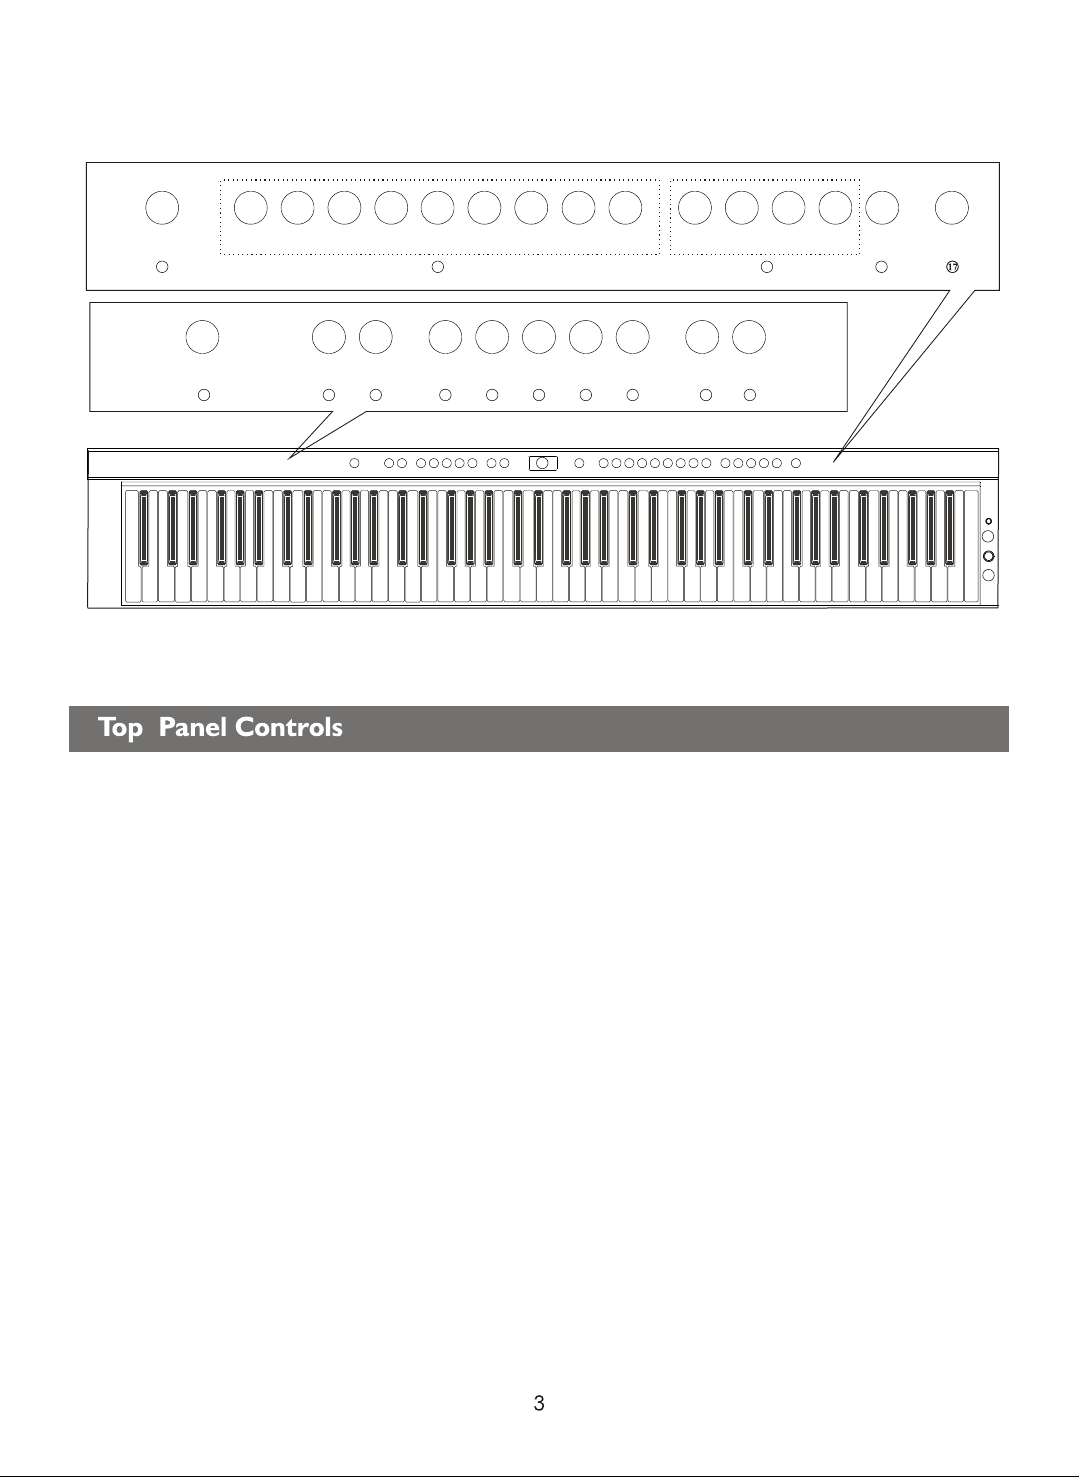
Top Panel Controls
1. POWER (STANDBY/ON)
2. VOLUME Control
MASTER VOLUME Knob
3. LCD Display
4. REVERB Button
5. CHORUS Button
6. TRANSPOSE Button
7. TOUCH Button
8. LAYER Button
9. SPLIT Button
10. TWIN Button
11. METRONOME Button
12. TEMPO/TAP Button
13. DATA CONTROL Knob
SPLIT
TWIN
METRONOME
TEMPO/TAPTOUCH
11 12
GRAND
BRIGHT
ELECTRIC
ELECTRIC
CHURCH
GUITAR
PIANO
PIANO
STRINGS BRASS
PIANO 1
PIANO 2
ORGAN
GM VOICE RECORD
TRACK 2/
TRACK 1/
DEMO
PLAY LEARN
RIGHT
LEFT
MP3
18
STANDBY/ON
1
LAYERREVERB
5
6 7 8 9 10
TWIN
LAYERREVERB
SPLIT
CHORUS TRANSPOSE
METRONOME
TOUCH
TEMPO/TAP DATA CONTROL
3
14. Voice Select Buttons
15. RECORDING FUNCTION
RECORD Button
TRACK/LEFT Button
TRACK/RIGHT Button
PLAY Button
16. LEARN Button
17. DEMO Button
18. Mp3
3
PEDAL PEDAL
LINE INLINE IN
USB TO HOSTUSB TO HOST LINE OUTLINE OUT
DC 12V DC 12V
PHONES 2
23
PHONES 1
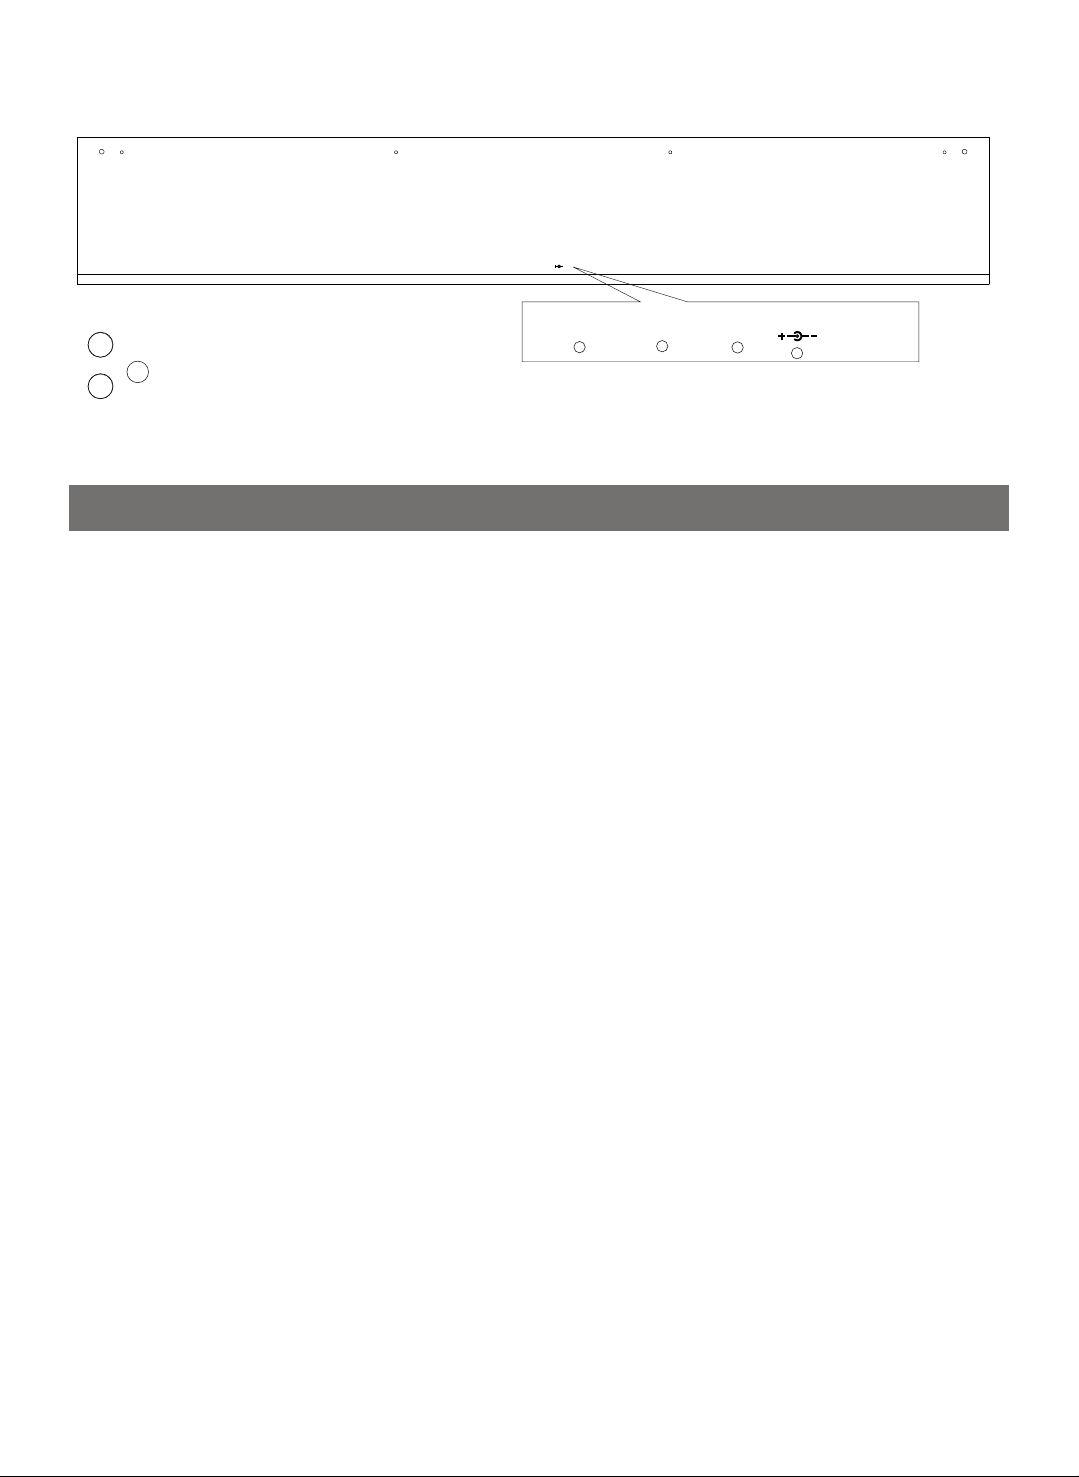
Rear Panel Controls
19. PEDAL JACK
20. USB TO HOST JACK
21. LINE OUT JACK
22. DC POWER
23. PHONES1 JACK
PHONES2 JACK
PEDAL PEDAL
19
USB TO HOSTUSB TO HOST LINE OUTLINE OUT
20
21
DC 12V DC 12V
22
4
Basic Operation
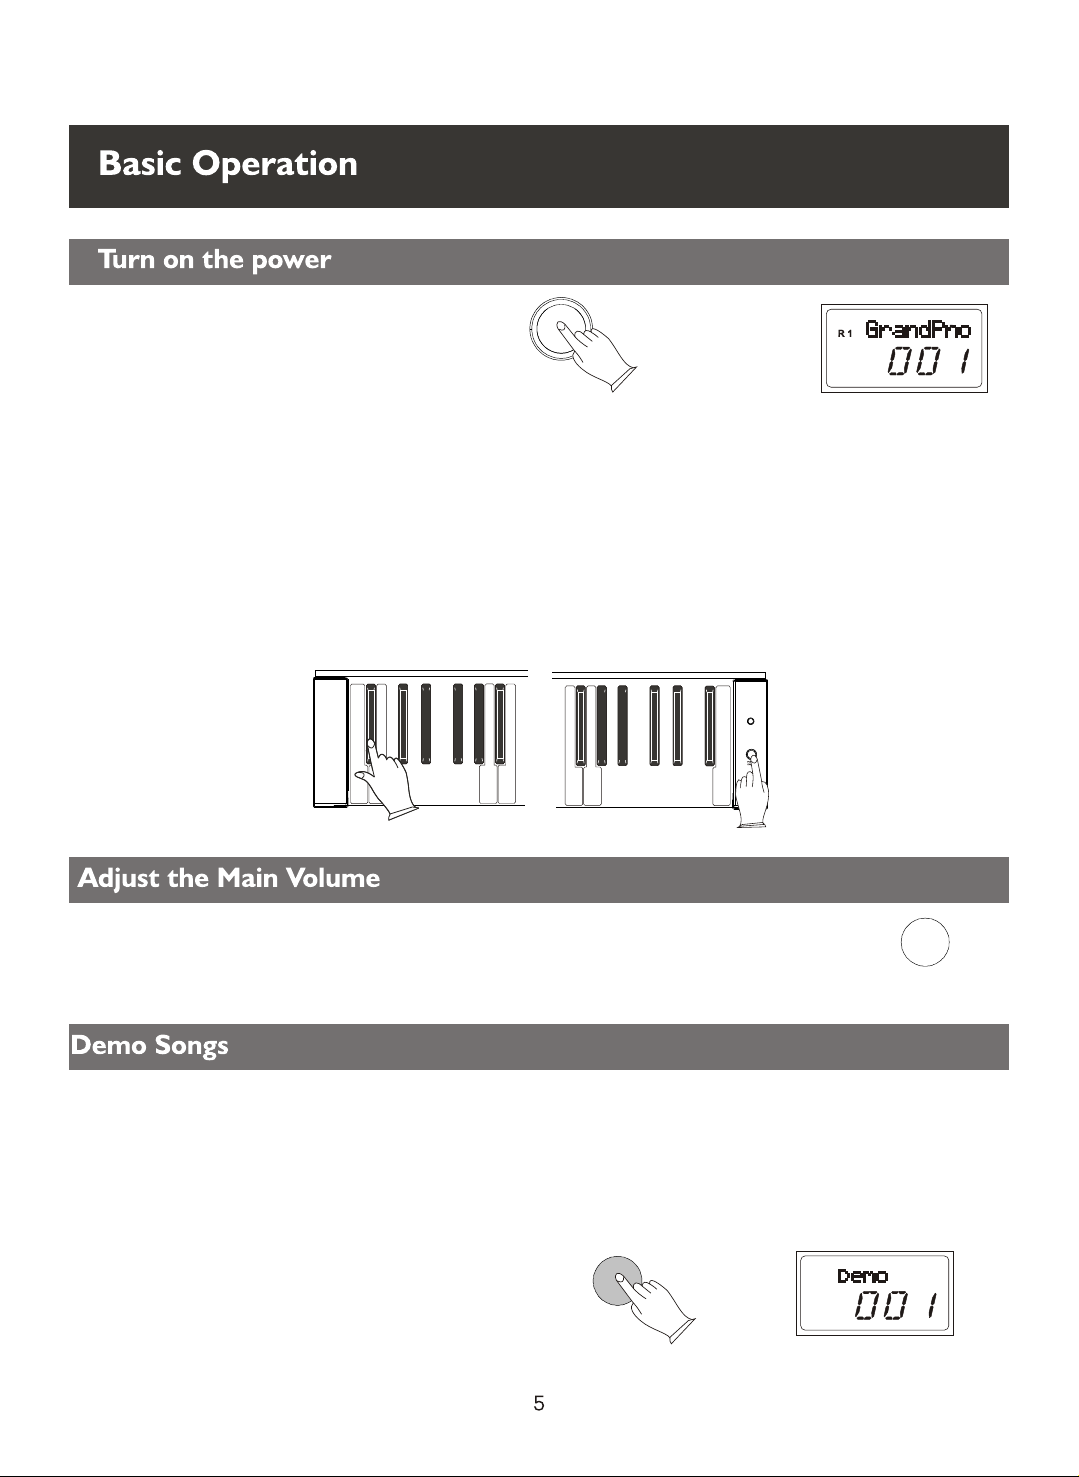
Turn on the power
Turn the power on, the LCD will light.
STANDBY/ON
Standby On
This product will switch off automatically in 30 minutes after no any operation on it.
In this case, press the [STANDBY/ON] button again to turn the power switch on.
Deactivate the Auto Standby function
Hold the first white key and first black key on the left side of the keyboard at the
same time and then turn on the unit to deactivate the AUTO STANDBY function.
MP3
POWER
ON/OFF
Adjust the Main Volume
Use [MASTER VOLUME] control to adjust the volume to
your desired level.
Demo Songs
MASTER VOLUME
There are 8 preset demo songs that you can play individually. Listen to the pre-
programmed demo songs and they will give you a good idea of what the instrument can do.
buttons (001-008) to select the demo songs.
Press [DEMO] button to play the demo songs in sequence. You can use the number
Press [DEMO] button again to stop playing.
5
DEMO
Connection
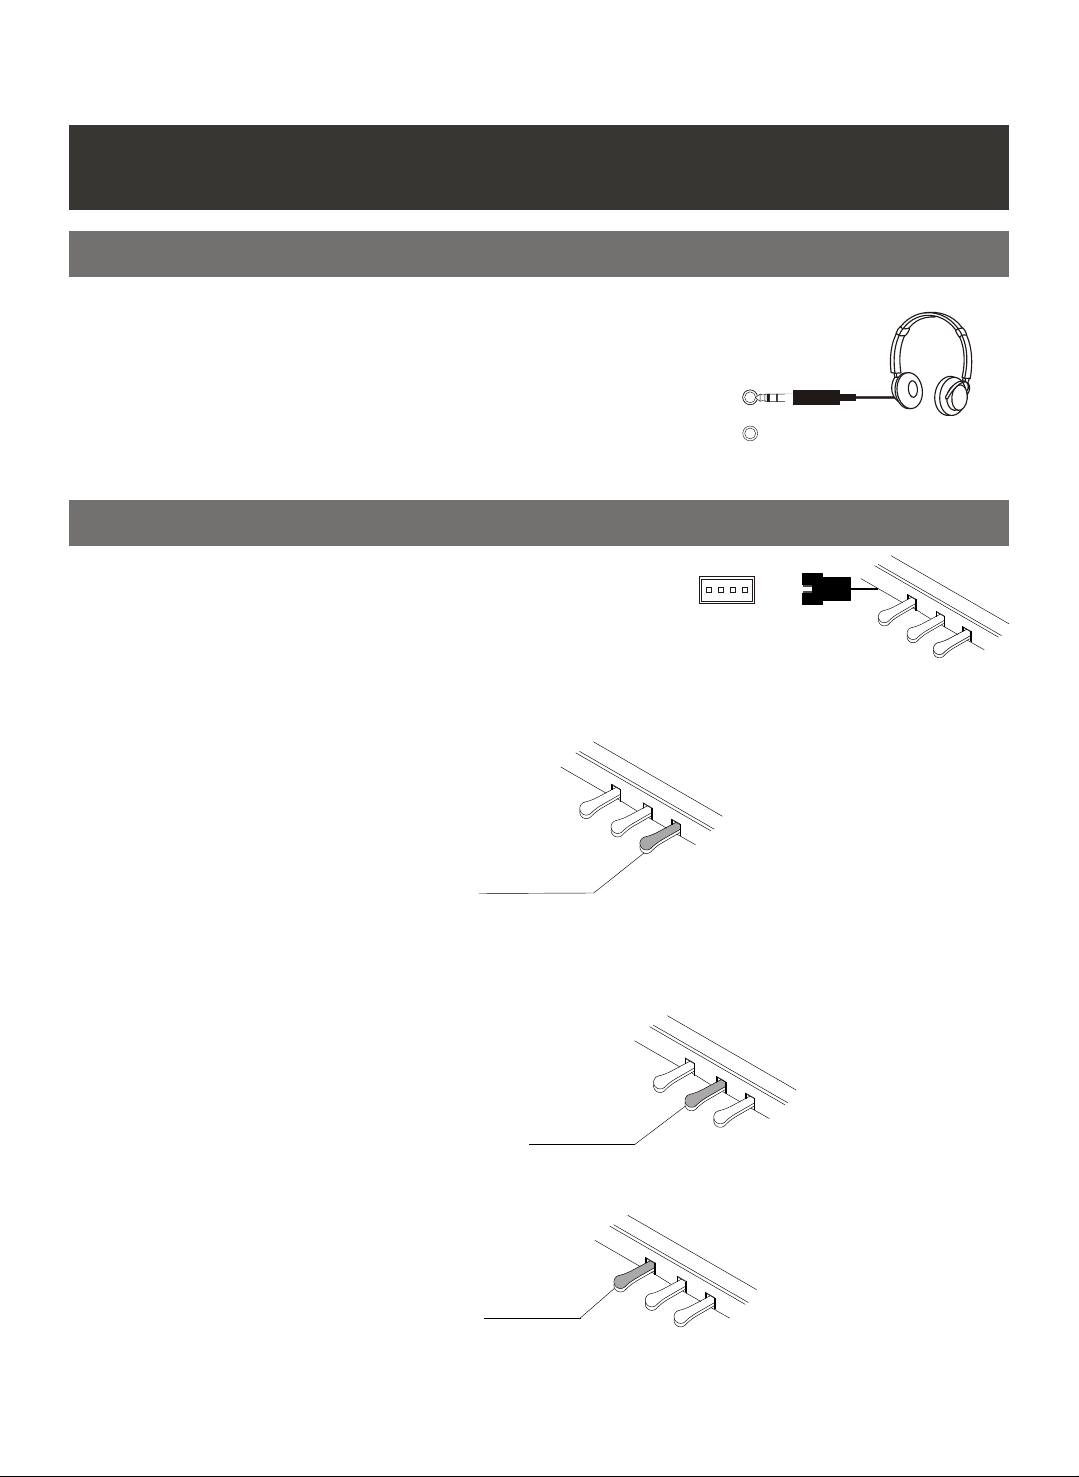
Headphones
Two sets of Headphones can be plugged in for private
practice. The sockets are located in the front of the
instrument in left part of the keyboard and allows you
to play without disturbing anyone else or being disturbed
by outside noise, and the internal speaker system is
automatically shut off when the headphone is plugged.
Pedal
Connect the plug of the foot pedal unit to the pedal
connector under the piano.
Damper Pedal (Right)
It performs the same function as the damper pedal on an actual acoustic piano, letting
you sustain the sound of the voices even after releasing your fingers from the keys.
PHONES 2
PHONES 1
Sostenuto Pedal (Center)
SUSTAIN
If you play a note or chord on the keyboard and press the sostenuto pedal while the
notes are held, those notes will be sustained as long as the pedal is held, but all
subsequently played notes will not be sustained.
Soft Pedal (Left)
SOSTENUTO
The Soft Pedal controlling the sound volume. Press the pedal to decrease the output
sound volume.
SOFT
6
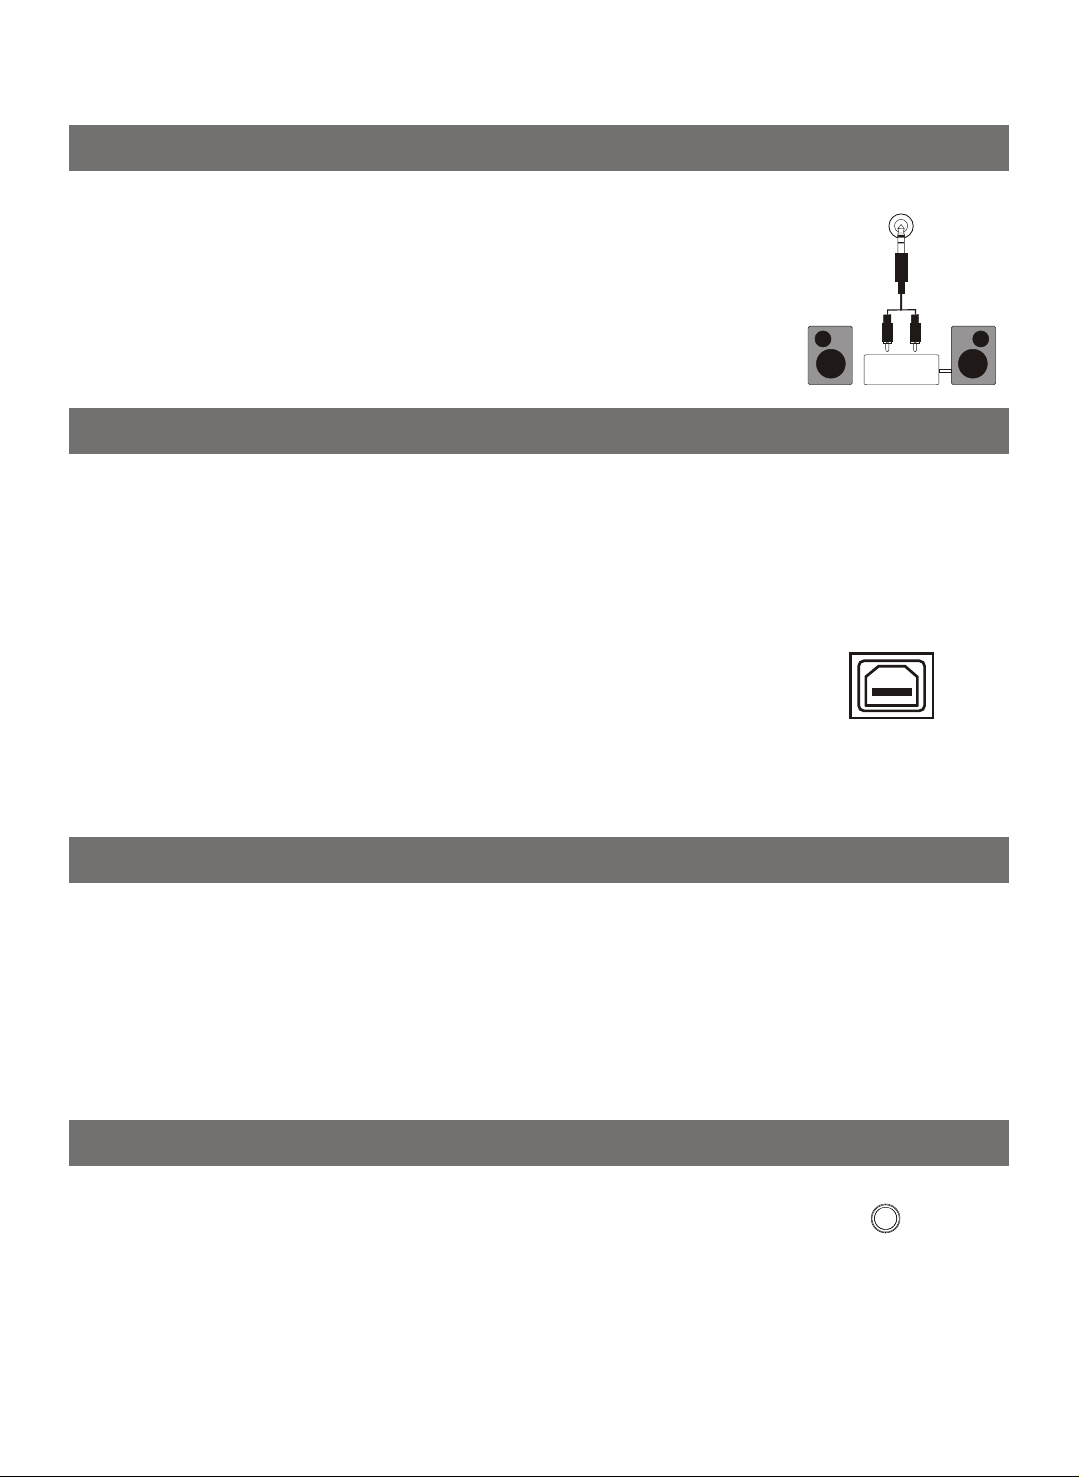
Line Out
The Line out jack can be used to deliver the output of the
LINE OUT
piano to a keyboard amplifier, stereo sound system, mixing
console or tape recorder.
Note: To avoid damaging the speakers, please ensure that the volume
has set to the minimum level before connecting the power and other devices
Stereo
System
USB MIDI / USB AUDIO Jack
This product allows the transfer of MIDI information over USB to a computer.
Complicated as it sounds, it's pretty simple.
there is no need to install a driver to enable it to work with OSX, Windows XP, Vista or
Windows 7. Just plug it in and the OS will do the rest. The piano will work with all standard
MIDI based computer software.
USB AUDIO interface is a digital audio interface. By USB cable,
you can digitally transfer intact audio signals of PC to
and enjoy it on this instrument or use it for accompany
this instrument; likewise, you can transfer intact audio signals of the
instrument to PC to record and edit music.
Because your piano is USB Class Compliant,
this instrument,
when you play
USB TO HOSTUSB TO HOST
Using DC Power Jack
1. Ensure the keyboard is turned off when connecting and disconnecting the power,
and turn the volume switch to the minimum level.
2. Plug the adaptor into the AC wall outlet and the cord into the unit, then turn the
power on.
Note:1.Ensure the piano is turned off when connecting and disconnecting the power.
2.Turn the volume switch to the minimum level before turning on the power.
Mp3
The audio output from other sound system connected to the MP3
jack can be mixed with the sound of the unit. This function is
convenient when you want to play along with a favourite song.
7
MP3

Voices
Your piano has 128 sounds in the internal sound library numbered from 01 to 128, and
The available sounds can be played in three different modes: Main voice, Layer voice
and Split voice.
Select a Voice
You can use the voice button on the panel, or use [DATA CONTROL] knob to select
voice.
Selecting Voice Directly
There are 9 voices that can be selected quickly by Pressing one of the 9 voice select
buttons and its indicator is lighted.
GRAND
PIANO
BRIGHT
PIANO
ELECTRIC
PIANO 1
ELECTRIC
PIANO 2
CHURCH
ORGAN
GUITAR
STRINGS BRASS
GM VOICE
Use [DATA CONTROL] knob
Select a voice, then use [DATA CONTROL] knob to select your desired voice.
Layer Button
This function is capable of enhancing the delicacy of your music by playing two voices
of musical instruments simultaneously; new combinations of voices and music could be
created. When the layer function is off, the voice indicated is VOICER1. When the layer
function is on, the voice indicated is VOICE R2.
Press [LAYER] button to turn on or turn off Layer function.
Select Layer Voice
Press [LAYER] button to enter the Layer voice mode, the indicator is lighted
8

simultaneously. The number of the dual voice will be displayed on the LCD. Now, you
can play two different sounds at the same time.
To change the Layer voice by using [DATA CONTROL] knob while the Layer indicator
is light.
LAYER
Adjust Layer Voice Volume
old down the [LAYER] button, then use [DATA CONTROL] to adjust Layer
Press and h
Voice volume. Range: 000-127.
LAYER
Press the [GRAND PIANO
] and [BRIGHT PIANO] buttons simultaneously to restore
the default value: 75.
Exit The Layer Mode
Press [LAYER] button again
to exit the Layer mode.
Split Voice
Split function let the keyboard split into two sections which means different voices
can be played with the left and right hands at the same time.
Select Split Voice
Press [SPLIT] button to enter the split mode, the [SPLIT] indicator light is light, now
you can change the split voice by using [DATA CONTROL] knob.
9

SPLIT
Change the Split Point
Press and hold down [SPLIT] button, then press the appropriate piano key to select the
Split Point. Range:000~087. Default: 034.
SPLIT
Adjust Spilt Voice Volume
Press and h
old down the [SPLIT] button, then use [DATA CONTROL] to adjust Layer
Voice volume. Range: 000-127.
SPLIT
Press the [GRAND PIANO
the default value: 127.
] and [BRIGHT PIANO] buttons simultaneously to restore
Exit The Split Mode
Press [SPLIT] button again
to exit the Layer mode.
10

Effect
Digital Effect
This function allows you to perform the overall sound in a realistic style.
Reverb
The [REVERB] button selects a number of digital reverb effects that you can use for
extra depth and expressive power.
Press [REVERB] button, use [DATA CONTROL] knob to select reverb type.
REVERB
Press the [GRAND PIANO
] and [BRIGHT PIANO] buttons simultaneously to restore
the default value: Room3.
The reverb types in the list below can be selected from the reverb display.
1 2 3 4 5 6 7 8
Hall1 Hall2 Room1 Room2 Room3 Stage1 Stage2 Plate
Press [REVERB] button again to turn off the reverb effect.
Reverb Level
Press and hold down the [REVERB] button, use [DATA CONTROL] knob to adjust the
reverb level.
Range: 000~127. Default: 036.
REVERB
11

Chorus
Press [CHORUS] button, use [DATA CONTROL] knob to select chorus type.
CHORUS
Press the [GRAND PIANO
] and [BRIGHT PIANO] buttons simultaneously to restore
the default value: Chorus3.
The chorus types in the list below can be selected from the reverb display.
1 2 3 4 5 6 7 8 9 10 11 12 13
Chorus1 Chorus2 Chorus3 Chorus4 Feedbak Flanger1 ShDl S hDlFb Flanger2 Flanger3 Celeste1 Celeste2 Celeste3
Press [CHORUS] button again to turn off the reverb effect.
Chorus Level
Press and hold down the [CHORUS] button, use [DATA CONTROL] knob to adjust the
chorus level.
Range: 000~127. Default: 036.
REVERB
Touch
The touch function provides three different types of keyboard touch sensitivity
that can be selected to match different playing styles.
12

Press the [TOUCH] button and its indicator is lighted , use [DATA CONTROL] knob to
select the touch sensitivity type. Range: Low, Normal, High. Default: Normal.
TOUCH
When [TOUCH] is off, the indicator is unlighted, means that regardless of how hard you
play, the keyboard will transmit a velocity value of 100. Hold [TOUCH] button till
Touchfix:100 displayed, then use [DATA CONTROL] knob to set the fixed touch level.
Range: 000~127. Default: 100.
TOUCH
Transpose
The Transpose function allows you to change the pitch of the instrument in semitone
steps, up to a maximum setting of 12 semitones (a maximum of one octave up or down).
Press [TRANSPOSE] button, the Transp 000 appears, then use the
[DATA CONTROL] button to change the transpose value. Range: -12 to 12. Default: 000.
TRANSPOSE
13

Twin
Press the [TWIN] button to enter TWIN mode. In this mode, the keyboard will be
separated into two playing areas.
Right: from C#3 to C7
Left: from A-1 to C3
TWIN
This will be very helpful when the instrument is used by two players at the same time
(example: Teacher and Student) and they will be able to play the same piano sound in the
same octave.
When the Twin mode is selected, use the optional 3 level pedal and the pedals will
automatically switch in a different configuration where there are 2 Sustain pedals, one for
the left and anther for the right part of the keyboard.
Metronome
Metronome is a convenient feature for practice, and it can also provide a solid
rhythmic guide when recording.
The metronome sound is alternately turned on and turned off by pressing
[METRONOME] button.
METRONOME
Time signature
Press [METRONOME] button, the time signature appears in the display, use the
[DATA CONTROL] to select it.
Time signature: 2/2, 1/4, 2/4, 3/4, 4/4, 5/4, 6/4, 3/8, 6/8, 7/8, 9/8, 12/8.
Default: 4/4
14

METRONOME
Tempo/Tap
This function allows you to set the rhythm tempo by tapping tempo on the [TEMPO/TAP]
button. Tap on the button 2 times while rhythm is playing, the rhythm tempo are set as your
desired speed.
If you want to set the tempo before starting rhythm, you have to tap the button 4 times,
but only tap 3 times for 3/4 time signature.
[DATA CONTROL] button after
tap on the button one time.
You also can set the tempo by using
Range:020~280. Default: 120.
TEMPO/TAP
15

Recording Function
Recording function lets you record your performances using up to two independent
tracks. The recorded data will not be lost when you turn off the power.
Start Recording
Hold down the [RECORD] button, and then press [TRACK1/LEFT] (or [TRACK2/
RIGHT]) button to enter record mode, the [RECORD] button and tracks indicator and is
flishing, then set the tempo, press the key to start Recording.
RECORD
TRACK 1/
LEFT
TRACK 2/
RIGHT
PLAY
Note: If the other track has data recorded, it will play when the record is started.
You also can press the track button to mute it.
Stop Recording
Press the [RECORD] button again to stop recording.
RECORD
TRACK 1/
LEFT
TRACK 2/
RIGHT
PLAY
Play Recording
Press [TRACK1/LEFT] or [TRACK2/RIGHT] button, the indicator is lighted, then press
the [PLAY] button to play recording.
16

RECORD
TRACK 1/
LEFT
TRACK 2/
RIGHT
PLAY
Press the [PLAY] button again to stop recording.
Clear Recording
Hold down the [TRACK1/LEFT] button or [TRACK2/RIGHT] button to clear the
recording data.
RECORD
TRACK 1/
LEFT
TRACK 2/
RIGHT
PLAY
17

Learning Function
Your instrument has three bank songs to select for learning. The CZERNY bank includes
70 learning songs, the BEYER bank includes 106 learning songs and the School bank
includes 124 learning songs
Play the Song
Press [LEARN] button repeatedly to select three bank
and its . Then use [DATA CONTROL]
to select three bank songs.
indicator is lighted
LEARN
Press [PLAY] button to play the song, the [LEARN] button
RECORD
TRACK 1/
LEFT
TRACK 2/
RIGHT
PLAY
indicator is flashing.
Adjust the song's tempo
Press the [TEMPO/TAP] button to adjust the song's tempo. Range:20-280.
Practicing The Left Hand Of The Selected Song
In Learn Mode, press the [LEFT] button to mute the right hand part. The left indicator
lights up. You will then hear the right-hand part.
the [LEARN] button
indicator is flashing.
Press [PLAY] button to play the song,
Practicing The Right Hand Of The Selected Song
In Learn Mode, press the [RIGHT] button to mute the right hand part. The right indicator
lights up. You will then hear the left-hand part.
[LEARN] button
indicator is flashing.
Press [PLAY] button to play the song, the
Exit the Learning Function
Press [LEARN] button again to exit theLearning function.
18

Reset
1). Turn off the power.
STANDBY/ON
2). Hold down buttons,
the [ buttonMETRONOME] and [TEMPO/TAP] buttons
then turn the power on, it can restore all internal settings to factory set.
METRONOME TEMPO/TAP
STANDBY/ON
19

Appendix
Voice List
PROGRAM
.
NO
BANK
CHANGE
VOICE NAME
PROGRAM
.
BANK
NO
CHANGE
VOICE NAME
PROGRAM
.
NO
BANK
CHANGE
VOICE NAME
20

Percussion Voice List
Note#
25
26
27
28
29
30
31
32
33
34
35
36
37
38
39
40
41
42
43
44
45
46
47
48
49
50
51
52
53
54
55
56
57
58
59
60
61
62
63
64
65
66
67
68
69
70
71
72
73
74
75
76
77
78
79
80
81
82
83
84
85
Note
#C
D
#D
E
F
#F
G
#G
A
#A
B
C
#C
D
#D
E
F
#F
G
#G
A
#A
B
C
#C
D
#D
E
F
#F
G
#G
A
#A
B
C
#C
D
#D
E
F
#F
G
#G
A
#A
B
C
#C
D
#D
E
F
#F
G
#G
A
#A
B
C
#C
Standard(0)
Seq Click H
Brush Tap
Brush Slap
Brush Swirl H
Snare Roll
Castanet
Snare L
Sticks
Bass Drum L
Open Rim Shot
Bass Drum L
Seq Click H
Brush Tap
Brush Swirl L
Brush Slap
Brush Swirl H
Snare Roll
Castanet
Snare L
Sticks
Bass Drum L
Open Rim Shot
Bass Drum M
Bass Drum H
Side Stick
Snare M
Hand Clap
Snare H
Floor Tom L
Hi-Hat Closed
Floor Tom H
Hi-Hat Pedal
Low Tom
Hi-Hat Open
Mid Tom L
Mid Tom H
Crash Cymbal 1
High Tom
Ride Cymbal 1
Chinese Cymbal
Ride Cymbal Cup
Tambourine
Splash Cymbal
CowBell
Crash Cymbal 2
Vibraslap
Ride Cymbal 2
Bongo H
Bongo L
Conga H Mute
Conga H Open
Conga L
Timbale H
Timbale L
Agogo H
Agogo L
Cabasa
Maracas
Samba Whistle H
Samba Whistle L
Cuiro Short
Note#
86
87
88
89
90
91
92
93
94
95
96
97
98
99
100
101
102
103
104
105
106
107
108
Note
D
#D
E
F
#F
G
#G
A
#A
B
C
#C
D
#D
E
F
#F
G
#G
A
#A
B
C
Standard(0)
Cuiro Long
Claves
Wood Block H
Wood Block L
Guica Mute
Guica Open
Triangle Mute
Triangle Open
Shaker
Jingle Bell
Bell Tree
Seq Click M
Seq Click H
Brush Tap
Brush Swirl L
Brush Slap
Brush Swirl H
Snare Roll
Castanet
Snare L
Sticks
Bass Drum L
Open Rim Shot
Note#
51
52
53
54
55
56
57
58
59
60
61
62
63
64
65
66
67
68
69
70
71
72
73
74
75
76
77
78
79
80
81
82
83
84
85
86
87
88
89
90
91
92
93
94
95
96
Note
#D
E
F
#F
G
#G
A
#A
B
C
#C
D
#D
E
F
#F
G
#G
A
#A
B
C
#C
D
#D
E
F
#F
G
#G
A
#A
B
C
#C
D
#D
E
F
#F
G
#G
A
#A
B
C
Effects(56)
High-Q
Slap
Scratch Push
Scratch Pull
Sticks
Square Click
Mtrnm .Click
Mtrnm. Bell
Gt.FretNoiz
Gt.CutNoise
Gt.CutNoise
String Slap
Fl.KeyClick
Laughing
Screaming
Punch
Heart Beat
Footsteps 1
Footsteps 2
Applause
Door Creaking
Door
Scratch
Wind Chimes
Car-Engine
Car-Stop
Car-Pass
Car-Crash
Siren
Train
Jetplane
Helicopter
Starship
Gun Shot
Machine Gun
Lasergun
Explosion
Dog
HorseGallop
Bird
Rain
Thunder
Wind
Seashore
Stream
BuBBle
21

MIDI Implementation Chart
Function Transmitted
Basic
Channel
Mode
Note
Number
Velocity
Affter
Pitch Bender
Control Change
Programe
Change
System Exclusive
System
Common
Aux
Messages
Default
Changed
Default
Messages
Altered
:True voice
Note ON
Note OFF
Key's
0,32
1
5
6
7
10
11
64
65
66
67
80,81
91,9.3
100,101
120
121
122
: True
: Song Position
: Song Select
: Tune
: Local on/off
: All Notes Off
: Active Sense
: Reset
1-16CH
1-16CH
Mode 3
X
**********
0-127
**********
O 9nH,v=1~127
O 9nH,v=0 or 8nh
X
X
O
O
X
O
O
X
X
O
X
O
O
O
O
O
O
X
X
O 0-127
0-127
X
X
X
X
X
X
X
X
Recognized
1-16CH
1-16CH
Mode 3
X
X
0~127
0~127
O 9nH,v=1~127
O 9nH,v=0 or 8nh
X
O
O
O
O
O
O
O
O
O
O
O
O
O
O
O(*1)
O
O
O
O 0-127
0-127
O
X
X
X
O
O
O
O
Remarks
Bank Select
Modulation
Portamento time
Data Entry
Volume
Pan
Expression
Sustain
Portamento
Sostenuto
Soft pedal
DSP TYPE
DSP DEPTH
RPN LSB,MSB
All sound off
Reset all Controllers
Local control
Mode1:OMNI ON,POLY
Mode3:OMNI OFF,POLY
*1: Registered parameter number:
#0: Pitch sensivity
#1: Fine tuning cents
#2: Coarse tuning in half-tones
Mode2:OMNI ON,MONO O Yes
Mode4:OMNI OFF,MONO X No
22

Troubleshooting Hints
When the instrument is turned on or off, a Popping
sound is temporarily produced.
When using a mobile phone, noise is produced. Using a
mobile phone in close proximity to the instrument may
produce interference.
Not all of the voices seem to sound, or the sound seems
to cut off
The Auto Accompaniment does not sound properly
No sound produced by the keyboard, but the lights and
screen work.
The sound of the voice changes from note to note.
The volume is too soft.
The sound quality is poor.
The rhythm stops unexpectedly or will not play.
The recorded data of the song, etc. does not play
correctly.
The LCD display suddenly goes dark, and all panel
settings are reset.
To completely restore all settings as per factory settings
The sustain pedal or footswitch seems to produce the
opposite effect. Example pressing the footswitch
deactivates the sustain, and releasing the footswitch
triggers the sustain.
This is normal and indicates that the instrument is
receiving electrical power.
To prevent this, turn off the mobile phone or use it further
away from the instrument.
The instrument is polyphonic up to a maximum of 64
notes including Dual voice, Split Voice, auto
accompaniment,song, and Metronome.Notes exceeding
this limit will not sound.
Make sure that the Auto Accomp Volume Function is set
to an appropriate level.
Is the Split Point set to an appropriate key for the chords
you are playing? Set the Split Point to an appropriate
position on the keyboard.
Is the chord indicator showing in the LCD display? If it
is not showing, press the CHORD button so that it does
show.
Check that the master volume c ontrol is not set to minimum.
Check that nothing is plugged into the headphone socket.
This is normal. The digital tone generation uses multiple
recordings(samples) of an instrument across the range of
the keyboard; The actual sound of the voice may be
slightly different from note to note.
The batteries are low or dead. Replace all six batteries
with completely new ones, or use the supplied AC
adaptor.
If you have lost or damaged your AC adaptor, please
contact your nearest store for a correct replacement
adaptor.
An incorrect AC mains adaptor which is not rated
sufficiently can cause malfunction or damage.
Perform a factory reset,Please refer to content in this
owner's manual.All of the user setting will be erased
and the default factory settings will be applied to the
instrument.
The polarity of the footswitch needs to be correctly
detected.Make sure the jack plug for the footswitch is
connected. Switch the instrument on whilst not touching
the pedal.
23

Specifications
Keyboards:
Display:
Polyphony:
Voices:
Voice Control:
Effect:
Keyboard Control:
Demo:
Song recording:
Learning Function
88 standard-size hammer keys (A-1 C7)
with touch response
LCD display.
64 notes max
128
Transpose,Touch
Reverb type (8), Chorus type (13)
Dual, 3 touch sensitivity and fixed touch select,
Split,Chord,Twin
8 songs
Real time record (2 tracks) and playback.
Beyer 106
Czerny 70
School 124
Others:
Interface:
Speakers:
Dimensions (W x D x H):
Weight:
Metronome
Pedal , USB to Host, MP3, Line out,
DC Power, Phones
15W/4ohmX2
1390X455X870mm
53kg
24

Assembly Instructions
G
A
B
D/F
C
E/F
DP-7
Turn the adjustable Pedal Board support until it is in firm contact with the floor.
Before moving the piano to a new
location, always remember to raise
the level of the Pedal Board support
so that it is not touching the floor.
Once the piano is in place, you can
adjust it so it is in firm contact with
the floor again.
25

FCC STATEMENT
1. This device complies with Part 15 of the FCC Rules. Operation is subject to the
following two conditions:
(1) This device may not cause harmful interference.
(2) This device must accept any interference received, including interference that may
cause undesired operation.
2. Changes or modifications not expressly approved by the party responsible for
compliance could void the user's authority to operate the equipment.
NOTE: This equipment has been tested and found to comply with the limits for a
Class B digital device, pursuant to Part 15 of the FCC Rules. These limits are designed
to provide reasonable protection against harmful interference in a residential installation.
This equipment generates uses and can radiate radio frequency energy and, if not
installed and used in accordance with the instructions, may cause harmful interference
to radio communications. However, there is no guarantee that interference will not
occur in a particular installation. If this equipment does cause harmful interference to
radio or television reception, which can be determined by turning the equipment off
and on, the user is encouraged to try to correct the interference by one or more of the
following measures:
Reorient or relocate the receiving antenna.
Increase the separation between the equipment and receiver.
Connect the equipment into an outlet on a circuit different from that to which the
receiver is connected.
Consult the dealer or an experienced radio/TV technician for help.

Virgin Musical Instrument Company INC
P O Box 2908
La Mesa, CA 91943
PH: 619 244-0006
E-mail: info@virginmusicalinstruments.com
Virginmusicalinstrumentscompany.com
 Loading...