

Page 1

English
中文
RIGOL
Quick Guide
RSA5000 Series Real-time
Spectrum Analyzer
RIGOL TECHNOLOGIES, INC.
Dec. 2017
Page 2

Page 3

RIGOL
English
Guaranty and Declaration
Copyright
© 2017 RIGOL TECHNOLOGIES, INC. All Rights Reserved.
Trademark Information
RIGOL is a registered trademark of RIGOL TECHNOLOGIES, INC.
Publication Number
QGD20102-1110
Notices
RIGOL products are co vere d by P.R.C. and forei gn patents, issued and
pending.
RIGOL reserves the right to modify or change parts of or all the
specifications and pricing policies at the company’s sole decision.
Information in this publication replaces all previously released materials.
Information in this publication is subject to change without notice.
RIGOL shall not be liable for either incidental or consequential losses in
connection with the furnishing, use, or perform a nce of this manual, as
well as any information contained.
Any part of this document is forbidden to be copied, photocopied, or
rearranged without prior written approval of RIGOL.
Product Certification
RIGOL guarantees that this product conforms to the national and industrial
standards in China as well as the ISO9001:2008 standard and the
ISO14001:2004 standard. Other international standard conformance
certifications are in progress.
Contact Us
If you have any problem or requirement when using our products or this
manual, please contact RIGOL.
E-mail: service@rigol.com
Website: www.rigol.com
RSA5000 Quick Guide 1
Page 4
RIGOL
English
1. Only the exclusive power cord
air outlet.
7. Use the proper fuse.
WARNING
avoided, will result in serious injury or death.
CAUTION
avoided, could result in damage to the product or loss of
important data.
DANGER
It calls attention to an operation, if not correctly performed,
could result in injury or hazard immediately.
WARNING
It calls attention to an operation, if not correctly performed,
could result in potential injury or hazard.
CAUTION
It calls attention to an operation, if not correctly performed,
connected to the product.
General Safety Summary
designed for the instrument
and authorized for use within
the local country could be
used.
2. Ensure that the instrument is
safely grounded.
3. Observe all terminal ratings.
4. Use proper overvoltage
protection.
5. Do not operate without
covers.
6. Do not insert objects into the
8. Avoid circuit or wire exposure.
9. Do not operate the instrument with
suspected failures.
10. Provide adequate vent il at io n .
11. Do not operate in wet conditions.
12. Do not operate in an explosive
atmosphere.
13. Keep instrument surfaces clean
and dry.
14. Prevent electrostatic i m pac t .
15. Handle with caution.
Safety Notices and Symbols
Safety Notices in this Manual:
Indicates a potentially hazardous situation or pr actice which, if not
Indicates a potentially hazardous situation or pract ic e w hich, i f no t
Safety Terms on the Product:
could result in damage to the product or other devices
2 RSA5000 Quick Guide
Page 5
English
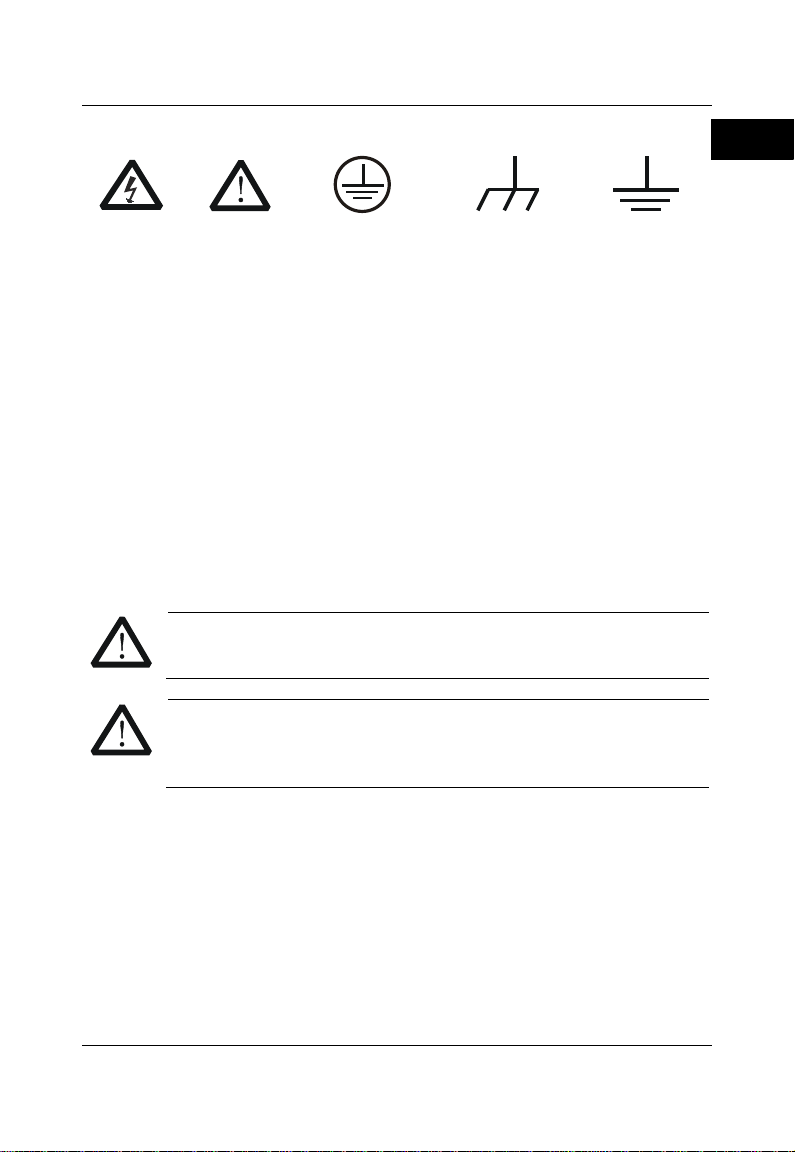
Safety Symbols on the Product:
Hazardous
Voltage
Safety
Warning
Protective Earth
Terminal
Chassis Ground
Test Ground
CAUTION
liquids.
WARNING
to the power supply.
RIGOL
Care and Cleaning
Care
Do not store or leave the instrument where it may be exposed to direct sunlight
for long periods of time.
Cleaning
Clean the instrument regularly according to its operating conditions.
1. Disconnect the instrument from all power sources.
2. Clean the external surfaces of the instrument with a soft cloth dampened
with mild detergent or water. When cleaning the LCD, take care to avoid
scarifying it.
To avoid damage to the instrument , do not expose it to caustic
To avoid short-circuit resulting from moisture or personal injuries,
ensure that th e in stru men t is c om pletely dry b efore c on nect ing it
RSA5000 Quick Guide 3
Page 6
RIGOL
English
Tip
of RIGOL (www.rigol.com).
Document Overview
This manual introduces some basic information that you should know when you
use the RSA5000 series spectrum analyzer for the first time. It contains the
following contents: out-of-box inspection method, product overview, how to
connect the instrument to the AC power, turn-on checkout, and rem ote control
overview.
For the latest version of this manual, d ownload it from the official website
Format Conventions in this Manual
1. Keys:
The keys on the front panel are usually denoted by the format of "Key
Name (Bold) + Text Box". For example, FREQ denotes the FREQ key.
2. Menu Keys:
The menu softkeys are usually denoted by the format of "Menu Word
(Bold) + Character Shading". For example, Center Freq denotes the
center frequency menu under the FREQ function key.
3. Connectors:
The connectors on the front or rear panel are usually denoted by the
format of "Connector Name (Bold) + Square Brackets (B old)". For
example, [Gen Output 50Ω].
4. Operation Procedures:
"" represents the next step of operation. For example, FREQ Center
Freq indicates pr essing FREQ on the front panel and then pressing the
menu softkey Center Freq.
4 RSA5000 Quick Guide
Page 7
RIGOL
English
Model
Frequency Range
RSA5065
9 kHz to 6.5 GHz
RSA5032
9 kHz to 3.2 GHz
Content Conventions in this Manual
The RSA5000 series spectrum analyzer includes the following models. Unless
otherwise specified, this manual takes RSA5065 as an example to illustrate the
functions and operation methods of RSA5000 series spectrum analyzer.
RSA5000 Quick Guide 5
Page 8

RIGOL
English
General Inspection
1. Inspect the packaging
If the packaging has been damaged, do not dispose the damaged
packaging or cushioning materials until the shipment has been checked
for completeness and has passed both electrical and mechanical tests.
The consigner or carrier shall be liable for the damage to the instrument
resulting from shipment. RIGOL would not be responsible for free
maintenance/rework or replacement of the instrument.
2. Inspect the instrument
In case of any mechanical damage, missing parts, or failure in passing the
electrical and me chanical tests, contact your RIGOL sales
representative.
3. Check the accessories
Please check the accessories according to the packing lists. If the
accessories are damaged or incomplete, please contact your RIGOL
sales representative.
Product Over v iew
RSA5000 series is a new generation of cost-efficient real-time spectrum
analyzer with high performance. With superb performance specifications, clean
and reliable output, as well as the clear user interface, the RSA5000 series
allows you to operate it through various ways, such as pressing keys on the
front panel, using the touch screen, connecting the mouse and the keyboard.
Remote communication interfaces are also available. The instrument can be
widely used in education science, corporate R&D, industrial production, and
other fields.
For descriptions of the front panel, refer to Figure 1; for descriptions of the rear
panel, refer to Figure 2; and for descriptions of the main interface (LCD), refer
to Figure 3.
6 RSA5000 Quick Guide
Page 9

English
No.
Description
No.
Description
1
LCD 9 Numeric keyboard
2
Menu softkeys
10
TG output
[1]
3
Back to previous menu page
11
Utility function key area
4
Function key area
12
Page Up/Down key
5
Help key
13
Speaker
6
Knob
14
Earphone jack
7
Arrow keys
15
USB HOST interface
8
RF Input
16
Power key
1 2 3 4
5
16 15 14 13 12 11 10 9 8
Figure 1 Front Panel
Table 1 Front Panel Description
RIGOL
6
7
[1]
Note
: This function is only available for the instrument installed with RSA5000-TG3 or
RSA5000-TG6.
RSA5000 Quick Guide 7
Page 10

RIGOL
English
No.
Description
No.
Description
1
AC power cord connector
8
TRIGGER IN
2
Fuse holder
9
LAN interface
3
OCXO (option)
10
USB DEVICE interface
4
Handle
11
USB HOST interface
5
10MHz IN
12
HDMI
6
10MHz OUT
13
IF OUT
7
TRIGGER IN/OUT
——
——
1 2 3 4
13
Table 2 Rear Panel Description
Figure 2 Rear Panel
12
11
10
9
8
7
6
5
8 RSA5000 Quick Guide
Page 11

English
No.
Name
Description
1
Reference level
Displays the reference level value.
2
Measurement
Displays the current measurement results for
value).
3
RIGOL
Indicates the compa ny lo go.
4
System status
Rmt: indicates remote operation.
has been enabled.
5
Trace indicator
[1]
Displays information about the trace and the
detector.
3 4 5
6 7 8 9 10 11 12 13 14
24 23 22 21 20 19 18 17 16 15
2
1
Table 3 User Interface Icons
RIGOL
Figure 3 User Interface
result
the marker (when no marker exists, t h e
measurement results display frequency/span
Ext: indicates the external reference.
Uncal: indicates that the measurement has not
be calibrated.
PA on: indicates that the preamp has been
enabled.
TG on: indicates that the tracking generator
RSA5000 Quick Guide 9
Page 12

RIGOL
English
6
Information
touch screen.
7
Measurement bar
Displays measurement settings.
8
Measurement
function
Displays the currently selected measurement
function.
9
Working mode
Displays the currently selected working mode.
10
Clicks the keypad to display the function
keypad interface.
11
Active function
area
12
Time
Displays the system time.
13
Menu title
Displays the currently selected menu name.
14
Menu item
Displays the menu item of the current function.
15
Shows the current page and the total number
of pages for the menu.
16
Sweep time and
points
Indicates the sweep t im e an d the number of
sweep points in swept mode.
17
The frequency range of the current sweep
frequency.
18
Trigger level
Indicates video trigger level.
19
Indicates the readout reference and the
threshold criteria for the peak
20
VBW
Indicates video bandw i dth.
21
Spectrum line
display area
Indicates the display area for the spectrum
line.
22
RBW
Indicates the resolution bandwidth.
23
Center or start
The frequency range of the current sweep
setting
Function keypad
Menu page
: indicates messages, such as the prompt
messages, alarm messages, and error
messages.
: indicates the speaker. You can tune it up
and down to increase and decrease the
speaker volume, or set it to mute.
: indicates the network settings. You can
configure network parameters.
: unlocks the front panel keys; : locks
the front panel keys.
: unlocks the touch screen; : locks the
Displays the current parameter and its value.
channel can be expressed by the combination
of center frequency and span or the
combination of start frequency and stop
Span or stop
frequency
Display line
10 RSA5000 Quick Guide
Page 13

English
frequency
channel can be expressed by the combination
of center frequency and span or the
frequency.
24
Y scale
Indicates the scale indication in the Y axis.
Trace Number
Trace Type
Detector Type
combination of start frequency and stop
[1]
Note
:
The display of the trace indicator is shown in the following figure :
RIGOL
The first line displays the trace number. The color of the number is the same as that of
the trace.
The second line displays the trace type, including W (Clear/Write), A (Trace Average), M
(Maximum Hold), and m (Minimum Hold). The letters with different colors and in
different forms show different meanings.
— The letter in blue indicates that the trace is updating.
— The letter in gray indicates that the trace is not updated.
— The letter with strikethrough and in gray color indicates that the trace will neither
be updated nor displayed.
— The letter with s trikethrough and in blue color indicates that the trace is updating
but not displayed. It is useful in trace math operation.
The third line displays the detector type of each trace, including N (Normal, only for
GPSA), V (Voltage Average, only for GPSA), P (Positive Peak), p (Negative Peak), S
(Sample), R (RMS Average, only for GPSA), Q (Quasi Peak, only for GPSA) and A
(Average, only for RTSA). If it shows "f", it indicates that it is math operation trac e. The
letter in blue in the third line (detector type) indicates that the detector is in auto state;
the letter in white indicates that it is in manual state.
RSA5000 Quick Guide 11
Page 14

RIGOL
English
To unfold the
To fold the
To Prepare for Us e
To Adjust the Supporting Legs
You can unfold the supporting legs to use them as stands to tilt the instrument
upwards for easier operation and observati on. You can also fold the supporting
legs for easier storage or shipment when the instrument is not in use.
Figure 4 To Adjust the Supporting Legs
supporting legs
To Connect to AC Power
Please use the power cord provided in the accessories to connect the spectrum
analyzer to the AC power source. The AC power supply specification of this
spectrum analyzer i s 100-240 V, 45-440 Hz. The power consumption of the
instrument cannot exceed 95 W. When the spectrum analyzer is connected to
the AC power source via the power cord, the instrument automatically adjusts
itself to within the proper voltage range, and you do not need to select the
voltage range manually.
supporting legs
12 RSA5000 Quick Guide
Page 15

RIGOL
English
CAUTION
grounded.
To avoid electric shock, ensure that the instrument is correctly
Turn-on Checkout
After connecting the instrument to the power source properly, press the Power
key on the front panel to start the spectrum analyzer. Then, you will
see an initial splash screen. Following the start-up screen which shows the
start-up initialization process information, the sweep curve is displayed.
Self-calibration
After the instrument starts, execute self-calibration.
Press System Alignment Align Now, and then the instrument will
perform self-calibration with the internal calibration source.
To Set the System Language
RSA5000 series spectrum analyzer supports multiple system languages. You
can press System Language to switch the system language.
RSA5000 Quick Guide 13
Page 16

RIGOL
English
Front Panel Key
Keyboard Shortcut Key
[1]
Mode
Alt + o
Mode Setup
[2]
Shift + o
Meas
Alt + e
Meas Setup
[2]
Shift + e
Auto Tune
Ctrl + Alt + a
Preset
Ctrl + Alt + p
FREQ
[2]
Shift + f
SPAN
[2]
Shift + s
AMPT
[2]
Shift + a
BW
[2]
Shift + b
Trace
[2]
Shift + t
Sweep
[2]
Shift + w
Basic Operations
Mouse/Keyboard/Touch Screen Operation Rule
Mouse Operation Rule
Connect the mouse (note that only the left-click operation is supported; the
scroll and right-click operations with the mouse are not supported) to the
spectrum analyzer via the USB HOST interface to perform the following
operations:
1. Click to select the menu and window.
2. Press and hold the left mouse button to drag the data displayed on the
graticule or move th e slide bar.
3. Double-click the data displayed on the graticule and then the data will be
appeared at the right-corner.
4. Under the Marker function, y ou can only use the mouse to move a marker ,
but unable to add a marker with the mouse.
Keyboard Operation Rule
Connect the keyboard to the spectrum analyzer via the USB HOST interface,
and then use the shortcut keys on the keyboard to perform the same f uncti on
as what you do with the front panel keys.
Table 4 Matching Relations between the Front Panel Keys and the Keyboard
Shortcut Keys
14 RSA5000 Quick Guide
Page 17

RIGOL
English
Input Output
[2]
Shift + i
TG
[2]
Shift + g
Cont
F11
Marker
[2]
Shift + m
Marker ->
[2]
Shift + k
Single
F12
Peak
[2]
Shift + p
Marker Function
[2]
Shift + u
Trigger
[2]
Shift + r
System
[2]
Shift + y
File
Ctrl + f
User
Ctrl + u
Recall
Ctrl + r
Save
Ctrl + s
Quick save
Ctrl + Alt + q
Help
Alt + F1
Alt + F2
Alt + F3
Alt + F4
Alt + F5
Page Up
Page Down
11 numeric keys
Numeric keys on the keyboard: 10
8, 9, 0) and a decimal point(.)
+
+
-
-
Esc
Esc
Back
Backspace
Enter
Enter
Arrow keys (Up/Down/L e f t/Ri ght
arrow key)
7 menu softkeys from top to bottom
F1 to F7
numeric numbers (1, 2, 3, 4, 5, 6, 7,
[1]
Note
: Except the keyboa rd shortcut keys mentioned in the above table , all the other keys on
the keyboard do not work for the menu operation.
[2]
Note
: When the Caps Lock key i s enabled, e very letter you type would be in uppercase, even
if you're not holding down the "Shift" key. If disabled, you have to press down "Shift" and the
specified letter on the keyboard at the same time to input t he letter in upp ercase. F or ex ample,
if you want to execute the Shift+f shortcut key operation, you only need to press "f" on the
premise that the Caps Lock key is enabled.
RSA5000 Quick Guide 15
↑, ↓, ←, →
Page 18

RIGOL
English
Select the menu and use the numeric keys to
input.
Press the corresponding menu key to switch
disable the signal tracking function.
Touch Screen Operation Rule
RSA5000 has a 10.1-inch capacitive multi-touch screen that supports touch
gestures.
1. When operating on the menus other than the Marker menu:
Tap the trace window, then sl ide lef t an d ri ght to mod ify the cen ter
frequency; slide up and down to modify the reference level.
Stretch two fingers horizontally in the trace window to decrease the
span, and pinch the fingers horizontally to increase the span. Stretch
two fingers in the vertical direction to decrease the Y-axis scale, and
pinch the fingers vertically to increase the Y-axis scale.
2. When operating on the Marker menu:
In the empty space of the screen trace region, press and hold the
region to add one new marker.
Tap and hold one marker to drag the marker.
Menu Operation
There are 6 types of menus according to their operation modes. Each type of
menu and its operation method are introduced below.
1. Parameter Input
modify the value directly.
For example, to modify center frequency, first
2. State Switching
16 RSA5000 Quick Guide
select Center Freq, and then input the desired
value. Then, press Enter to complete parameter
between the sub-options.
For example, press Signal Track, and then you
can switch between "On" and "Off" to enable or
Page 19

English
3. Enter Lower-level Menu (with parameter)
Tip:
the keyboard shortcut keys, refer to Table 4.
Press the corresponding menu key to enter the
Press the corresponding menu key to enter the
Press the key to execute the corresponding
the current marker.
Press the corresponding menu key and modify
state at present.
lower-level menu and change the currently
selected option. The parameter type in the
upper-level menu will be changed when you
return to the upper-level menu again.
For example, press Y Axis Unit to enter the
lower-level menu. Select dBm and then
automatically return to the previous menu. Then,
the unit of Y axis will be changed to dBm.
4. Enter Lower-level Menu (without parameter)
lower-level menu.
For example, press Peak Config to enter the
lower-level menu directly.
5. Direct Execution
function.
For example, press Mkr->CF to set the center
frequency of the analyzer to the frequency of
6. State Selection
RIGOL
the parameters, and then go back to the
previous menu.
For example, press Source Free Run to
select free trigger. The analyzer is in Free Run
The above menu operations can be executed by touch gestures or clicking
with the externally connected mouse. Also, you can connect to the
keyboard and use the shortcut keys to perform the above menu
operations. For the matching relations between the front panel keys and
RSA5000 Quick Guide 17
Page 20

RIGOL
English
Parameter Setting
You can enter the desired parameter values by using the numeric keys, the
knob, or arrow keys on the front panel. Also, you can set the parameters by
using the touch screen, the keyboard or the mouse. This section takes an
example (set the center frequency to 800 MHz) to describe six methods of
parameter setting.
1. Use the numeric keys
1) Press FREQ Center Freq;
2) Input 800 using the numeric keys;
3) Select the desired unit (MHz) from the pop-up menu.
2. Use the knob
When the parameter is editable, turn the knob clockwise to increase or
counterclockwise to decrease the parameter value at the specified step.
1) Press FREQ Center Freq;
2) Rotate the knob until the parameter is set to the desired value (800
MHz).
Figure 5 Knob
3. Use the arrow keys
When the parameter is editable, use the arrow keys to increase or
decrease the parameter value at the specific step. Note that the step sizes
for the Up/Down arrow key and the Left/Right arrow key are different.
1) Press FREQ Center Freq;
2) Press the Up/Down arrow key or the Left/Right arrow key until the
parameter is set to the desired value (800 MHz).
18 RSA5000 Quick Guide
Page 21

RIGOL
English
Figure 6 Arrow Keys
4. Use the touch screen
1) Touch the screen to select the function keypad icon
at the
upper-right corner. Then, the function keypad is displayed. Touch
"FREQ";
2) Click Center Freq;
3) Then the numeric keypad is displayed. Input 800, and select the
desired unit "MHz".
5. Use the keyboard
1) Press "Shift + f" to open the Frequency menu;
2) Press "F1" to select Center Frequency;
3) Input 800 by using the numeric keys;
4) Press "F2" to select the desired unit (MHz) from the pop-up menu.
For the matching relations between the front panel keys and the keyboard
shortcut keys, refer to Table 4.
6. Use the mouse
1) Click with the mouse to select the function keypad icon
upper-right corner of the screen. Then, the function keypad is
displayed. Click "FREQ";
2) Click Center Freq;
3) Then the numeric keypad is displayed. Input 800, and select the
desired unit "MHz".
at the
RSA5000 Quick Guide 19
Page 22

RIGOL
English
To Use the Built-in Help Syst em
The built-in help system provides information about every function key on the
front panel and every menu softkey.
1. Get the built-in help information
Press Help and a prompt message about how to obtain help information
will be shown on the screen. Then, press the key that you want to know
about its usage, and then the relevant help information for the key will be
shown on the screen.
2. Page up/down operation
If the help information is displayed in several pages, you can press the
arrow keys or use the knob to page up and down the help information.
3. Close the current help information
When the help information is displayed on the screen, perform any one of
the following operations to close the currently displayed help information
dialog box:
press Esc;
press the Help key again;
click "Ok" in the displayed help information dialog box.
4. Get the help information of the menu key
Press Help, and the help information display window is displayed on the
screen. Then, press the menu key and the help inform ation of the
corresponding menu item is displayed.
5. Get the help information of any function key
Press Help, and the help information display window is displayed o n t h e
screen. Then, press any function key and the corresponding function help
information is displayed.
20 RSA5000 Quick Guide
Page 23

RIGOL
English
WARNING
fuse to be used conforms to the fuse rating.
Fuse Holder
Fuse
Fuse Replacement
If you need to replace the fuse, use only the specified fuse (AC 250 V, T3.15 A;
5.2 mm×20 mm) and perform the following operations:
1. Turn off the instrument, cut off the power, and remove the power cord.
2. Use a small straight slotted screwdriver to pry out the fuse holder.
3. Take out the fuse.
4. Replace the old fuse with a specified fuse.
5. Install the fuse holder.
Figure 8 Fuse Replacement
To avoid electric shock, please ensure that the instrument has
been turned off, the power source has been cut off, and the
RSA5000 Quick Guide 21
Page 24

RIGOL
English
Working Mode Setting
RSA5000 provides two working modes: GPSA (general purpose spectrum
analyzer) and RTSA (real-time spectrum analyzer ) . Press Mode to select the
working mode.
Note: In different working modes, the functions of the keys on the front panel
may be different. Press Help to display the help information of the current
working mode. If you need help information for other modes, exit the help
interface first. Then select the desired working mode and obtain the
corresponding help information.
1. GPSA
GPSA adopts two analysis methods: swept and FFT. GPSA can not only
carry out frequency domain analysis, but also time domain (zero span)
analysis.
Select GPSA. In this working mode, you can press Meas to select multiple
measurements..
2. RTSA
RTSA provides the real-time signal analysis function, which can capture
the complex signal seamlessly.
Select RTSA. In this working mode, you can also press Meas to select
multiple measurements.
You can also press Mode Setup to open the global parameter setting menu for
the selected working mode under Mode. If no working mode is currently
selected, when you power on the instrument, it selects GPSA mode by default.
22 RSA5000 Quick Guide
Page 25
RIGOL
English
Remote Control
RSA5000 can be connected to the PC via the USB or LAN interface to set up
communication and realize remote control through the PC. The remote control
can be realized by using SCPI (Standard Commands for Programmable
Instruments) commands. The RSA5000 series spectrum analyzer supports two
ways of remote control: user-defined pro gramm in g an d PC s oftware (e.g.
RIGOL Ultra Sigma).
When the instrument is in remote control, the keys (except the Power key
and Esc) on the front panel are locked. At this time, you can press Esc
to exit the remote mode.
More Product Information
Obtain the device information
Press System System Info to view the device information and the
installation status of all the options.
For more information about this instrument, refer to the relevant manuals by
logging in to the official website of RIGOL (www.rigol.com) to download them.
RSA5000 User's Guide
operation methods, remote control methods, possible failures and solutions in
using the instrument, the technical specifications, and order information.
RSA5000 Programming Guide
commands and programming instances of the instrument.
RSA5000 Datasheet
the instrument.
: introduces the functions of the instrument and the
: provides detailed descriptions of SCPI
: provides the main features and technical specifications of
RSA5000 Quick Guide 23
Page 26

 Loading...