

Page 1

RIGOL
Service Guide
DS1000E, DS1000D Series
Digital Oscilloscopes
DS1102E, DS1052E, DS1102D, DS1052D
May 2009
RIGOL Technologies, Inc.
Page 2

Page 3

RIGOL
I
Copyright
© 2009 RIGOL Technologies, Inc. All Rights Reserved.
Trademark Information
RIGOL is registered trademark of RIGOL Technologies, Inc.
Notices
RIGOL products are protected by patent law in and outside of P.R.C..
RIGOL Technologies, Inc. reserves the right to modify or change parts of or all the
specifications and pricing policies at company’s sole decision.
Information in this publication replaces all previously corresponding material.
RIGOL shall not be liable for losses caused by either incidental or consequential in
connection with the furnishing, use or performance of this manual as well as any
information contained.
Any part of this document is forbidden to copy or photocopy or rearrange without prior
written approval of RIGOL.
Service Guide for DS1000E, DS1000D Series
Page 4

RIGOL
II
Safety Notices
Review the following safety precautions carefully before operating the instrument to
avoid any personal injuries or damages to the instrument and any product connected
to it. To prevent potential hazards, do use the instrument specified by this user’s guide
only.
The instrument should be serviced by qualified personnel only.
To avoid instrument damage or personnel injury caused by misoperation, the
instrument should be serviced by qualified personnel only.
Use Proper Power Cord.
Use the power cord designed for the instrument and authorized in your country only.
Connect and Disconnect Accessories.
Do not connect or disconnect probes or test leads while they are connected to a
voltage source.
Ground The Instrument.
The oscilloscope is grounded through the grounding conductor of the power cord. To
avoid electric shock the instrument grounding conductor(s) must be grounded
properly. Before making connections to the input or output terminals of the
instrument.
Connect The Probe.
The probes’ ground terminals are at the same voltage level of the instrument ground.
Do not connect the ground terminals to a high voltage.
Observe All Terminal Ratings.
To avoid fire or shock hazard, observe all ratings and marks on the instrument. Follow
the user’s guide for further ratings information before making connections to the
instrument.
Do Not Operate Without Covers.
Do not operate the instrument with covers or panels removed.
Use Proper Fuse.
Use the fuse of the type, voltage and current ratings as specified for the instrument.
Avoid Circuit or Wire Exposure.
Do not touch exposed connections and components when power is on.
Do Not Operate With Suspected Failures.
If suspected damage occurs with the instrument, have it inspected by qualified service
personnel before further operations.
Service Guide for DS1000E, DS1000D Series
Page 5

RIGOL
III
Keep Well Ventilation.
Inadequately ventilated will cause the temperature rises or damages to the device.
Please keep well ventilation and inspect the intake and fan regularly.
Do not Operate in Wet/Damp Conditions.
In order to avoid short circuit to the interior of the device or electric shock, please do
not operate in a humid environment.
Do not Operate in an Explosive atmosphere.
In order to avoid damages to the device or personal injury, please operate far away
from an explosive atmosphere.
Keep Product Surfaces Clean and Dry.
In order to prevent the performance of the device from influencing by dust or water in
air, please keep the surface of device clean and dry.
The disturbance test of all the models meet the limit values of A in the
standard of EN 61326: 1997+A1+A2+A3, but can’t meet the limit values of
B.
Measurement Category
The DS1000E, DS1000D series Digital Oscilloscope is intended to be used for
measurements in Measurement Category I.
Measurement Category Definitions
Measurement Category I is for measurements performed on circuits not directly
connected to MAINS. Examples are measurements on circuits not derived from MAINS,
and specially protected (internal) MAINS derived circuits. In the latter case, transient
stresses are variable; for that reason, the transient withstand capability of the
equipment is made known to the user.
WARNING
IEC Measurement Category I, The input terminals may be connected to circuit
terminal in IEC Category I installations for voltages up to 300 VAC. To avoid the
danger of electric shock, do not connect the inputs to circuit’s voltages above 300 VAC.
Transient overvoltage is also present on circuits that are isolated from mains. The
DS1000E, DS1000D series Digital Oscilloscopes is designed to safely withstand
occasional transient overvoltage up to 1000Vpk. Do not use this equipment to
measure circuits where transient overvoltage could exceed this level.
Service Guide for DS1000E, DS1000D Series
Page 6
RIGOL
IV
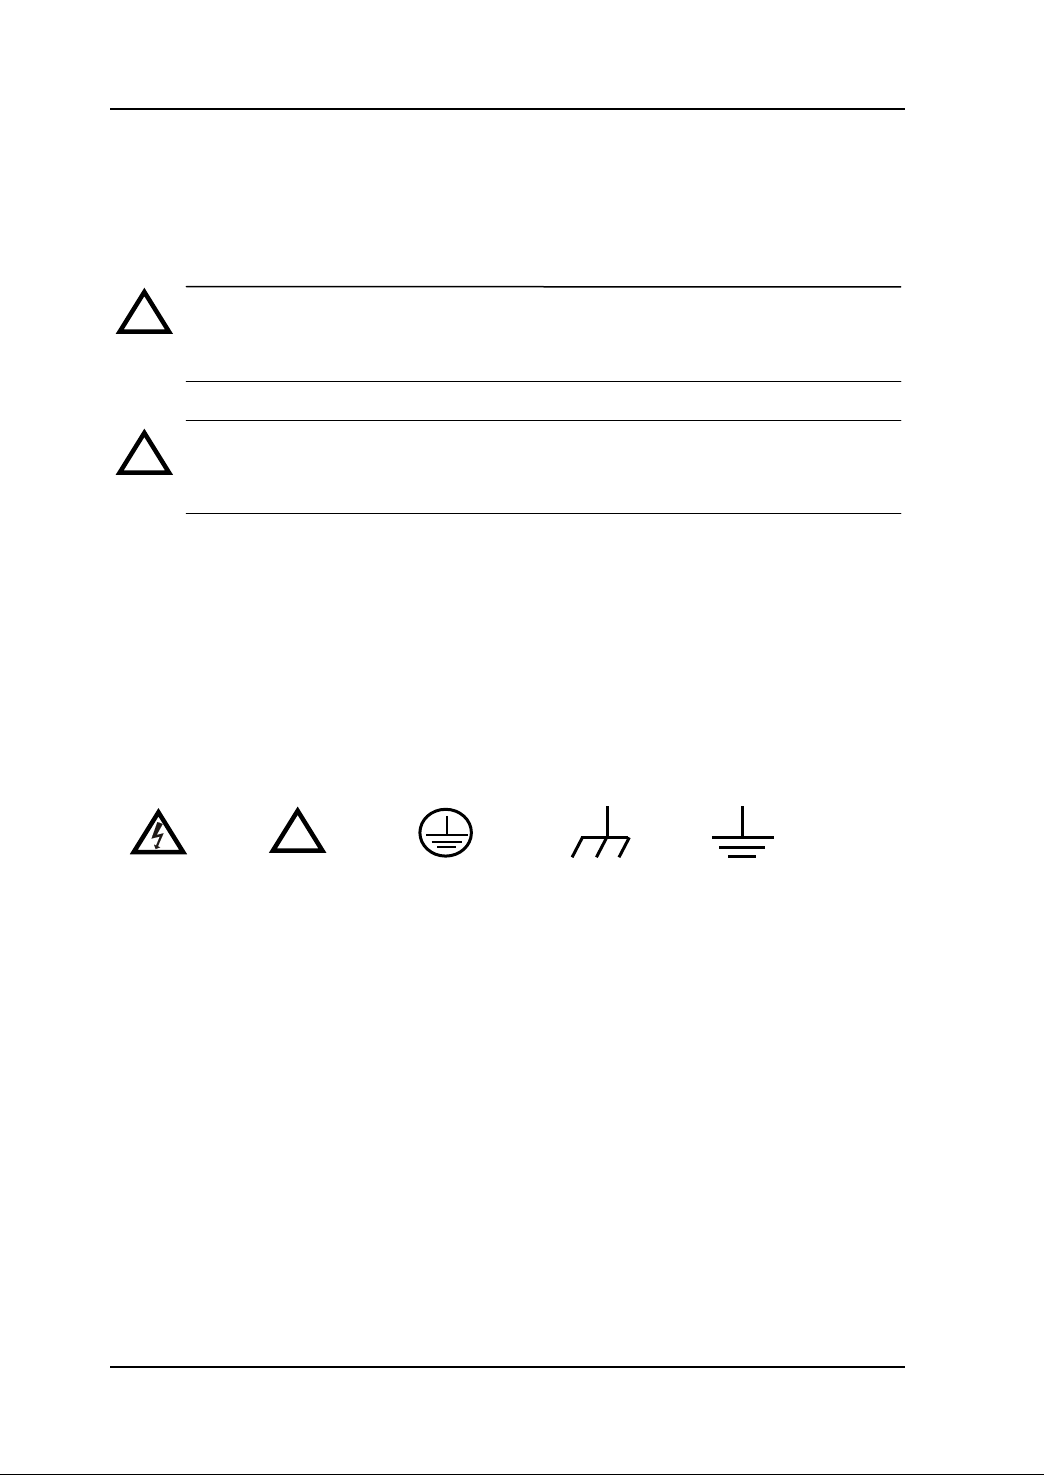
!
!
Protective
Earth
Terminal
Hazardous
Voltage
Refer to
Instructions
Test
Ground
Chassis
Ground
!
Safety Terms and Symbols
Terms in this Guide. These terms may appear in this manual:
WARNING
Warning statements indicate the conditions or practices that could result in
injury or loss of life.
CAUTION
Caution statements indicate the conditions or practices that could result in
damage to this product or other property.
Terms on the Product. These terms may appear on the product:
DANGER indicates an injury or hazard that may immediately happen.
WARNING indicates a potential injury or hazard that may happen.
CAUTION indicates that a potential damage to the instrument or other property
might occur.
Symbols on the Product. These symbols may appear on the product:
Service Guide for DS1000E, DS1000D Series
Page 7

RIGOL
V
Document Overview
Chapter 1 Specifications
List the specifications and general specifications of DS1000E, DS1000D series.
Chapter 2 Prepare for Use
Introduce the preparatory work should be done before using the oscilloscope.
Chapter 3 Performance Test
Introduce how to execute the performance test to understand current performance
status of the oscilloscope.
Chapter 4 Calibration
Introduce how to calibrate the oscilloscope.
Chapter 5 Disassembly and Assembly
Introduce how to disassemble and assemble the oscilloscope to understand its
structure.
Chapter 6 Troubleshooting
List the troubles may appear during measuring and the corresponding solutions.
Chapter 7 Replaceable Parts
List the replaceable parts for user’s repair or exchange.
Chapter 8 Service & Support
Provide the service and support information.
Service Guide for DS1000E, DS1000D Series
Page 8

RIGOL
VI
Contents
Safety Notices ............................................................................................. II
Safety Terms and Symbols ........................................................................... IV
Document Overview ..................................................................................... V
Contents .................................................................................................... VI
Figures .................................................................................................... VIII
Tables ........................................................................................................ IX
Chapter 1 Specifications ........................................................................ 1-1
Specifications ........................................................................................... 1-2
General Specifications ............................................................................... 1-5
Chapter 2 Prepare for Use ..................................................................... 2-1
General Inspection .................................................................................... 2-2
Power-On Inspection ................................................................................. 2-3
Connect the Probe .................................................................................... 2-4
Probe Compensation ................................................................................. 2-5
Digital Probe (Only for DS1000D Series) ..................................................... 2-7
Display a Waveform Automatically .............................................................. 2-9
Chapter 3 Performance Test .................................................................. 3-1
Interfaces Test .......................................................................................... 3-2
USB Host Interface Test ...................................................................... 3-2
USB Device Interface Test ................................................................... 3-4
RS-232 Interface Test ......................................................................... 3-6
P/F Interface Test ............................................................................... 3-8
Logic Analyzer Interface Test (Only for DS1000D Series) ....................... 3-9
Specifications Test .................................................................................. 3-11
Chapter 4 Calibration ............................................................................. 4-1
Chapter 5 Disassembly and Assembly ................................................... 5-1
Notices .................................................................................................... 5-2
Structure Chart ......................................................................................... 5-3
Disassemble and Assemble the Cover ......................................................... 5-4
Disassemble and Assemble the Upper and Rear Covers ............................... 5-5
Disassemble and Assemble the Power Board and the Fan ............................ 5-6
Disassemble and Assemble the Panel ......................................................... 5-8
Disassemble and Assemble LCD and the Keyboard ...................................... 5-9
Disassemble and Assemble the Mainboard ................................................ 5-10
Chapter 6 Troubleshooting .................................................................... 6-1
Chapter 7 Replaceable Parts .................................................................. 7-1
Chapter 8 Service & Support.................................................................. 8-1
Service Guide for DS1000E, DS1000D Series
Page 9

RIGOL
VII
Warranty .................................................................................................. 8-2
Care and Cleaning ..................................................................................... 8-3
Contact Us ................................................................................................ 8-4
Index ........................................................................................................... 1
Service Guide for DS1000E, DS1000D Series
Page 10

RIGOL
VIII
Figures
Figure 2-1 Connect the power cord ................................................................... 2-3
Figure 2-2 Power-on inspection ........................................................................ 2-3
Figure 2-3 Connect probe to oscilloscope .......................................................... 2-4
Figure 2-4 Connect probe to circuit ................................................................... 2-4
Figure 2-5 Set the probe attenuation quotient and switch ................................... 2-5
Figure 2-6 Connect the probe compensator ....................................................... 2-5
Figure 2-7 Waveform compensation .................................................................. 2-6
Figure 2-8 Connect the digital probes to oscilloscope ......................................... 2-7
Figure 2-9 Test clip of digital probe ................................................................... 2-7
Figure 2-10 Attach the clip to testing point ........................................................ 2-8
Figure 2-11 Connecting to the ground ............................................................... 2-8
Figure 3-1 Connect the U disk .......................................................................... 3-2
Figure 3-2 Successful prompt of USB interface connection .................................. 3-2
Figure 3-3 USB Device interface connection ....................................................... 3-4
Figure 3-4 Select USB interface ........................................................................ 3-4
Figure 3-5 Fail prompt of USB interface connection ............................................ 3-5
Figure 3-6 RS-232 interface connection ............................................................. 3-6
Figure 3-7 Select RS-232 interface .................................................................... 3-6
Figure 3-8 RS-232 interface setting ................................................................... 3-7
Figure 3-9 Fail prompt of RS-232 interface connection ........................................ 3-7
Figure 3-10 P/F interface connection ................................................................. 3-8
Figure 3-11 DS1000D LA interface connection ................................................... 3-9
Figure 3-12 Setting interface .......................................................................... 3-10
Figure 3-13 Edge trigger of digital channel ...................................................... 3-10
Figure 3-14 Connect the testing device ........................................................... 3-11
Figure 4-1 Self-Calibration interface .................................................................. 4-1
Figure 4-2 Finish Self-Calibration ...................................................................... 4-1
Figure 5-1 Stucture chart ................................................................................. 5-3
Figure 5-2 Disassemble and assemble the cover ................................................ 5-4
Figure 5-3 Disassemble and assemble the upper and rear covers ........................ 5-5
Figure 5-4 Disassemble and assemble the power board and the fan .................... 5-6
Figure 5-5 Disassemble and assemble the panel ................................................ 5-8
Figure 5-6 Disassemble and assemble LCD and the keyboard ............................. 5-9
Figure 5-7 Disassemble and assemble the mainboard ....................................... 5-10
Figure 7-1 DS1000E, DS1000D Exploded View ................................................... 7-1
Service Guide for DS1000E, DS1000D Series
Page 11

RIGOL
IX
Tables
Table 2-1 The auto items .................................................................................. 2-9
Table 3-1 Pass/Fail setting items........................................................................ 3-8
Table 3-2 Testing specifications and the ranges ................................................ 3-11
Table 7-1 Replaceable parts list ......................................................................... 7-1
Service Guide for DS1000E, DS1000D Series
Page 12

Page 13

Chapter 1 Specifications RIGOL
1-1
Chapter 1 Specifications
All specifications apply to DS1000E, DS1000D series Oscilloscopes unless noted
otherwise. To meet these specifications, two conditions must first be met:
The instrument must have been operating continuously for thirty minutes within
the specified operating temperature.
Do perform the “Self Cal” operation, accessible through the Utility menu, if the
operating temperature changes by more than 5°C.
NOTE: All specifications are guaranteed unless noted “typical”.
Service Guide for DS1000E, DS1000D Series
Page 14

RIGOL Chapter 1 Specifications
1-2
Acquisition
Sampling Modes
Real-Time
Equivalent
Sampling Rate
1GSa/s, 200MSa/s
[1]
DS1102X
DS1052X
25GSa/s
10GSa/s
Averages
N time acquisitions, all channels simultaneously, N is
selectable from 2, 4, 8, 16, 32, 64, 128 and 256.
Inputs
Input Coupling
DC, AC, GND
Input Impedance
1MΩ±2%
18pF± 3pF
Probe Attenuation Factors
1X, 5X, 10X, 50X, 100X, 500X,1000X
Maximum Input Voltage
400V (DC+AC Peak, 1MΩ input impedance)
40V (DC+AC Peak)
[1]
Time delay between channel
(typical)
500ps
Horizontal
Sample Rate
Range
Real-Time: 13.65Sa/s-1GSa/s
Equivalent: 13.65Sa/s-25GSa/s
Waveform
interpolation
Sin(x)/x
Record Length
Channel Mode
Sample rate
Record
Length
(normal)
Record
Length
(long record)
Single channel
1GSa/s
16kpts
N.A.
Single channel
500MSa/s
Or lower
16kpts
1Mpts
Double channel
500MSa/s
Or lower
8kpts
N.A.
Double channel
250MSa/s
Or lower
8kpts
512kpts
Scan speed Range
(Sec/div)
2ns/div~50s/div, DS1102X
5ns/div~50s/div, DS1052X
1-2-5 Sequence
Sample Rate and
Delay Time
Accuracy
± 50ppm (over any 1ms time interval)
Delta Time
Measurement
Accuracy
(Full Bandwidth)
Single-shot: ± (1 sample interval + 50ppm × reading + 0.6 ns)
>16 averages: ± (1sample interval + 50ppm × reading + 0.4
ns)
Vertical
Specifications
Service Guide for DS1000E, DS1000D Series
Page 15

Chapter 1 Specifications RIGOL
1-3
A/D converter
8-bit resolution, each channel samples simultaneously
[2]
Volts/div Range
2mV/div~10V/div at input BNC
Maximum Input
Analog channel maximum input voltage
CAT I 300Vrms, 1000Vpk; instantaneous voltage 1000Vpk
CAT II 100Vrms, 1000Vpk
RP2200 10:1: CAT II 300Vrms
RP3200 10:1: CAT II 300Vrms
RP3300 10:1: CAT II 300Vrms
Offset Range
± 40V(250mV/div~10V/div),± 2V(2mV/div~245mV/div)
Analog Bandwidth
100MHz (DS1102D,DS1102E)
50MHz (DS1052D, DS1052E)
Single-shot
Bandwidth
100MHz (DS1102D, DS1102E)
50MHz (DS1052D, DS1052E)
Selectable Analog
Bandwidth Limit
(typical)
20MHz
Lower Frequency
Limit (AC –3dB)
≤5Hz (at input BNC)
Rise Time at BNC,
typical
<3.5ns, <7ns,
On (100MHz, 50MHz) respectively
Dynamic range
± 5div
DC Gain Accuracy
2mV/div-5mV/div:
± 4% (Normal or Average acquisition mode)
10mV/div-10V/div:
± 3% (Normal or Average acquisition mode)
DC Measurement
Accuracy, Average
Acquisition Mode
Average of ≥16 Waveforms with vertical position at zero:
±(DC Gain Accuracy× reading+0.1div+1mV)
Average of ≥16 Waveforms with vertical position not at zero:
±[DC Gain Accuracy× (reading+vertical position)+(1% of
vertical position) + 0.2div]
Add 2mV for settings from 2mV/div to 245 mV/div
Add 50mV for settings from >250mV/div to 10V/div
Delta Volts
Measurement
Accuracy (Average
Acquisition Mode)
Delta Volts between any two averages of 16 waveforms
acquired under same setup and ambient
conditions: ± (DC Gain Accuracy× reading + 0.05 div)
Trigger
Trigger Sensitivity
0.1div~1.0div (adjustable)
Trigger Level Range
Internal
± 6 divisions from center of screen
EXT
± 1.2V
Trigger Level Accuracy
(typical) applicable for
the signal of rising and
falling time ≥20ns
Internal
± (0.3div × V/div)(± 4 divisions from center of
screen)
EXT
± (6% of setting + 200 mV)
Service Guide for DS1000E, DS1000D Series
Page 16
RIGOL Chapter 1 Specifications
1-4
Trigger Offset
Normal mode: pre-trigger (storage depth/ 2*sampling
rate), delayed trigger 1s
Slow Scan mode: pre-trigger 6div, delayed trigger 6div
Trigger Holdoff range
500ns~1.5s
Set Level to 50%
(Typical)
Input signal frequency ≥50Hz
Edge Trigger
Edge trigger slope
Rising, Falling, Rising + Falling
Pulse Trigger
Trigger condition
(>, <, =) Positive pulse, (>, <, =) negative pulse
Pulse Width range
20ns ~10s
Video Trigger
Video standard &
line frequency
Support standard NTSC, PAL and SECAM broadcast systems.
Line number range: 1~525 (NTSC) and 1~625 (PAL/SECAM)
Slope Trigger
Trigger condition
(>, <, =) Positive slope, (>, <, =) negative slope
Time setting
20ns~10s
Alternate Trigger
Trigger on CH1
Edge, Pulse, Video, Slope
Trigger on CH2
Edge, Pulse, Video, Slope
Pattern Trigger
[1]
Trigger mode
D0~D15 select H, L, X, ,
Duration Trigger
[1]
Trigger Type
D0~D15 select H, L, X
Qualifier
>, <, =
Time setup
20ns~10s
Measurements
Cursor
Manual
Voltage difference between cursors (∆V)
Time difference between cursors (∆T)
Reciprocal of ∆T in Hertz (1/∆T)
Track
Voltage value for Y-axis waveform
Time value for X-axis waveform
Auto
Cursors are visible for Automatic Measurement
Auto Measure
Vpp, Vamp, Vmax, Vmin, Vtop, Vbase, Vavg, Vrms, Overshoot,
Preshoot, Freq, Period, Rise Time, Fall Time, +Width, -Width,
+Duty, -Duty, Delay1→2 , Delay1→2
Remarks:
[1] For DS1000D series;
[2] When sampling is 1GSa/s, only single channel can be used.
Service Guide for DS1000E, DS1000D Series
Page 17

Chapter 1 Specifications RIGOL
1-5
Display
Display Type
5.7 in. (145 mm) diagonal TFT Liquid Crystal Display
Display Resolution
320 horizontal × RGB× 234 vertical pixels
Display Color
64k color
Display Contrast (typical)
150:1
Backlight
Brightness(typical)
300 nit
Probe Compensator Output
Output Voltage(typical)
Approximately 3Vpp (peak to peak value)
Frequency(typical)
1kHz
Power
Supply Voltage
100 ~ 240 VAC
RMS
, 45~440Hz, CAT II
Power Consumption
Less than 50W
Fuse
2A, T rating, 250 V
Environmental
Ambient Temperature
Operating 10℃~ 40℃
Non-operating -20℃~ +60℃
Cooling Method
Fan force air flow
Humidity
+35℃ or below: ≤90% relative humidity
+35℃~ +40℃: ≤60% relative humidity
Altitude
Operating 3,000 m or below
Non-operating 15,000 m or below
Mechanical
Size
Width
303mm
Height
154mm
Depth
133 mm
Heavy
Without package
2.3 kg
Packaged
3.5 kg
IP Protection
IP2X
Calibration Interval
The recommended calibration interval is one year
General Specifications
Service Guide for DS1000E, DS1000D Series
Page 18

Page 19

Chapter 2 Prepare for Use RIGOL
2-1
Chapter 2 Prepare for Use
This chapter contains the following topics:
General Inspection
Power-On Inspection
Connect the Probe
Probe Compensation
Digital Probe (Only for DS1000D Series)
Display a Waveform Automatically
Service Guide for DS1000E, DS1000D Series
Page 20

RIGOL Chapter 2 Prepare for Use
2-2
General Inspection
When you get a new DS1000E, DS1000D series oscilloscope, please inspect the
instrument according to the following steps:
1. Inspect the shipping container for damage.
Keep a damaged shipping container and cushioning material until the contents of
the shipment have been checked for completeness and the instrument has been
checked mechanically and electrically.
2. Inspect the instrument.
In case there is any mechanical damage or defect, or the instrument does not
operate properly or fails performance tests, please notify the RIGOL Sales
Representative.
If the shipping container is damaged, or the cushioning materials show signs of
stress, please notify the carrier as well as the RIGOL sales office. Keep the
shipping materials for the carrier’s inspection. RIGOL offices will arrange for
repair or replacement at RIGOL’s option without waiting for claim settlement.
3. Check the accessories.
Accessories supplied with the instrument are listed below. If the contents are
incomplete or damaged, please notify the RIGOL Sales Representative.
Standard Accessories:
Probe× 2 (1.5m), (1:1 or 10:1 adjustable) Passive Probes
The passive probes have a 6MHz bandwidth with a rating of 150V CAT II
when the switch is in the 1X position, and a Full oscilloscope bandwidth with
a rating of 300 V CAT II when the switch is in the 10X position.
A Power Cord that fits the standard of destination country
An USB Cable
A Logic Cable (only for DS1000D series)
An active logic head (only for DS1000D series)
20 Logic Testing Nips (only for DS1000D series)
20 Logic Testing Leads (only for DS1000D series)
A CD-ROM (including “User’s Guide” and Application Software)
A Quick Guide
Service Guide for DS1000E, DS1000D Series
Page 21

Chapter 2 Prepare for Use RIGOL
2-3
!
Storage button
Power button
Power-On Inspection
Generally, normal operating voltage and frequency for DS1000E, DS1000D series
digital oscilloscope are 100-240V
terminal of the power cord to the socket in left side of the oscilloscope and the other
to the AC power source.
and 45-440Hz respectively. Please connect one
RMS
Figure 2-1 Connect the power cord
Press the power button on top of the oscilloscope, some keys on the front panel will
light for about 2 seconds until the normal display appears. And then you can operate
the oscilloscope.
WARNING
To avoid the electric shock, make sure the oscilloscope is under good
grounding before connecting AC power.
After power-on, the oscilloscope performs all the self-testing automatically. Then,
press Storage and select Storage to recall the Factory settings after passing test (the
screen will appear).
Figure 2-2 Power-on inspection
Service Guide for DS1000E, DS1000D Series
Page 22

RIGOL Chapter 2 Prepare for Use
2-4
!
Connect the Probe
DS1000E series is a type of digital oscilloscope with dual channel inputs and one
external trigger input. While, DS1000D series is a type with dual channel input, one
external trigger input and sixteen channel digital inputs.
Please take the following steps to connect the probe:
1. Attach BNC connector of the probe to the channel input or external trigger
interfaces, insert it vertically until it latches into places. Then circumvolve the BNC
connector clockwise to get a firm connection.
Figure 2-3 Connect probe to oscilloscope
2. Connect the other end of probe to circuit under test.
Figure 2-4 Connect probe to circuit
3. Disconnect the circuit after testing, and then circumvolve the BNC connector of
probe anticlockwise, and pull it out of the interface vertically.
WARNING
When use 10:1 attenuation probe, don’t input a signal with higher than
maximum input voltage.
Service Guide for DS1000E, DS1000D Series
Page 23

Chapter 2 Prepare for Use RIGOL
2-5
Probe Attenuation Quotient
Probe Compensation
You are suggested to compensate probe before first using so as to match its
characteristics with oscilloscope. Measurement error may be generated without
compensation or because of deviation compensation. To compensate the probe,
follow the steps below.
1. Set both the attenuation switch of the probe and the probe scale in the menu to
10X.
Figure 2-5 Set the probe attenuation quotient and switch
2. Connect the probe to CH1. And attach both the probe tip and ground lead to the
connector of probe compensator.
Figure 2-6 Connect the probe compensator
3. Open CH1 and press AUTO button after a few seconds, a square wave will be
displayed (1 kHz, approximately 3 V peak- to- peak). Check if the compensation is
Service Guide for DS1000E, DS1000D Series
Page 24

RIGOL Chapter 2 Prepare for Use
2-6
!
correct in accordance with the shape of waveform.
Over compensation Correct Compensation Under Compensation
Figure 2-7 Waveform compensation
4. If necessary, use a non-metallic screwdriver to adjust the variable capacitor of the
probe until a “Correct Compensation” wave displayed on the screen.
5. Continue in the same way to check CH2.
WARNING
To avoid electric shock while using the probe, be sure the perfection of the
insulated cable, and do not touch the metallic portions of the probe head
while it is connected with a high-voltage power supply.
Service Guide for DS1000E, DS1000D Series
Page 25

Chapter 2 Prepare for Use RIGOL
2-7
Test clip
!
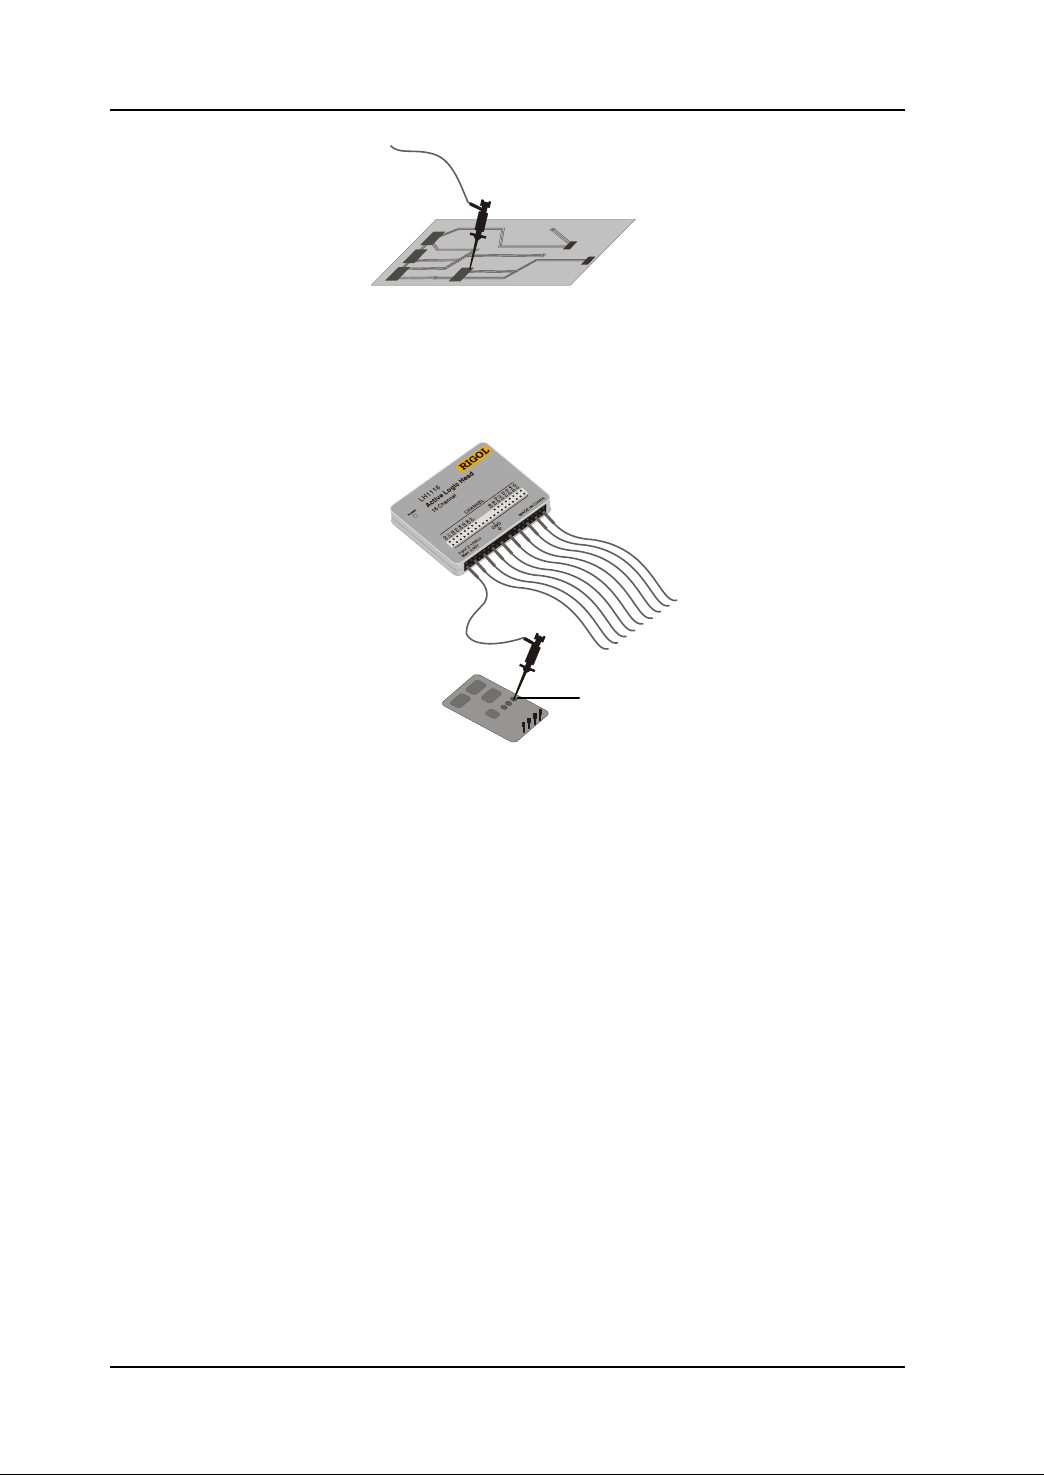
Digital Probe (Only for DS1000D Series)
DS1000D series provide sixteen digital channels. Take the steps below to connect
instrument and test points by digital probes:
1. Switch off power supply of the device under test if necessary to avoid short circuit.
Since no voltage is applied to the leads at this step, you may keep the
oscilloscope on.
2. Connect one terminal of the flat cable FC1868 to the Logic Analyzer Input;
connect the other end to Logic Head LH1116. An identifier is located on each end
of the flat cable; it can only be connected in one way. It is unnecessary to switch
off power supply of your oscilloscope when connecting the cable.
Figure 2-8 Connect the digital probes to oscilloscope
CAUTION
Use only FC1868, LH1116, TC1100 and LC1150 made by RIGOL for
specified DS1000D series.
3. Connect a test clip to one lead wire; make sure it’s connection good.
Figure 2-9 Test clip of digital probe
4. Test your device with the clip.
Service Guide for DS1000E, DS1000D Series
Page 26
RIGOL Chapter 2 Prepare for Use
2-8
Ground
Figure 2-10 Attach the clip to testing point
5. Connect the test clip to the ground.
Figure 2-11 Connect to the ground
Service Guide for DS1000E, DS1000D Series
Page 27
Chapter 2 Prepare for Use RIGOL
2-9
Functions
Settings
Display format
Y-T
Acquire mode
Normal
Vertical coupling
Adjust to AC or DC according to the
signal.
Vertical “V/div”
Adjust to right position
Volts/Div
Coarse
Bandwidth limit
Full
Signal Invert
OFF
Horizontal position
Center
Horizontal “S/div”
Adjust to right position
Trigger type
Edge
Trigger source
Find the channel with input signal
automatically.
Trigger coupling
DC
Trigger voltage
Midpoint setting
Trigger mode
Auto
knob
Trigger offset
Display a Waveform Automatically
DS1000E, DS1000D series digital oscilloscopes have an automatic feature to display
the input signal best-fit. The oscilloscope enables to automatically set up VERTICAL,
HORIZONTAL and TRIGGER parameters for the input signal under display. The input
signal should be 50Hz or higher of frequency and the duty cycle of which should
greater than 1%.
1. Operation steps
Connect a signal to input channel.
Press AUTO and adjust parameters manually to get the best display if necessary.
2. Auto settings
Table 2-1 The auto items
Service Guide for DS1000E, DS1000D Series
Page 28

Page 29

Chapter 3 Performance Test RIGOL
3-1
Chapter 3 Performance Test
This chapter contains the following topics:
Interfaces Test
USB Host Interface Test
USB Device Interface Test
RS-232 Interface Test
P/F Interface Test
Logic Analyzer Interface Test (Only for DS1000D Series)
Specifications Test
Service Guide for DS1000E, DS1000D Series
Page 30

RIGOL Chapter 3 Performance Test
3-2
Interfaces Test
USB Host Interface Test
Purpose:
Test if the USB Host interface works normally through U disc.
Tools:
A set of DS1000E, DS1000D series digital oscilloscope
An U disk
Steps:
1. Insert the U disk into the USB Host interface on the front panel of the
oscilloscope.
Figure 3-1 Connect the U disk
2. Wait until a prompt “USB device install success” appeared on the screen, which
indicates the USB Host interface works normally, otherwise, you need to check or
repair this interface.
Figure 3-2 Successful prompt of USB interface connection
Service Guide for DS1000E, DS1000D Series
Page 31

Chapter 3 Performance Test RIGOL
3-3
3. If an update program about the oscilloscope available in the U disc is detected, a
prompt will appeared to ask you whether to update or not; if select OK, the
corresponding update process will be shown on the screen.
4. Press Storage→External to copy or delete the information in U disc.
5. Remove the U disc and a corresponding prompt “USB device removed” will
appear.
Service Guide for DS1000E, DS1000D Series
Page 32

RIGOL Chapter 3 Performance Test
3-4
USB Device Interface Test
Purpose:
Test if the USB Device interface works normally through Ultrascope for DS1000E,
DS1000D series.
Tools:
A set of DS1000E, DS1000D series digital oscilloscope
A PC with USB interface
A standard USB cable (Type AB)
Ultrascope for DS1000E, DS1000D series
Steps:
1. Install the Ultrascope for DS1000E, DS1000D series software on the PC.
2. Connect the oscilloscope with PC using an USB cable, and install the driver
program step by step following the prompt.
Figure 3-3 USB Device interface connection
3. Run Ultrascope for DS1000E, DS1000D series, then click Tools→Options and
select USB as the current IO.
Figure 3-4 Select USB interface
Service Guide for DS1000E, DS1000D Series
Page 33

Chapter 3 Performance Test RIGOL
3-5
Hint
For the newest version of this software please go to www.rigolna.com download.
4. Click Tools → Connect to Oscilloscope; If successful, the corresponding
indicator at the upper right corner of the software will be changed from red to
blue; if failed, a prompting message will be appeared as below.
Figure 3-5 Fail to connection
Service Guide for DS1000E, DS1000D Series
Page 34

RIGOL Chapter 3 Performance Test
3-6
RS-232 Interface Test
Purpose:
Test if RS-232 interface works normally through Ultrascope for DS1000E, DS1000D
series.
Tools:
A set of DS1000E, DS1000D series digital oscilloscope
A PC with RS-232 interface
A standard RS-232 cable
Ultrascope for DS1000E, DS1000D series
Steps:
1. Install the Ultrascope for DS1000E, DS1000D series software on the PC.
2. Connect the oscilloscope with PC using an RS-232 cable.
Figure 3-6 RS-232 interface connection
3. Run Ultrascope for DS1000E, DS1000D Series, then click Tools→Options and
select RS-232 as the current IO.
Figure 3-7 Select RS-232 interface
Service Guide for DS1000E, DS1000D Series
Page 35

Chapter 3 Performance Test RIGOL
3-7
4. Click Communication Setting and setup the communication interface under
using and the baud rate.
Figure 3-8 RS-232 interface setting
5. Press Utility→I/O Setting and set the baud rate as the same value in Ultrascope.
6. Click Tools → Connect to Oscilloscope; If successful, the corresponding
reminder light at the upper right corner of the software will be changed from red
to blue; otherwise, a prompting message will be appeared as below.
Figure 3-9 Fail prompt of RS-232 interface connection
Service Guide for DS1000E, DS1000D Series
Page 36

RIGOL Chapter 3 Performance Test
3-8
Items
Setting
Enable Test
ON
Source
CH1
Msg display
ON
Output
Fail
Stop on Output
OFF
P/F Interface Test
Purpose:
Test if P/F interface work normally through RS5101 module.
Tools:
A set of DS1000E, DS1000D series digital oscilloscope
A BNC cable
A RD5101 module
Steps:
1. Power on the oscilloscope and RD5101 respectively.
2. Connect P/F interface on DS1000E, DS1000D with [Pass/Fail out] interface on
RD5101 by BNC cable.
Figure 3-10 P/F interface connection
3. Turn on the oscilloscope, press Storage → Storage → Factory to recall the
factory settings.
4. Press Utility→Pass/fail to enter the setting interface of Pass/Fail, see the table
below
Table 3-1 Pass/Fail setting items
5. After setting, press Operate to start Pass/Fail test.
6. Observe the reminder light of PASS/FAIL INDICATO of RRD5101; if the reminder
light twinkles at a frequency, which indicates that the interface works normally, if
no response to the lighter, errors might happened to the interface.
Service Guide for DS1000E, DS1000D Series
Page 37

Chapter 3 Performance Test RIGOL
3-9
DIGITAL OUTPUT
Interface
DG3000
DS1000D
17 Logic Testing Leads
Logic Cable
Logic Cable
LA Interface
Logic Analyzer Interface Test (Only for DS1000D Series)
Purpose:
Test if the Logic Analyzer (hereinafter referred to as LA) interface works normally
through the logic signal output module (DG-POD-A) of DG3000.
Tools:
A set of DS1000D series digital oscilloscope
A set of DG3000 Function/ Arbitrary waveform Generator
An active logic head
Two logic cables
17 logic testing leads
A DG-POD-A module
Steps:
1. Connect LA interface on DS1000D with the active logic head by logic cable.
2. Connect “DIGITAL OUTPUT” interface on the rear panel of DG3000 with
DG-POD-A module by logic cable.
3. Connect the active logic head with DG-POD-A module by logic testing leads, so as
to realize DS1000D and DG3000 connection.
Figure 3-11 DS1000D LA interface connection
4. Power on DS1000D and DG3000 respectively.
5. Turn on DG3000 and press Utility→Output Setup→Digit-Modu→Power on to
enable the digital module power on.
6. Press Arb→Edit Digital W, select Protocol→PO, Code Pat→ 32PRBS and adjust
Output Length as 16 Byte as follows, then press Arb button to output digital
signal.
Service Guide for DS1000E, DS1000D Series
Page 38

RIGOL Chapter 3 Performance Test
3-10
Figure 3-12 Setting interface
7. Press LA button on the oscilloscope, select D7-D0 and D15-D8 to open all the
logic channels.
8. Select EDGE mode under the trigger menu and select any one source among Do
to D15, if obtain the stable interface as follows, the LA module will be proved
works normally.
Figure 3-13 Edge trigger of digital channel
Service Guide for DS1000E, DS1000D Series
Page 39

Chapter 3 Performance Test RIGOL
3-11
Testing item
Returned value
Errors
Noise
Vpp:
CH1, CH2
0.0~0.65div
Input impedance
Input impedance:
CH1:100mV
500mV
CH2:100mV
500mV
1MΩ±2%, in parallel with
15pF± 3pF
1MΩ±2%, in parallel with
15pF± 3pF
PROBE (9500B accessories)
Fluke
9500B
GPIB
USB
Specifications Test
Purpose:
Test if all the specifications are in the specified range.
Requirement:
Verify whether the oscilloscope is qualified through FLUKE calibration instrument and
relative softwares.
Tools:
A set of DS1000E, DS1000D series oscilloscope
A set of FLUKE 9500B calibration instrument for oscilloscope and accessories to it
Auxiliary testing softwares
A computer with GPIB and USB interfaces
A GPIB cable
A standard USB cable (Type AB)
Three BNC terminals with 50Ω of resistance
Steps:
1. Connect the FLUKE oscilloscope with PC using a GPIB cable.
Figure 3-14 Connect the testing device
2. Connect the oscilloscope with PC using an USB cable.
3. Use the testing software to test the specifications listed in the table below. Check
if all the specifications are in the specified range.
Table 3-2 Testing specifications and the ranges
Service Guide for DS1000E, DS1000D Series
Page 40

RIGOL Chapter 3 Performance Test
3-12
1MΩ±2%, in parallel with
15pF± 3pF
1MΩ±2%, in parallel with
15pF± 3pF
Voltage accuracy
Relative error between the
average and the actual:
CH1, CH2
2mV, 5mV scale
>5mV scale
± 4%
± 3%
DC linearity
DC voltage error array:
CH1, CH2
200mV scale
5V scale
-2.60~2.60(mV)
-2.60~2.60(mV)
DC offset
Relative error of the voltage:
CH1, CH2, 5V scale
0~6%
Horizontal time
Accuracy
delta-t error
-5.00e-9~5.00e-9(s)
Trigger sensitivity
Trigger sensitivity error:
10MHz
Full bandwidth
0.1~1.0div
0.1~1.5div
Timebase linearity
Period error
0.0~5.0e-10(s)
Channel delay
Delay:
CH1, CH2
500ps
Trigger delay
Delay:
CH1, CH2
500ps
Service Guide for DS1000E, DS1000D Series
Page 41

Chapter 4 Calibration RIGOL
4-1
Chapter 4 Calibration
The oscilloscope can achieve the optimum state fleetly by performing the calibration
program and get accurate measurement. You can execute the calibration at any time.
But when the operating temperature changes up to or more than 5℃, you must
perform this programme.
NOTE:
The oscilloscope must have been working or warm-up at least 30-minutes before
running self-calibration to get best accuracy.
Steps:
1. Disconnect any probes or cables from all channel inputs, otherwise failure or
damage to the oscilloscope may occur.
2. Press Utility→Self-Cal, enter the Self-Calibration interface.
Figure 4-1 Self-Calibration interface
3. Press RUN/STOP to start the Self-Calibration, the oscilloscope will calibrate the
vertical system (CH1, CH2 and Ext), horizontal system and the trigger system
automatically to guarantee the specifications in different environment.
4. The screen will give a message of “Calibration finished” after finish the calibration
and you can press RUN/STOP to exit.
Figure 4-2 Finish Self-Calibration
Service Guide for DS1000E, DS1000D Series
Page 42

RIGOL Chapter 4 Calibration
4-2
Generally speaking, the Self-Calibration will take about 5-6 minutes, if the calibration
does not pass after this time, or the progress bar stop at one of the calibration item,
there may be a trouble to the instrument. To resolve the trouble, restart the
instrument and perform the Self-Calibration again, if the problem still remains, contact
RIGOL for help.
Service Guide for DS1000E, DS1000D Series
Page 43

Chapter 5 Disassembly and Assembly RIGOL
5-1
Chapter 5 Disassembly and Assembly
This chapter includes the following topics:
Notices
Structure Chart
Disassemble and Assemble the Cover
Disassemble and Assemble the Upper and Rear Cover
Disassemble and Assemble the Power Board and the Fan
Disassemble and Assemble the Panel
Disassemble and Assemble LCD and the Keyboard
Disassemble and Assemble the Mainboard
Service Guide for DS1000E, DS1000D Series
Page 44

RIGOL Chapter 5 Disassembly and Assembly
5-2
!
Notices
Notices:
Don’t disassemble the product except the work needed.
Disassemble only can be done by qualified person.
Cut the power before disassembling.
Take ESD glove under disassembling.
Use proper tools and follow the disassembly sequence.
Prevent metallic parts from transfiguration and avoid being scratched when
disassembling.
Required tools:
TORX drivers (T6, T10, T20)
BNC sleeve
WARNING
Before disassembling, please make sure the power has been cut off. The
operator should be trained or had related qualification.
Service Guide for DS1000E, DS1000D Series
Page 45

Chapter 5 Disassembly and Assembly RIGOL
5-3
Function
Buttons
Power Button
Multi-function Knob
Run Control
Vertical Control
Horizontal Control
Trigger Control
USB Host
Interface
Digital
Signal Input
Analog
Signal Input
External
Trigger Input
Handle
Structure Chart
Figure 5-1 Structure chart
Service Guide for DS1000E, DS1000D Series
Page 46

RIGOL Chapter 5 Disassembly and Assembly
5-4
①
Handle
Power Button
Foot Mat
Cover
①
②
②
Disassemble and Assemble the Cover
Figure 5-2 Disassemble and assemble the cover
Parts Explanations:
① Bolts on the bottom of the cover (M3*8 Pan head Torx recess Drilling tapping
screws): 2
② Bolts at the groove of the handle (M3*8 Pan head Torx recess machine screws): 2
Disassemble steps:
1. Backout both the two bolts ① and ② using a TORX driver (T10);
2. Jiggle the power button and pull the cap out from it;
3. Remove the cover at the power socket forcibly.
Assemble steps:
About assembly, please operate as reverse orders, the same below.
Service Guide for DS1000E, DS1000D Series
Page 47

Chapter 5 Disassembly and Assembly RIGOL
5-5
④
③
③
④
Panel
Tank Body
Upper Cover
Rear Cover
Disassemble and Assemble the Upper and Rear
Covers
Figure 5-3 Disassemble and assemble the upper and rear covers
Parts Explanations:
③ Bolts at the interface of RS-232 (DB9 interface bolts): 2
④ Bolts at the upper cover (M3*6 Pan head Torx recess composite machine screws):
2
Disassemble steps:
1. Backout the two bolts ③ and remove the rear cover;
2. Backout the two bolts ④ using a TORX driver (T10); Then, remove the upper
cover.
Service Guide for DS1000E, DS1000D Series
Page 48

RIGOL Chapter 5 Disassembly and Assembly
5-6
⑧
⑦
⑦
⑧
⑤ ⑥ ⑤
⑤
⑧
⑧
Power Board
Fan
Mainboard
Panel
Disassemble and Assemble the Power Board and
the Fan
Figure 5-4 Disassemble and assemble the power board and the fan
Parts Explanations:
⑤ Small bolts for fixing the power board (M3*6 Pan head Torx recess composite
machine screws): 3
⑥ Big bolts for fixing the power board (M4*8 Pan head Torx recess machine screws):
1
⑦ Bolts (M3*8 Pan head Torx recess Drilling tapping screws) and nuts (M3 hexagon
nut with locking plate) for linking up the power board and shell: 2 pairs
⑧ Bolts for fixing the fan (M5*8 Pan head Torx recess machine screws): 4
Disassemble steps:
1. Pull out the power line 12pin from the J2 interface of mainboard and the power
Service Guide for DS1000E, DS1000D Series
Page 49

Chapter 5 Disassembly and Assembly RIGOL
5-7
line 2pin for the screen as well as the power ground wire;
2. Back out both the three bolts ⑤ and the bolt ⑥ on the power board separately
using TORX driver T10 and T20;
3. Backout the two bolts and nuts ⑦ for linking up the power board and shell using
a TORX driver (T10) and remove the power board;
4. Pull out the line 12pin power to fan from the J5 interface of mainboard (locates
under the fan), and then backout the four bolts ⑧ using a TORX driver (T10) to
remove the fan.
Service Guide for DS1000E, DS1000D Series
Page 50

RIGOL Chapter 5 Disassembly and Assembly
5-8
⑨
⑨
⑨
⑩
⑩
⑨
⑪
⑪ ⑪ ⑪
⑪
Button, Knob
Panel
Tank Body
Disassemble and Assemble the Panel
Figure 5-5 Disassemble and assemble the panel
Parts Explanations:
⑨ Small knobs: 4
⑩ Big knobs: 2
⑪ Bolts for fixing board on the tank body (M3*8 Pan head Torx recess Drilling tapping
screws): 5
Disassemble steps:
1. Pull out the four small knobs ⑨ and two big knobs ⑩ (note do not damage the
board by something hard)
2. Backout the five bolts from the tank body using a TORX driver (T10) to remove
the board.
Service Guide for DS1000E, DS1000D Series
Page 51

Chapter 5 Disassembly and Assembly RIGOL
5-9
⑫
⑬
⑬ ⑬ ⑬
Keyboard
Rubber Button
Tank Body
LCD
Disassemble and Assemble LCD and the
Keyboard
Figure 5-6 Disassemble and assemble LCD and the keyboard
Parts Explanations:
⑫ Bolts for the screen ground wire (M2*4 Pan head Torx recess machine screws): 1
⑬ Bolts fixed on the keypad board (M3*6 Flush head Torx recess machine screws): 4
Disassemble steps:
1. Pull out the LCD wire from the J603 interface of the mainboard;
2. Backout the one bolt of the screen ground wire using a TORX driver (T6);
3. Take out the LCD screen gently (Be careful the screen cable and ground wire);
4. Backout the keypad board cable from the J604 interface of the mainboard;
5. Backout the four bolts ⑬ from the keypad board using a TORX driver (T10); the
moment of force is 6 NM;
6. Take out the keypad board gently (pay attention to the wire).
Service Guide for DS1000E, DS1000D Series
Page 52

RIGOL Chapter 5 Disassembly and Assembly
5-10
⑱ ⑲ ⑱
⑱ ⑲ ⑲ ⑳ ⑳
Cooling Plate
LA Board
Mainboard
BNC Nut
Tank Body
⑭
⑭
⑯ ⑯ ⑮
⑮
⑮
⑰
Disassemble and Assemble the Mainboard
Figure 5-7 Disassemble and assemble the mainboard
Parts Explanations:
⑭ Bolts on the LA board ((M3*6 Pan head Torx recess composite machine screws): 2
⑮ Bolts on the cooling plate (M3*6 Pan head Torx recess composite machine screws):
3
⑯ Bolts for fixing the mainboard (M3*6 Pan head Torx recess composite machine
screws): 2
⑰ Stud on the mainboard (M3*6 Copper pillar): 3
⑱ Nuts at BNC terminal (BNC nuts): 3
⑲ Spacer at BNC fracture (BNC lock spacer): 3
Service Guide for DS1000E, DS1000D Series
Page 53

Chapter 5 Disassembly and Assembly RIGOL
5-11
⑳ Bolts at LA terminal (0.1*0.3inch Hexagon Bolt in British system): 2
Disassemble steps:
1. Backout the two bolts ⑭ from LA board using a TORX driver (T10);
2. Backout the three bolts ⑮ from the cooling plate using a TORX driver (T10);
3. Backout the two mainboard bolts ⑯ using a TORX driver (T10), and backout the
three mainboard studs ⑰ using sleeve (D89); (Pay attention that one M3 spacer
is existed between LA board and stud whose position is next to the L808.)
4. Backout the three bolts ⑱ using sleeve, and remove the three spacers ⑲;
5. Backout the two bolts ⑳ at LA terminal using a TORX (T10);
6. Disconnect the earth card on the metal shell from the shore at the USB
interface of the mainboard using an electric iron. (Note: please set the
temperature of iron as 310℃)
7. Take out the mainboard gently after check.
Service Guide for DS1000E, DS1000D Series
Page 54

Page 55

Chapter 6 Troubleshooting RIGOL
6-1
Chapter 6 Troubleshooting
1. After the oscilloscopes is powered on, the screen remains dark (no
display):
(1) Check the power cable connection.
(2) Ensure the power switch has been turned on.
(3) After above inspection, restart the oscilloscope.
(4) If the problem still remains, please ask RIGOL for help.
2. After the signal acquisition the waveform does not appear:
(1) Check if the probe is connecting with the signals.
(2) Check if the probe is connecting to the channels firmly.
(3) Check if the probe is connecting with the object being tested.
(4) Check if any signal generated from testing point.
(5) Repeat the acquisition.
3. The measurement result is 10 times higher or lower than the value
expected.
Check if the probe attenuation corresponds with the channel attenuation.
4. If the oscilloscope does not get a stable waveform display:
(1) Check the Source and notice if it is set to the channel in use.
(2) Check the Mode. Use Edge for normal signals, and use Video for VIDEO
signals.
(3) Switch the Coupling into HF Rejection or LF Rejection in order to filter
the noise which disturbs trigger.
(4) Adjust the trigger Sensitivity and the Holdoff time.
5. After pressing RUN/STOP, the oscilloscope does not display any
waveform on screen.
Check whether the Sweep is set to Normal or Single and see whether the
trigger level is out of the signal range. If it is, set the trigger level in proper range
by turning the knob or pressing the 50% button. Or set the Mode as
AUTO. Moreover, push AUTO button to display the waveform on screen.
6. After the Acquisition was set to “Averages” or Display Persistence is set
ON, the waveform refreshes slowly.
Normal phenomenon.
7. The waveform is displayed on the appearance of ladder.
(1) Normal phenomenon. Maybe the time base setting maybe is too slow. Please
Service Guide for DS1000E, DS1000D Series
Page 56

RIGOL Chapter 6 Troubleshooting
6-2
rotate the horizontal knob to increase horizontal resolution to
improve the display.
(2) Maybe the display Type is set to Vectors set it to Dots mode to improve the
display.
Service Guide for DS1000E, DS1000D Series
Page 57

Chapter 7 Replaceable Parts RIGOL
7-1
No.
Name
Specification
1
Big Knob
2 Small Knob
3
Panel
Chapter 7 Replaceable Parts
RIGOL provides some replaceable parts in order to maintain or update for users.
Please see as the following figure and table. Note that the numbers in the figure and
the table are associated with each other.
Figure 7-1 DS1000E, DS1000D Exploded View
Table 7-1 Replaceable parts list
Service Guide for DS1000E, DS1000D Series
Page 58
RIGOL Chapter 7 Replaceable Parts
7-2
4
LCD
Color Screen: FG050600ANNNA-01
5
Metallic Tank Body
6 Rubber Button
7 BNC Nut
BNC Nut
8
BNC Lock Spacer
BNC Lock Spacer
9
Encoder
10
Keyboard
11
Bolt
0.1*0.3inch Hexagon Bolt, British
system
12
Fan
AFB0612LC-714
13
Large Terminal
14
Small Terminal
15
BNC
16
Cooling Plate
Aluminum
17
LA Board
18
LA Interface
19
RS-232 Interface
20
Power Jacket
21
USB Host Interface
22
Mainboard
RDSB1003
23
USB Device Interface
24
Power Switch Cap
25
Upper Metallic Cover
26
Power Interface
27
Power Supply
28
Power Board
RDSB1001
29
Rear Metallic Cover
30
Female ScrewLock
M3*7/ DB9 bolt, British system
31
Front Trestle
32
Rear Trestle
33
Handle
34
Cover
Service Guide for DS1000E, DS1000D Series
Page 59

Chapter 8 Service & Support RIGOL
8-1
Chapter 8 Service & Support
This chapter contains the following topics:
Warranty
Care and Cleaning
Contact Us
Service Guide for DS1000E, DS1000D Series
Page 60

RIGOL Chapter 8 Service & Support
8-2
Warranty
RIGOL warrants that its products mainframe and accessories will be free from
defects in materials and workmanship within the warranty period. If a product proves
defective within the respective period, RIGOL guarantees the free replacement or
repair of products which are approved defective.
To get repair service or obtain a copy of the whole warranty statement, please contact
with your nearest RIGOL sales and service office.
RIGOL does not provide any other warranty items except the one being provided by
this summary and the warranty statement. The warranty items include but not being
subjected to the hint guarantee items related to tradable characteristic and any
particular purpose.
RIGOL will not take any responsibility in cases regarding to indirect, particular and
ensuing damage.
Service Guide for DS1000E, DS1000D Series
Page 61

Chapter 8 Service & Support RIGOL
8-3
!
Care and Cleaning
General Maintenance
Do not store or leave the instrument in where the instrument will be exposed to direct
sunlight for long periods of time.
Caution
To avoid damages to the instrument or probes, do not expose them to liquids which
have causticity.
Cleaning
Clean the instrument and probes often based on its operating conditions require. To
clean the exterior surface, perform the following steps:
1. Disconnect the instrument from all power sources.
2. Clean the loose dust on the outside of the instrument and probes with a lint- free
cloth (with a mild detergent and water). When clean the LCD, take care to avoid
scarifying it.
WARNING
To avoid injury resulting from short circuit, make sure the instrument is
completely dry before reconnecting into a power source.
Service Guide for DS1000E, DS1000D Series
Page 62

RIGOL Chapter 8 Service & Support
8-4
Contact Us
If you have any problem or requirement during using our products, please contact
RIGOL Technologies, Inc. or the local distributors.
Domestic: Please call
Tel: (86-10) 8070 6688
Fax: (86-10) 8070 5070
Service & Support Hotline: 800 810 0002
9:00 am –5: 00 pm from Monday to Friday
Or by e-mail:
service@rigol.com
Or mail to:
RIGOL Technologies, Inc.
156# CaiHe Village, ShaHe Town, ChangPing District, Beijing, China
Post Code: 102206
Overseas: Contact the local RIGOL distributors or sales office.
For the latest product information and service, visit our website: www.rigolna.com
Service Guide for DS1000E, DS1000D Series
Page 63

Index RIGOL
1
Index
Acquisition ................................... 1-2
Big Knob ..................................... 7-1
BNC ............................................ 7-2
BNC Lock Spacer .......................... 7-2
BNC Nut ...................................... 7-2
Bolt ............................................. 7-2
Calibration ................................... 4-1
Calibration Interval ....................... 1-5
Care and Cleaning ........................ 8-3
Cleaning ...................................... 8-3
Connect the Probes ...................... 2-4
Contact Us .................................. 8-4
Cooling Plate ............................... 7-2
Cover ................................... 5-4, 7-2
Digital Probes ....................... 2-1, 2-7
Disassembly and Assembly ........... 5-1
Display ........................................ 1-5
Display a Waveform Automatically . 2-9
Encoder ...................................... 7-2
Environmental ............................. 1-5
Exploded View ............................. 7-1
Fan ............................................. 7-2
Front trestle ................................ 7-2
General Inspection ....................... 2-2
General Specifications .................. 1-5
Handle ........................................ 7-2
Horizontal .................................... 1-2
Inputs ......................................... 1-2
IP Degree .................................... 1-5
Keyboard..................................... 7-2
LA board ..................................... 7-2
LA interface ................................. 7-2
Large Terminal ............................ 7-2
LCD ............................................ 7-2
LCD and the Keyboard .................. 5-9
Logic Analyzer Interface ........ 3-1, 3-9
Mainboard .......................... 5-10, 7-2
Measurements ............................. 1-4
Mechanical ................................... 1-5
Metallic Case ................................ 7-2
Metallic Rear Cover ....................... 7-2
P/F Interface ......................... 3-1, 3-8
Panel .................................... 5-8, 7-1
Performance Test ......................... 3-1
Power .......................................... 1-5
Power Board ................................ 7-2
Power Board and the Fan .............. 5-6
Power interface ............................ 7-2
Power Jacket ............................... 7-2
Power Supply ............................... 7-2
Power-On Inspection .................... 2-3
Prepare for Use ............................ 2-1
Probe Compensator ...................... 1-5
Probes Compensation ................... 2-5
Rear trestle .................................. 7-2
Replaceable Parts ......................... 7-1
RS-232 Interface ................... 3-1, 3-6
Rubber Button ............................. 7-2
Small Knob .................................. 7-1
Small Terminal ............................. 7-2
Specifications ............................... 1-1
Specifications Test ...................... 3-11
Structure Chart ............................ 5-3
Trigger ........................................ 1-3
Troubleshooting ........................... 6-1
Upper and Rear Covers ................. 5-5
Upper Metallic Cover ..................... 7-2
USB Device Interface ............. 3-1, 3-4
USB Host Interface ................ 3-1, 3-2
Vertical ........................................ 1-2
Warranty ..................................... 8-2
Service Guide for DS1000E, DS1000D Series
 Loading...