

SMOOTHING IRON
Model :KB-819 Catena
Designed in Germany, Made in P.R.C.
INSTRUCTION MANUAL
PLEASE SAVE THESE INSTRUCTIONS
Important safeguards
When using your iron, basic safety precautions should always be followed , including the
following:
Read all instructions before using
1. Use the iron only for its intended use.
2. To protect against the risk of electric shock, do not immerse the iron in water or other liquids.
3. The iron should always be turned to “min” before plugging or unplugging from the mains
outlet. Never pull the cord to disconnect from the mains: instead, grasp plug and pull to
disconnect.
4. Do not allow the cord to touch hot surfaces. Allow the iron to cool completely before putting
away.
5. Always disconnect the iron from the electrical outlet when lling with water or emptying and
when not in use
6. Do not operate the iron with a damaged cord or if the iron has been dropped or damaged. To
avoid the risk of electric shock, do not disassemble the iron .take it to a qualied service agent
for examination and repair. Incorrect re-assembly, can cause a risk of electric shock when the
iron is used.
7. Close supervision is necessary for any appliance being used by or near children. Do not
leave the iron unattended when connected to the mains or on an ironing board.
8. Burns can occur from torching hot metal parts, hot water or steam, use caution when you turn
a steam iron upside down-there may be hot water in the reservoir.
9. If the iron is not operating normally ,disconnect from the power supply. And contact the
nearest authorized service agent.
10. Your iron is designed to rest on the heel. Do not leave the iron unattended when switched
on. Do not place the iron on an unprotected surface even if it is on its heel rest.
11. Caution, hot surface
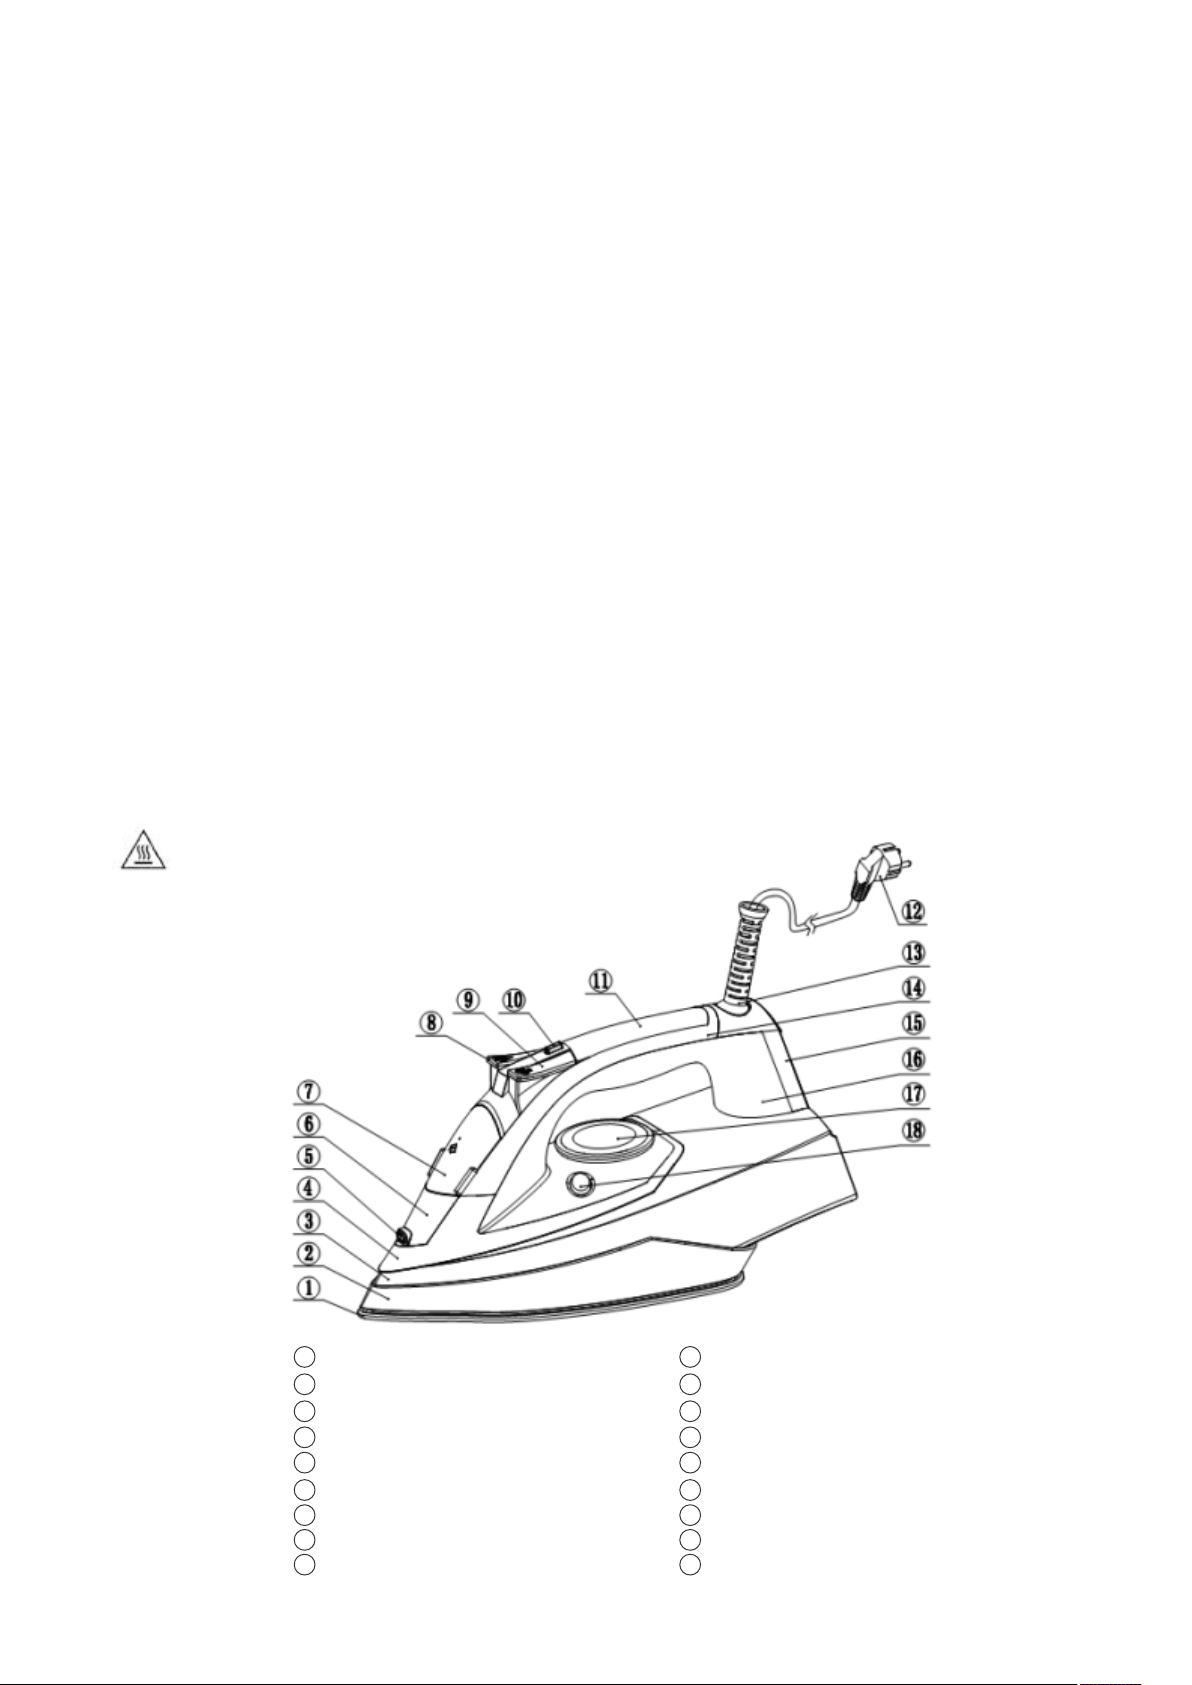
Know your steam/spray/dry iron
1 10
Soleplate
2
Skirt
3
Watertank
Ornament ring
4 13
5
Spray nozzle
Front cover
6 15
Water inlet lid
7 16
8 17
Spray button
9 18
Shot of steam buttom
Key
Transparent lamp cover
11
Power cord
12
Cord guard
Handle
14
Rear cover
Housing
Temperature knob
Slefcean knob
Safety recommendations and precautions
Important precautions
To make good use of your appliance , please read these instructions carefully and look at the
illustrations before using it.
1. Check that the voltage on the product rating plate coincides with your mains voltage.
2. The iron shall not be used if there are visible signs of damage or if the iron in leaking .The
iron shall be sent to the manufacturer or his qualied service agent before further use.
3.Completely unwind the mains cable.
4.Always unplug the iron when not in use ,even if only for a short period of time.
Unplug it from the mains and leave it standing on its rear base.
5.make sure that children can not touch the hot iron and that they can not pull on the mains
wire.
6.Always unplug the iron before lling the water or when removing the excess water form it.
7.Never submerge the iron in water.
8. The iron shall be used on a stable ironing board.
9. The iron must be used and rested on a stable surface.
10.When placing the iron on its stand, ensure that the surface on which the stand is placed is
stable.
If the supply cord is damaged, it must be replaced by the manufacturer, its service agent or
similarly qualied persons in order to avoid a hazard.
This appliance can be used by children aged from 8 years and above and persons with reduced
physical,sensory or mental capabilities or lack of experience and knowledge if they have been
given supervision or instruction concerning use of the appliance in a safe way and understand
the hazards involved. Children shall not play with the appliance.
Cleaning and user maintenance shall not be made by children without supervision.
- the iron must not be left unattended while it is connected to the supply mains;
- the plug must be removed from the socket-outlet before the water reservoir is lled with water;
- the iron must be used and rested on a stable surface;
- when placing the iron on its stand, ensure that the surface on which the stand is placed is
stable;

- the iron is not to be used if it has been dropped, if there are visible signs of damage or if it is
leaking;
- keep the iron and its cord out of reach of children less than 8 years of age when it is energized
or cooling down.
Special instructions
1. Model:
KB-819E1 Mains Supply: 220V-240V~50/60Hz Rated Power:2750W~3250 W
KB-819E2 Mains Supply: 220V-240V~50/60Hz Rated Power:2550W~3050 W
KB-819E3 Mains Supply: 220V-240V~50/60Hz Rated Power:2450W~2950 W
KB-819E4 Mains Supply: 220V-240V~50/60Hz Rated Power:2350W~2850 W
KB-819E5 Mains Supply: 220V-240V~50/60Hz Rated Power:2200W~2600 W
KB-819E6 Mains Supply: 220V-240V~50/60Hz Rated Power:2000W~2400 W
KB-819E7 Mains Supply: 220V-240V~50/60Hz Rated Power:1800W~2200 W
KB-819BE3 Mains Supply: 220V-240V~50/60Hz Rated Power:2450W~2950 W
KB-819BE4 Mains Supply: 220V-240V~50/60Hz Rated Power:2350W~2850 W
KB-819BE5 Mains Supply: 220V-240V~50/60Hz Rated Power:2200W~2600 W
KB-819BE6 Mains Supply: 220V-240V~50/60Hz Rated Power:2000W~2400 W
KB-819BE7 Mains Supply: 220V-240V~50/60Hz Rated Power:1800W~2200 W
2.To avoid overloads , do not plug any other high-power appliance into the same electricity line.
Suggestions before using the iron for the rst time
1. Certain parts of the iron have been lightly greased therefore the iron could give off a little
smoke when plugged in for the rst time. This will cease after a short while.
2.Before using the iron for the rst time , remove the plastic protector from the base(if it has one)
clean the base with a soft cloth.
3. Keep the base very smooth. Do not run it over metal objects (such as against the ironing
board, buttons , zips ,etc.)
4. Pure wool bres (100% wool)can be ironed with the appliance in the steam position .by
preference ,select a high steam position and use a dry ironing cloth.
Selecting the temperature
1.Check the ironing instructions on the garment to be ironed.
2.If the garment does not have any ironing instructions but you know the kind of fabric in
question, use the chart below.
3. Fabrics that have some kind of nish(polishing . wrinkles , contrasts….)can be ironed at the
lowest temperatures.
4.If the fabric contains several kinds of bres ,always select the temperature applicable ,if an
article contains 60% polyester and 40% cotton ,you must always choose the temperature
corresponding to polyester and without steam.
5. First classify the articles to be ironed according to the most suitable ironing temperature : wool
with wool, cotton with cotton, etc. as the iron heats up as fast as it cools , start by ironing the
articles requiring the lowest temperature such as those made of synthetic bres . Progress
towards those that require the highest temperatures.
6.Turn the temperature control until it is in front of the appropriate signal according to the
following:
· position for nylon and acetate
·· position for wool ,silk or mixures
··· position for cotton or linen (steam).
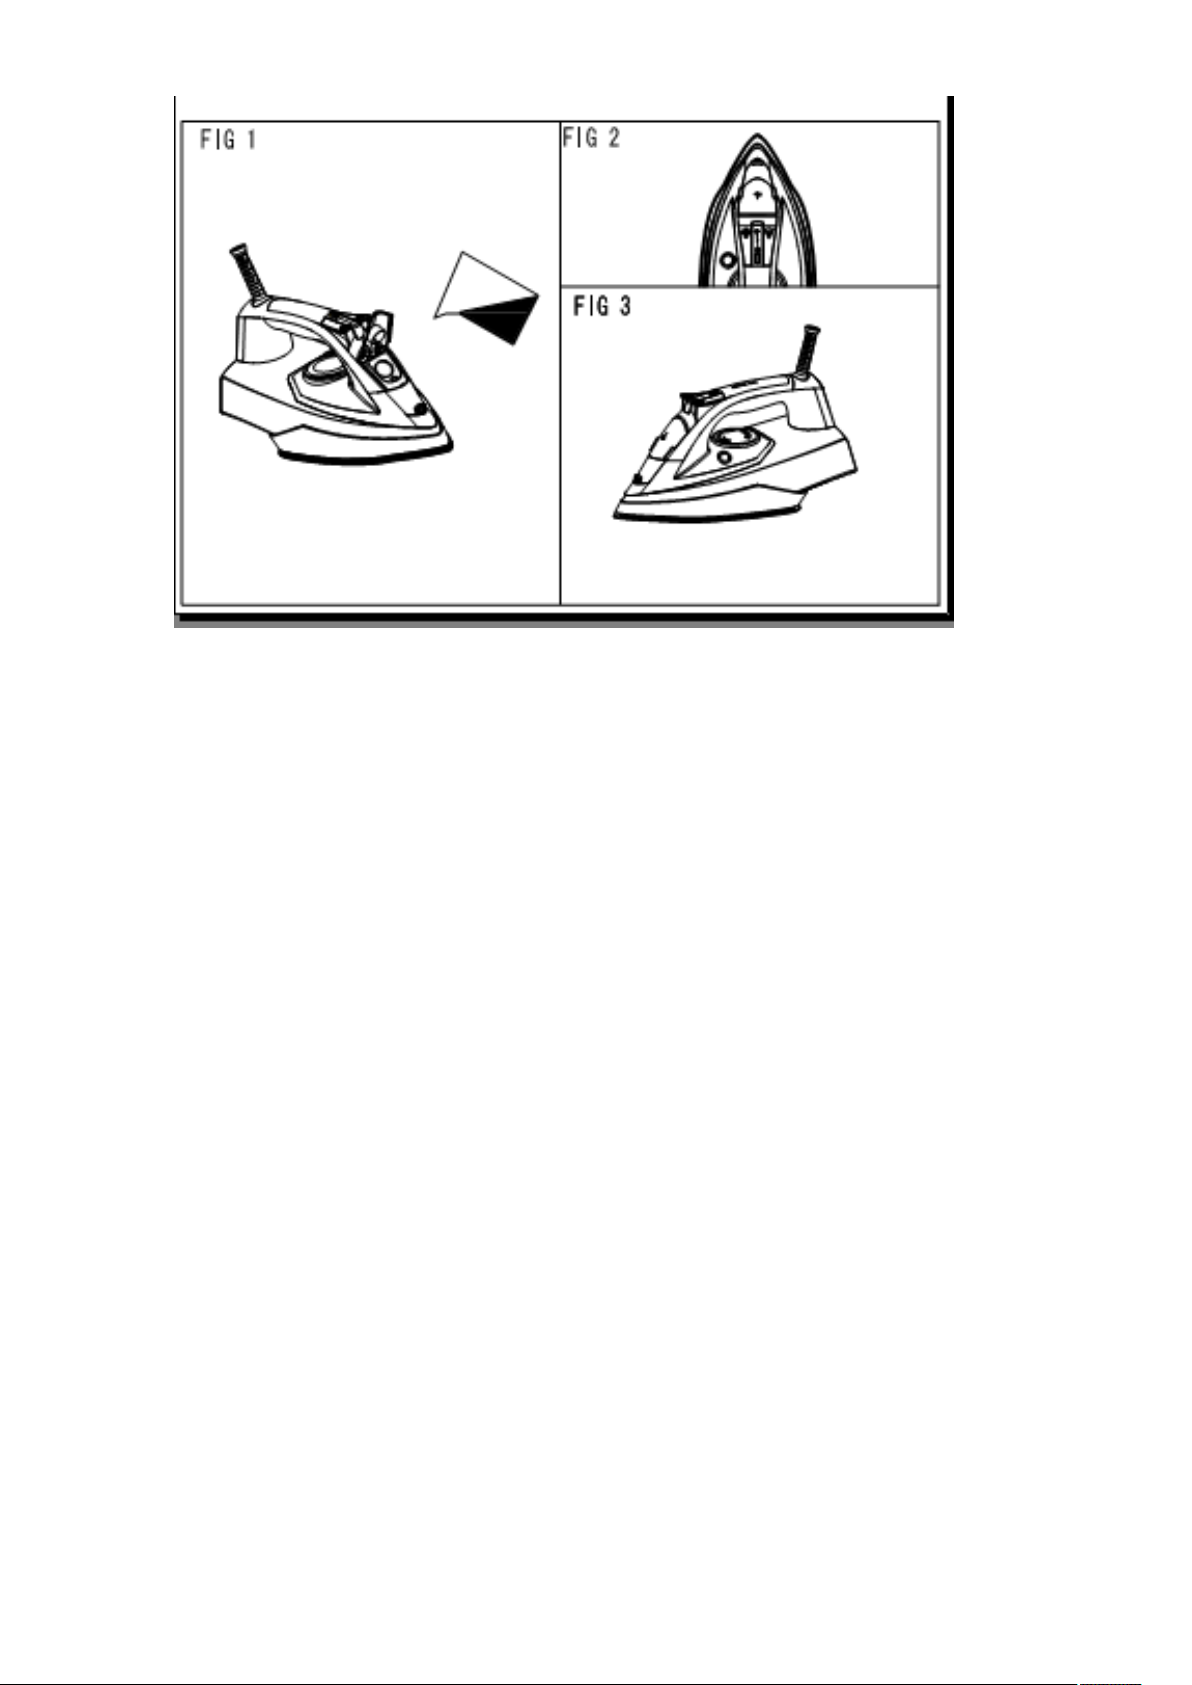
How to ll the water tank.
1.Unplug the iron.
2.Open the iron water inlet lid .(g.1)
3.Fill the tank through the lling hole.(g.1)
-If you have hard water ,it is advisable to use only distilled or demineralized water.
-do not use chemically de-limed water or perfumed
4.Do not store the iron with water in the tank.
Steam ironing
1.Fill the iron as described in the section “how to ll the water tank”.
2. Plug the iron into the mains.
3.Steam ironing is only possible when the highest temperatures shown on the temperature
control are selected .
4. Wait until the green light goes out , which indicates that the selected temperature has been
reached.
>Your iron is equipped with a steam setting selection key and with indicator lamps showing the
steam setting.
> When the temperature of the soleplate are not in a certain temperature, steam indicator light
blue lights ashing, the bottom not out of steam, when steam indicator light blue light remains
on, holding the iron can out of steam.
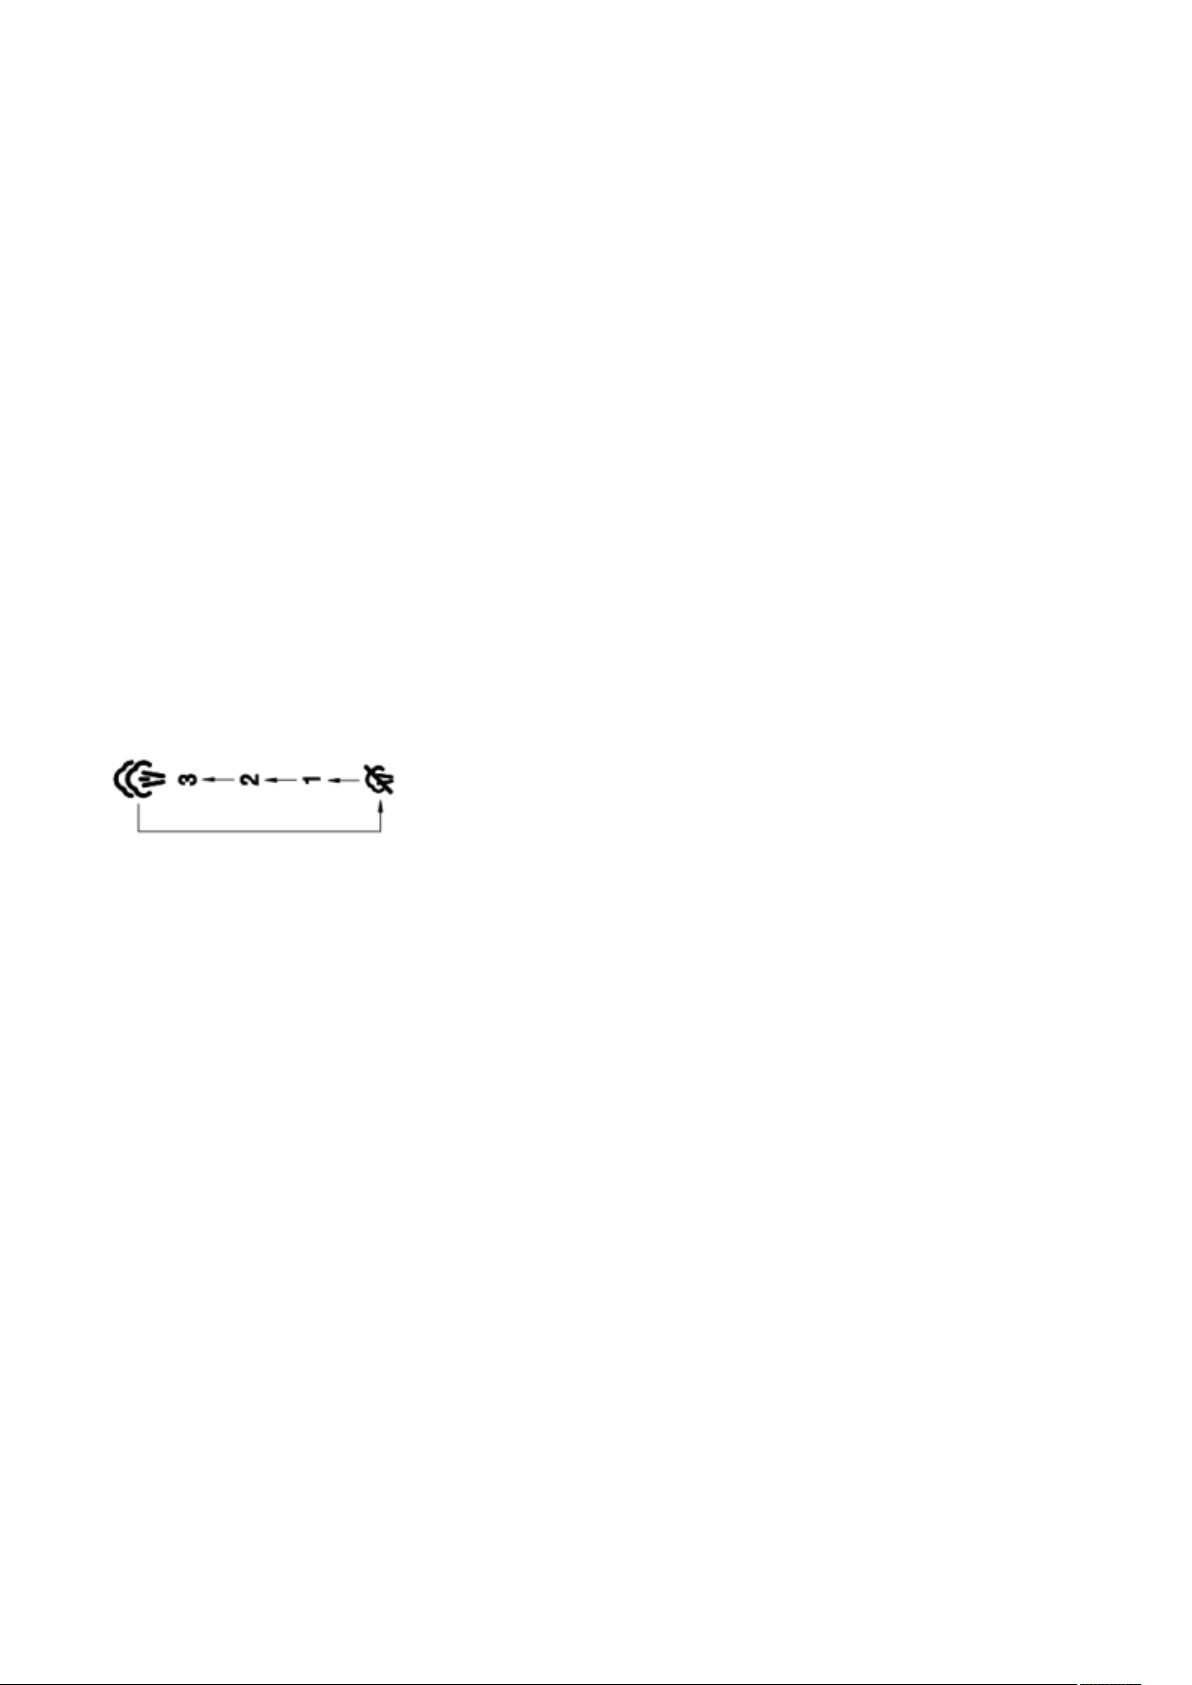
5.Turn the steam setting selection key to the required position. (g.2)
>The steam setting can be chang by pressing the steam setting selection key. The iron runs
through the following cycle:
6.When the ironing is nished and during breaks in ironing , place the iron in its upright position.
7.Disconnect the iron from the mains supply . Pour of any remaining water and leave the iron to
cool off.
“Sensor Steam”function
! The “Sensor Steam”function switches off the iron when the handle is no longer gripped, thus
increasing safety and saving energy.
1,Initial heating up process:After plugging in the appliance,this function will be inactive until the
iron heats up to the set temperature.
2,After the initial heating up period,the “Steam indicator light” blue lights inside the transparent
lamp cover stop ashing.
3, From this moment on, When the handle of the iron is gripped, the “Sensor Steam” function
switches on.
4, Immediately after releasing the handle of the iron, the “Sensor Steam”function indicating that
the iron is about to switch itself off.
5,When the handle is gripped again,the iron will automatically switch itself back on and will start
heating up again.
If the iron is left unattended for more than thirty seconds (vertical) or eight minutes(horizontal),
the red lights will be on ,once the handle is momentarily or continuously gripped again, the initial
heating up process will start again.

Spray
1.The spray can be used in any position, either in dry or steam ironing, as long as the water tank
is lled with water.
2.Press the spray button for this function
NOTE : This button has to be pressed repetitively to start this function for the rst time.
Shot of steam
Shot of steam give extra steam for removing persistent wrinkles.
1.Place the temperature selector at the “max”(g.3)position and wait until the pilot light goes out
2.Wait for a few seconds for the steam to penetrate the bre before pressing again.
NOTE : For the best steam quality, do not use more than three successive bursts each time.
Several pumping actions are needed to start this function.
Excessive use of this feature will cause the iron to cool , ensure that the pilot light is out, before
operating the shot of steam control
Defects and repairs
Do not attempt to replace a defective mains lead .The appliance has to be returned to an
authorized service centre for repair.
Faults-reasons and solutions
Iron emits an odor or smoke
Iron gives off an odor when turned on for the rst time. Oils used during manufacture need to be
burnt off allow ten minutes for odor to disappear.
Iron does not heat
The iron should be plugged into a 230 Volt , AC electrical outlet only. The temperature dial must
be set at the desired temperature.
Iron does not steam
The water tank many be empty. add water .Allow the iron to heat, and then set the steam key to
the steam setting.
Burst of steam feature does not work
The water tank must be at least 1/4 full .Temperature must be set to steam position. Iron should
be in the horizontal position. Prime pump briey. Allow a short pause between shots. Be sure to
fully depress the burst of steam button.
Spry mist feature does not work
The water tank must be at least 1/4 full. Fill the iron as described in the section “how to ll the
water tank”.
Iron is leaking
The variable steam dial must be set on” “,until the iron is hot . The temperature setting is too low
to produce steam. Shot of steam used too much, allow iron to re-heat.
 Loading...