


Chapter
1
GETTING STARTED
Before Using the Camera ..................................... 20
Attaching the Wrist Strap ............................................. 20
Attaching the Lens Cap ............................................... 20
Powering the Camera ........................................... 21
Charging the Battery .................................................... 21
Loading the Battery ..................................................... 22
Connecting an AC Adapter .......................................... 25
SmartMedia Memory Cards ................................. 26
What is a SmartMedia Memory Card? ........................ 26
Inserting a SmartMedia Memory Card ........................ 27
Turning the Camera On and Off ........................... 30
How to Use the Mode Dial .................................... 31
Explanation of Information Displays ..................... 32
Shooting Mode Display ................................................ 32
Playback Mode Display ................................................ 33
Menus ................................................................... 34
Setting the Date and Time .................................... 37
How to Hold the Camera ...................................... 40
Adjusting the Camera ........................................... 42
Diopter Adjustment ...................................................... 42
Adjusting the Brightness of the LCD Monitor ............... 42

20
Before Using the Camera
Important
Note
• Do not swing the camera
around by its strap.
Attach the wrist strap and lens cap before using the
camera.
Attaching the Wrist Strap
1
Pass the small loop of the wrist strap
through the wrist strap eyelet and pass the
other end through the loop as illustrated.
Attaching the Lens Cap
1
Attach the lens cap by pressing the
buttons in the direction of the arrow.
Remove the lens cap by gripping and pressing the
buttons.
Note
• Attach the lens cap to the
wrist strap to prevent it from
being lost.

21
Getting Started
1
This section explains how to load and charge the
battery, and how to connect the AC adapter to power
the camera from a household electrical outlet.
Charging the Battery
When using the camera for the first time or when the
battery symbol (
) lights, charge the battery to its full
capacity following the procedure described below.
1
Insert the connector of the power cord into
the battery charger.
2
Insert the plug on the other end of the
power cord into an electrical outlet.
3
Set the battery on the battery charger.
Charging will start and continue as shown below.
When charging is completed, disconnect the power
plug from the electrical outlet.
Powering the Camera
Lights red
Lights green
Lamp off
CHARGE
Contents
lamp
Charging has started.
The completion of charging
(90% of full charge), after
approximately 75 min.
* The battery can be used at this point if
you are in a hurry.
Full charge has been reached,
approximately 35 min. after the
lamp lights green.

22
■ Precautions
• Do not use any batteries other than the Ricoh DB-20L.
• Use only a Ricoh BJ-1 battery charger to charge the
battery.
• Do not use the BJ-1 battery charger to charge
batteries other than the DB-20L battery.
• Charge the battery in a well ventilated area with an
ambient temperature of 10°C – 40°C (50°F – 104°F).
• When the battery reaches the end of its service life,
even if charged correctly, it will be effective for shorter
and shorter periods. Replace with a new battery.
• After charging, the battery will feel hot, but this is
normal.
• After charging, remove the power plug from the
electrical outlet. Failure to do so may result in fire.
Loading the Battery
Load the battery (rechargeable lithium ion battery)
before operating the camera.
1
Check that the camera is turned off, and
then open the battery cover by pressing
and sliding it in the direction shown.
See
•“Turning the Camera On and Off” (p.30).
2
Load the battery.
Important
Note
• Before using the camera for
the first time, be sure to
charge the battery. (The
battery leaves the factory in
an uncharged state.) See
“Charging the Battery”. (p.21)
Important
Note
• Do not bring metallic objects,
such as a needle, into
contact with the battery
contact surface or electrical
connections. Electrostatic
damage could result.

23
Getting Started
1
3
Close the battery cover.
Close the battery cover until it clicks into position.
● Shooting and Playback Guidelines
The table below shows the approximate
recording and playback times, as measured
under the following test conditions:
[Test conditions]
During shooting: Shoot continuously in shooting
mode with the power turned on
(shoot at intervals of 30
seconds, without turning the
camera off in the middle, with
the flash fired 50%, at a
temperature of 20°C (4°F))
During playback: Leave the camera continuously
turned on in playback mode at
a temperature of 20°C (4°F)
Tips
Tips to Extend Recording and
Playback Times
• The battery life indicated on the previous page
tends to decrease depending on the ambient
temperature.
In a cold environment, warming the battery by
hand, for example, may allow you to take more
pictures.
• Increased use of the flash or zoom feature or the
LCD monitor will accelerate expiration of the
battery. Keep their usage to a minimum.
• Copying or erasing images repeatedly will also
accelerate expiration of the battery.
• The battery life may be extended by shooting
images using the viewfinder with the LCD monitor
closed.
Battery Type
DB-20L lithium ion battery
(fully charged)
Approximate Approximate
Recording Time Playback Time
50 minutes 50 minutes

24
■ Handling Precautions
• Read the instruction manual supplied with the battery
before using it.
• Use only the specified lithium ion battery. Check the
type of battery in “Accessories” (p.143).
• Clean the contact area of the battery terminal and the
battery with a dry cloth before loading.
• If the camera is used continuously for a long period,
the battery may become hot. Allow to cool before
unloading it.
• Except when charging the battery, store the charger
and the battery separately.
• Store the battery in the case provided.
• If the camera is not to be used for a long period,
discharge the battery completely before removing it
from the camera and store in a cool place. Recharge
the battery fully before reusing the camera.
Note
• When using the camera for an extended period near an electrical
source, it is recommended to use an AC adapter (optional). See
“Connecting an AC Adapter” (p.25).
• It is advisable to have a spare battery handy when powering the
camera by the battery alone.
• The battery symbol (
) lights to show that the battery voltage is low.
Recharge the battery. See “Charging the Battery” (p.21).

25
Getting Started
1
Connecting an AC Adapter
When using the camera for long periods of time to
record or playback images or when connecting the
camera to a personal computer, connect an AC adapter
(optional) to the camera and power the camera from a
household electrical source.
Using the AC Adapter
Before using the AC adapter, be sure to read the
safety precautions in the accompanying manual.
1
Check that the camera is turned off.
Connect the AC adapter cable to the power
supply terminal (DC input) on the camera.
See
•“Turning the Camera On and Off” (p.30).
2
Insert the power plug into the electrical
outlet.
Note
• If the battery is loaded in the camera while it is connected to the
household power source, the camera is powered from the AC source
and not by the battery. Unload the battery when using the camera for
long periods of time.
Important
Note
• Insert the power plug and connection cable securely. If the plug or
cable works loose during recording, the data may be lost or damaged.
• If you connect or disconnect the AC adapter while operating the
camera (recording, playback, or erasing), the camera will switch off to
determine the power source. This may cause the data to be lost or
damaged. To avoid this, connect or disconnect the AC adapter while
the camera is turned off.
• Disconnect the AC adapter from the camera and electrical outlet if the
camera will not be used for a long period of time.

26
This section explains the types and usage of
SmartMedia memory cards.
What is a SmartMedia Memory Card?
Files are recorded as data on the SmartMedia memory
card in your camera. The following types of SmartMedia
memory cards can be used:
• Capacity:
2 MB, 4 MB, 8 MB, 16 MB, 32 MB, 64 MB, 128MB
• Operating voltage: 3.3 V
■ Protecting Against Accidental Writing
Attaching a write protect pad to a SmartMedia
memory card will prevent accidental erasure or
overwriting of recorded files.
Remove the write protect pad from the SmartMedia
memory card to record or erase data.
Note
• If the write protect pad gets dirty, wipe it clean with a soft, dry cloth.
■ Handling Precautions
● SmartMedia Memory Cards
• Do not insert or remove the SmartMedia
memory card while the camera is turned on.
• Do not bend, subject to strong force, shock, or
drop the SmartMedia memory card.
• Avoid using or storing SmartMedia memory
cards in environments that are subject to static
electricity or electrical interference.
• Avoid using or storing SmartMedia memory
cards in environments that are subject to high
temperature and humidity, where dust
accumulates, or in atmospheres where
corrosive substances are present.
SmartMedia Memory Cards
Note
• There are numerous types of
SmartMedia memory cards.
Before using a commercially
available SmartMedia
memory card, check with the
manufacturer that it is
compatible with your camera.
• By using an optional PC card
adapter or floppy disk
adapter, you can insert a
SmartMedia memory card
directly into the PC card slot
or floppy disk drive of your
PC.
Attach a
write
protect
pad.

27
Getting Started
1
• Keep the contact surface of the SmartMedia
memory card clean and free from dust and
foreign matter. Should the contact surface get
dirty, wipe it clean with a soft, dry cloth.
• Keep the SmartMedia memory card slot free
from dust and foreign matter.
• To avoid possible hazards, keep SmartMedia
memory cards away from flames and do not
dispose of them in fire.
• SmartMedia memory cards have a limited
service life. Cards that have been used over an
extended period of time may fail to record
additional files.
● Data
• Data recorded on a SmartMedia memory card
may be lost by improper handling by the
customer or a third party, by being subjected to
static electricity or electrical interference, or
during camera malfunction or repair. Ricoh Co.,
Ltd. assumes no liability for damages incurred
by such loss of recorded data.
• Do not remove the battery from the camera,
turn off the camera, or connect the AC adapter
while data is being recorded on the SmartMedia
memory card. The data stored on the
SmartMedia memory card may be lost or
damaged.
• You are advised to copy important data from
the SmartMedia memory card onto other media,
such as floppy disks or hard disks.
Inserting a SmartMedia Memory Card
Check that the camera is turned off before inserting the
SmartMedia memory card.
Important
Note
• Never insert or remove a SmartMedia memory card while the camera
is turned on. The data stored on the SmartMedia memory card may
be lost or damaged, or the camera may malfunction.
• When using a new SmartMedia memory card, or when using a
SmartMedia memory card that has been used on other equipment,
such as a personal computer, the SmartMedia memory card must first
be formatted (initialized) with the camera. See “Formatting a Card/
Internal Memory” (p.120).
• Never remove the SmartMedia memory card while data is being
recorded or erased. The data stored on the card may be lost or
damaged.
• When the SmartMedia memory card has been removed, place it in
the antistatic case supplied or other protective cover.

28
■ Inserting Card
1
Check that the camera is turned off, and
then open the card door.
See
•“Turning the Camera On and Off” (p.30).
2
Insert the SmartMedia memory card into
the card insert slot and close the card
door.
Push the SmartMedia memory card fully into
position, with the contact surface facing down.
■ Removing Card
1
Check that the camera is turned off, and
then open the card door.
See
•“Turning the Camera On and Off” (p.30).
Set with the contact
surface facing down
Note
• Insert the SmartMedia
memory card in the correct
direction. Do not insert it at
an angle.
• The camera will not turn on
when the card door is open.

29
Getting Started
1
2
Pull the SmartMedia memory card straight
out of the slot.
3
Close the card door.

30
The camera is turned on and off by means of the power
switch.
1
Press the power switch.
The camera will turn on.
To turn the camera off, press the power switch
again.
Tips
Auto Power Off
The camera will turn off automatically (auto power
off) to conserve the battery if it is left idle (no
buttons operated) for a preset time. To resume
use, turn the power on again.
The auto power off feature does not function when
the camera is powered by an AC adapter.
See “Auto Power Off Setting” (p.123).
Turning the Camera On and Off

31
Getting Started
1
The camera offers a number of recording and playback
modes. Select the desired mode with the mode dial.
How to Use the Mode Dial
1
Turn the mode dial to select the desired
mode.
The information displayed on the LCD monitor varies
depending on the mode. For details, see the reference
pages listed below.
•
(Still Picture) (p.45)
• (Sound) (p.56)
•
(Text) (p.55)
•
(Continuous Shooting) (p.56)
•
(Motion Picture) (p.57)
•
(Playback) (p.92)
•
(Settings) (p.120)
Mode
Mode name
dial
Still Picture
mode
Sound mode
Text mode
Continuous
Shooting mode
Motion Picture
mode
Playback mode
Settings mode
Description
This mode is used for normal
shooting.
This mode is used for recording
sound.
This mode is used for recording text.
Recording is in two colors, black and
white, without any gradations.
In this mode, the subject is shot
continuously while the shutter
release button is depressed.
This mode is used for recording
motion pictures with sound.
This mode is used for playing
recorded image files.
This mode is used for entering or
changing the camera settings.

32
Explanation of Information Displays
The LCD monitor or the LCD panel displays symbols
and figures showing the status of your camera, such as
the battery level, the number of pictures that can be
taken, and the mode settings.
Shooting Mode Display
Storage memory
Flash mode
Red-eye reduction
mode
Black/white contrast
in Text mode
White balance
File type
Monochrome mode
Sharpness mode
Negative mode
Digital zoom
Size/No. of pixels
Image quality/
Compression rate
ISO sensitivity
Note
• All items of information are
shown for illustration
purposes. During actual
operation, only the relevant
items are displayed.
• Items other than recording
destination/playback source
(
/ ) are not
displayed for files recorded
with another digital camera.
• If a message is displayed,
see “Error Messages”
(p.140).
LCD panel
(lit)
––
––
––
––
––
––
––
LCD monitor
(lit)
–2 • –1 • 0 (no display) •
+1 • +2
AUTO (no display)
M
Still picture (no display)
B & W • SEPIA
SHARP+1 • SHARP–1
NEG.
× 1.4 • × 1.8 • × 3.6
2272 × 1704 • 1120 × 840 • 640 × 480
F • N • E • NC
AUTO (no display) • ISO200 •
ISO400 • ISO800
LCD panel LCD monitor
2001/10/15 10:15
1120 840N
0028
1.4
EV+0.5
SLOW SHUTTER
SEPIA
AB
L2MF
ISO200
WIDE
TELE
q:Remaining number of pictures / Remeining recording time
w:Remaining number of pictures / Remeining recording time
e:Zoom indication bar
r:Message
t:Date and time
ert
wq

33
Getting Started
1
Auto bracket
Focus
Time exposure
Macro mode
Self-timer mode
Battery symbol
Exposure
compensation
LCD panel
––
––
––
––
*
––
LCD monitor
AB
AF (no display) • MF • 2.5m • ∞
L1 • L2 • L4 • L8
*
EV –2.0 – EV+2.0
* The battery symbol will be displayed when the battery level
gets low.
Playback Mode Display
LCD panel LCD monitor
Storage memory
File type
Size/No. of pixels
Image quality/
Compression rate
Battery symbol
Image protect mark
Sound recording
* The battery symbol will be displayed when the battery level
gets low.
LCD panel
*
––
LCD monitor
Still picture (no display)
2272 × 1704 • 1120 × 840 • 640 × 480
F • N • E • NC
*
18/28
12:32
2001/10/15 10:15
1120 840N
100–0012
q:Playback file no. Playback
w:Sound recording time Motion picture recording time
e:Playback file no./Total no. of files
r:File name
t:Date and time
y:Indicator display
r
ty
we
q

34
This camera features various menus which can be used
to enter or change the settings. Select and set the items
using the buttons on the operation panel as shown
below.
■ Menu Displays
● SET Menu
Set the mode dial to [
].
To exit the set menu, turn the mode dial to select
another mode.
● SHOOTING MODE Menu
Set the mode dial to shooting mode
(
• • • • ) and press the MENU
button.
To exit the record menu, press the MENU button
again.
Menus
FORMAT
SET 1/3
SELECT: CHANGE:
SEL.:ENTER
KEEP SETTINGS
LCD CONFIRMATION 1SEC.
BEEP SOUND ON
AUTO POWER OFF 1MIN
IMAGE WITH SOUND OFF
SHOOTING MODE
1/4
SELECT: CHANGE:
SEL.:ENTER
FOCUS AF
FLASH STRENGTH NORMAL
ISO SENSITIVITY AUTO
REDEYE REDUCTION OFF
BACK:MENU
Note
• For details of the settings that
can be made on each menu,
see “Functional Index”
(p.154).
35
Getting Started
1
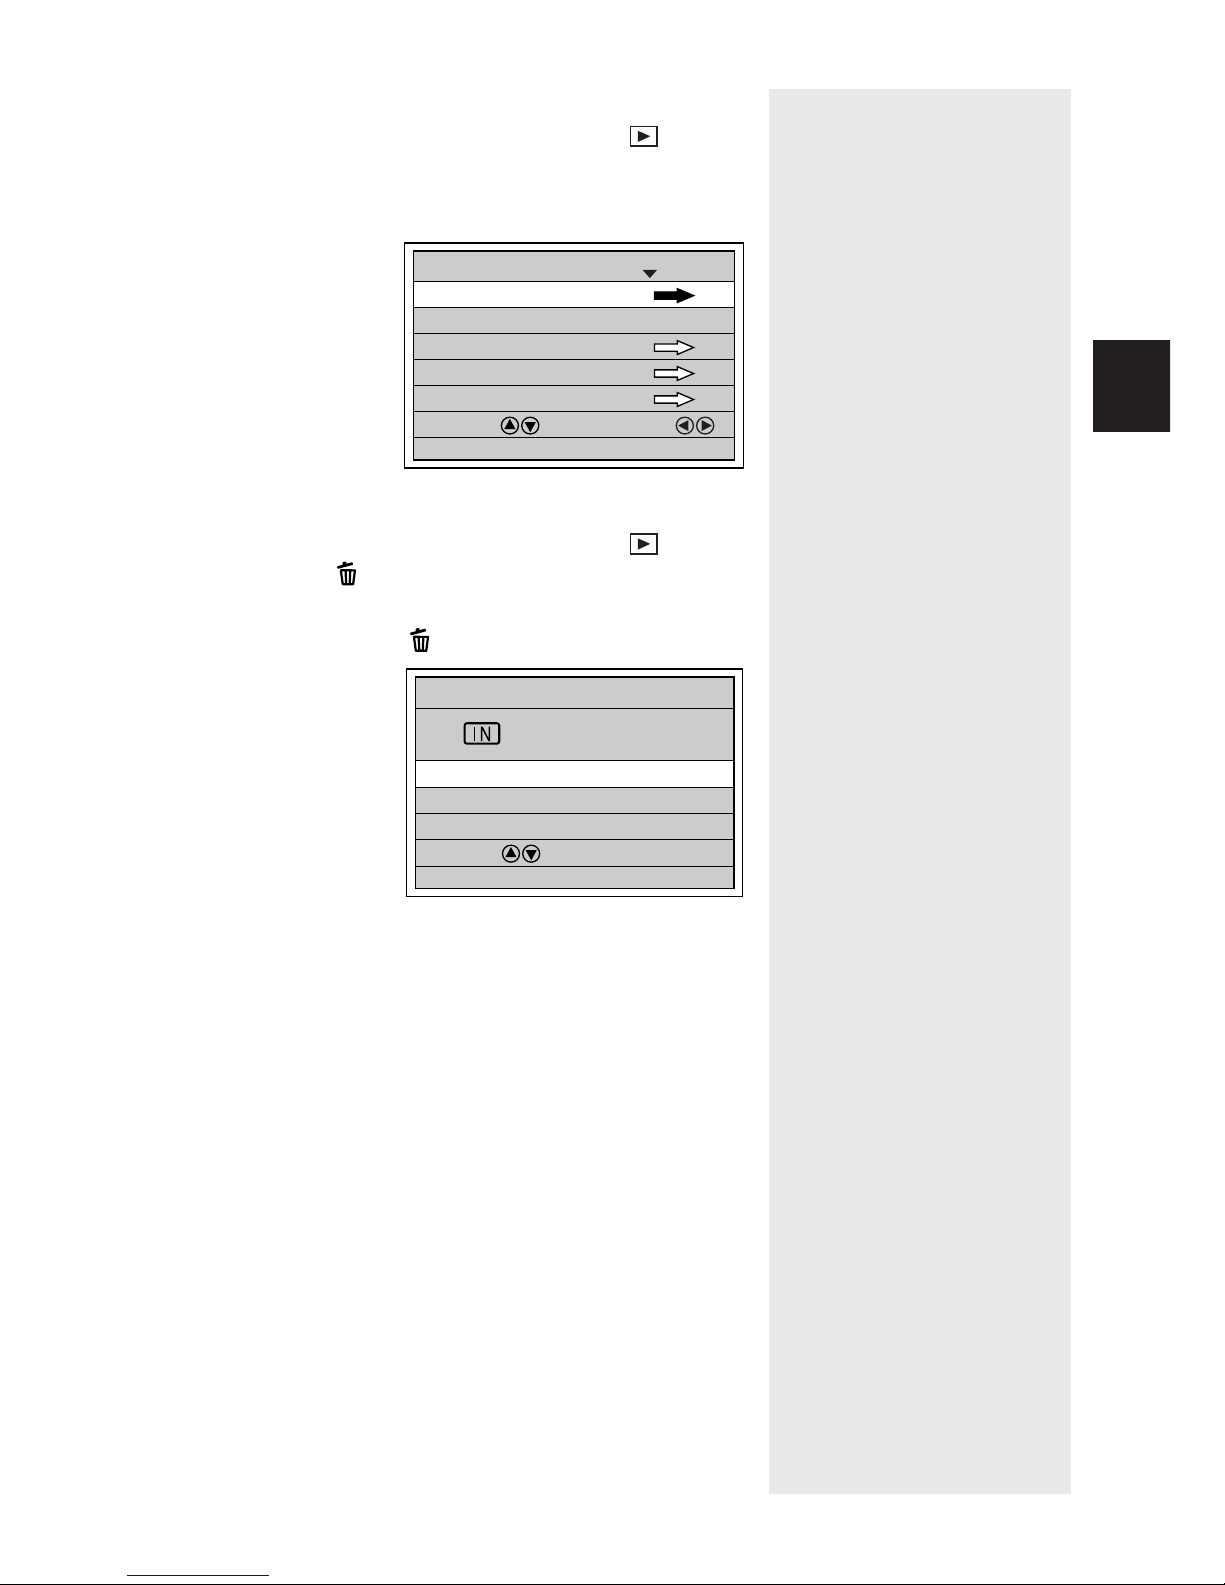
● PLAYBACK MODE Menu
Set the mode dial to playback mode (
) and
press the MENU button.
To exit the playback MENU, press the Menu
button again.
● ERASE Menu
Set the mode dial to playback mode (
) and
press the
button.
To exit the erase menu and return to playback
mode, press the
button again.
ERASE
ERASE SINGLE IMAGE
ERASE ALL IMAGES
ERASE SELECTED IMAGES
SELECT:
BACK:CANCEL SEL.:ENTER
MULTI IMAGE
PLAYBACK MODE
1/2
SELECT: CHANGE:
SEL.:ENTER
AUTO PLAYBACK 1SEC.
CROPPING
SELECT FOLDER
COPY
BACK:MENU

36
■ Selecting, Setting and Cancelling
Items
● Selecting the Item
Press the
or button to select the item you
want to set. If there is more than one screen,
press the
button to display the previous
screen and the
button to display the next
screen.
button button
button button
If the item has an arrow (
), press the ENTER
button to display the next screen.
ENTER button
CANCEL button
● Selecting the Desired Setting
Press the
or button to select the desired
setting and press the ENTER button.
● Cancelling the Setting
Press the CANCEL button. The setting will be
cancelled and the screen will return to the
previous display.
Note
• Items that are not fully
illuminated cannot be
selected.
Operation Panel
INITIALIZE SETTING
SET 3/3
SELECT: CHANGE:
SEL.:ENTER
POWER SAVE MODE ON
SET 2/3
SELECT: CHANGE:
SEL.:ENTER
SEQUENTIAL NO. OFF
DATE SETTING 2001/10/15
LANGUAGE ENGLISH
VIDEO OUT MODE NTSC
FORMAT
SET 1/3
SELECT: CHANGE:
SEL.:ENTER
KEEP SETTINGS
LCD CONFIRMATION 1SEC.
BEEP SOUND ON
AUTO POWER OFF 1MIN
FORMAT
SET 1/3
SELECT: CHANGE:
SEL.:ENTER
KEEP SETTINGS
LCD CONFIRMATION 1SEC.
BEEP SOUND ON
AUTO POWER OFF 1MIN
FLASH OFF
KEEP SETTINGS
1/4
+
/– OFF
DATE IMPRINT OFF
LANGUAGE OFF
SELECT: CHANGE:
BACK:CANCEL SEL.:ENTER
WHITE BALANCE OFF
DATE IMPRINT OFF
SHOOTING MODE
2/4
SELECT: CHANGE:
SEL.:ENTER
SPLIT SHOOTING
SHARPNESS OFF
NEGATIVE OFF
MONOCHOME MODE OFF
BACK:MENU
DATE IMPRINT DT/TM
SHOOTING MODE
2/4
SELECT: CHANGE:
SEL.:ENTER
SPLIT SHOOTING
SHARPNESS OFF
NEGATIVE OFF
MONOCHOME MODE OFF
BACK:MENU

37
Getting Started
1
You can set the date and time on the camera. Use this
function when using the camera for the first time or
when you want to change the date and time.
Note
• Use the yyyy/mm/dd format to set the date.
• Time is displayed in the 24-hour clock format. Midnight is expressed
as 00:00 and noon as 12:00.
1
Press the POWER switch to turn the
camera on and set the mode dial to [ ].
2
Press the or button to select [DATE
SETTING].
3
Press the DISPLAY button to select the
date display method.
Setting the Date and Time
POWER SAVE MODE ON
SET 2/3
SELECT: CHANGE:
SEL.:ENTER
SEQUENTIAL NO. OFF
DATE SETTING 2001/ 1/ 1
LANGUAGE ENGLISH
VIDEO OUT MODE NTSC
See
“Turning the Camera On and Off”
(p.30).

38
There are three ways of displaying the date:
2001/10/15 ➞ Oct 15 2001 ➞ 15 Oct 2001
Each time you press the DISPLAY button, the
display method is switched in the sequence shown
above. Press the DISPLAY button to select the
desired date display method.
4
Press the ENTER button.
The date setting menu is displayed.
5
Press the or button to change the
highlighted digit.
Press the button to increase the digit and the
button to decrease the digit. Pressing the button
continuously increases the speed.
6
Press the or button to highlight the
digit you wish to change.
Make the required changes by repeating steps
5
and 6.
Note
Each time the button is
pressed, the highlighted digit
changes in the sequence:
year → month → day → hour
→ minute.
0:00
2001/ 1/ 1
SELECT:
BACK:CANCEL SEL.:ENTER
DATE SETTING
10:15
2001/10/15
SELECT:
BACK:CANCEL SEL.:ENTER
DATE SETTING

39
Getting Started
1
Note
• The set date and time will be
reset about 20 days after the
battery has been removed,
for example when changing
the battery. In this case, reset
the date and time.
7
After setting the minutes, press the ENTER
button.
The clock will start and the display will return to the
SET menu.
Tips
How to check the date and time
Press the DISPLAY button to display the set date
and time on the LCD monitor. See “LCD Monitor
Display” (p.46, p.97).

40
Unintentional movement of the camera during shooting
will result in blurred images. To avoid such so-called
“camera shake”, hold the camera as described below.
Be particularly careful to avoid camera shake with
telephoto zoom shots.
1
Hold the camera steady with both hands
with your elbows close to your body.
● When viewing through the viewfinder
With the camera pressed lightly to your face, aim
it at your subject while looking through the
viewfinder.
● When viewing on the LCD monitor
Hold the camera firmly in both hands, and aim it
at your subject while looking at the LCD monitor.
2
Press the shutter release button lightly
with your fingertip.
Horizontal Vertical
Horizontal Vertical
Main shutter release button Sub shutter release button
How to Hold the Camera
Important
Note
• Keeping your finger away
from the shutter release
button and then pressing the
shutter release button in one
go may result in a blurred
image.
• Do not move the camera until
the beep sound is heard.

41
Getting Started
1
■ LCD Monitor
To open the LCD monitor, press the knob and open the
monitor as shown in the diagram.
You can turn the LCD monitor as shown in the diagram,
allowing you to shoot at any angle you wish.
■ Usage Precautions
Be careful to keep the camera lens and flash from
being covered by your fingers or hair, or by the
wrist strap.
90°90°
180°180°
140°140°
Important
Note
• Open the LCD monitor 90
degrees perpendicularly
before rotating it in a
horizontal direction.

42
Adjust the brightness of the LCD monitor and the
dioptor.
Diopter Adjustment
Adjust the diopter so that the subject is clearly visible
through the viewfinder.
1
Adjust by rotating the diopter knob left or
right until the subject appears clearly.
Adjusting the Brightness of the LCD
Monitor
You can adjust the brightness of the LCD monitor when
it is hard to see.
1
Press the LCD LIGHT button on the
operation panel.
Each time you press the button, the brightness
changes. The brightness can be adjusted in five
stages.
Adjusting the Camera
 Loading...