

Ricoh Savin en5100WD, Lanier LW5100en, Aficio MP W5100en, Lanier LW7140en, Aficio MP W7140en Operating Instructions Manual
...
Placing Originals
1
Basic Copying
2
Advanced Copying
3
Document Server
4
Appendix
5
Operating Instructions
Copy/Document Server
Reference
For safe and correct use, be sure to read the Safety Information in "About This Machine" before using the machine.

Introduction
This manual contains detailed instructions and notes on the operation and use of this machine. For your safety and
benefit, read this manual carefully before using the machine. Keep this manual in a handy place for quick reference.
Important
Contents of this manual are subject to change without prior notice. In no event will the company be liable for direct,
indirect, special, incidental, or consequential damages as a result of handling or operating the machine.
Do not copy or print any item for which reproduction is prohibited by law.
Copying or printing the following items is generally prohibited by local law:
bank notes, revenue stamps, bonds, stock certificates, bank drafts, checks, passports, driver's licenses.
The preceding list is meant as a guide only and is not inclusive. We assume no responsibility for its completeness or
accuracy. If you have any questions concerning the legality of copying or printing certain items, consult with your
legal advisor.
Notes:
Some illustrations in this manual might be slightly different from the machine.
Certain options might not be available in some countries. For details, please contact your local dealer.
Depending on which country you are in, certain units may be optional. For details, please contact your local dealer.
Notes:
The model names of the machines do not appear in the following pages. Check the type of your machine before
reading this manual. (For details, see "Machine Types", About This Machine.)
Type 1: en5100WD/LW5100en/Aficio MP W5100en
Type 2: en7140WD/LW7140en/Aficio MP W7140en
Certain types might not be available in some countries. For details, please contact your local dealer.
Two kinds of size notation are employed in this manual. With this machine refer to the inch version.

Manuals for This Machine
Refer to the manuals that are relevant to what you want to do with the machine.
• Media differ according to manual.
• The printed and electronic versions of a manual have the same contents.
• Adobe® Acrobat® Reader®/Adobe Reader must be installed in order to view the manuals as PDF
files.
• A Web browser must be installed in order to view the html manuals.
• For details about the functions of RW-7140, refer to the manuals for this option.
About This Machine
Be sure to read the Safety Information in this manual before using the machine.
This manual provides an introduction to the functions of the machine. It also explains the control
panel, preparation procedures for using the machine, how to enter text, and how to install the CDROMs provided.
Troubleshooting
Provides a guide to solving common problems, and explains how to replace paper, toner, and
other consumables.
Copy/ Document Server Reference
Explains Copier and Document Server functions and operations. Also refer to this manual for
explanations on how to place originals.
Printer Reference
Explains Printer functions and operations.
Scanner Reference
Explains Scanner functions and operations.
Network Guide
Explains how to configure and operate the machine in a network environment, and use the
software provided.
General Settings Guide
Explains User Tools settings, and Address Book procedures such as registering e-mail addresses,
and user codes. Also refer to this manual for explanations on how to connect the machine.
Security Reference
This manual is for administrators of the machine. It explains security functions that you can use to
prevent unauthorized use of the machine, data tampering, or information leakage. For enhanced
security, we recommend that you first make the following settings:
1

• Install the Device Certificate.
• Enable SSL (Secure Sockets Layer) Encryption.
• Change the user name and password of the administrator using Web Image Monitor.
For details, see “Setting Up the Machine”, Security Reference.
Be sure to read this manual when setting the enhanced security functions, or user and administrator
authentication.
PostScript 3 Supplement
Explains how to set up and use PostScript® 3TM.
UNIX Supplement
For “UNIX Supplement”, please visit our Web site or consult an authorized dealer.
This manual includes descriptions of functions and settings that might not be available on this
machine.
Information
Contains general notes on the machine, and information about the trademarks of product names
used in the manuals.
Other manuals
• Manuals for DeskTopBinder Lite
• DeskTopBinder Lite Setup Guide
• DeskTopBinder Introduction Guide
• Auto Document Link Guide
• Manuals provided are specific to machine types.
2

What You Can Do with This Machine
BAS053S
BAS054S
This section introduces the machine's copier functions that you are likely to use most often.
Functions differ depending on machine type and options.
See p.17 "Functions Requiring Optional Configurations".
Assembling Copies as Sets in Sequential Order
Sort
Copies are assembled as sets in sequential order.
See p.77 "Sort".
Rotate Sort
Every other copy set is rotated by 90 degrees and delivered to the copy tray.
See p.77 "Sort".
Reducing/Enlarging Originals by Specifying the Paper Size
The machine automatically detects the original size, and then selects an appropriate reproduction ratio
based on the paper size you select.
Auto Reduce/Enlarge
See p.65 "Auto Reduce/Enlarge".
3

BAS033S
Saving Paper
BAS038S
BAS039S4BAS040S
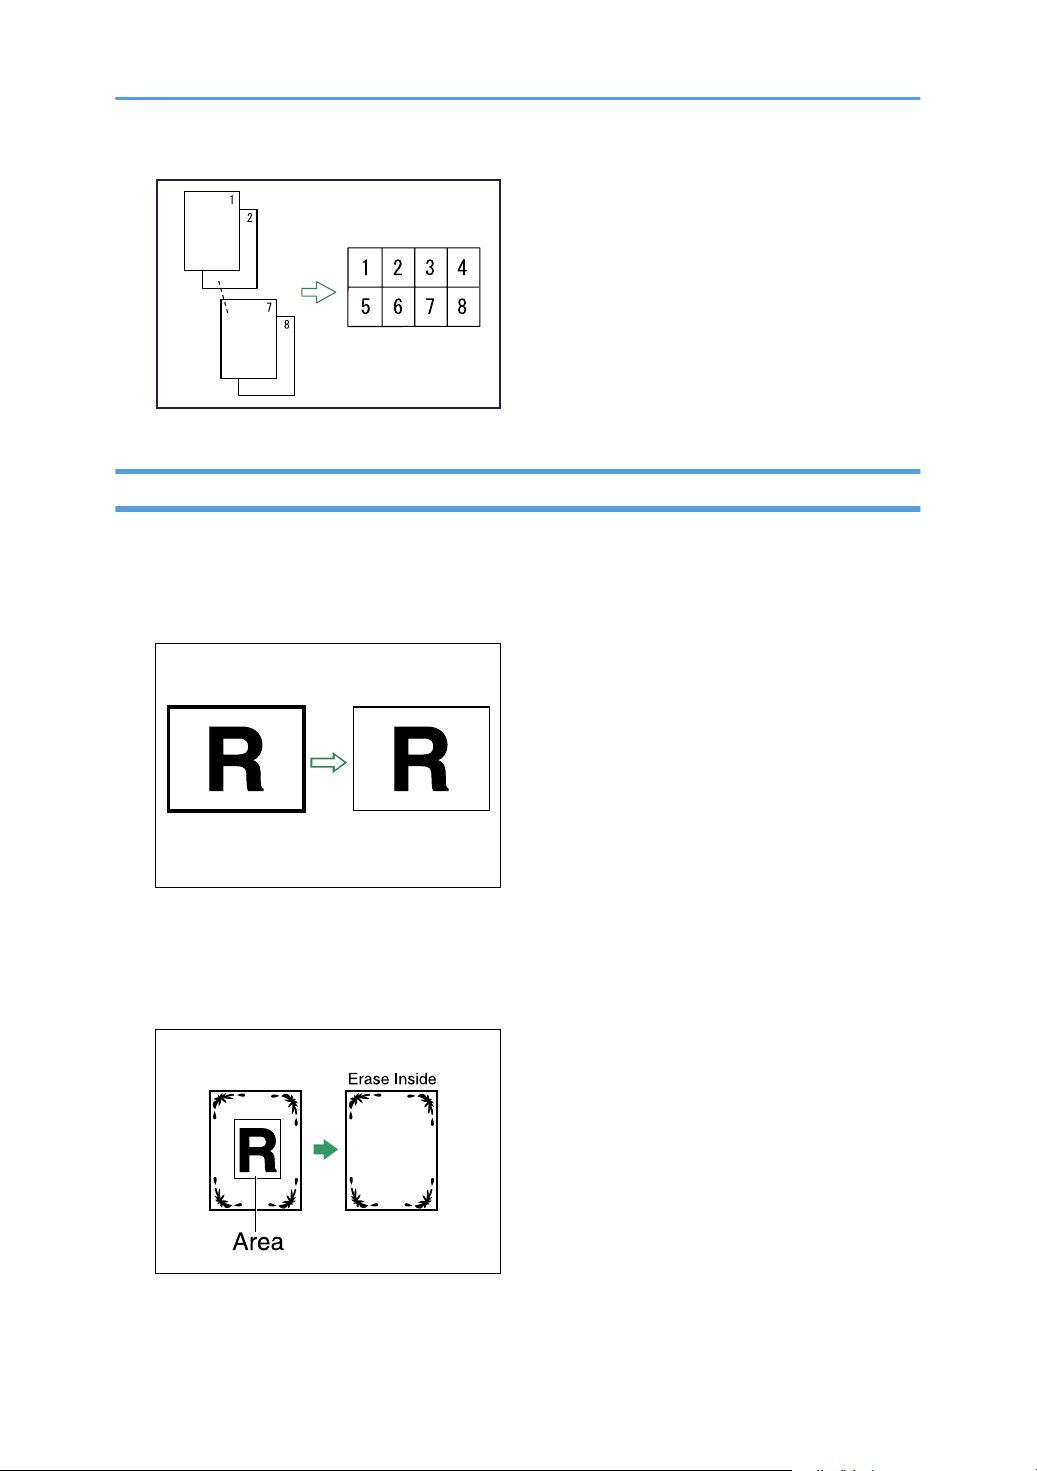
The Combine function allow you to save paper.
Combine
Combines several pages onto one side of a sheet.
See p.74 "One-Sided Combine".
Adjusting Image
BKW013S
BKY003D
Erase Border
Erases the edge margin of the original image.
See p.124 "Erase Border (same width)" and p.125 "Erase Border (different width)"
Erase Inside
Copies the original while erasing a specified area.
See p.126 "Erase Inside"
5
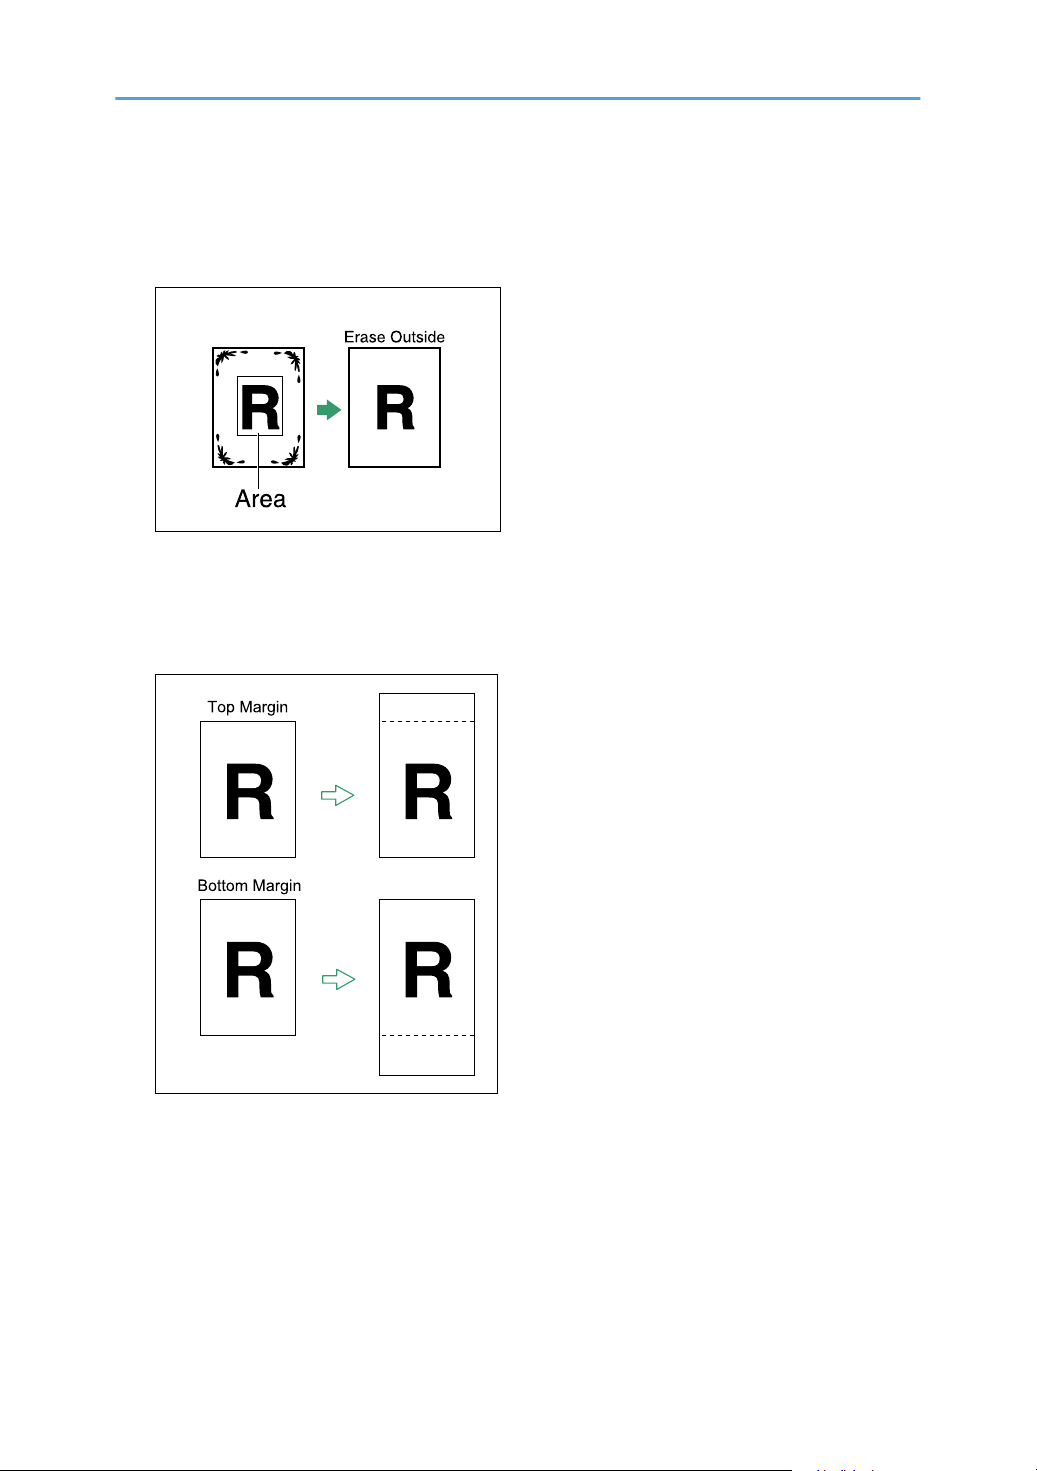
Erase Outside
BKY004D
BKY005D
Copies the original while erasing outside a specified area.
See p.128 "Erase Outside"
Margin Adjustment
When Synchro Cut is selected, you can create a margin on the copy's leading and trailing edge.
See p.130 "Margin Adjustment".
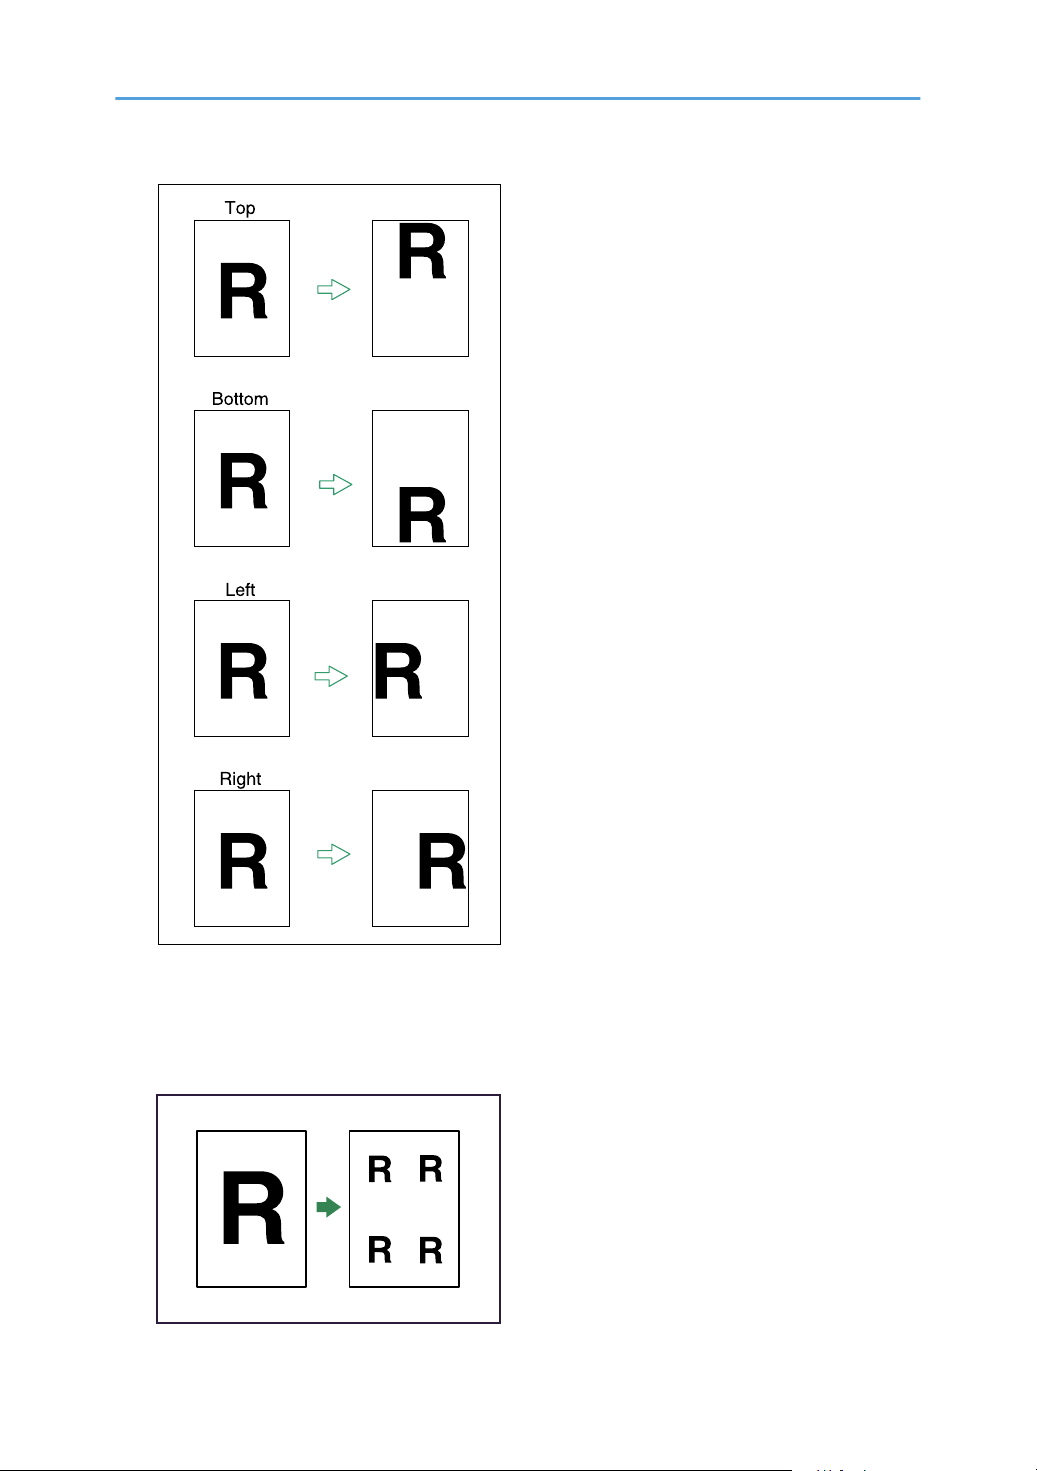
Adjust Print Position
6
Moves (shifts) the copy image up, down, left, or right to create a margin.
See p.141 "Adjust Print Position".
BKY006D
Image Repeat
BAS095S
Repeatedly copies the entire image.
See p.131 "Image Repeat".
7
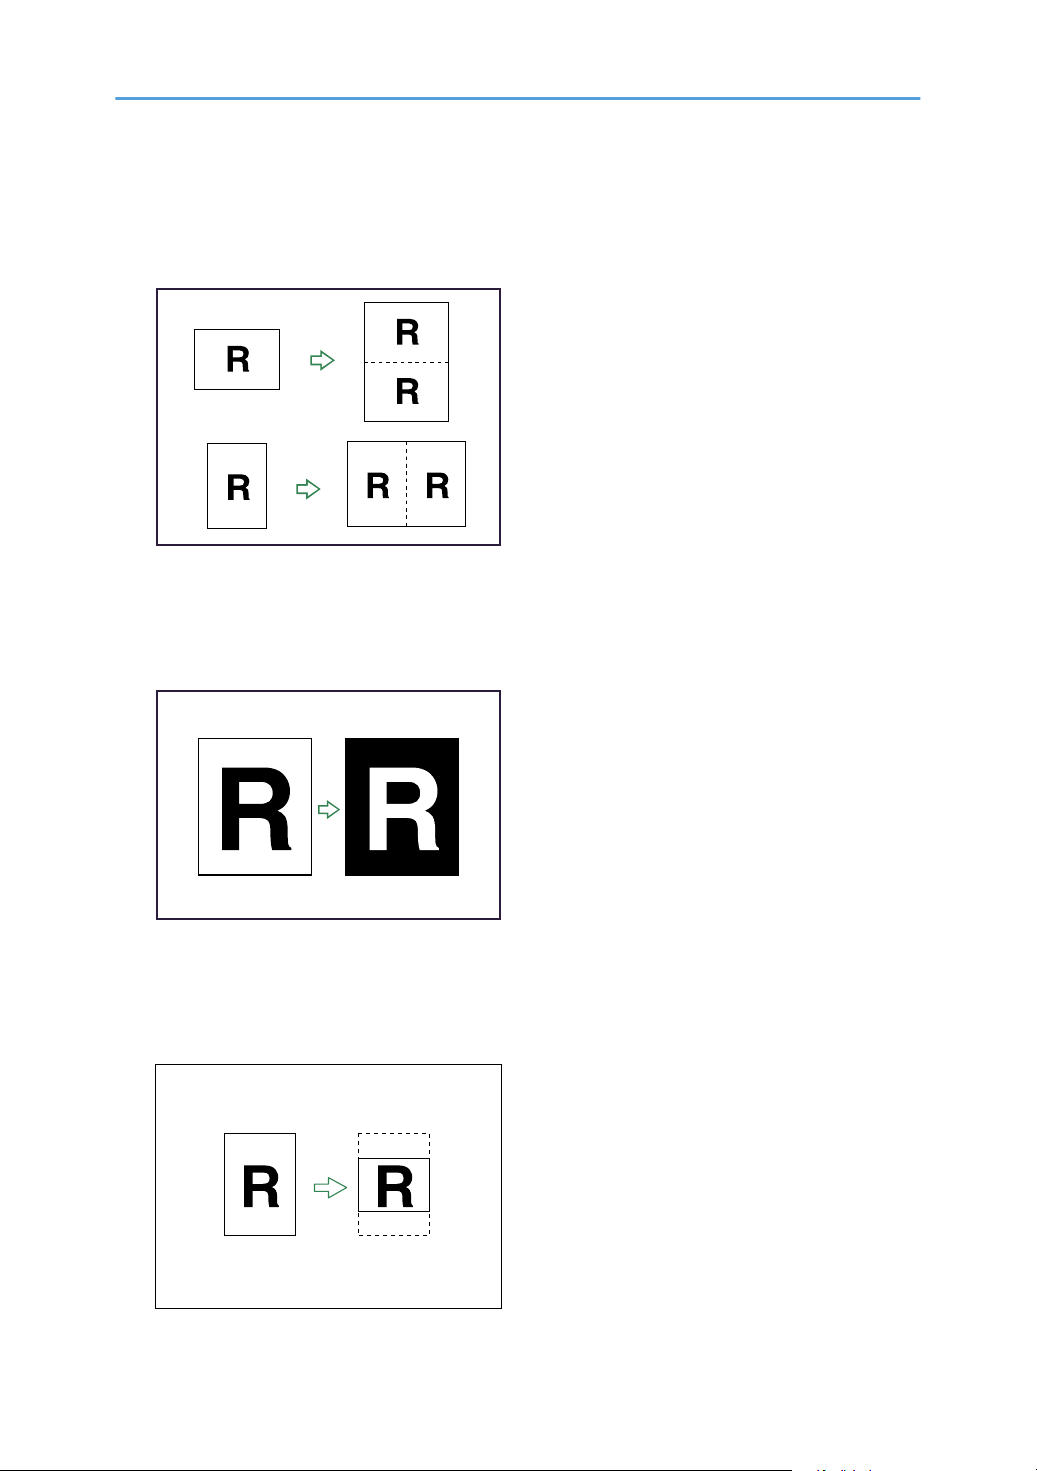
Double Copies
BAS098S
BAS100S
BKW045D
One original image is copied twice on one sheet.
See p.132 "Double Copies".
Positive/Negative
Copies an image inverted.
See p.133 "Positive/Negative".
8
Partial Copy
Copies only a specified portion of the original.
See p.134 "Partial Copy".
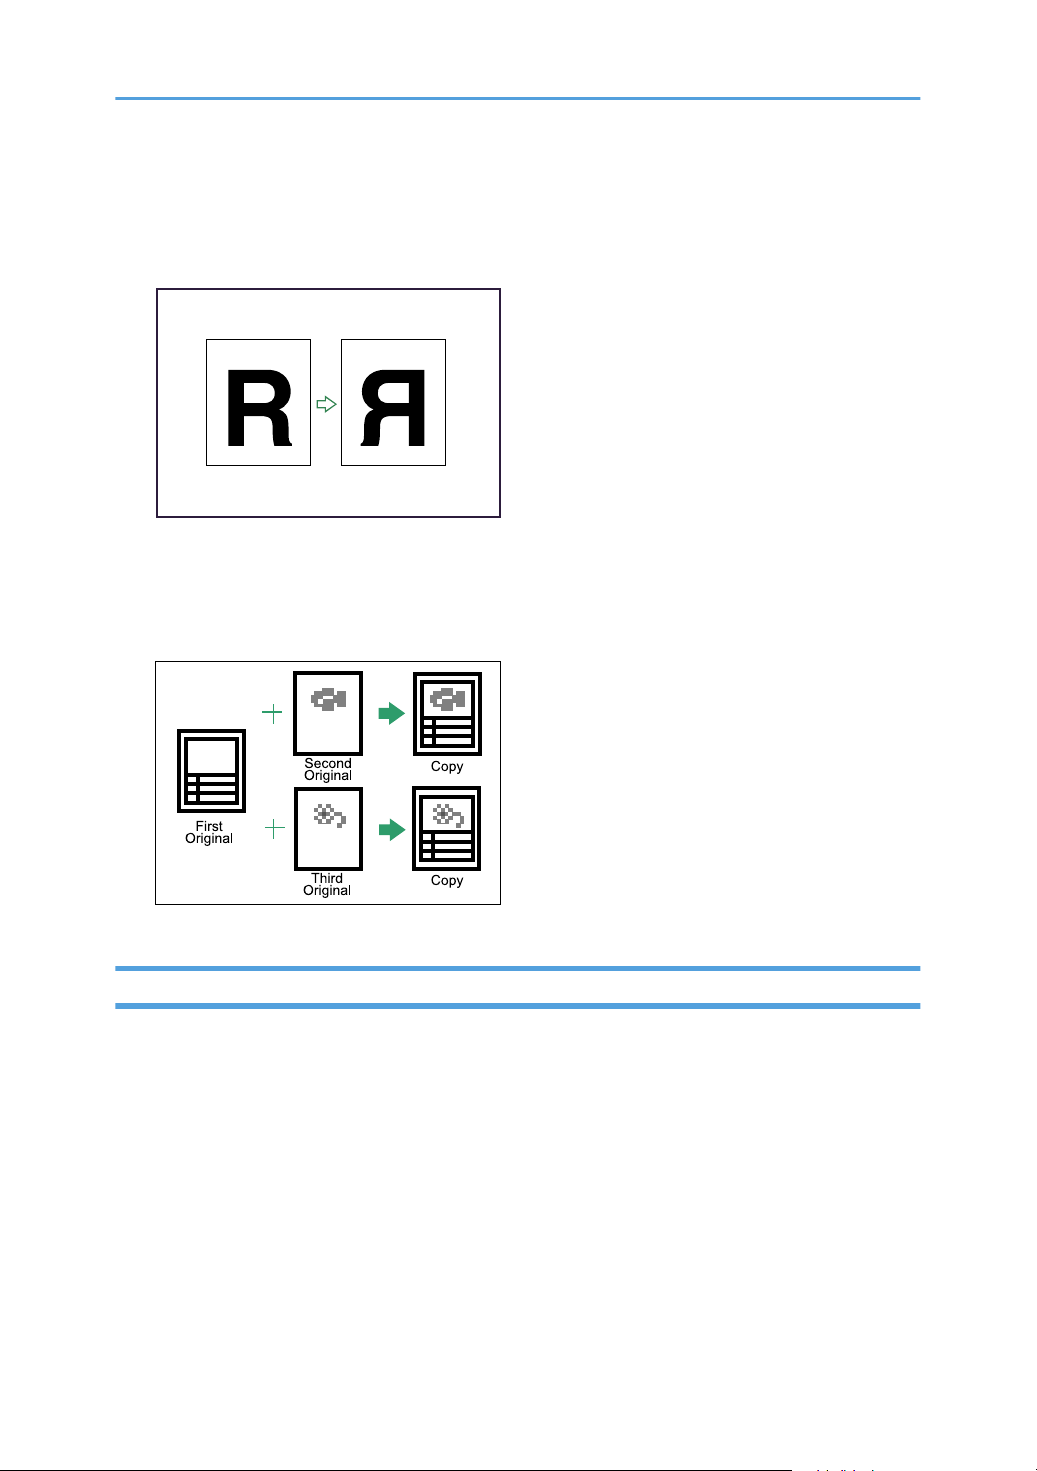
Mirror Image
BAS101S
BKY007D
Copies by reversing the image from left to right, as reflected in a mirror.
See p.135 "Mirror Image".
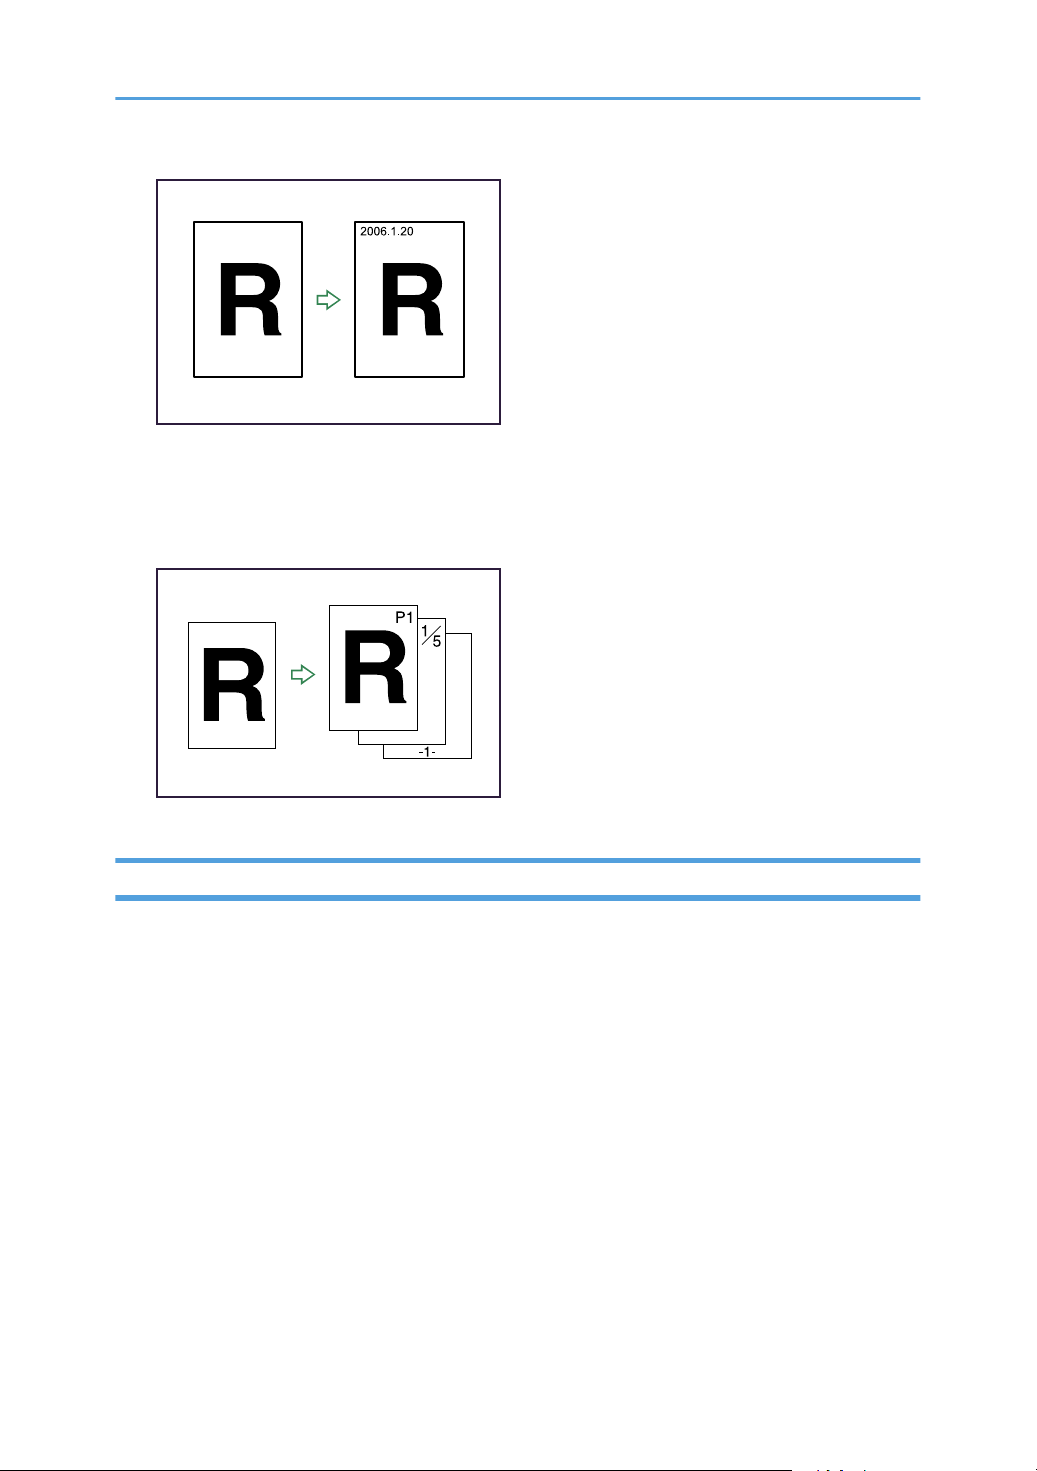
Format Overlay
Combines two images onto one copy.
See p.136 "Format Overlay".
Adding Stamps such as Page Number to the Copies
Background Numbering
Prints numbers on the background of copies.
See p.106 "Background Numbering".
9

BAS070S
Preset Stamp
BKY008D
BAS073S
Preset messages are stamped on copies.
See p.107 "Preset Stamp".
User Stamp
Copies a scanned image as a stamp.
See p.110 "User Stamp".
10
Date Stamp
Prints dates on copies.
See p.115 "Date Stamp".
BAS076S
Page Numbering
BAS078S
Prints page numbers on copies.
See p.118 "Page Numbering".
Registering the Initial Display's Default Functions
You can configure the settings of the initial screen so that the default display contain the functions you
use most often.
For example, the default setting for [Original Output Exit] is [Front], but you can change this setting to
[Rear]. For details, see “Registering the Initial Display's Default Functions”.
You can also store frequently used copy job settings in the machine memory and recall them for future
use. For details, see “Registering Frequently Used Function”.
See p.93 "Registering Frequently Used Functions".
See p.97 "Registering the Initial Display's Default Functions".
11

TABLE OF CONTENTS
Manuals for This Machine.................................................................................................................................1
What You Can Do with This Machine...............................................................................................................3
Assembling Copies as Sets in Sequential Order.........................................................................................3
Reducing/Enlarging Originals by Specifying the Paper Size....................................................................3
Saving Paper..................................................................................................................................................4
Adjusting Image..............................................................................................................................................5
Adding Stamps such as Page Number to the Copies.................................................................................9
Registering the Initial Display's Default Functions......................................................................................11
How to Read This Manual...............................................................................................................................16
Symbols........................................................................................................................................................16
Functions Requiring Optional Configurations................................................................................................17
Display..............................................................................................................................................................18
Simplified Display........................................................................................................................................18
1. Placing Originals
Original and Copy Output Locations.............................................................................................................21
Original Output Locations...........................................................................................................................21
Copy Output Locations................................................................................................................................23
Adjusting the rear output.............................................................................................................................25
Originals...........................................................................................................................................................26
Sizes and Weights of Recommended Originals.......................................................................................26
Originals that should be scanned using the carrier sheet.........................................................................27
Non-compatible originals...........................................................................................................................28
Missing Image Area....................................................................................................................................29
Placing Originals..............................................................................................................................................30
Placing Originals on the Original Table....................................................................................................30
To stop originals feeding in.........................................................................................................................31
Original Orientation....................................................................................................................................32
Placing Custom Size Originals....................................................................................................................34
Wide Scan....................................................................................................................................................35
Setting the Carrier Sheet.............................................................................................................................36
Setting the Original Hangers......................................................................................................................37
2. Basic Copying
Basic Procedure................................................................................................................................................39
12

Check Modes...............................................................................................................................................40
Original Counter/Reset..............................................................................................................................41
Auto Start......................................................................................................................................................41
Interrupt Copy..............................................................................................................................................41
Job Preset......................................................................................................................................................43
Copying from the Bypass Tray........................................................................................................................44
Copying onto Regular Size Paper..............................................................................................................46
Copying onto Custom Size Paper..............................................................................................................46
Copying onto Special Paper.......................................................................................................................48
Selecting the Original Type Setting................................................................................................................50
Adjusting Copy Image Density........................................................................................................................52
Auto Image Density.....................................................................................................................................52
Manual Image Density................................................................................................................................52
Combined Auto and Manual Image Density.............................................................................................53
Copy Quality................................................................................................................................................53
Selecting Copy Paper......................................................................................................................................56
Auto Paper Select........................................................................................................................................56
Manual Paper Select...................................................................................................................................57
Rotate Copy.................................................................................................................................................58
Setting the Length of Copy Paper Cut.............................................................................................................59
Synchro Cut..................................................................................................................................................59
Preset Cut......................................................................................................................................................60
Variable Cut.................................................................................................................................................62
Reducing or Enlarging Originals.....................................................................................................................64
Auto Reduce/Enlarge.................................................................................................................................65
User Auto Reduce/Enlarge.........................................................................................................................67
Preset Reduce/Enlarge...............................................................................................................................69
Zoom.............................................................................................................................................................70
Combined Copying.........................................................................................................................................74
One-Sided Combine...................................................................................................................................74
Finishing............................................................................................................................................................77
Sort................................................................................................................................................................77
Fold...............................................................................................................................................................80
13

Storing Data in the Document Server.............................................................................................................86
Managing Jobs................................................................................................................................................88
Job List Screen..............................................................................................................................................88
Checking Jobs in the Job List.......................................................................................................................89
Changing the Order of Jobs.......................................................................................................................90
Holding Jobs................................................................................................................................................90
Deleting Jobs................................................................................................................................................91
Checking the Job History.............................................................................................................................91
Registering Frequently Used Functions...........................................................................................................93
Registering Functions in a Program............................................................................................................93
Changing a Stored Program.......................................................................................................................94
Deleting a Stored Program.........................................................................................................................95
Recalling a Stored Program........................................................................................................................95
Registering the Initial Display's Default Functions..........................................................................................97
3. Advanced Copying
Advanced Reduce/Enlarge Copying............................................................................................................99
Size Magnification.......................................................................................................................................99
Directional Magnification (%)..................................................................................................................100
Directional Size Magnification (inch)......................................................................................................102
Fine Magnification....................................................................................................................................104
Stamps............................................................................................................................................................106
Background Numbering...........................................................................................................................106
Preset Stamp..............................................................................................................................................107
User Stamp.................................................................................................................................................110
Date Stamp................................................................................................................................................115
Page Numbering.......................................................................................................................................118
Advanced Copier Functions.........................................................................................................................124
Erase Border (same width).......................................................................................................................124
Erase Border (different width)...................................................................................................................125
Erase Inside................................................................................................................................................126
Erase Outside............................................................................................................................................128
Margin Adjustment....................................................................................................................................130
Image Repeat............................................................................................................................................131
14

Double Copies...........................................................................................................................................132
Positive/Negative.....................................................................................................................................133
Partial Copy...............................................................................................................................................134
Mirror Image.............................................................................................................................................135
Format Overlay.........................................................................................................................................136
Adjust Print Position....................................................................................................................................141
4. Document Server
Relationship between Document Server and Other Functions...................................................................145
Document Server Display..............................................................................................................................146
Simplified Display......................................................................................................................................147
Preview Display.........................................................................................................................................148
Using the Document Server...........................................................................................................................150
Storing Data...............................................................................................................................................150
Changing the User Name of a Stored Document...................................................................................154
Changing the File Name of a Stored Document....................................................................................155
Changing the Password of a Stored Document......................................................................................156
Checking the Details of a Stored Document...........................................................................................156
Searching for Stored Documents.............................................................................................................157
Printing Stored Documents........................................................................................................................159
Deleting a Stored Document....................................................................................................................165
Print Backup...............................................................................................................................................166
Displaying Stored Documents with Web Image Monitor......................................................................167
Downloading Stored Documents with Web Image Monitor.................................................................167
5. Appendix
Function Compatibility...................................................................................................................................169
Supplementary Information...........................................................................................................................171
Scan Size Limitations, by Function...........................................................................................................176
Settings Record Sheet....................................................................................................................................178
Magnification Ratio Chart.............................................................................................................................183
Measure Chart...............................................................................................................................................185
User Tools Menu (Copier/Document Server Features)..............................................................................187
INDEX...........................................................................................................................................................191
15

How to Read This Manual
• For proper use of this product, be sure to read About This Machine first.
• Supplementary information about the copier mode is described in “Supplementary Information”.
• p.171 "Supplementary Information"
Symbols
This manual uses the following symbols:
Indicates points to pay attention to when using the machine, and explanations of likely causes of paper
misfeeds, damage to originals, or loss of data. Be sure to read these explanations.
Indicates supplementary explanations of the machine’s functions, and instructions on resolving user
errors.
This symbol is located at the end of sections. It indicates where you can find further relevant information.
[ ]
Indicates the names of keys on the machine's display or control panels.
16

Functions Requiring Optional Configurations
Certain functions require special machine configuration and extra options as follows:
Fan Fold: Fan Folding Finisher, Cross Folding Finisher
Regular Size Fold: Cross Folding Finisher
Programmed Fold: Cross Folding Finisher
17
Display
BKY057S
The function items displayed serve as selector keys. You can select or specify an item by lightly pressing
them.
When you select or specify an item on the display panel, it is highlighted like . Keys appearing
as cannot be used.
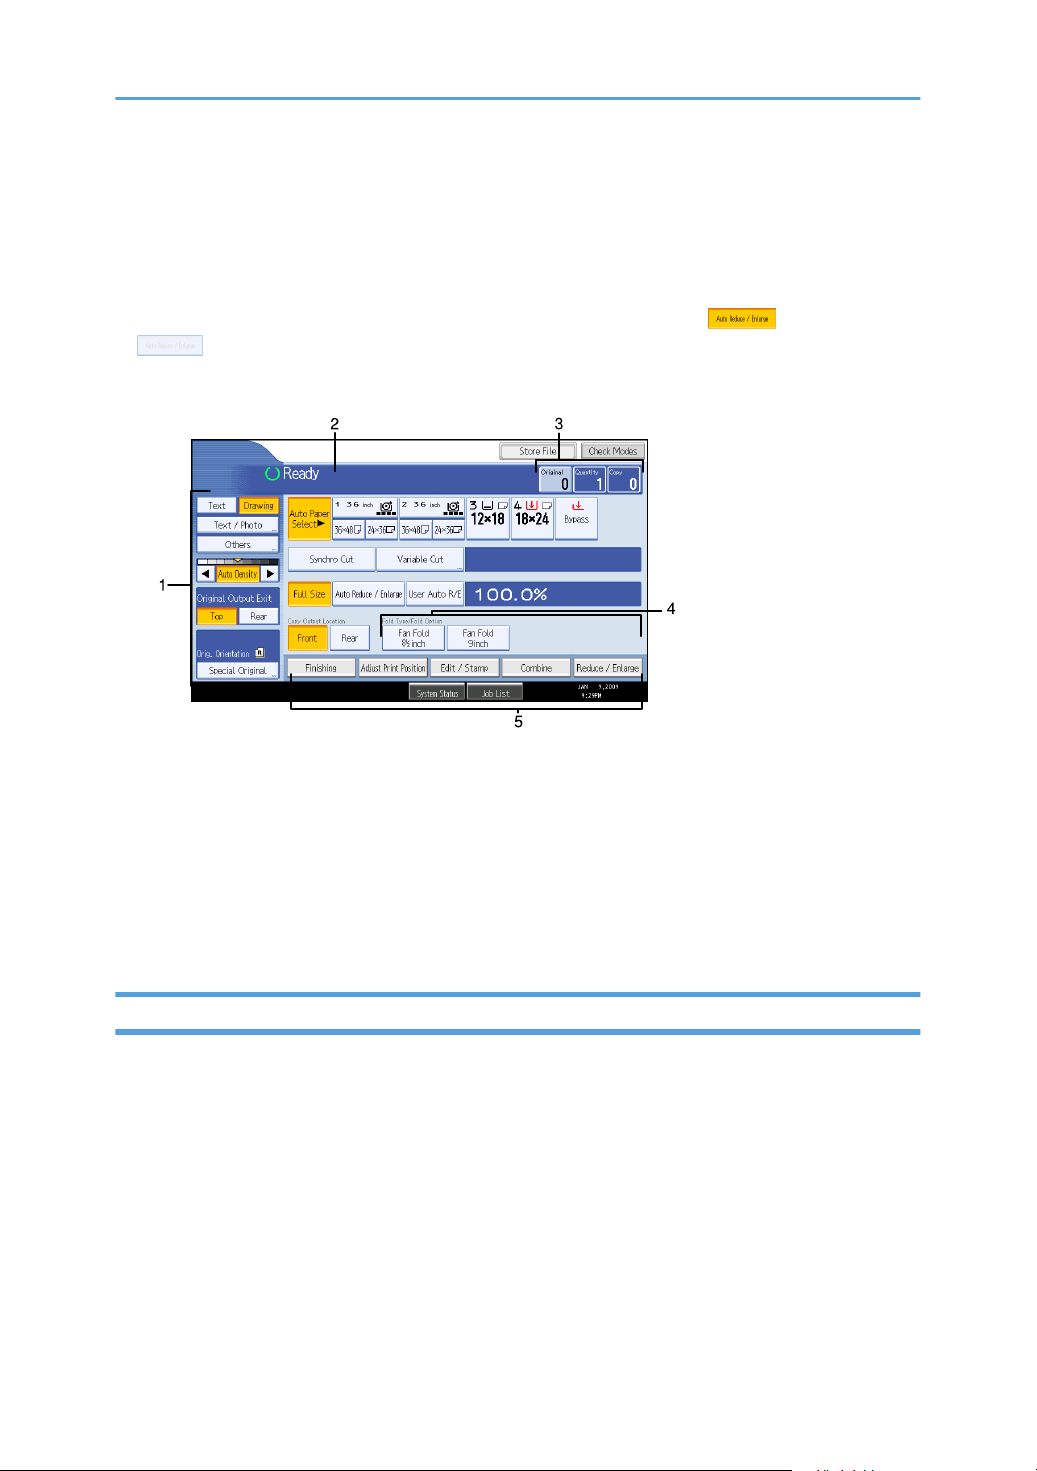
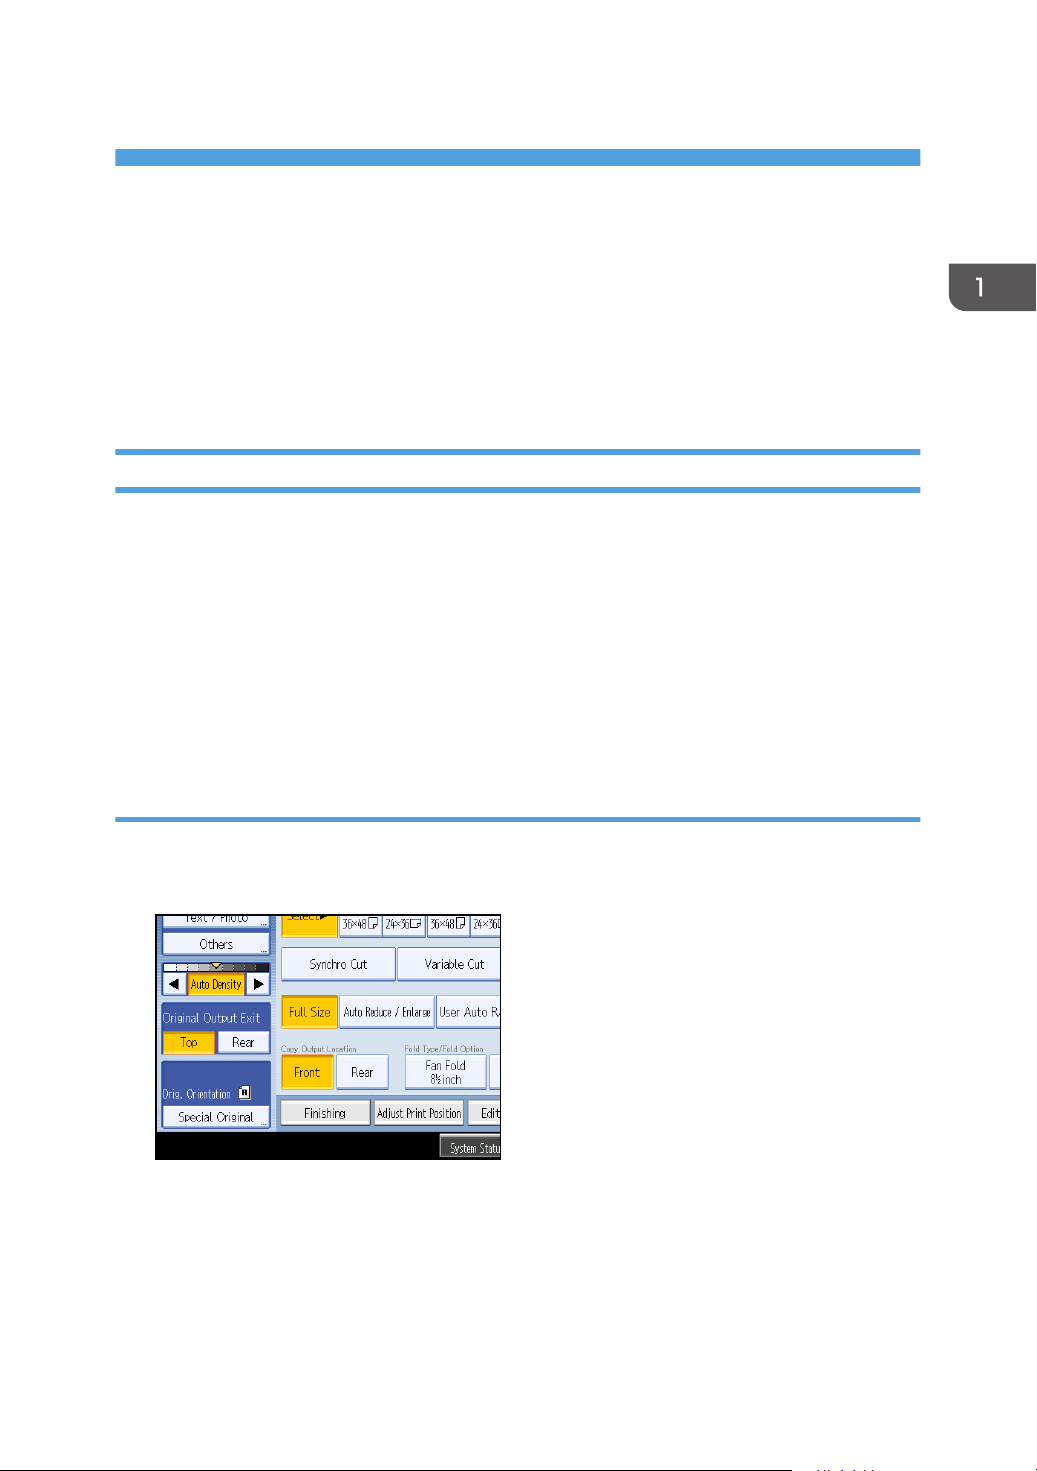
Initial copy display
1. Use this area to specify the original type, original orientation, image density level, and other
settings.
2. Displays operational status and messages.
3. Displays the numbers of originals scanned, copies set, and copies made.
4. Use this area to select the fold function and related options.
5. Displays available functions. Press a function to display its menu.
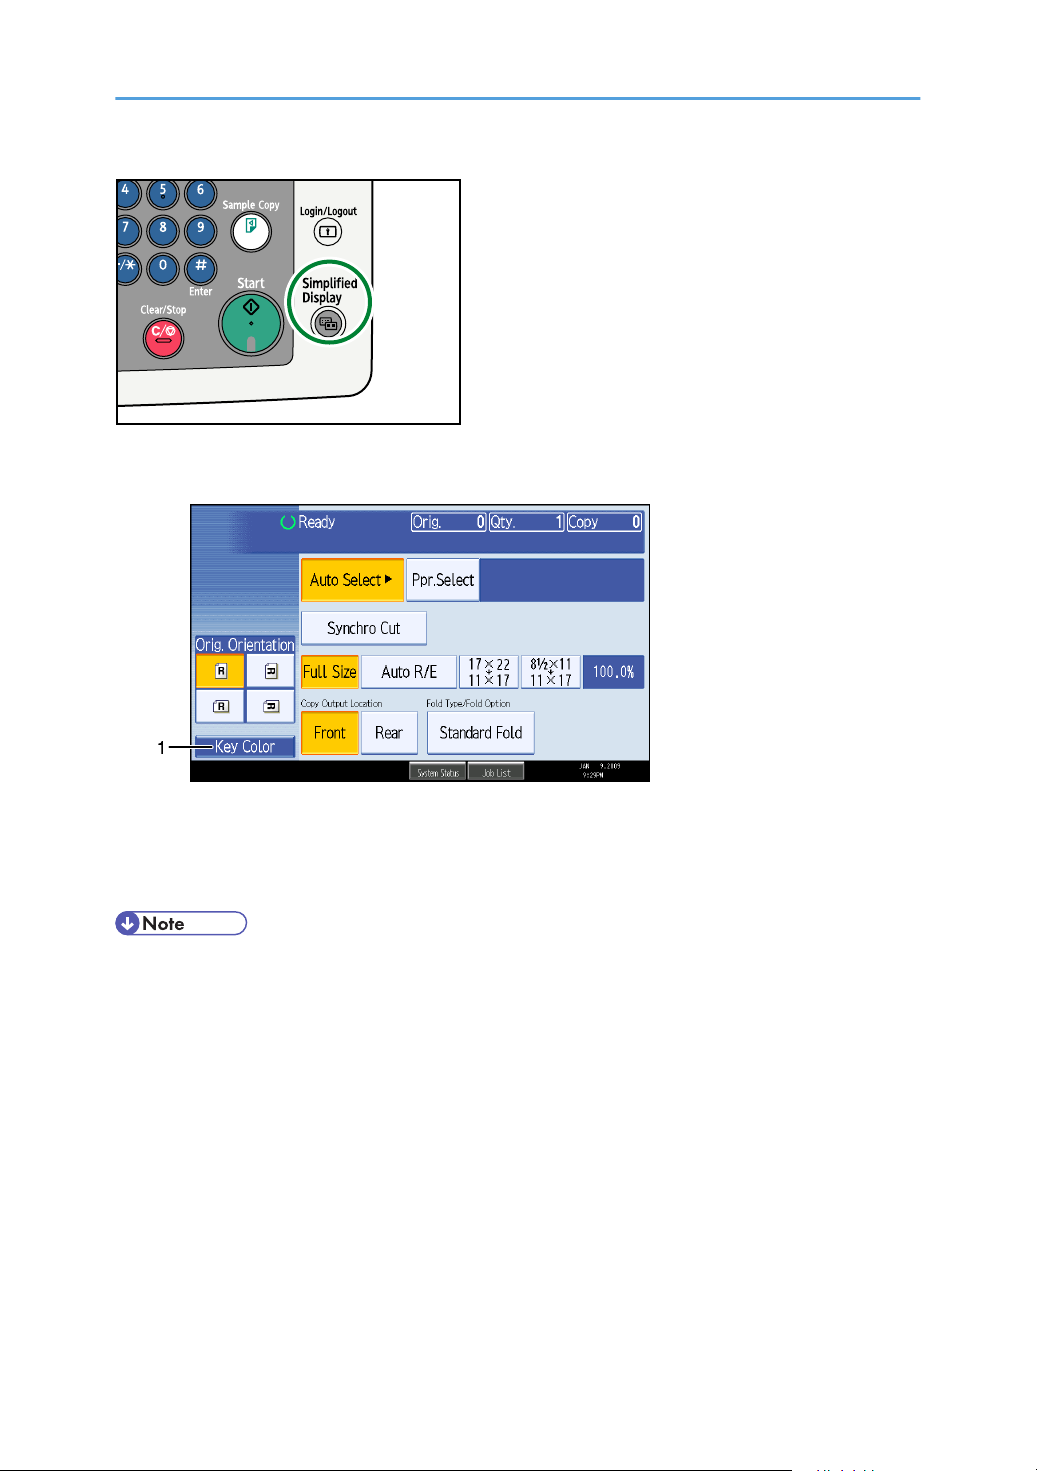
Simplified Display
This section explains how to switch to the simplified display.
When you press the [Simplified Display] key, the screen changes from the initial display to the simplified
display.
Letters and keys are displayed at a larger size, making operations easier.
18
BKX024S
Example of a simplified display
BKY058S
1. [Key Color]
Press to increase screen contrast by changing the color of the keys.
This is available only for the simplified display.
• To return to the initial display, press the [Simplified Display] key again.
• Certain keys do not appear on the simplified display.
19

20
1. Placing Originals
This chapter describes original and copy output locations, the types of originals you can set, and how to
place originals.
Original and Copy Output Locations
Specify original and copy output locations before copying.
Original Output Locations
Two types of original output locations are available.
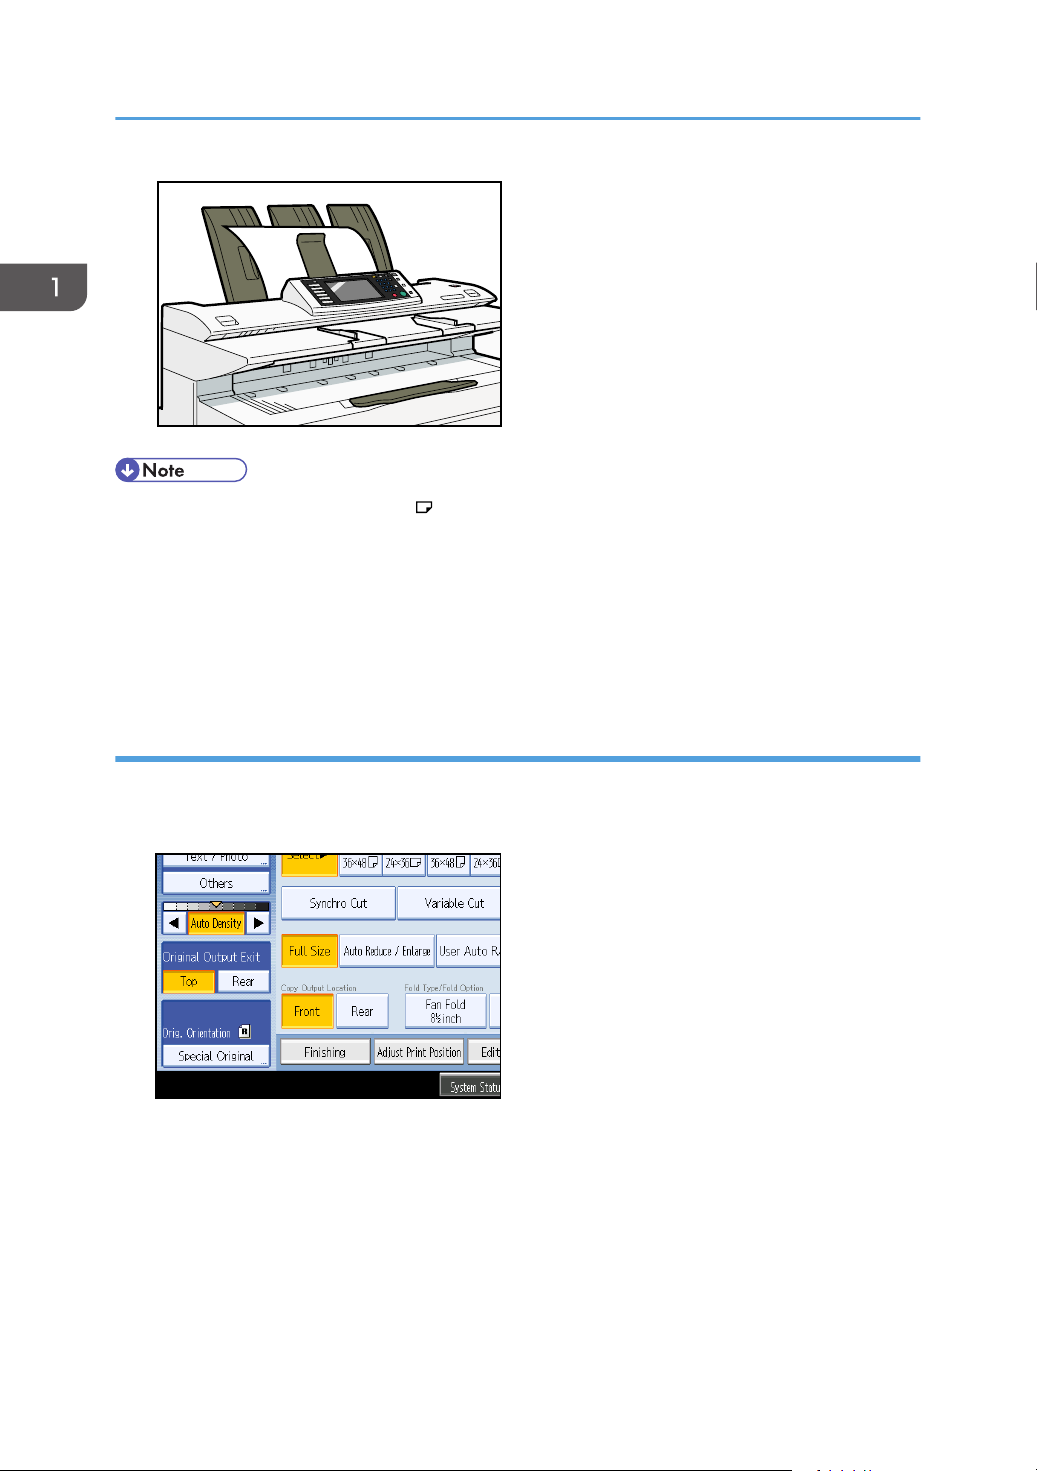
Original Upper Output
This is the basic original output location.
Originals are ejected onto the original stacker.
Original Rear Output
Originals are ejected onto the original output guides. When copying thick or hard originals, select
this output location.
Original upper output
Originals are ejected onto the original stacker.
1. Press [Top].
Originals are ejected onto the original stacker.
21
BKW019S
1. Placing Originals
• If the original is larger than A1(D) , select original rear output.
• If the original is heavier than 157 g/m2 (41.8 lb.), select original rear output.
• If the original is plain paper not heavier than 52.3 g/m2 (13.9 lb.) or translucent paper not
heavier than 80 g/m2 (21.3 lb.), select original rear output.
• When copying a rolled original, prevent it curling up on the stacker by holding its leading edge as
it is ejected.
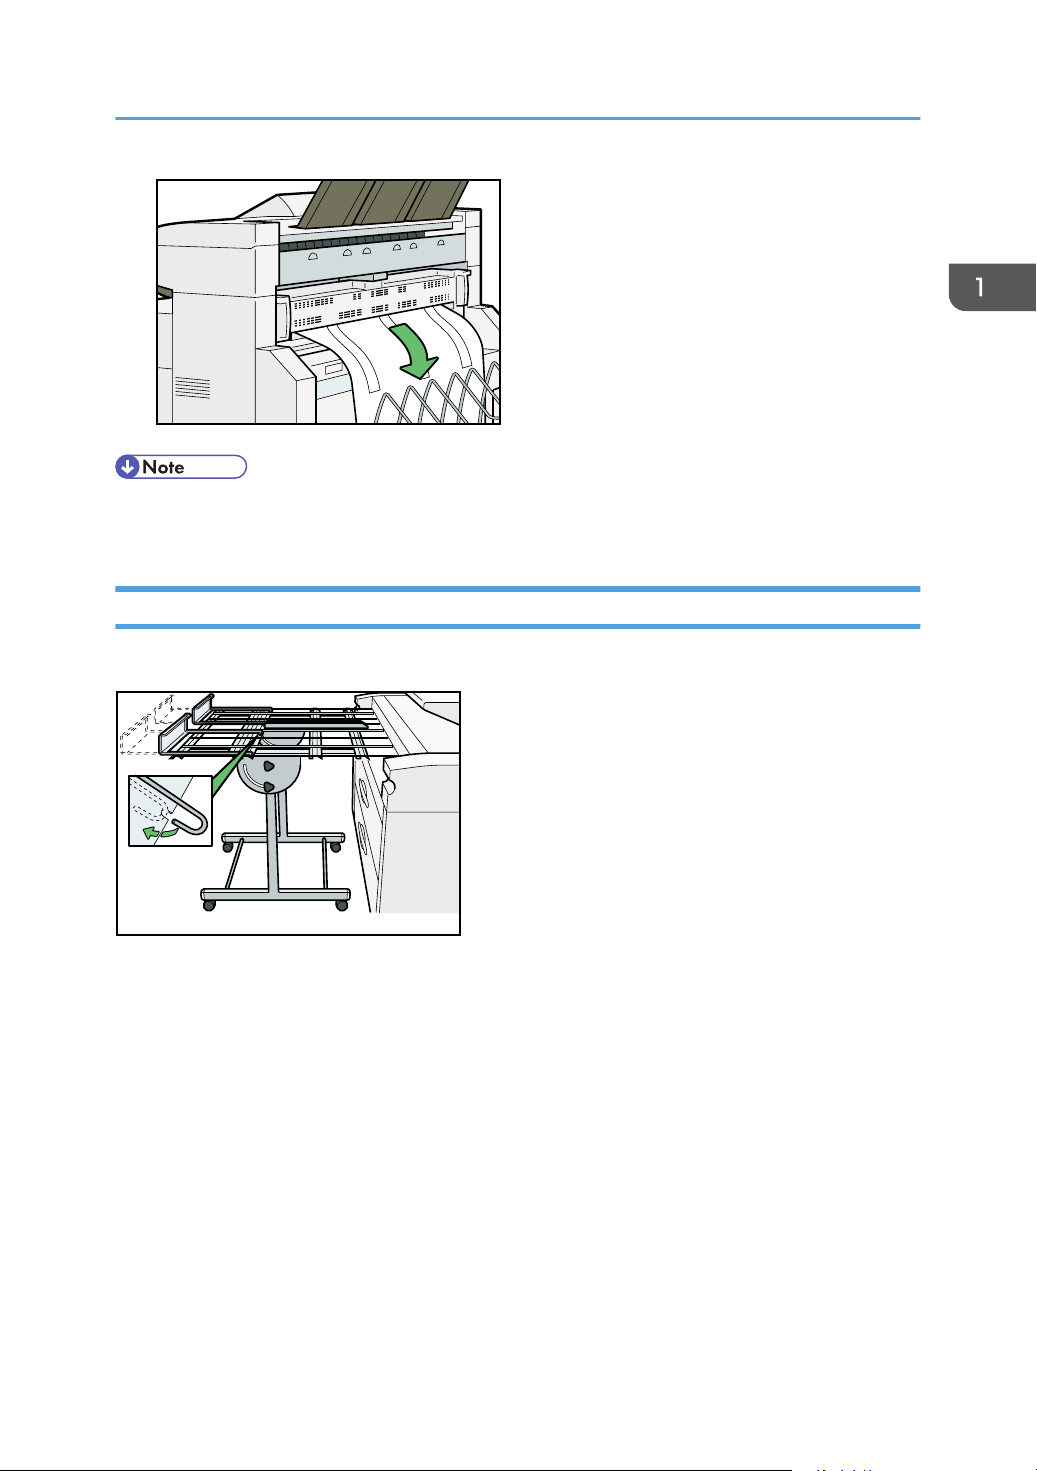
Original rear output
Originals are ejected onto the original output guides.
1. Press [Rear].
Originals are ejected onto the original output guides.
22
BKV034S
Copy Output Locations
Two types of copy output locations are available.
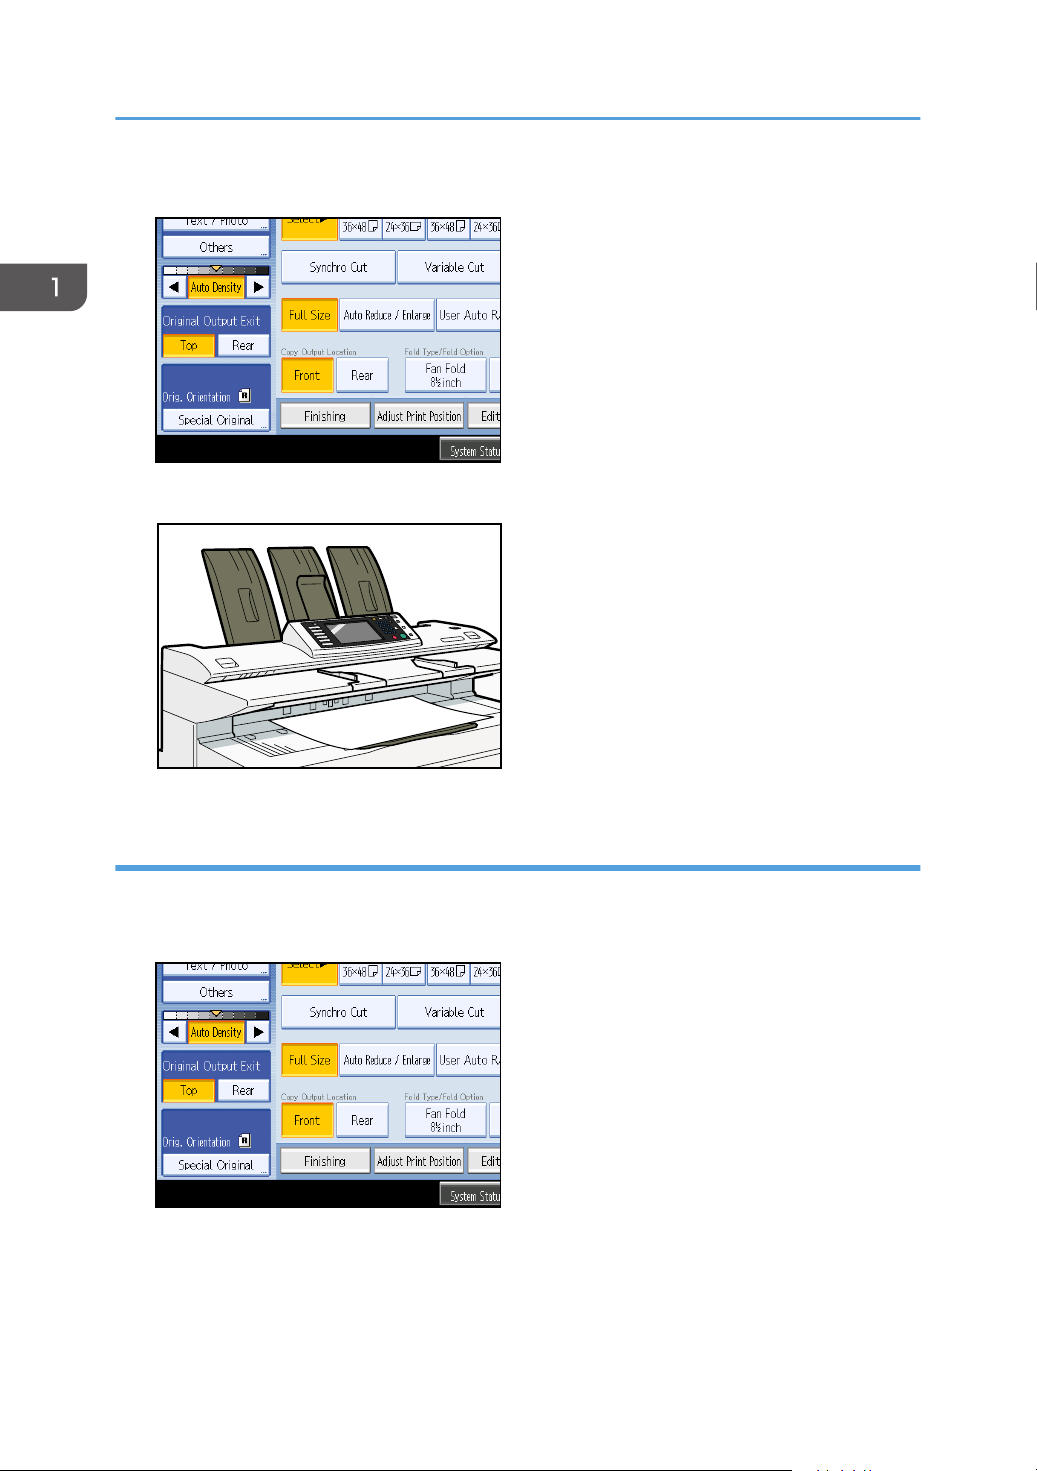
Front
Prints are delivered through the front paper output exit at the front of the machine.
When copying sizes up to A1 , we recommend selecting front copy output.
Original and Copy Output Locations
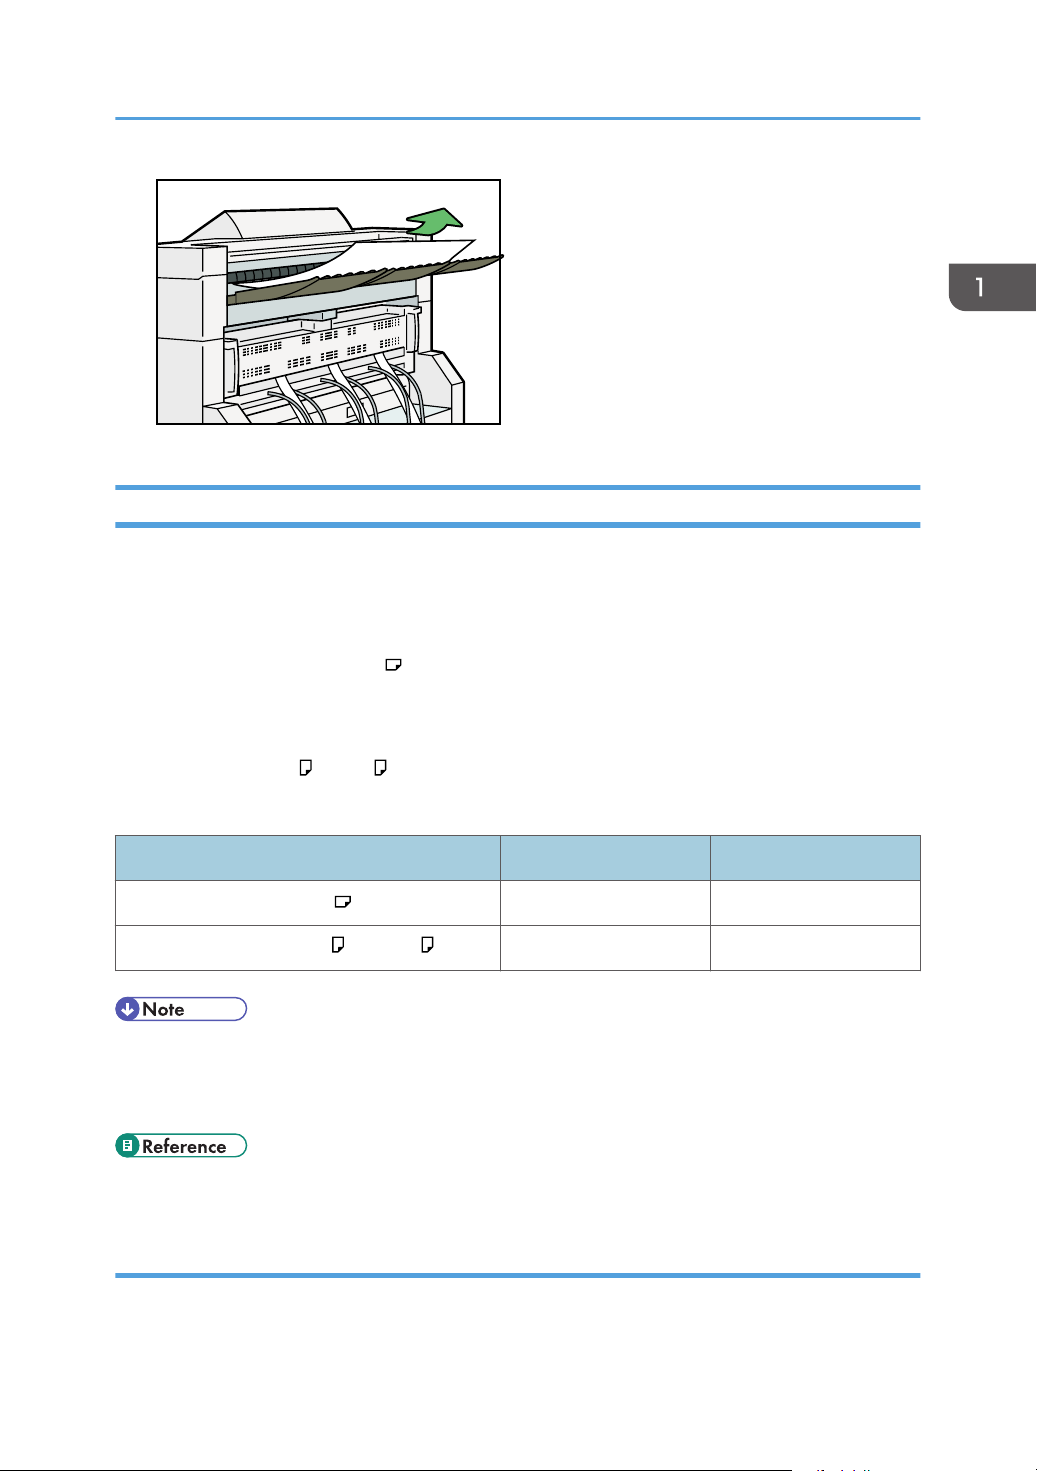
Rear
Prints are delivered through the rear paper output exit at the back of the machine.
When copying A1 K or A0 K, select rear copy output.
The table below shows you how many sheets can be stacked.
Plain paper Translucent paper
Upper copy output (A1 (D) or smaller) 100 sheets 10 sheets
Lower copy output (A1 (D) or A0 (E) ) 10 sheets 1 sheet
• If copies exceed the upper limit, paper jams may occur. Remove the copies from the stacker.
• When copying onto film, hold the leading edge of the copied film, remove it from the stacker, and
then place it on a level surface.
• p.17 "Functions Requiring Optional Configurations"
Front copy output
Prints are delivered through the front paper output exit.
23
BKW007S
1. Placing Originals
1. Make sure [Front] is selected under Copy Output Location.
Prints are delivered through the front paper output exit.
Rear copy output
Prints are delivered through the rear paper output exit.
1. Select [Rear] under Copy Output Location.
Prints are delivered through the rear paper output exit.
24
BKV033S
BKW054S
Original and Copy Output Locations
• When using thick paper, the last sheet to be ejected may remain in the output exit. If this happens,
remove it.
Adjusting the rear output
When using the rear output, adjust the hook position to the size of the copy.
25
1. Placing Originals
Originals
This section describes the types of originals that can be placed, and missing image area.
Sizes and Weights of Recommended Originals
The following describes recommended paper sizes and non-compatible originals for this machine:
Metric version
Original location Original size Original weight
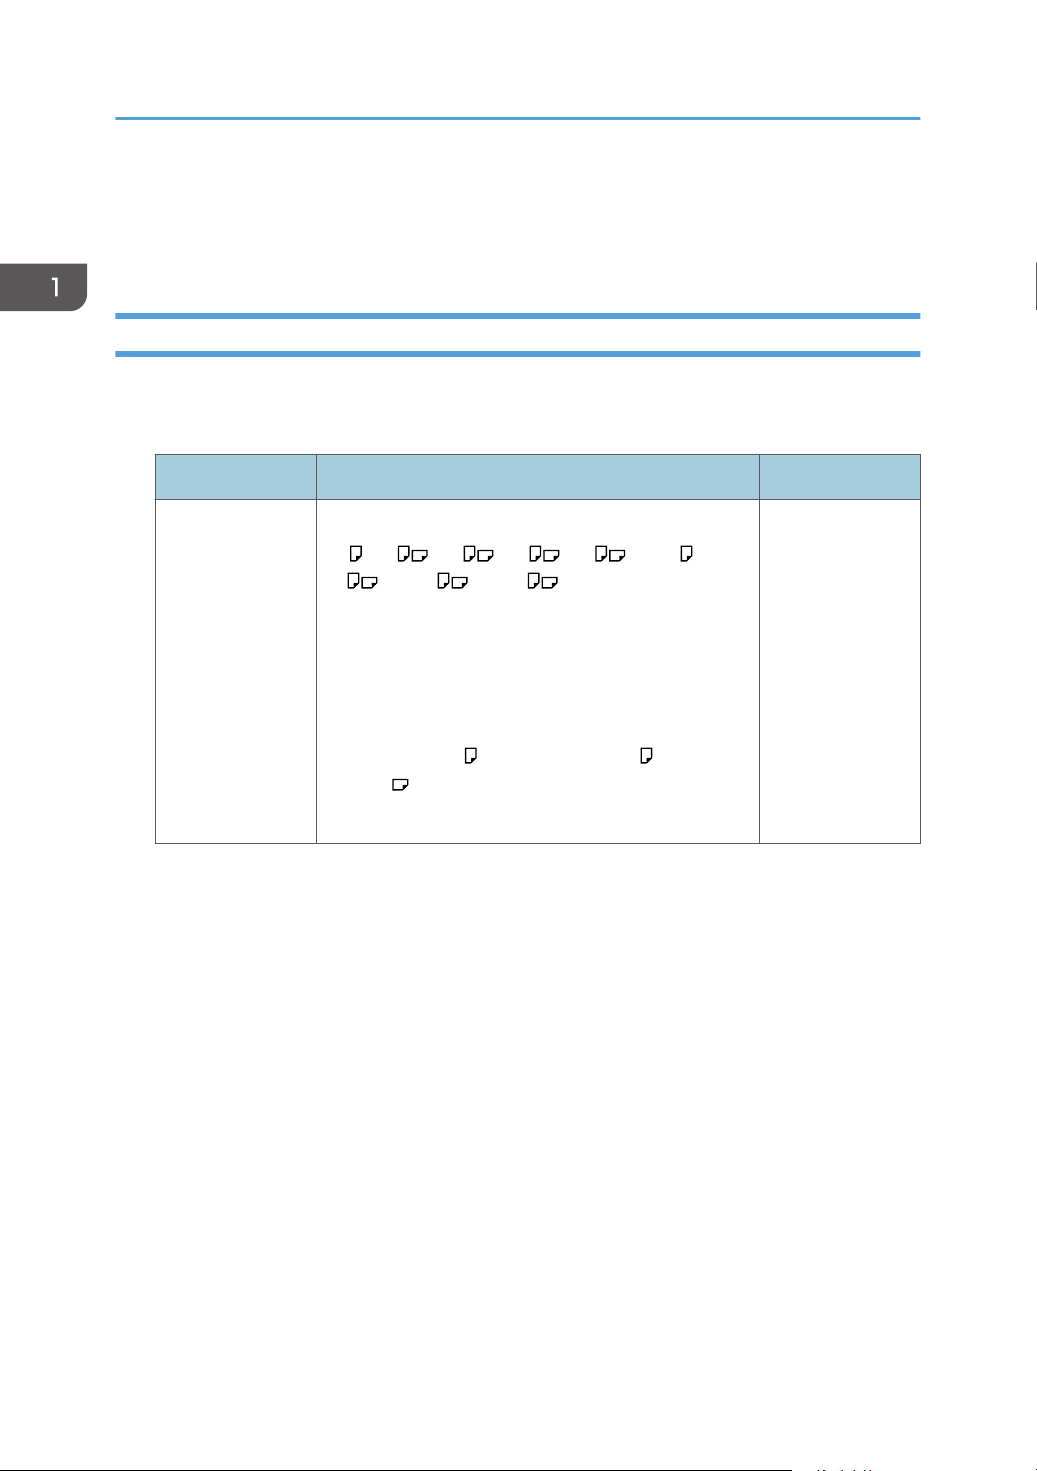
Original table Standard sizes:
A0 , A1 , A2 , A3 , A4 ,B1 JIS , B2
JIS , B3 JIS , B4 JIS
Custom sizes:
Length:182 - 15,000mm (Type 1)
Length:182 - 30,000mm (Type 2)
Width: 210 - 914 mm
(including B1 ISO , 625 mm × 880 mm , 440 mm ×
625 mm )
(Maximum width 950 mm)
JIS: Japanese Industrial Standard
ISO: International Organization for Standardization
20.9 - 157 g/m
and 0.03 - 1 mm
thick originals
2
26
Inch version
Original location Original size Original weight
Originals
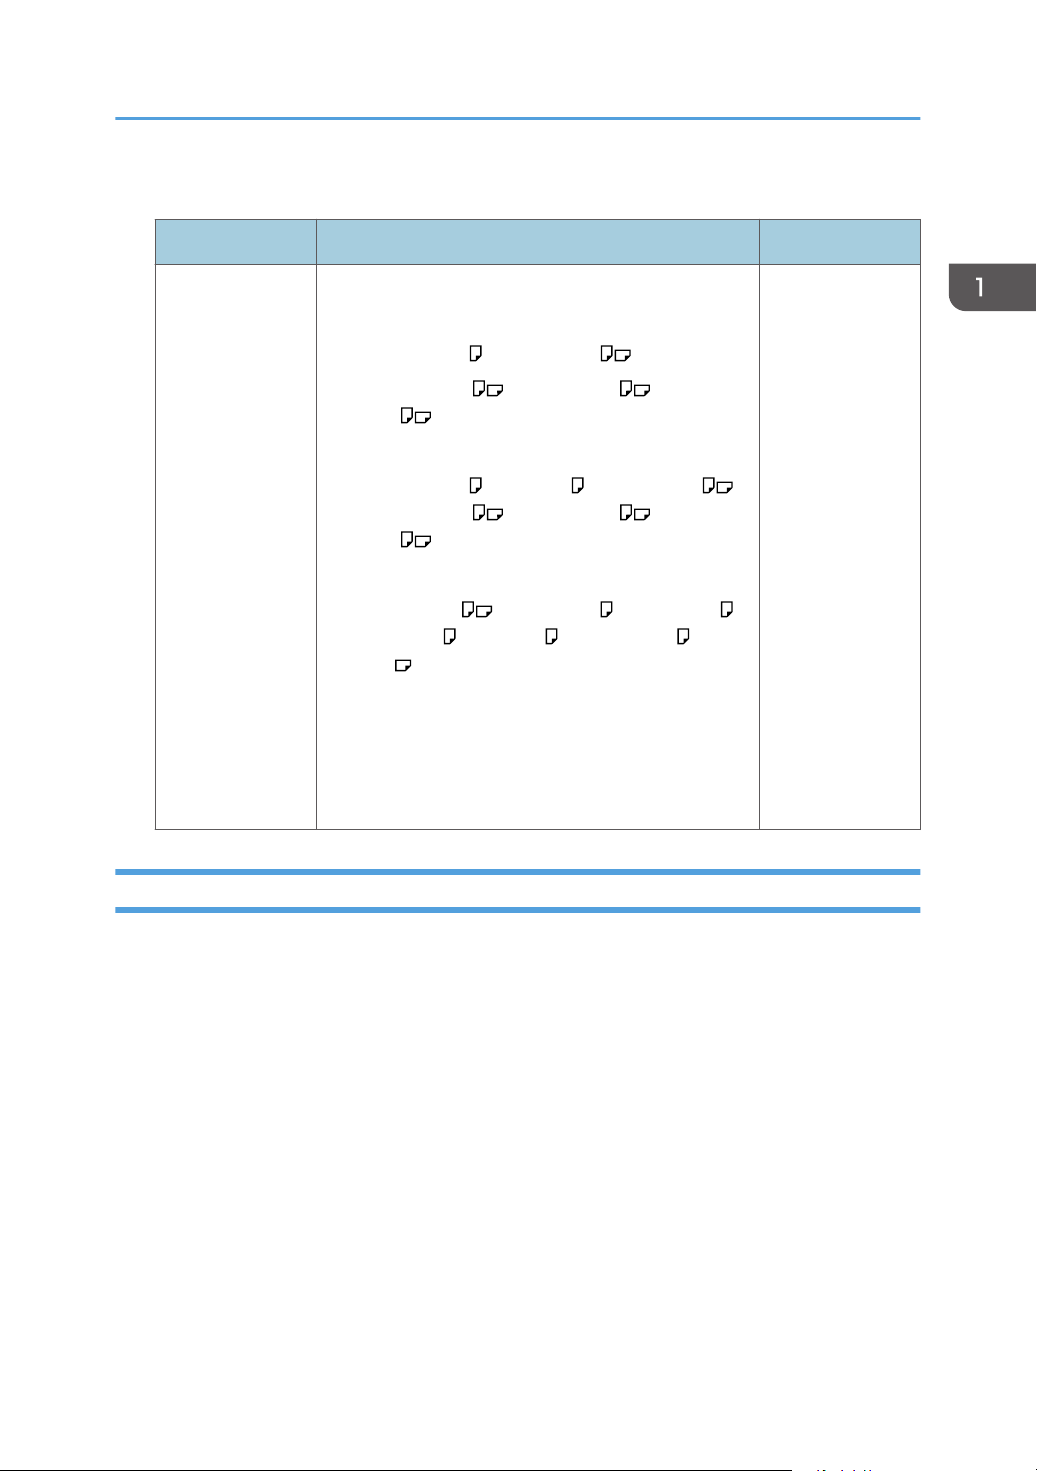
Original table Standard sizes:
• Engineering
E (34" × 44") , D (22" × 34") ,
C (17" × 22") , B (11" × 17") , A (81/2" ×
11")
• Architecture
E (36" × 48") , 30" × 42" , D (24" × 36") ,
C (18" × 24") , B (12" × 18") , A (9" ×
12")
• Other
81/2" × 12" , 81/2" × 13" , 81/2" × 14" ,
11" × 14" , 11" × 15" , 12" × 141/2" , 30" ×
21"
Custom sizes:
Length: 81/2" - 1181.2"
Width: 81/2" - 36"
(Maximum width: 37.4")
5.6 - 41.8 lb. and
1.1 Mil - 40 Mil
thick originals
Originals that should be scanned using the carrier sheet
The following types of originals should be mounted on the carrier sheet. You should also use the carrier
sheet for important originals and for originals you will copy repeatedly.
• Cut and pasted originals
• Originals with fold lines
• Wrinkled or torn originals
• Waved originals
• Punched originals
• Originals with sticky tape or adhesive
• Pasted originals
• Originals with a damaged leading edge
• Originals with surfaces that attach to glass easily such as photographs
• Originals drawn in pencil
27

1. Placing Originals
• Originals no thicker than 52.3g/m2 (14 lb.).
• p.36 "Setting the Carrier Sheet"
Non-compatible originals
The following types of originals can cause jams, or may itself be damaged.
• Originals other than those specified in “Sizes and Weights of Recommended Originals”
• Stapled or clipped originals
• Perforated or torn originals
• Bent, folded, or creased originals
• Pasted originals
• Originals with any kind of coating, such as thermal fax paper, art paper, aluminum foil, carbon
paper, or conductive paper
• Originals with indexes, tags, or other projecting parts
• Thin and soft originals such as translucent paper
• Bound originals such as books
• Damp originals
• Badly curled originals
• Originals that vary in thickness
• Originals with sticky tape or adhesive
• Originals with thick leading edges
• Originals with wet ink or correction fluid
• Carbon-backed originals
• Originals not made of paper (such as glass, metal)
• Originals with a roll diameter smaller than 35 mm (1.4")
• Originals with a roll diameter larger than 110 mm (4.3")
Flatten curled originals so they fit within the range shown below.
• Front and back curl; R 60 mm (2.4") or more, height 10 mm (0.4") or less
28
 Loading...