

Page 1

Connecting to a Personal Computer
Operation Manual
To ensure correct use of your
camera, read this manual
carefully before use. Keep the
manual handy for future use.
Page 2

Introduction
Thank you for purchasing a Ricoh RDC-i500. This manual explains the correct handling
procedures and precautions for your camera. To ensure the best performance, please
read the manual thoroughly before using the camera. Keep the manual handy for quick
future reference.
Ricoh Co., Ltd.
Test Shots
Check that your camera is recording the images correctly by taking a number of test
shots.
Copyright
Reproduction or alteration of copyrighted documents, magazines, music and other
materials, other than for personal, home or similarly limited purposes, without the
consent of the copyright holder is prohibited.
Exemption from Liability
Ricoh Co., Ltd. assumes no liability for failure to record or play back images caused
by malfunction of the RDC-i500.
Warranty
This product is manufactured to local specifications and the warranty is valid within
the country of purchase. Should the product fail or malfunction while you are abroad,
the manufacturer assumes no responsibility for servicing the product locally or bearing the expenditure incurred therefor.
Radio Interference
Operating the RDC-i500 in the vicinity of other electronic equipment may adversely
affect the performance of both devices. In particular, operating the camera close to
a radio or television may lead to interference. If interference occurs, follow the procedures below.
– Move the camera as far away as possible from the TV, radio or other device
– Reorient the TV or radio antenna.
– Plug the devices into separate electrical outlets.
• This publication may not be reproduced in whole or part without the express written permission of Ricoh.
©2001 Ricoh Co., Ltd. All rights reserved.
• Ricoh reserves the right to change the contents of this publication without notice. Considerable care was
taken in preparing this manual. If, however, you have questions about any part of the manual, or note
mistakes or inaccuracies, please contact us at the address listed on the back cover.
Microsoft, MS and Windows are registered trademarks of Microsoft Corporation in the United States of America
and other countries.
Macintosh is a registered trademark of Apple Computer, Inc., in the United States of America and other countries.
CompactFlash is a registered trademark of SunDisk Corporation in the United States of America.
SmartMedia is a trademark of Toshiba Corporation.
Net Font is a registered trademark of Access Co., Ltd. in Japan.
All trademarked company and product names mentioned in this manual are the property of their respective owners.
Page 3
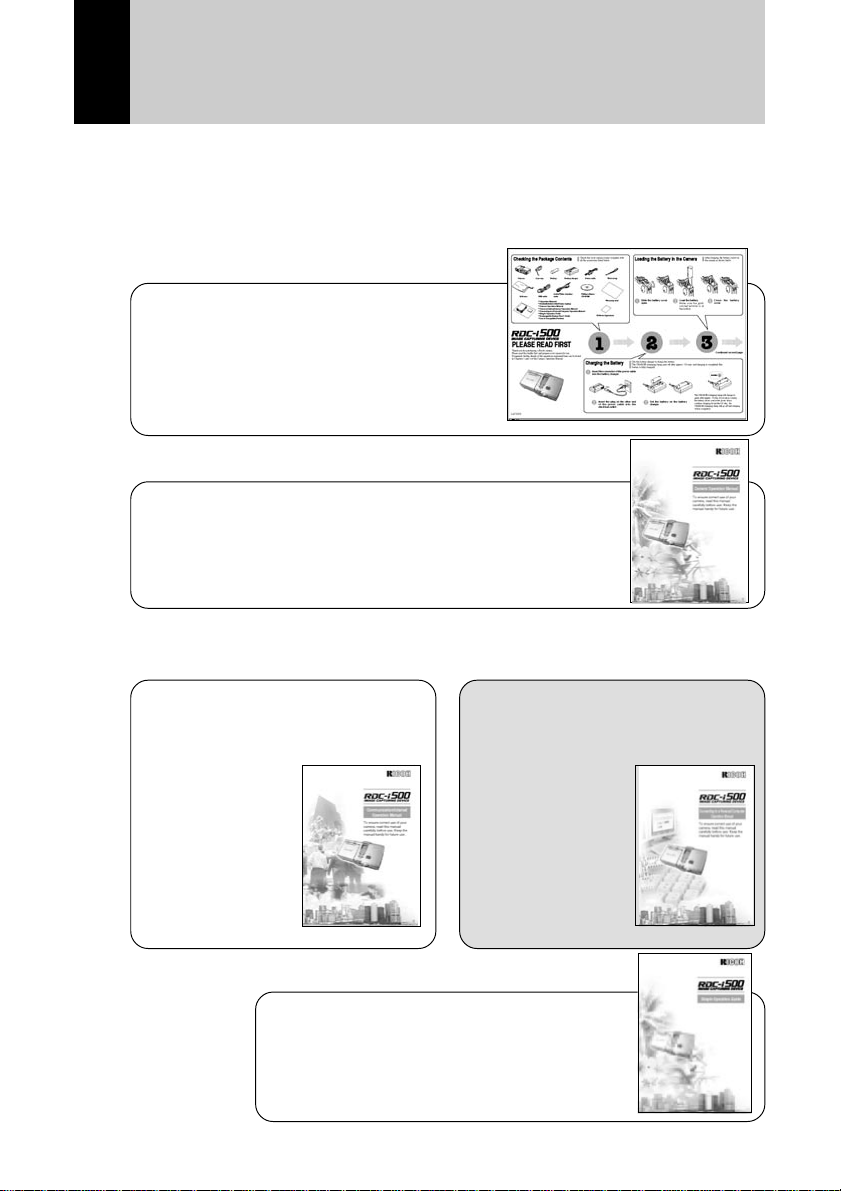
How to Use the Operation Manuals
Five operation manuals are supplied with this camera.
Use each operation manual as shown below to suit the purpose.
Open the package
➜
Read This Before Proceeding!
These instructions explain the procedure
for checking the contents of the package
and loading the battery to enable you to
use the camera straightaway.
➜➜
Basic operation
Camera Operation Manual
This manual explains in detail the preparations to take
before using the camera together with the procedures for
shooting and playback using the various functions.
➜
Using the communication
and Internet functions
Sending and receiving data
using the camera and a PC
Communication/Internet
Operation Manual
This manual
explains the
procedures for
transmitting images
and using Internet
functions.
Simple Operation Guide
This guide explains the basic setting
procedures of recording, transmitting images
and transferring them to a PC.
Connecting to a Personal
Computer Operation
Manual (this manual)
This manual explains
the procedures for
connecting the
camera to a PC,
transmitting images
from the camera to
the PC and
operating the
camera from the PC.
1
Page 4

CONTENTS
How to Use the Operation Manuals...................................................... 1
Chapter 1 Getting Started
Using a Personal Computer.................................................................. 8
What You Can Do Using a PC............................................................... 8
PC Environment ................................................................................... 10
Connecting Methods ............................................................................ 12
Installing the USB Driver..................................................................... 13
For Windows ........................................................................................ 13
For Macintosh....................................................................................... 14
Installing the Application Software ..................................................... 15
For Windows ........................................................................................ 15
For Macintosh....................................................................................... 17
Connecting the Camera to a PC......................................................... 20
Connecting the Camera to the USB Port ............................................ 20
Connecting the Camera to a Network ................................................. 23
Making the Camera Settings ............................................................... 25
COM Port Settings for Windows 98/ME .............................................. 25
Chapter 2 Viewing Images on a PC
Controlling the Camera from the Browser .......................................... 28
Preparing the Camera.......................................................................... 28
Opening the Camera’s Homepage on the Browser ............................ 28
Displaying Thumbnail Images ............................................................ 31
Viewing Thumbnail Images.................................................................. 31
Displaying File Properties .................................................................... 33
Checking the Data................................................................................ 34
Saving Data in the PC.......................................................................... 36
Displaying Thumbnail Images with Capture Guide Titles .................. 38
Viewing Thumbnail Images with Guide List......................................... 38
Displaying File Properties .................................................................... 40
Displaying an Image in its Actual Size ................................................ 41
Saving Data in the PC.......................................................................... 42
2
Page 5

Chapter 3 Recording Images with the Camera
Shooting Still Images .......................................................................... 44
Shooting ............................................................................................... 44
Checking the Image ............................................................................. 47
Saving the Image ................................................................................. 48
Shooting Text Files ............................................................................. 49
Shooting ............................................................................................... 49
Saving the Image ................................................................................. 52
Recording Motion Pictures.................................................................. 53
Recording ............................................................................................. 53
Saving the Motion Picture .................................................................... 56
Recording a Voice Memo ................................................................... 57
Recording ............................................................................................. 57
Saving the Voice Memo File ................................................................ 60
Chapter 4 Changing the Camera Settings
Address Book Settings ....................................................................... 6 2
Displaying the Address Book ............................................................... 62
Entering a New Address ...................................................................... 63
Editing an Address ............................................................................... 64
Deleting an Address............................................................................. 65
Saving the Address Book in the PC .................................................... 65
Transferring the Address Book Stored in the PC to the Camera........ 66
User Information Settings ................................................................... 68
Modem Settings .................................................................................. 70
E-Mail Settings.................................................................................... 72
Preset Memo Settings ........................................................................ 74
Displaying the Preset Memos .............................................................. 74
Creating a New Preset Memo.............................................................. 75
Editing a Preset Memo......................................................................... 76
Deleting a Preset Memo ...................................................................... 77
Setting Signatures............................................................................... 78
Displaying the List of the Signatures ................................................... 78
Selecting the Signature to be Used ..................................................... 79
Adding New Signatures ....................................................................... 80
Editing a Signature............................................................................... 81
Deleting a Signature ............................................................................ 82
Dial-Up Account Settings.................................................................... 83
Displaying the Dial-Up Accounts ......................................................... 83
Entering a New Dial-Up Account ......................................................... 84
Editing a Dial-Up Account .................................................................... 85
Deleting a Dial-Up Account.................................................................. 86
3
Page 6

Direct Upload Settings ........................................................................ 87
Displaying the Direct Upload Dial-Up Accounts .................................. 87
Selecting a Direct Upload Dial-Up Account......................................... 88
Setting the Send-To Folder Name and Server .................................... 89
Quick Send Settings .......................................................................... 90
Displaying the Quick Send Dial-Up Accounts ..................................... 90
Selecting a Quick Send Dial-Up Account ............................................ 91
Selecting a Quick Send Send-To Account .......................................... 92
Selecting the Size of the Image to be Sent by Quick Send ................ 93
Setting FTP Upload............................................................................. 94
Displaying the FTP Upload Dial-Up Accounts..................................... 94
Selecting an FTP Upload Dial-Up Account ......................................... 95
Setting a Server for FTP Upload.......................................................... 96
Making a Backup/Restoring the Camera Settings ............................. 97
Saving the Camera Settings in the PC ................................................ 97
Restoring the Backup Settings to the Camera .................................... 98
Chapter 5 Using JOB Navi. Func. Image Capture Guide
List
JOB Navi. Func. Image Capture Guide List ..................................... 102
Role of Guide List............................................................................... 102
Creating a Guide List ......................................................................... 102
Using the Guide List........................................................................... 103
Using the Image Capture Guide List on Excel ................................. 104
Creating a Guide List ......................................................................... 104
Recording Images Using the Guide List ............................................ 106
Pasting the Recorded Images to the Table ....................................... 107
Using the Image Capture Guide List on Word ................................. 110
Creating a Guide List ......................................................................... 110
Recording Images Using the Guide List ............................................ 112
Pasting the Recorded Images into a Document................................ 112
Setting the Image Capture Guide List on the Browser..................... 114
Displaying the Guide Lists ................................................................. 114
Creating a New Guide List ................................................................. 116
Editing the Guide List ......................................................................... 118
Deleting a Guide List.......................................................................... 122
Saving the Guide List on the PC........................................................ 123
Transferring the Guide List Saved in the PC to the Camera ............ 124
Setting the Image Capture Guide List Independently on the
Camera ............................................................................................. 126
Rearranging the Image List ............................................................... 126
Deleting a Guide List.......................................................................... 127
4
Page 7

Chapter 6 Using the Extension Functions
Using the RDC-i Explorer Plug-In..................................................... 130
Using the RDC-i Mounter.................................................................. 133
Making a Backup File of the Camera Settings ................................. 136
Making a Backup File......................................................................... 136
Restoring the Backup Settings to the Camera .................................. 138
Using the TWAIN Function ............................................................... 140
For Windows ...................................................................................... 140
For Macintosh..................................................................................... 142
Chapter 7 Setting the Receiving PC for Direct Upload
Setting the Receiving PC for Direct Upload ..................................... 146
For Windows ...................................................................................... 146
For Macintosh..................................................................................... 151
Appendix
Camera Settings When Connected to a PC..................................... 156
Setting the PC Connection Environment ........................................... 156
Setting the Network Environment ...................................................... 158
Error Messages................................................................................. 160
Error Messages Displayed on the Web Browser .............................. 160
Other Error Messages........................................................................ 163
Troubleshooting ................................................................................ 166
Restoring the Device Which Could not be Used anymore................ 166
Selecting “Never dial a connection” ................................................... 167
Checking the Proxy Server ................................................................ 168
Installing the Dial-Up Adapter ............................................................ 169
Index.................................................................................................. 170
Functional Index ................................................................................. 170
Alphabetical Index.............................................................................. 174
Tips
Saving the Camera’s Homepage...................................................... 30
Image Capture Guide List Display.................................................. 128
Using the Microsoft Power Point Presentation Data ...................... 132
At the end of this manual troubleshooting for error
messages, alphabetical index and index by functions are
listed for your convenience.
Refer to the most up-to-date information included in the
[Readme] file in the CD-ROM, if necessary.
5
Page 8

6
Page 9

Chapter
1
Getting Started
Using a Personal Computer .....8
What You Can Do Using a PC .......8
PC Environment ...........................10
Connecting Methods ....................12
Installing the USB Driver ........13
For Windows ................................ 13
For Macintosh ..............................14
Installing the Application
Software ...................................15
For Windows ................................ 15
For Macintosh ..............................17
Connecting the Camera to a
PC .............................................20
Connecting the Camera to the
USB Port ......................................20
Connecting the Camera to a
Network ........................................23
Making the Camera Settings ........25
COM Port Settings for Windows
98/ME ........................................... 25
Page 10

Using a Personal Computer
The range of available applications can be greatly increased by connecting the
camera to a PC.
What You Can Do Using a PC
By connecting the camera to a PC, you can take advantage of the following
functions.
■ Using the Camera Control Functions from the Browser
By accessing the camera’s homepage from the PC Web browser, you can use
the following functions.
● Viewing and Saving Images
This function enables you to view images recorded in the camera’s storage
memory (internal memory or CF card) on the PC screen. You can view the
images in a thumbnail display or in their actual size. Simple procedures also
enable you to save a displayed image (or voice memo or motion picture) as a
file on the hard disk or external disk drive of the PC.
● Recording Images While Controlling the Camera from the PC
You can control the camera from the PC to record still images, text files, motion
pictures and voice memos.
● Setting the Camera from the Large Screen
You can make the various camera settings, such as Address Book and Dial-Up
settings, using the large screen of the PC. You can also make a backup file of
all the camera settings as a PC file.
• To use this function, after installing the software and connecting the
See
camera according to the instructions in the latter half of the chapter,
refer to Chapter 2 “Viewing Images on a PC”, Chapter 3 “Recording
Images with the Camera” and Chapter 4 “Changing the Camera
Settings”.
■
Using the JOB Navi. Func. Image Capture Guide List Tool Kit
If you install the
create a capture guide list based on a Microsoft Excel or Microsoft Word table
or document and transfer it to the camera using the extended functions. After
shooting the images with the camera according to the guide list, open the
original table or document again and the images will be incorporated.
JOB Navi. Func.
The
PC running Windows.
JOB Navi. Func.
Image Capture Guide List Tool Kit can only be used on a
Image Capture Guide List Tool Kit, you can
8
Page 11

• To use the Image Capture Guide List Tool Kit, after installing the
See
software and connecting the camera according to the instructions in
the latter half of this chapter, refer to Chapter 5 “Using JOB Navi.
Func. Image Capture Guide List”.
■ Using the RDC-i Explorer Plug-In / RDC-i Mounter
The RDC-i Explorer Plug-In (Windows) / RDC-i Mounter (Macintosh) are
extended functions for copying images stored in the camera onto the hard disk
of the PC, or copying image files or setting files created on the PC in the
camera.
Function such as making a backup file of all the camera settings on the PC is
also available.
• To use the RDC-i Explorer Plug-In / RDC-i Mounter functions, after
See
installing the software and connecting the camera according to the
instructions in the latter half of this chapter, refer to Chapter 6 “Using
the Extension Functions”.
■ Using the TWAIN Function
If you install a TWAIN driver for this camera, you can call up the images
recorded in the camera’s storage memory (internal memory or CF card) directly
from the graphic application software compatible with TWAIN onto the screen.
1
Getting Started
• To use the TWAIN function, after installing the software and
See
connecting the camera according to the instructions in the latter half of
this chapter, refer to Chapter 6 “Using the Extension Functions”.
■ Setting the PC for Direct Upload
To use the [DIRECT UPLOAD] function to send images directly to a specific PC
from outside the company, the PC must be set to receive the images. This
manual explains the settings to be made.
• To set the receiving PC, after installing the software and connecting
See
the camera according to the instructions in the latter half of this
chapter, refer to Chapter 7 “Setting the Receiving PC for Direct
Upload”.
9
Page 12

PC Environment
To connect the camera to a PC, the PC must meet the following conditions.
■ For a PC running Windows
• One of the following Windows programs must be installed.
Microsoft Windows
Microsoft Windows
Microsoft Windows
Microsoft Windows
• USB port:
When you use the USB cable to connect the camera with a PC, the PC
must be factory equipped with a USB port guaranteed by the PC
manufacturer.
• Memory:
Windows 98/SE: 32 MB or more (recommended 96 MB or more)
Windows Me: 32 MB or more (recommended 96 MB or more)
Windows 2000: 128 MB or more (recommended 256 MB or more)
• Hard disk space: 6 MB or more
• To access the camera from the Web browser, Internet Explorer (version 5),
Netscape Communicator (version 4.7) or other Web browser must be
installed.
• To use the Image Capture Guide List Tool Kit, Microsoft Office 97 or 2000
(Microsoft Excel, Microsoft Word) must be installed.
®
98
®
98 Second Edition
®
Me
®
2000
10
• To use the TWAIN function, application software compatible with
Note
TWAIN must be installed.
• The explanations in this manual are based on Windows 98. The
displays may differ slightly depending on the Windows version.
• The display may differ depending on the kind or version of the
browser.
Page 13

■ For Macintosh
• If you use the USB cable to connect the camera to a Macintosh equipped with
a standard USB port, a MacOS 8.6~9.1 operating system must be installed.
• CPU: PowerPC
• Memory: 96 MB or more
• Hard disk space: 6 MB or more
• To access the camera from the Web browser, Internet Explorer
Note
(version 5), Netscape Communicator (version 4.7) or other Web
browser must be installed.
• To use the TWAIN function, application software compatible with
TWAIN is required.
• If the Mac operating system is earlier than OS9, Apple Remote Access
(ARA) is required to set the PC for Direct Upload.
• The explanations in this manual are based on OS9. The displays may
differ slightly depending on the OS version.
• The display may differ depending on the kind or version of the
browser.
1
Getting Started
11
Page 14

Connecting Methods
The camera can be connected to the PC by one of the following methods.
Decide which method you will use. (Connect the camera after the software has
been installed.)
■ Connecting the Camera to the USB Port
This method is for connecting the camera to the PC using the USB cable,
supplied with the camera.
USB cable supplied
■ Connecting the Camera to a Network
You can connect the camera to an existing network (LAN by Ethernet, etc.)
using the recommended LAN card. This method is useful when using the
camera on several PCs or when using several cameras.
12
Ethernet cable
HUB
Page 15

Installing the USB Driver
This section explains how to install the software for connecting the camera to
the PC by USB cable.
Follow these instructions only if connecting the camera to the PC by USB
cable.
Important
• Do not connect the camera to the PC until the software has been
Note
installed, otherwise installation will not proceed smoothly.
When you have established a connection, click [Cancel] on a plug &
play window that appears and remove the USB cable.
For Windows
If you are using Windows, install the USB driver as follows.
A Turn the PC on.
When Windows is up and running, proceed to the next step.
B Insert the CD-ROM provided in the CD-ROM drive of the PC.
C Double-click on [My Computer] and then double-click on the CD-
ROM. Next double-click on the [USB_Drvs] folder.
1
Getting Started
D Double-click on [Setup].
Installation of the software for connecting the camera by USB cable will start.
Follow the instructions displayed on the screen. When installation is completed,
proceed to the next step.
13
Page 16

• Updated information on installation is provided in the [Readme] file in
Note
the [Usb drvs] folders. If necessary, refer to this information.
• When you connect/remove the USB cable or cancel installation before
installing the USB driver, the cable may be recognized as an unknown
device for a PC. Refer to page 166 “Troubleshooting” for
troubleshooting.
For Macintosh
If you are using a Macintosh, install the USB driver as follows.
A Turn the PC on.
When the Macintosh is up and running, proceed to the next step.
B Insert the CD-ROM provided in the CD-ROM drive of the PC.
C Double-click on the CD-ROM. Next double-click on the [Usb driver]
folder, and then double-click on [RDC-i USB Inst].
Installation of the software for connecting the camera to the PC by USB cable
will start. Follow the instructions displayed on the screen. When installation is
completed, proceed to the next step.
14
• Updated information on installation is provided in the [Readme] file. If
Note
necessary, refer to this information.
• This USB driver cannot be used with Mac OS-X.
Page 17

Installing the Application Software
This section explains how to install the various application software for using
the camera.
For Windows
Install the application software for Windows.
■ Installing RDC-i Software
• This procedure will install the following items: RDC-i Explorer Plug-In,
Note
RDC-i Direct upload, RDC-i virtual server process, RDC-i TWAIN
Driver, RDC-i Signature transfer. Use the custom installation to install
only the specified items. Note that the RDC-i Signature transfer is a
software exclusive for RDC-i 700 camera.
A Check that the PC is turned on.
B Check that the CD-ROM supplied is inserted in the CD-ROM drive
of the PC.
C Double-click on [My Computer] and then double-click on the CD-
ROM. Next, double-click on the [RDC-i Software] folder and
double-click on the [Disk1] folder.
D Double-click on [Setup].
1
Getting Started
Installation of the RDC-i Software will start. Follow the instructions displayed on
the screen.
Important
• When you have finished installation shown above, the software “RDC-i
Note
virtual server process” will be launced automatically everytime
Windows runs and the corresponding icon will be displayed on the
task bar. When you have exited this software in case of connecting
with a USB cable, take note that the communication between the
camera and PC will not be established.
15
Page 18

■ Installing QuickTime
• QuickTime is software for viewing a motion picture recorded with the
Note
camera.
• If QuickTime 4 has already been installed on the PC, this procedure is
not necessary.
A Check that the PC is turned on.
B Check that the CD-ROM supplied is inserted in the CD-ROM drive
of the PC.
C Double-click on [My Computer] and then double-click on the CD-
ROM. Next, double click on the [QuickTime] folder.
D Double-click on [QuickTime Installer].
Installation of the QuickTime software will start. Follow the instructions
displayed on the screen. Install the QuickTime and Web browser plug-in
software for your Web browser.
■ Installing
JOB Navi. Func. Image Capture Guide List
Kit
• For detais of the image capture guide list tool kit, refer to page 8
Note
“Using the
A Check that the PC is turned on.
B Check that the CD-ROM supplied is inserted in the CD-ROM drive
of the PC.
C Double-click on [My Computer] and then double-click on the CD-
ROM. Next, double-click on the [Image Capture Guide] folder.
16
JOB Navi. Func. Image Capture Guide List
Tool Kit”.
Tool
Page 19

D Double-click on [Setup].
The Image Capture Guide List Tool Kit installer will start up. Follow the
instructions displayed on the screen.
• You can choose whichever kit (Excel or Word) you need.
Note
For Macintosh
This section explains how to install the application software for Macintosh.
■ Installing the RDC-i Mounter
A Check that the PC is turned on.
B Check that the CD-ROM supplied is inserted in the CD-ROM drive
of the PC.
C Double-click on the CD-ROM, then double click on [RDC-i Mounter
Inst].
1
Getting Started
Installation of the RDC-i Mounter software will start. Follow the instructions
displayed on the screen.
■ Installing the RDC-i TWAIN Driver
A Check that the PC is turned on.
B Check that the CD-ROM supplied is inserted in the CD-ROM drive
of the PC.
17
Page 20

C Double-click on the CD-ROM, then double-click on [RDC-i TWAIN
Inst].
Installation of the TWAIN driver will start. Follow the instructions displayed on
the screen.
■ Installing QuickTime
• QuickTime is a software required for viewing a motion picture file with
Note
a camera.
• This procedure is not required if QuickTime 4 has already been
installed on your Macintosh.
A Check that the PC is turned on.
B Check that the CD-ROM supplied is inserted in the CD-ROM drive
of the PC.
C Double-click on the CD-ROM, then double-click on the [QuickTime]
folder.
D Double-click on [QuickTime Installer].
Installation of QuickTime will start. Follow the instructions displayed on the
screen.
18
Page 21

■ Installing RDC-i Direct upload
• RDC-i Direct upload is software for preparing and setting the PC that
Note
will receive direct upload from the camera.
A Check that the PC is turned on.
B Check that the provided CD-ROM is placed in the CD-ROM drive of
the PC.
C Double-click on the CD-ROM, then double-click on the [RDC-i
Direct Upload].
D Double-click on the CD-ROM, then double-click on [RDC-i Direct
Inst].
The installation of Direct upload will start. Follow the instructions displayed on
the screen.
1
Getting Started
19
Page 22

Connecting the Camera to a PC
This section explains how to connect the camera to a PC.
Connecting the Camera to the USB Port
This method is for connecting the camera to the PC using the USB cable.
Important
• Make sure that the USB driver is installed before connecting to a USB
Note
port.
• The flash lamp (red) on the camera blinks while data is being
transmitted. Do not disconnect the cable or turn the camera off while
data is being transmitted between the camera and the PC as the
camera or PC may be adversely affected.
• After connecting the camera to a PC, you are advised to use an AC
adapter when using the camera and avoid powering the camera by the
battery. Particularly if you are handling non-compressed files, motion
pictures or other large files, transmission takes a long time. If the
power fails during transmission, the camera or PC may be adversely
affected.
• Connecting the camera via the USB hub may result in the camera not
functioning properly. If possible, you are advised not to use the USB
hub.
• The camera will not operate on power supplied from the USB port.
■ Connecting the Camera by USB Cable (For Windows)
You can connect the camera to a PC running Windows using the USB cable
supplied with the camera.
A Open the terminal cover on the left
side of the camera.
B Insert the smaller connector on one
end of the USB cable into the
DIGITAL (USB) terminal of the
camera.
20
Page 23

C Insert the connector on the other end
of the cable into the USB port of the
PC.
D Turn the camera on.
The PC will automatically detect the
equipment which has been connected and
operate accordingly. If a message is
displayed, follow the instructions on the
screen.
USB connection is completed.
Before disconnecting the USB cable, check that data transmission is not
performed between a camera and a PC, turn off the camera and disconnect the
USB cable.
Important
• For Windows Me user, make sure to give a time interval of more than
Note
10-seconds when:
• Turning off and then on the camera
• Setting the mode dial from the modes other than Communication
mode to Communication mode.
• Inserting and removing the USB cable
• Do not remove the RDC-i virtual server process installed in Windows
Start-up item folder. The USB connection can not be made without it.
1
Getting Started
21
Page 24

■ For Macintosh
You can connect the camera to a Macintosh using the USB cable supplied with
the camera.
A Open the terminal cover on the
leftside of the camera.
B Insert the smaller connector on one
end of the USB cable supplied into
the DIGITAL (USB) terminal of the
camera.
C Insert the connector on the other end
of the cable into the USB port of the
PC.
D Turn the camera on.
The PC will automatically detect the equipment which has been connected and
operate accordingly. If a message is displayed, follow the instructions on the
screen.
Connection by USB cable is completed.
Before disconnecting the USB cable, perform the following steps
Check that data transmission is not performed between a camera and a PC.
Turn off the camera.
Disconnect the USB cable.
22
Page 25

Connecting the Camera to a Network
You can connect the camera to an existing internal network or household
network (LAN using Ethernet, etc.).
Important
• This camera is compatible with a 10BASE-T LAN (Ethernet).
Note
• To connect the camera to a LAN, it is necessary to purchase a LAN
connection CF card. For details of equipment checked or
recommended by Ricoh, refer to the separate list of Compatible
Products. Updated information can be found in Ricoh’s homepage on
the Internet (noted at end of manual).
• Do not remove the cable or turn the camera off while data is being
transmitted between the camera and the PC as the camera or PC may
be adversely affected. (When the camera is connected to LAN, the
flash lamp (red) will not flash during data communication.)
• When you use the camera by connecting it to the PC, you are advised
to use an AC adapter and avoid powering the camera by the battery.
Particularly if you are handling non-compressed files, motion pictures
or other large files, transmission will take a long time. If the power fails
during transmission, the camera or the PC may be adversely affected.
• Do not touch the cable terminal of the LAN connection CF card.
• Do not connect the camera to a LAN and a USB cable simultaneously.
The camera or PC may be adversely affected.
■ Requirements
• LAN connection CF card suitable for the network to which the camera will be
connected
• Connection cable
1
Getting Started
Important
• If you use this method to connect the camera to a PC, the CF card slot
Note
will be used for the LAN connection CF card. You will therefore be
unable to view images recorded on the CF card or send them to the
PC. If you use this method, record the images in the internal memory.
23
Page 26

■ Connecting Procedure
A Check that the PC and the camera are
turned off.
B Insert the LAN connection CF card
into the CF card slot of the camera.
C Insert the connection cable into the
LAN connection CF card.
D Insert the connector on the other end
of the connection cable into the
connector of the LAN cable.
E Insert the connector on the other end
of the LAN cable into the free terminal
of the LAN hub.
Connection of the camera to the LAN is now
completed.
24
Page 27

Making the Camera Settings
Normally, when the camera is connected to a PC, you can immediately access
the camera using the Web browser or the PC. This is because various general
settings have been made for the factory default settings.
However, depending on the PC or LAN used, operation may not proceed
smoothly with the settings as they are.
In this case, refer to the appendix “Camera Settings When Connected to a PC”
(p.156) and change the settings to suit the PC or LAN used. (As a certain
amount of knowledge about the LAN is required, you are recommended to
consult the person in charge of the network before making any changes.)
COM Port Settings for Windows 98/ME
The USB driver for Windows treats the camera as equipment that uses the
COM port virtually.
For Windows 98/Me, if the COM port conflicts with other equipment, the camera
may fail to be detected even when the driver has been correctly installed.
In this case, change the COM port used by the following procedure.
A Connect the camera to the PC using the USB cable and turn the
camera on.
1
Getting Started
B Start the device manager.
Select [Settings] → [Control Panel] from the [Start] button. Double click on the
[System] icon in the window that opens. Select the [Device Manager] tab from
the [System Properties] dialog box, and open [Ports (COM/LPT)] from the list.
C Set [RICOH Camera Port] of [Ports (COM/LPT)] and click on
[Properties].
D Change to another COM number (COM 5 - 9) at the [Port Select]
screen.
An [*] will be attached to the port that is used by the camera.
25
Page 28

26
 Loading...