

Page 1
Camera User Guide
Quick Guide
A Variety of Shooting
Techniques/Playback
Changing Camera
Settings
Installing Software
The serial number of this product is given
on the bottom face of the camera.
Caution!
Caution!
Caution!Caution!
Do not connect the USB cable yet!
If you connect the camera to a computer through the
USB cable before installing the provided software on the
computer, the software required for connection between
camera and computer may not be installed
appropriately.
Be sure to connect the camera to your computer after
installing the provided software.
For how to install the software, see P.131.
About other documentation
Detailed explanations on how to use the provided
software can be found in "Software User Guide" (PDF
format file) included on the supplied CD-ROM.
For how to display the PDF file, see P.135.
Troubleshooting
Page 2

Preface
This manual provides information on how to use the shooting and playback functions of this
product, as well as warnings on its use. To make the best use of this product's functions, read
this manual thoroughly before use. Please keep this manual handy for ease of reference.
Safety Precautions For the safe use of your camera, be sure to read the
Test shooting Please be sure to do some test shooting to make sure it
Copyright Reproduction or alteration of copyrighted documents,
Exemption from
Liability
Warranty This product is manufactured to local specifications and
Radio Interference Operating this product in the vicinity of other electronic
• This publication may not be reproduced in whole or in part without the express written permission of Ricoh.
©
2005 RICOH CO.,LTD. All rights reserved.
• The contents of this document may be changed in the future, without prior notice.
• This booklet was created with thorough attention to its content. If, however, you have a question, spot an
error, or find a description lacking, please refer to the end of this booklet for information on how to contact us.
Microsoft, MS, Windows and DirectX are registered trademarks of Microsoft Corporation in the United States of
America and other countries.
Adobe and Adobe Acrobat are trademarks of Adobe Systems Incorporated.
All trademarked company and product names mentioned in this manual are the property of their respective
owners.
safety precautions thoroughly.
is recording properly before normal use.
magazines, music and other materials, other than for
personal, home or similarly limited purposes, without the
consent of the copyright holder is prohibited.
Ricoh Co., Ltd. assumes no liability for failure to record or
play back images caused by malfunction of this product.
the warranty is valid within the country of purchase.
Should the product fail or malfunction while you are
abroad, the manufacturer assumes no responsibility for
servicing the product locally or bearing the expenditure
incurred thereof.
equipment may adversely affect the performance of both
devices. In particular, operating the camera close to a
radio or television may lead to interference. If
interference occurs, follow the procedures below.
• Move the camera as far away as possible from the TV, radio or other
device.
• Reorient the TV or radio antenna.
• Plug the devices into separate electrical outlets.
Ricoh Co., Ltd.
Page 3

Telephone Support Numbers in Europe
UK (from within the UK) 02073 656 580
(from outside of the UK) +44 2073 656 580
Deutschland (innerhalb Deutschlands) 06331 268 438
(außerhalb Deutschlands) +49 6331 268 438
France (à partir de la France) 0800 91 4897
(en dehors de la France) +49 6331 268 409
Italia (dall’Italia) 02 696 33 451
(dall’estro) +39 02 696 33 451
España (desde España) 91 406 9148
(desde fuera de España) +34 91 406 9148
Nederland (binnen Nederland) 0800 022 9494
(vanuit het buitenland) +49 6331 268 443
http://www.service.ricohpmmc.com/
Page 4

Key Features
Equipped with a wide zoom lens in
4.8x high magnification
This product has a compact body only 25
mm thick, featuring a 28 to 135mm* wide
4.8x lens that applies to most normal
shooting. The lens supports the shooting of
various indoor and outdoor scenes.
* Equivalent to that on a 35mm camera
Rapid shutter response to capture a
moment (P.31)
The shutter release time lag is as short as
0.1 seconds.
Ricoh's patented hybrid auto focusing
system technology even keeps action shots
looking good.
1-cm macro (P.37) and close
flashing for 13 cm (for Telephoto)
or 20 cm (for Wide-angle) (P.38)
The unsurpassed macro function allows you
to capture details from a very close distance
at only 1 cm. The camera also has a built-in
flash for very close shots within 13 cm (for
Telephoto) and 20 cm (for Wide-angle). This
combination will give you clear macro shots
even under low light conditions.
AF target shift function for easy
focus lock even on a tripod (P.83)
The camera has an AF target shift function.
At macro shooting, the AF target shift
function allows you to lock the focus by
button operation, without moving the camera
itself.
1
Page 5
Choice of three power sources
makes sure you wont miss any
shooting opportunities (P.16)
The camera can be used with one of three
power supplies: Dedicated large-capacity
rechargeable battery, an AA alkaline battery
easily available anywhere (available in
stores), and an economical AC adapter (sold
separately) useful for transfer to a computer.
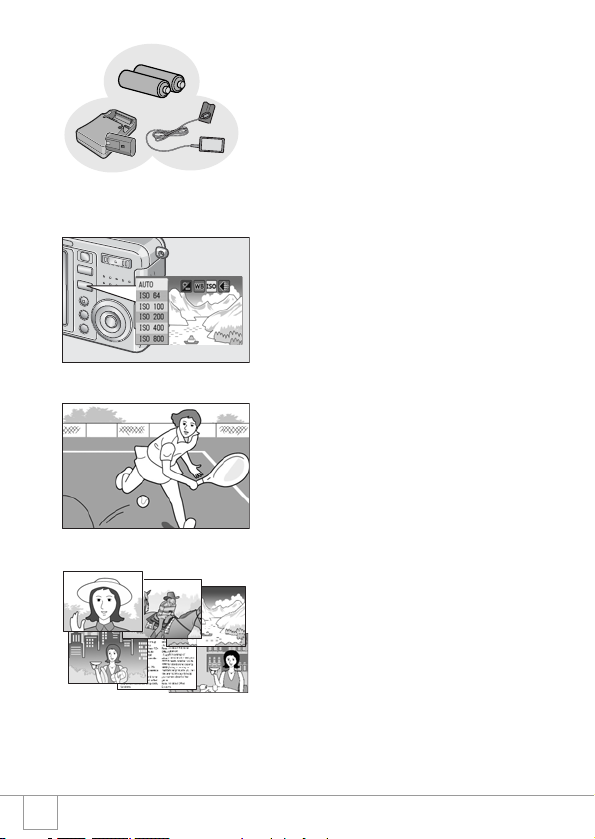
Adjust (ADJ.) button for easy
customizing to optimum setting
(P.57)
The ADJ. button reduces button operation
steps. It allows you to quickly adjust the
exposure, white balance, and ISO sensitivity
with minimum steps. You can also assign a
function as required.
High-quality movie with sound of 30
or 15 frames/second (P.89)
A high-quality movie of 320 x 240 pixels can
be shot at 30 frames/second with sound.
Scene mode for easy and beautiful
shooting (P.39)
In Scene Mode, you need only to select from
among six types of shooting modes for
shooting with optimal settings for the scene.
2
Page 6
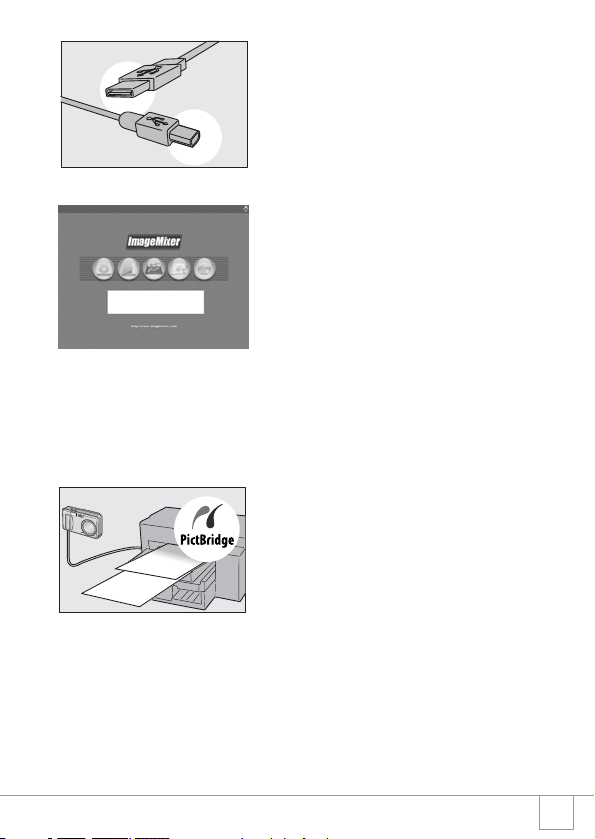
Instant transfer to PC through the
USB cable
If the provided software is installed on your
computer, just connecting the camera to
your computer with the provided USB cable
will automatically transfer images to your
computer.
Provided with multi-functional
software "ImageMixer" that helps in
not only managing shot images in
an album, but also editing images
and sounds, and creating video CDs
For the integrated handling of images, this
software has a input function to download
still images, movies, and sounds from a
digital camera or music CD, an album
function to manage captured contents, an
edit function to edit movies by MPEG-1, a
layout function to create layouts using still
image contents, and a disk creation function
to create video CDs.
Direct printing without requiring any
computer (P.52)
A direct print compatible printer can be
connected to the camera with the USB cable
for direct transfer. This allows for easy
printing without using a computer.
3
Page 7

Contents
Chapter 1 Quick Guide
Before Shooting .......................................................................................... 10
Packing List.................................................................................................................. 10
Names of parts............................................................................................................. 12
About LCD Monitor Display.......................................................................................... 14
Getting Ready to Shoot .............................................................................. 16
About the Batteries....................................................................................................... 16
Batteries (Cells) Not Acceptable .................................................................................. 17
Battery level indication ................................................................................................. 18
About an SD Memory Card (available in stores) .......................................................... 19
Charging the Rechargeable Battery............................................................................. 20
Loading the Rechargeable Battery and SD Memory Card........................................... 21
Inserting Dry Cells (available in stores)........................................................................ 23
Turning the Power On/Off ............................................................................................ 24
Setting the language .................................................................................................... 25
Setting the date and time ............................................................................................. 26
Changing the Display ................................................................................................... 27
Maximizing the LCD Monitor Brightness...................................................................... 27
Histogram Display ........................................................................................................ 28
Basic Shooting............................................................................................ 29
How to Hold the Camera.............................................................................................. 29
Preventing camera shake............................................................................................. 30
Capturing the Moment Shooting (Full-press) ............................................................... 31
Checking the Focus and Shooting (Half-press)............................................................ 32
When the Subject is not Centered (Shooting with Focus-lock) .................................... 34
Using the Zoom Function ............................................................................................. 36
Shooting Close-Ups (Macro-Mode).............................................................................. 37
Using the Flash ............................................................................................................ 38
Shooting with Scenery-Matching.................................................................................. 39
Playing Back................................................................................................ 41
Checking the image you just took (Quick Review)....................................................... 41
Viewing Your Images ................................................................................................... 42
Playing back in the three-frame view ........................................................................... 43
Thumbnail Display........................................................................................................ 45
Magnifying Images ....................................................................................................... 46
Viewing on a Television ............................................................................. 47
Erasing......................................................................................................... 49
Erasing Unwanted Images ........................................................................................... 49
Erasing Multiple Frames at One Time.......................................................................... 50
Chapter 2 A Variety of Shooting Techniques/Playback
Direct Printing ............................................................................................. 52
Direct Print Function..................................................................................................... 52
Connecting the Camera to a Printer............................................................................. 52
Printing Still Images...................................................................................................... 53
4
Page 8

A Variety of Shooting Techniques ............................................................ 57
Using the ADJ. (Adjust) Button..................................................................................... 57
Shooting Setting Menu................................................................................................. 58
Using the Shooting Setting Menu................................................................................. 59
Choosing Picture Quality Mode/Image Size (PIC QUALITY/SIZE).............................. 60
Manual Focus Shooting (FOCUS)................................................................................ 62
Changing the Light Metering (PHOTOMETRY) ........................................................... 65
Changing the Edge Quality of Still Images (SHARPNESS)......................................... 66
Setting Color Depth (COLOR DEPTH)......................................................................... 67
Shooting Consecutively with Different Exposures (AUTO BRACKET) ........................ 68
Shooting Consecutively with Different White Balance (WHITE BALANCE BRACKET) 69
Using Long Time Exposure (TIME EXPOSURE)......................................................... 71
Shooting Pictures Automatically at Set Intervals (INTERVAL)..................................... 72
Shooting a Still Image with Sound (IMAGE WITH SOUND) ........................................ 74
Inserting the Date into a Still Image (DATE IMPRINT)................................................. 75
Changing the Exposure (EXPOSURE COMP.)............................................................ 76
Using Natural and Artificial Lighting (WHITE BALANCE)............................................. 77
Changing Sensitivities (ISO SETTING)........................................................................ 79
Limiting the Shutter Release Speed (SLOW SHUTTER LMT)..................................... 80
Returning the Shooting Setting Menu Settings to their Defaults (RESTORE DEFAULTS) . 81
Changing Shading for Shooting Text (DENSITY) ........................................................ 82
Using the AF Target Shift Function.............................................................................. 83
Using the Self-Timer..................................................................................................... 84
Shooting with Multi-Shot............................................................................ 85
CONT .......................................................................................................................... 87
SCONT (S Multi-Shot)................................................................................................. 87
MCONT (M Multi-Shot)................................................................................................ 87
Viewing an S Multi-Shot or M Multi-Shot Still Image in Enlarged Display Mode.......... 88
Shooting/Playing Back Movies.................................................................. 89
Shooting Movies........................................................................................................... 89
Setting the Frame Rate................................................................................................ 90
Playing Back Movies .................................................................................................... 91
Recording/Playing Back Sound................................................................. 92
Recording Sound (Voice Memo).................................................................................. 92
Playing Back Sound ..................................................................................................... 93
Other Functions Available in Playback Mode .......................................... 94
Playback Setting Menu................................................................................................. 94
Using the Playback Menu............................................................................................. 94
Showing Photos in Order Automatically (SLIDE SHOW)............................................. 95
Write-protecting Your Images (PROTECT).................................................................. 96
Using a Printing Service (DPOF: Dee-Pof) .................................................................. 99
Changing the Image Size (RESIZE)........................................................................... 102
Copying the Contents of Internal Memory to a Memory Card (COPY TO CARD)..... 103
Chapter 3 Changing Camera Settings
Changing Camera Settings ...................................................................... 106
SETUP Menu ............................................................................................................. 106
Using the SETUP Menu ............................................................................................. 107
Getting the SD Memory Card Ready for Use (FORMAT [CARD]) ............................. 108
Formatting Internal Memory (FORMAT [INT. MEM.]) ................................................ 109
Adjusting the Brightness of the LCD Monitor (LCD BRIGHTNESS) .......................... 110
5
Page 9

Setting a Function to the ADJ. Button (ADJ BTN.SET.)............................................. 111
Changing Auto Power-Off Settings (AUTO POWER OFF) ........................................ 112
Changing the Beep Sound Setting (BEEP SOUND) .................................................. 113
Changing the Beep Sound Volume (Volume Setting) ................................................ 114
Changing Image Confirmation Time (LCD CONFIRM.) ............................................. 115
Changing File Name Settings (SEQUENTIAL NO.)................................................... 116
Setting the Date and Time (DATE SETTINGS).......................................................... 117
Changing the Display Language (LANGUAGE/ ) ............................................... 118
Changing the Playback Method for Viewing on TV (VIDEO OUT MODE)................. 119
Changing the Setting of Step Zooming (STEP ZOOM).............................................. 120
Displaying a Setting Change Warning (SHTG STGS WARNG.)................................ 121
Changing the USB Communication System (USB Connection)................................. 122
Enlarging Icon Display (ENLGE PHOTO ICON)........................................................ 126
Chapter 4 Installing Software
Installing the Provided Software (For Windows) ................................... 128
System Requirements for Using the Provided Software ............................................ 130
Installing the Software on Your Computer.................................................................. 131
Connecting the Camera to Your Computer ................................................................ 133
Installing Acrobat Reader........................................................................................... 135
Installing DirectX ........................................................................................................ 136
Uninstalling the Software............................................................................................ 137
Uninstalling the ImageMixer....................................................................................... 138
Installing the Provided Software (For Macintosh) ................................. 139
System Requirements for Using the Provided Software ............................................ 141
Installing the Software on Your Computer (Mac OS 8.6 to 9.2.2) .............................. 142
Installing the Software on Your Computer (Mac OS X 10.1.2 to 10.3)....................... 143
Chapter 5 Troubleshooting
Troubleshooting........................................................................................ 146
Troubleshooting the Camera...................................................................................... 146
Warning Messages Under Windows XP Service Pack 2 ........................................... 151
Appendices................................................................................................ 153
A. Specifications......................................................................................................... 153
B. Optional Accessories ............................................................................................. 155
C. Combination of Scene Mode and Function............................................................ 156
D. Menu Items By Mode............................................................................................. 157
E. Functions Whose Defaults will be Restored upon Power-off ................................. 158
F. Number of Images That Can be Stored in Internal Memory/SD Memory Card...... 159
G. Using Your Camera Abroad .................................................................................. 160
H. Cautions on Use .................................................................................................... 161
I. Care and Storage.................................................................................................... 162
J. Error Messages ...................................................................................................... 163
K. Warranty and Servicing.......................................................................................... 164
Index........................................................................................................................... 166
6
Page 10
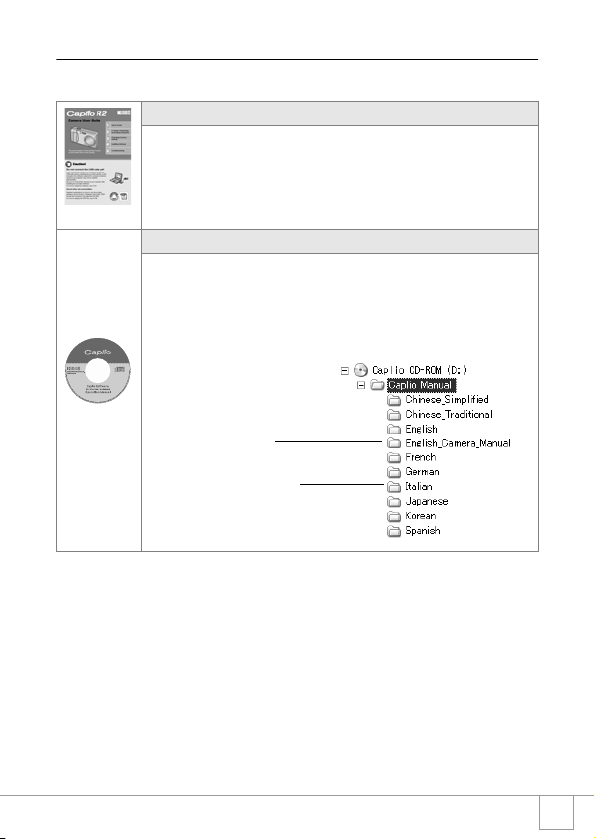
Using Manuals
The two manuals included are for your Caplio R2.
Camera User Guide (This booklet)
This guide explains the usage and functions of the
camera.You will also see how to install the provided
software on your computer.
*The Software User Guide (English edition) is available
from the provided CD-ROM as a PDF file.
Software User Guide (PDF file)
This guide explains how to download images from the
camera to your computer, and display and edit them on
your computer.
*The Software User Guide is available from the following folder on the provided CD-ROM.
"Software User Guide (English
edition)" (PDF file)
Each language has its own Software
User Guide in the respective folder.
To copy the Software User Guide onto your hard disk
Copy the PDF file from the above folder.
7
Page 11
Reference
The camera is provided with software (ImageMixer) that allows you to display and edit
images from your computer. For how to use ImageMixer, click the [?] button on the
ImageMixer window and see the displayed manual.
For more information on the ImageMixer, contact the Customer Support Center below.
North America (Los Angeles) TEL: +1-213-341-0163
Europe (U.K.) TEL: +44-1489-564-764
Asia (Philippines) TEL: +63-2-438-0090
China TEL: +86-21-5450-0391
Registration time: 9:00 - 17:00
How to Use This Guide
Chapter 1 explains the basic operations of this product.
If you are using the camera for the first time, read from this chapter.
The following symbols are also used in this guide:
Important
Note
Ter m
Reference
The LCD Monitor Display examples may be different from actual
display screens.
This indicates important notices and restrictions for using this camera.
This indicates supplementary explanations and useful tips about camera
operations.
This indicates terms that are useful for understanding the explanations.
This indicates page(s) relevant to a particular function.
8
Page 12

Chapter 1
Quick Guide
If you are using the camera for the first time,
read from this chapter.
Before Shooting ............................................... 10
Getting Ready to Shoot................................... 16
Basic Shooting................................................. 29
Playing Back .................................................... 41
Viewing on a Television .................................. 47
Erasing.............................................................. 49
Page 13
Before Shooting
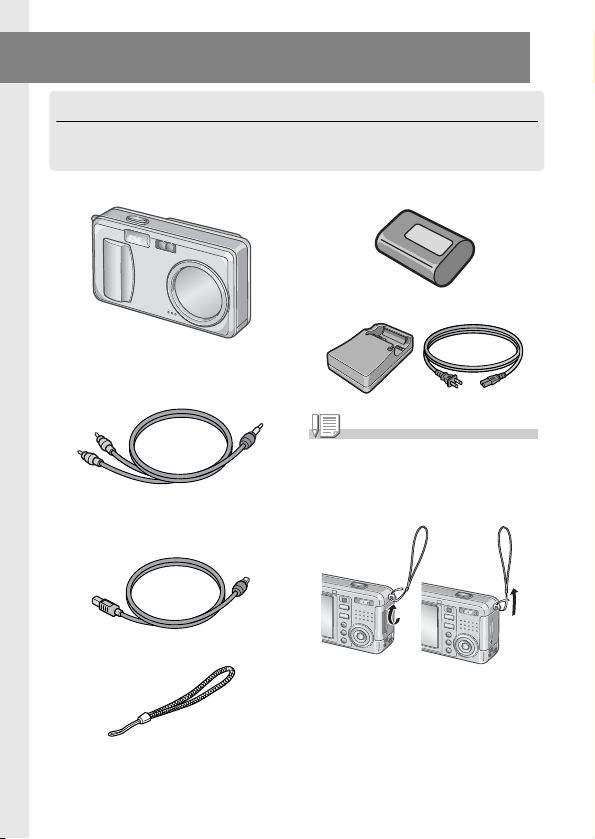
Packing List
Open the package and make sure all the items are included.
• Caplio R2
• AV Cable
Used when viewing your images on a TV
unit.
• USB Cable
Used to connect the camera to a computer
or Direct Print supported printer.
• Handstrap
• Rechargeable Battery
• Battery Charger
Note
Attaching the hand strap to the camera
Thread the tips of the strap through the
camera's strap eyelet and loop them as
shown.
The serial number of this product is given
on the bottom face of the camera.
10
Page 14
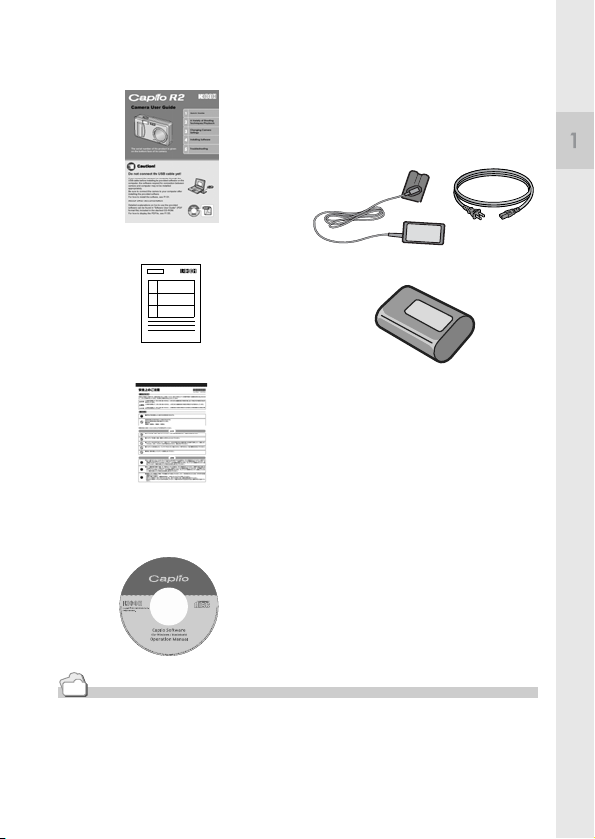
• Camera User Guide
(This booklet)
• Warranty
Optional Accessories
• AC Adapter (AC-4b)
Used for power supply from a home outlet
to the camera. Connect this adapter for
long time play or image transfer to a
personal computer.
Quick Guide
• Rechargeable Battery (DB-50)
• Safety Precautions
• PC Card Adapter (FM-SD53)
For when you want to load an SD Memory
Card directly into your computer's PC Card
Slot.
• SD Memory Card (available in
stores)
• Caplio Software CD-ROM
The provided software and the Software
User Guide are included on this CD-ROM.
Reference
For the latest information about accessories, access Ricoh home page
(http//:www.ricohpmmc.com).
11
Page 15
Names of parts
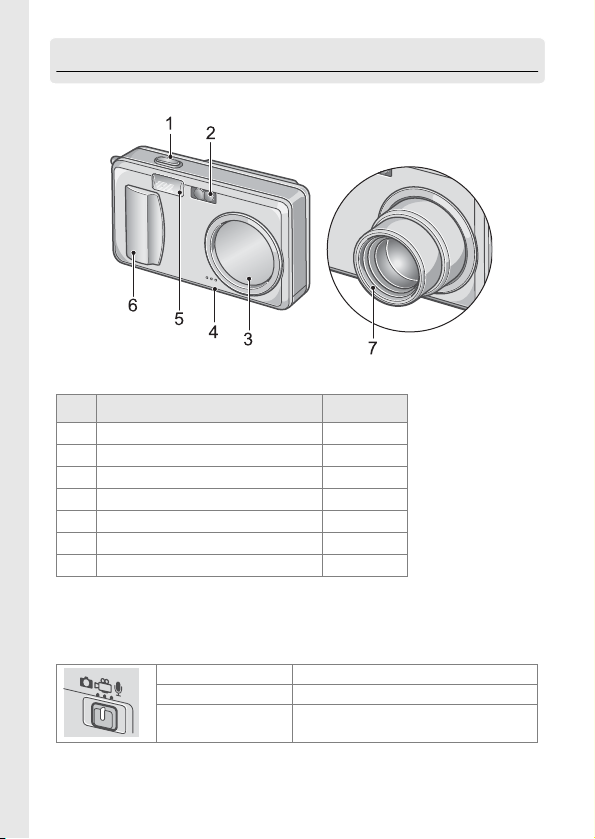
Camera
Front View
Item Name Refer to
1
Shutter Release Button P.29
2
AF Window
3
Lens Cover
4
Microphone P.92
5
Flash P.38
6
Power Switch P.24
7
Lens P.29
Mode Selector
You can select one of the three modes with the mode selector.
Still Image Mode Allows you to shoot still images.
Movie Mode Allows you to shoot movies.
Voice Memo Mode Allows you to record sounds.
-
-
12
Page 16
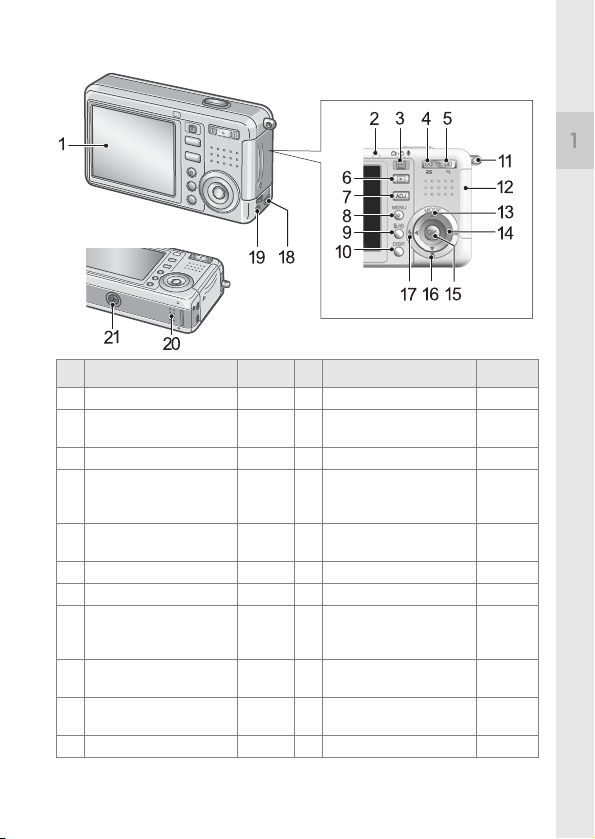
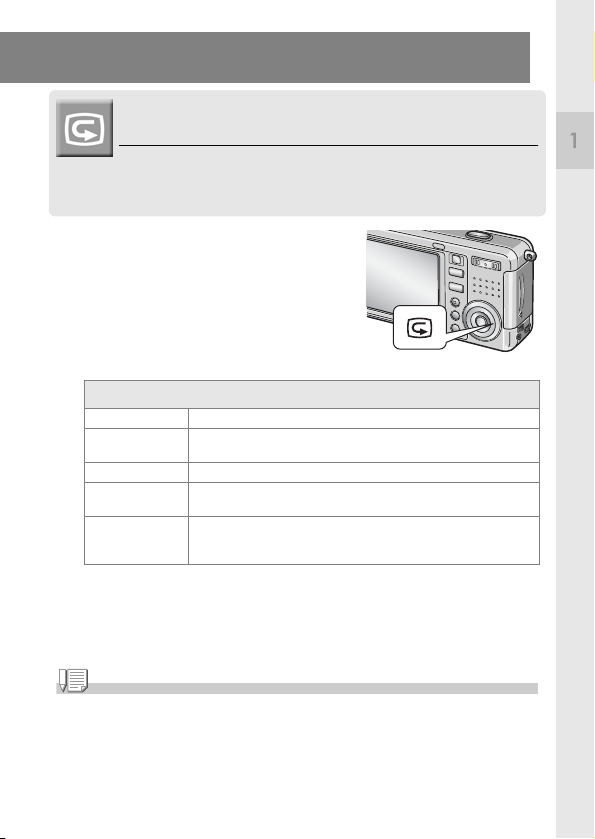
Rear View
Item Name Refer to Item Name Refer to
1
LCD Monitor -
2
Auto Focus/
Flash Lamp
3
Mode Selector P.12
4
Z (Wide-angle) /
9 (Thumbnail Display)
Button
5
z (Telephoto)/
8 (Enlarged View) Button
6
Playback Button P.41
7
ADJ. Button P.57
8
M Button P.59
9
D (Delete) /
T (Self-timer) Button
10
DISP. Button P.27
11
Strap Eyelet P.10
P. 3 2
P. 3 8
P. 3 6
P. 4 5
P. 3 6
P. 4 6
P. 9 4
P. 1 0 6
P. 4 9
P. 8 4
12
Battery/Card Cover
13
!/MODE Button P.39
14
$ /Q(Quick Review)Button P.41
15
O Button
16
"/N (Macro) Button P.37
17
#/F(Flash) Button P.38
18
USB Terminal P.133
19
AV Output Terminal P.47
20
Speaker P.91
21
Tripod Screw Hole
(underside)
Quick Guide
-
-
P. 9 3
-
13
Page 17

About LCD Monitor Display
Screen Examples when Shooting Pictures
123 4 5678
28
9
11
12
13
15
17
1 Flash P.38 15 Color Depth P.67
2 Macro Shooting P.37 16 Auto Bracket P.68
3 Self-timer P.84 17 Zoom Bar P.36
4 Mode Types - 18 Interval P.72
5 Recording Destination P.19 19 Time Exposure P.71
6 Remaining Number of Still Images P.159 20 Histogram P.28
7 Picture Quality P.60 21 Battery P.16
8 Image Size P.60 22 Date/Time P.75
9 Focus P.62 23 Camera Shake P.30
10 White Balance P.77 24 Aperture Value P.32
11 Exposure Comp. P.76 25 Shutter Speed P.32
12 ISO Setting P.79 26 Remaining Recording Time P.159
13 Photometry P.65 27 Recording Time P.159
14 Sharpness P.66 28 Frame Rate P.90
1010
1414
1616
2222
2323
Still Image Mode
Item Name Refer to Item Name Refer to
18
19
20
21
24
25
2626
2727
Movie Mode
Note
• The number of remaining shots available may differ from the actual number of shots, depending
on the subject.
• Even between cards of the same capacity, the number of remaining shots and other values may
vary with the manufacturer, type, and shooting condition.
• The continuous shooting (recording) time depends on the card type, capacity, and performance.
• When the number of remaining shots is 10,000 or more, "9999" is displayed.
14
Page 18

The Screen During Playback
12 3 4 5 6
8, 9
7
Still Image Mode
Item Name Refer to Item Name Refer to
1 Protect P.96 8 Picture Quality P.60
2 DPOF P.99 9 Image Size P.60
3 Mode Types - 10 File No. -
4 Playback Data Source P.42 11 Battery P.16
5 Number of Playback Files - 12 Date at Shooting P.75
6 Total Number of Files - 13 Recording Time or Lapsed Time -
7 Setting at Shooting (Recording) - 14 Indicator -
10
11
14
12
13
Movie Mode
Quick Guide
P.1 1 7
Note
The LCD monitor may display messages to inform you of operational instructions or the
camera’s status while in use.
15
Page 19

Getting Ready to Shoot
Turn the power on and get ready to shoot.
Note
If you have already used this camera, follow the steps below to
make sure it is turned off before removing or loading batteries.
1. Make sure the LCD monitor is turned off.
2. Make sure the lens cover is closed.
For how to turn the camera off, see P.24.
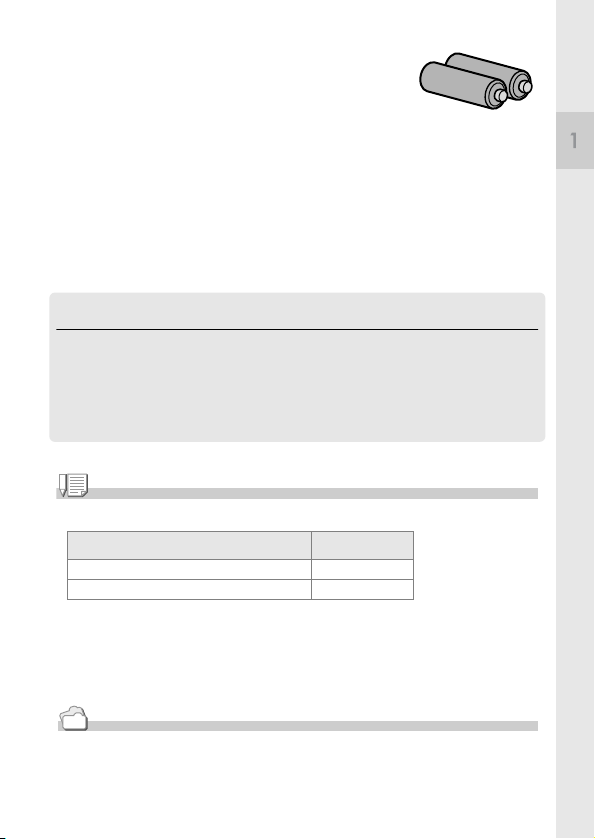
About the Batteries
The following batteries can be used in the camera. Please choose
which kind to use according to your needs.
• Rechargeable Battery DB-50 (Included)
This is a lithium-ion battery. This is economical
because you can recharge it using the battery charger
and use it over and over again. They last a long time,
so they are convenient for travel.
• AA Alkaline Batteries (LR6) (available in
stores)
You can obtain them anywhere, so they are
convenient for travel.
However, in a low-temperature environment the
number of shots you can take will decrease. Warm the
batteries before use. It is recommended that you use
the rechargeable battery when using the camera for a long time.
• AA Nickel Batteries (available in stores)
These batteries are not rechargeable. However, they
last a long time as compared with AA Alkaline
Batteries when used with a digital camera.
16
Page 20
• Nickel-Hydrogen Battery (available in stores)
This is economical because you can recharge and use
it over and over again. Use a charger (available in
stores) for charging.
The battery may be inert and consequently it may not supply power
immediately after it is purchased or left unused for more than a month. In
such a case, recharge the battery two or three times before use. The battery
self-discharges with time even if the camera is not used, so recharge it
before use.
• AA-size Oxyride (oxy nickel hydroxide) dry cell (available in stores)
This cell has a longer life than an AA-size alkaline dry cell.
In addition to the batteries, you can use the AC Adapter (P.155).
Batteries (Cells) Not Acceptable
The camera does not accept the following batteries (cells):
• Manganese dry cell (R6)
• Ni-Cd battery
• CR-V3
Note
Indication of the number of images you can take
Battery Type Number of Shots
Rechargeable Battery (DB-50) Approx. 490
AA Alkaline Batteries (LR6) Approx. 190
• The number of shots is based on a temperature of 22 degrees Celsius, shooting at 30
second intervals and one out of every two being shot with the flash. If you set the camera to
the Power-Save or Synchro-Monitor mode, the number of shots you can take will increase.
• The number of shots is for reference only. If the camera is used for long periods of time for
setting and playback, the shooting time (the number of shots) will decrease.
Quick Guide
Reference
• For how to insert the Rechargeable Battery , see P.21.
• For how to use the AC Adapter, see P.155.
17
Page 21
Caution
• Please remove the batteries if you are not going to use the camera for a long period of
time.
• The life of an AA alkaline battery (LR6) depends on the brand and the storage time from the
date of production. In addition, the life of an alkaline battery becomes shorter at low
temperatures.
• The Nickel-Hydrogen Battery is not factory-charged. Charge it before use.
Immediately after the purchase or after a long storage, the battery may not be charged fully.
Repeat charging and discharging before use. For details, see the documentation that came
with the battery or charger.
• The battery may become very hot immediately after operation. Turn the camera off and
leave it to cool down sufficiently before removing the battery.
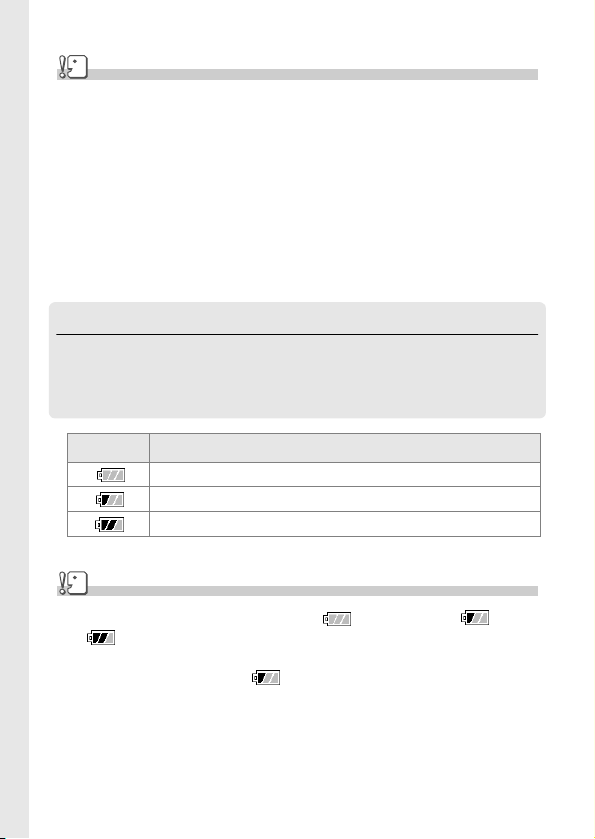
Battery level indication
A battery mark appears at the lower left of the LCD monitor to
indicate the battery level. Prepare new batteries before the batteries
wear out.
Battery M ark Description
Sufficient battery charge
Low remaining charge: Prepare new batteries.
No remaining charge: Replace the batteries.
Caution
• If you are using nickel metal hydride batteries, may not appear or or
may appear immediately depending on the battery type and environmental
conditions. Check the batteries at hand before use.
• If you are using the AC Adapter, may appear. This does not indicate malfunction
and you can continue to use the camera.
18
Page 22

About an SD Memory Card (available in stores)
You can store still images you have taken either in the camera's internal
memory or on an SD Memory Card (available in stores). The internal
memory capacity is 28 MB.
When you want to record a lot of images, or images at high resolutions,
use a high-capacity SD Memory Card.
Note
Where images are recorded
When no SD memory card is inserted, the camera records images in the internal memory;
when an SD memory card is inserted, it records images on the memory card.
When no memory card is loaded When an SD Memory Card is loaded
Records to i nternal memor y Records to the SD memory card
Caution
• If an SD memory card is loaded, the camera will not record to the internal memory, even if
the card is full.
• Take care not to get the metal parts of the card dirty.
Note
Write-protecting your images
If you move the card's write-protection switch to LOCK, your still images cannot
be accidentally erased and the memory card cannot be formatted. If you release
the protection (by returning the switch to its original position), it is once again
possible to erase images and format the card.
So it's a good idea to switch to LOCK when you have some important data recorded.
Note that you cannot shoot images in the LOCK state because no data can be
recorded on the card. Unlock the card when shooting.
Reference
• For switching between the SD Memory Card and internal memory during playback, see P.42.
• For recording capacities, see P.159.
Quick Guide
19
Page 23
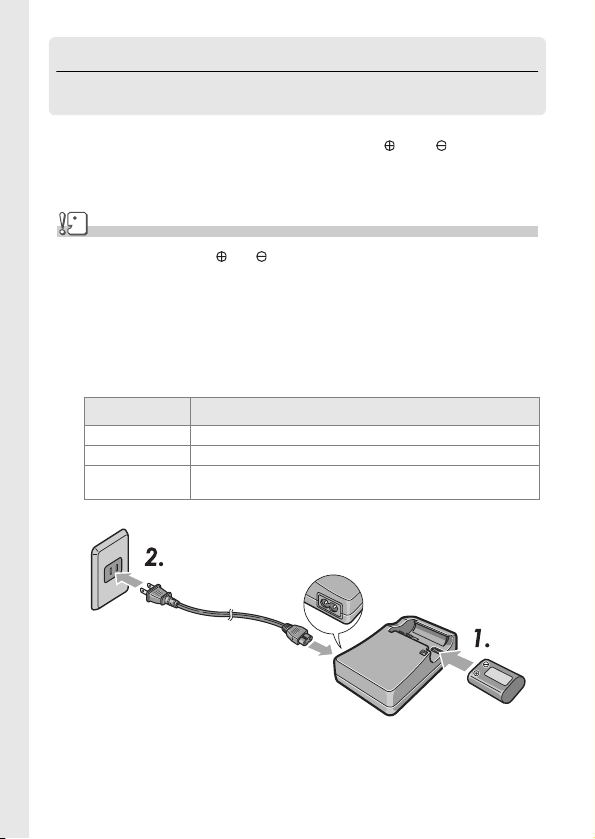
Charging the Rechargeable Battery
The rechargeable battery needs to be charged before use.
1. Insert the battery, making sure that the and markings
on the battery match with those on the battery charger.
The battery label should face up.
Caution
Be careful not to reverse the and sides.
2. Plug the power cord into an outlet.
Charging starts and the charger lamp shows you the progress as shown
below. Once charging has finished, unplug the power cable from the
power outlet.
Depending on the battery level, the charging time differs:
Charger Lamp Description
Unlit Charging started
Unlit Charging complete
Flashing Battery charger or battery may be faulty (Unplug the power cable from the
power outlet and remove the battery from the battery charger.)
20
Page 24
Loading the Rechargeable Battery and SD
Memory Card
The rechargeable battery (DB-50) is another option for powering this
camera. This battery is convenient because it can be used over and
over again by recharging, and the battery power lasts long.
If you have already used this camera, make sure it is turned off
before loading batteries.
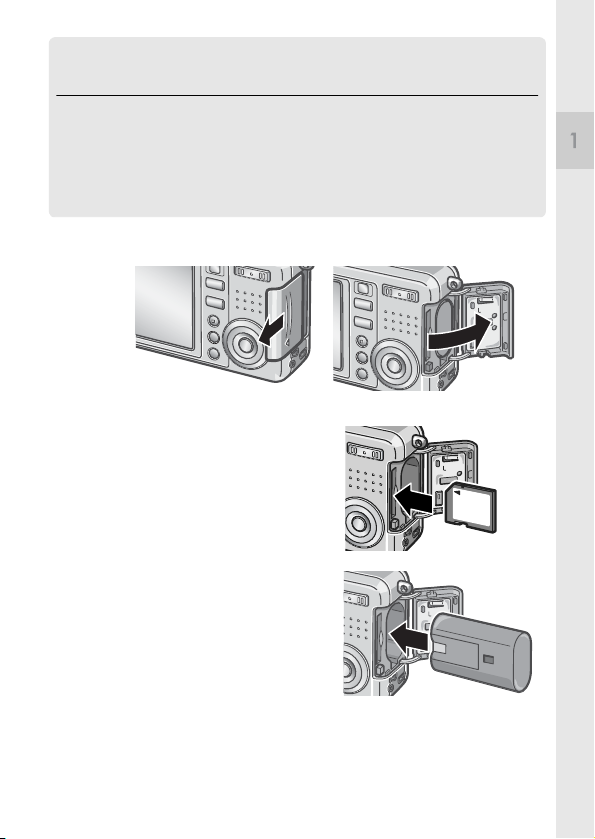
1. Open the battery/card cover.
2. Make sure the card is facing the
right way and then push the
card all the way in until it clicks.
The rechargeable battery may be
inserted first.
3. Insert the rechargeable battery.
Quick Guide
21
Page 25
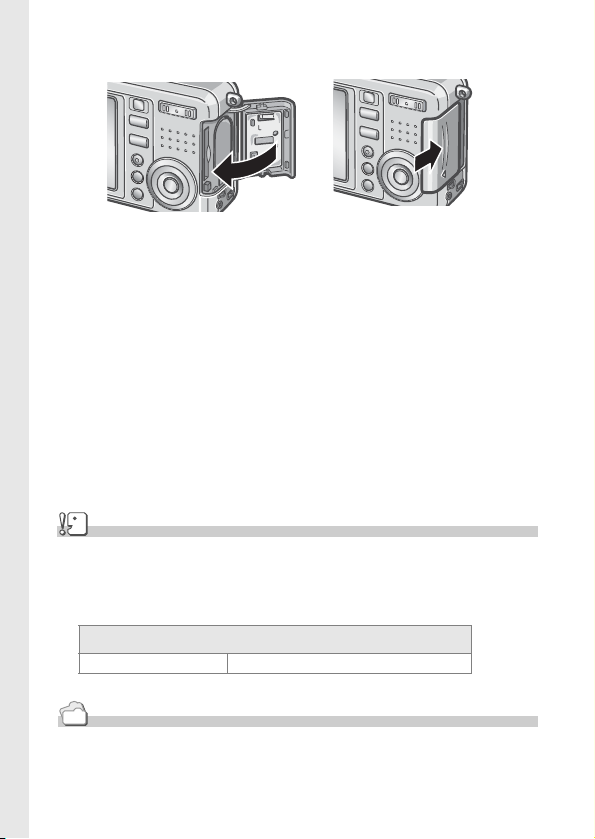
4. Close the battery/card cover and slide it back into place.
Caution
• Please remove the rechargeable batteries if you are not going to use the camera for a long
period of time.
• Store the removed battery in a dry cool place.
• Use the battery charger (sold separately) to recharge the battery.
Rechargeable battery charging time
DB-50 About three hours (25°C)
Reference
For how to format an SD memory card, see P.108.
22
Page 26
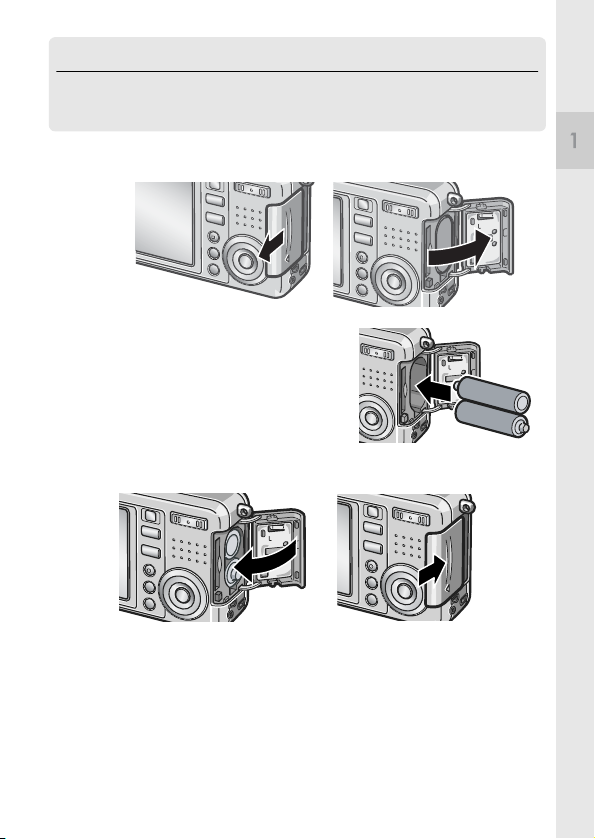
Inserting Dry Cells (available in stores)
If you have already used this camera, make sure it is turned off
before loading batteries and memory card.
1. Open the battery/card cover.
2. Insert the two batteries, making
sure they are facing the correct
way.
3. Close the battery/card cover and slide it back into place.
Quick Guide
23
Page 27
Turning the Power On/Off
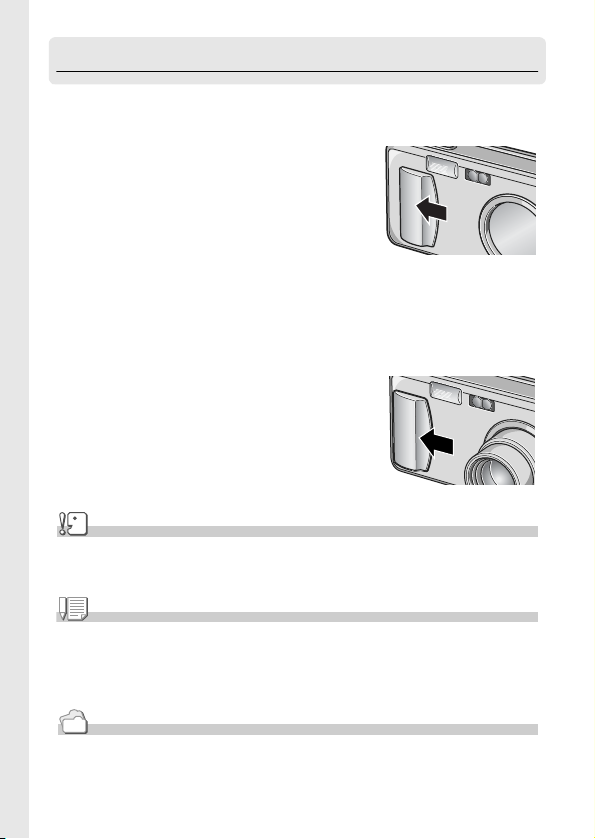
To turn the power on:
1. Slide the power switch to open
the lens cover.
After the start sound, the auto-focus/flash
lamp blink for several seconds.
Using the Camera in Playback Mode
If the Playback button is pressed with the lens cover closed, the power is
turn on in Playback Mode and the camera can be used in this mode.
To turn the power off:
1. Slide the power switch to close
the lens cover.
Caution
It takes longer from power-on until the camera becomes ready for shooting when the flash is
enabled than when it is disabled.
Note
Auto Power Off
If the camera goes unused for a set period of time, it will automatically turn itself off to save
power. To continue on using the camera, slide the power switch to close the lens cover once
(power-off) and slide it again to open (power-on).
Reference
For how to change the Auto Power Off setting, see P.112.
24
Page 28
Setting the language
When the power is turned on for the first time, the language setting
screen appears (for the LCD monitor display language). After setting
the language, go on to the date/time setting (for printing the date and
time on your photos).
You can shoot without these settings. However, be sure to set the
language, and the date/time later. Use the SETUP screen for these
settings.
Note
To display the SETUP screen, turn the mode dial to SETUP.
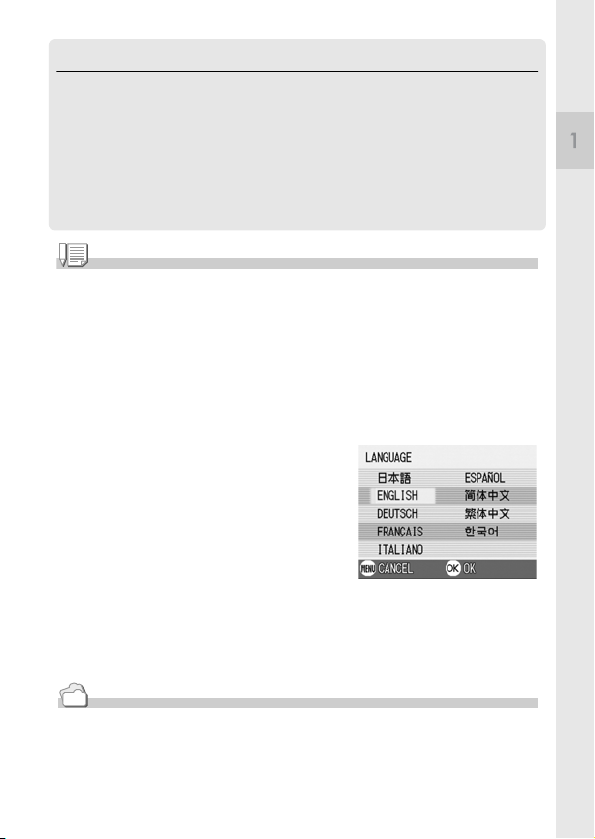
1. Turn the power on for the first time after purchase.
The language selection screen appears.
To skip language setting, press the MENU button.
When the MENU button is pressed, the language setting is cancelled and
the video signal format-setting screen appears.
2. Press the !"
3. Press the O
The display language is set, and the date/
time setting screen appears.
!"#$
#$ buttons to select a language.
!"!"
#$#$
O button.
OO
Quick Guide
Reference
For how to set the display language and date/time on the SETUP screen, see "Changing the
Display Language (LANGUAGE)" and "Setting the Date and Time (DATE SETTINGS)" in this
guide.
25
Page 29
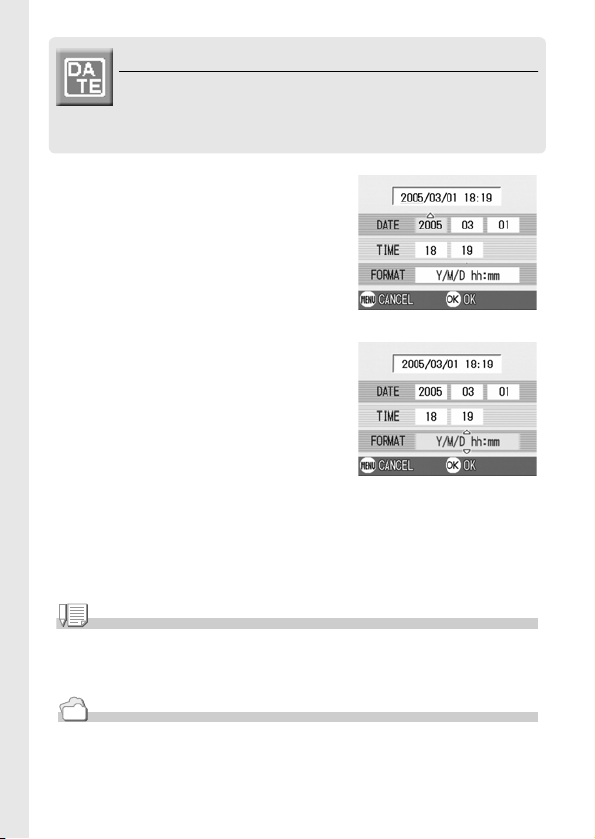
Setting the date and time
When the power is turned on for the first time and the
language setting is completed, the date/time setting
screen appears.
1. Press the !"
!"#$
#$ buttons to set
!"!"
#$#$
the year, month, date and time.
Change the value with !" and move
the frame with #$.
Setting at shipping
2. In [FORMAT], choose the Date and
Time format.
Select the format with !".
3. Check the display on the bottom of
the screen and then press the OOOO
button.
The date is set.
Note
If the batteries are removed for more than one week, the date and time settings will be lost.
These settings must be made again. Any other changes you made with the Setup mode and
Shooting setup menu will also be reset.
Reference
• For how to correct the date and time, see P.117.
• For how to put a date stamp on each frame, see P.75.
26
Page 30
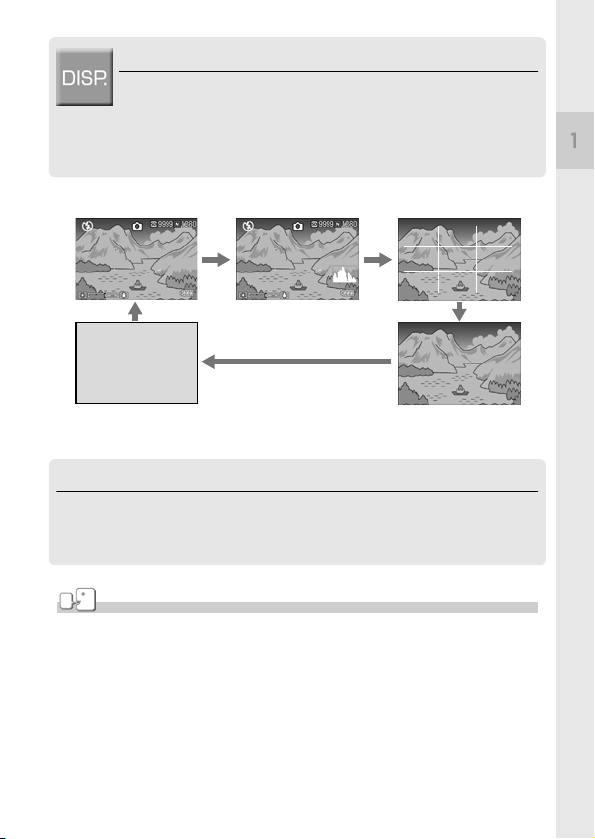
Changing the Display
If you press DISP., you can change the screen display mode, such
as switching between display/no display of symbols, etc.
Every time you press the DISP. button, the view cycles in the order
of Histogram On, Grid Guide, No Display, LCD Monitor Off, and
Normal Symbol Display.
Normal Symbol Display
Histogram On
Switches screens with the
DISP button
Quick Guide
Grid Guide
LCD Monitor Off
(Synchro-Monitor Mode)
No Display
Maximizing the LCD Monitor Brightness
Hold the DISP. button down to maximize the display brightness.
When the brightness is maximal, holding the DISP. button down returns the
brightness to the level set in [LCD BRIGHTNESS] (P.110).
Ter m
Grid Guide
Displays auxiliary lines on the LCD monitor to help shooting. These lines are not recorded
with images.
Synchro-Monitor Mode
Keeps the LCD monitor off except when the camera is operated. This mode is effective for
saving power consumption. With this mode, half-pressing the shutter release button turns the
LCD monitor on. Subsequently, full-pressing the shutter release button displays the shot
image on the LCD monitor, and then turns the LCD monitor off.
27
Page 31

Histogram Display
When histogram display is on, a histogram
appears in the lower right corner on the LCD
monitor screen.
A histogram is a graph indicating the number
of pixels on the vertical axis and the
brightness on the horizontal axis. The
brightness is shadow (dark), halftone, and
highlight (light) from the left.
By using the histogram, you can judge the brightness of an image without
being affected by the brightness around the LCD monitor. This also helps
preventing voids and solids.
If the histogram has only peaks on the right
side without anything else, this picture is
over-exposed with too many pixels only for
highlight sections.
If the histogram has only peaks on the left
side without anything else, this picture is
under-exposed with too many pixels only for
shadow sections.
Correct the exposure to an appropriate level.
Note
• The histogram displayed on the LCD monitor is for reference only. Depending on the shooting
condition (flashing is required, the surrounding light is dark, and so on), the exposure level
indicated in the histogram may not correspond to the brightness of the shot image.
• Exposure compensation has its limitation. It does not necessarily achieve the best possible result.
• The histogram having peaks in the center part does not necessarily provide the best result
to suit your particular requirements.
For example, an adjustment is required if you want to intentionally achieve under or over
exposure.
Reference
For details about exposure correction, see P.76.
28
Page 32

Basic Shooting
Now you are ready. Let's shoot!
How to Hold the Camera
Hold the camera as illustrated below for best results.
1. Hold the camera with both hands
and lightly press both elbows
against your body.
2. Put your finger on the shutter
button.
Quick Guide
Note
Be careful when you are shooting not to get a finger, your hair, or the strap in front of the lens
or the flash.
29
Page 33

Preventing camera shake
If the camera moves when you press the shutter button, the still
image might not come out clearly (due to camera shake). The
mark displayed on the LCD monitor indicates that camera shake
should be avoided under the current shooting condition.
To prevent camera shake, use a tripod or hold the camera securely
with both hands when you shoot.
Note that camera shake tends to occur in the following cases:
• When shooting in a dark place without using the flash
• When shooting in Slow Sync Mode (P.38)
• When using the Zoom function
If the camera shake mark ( ) is displayed, try the following:
• Using the flash (Set the camera to Forced Flash Mode) (P.38).
• Raising the ISO sensitivity (P.79).
30
Page 34

Capturing the Moment Shooting
(Full-press)
The shutter release button works in two steps.
There are two methods of using the shutter button; pressing the
shutter button all the way down at once (full-press) and pressing it
halfway (half-press).
Full-press the shutter release button for quick focusing not to miss
a shooting opportunity.
1. To turn the power on, slide the power switch to open the
lens cover.
For how to turn the power on, see P.24.
2. Switch the Mode Selector to 5
5.
55
3. Put the subject of your photo right
in the middle of the LCD monitor
and press the shutter release
button half-way.
4. Put the subject of your photo right
in the middle and press the
shutter release button fully.
Quick Guide
Note
• The still image you have taken freezes for a moment on the LCD Monitor and is recorded.
(P.115)
• Full-press is apt to cause camera shake. Hold the camera firmly with both hands and shoot.
31
Page 35

Checking the Focus and Shooting
(Half-press)
When you press the shutter release button halfway (half-press),
the autofocus function is triggered to determine the focal distance.
Subsequently press it all the way down (full-press) to shoot.
This is useful when the subject is not in the middle (see P.34).
1. To turn the power on, slide the power switch to open the
lens cover.
For how to turn the power on, see P.24.
2. Switch the Mode Selector to 5
5.
55
3. Compose your shot by looking at
the LCD Monitor.
4. Since the focus is adjusted at the
center of the screen, position the
subject at the center of the screen
and half-press the shutter.
Once focused, the exposure and white
balance are fixed.
If the automatic focusing fails, the frame in
the center of the LCD monitor turn red and
the auto-focus/flash lamp in the upper
right of the LCD Monitor blinks in green.
.
Frame color Auto Focus/Flash Lamp
Before focusing White Off
Focused Green On (green)
Focusing failure Blink (red) Blink (green)
32
Auto Focus/Flash Lamp
Frame
Page 36

A frame is displayed at the focus position.
In some cases, several frames may
appear.
Reference
When specifying a focus position at macro shooting, use the AF target shift function. (P.83)
5. Gently press the shutter button all
the way.
The still image you have taken freezes
for a moment on the LCD Monitor and is
recorded.
Note
• Press gently to prevent camera shake when you press the shutter release button.
• The mark indicates that blurring may occur. Hold the camera still and focus the
camera again.
• When shooting in a dark place, the camera raises the focusing performance (auto focus
precision) by preliminary flashing immediately before shooting. This preliminary flashing is
skipped for shooting in no-flash mode.
• When the [LCD CONFIRM] is set to OFF in the setup screen, the still image shot will not be
displayed on the LCD monitor.
Quick Guide
Reference
For how to change the image confirmation time, see P.115.
33
Page 37
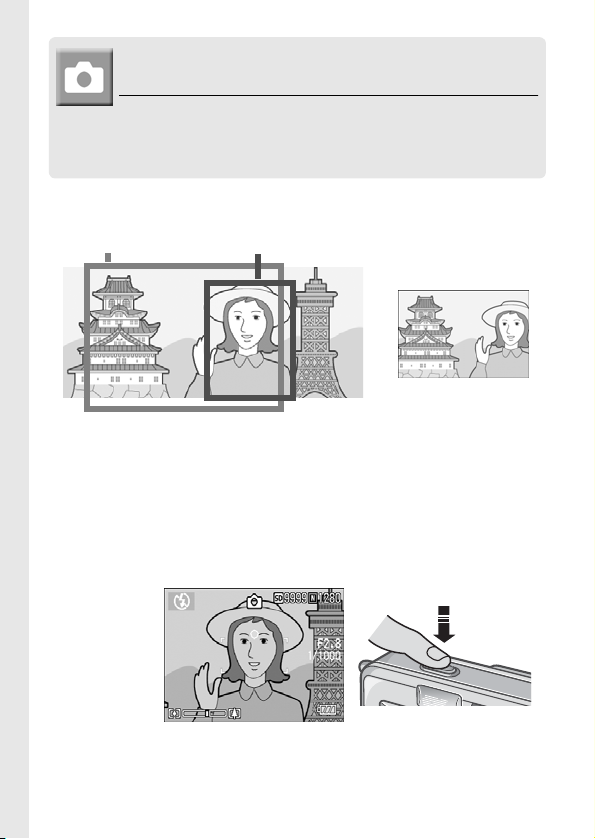
When the Subject is not Centered
(Shooting with Focus-lock)
When your subject is not in the center of your
composition, compose your photo after focusing. (Focuslock)
Example: Taking a photograph of the castle in the background with the camera
focused on a person in front.
Shooting range Subject to be focused on
Final still image
1. To turn the power on, slide the power switch to open the
lens cover.
For how to turn the power on, see P.24.
2. Switch the Mode Selector to 5
5.
55
3. Put the subject of your photo right in the center of the LCD
Monitor or the Viewfinder and press the shutter button halfway.
34
Page 38

4. With the shutter half-pressed,
move the camera and compose
your shot.
5. Gently press the shutter button all
the way.
Note
At macro shooting, the AF target shift function allows you to lock the focus without moving the
camera. This function is useful when a tripod is used.
Reference
• For details about macro shooting, see P.37.
• For details about the AF target shift function, see P.83.
Quick Guide
35
Page 39

Using the Zoom Function
If you use the Z (Wide angle)/ z (Telephoto) button, you
can alter the size of the subject in your photo without
having to change your distance from it.
By pressing the Z button, the field in the LCD monitor
and the viewfinder becomes wider. By pressing the z
button, the subject you see in the LCD monitor and the
viewfinder becomes larger.
Wide angle Telephoto
1. With the camera ready to shoot,
press the ZZZZ button or the zzzz
button.
You can check the Zoom status on the
Zoom Bar of the LCD monitor.
2. Compose your picture and half-
press the shutter release button.
3. Press the shutter release button
all the way.
Note
Using the Digital Zoom
Digital zooming enables you to enlarge the subject more than the maximum magnification
(x4.8) that can be specified by pressing the z (Telephoto) button (up to x3.6).
For digital zooming, release the z button once when the zoom reaches the limit on the z
(Tele) end on the Zoom Bar, and then hold the button down again.
36
Page 40

Shooting Close-Ups (Macro-Mode)
Using the N (Macro) button
allows you to take a tight close-up
(Macro Photo).
It is good for shooting small
subjects because you can get up
to one centimeter (1/2 inch) away.
1. With the camera ready to shoot,
press the NNNN button.
N is displayed momentarily in a large
size at the center of the LCD monitor
and then at the upper part.
2. Compose your picture and half-
press the shutter release button.
3. Press the shutter release button
all the way.
To get out of Macro Mode, press the :N
button again.
Note
• When using the zoom, you can shoot close-ups within the following distances from the front
of the lens:
In Wide-Angle (W): About 1 cm from the front of the lens
In Telephoto (T): About 13 cm from the front of the lens
• During Macro Shooting, the Viewfinder cannot be used. Use the LCD Monitor.
• The AF target shift function enables you to lock the focus for macro shooting only by button
operation without moving the camera. This function is useful for shooting on a tripod. (P.83)
Quick Guide
37
Page 41

Using the Flash
Press the F (Flash) button to switch between flash
modes. By default, your camera is set to Flash Off.
From the front edge of the lens, flashlight reaches about
0.2 to 2.7 m (W) or about 0.13 to 2.1 m (T) when ISO
sensitivity is set to AUTO.
Flash Modes
Flash Off The flash will not fire.
Auto When your subject is poorly lit or backlit, the flash fires automatically.
Red-eye reduction Reduces the red-eye phenomenon, in which people's eyes appear red
Forced Flash The flash fires, whatever the light conditions are, when you shoot.
Slow Synchro
when shooting images of people.
The flash fires with the shutter speed slowed. This is suitable when taking
portrait pictures in a nightscape. It is recommended to use a tripod.
1. Switch the Mode Selector to 5
2. Press the F
The Flash mode mark appears momentarily in a large size at the center of
the LCD monitor and then is displayed at the upper left.
During flash charging, the flash lamp keeps blinking. Once the flash is
charged, the lamp goes off and it is possible to shoot.
F (Flash) button to switch between flash modes.
FF
5.
55
Note
• The settings are saved until you press the F (Flash) button to change them.
• When shooting movies or in Multi-Shot mode, the flash turns off.
• When shooting in a dark place, the camera raises the focusing performance (auto focus
precision) by preliminary flashing immediately before shooting. This preliminary flashing is
skipped for shooting in no-flash mode.
• If you are using the camera on AA alkaline batteries, the LCD Monitor is turned off during
flash charging.
38
Page 42

Shooting with Scenery-Matching
If you use the Scene Mode, you can select from among
six types of still image modes and shoot automatically
with optimal settings for that kind of scene.
PORTRAIT Use when taking portrait pictures.
SPORT Use when taking pictures of moving objects.
LANDSCAPE Use when you are taking scenery pictures with abundant greens or
NIGHTSCAPE Use when shooting night scenes.
TEXT MODE Use when capturing text images, for example, notes written on the
HIGH SENSITIVITY Use when taking pictures in dimly lit places. Also, LCD monitor
1. Switch the Mode Selector to 5
2. Press the !
The still image mode selection screen
appears.
3. Press the "
! button.
!!
" button to move to the
""
blue sky.
You can also shoot with persons in the frame.
whiteboard at a meeting.
becomes brighter.
5.
55
SCENE menu.
4. Press the #$
#$ buttons to move the
#$#$
orange rectangle to the mode you
want to select.
Quick Guide
39
Page 43

5. Press the O
The Mode's symbol is displayed on the
upper part of the LCD monitor.
O button.
OO
6. Press the shutter release button.
If you press the ! button, the still image mode selection screen appears
and you can change the mode.
To return to ordinary shooting mode, on the still image mode selection
screen, press the ! button to select [NRML SHT], and then press the O
button.
Note
In Nightscape Mode, the flash works when all of the following conditions are satisfied:
• The flash is set to Auto.
• Flash is judged to be necessary because it is dark around.
• There is a figure or any other object nearby.
Reference
• For how to change PIC QUALITY/SIZE, see P.60.
• For how to change to density in TEXT Mode, see P.82.
• For the list of Shooting Setting menu items in Scene Mode, see P.157.
• For combination of Scene Mode and the functions, see P.156.
40
Page 44
Playing Back
Checking the image you just took
(Quick Review)
You can view the image you just took on the LCD monitor. If you
are not pleased with the way the photo came out, you can erase it
then and there.
1. While still in the Still Image Mode,
press the QQQQ (Quick Review) button.
The last image you took is displayed on the
LCD monitor.
In Quick Review
Q Button Returns to Shooting Mode.
8 Button Enlarges the displayed still image. You can move around on the displayed
9 Button Reduces the displayed still image enlarged by pressing the 8 button.
O Button Displays the still image at the maximum available ratio or returns it to its
D Button Deletes the currently displayed file. When the D button is pressed, a warning
Note
• Once the power is turned off, the image you took cannot be displayed in the still image
mode even if you press the Q button.
• If you use Quick Review to view the image taken in Text mode (see P.39), the displayed
image may have slightly lower quality than the recorded one.
image by pressing the !"#$ buttons.
original size.
message about deleting the file appears. Select [DELETE] and press the O
button.
Quick Guide
41
Page 45

Viewing Your Images
In the Playback Mode you can check still images you
have taken. You can also delete or zoom in on them.
1. Press the Playback button.
The camera switches to Playback mode
and the last still image you took is
displayed.
You can view your pictures in order by
using the #$ button.
To switch the camera from playback mode
to still image mode (or movie or voice
memo mode), press the Playback button again.
To Pr ev i o u s
To Ne xt
Note
About power-on in playback mode
When you press the Playback button while the camera is turned off (the lens cover is closed),
the camera is turned on in playback mode with the lens cover still closed.
In this status, you can playback still images or make settings in the Setup Menu, while
shooting is not possible.
Where images are played back from
When no SD memory card is inserted, the camera plays back from the internal memory.
When an SD memory card is inserted, it plays back from the SD memory card.
Reference
• For how to playback movies, see P.91.
• For how to playback sounds, see P.93.
• For how to playback still images with voice memo, see P.74.
42
Page 46

Playing back in the three-frame view
A playback view can be divided into three frames. The
three-frame view allows you to select a still image to
enlarge or delete it.
1. Press the Playback button.
The last image you took is displayed.
2. Press the 9
button.
The screen changes to the three-frame
view. The large frame at the center
displays the still image now selected.
A file shot in Text Mode appears
sorrounded by the blue rectangle.
To switch to single-picture display:
1. Press the #$
2. Press the 8
9 (Thumbnail Display)
99
#$ buttons to select a still image.
#$#$
8 (Enlarge) button or the OOOO button.
88
Quick Guide
43
Page 47

About Screen Switching at Playback
The playback screen changes as follows:
Note
If one of the following operations is performed on the three-frame view, the display returns to
the ordinary playback screen (single-picture display) and the operation is executed.
• Deletion (P.49)
• Menu display (P.94)
• Movie playback (P.91)
• Sound playback (P.93)
Reference
For how to erase unwanted Images, see P.49.
44
Page 48

Thumbnail Display
You can view your images in sets of six.
You can then select an image to erase or magnify.
1. Press the Playback button.
The last image you took is displayed.
2.
Press the
button.
The screen changes to three-frame
view.
3.
Press the
button.
The screen is divided into 12 frames and
displays 12 still images at once.
To display just one photo
1. Use the !"
2. Press the 8
Reference
• For how to erase the selected image, see P.49.
• For how to switch to the three-frame view, see P.43.
9999
(Thumbnail Display)
9999
(Thumbnail Display)
!"#$
#$ buttons to select an image.
!"!"
#$#$
8 (Enlarge) button twice, or press the OOOO button.
88
Quick Guide
Selected still image
45
Page 49

Magnifying Images
You can enlarge a still image displayed on the LCD
Monitor.
An image can be enlarged up to 8 times when its size is
2560x1920 or 2048x1356, up to 6.7 times when its size is
1280x960, and up to 3.4 times when its size is 640x480.
1. Press the Playback button.
The last image you took is displayed.
2. Press the #$
enlarge.
3. Press the 8
button.
The still image is enlarged.
In Enlarged View
8 Button Enlarges the displayed still image. You can move aoround on the displayed
9 Button Reduces the displayed still image enlarged by pressing the 8 button.
O Button Displays the still image at the maximum available ratio or returns it to its
#$ buttons to display the still image you want to
#$#$
8 (Enlarged View)
88
image by pressing the !"#$ buttons.
original size.
46
Page 50

Viewing on a Television
You can view still images you have taken on a TV screen. The
camera displays everything on the TV screen just as it would on the
LCD Monitor.
To use your television for viewing, connect your camera to the
television with the AV cable that came with your camera.
To view still images on a television, follow the steps below.
Quick Guide
1. Securely connect the AV cable to
the Video In terminal on the
television.
Connect the white plug of the AV cable
to the audio input terminal (white) of the
TV unit and the yellow plug to the video
input terminal (yellow).
Video input terminal (yellow)
Audio input terminal (white)
2. Make sure the camera power is off.
3. Securely connect the AV cable to
the Video Out terminal.
4. Set the television to "Video" mode. (Set the input to
"Video".)
For details, see the documentation that
came with the television.
47
Page 51

5. To turn the power on, slide the
power switch to open the lens
cover or press the Playback
button.
Connecting the AV cable to the camera
turns off the LCD monitor display and
the speaker output.
Note
• If you connect the AV cable to your video recorder's In terminal, you can record what you
have shot onto video.
• Your camera is set to NTSC playback format (used in Japan and other countries) for use
with television equipment, etc. If the equipment you want to connect to uses PAL format
(used in Europe and else-where), then switch your camera to PAL format in the Setup
Menu before connecting.
Reference
For how to change the video out mode, see P.119.
48
Page 52

Erasing
Erasing Unwanted Images
You can erase unwanted images from the internal memory or SD
Memory Card.
You can erase them in the following three ways:
•One file at a time
•Deleting all frames at once
•Select multiple frames and erase together
1. Press the Playback button.
2. To erase images one at a time,
press the #$
the image you want to erase.
3. Press the D
#$ buttons to display
#$#$
D (Delete) button.
DD
Quick Guide
4. Press the !"
[DELETE ONE] or [DELETE ALL].
If you selected [DELETE ONE], you can
also change the image for deletion with
the #$ buttons.
5. Press the O
!" buttons to select
!"!"
O button.
OO
If you selected [DELETE ONE]:
The display indicates deletion is in progress; once finished, it returns
to the screen in step 4.
If you selected [DELETE ALL]:
You will be prompted to confirm that you want to erase; if so, press
the $$$$ button to select [Yes], and then press the OOOO button.
Note
In the three-frame view (see P.43), you can display a still image at the center and press the
D (Delete) button to delete it. After deletion, the screen returns to single-picture display.
49
Page 53

Erasing Multiple Frames at One Time
1.
Press the Playback button.
2. Press the 9
twice.
The screen is divided into 12 frames and
displays 12 still images at once.
9 (Thumbnail) button
99
3. Press the !"
the image you want to erase and
press the DDDD (Delete) button.
The trash symbol is displayed in the
upper left corner of the image.
!"#$
#$ buttons to select
!"!"
#$#$
4. Repeat Step 3. to select all the still images you wish to
erase.
If you selected an image by mistake, you can deselect it by selecting the
image and pressing the D (Delete) button again.
5. Press the O
6. Press the $
and then press the OOOO button.
The display indicates deletion is in
progress; once finished, the Thumbnail
Display screen returns.
50
O button.
OO
$ button to select [YES]
$$
Page 54

Chapter 2
A Variety of Shooting
Techniques/Playback
Direct Printing .................................................. 52
A Variety of Shooting Techniques ................. 57
Shooting with Multi-Shot ................................ 85
Shooting/Playing Back Movies ....................... 89
Recording/Playing Back Sound ..................... 92
Other Functions Available in Playback Mode .........94
Page 55
Direct Printing
Direct Print Function
The Direct Print standard enables direct printing from a camera to a printer, by
connecting them via a USB cable. Photos can be printed quickly and easily
from your digital camera without using a computer.
Caution
• You cannot print movies (.AVI) with this function. For still images with sounds (.JPG and
.WAV), only the still images (.JPG) are printed.
• Some printer does not support images taken in Text mode (TIFF). Even when TIFF images
are printed, their printed contents cannot be guaranteed.
Note
• This camera uses PictBridge, an industry standard for Direct Printing.
• Your printer must comply with the PictBridge to use the Direct Print function. For support
information, see the documentation that came with the printer.
• For direct printing on a printer supporting both Direct Print and PictBridge, select [Original]
for [USB Connection].
Connecting the Camera to a Printer
Connect your camera to a printer using the USB cable provided.
1. Make sure the camera power is off.
2. Make sure the printer power is off.
Load paper into the printer and check that the printer is ready to print.
3. Connect one end of the USB cable provided to the USB port
of your printer.
4. Connect the other end of the USB cable to the USB terminal
on your camera.
5. Turn the printer power on.
52
Page 56

Note
To disconnect the camera from the printer, check that the power is off on both units before
disconnecting the USB cable between them.
Printing Still Images
You can send still images from the camera to a PictBridge
compatible printer to print them.
Still images are sent from the internal memory when no SD memory
card is loaded or from an SD memory card when one is loaded.
Caution
Do not disconnect the USB cable during printing.
Note
If a printer error message appears during transmission, check the condition of the printer, and
take the appropriate action.
Printing One or All Still Images
1. Check that the printer is ready for printing.
The "Connecting" screen appears.
2. Press the ADJ. button.
When the connection between the printer
and the camera is established, the Direct
Print playback mode screen appears.
3. Press the #$
image for printing.
#$ buttons to select an
#$#$
4. Press the ADJ. button.
A Variety of Shooting Techniques/Playback
53
Page 57

5. Press the !"
!" button to select [1
!"!"
FILE] or [ALL FILES].
6. Press the O
The Direct Print menu appears.
O button.
OO
7. Press the !"
!" buttons to select an
!"!"
item, and then press the $$$$ button
to display the detailed options
screen.
If there are no options available for an
item, the detailed options screen does not
appear even if you press the $ button.
Also, items that are not available on the
printer do not appear.
The following items can be selected. Each item is displayed only when
supported by the printer.
Item Name Function
PAPER SIZE Sets the paper size.
PAPER TYPE Sets the paper type.
LAYOUT Sets the number of images printed on a sheet of paper.
DATE PRINT Selects whether to print the date (shooting date). The date format can be set using
FILE NAME PRINT Selects whether to print the file name.
OPTIMIZE IMAGE Selects whether to optimize the image data (still image) prior to printing on the printer.
FIXED-SIZE PRINT Setting the print image size.
PRINT QUALITY Setting the print quality.
FORMS PRINT Printing forms.
8. Press the !"
the date/time option in the 1 Mode.
!" buttons to select the detailed item, and then
!"!"
press the OOOO button.
The display returns to the Direct Print menu.
9.
Repeat steps 7 and 8 to change the settings as required.
54
Page 58

Note
To specify the set value as the default selected at the
next connection, click the ADJ. button on the screen of
Step 7. Upon appearance of the screen at right, select
[Set] and press the O button.
Select [Cancel] to return to the default setting.
10.Press the O
The selected still images are sent to the printer and the "Connecting" screen
appears.
Press the M button to cancel the operation.
At the end of transmission, the display returns to the Direct Print playback mode
screen and printing starts.
O button.
OO
Printing Several Still Images
1. Check that the printer is ready for printing.
The "Connecting" screen appears.
2. Press the ADJ. button.
When the connection between the
printer and the camera is established,
the Direct Print playback mode screen
appears.
3. Press the 9
twice.
The screen is divided into 12 frames and displays 12 still images at once.
4. Press the !"
5. Press the O
6. Press the !"
number of copies to print.
Press the ! button to increase the
number, or the " button to decrease it.
7. Press the #$
image for printing.
9 (Thumbnail) button
99
!"#$
#$ buttons to select an image for printing.
!"!"
#$#$
O button.
OO
!" buttons to set the
!"!"
#$ buttons to select an
#$#$
A Variety of Shooting Techniques/Playback
55
Page 59

8. Press the !"
!" buttons to set the number of copies to print.
!"!"
9. Repeat steps 7 and 8 to select all the still images to be
printed and the number of copies for each.
10.Press the M
The Direct Print menu appears.
11.Press the !"
item, and then press the $$$$ button
to display the detailed options
screen.
If there are no options available for an
item, the detailed options screen does not
appear even if you press the $ button.
Also, items that are not available on the
printer do not appear.
For settings available, see P.54.
12.Press the !"
press the OOOO button.
The display returns to the Direct Print menu.
13.
Repeat steps 11 and 12 to change the settings as required.
14. Press the O
The selected still images are sent to the printer and the "Connecting"
screen appears.
Press the M button to cancel the operation.
When all the selected still images have been sent from the camera to the
printer, the camera display returns to the Direct Print playback mode
screen.
Note
M button.
MM
!" buttons to select an
!"!"
!" buttons to select the detailed item, and then
!"!"
O button.
OO
• Only images with a printer mark ( ) are printed. When you cancel printing and then try to
print again, make sure that the printer mark is on the images you want to print.
• The same still image can also be printed several times on a single sheet.
• The items available vary depending on the functions of the printer.
• To print images using the printer's default settings, select Printer Setting on the detailed
options screen.
56
Page 60

A Variety of Shooting Techniques
Using the ADJ. (Adjust) Button
The ADJ button allows exposure correction, white balancing, and
ISO sensitivity setting by fewer operations. You can also register a
function other than these adjustment functions to the ADJ button. If a
frequently used function is registered, they can be set easily by
fewer button operations.
Use the SETUP menu to register a function to the ADJ button (P.111).
Adjustments Using the ADJ. Button
Adjustments that can be made with the ADJ. button differ between SCENE
mode and Movie mode.
Still Image Mode Exposure control, white balance, ISO sensitivity
Movie Mode White Balance
Scene Mode (Tex t Mode) Density
Scene Mode (other than Text Mode) Exposure control, white balance
A Variety of Shooting Techniques/Playback
Reference
• Exposure Comp, see P.76.
• White Balance, see P.77.
• ISO Setting, see P.79.
• Text Density, see P.82.
• For how to set a function to the ADJ. button, see P.111.
57
Page 61

Shooting Setting Menu
The Shooting Setting menu enables you to shoot pictures by setting the items
listed in the table below.
*Among the choices listed in the table below, default values at purchase are enclosed in [ ].
Setting Option Refer to
PIC QUALITY/SIZE F2560, N2560, F2048, N2048, F1280,[N1280], N640 P.60
FOCUS [AF], MF, SNAP, ∞ P.6 2
PHOTOMETRY [MULTI], CENTRE, SPOT P.65
SHARPNESS SHARP, [NORMAL], SOFT P.66
CONT. MODE [OFF], CONT, SCONT, MCONT P.85
COLOR DEPTH VIVID, [NO RMAL], NEUTRAL, B&W P.67
AUTO BRACKET ON , [OFF], WB-BKT P.68
TIME EXPOSURE [ OFF], 1, 2, 4, 8 seconds P.71
INTERVAL [0 s], 5 seconds to 3 hours P.72
IMAGE WITH SOUND [OFF], ON P.74
DATE IMPRINT [Off], Date, Date and Time P.75
EXPOSURE COMP. -2.0 to +2.0 P.76
WHITE BALANC E
ISO SETTING [AUTO], ISO64, ISO100, ISO200, ISO400, ISO800 P.79
SLOW SHUTTER LMT [OFF], ON P.80
RESTORE DEFAULTS P.81
[AUTO], (Daylight), (Overcast), (Tungsten light),
(Tungsten light 2), (Fluorescent light), (One Push)
P.7 7
Note
The SETUP menu can be accessed from within the Shooting Setting menu. For details, see
P.106.
Reference
For the list of Shooting Setting menu items in Movie and Scene Modes, see P.157.
58
Page 62

Using the Shooting Setting Menu
1.
With the camera ready to shoot, press the M
The Shooting Setting menu appears.
2. Press the !"
The setting items are provided on three screens.
When the " button is pressed at the
bottom item, the next screen
appears.
To select a screen by screen number:
1. Press the # button to select a screen number on
the left of the screen.
2. With the screen number selectable, press the
buttons to switch between screens.
3. After selecting the screen, press the
return to the setting item selection step.
!" buttons to select the desired item.
!"!"
!"
$ button to
M button.
MM
A Variety of Shooting Techniques/Playback
3. After selecting a setting item, press the O
Choices for the setting item are displayed.
4. Press the !"
5. Press the O
6. If you pressed the #
!" buttons to select a choice.
!"!"
O or #
# button.
OO
##
# button in step 5, press also the M
##
O or $$$$ button.
OO
button.
The Shooting Setting menu disappears and the camera becomes ready
for shooting.
M
MM
59
Page 63
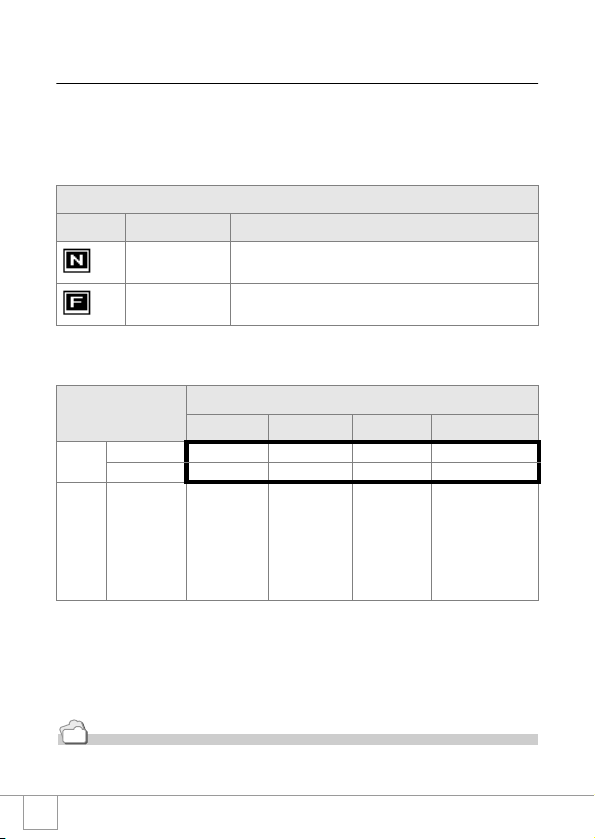
Choosing Picture Quality Mode/Image Size
(PIC QUALITY/SIZE)
The size of a stored still image and movie file depends on picture
quality and size settings.
In Picture Quality Mode, there are two types, N (Normal) and F
(Fine).
Types of Modes You Can Select
Symbol Mode Description
Normal Mode The compression ratio is high, resulting in a small file. Normally,
Fine Mode The compression ratio is low, resulting in a large file, but the picture
Combining Picture Quality Mode and Image Size.
Mode F (Fine) F2560 F2048 F1280 -
N (Normal) N2560 N2048 N1280 N640
Uses Suitable for
Figures inside the bold frame indicate those shown on the screen.
shooting is done in this mode.
quality is better than in Normal Mode.
Size
2560 X 1920 2048 X 1536 1280 X 960 640 X 480
downloading
images to your
computer and
correcting the
images or
printing them in
large sizes.
Suitable for
printing images
in large sizes.
Suitable for
shooting many
pictures.
Capable of recording
the greatest number of
pictures on a single
SD memory card.
Suitable for attaching
images to e-mail
messages or using
them on Web pages.
In Movie Mode, 320 X 240 or 160 X 120 can be selected.
Reference
For internal memory/SD memory card recording capacities, see P.159.
60
Page 64
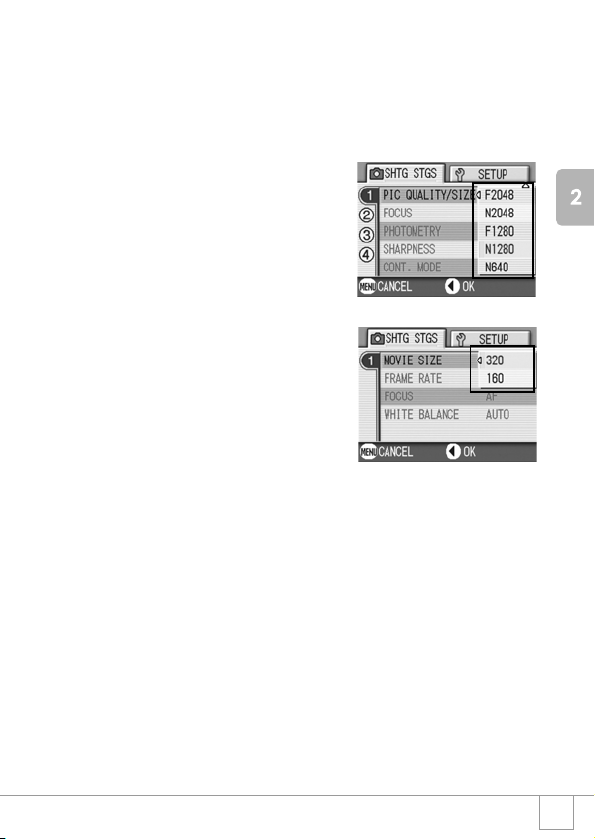
1. Switch the Mode Selector to 5
2. Press the M
The Shooting Setting menu appears.
3. Press the"
M button.
MM
"button to select [PIC QUALITY/SIZE] and press
""
5.
55
the OOOO or $$$$ button.
4. Press the !"
!" buttons to select a
!"!"
picture quality/size.
5. Press the O
Picture Quality/Image Size settings are
completed.
6. If you pressed the #
5, press also the M
The shooting setting menu disappears
and the LCD monitor displays the set
values.
This setting will be used for shooting
until you change it.
O or $$$$ button.
OO
# button in step
##
M button.
MM
A Variety of Shooting Techniques/Playback
Still Image Mode
Movie Mode
61
Page 65

Manual Focus Shooting (FOCUS)
When Auto-Focus does not focus as desired, you can focus
manually (Manual Focus).
Manual focusing allows shooting at a fixed distance. When using a
fixed shooting distance, it can be set to either Snapshot or Infinity
(∞).
Note
• Manual focus cannot be used in Scene Mode.
• Manual focusing can focus the camera also on an object that requires macro shooting.
• In manual focus, the Macro Mode cannot be used.
Setting Manual Focusing
1. Switch the Mode Selector to 5
2. Press the M
The Shooting Setting menu appears.
3. Press the "
$$$$ button.
4. Press the !"
[MF].
5. Press the O
Focus settings are complete.
M button.
MM
" button to select [FOCUS] and press the OOOO or
""
!" buttons to select
!"!"
O or #### button.
OO
5.
55
6. If you pressed the #
step 5, press also the M
button.
The Menu closes and "MF" is displayed
on the screen.
62
# button in
##
M
MM
Page 66

Shooting with Manual Focusing
1. Press the "
Pressing the " button enlarges the
display for easy focusing.
2. Press the O
focus bar/zoom bar display to the
focus bar.
Each time the O button is pressed, the
focus bar and the zoom bar appear
alternately.
" button as required.
""
O button to set the
OO
A Variety of Shooting Techniques/Playback
3. Press the z
Pressing z button moves the focus away from you.
Pressing the Z button brings the focus closer to you.
Until the setting is changed the next time, pictures are shot by manual
focusing.
z and ZZZZ buttons for focusing.
zz
4. Press the shutter button for shooting.
Note
• When the zoom bar is displayed, you can operate the zoom bar with the zZ buttons.
• At interval shooting, the O button cannot be used to operate zooming or switch to
manual focusing.
63
Page 67

Shooting at a Fixed Distance
The shooting distance can be set to short distance or infinity.
Infinity is useful to shoot a distant view.
To shoot with the shooting distance fixed, follow the steps below.
1. Switch the Mode Selector to 5
2. Press the M
The Shooting Setting menu appears.
3. Press the "
$$$$ button.
4. Press the !"
[SNAP] or [∞] (Infinity).
Selecting [SNAP] will fix the shooting
distance to 2.5 meters.
Selecting [∞] will fix the shooting distance
to infinity.
5. Press the O
Focus settings are complete.
6. If you pressed the #
button.
The Shooting Setting menu closes and the setting value appears on the
screen.
This setting will be used for shooting until you change it.
M button.
MM
" button to select [FOCUS] and press the OOOO or
""
!" buttons to select
!"!"
O or #### button.
OO
# button in step 5, press also the M
##
5.
55
M
MM
64
Page 68

Changing the Light Metering (PHOTOMETRY)
You can change the metering method (the range to use for metering) to
determine the exposure value.
There are three Light Metering Methods available: MULTI, CENTER, and
SPOT.
Types of Modes You Can Select
Symbol Mode Description
(No Symbol) MULTI The entire shooting range is divided into 256 partitions, and subjected to
CENTER The light metering is determined by a measurement of the whole, with
SPOT Light metering is determined by measuring only the central part.
1. Switch the Mode Selector to 5
2. Press the M
The Shooting Setting menu appears.
3. Press the "
OOOO or $$$$ button.
4. Press the !"
the desired setting.
5. Press the O
Light Metering Method setting is
complete.
M button.
MM
" button to select [PHOTOMETRY] and press the
""
!" buttons to select
!"!"
O or #### button.
OO
photometry for overall decision.
the central part emphasized.
Use this when the brightness of the center and surroundings are
differen t.
Use this setting when you want to use the brightness of the center. It is
useful if there is marked difference in contrast or backlighting.
5.
55
A Variety of Shooting Techniques/Playback
6. If you pressed the #
# button in
##
step 5, press also the M
button.
The shooting setting menu disappears
and the LCD monitor displays the set
values.
This setting will be used for shooting
until you change it.
M
MM
65
Page 69

Changing the Edge Quality of Still Images
(SHARPNESS)
You can change the definition of your still images to either sharp or
soft.
1. Switch the Mode Selector to 5
2. Press the M
The Shooting Setting menu appears.
3. Press the "
OOOO or $$$$ button.
4. Press the !"
the desired setting.
5. Press the O
Sharpness settings are complete.
6. If you pressed the #
step 5, press also the M
button.
The shooting setting menu disappears
and the LCD monitor displays the set
values.
This setting will be used for shooting until
you change it.
M button.
MM
" button to select [SHARPNESS] and press the
""
!" buttons to select
!"!"
O or #### button.
OO
# button in
##
M
MM
5.
55
66
Page 70

Setting Color Depth (COLOR DEPTH)
Color depth of the shot still image can be selected from Normal,
Natural, Neutral, and Monochrome.
1. Switch the Mode Selector to 5
2. Press the M
The environment setting menu is displayed.
3. Press the "
the OOOO or $$$$ button.
4. Press the !"
5. Press the O
This completes the color depth setting.
6. If the #
Step 5, press the M
The shooting setting menu disappears. If
other than [Normal] is set, the LCD monitor
displays the set values.
The set values are used for shooting until
they are changed the next time. The LCD
monitor also reflects the values.
M button.
MM
" button to select [COLOR DEPTH]. Then press
""
!" buttons to select the color depth.
!"!"
O or #### button.
OO
# button was pressed in
##
M button.
MM
5.
55
A Variety of Shooting Techniques/Playback
67
Page 71

Shooting Consecutively with Different
Exposures (AUTO BRACKET)
The Auto Bracketing function automatically shoots three consecutive shots,
with the specified exposure value as standard, at three exposure levels, at
-0.5EV, ±0, and +0.5EV.
Note
This function is not available when shooting with sound.
1. Switch the Mode Selector to 5
2. Press the M
The Shooting Setting menu appears.
3. Press the "
M button.
MM
" button to select [AUTO BRACKET] and press
""
5.
55
the OOOO or $$$$ button.
4. Select [ON] and then press the O
O
OO
or #### button.
5. If you pressed the #
step 4, press also the M
# button in
##
M
MM
button.
The shooting setting menu disappears
and the LCD monitor displays [AB].
6. Press the shutter release button.
Three consecutive shots are taken, with
the specified Exposure Compensation
value as the standard, at -0.5EV, ±0, and
+0.5EV.
After shooting, three still images are
displayed on the LCD Monitor. They are,
from the left, at -0.5EV (darker), standard
compensation, and +0.5EV (brighter).
This setting will be used for shooting until you change it or you turn the
power off.
Reference
• For how to change the Exposure Compensation, see P.76.
• For how to change the White Balance, see P.77.
68
Page 72

Shooting Consecutively with Different White
Balance (WHITE BALANCE BRACKET)
Three images are automatically recorded - a reddish image, a bluish
image, and an image of the current white balance.
This is useful if the appropriate white balance cannot be judged.
1. Switch the Mode Selector to 5
2. Press the M
The Shooting Setting menu appears.
3. Press the "
the OOOO or $$$$ button.
4. Press the !"
[WB-BKT].
5. Press the O
White Balance Bracket settings are
complete.
6. If you pressed the #
5, press also the M
The Shooting Setting menu disappears
and the screen displays [WB-BKT].
M button.
MM
" button to select [AUTO BRACKET] and press
""
!" buttons to select
!"!"
O or #### button.
OO
# button in step
##
M button.
MM
5.
55
7. Press the shutter release button.
Three images (reddish, bluish, and equal
to the current white balance) are
automatically recorded.
This setting will be used for shooting until
you change it or you turn the power off.
A Variety of Shooting Techniques/Playback
69
Page 73

Note
• This function is not available for Multi-Shot shooting (P.85) and Auto Bracket shooting
(P.68).
• The flash cannot be used.
• Time Exposure (P.71) is set to OFF.
• If [Mono] is set for [COLOR DEPTH], the white balance bracket can be set but does not
become valid.
Reference
For how to change the White Balance, see P.77.
70
Page 74

Using Long Time Exposure (TIME EXPOSURE)
You can select an exposure time of 1, 2, 4 or 8 seconds.
By using long time exposure, you can capture the track of moving
subjects such as fireworks and car lights, when you shoot a night
scene.
1. Switch the Mode Selector to 5
2. Press the M
The Shooting Setting menu appears.
3. Press the "
the OOOO or $$$$ button.
4. Press the !"
the exposure time.
5. Press the O
This completes the setting of time
exposure.
6. If you pressed the #
step 5, press also the M
button.
The shooting setting menu disappears
and the LCD monitor displays the set
values.
This setting will be used for shooting until
you change it.
Note
• When using long time exposure, the shutter speed may go down and images may be
blurred. Hold the camera securely by both hands or use a tripod for shooting.
• While shooting with long time exposure, the LCD Monitor display turns off.
M button.
MM
" button to select [TIME EXPOSURE] and press
""
!"buttons to select
!"!"
O or #### button.
OO
# button in
##
M
MM
5.
55
A Variety of Shooting Techniques/Playback
71
Page 75

Shooting Pictures Automatically at Set
Intervals (INTERVAL)
You can set the camera to automatically take pictures at fixed
intervals.
You can set the shooting interval at any length from 5 seconds to 3
hours, in increments of 5 seconds.
1. Switch the Mode Selector to 5
2. Press the M
The Shooting Setting menu appears.
3. Press the "
[INTERVAL] and press the OOOO or
$$$$ button.
4. Press the !"
the length of time.
5. Press the $
minutes setting, then use the !"
buttons to set the minutes.
6. Press the $
seconds setting, then use the !"
buttons to set the seconds.
7. Press the O
Interval shooting is set and the LCD
monitor displays "Interval".
M button.
MM
" button to select
""
!" buttons to specify
!"!"
$ button to move to the
$$
$ button to move to the
$$
O button.
OO
5.
55
!"
!"!"
!"
!"!"
72
Page 76

8. Press the shutter release button.
A picture is taken every time the fixed interval elapses.
9. To stop shooting, press the O
Interval Shooting settings are cleared when the power is turned off.
Caution
If the time until the next shooting is set longer on the shooting menu than the time for interval
shooting, the shooting interval becomes longer than that for interval shooting.
Note
• In step 5, press and hold either the ! or " button to quickly raise or lower the setting
value for minute.
• If you use batteries for power, you may exhaust the batteries. Using the AC Adapter (sold
separately) is recommended.
• Even during Interval Shooting, if you press the shutter button, the camera will shoot as
usual. However, Interval Shooting Mode is unaffected. After shooting, once the time
specified in Interval Shooting elapses, the next shot is taken.
• Depending on Picture Quality Mode and Flash Mode settings, the shooting interval may
become longer than the time set.
• When Interval Shooting is on, even when Multi-Shot is set to [CONT] or [MCONT],
consecutive shooting is automatically switched off.
O button.
OO
A Variety of Shooting Techniques/Playback
73
Page 77

2222 Shooting a Still Image with Sound
(IMAGE WITH SOUND)
You can shoot a still image with a voice memo. Voice recording can
continue for up to eight seconds.
1. Switch the Mode Selector to 5
2. Press the M
The Shooting Setting menu appears.
3. Press the
then press the OOOO or $$$$ button.
4.
Press the
5. Press the O
6.
If you pressed the
5, press also the
The Shooting Setting menu disappears.
M button.
MM
""""
button to select [IMAGE WITH SOUND] and
!"
!"
buttons to select [ON].
!"!"
O or #### button.
OO
####
button in step
M
M
MM
button.
5.
55
7. Press the shutter release button
for shooting.
After shooting, the voice mark appears on
the screen to indicate the recording
status.
8. Press the shutter release button
to stop recording.
Note
When playing back a still image with sound, display the image in the same way as an ordinary
image without voice. Pressing the O button plays back the sound.
Press the !" buttons to display the volume adjustment bar, where you can adjust the
volume with the !" buttons.
Reference
For how to display still images, see P.42.
74
Page 78

Inserting the Date into a Still Image
(DATE IMPRINT)
You can insert the date (YY/MM/DD) or the date and time (YY/MM/
DD hh:mm) at the lower right of a still image.
1. Switch the Mode Selector to 5
2. Press the M
The Shooting Setting menu appears.
3. Press the "
press the OOOO or $$$$ button.
4.
Press the
desired setting.
5. Press the O
The Date Imprint settings are completed.
6. If you pressed the #
step 5, press also the M
button.
The shooting setting menu disappears
and the LCD monitor displays .
This setting will be used for shooting until
you change it.
Note
• If the date and time have not been set, DATE IMPRINT cannot be used. First make the
date and time settings (P.117).
• DATE IMPRINT cannot be used with movies.
• A thumbnail image is not displayed with a date.
M button.
MM
" button to select [DATE IMPRINT] and then
""
!"
!"
buttons to select the
!"!"
O or #### button.
OO
# button in
##
M
MM
5.
55
A Variety of Shooting Techniques/Playback
75
Page 79

Changing the Exposure (EXPOSURE COMP.)
The exposure setting allows you to select brightness levels for your shots.
Normally, if your subject is centered, backlight compensation is automatically
activated, and you can shoot with correct exposure.
However, in the following cases, or when you intentionally want to change the
exposure, you can change the exposure setting. Exposure can be specified in
the range from -2.0 to +2.0. Setting the level higher (+) makes pictures
brighter and lower (-) makes pictures darker.
For Backlighting
When the background is particularly bright, the subject will be dark (underexposure). In this case, set the exposure level higher (+).
When your subject is whitish
It will turn out entirely dark (underexposure). Set the exposure level higher (+).
When your subject is darkish
It will turn out entirely bright (overexposure). Set the exposure level lower (-).
The same happens when you take photos of people in a spotlight.
To change the setting, use either the Shooting Setting menu or the ADJ. button.
This section explains easy ways with the ADJ. button.
When using the Shooting Setting menu, see "Using the Shooting Setting Menu" ( P.59).
1. Switch the Mode Selector to 5
5.
55
2. Press the ADJ. button.
The Exposure Compensation bar
appears.
3. Press the !"
a value.
4. Press the O
The setting of exposure compensation is
completed and the LCD monitor displays the set values.
Note
When shooting in particularly bright places, you may fail in preventing overexposure. In that
case, the [!AE] symbol will be displayed.
76
!" buttons and specify
!"!"
O button.
OO
Page 80
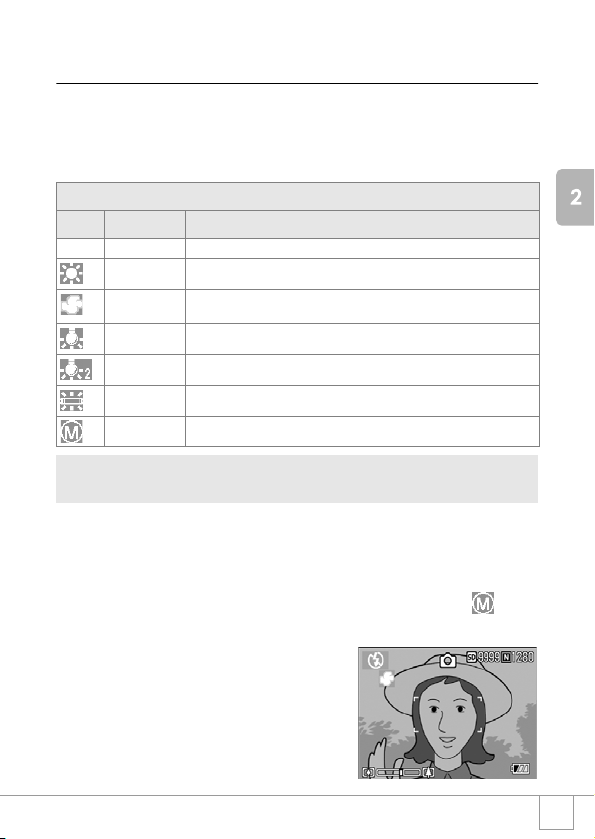
Using Natural and Artificial Lighting
(WHITE BALANCE)
Adjust the white balance so that a white subject may be reproduced as white.
At purchase, the White Balance is set to "AUTO"; normally you do not need to
change the setting, but if the camera is having difficulty determining the white
balance when shooting an object of a single color or under several light sources, you
can change the setting.
Types of Modes You Can Select
Symbol Mode Description
AUTO Auto Make adjustments automatically.
Daylight
Overcast Select when shooting in cloudy weather or shade and the White Balance fails to
Tungsten light
Tungsten light 2
Fluore scent light
One-push Manually set White Balance.
To change the setting, use either the Shooting Setting menu or the ADJ. button.
This section explains easy ways with the ADJ. button.
When using the Shooting Setting menu, see "Using the Shooting Setting Menu" ( P.59).
1. Switch the Mode Selector to
Select when shooting outdoors (Sunny) and White Balance fails to adjust properly.
adjust properly.
Select when shooting under tungsten light and White Balance fails to adjust properly.
Shooting under tungsten light (slightly reddish, compared with Tungsten light Mode)
Select when s hooting under flu orescent light a nd White Balance fai ls to adjust proper ly.
5555
.
2. Press the ADJ. Button three times.
The White Balance menu appears.
3. Press the !"
You can also press the shutter button in this state.
4. Press the O
White Balance settings are completed
and the symbol appears on the screen.
This setting will be used for shooting
until you change it.
!" buttons to select a mode other than .
!"!"
O button.
OO
A Variety of Shooting Techniques/Playback
77
Page 81

Setting the White Balance Manually (One Push)
1. Switch the Mode Selector to
5555
.
2. Press the ADJ. Button twice.
The White Balance menu appears.
3. Press the !"
!" buttons to select
!"!"
(One Push).
4. Point the camera at a piece of
paper or something white under
the lighting conditions for your
picture.
5. Press the M
White Balance is set.
6. Press the O
The setting of white balance is completed
and the LCD monitor displays a marking.
This setting will be used for shooting until
you change it.
If you press the M button in step 5,
the screen refreshes to show the White
Balance settings made. If the result is not
as expected, repeat steps 4 and 5 to change the settings as many times
as required.
M button.
MM
O button.
OO
Note
In Auto Mode, white balance may not be adjusted correctly for a subject mostly dark. In this
case, add something white as the subject.
Caution
When shooting with flash, white balance may not be adjusted correctly. In this case, switch to
Auto Mode for shooting with flash.
78
Page 82

Changing Sensitivities (ISO SETTING)
The ISO sensitivity indicates how sensitive to light the film is. A
greater value means higher sensitivity. High sensitivity is suitable for
shooting an object in a dark place or moving fast and suppresses
blurring. However, the images become rough.
For higher or lower sensitivity, you can select from the following six
levels:
AUTO, ISO64, ISO100, ISO200, ISO400, ISO800
A digital camera can automatically vary the sensitivity according to
the distance, brightness, zoom, and macro (AUTO). Usually use
your camera in the AUTO mode.
To change the setting, use either the Shooting Setting menu or the ADJ. button.
This section explains easy ways with the ADJ. button.
When using the Shooting Setting menu, see "Using the Shooting Setting Menu" ( P.59).
A Variety of Shooting Techniques/Playback
1. Switch the Mode Selector to 5
5.
55
2. Press the ADJ. Button three times.
The ISO Sensitivity menu appears.
3. Press the !"
ISO setting.
You can also press the shutter button in
this state.
4. Press the O
The setting of ISO sensitivity is completed
and the LCD monitor displays the set
values.
This setting will be used for shooting until
you change it.
Note
In Wide-angle Zoom mode, when the ISO Sensitivity is set to Auto, the sensitivity is
equivalent to ISO160 with flash or ISO100 without flash.
!" buttons to select an
!"!"
O button.
OO
79
Page 83

Limiting the Shutter Release Speed
(SLOW SHUTTER LMT)
By setting this function to [ON], the maximum shutter release speed
can be limited to the following:
In Wide-Angle (W): 1/8 second
In Telephoto (T): 1/30 second
When the function is set to [OFF], the maximum shutter release
speed is 1 second.
1. Switch the Mode Selector to 5
2. Press the M
The Shooting Setting menu appears.
3. Press the "
[SLOW SHUTTER LMT] and press
the OOOO or $$$$ button.
4. Press the !"
[ON] or [OFF].
5. Press the O
The setting of shutter release speed limit
is complete.
6. If you pressed the #
button.
The shooting setting menu disappears and the LCD monitor displays the
set values.
This setting will be used for shooting until you change it.
Note
• When Time Exposure is set to ON, priority is given to Time Exposure.
• When Nightscape is selected in Scene Mode, priority is given to Nightscape.
• When the flash is in Slow Synchro mode, the longest shutter speed is one second.
80
M button.
MM
" button to select
""
!" buttons to select
!"!"
O or #### button.
OO
# button in step 5, press also the M
##
5.
55
M
MM
Page 84

Returning the Shooting Setting Menu
Settings to their Defaults
(RESTORE DEFAULTS)
To return the Shooting Setting menu settings to their defaults, follow
the steps below.
1. Switch the Mode Selector to 5
2. Press the M
3. Press the !"
[RESTORE DEFAULTS] and press
the OOOO or $$$$ button.
M button.
MM
!" buttons to select
!"!"
5.
55
4. Make sure that [YES] is selected,
and then press the OOOO button.
The display indicates the camera is
restoring the initial settings; once it is
finished, the display returns to the Mode
screen.
Reference
For a list of functions whose settings are not cleared by power-off, see P.158.
A Variety of Shooting Techniques/Playback
81
Page 85

Changing Shading for Shooting Text
(DENSITY)
You can change the shading of text for shooting in Text Mode of
Scene Mode.
You can select from DEEP, NORMAL and LIGHT.
To change the setting, use either the Shooting Setting menu or the ADJ. button.
This section explains easy ways with the ADJ. button.
When using the Shooting Setting menu, see "Using the Shooting Setting Menu" ( P.59).
1. Switch the Mode Selector to 5
2. Press the !
The still image mode selection screen appears.
3. Press the "
4. Press the #$
text mode and then press the OOOO
button.
! button.
!!
" button to move to the SCENE menu.
""
#$ buttons to select the
#$#$
5.
55
5. Press the ADJ. button.
The Text Density menu appears.
6. Press the !"
the desired density setting.
You can also press the shutter button in
this state.
7. Press the O
Text Density settings are completed.
The Text Density setting value does not appear on the screen. This
setting will be used for shooting until you change it.
Reference
For how to shoot text, see P.39.
82
!" buttons to select
!"!"
O button.
OO
Page 86

Using the AF Target Shift Function
At macro shooting, the AF target shift function allows you to lock the
focus (P.34) by using the !"#$ buttons on the camera without
moving the camera.
This is useful for macro shooting on a tripod with locked focus.
The AF target shift function allows you to shift the cross at the center
of the LCD monitor to the subject with the !"#$ buttons for
focusing.
Press the #
button to shift the
cross (focus) to
the left
A Variety of Shooting Techniques/Playback
1. With the camera ready to shoot, press the N
The Macro symbol is displayed at the top of the screen.
2. Press the ADJ. Button four times.
Press five times if the ADJ. button has
the fourth function.
3. Shift the cross to the subject with
the !"
!"#$
#$ buttons for focusing.
!"!"
#$#$
4. Press the O
O button.
OO
5. Half-press the shutter button
The camera focuses on the cross.
6. Gently press the shutter button all
the way.
Until you get out of the Macro mode, the AF target shift function
automatically focuses the camera on the set position.
N button.
NN
83
Page 87

TTTTUsing the Self-Timer
You can set the Self-timer to shoot after either two or ten seconds.
A setting of two seconds is useful for preventing camera shake.
1. Switch the Mode Selector to 5
2.
Press the
The Self Timer mark appears momentarily
in a large size at the center of the LCD
monitor and then is displayed at the upper
left.
The "10" to the right of the symbol
indicates the number of seconds. In this
case, if you press the shutter button, the
camera will shoot after 10 seconds.
TTTT
(Self-timer) button.
5.
55
3. Press the shutter release button.
The focus is locked, the flash goes on, and the self-timer starts.
Once the picture is taken, the self-timer mode is cleared.
Note
• Each press of the T (Self-timer) button, it selects a function in the following sequence: 10
sec, 2 sec, Self-timer Off, 10 sec, 2 sec.
• Self-timer settings are released when the power is turned off.
• When the self-timer is set to 2 seconds, the flash for self-timer does not fire.
84
Page 88

Shooting with Multi-Shot
If you switch to Multi-Shot, you can shoot consecutive images.
Multi-shot can be classified into the following types:
CONT (Multi-Shot)
As long as you hold the shutter button
down, pictures continue to be taken.
The still images are recorded one file
each, just as in normal shooting.
S (Stream) Multi-Shot
With just one full-press of the shutter, you
can take 16 consecutive shots at
intervals of 1/7 second (in about 2.2
seconds).The 16 still images are grouped
together as a set and are recorded as
one image file (2560 x 1920 pixels).
M (Memory-reversal) Multi-Shot
The camera memorizes the scene while you hold the shutter release
button down, and once you release it the previous 2.2 seconds of
shots are recorded.
The 16 still images are grouped together as a set and are recorded
as one image file (2560 x 1920 pixels).
2. The camera records for about 2.2 seconds ahead
1. If you release the shutter release button here...
85
Page 89

Note
• When shooting with S Multi- or M Multi-Shot, the ISO sensitivity is fixed to AUTO even if it is
set to 64,100.
• The maximum number of images that can be shot in the Multi-Shot mode depends on the
image size setting as follows:
F2560 N2560 F2048 N2048 F1280 N1280 N640
3333131313
1. Switch
2. Press the M
3.
the Mode Selector to
M button.
MM
The Shooting Setting menu appears.
Press the
""""
button to select [CONT] and press the
button.
4.
Press the
!"
!"
buttons to select
!"!"
[CONT], [SCONT], or [MCONT].
5. Press the
OOOO
or
####
6. If you pressed the
step 5, press also the M
button.
The Shooting Setting menu closes and
the symbol is displayed at the top of the
screen.
86
button.
####
button in
M
MM
5555
.
OOOO
or
$$$$
Page 90

CONT
7.
Compose your picture, then press and hold the shutter
button.
As long as you hold the shutter button down, pictures continue to be
taken.
8. Release your finger from the shutter release button to stop
memorizing.
To playback consecutive images shot in Multi-Shot mode, turn the camera
to playback mode (see P.42) and select the still image with the #$
buttons for playback.
SCONT (S Multi-Shot)
7.
Compose your picture, then press the shutter button.
16 pictures are taken automatically.
MCONT (M Multi-Shot)
7.
Compose your picture, then press and hold the shutter
button.
The camera memorizes the scene while you hold the shutter release
button down.
8. Release your finger from the shutter release button.
The camera stops memorizing and the previous 16 still images (in about
2.2 seconds) are recorded as one still image.
Note
• When you want to return to normal single-shot shooting, follow step 1 through 3, select
[OFF] in step 4, and press the O button.
• In MCONT mode, if you release the shutter button within 2.2 seconds from the time you
first pressed it, the shots from the time you pressed the shutter until you released it will be
recorded (the number of consecutive shots will be less than 16).
• Flash is switched to OFF.
A Variety of Shooting Techniques/Playback
87
Page 91

Viewing an S Multi-Shot or M Multi-Shot Still
Image in Enlarged Display Mode
While still images (16 frames in a file) taken by SCONT or MCONT
are displayed, one of the 16 frames can be displayed in an enlarged
view. While viewing an enlarged frame image, you can switch
between frames.
To view a shot from S Multi-Shot or M Multi-Shot still images in
Enlarged Display Mode, follow the steps below.
1. Press the Playback button.
The last shot taken is displayed.
2. Press the #$
an S Multi-Shot or M Multi-Shot
still image.
#$ buttons to display
#$#$
3. Press the 8
8 (Enlarged Display)
88
button.
The first frame of consecutive images is
displayed in Enlarged Display Mode.
The shot position bar appears at the
lower part of the LCD monitor.
Press the #$ buttons to feed the shot.
To return to the 16-shot display, press
the O button.
Note
Press the DISP. button to turn on or off the bar display at the lower part of the LCD moitor.
Reference
For how to shoot images in S Multi-Shot or M Multi-Shot mode, see P.85.
88
Page 92

Shooting/Playing Back Movies
3333 Shooting Movies
You can shoot movies with sound.
You can select the image size, either 320 x 240 or 160 x 120 pixels.
You can select number of frames shot per second (frame rate), either 30 or 15.
Each movie you shoot is recorded as one AVI file.
1. Switch the Mode Selector to 3
3 (Movie Mode).
33
2. Press the shutter release button.
The camera starts recording.
Recording continues until you press the
shutter button again.
3. Pressing the shutter button again
stops recording.
Caution
• While shooting movies, operation sounds may be recorded.
• The maximum recording time per shooting depends on your card. Even within the
maximum recording time, some card may end shooting.
Note
• The flash cannot be used.
• While shooting movies, only Digital Zoom can be used.
• At the time you press the shutter button in Step 2, the shot comes into focus and the white
balance is automatically fixed.
• The remaining recording time may not change uniformly because it is recalculated from the
remaining memory capacity during movie recording.
Reference
• For how to change the image size for movies, see P.60.
• For how to change the frame rate, see P.90.
• For how to use the Digital Zoom, see P.36.
• For the list of shooting setup menu items available in Movie mode, see P.157.
A Variety of Shooting Techniques/Playback
89
Page 93

Setting the Frame Rate
The number of shot frames per second (frame rate) in Movie Mode
can be selected from 30 and 15.
1. Switch the Mode Selector to 3
2. Press the M
M button.
MM
3.
33
The shooting setting menu appears.
3. Press the "
" button to select [FRAME RATE]. Then press the
""
OOOO or $$$$ button.
4. Press the !"
!" button to select [30
!"!"
FPS] or [15 FPS].
5. Press the O
This completes the frame rate setting.
6. If the #
Step 5, press the M
The shooting setting menu disappears and
the LCD monitor displays the set values.
The set values are used for shooting until they are changed the next time.
O or #### button.
OO
# button was pressed in
##
M button.
MM
Note
The movie recording time depends on the capacity of the SD memory card.
The recording time is as shown below.
IN 32MB 64MB 128MB 256MB 512MB 1GB
15FPS 320 X 240 1 min
30FPS 320 X 240 42 s 44 s 1 min
15FPS 160 X 120 5 min
30FPS 160 X 120 2 min
23 s
1 s
38 s
1 min
27 s
5 min
18 s
2 min
48 s
2 min
57 s
30 s
10 min
51 s
5 min
45 s
5 min
59 s
3 min
2 s
21 min
57 s
11 m in
37 s
11 m in
56 s
6 min
4 s
43 min
44 s
23 min
10 s
24 min
4 s
12 min
13 s
88 min
7 s
46 min
42 s
46 min
17 s
23 min
30 s
169 min
27 s
89 min
48 s
90
Page 94

Playing Back Movies
To playback movies, follow the steps below.
1. Press the Playback button.
The last shot taken is displayed.
For movies, the first frame is displayed as a still image.
2. Move to the movie you want to
view using the #$
Press the $ button to display the next
file.
Press the # button to display the
previous file.
3. Press the O
Playback begins.
The elapsed playback indicator or the elapsed time is displayed on the
LCD Monitor.
Fast Forward Press the z button during playback.
Rewind Press the Z button during playback.
Pause/Playback Press the O button.
Slow Playback Keep pressing the z button during pause.
Slow Rewind Keep pressing the Z button during pause.
Next Frame Press the $ button during pause.
Previous Frame Press the # button during pause.
Volume Adjustment Press the !" buttons during playback.
#$ buttons.
#$#$
O button.
OO
A Variety of Shooting Techniques/Playback
Ter m
Movie Frames
A movie frame is also called a frame. Movies consist of many frames whose images appear
to be moving when displayed at high speed.
91
Page 95
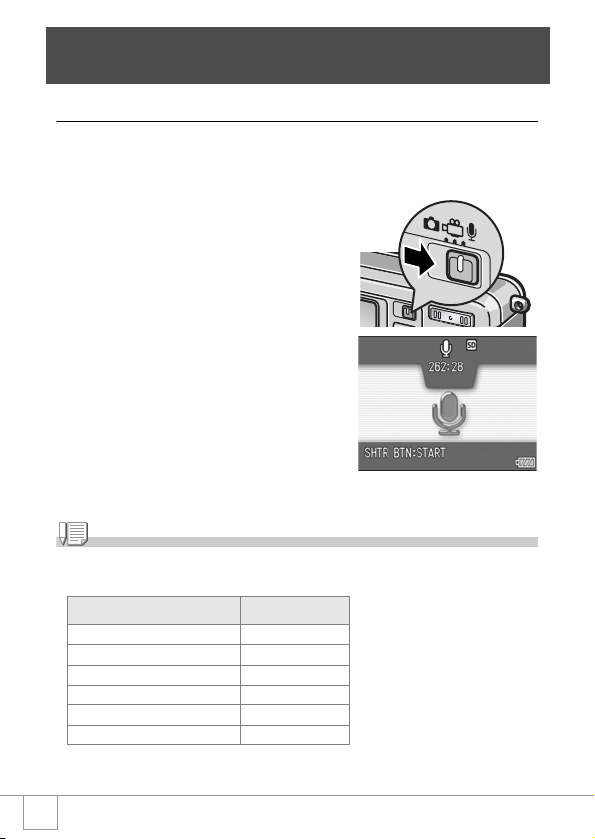
Recording/Playing Back Sound
2222 Recording Sound (Voice Memo)
You can record sound.
Recorded data is stored as a WAV file.
1. Switch the Mode Selector to 2
2
22
(Voice Memo Mode).
2. Press the shutter release button.
Sound recording starts.
3. Release your finger from the
shutter release button to stop
recording.
Note
The voice recording time depends on the capacity of the SD memory card.
The table below shows the available recording time.
Capacity Recording Time
28MB (Internal memory) 61 min 32 s
32MB 64 min 38 s
64MB 132 min 13 s
128MB 267 min 17 s
256MB 532 min 38 s
512MB 1073 min 11 s
92
Page 96

Playing Back Sound
To playback sounds, follow the steps below.
1. Press the Playback button.
The last shot taken is displayed.
2. Press the #$
sound file for playback (speaker
icon).
Press the $ button to display the next
file.
Press the # button to display the
previous file.
3. Press the O
Playback begins.
Fast Forward Press the z button during playback.
Rewind Press the Z button during playback.
Pause/Playback Press the O button.
Volume Adjustment Press the !" buttons during playback.
#$ buttons to select a
#$#$
O button.
OO
A Variety of Shooting Techniques/Playback
93
Page 97

Other Functions Available in Playback Mode
Playback Setting Menu
The Playback menu provides the functions shown in the table below:
Setting Option Refer to
SLIDE SHOW P.95
PROTECT Select/Deselect 1 FILE, Select/Deselect ALL FILES, Select Multi-files P.96
DPOF Select/Deselect 1 FILE, Select/Deselect ALL FILES, Select Multi-files P.99
RESIZE 1280, 640 P.102
COPY TO CARD P.103
Note
The SETUP menu can be accessed from within the Playback Setting menu. For details, see
P.106.
Using the Playback Menu
Press the Playback button to Switch the camera to playback
1.
mode.
2. Press the M
The Playback menu appears.
3. Press the !"
the desired setting.
4. After selecting a setting item,
press the OOOO or $$$$ button.
Each function screen appears.
M button.
MM
!" buttons to select
!"!"
94
Page 98

Showing Photos in Order Automatically
(SLIDE SHOW)
You can show the recorded still images, movies, and sound files
sequentially on the LCD Monitor. This function is called a slide show.
To view a slide show, follow the steps below.
1. Press the Playback button.
The last shot taken is displayed.
2. Press the M
The Playback menu appears.
M button.
MM
3. Make sure that [SLIDE SHOW] is
selected, and then press the OOOO
or $$$$ button.
The slide show starts and files are
played back in order.
If you want to stop the slide show in
progress, press any button on the
camera.
Until stopped, the slide show will repeat
itself.
A Variety of Shooting Techniques/Playback
Note
• Still images are displayed for 3 seconds each.
• For movies, not just one frame, but the entire movie you shot is displayed.
• Sound files are also played back.
95
Page 99

Write-protecting Your Images (PROTECT)
You can protect files from being accidentally deleted.
Caution
Protected files cannot be deleted normally. However, they will be deleted completely if you
format the memory where the files are stored.
Protecting Files
1. Press the Playback button.
The last shot taken is displayed.
2. Press the #$
protect.
3. Press the M
The Playback Setting menu appears.
4. Press the "
[PROTECT] and press the OOOO or
$$$$ button.
#$ buttons to display the file you want to
#$#$
M button.
MM
" button to select
""
5. Make sure that [1 FILE] is
selected, and then press the OOOO
button.
96
Page 100

Protection is applied and the Protect
symbol appears in the upper-left corner of
the screen.
Protecting All Files
To protect all your files, follow the steps below.
1. Press the Playback button.
2. Press the M
The Playback menu appears.
3. Press the "
[PROTECT] and press the OOOO or
$$$$ button.
4. Press the !"
[ALL FILES].
M button.
MM
" button to select
""
!" button to select
!"!"
5. Make sure that [SELECT] is
selected, and then press the OOOO
button.
Protection is applied and the Protect
symbol appears in the upper-left corner of
the screen.
To remove protection from all your files,
select [CANCEL] in step 5.
Note
You can remove protection from all or multiple files at once.
A Variety of Shooting Techniques/Playback
97
 Loading...