

Ricoh PJ-X5360N, PJ-WX5150, PJ-WX5140 User manual

PJ WX5140/WX5150
PJ X5260
LAN control function
User’s manual
Table of Contents
1. Controlling the projector via a web browser.................................2
1.1 Connecting to the projector..............................................................................2
1.2 Login................................................................................................................3
1.3 Home................................................................................................................4
1.4 Projector Control Panel....................................................................................5
1.5 Network Setting...............................................................................................7
1.7 Logout............................................................................................................12
2. Control the Projector via the Projector Management Utility.......13
2.1 Installing Projector Management Utility .......................................................13
2.2 Register projectors.........................................................................................14
2.3 Control the projector with the projector Management Utility.......................17
1. Controlling the projector via a web browser
You can control the projector by using a web browser from a PC.
<Note>
-If you want to connect an existing network system, consult the network administrator for network
settings.
-Network settings such as password will be reset when you set “Default settings 2” > “Reset All”
in the projector menu system.
-In rare cases, the network function won’t work properly due to electrostatic discharge or
something. Set “Default settings 2” > “Reset All” in such a case.
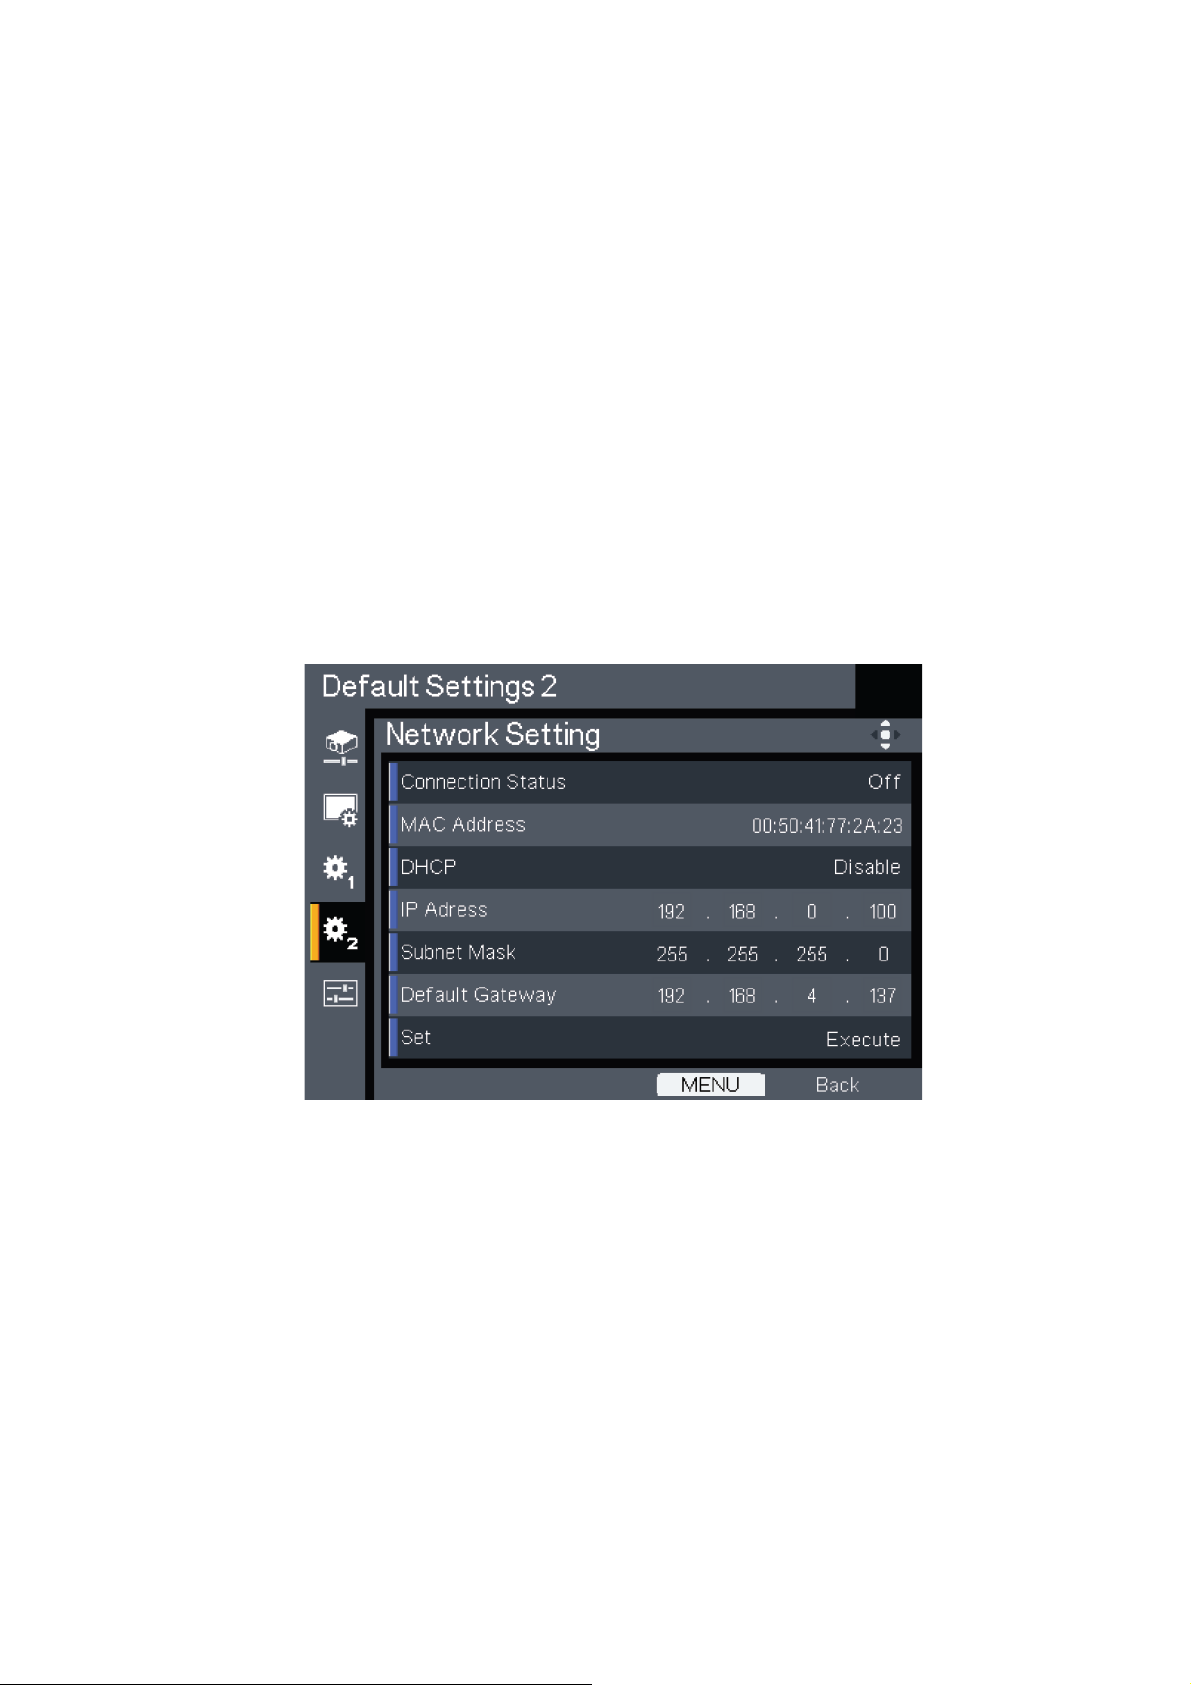
1.1 Connecting to the projector
1. Check IP address of the projector
Be sure to set “Default settings 1”>“Control Method” to “LAN” in the projector menu system
before starting to set Network setting
Check IP address in “Default settings 2” > “Network setting” in the projector menu system. (See
page 43 on the projector use’s manual)
2. Connect
Open your web browser and type in the IP address you checked. For example, type
“http://192.168.0.100” when IP address is displayed as the screen above.
<Note>
This web pages use Java Script. Please turn on Java Script in your browser.
22

1.2 Login
1. The web browser shows a login page.
2. Select a user.
You can use all functions (Control Panel, Network setting and Alert setting) when you select
“administrator”. And you can use only “Control Panel” when you select “user”.
3. Enter the Password
If the password setting is enabled the correct password needs to enter.
Default passwords of Administrator: “admin”.
Default passwords of User: “user”
If the password setting is disabled the “Password” item will be gray out.
Click [Login] button to login.
<Note>
-The warning message “Invalid Character” will popup if your password is incorrect.
-“B01” showed in the top in the web page picture indicates software version of this web page. It
may be different from “B01”.
4. Login
After login, control tabs will appear. It contains Home, Control Panel, Network Setting, Alert
Setting, and Logout.
Home is automatically selected after login.
33

1.3 Home
This is Home page which shows basic information of your projector. There is no control on this
page.
1. Projector Status:
System Status:
It shows the current system status of the projector. It includes Standby, Warm-up, Power-on,
cooling, Power-off and Unknown.
-Input:
[PJ WX5140, WX5150]
It shows the current input source of the projector. It includes Computer 1, Computer 2, S-Video,
Video, HDMI, None and Unknown.
[PJ X5260]
It shows the current input source of the projector. It includes Computer 1, Computer 2, S-Video,
Video, Component, DVI, HDMI and Unknown.
-Lamp Hours:
It shows the current lamp hours of the projector.
-FW Version:
It shows the current firmware version of the projector.
44
<Note>
The projector status will show “Unknown” if the projector is not set properly. Check the control
method setting in the OSD menu at this situation. Set it to “LAN” if you want to control the
projector via network.
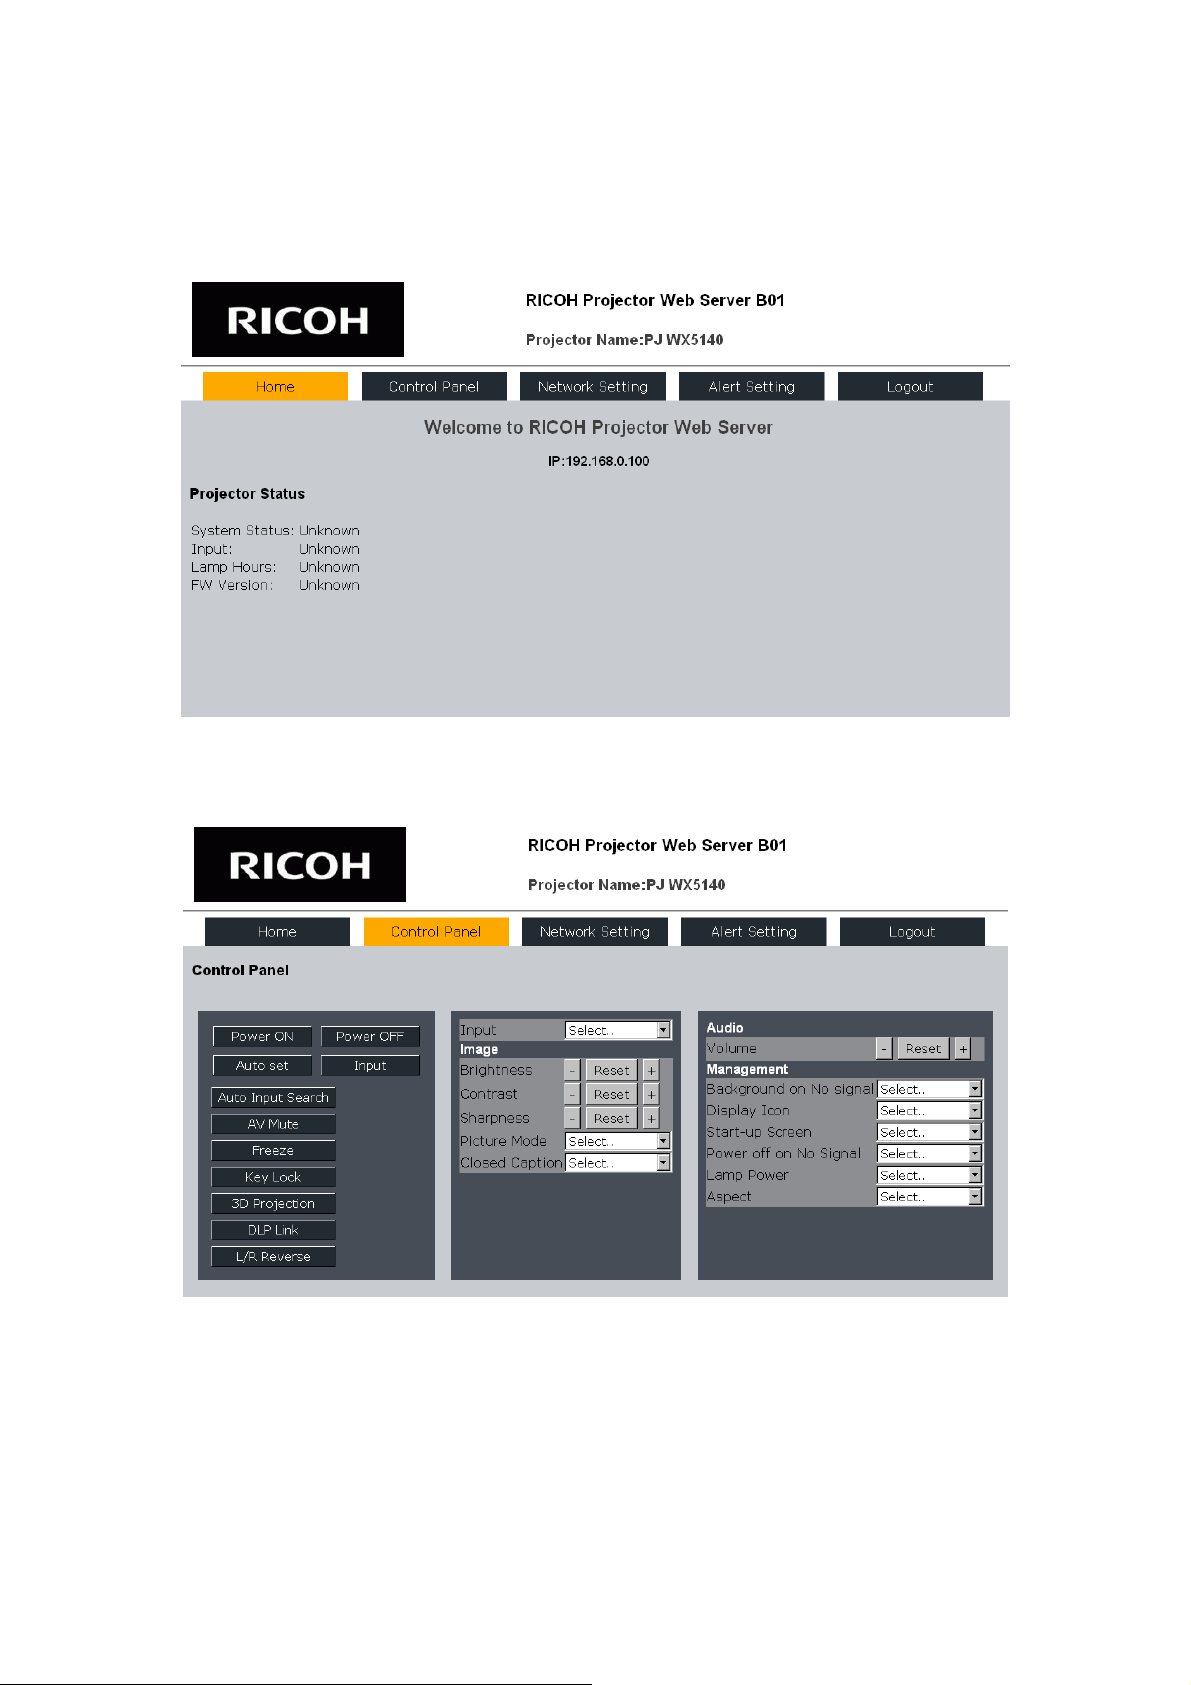
1.4 Projector Control Panel
This page shows the control items of your projector. User can control the projector by this page.
55

Control Buttons
Execute a function when the button is clicked.
[Power ON]
[Power OFF]
[Auto Set]
[Input]
Power is turned on.
Power is turned off.
Automatically adjust the RGB signal from the computer.
Switch among Computer1, Computer2, Component, Video, S-Video,
DVI-D and HDMI
Setting Buttons
Setting is toggled On and Off by clicking the button.
[Auto Input Search]
[AV Mute]
[Freeze]
[Key Lock]
[3D Projection]
[DLP Link]
[L/R Reverse]
Search the next signal source automatically when the current signal is
lost. (See p.37 on the Projector User's manual)
Momentarily turn off the audio and video.
Pause the screen image
Disable the keys on the projector.
Set 3D projection mode on.
Set 3D projection mode with DLP Link on.
Change left and right frame content of 3D projection.
(See p.42 on PJ User's manual for 3D related settings.)
Input select:
Select an input source from the drop down list.
Adjusting
Image:
[Brightness]
[Contrast]
[Sharpness]
[Picture mode]
[Closed Caption]
Adjust brightness by clicking [+] or [-]. Click [Reset] to return the
default value 0
Adjust contrast by clicking [+] or [-]. Click [Reset] to return the
default value 0
Adjust sharpness by clicking [+] or [-]. Click [Reset] to return the
default value 0.
Select a picture mode from the drop down list.
Select a Closed Caption mode from the drop down list.
(See p.40 on the Projector User's manual for 3D related settings.)
Audio
[Volume] Adjust volume by clicking [+] or [-]. Click [Reset] to return the
default value 5
Management
[Background on
No Signal]
[Display Icon]
[Start-up Screen]
[Power off on
No signal]
[Aspect]
Select an image on no signal from the drop down list.
Select "Off" to hide icons when the input source or settings are
changed.
Select On/Off for startup screen which is displayed when the
projector is turned on.
Select power off timer value after no signal is detected from the drop
down list.
Select aspect ratio from the drop down list.
66
 Loading...