

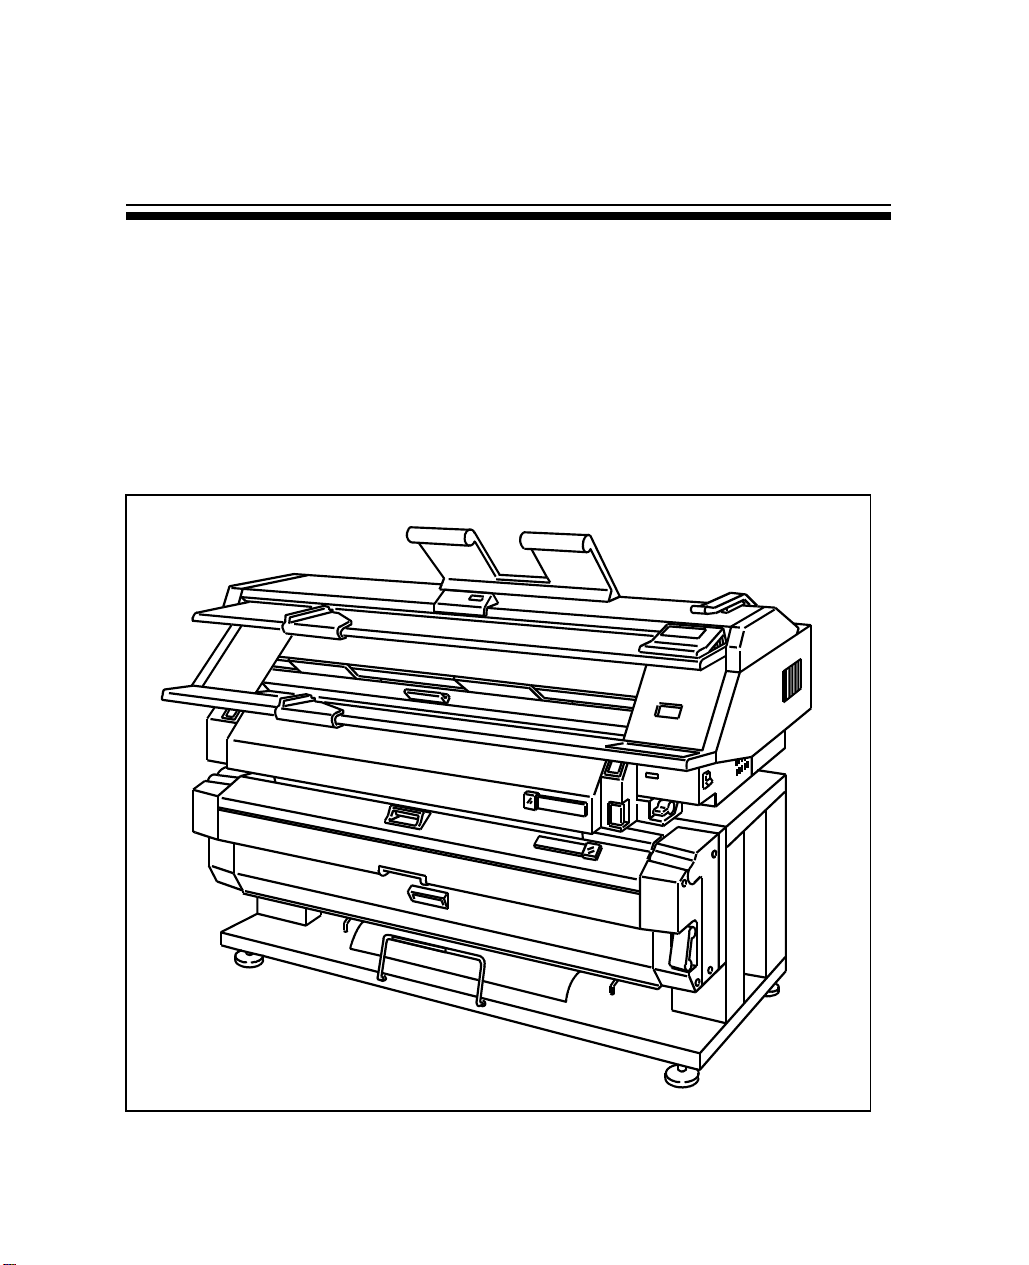
RICOH
FW830
OPERATING INSTRUCTIONS
RICOH COMPANY, LTD.
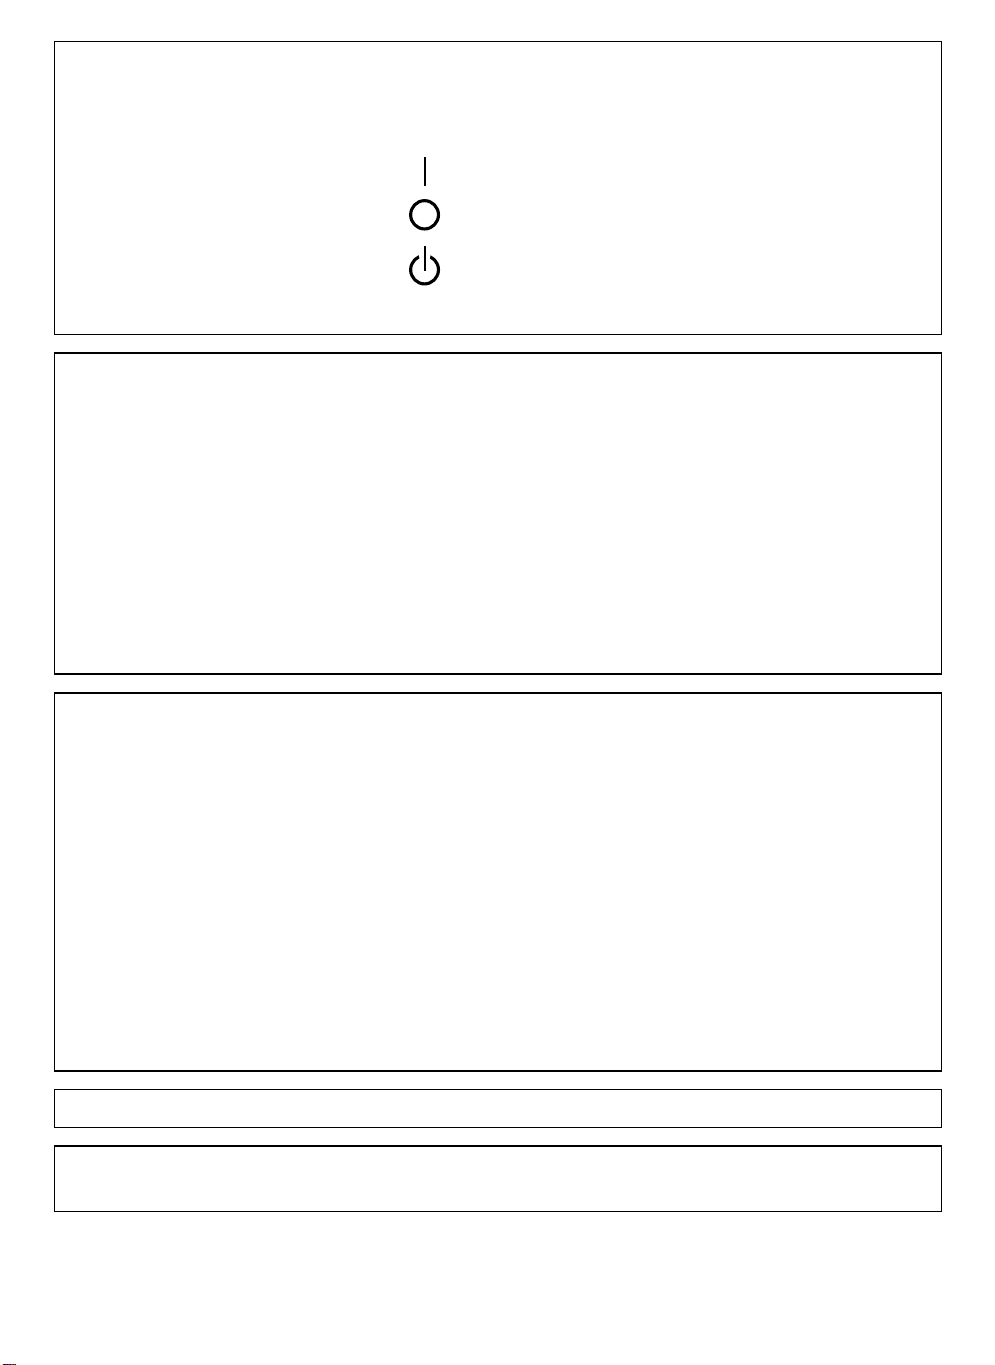
In accordance with ISO standard 7001, this machine uses the following
symbo ls for the main switch:
means POWER ON.
means POWER OFF.
means STAND BY.
Note to users in the United States of America
Warning:
This eq uipm ent has been t ested and foun d to co mp ly with t he limits fo r a Class
A digital device, pursuant to Part 15 of the FCC Rules. These limits are
designed to provide reasonable protection against harmful interference when
the equipment is operated in a commercial environment. This equipment
generates, uses, and can radiate radio frequency energy and, if not installed
and used in accordance with the instruction manual, may cause harmful
interference to radio communications. Operation of this equipment in a
resid ential area is likely to cau se h armfu l interfer enc e in wh ich c ase th e user will
be r equ ired t o c o rr ect th e interfer enc e at his o wn expen se.
Note to use rs in Canad a
Warning:
This digital apparatus does not exceed the Class A limits for radio noise
emissions from digital apparatus as set out in the interference-causing
equipment standard entitled "Digital Apparatus", ICES-003 of th e Departmen t of
Communications.
Rem arq ue co nce rnant les u tilisate urs a u Ca nad a
Avertisseme nt:
Cet appareil numérique respecte les limites de bruits radioélectriques
applicables aux appareils numériques de Classe A prescrites dans la norme
sur le matériel brouilleur: "Appareils Numériques", NMB-003 édictée par le
ministre des communications.
For good copy quality, Ricoh recommends that you use genuine Ricoh toner.
Ricoh shall not be responsible for any damage or expense that may result from
the use of parts other than genuine Ricoh parts in your Ricoh office product.

TABLE OF CONTENTS
COPYING
1. Starting the Copier .......................................................................................1
2. Copying with Manual Feed..........................................................................3
3. Adjusting Copy Density................................................................................6
4. Changing Copy Exit ....................................................................................7
5. Changing Leading and Trailing Edge Margins ............................................7
6. Clearing the Modes......................................................................................9
7. Canceling Copying .......................................................................................9
8. Changing the Fusing Temperature..............................................................10
9. Using The Rear Table.................................................................................11
10. Repeat Copying.........................................................................................12
OPTIONAL FUNCTIONS
1. Copying with the Sheet Feeder ...................................................................14
2. Copying with the Roll Feeder......................................................................16
REPLENISHING SUPPLIES
1. Setting Copy Paper on the Paper Tray of the Sheet Feeder .....................21
2. Loading Roll Paper in the Roll Feeder ........................................................23
3. Adding T oner .......... ........ .......... ........ ........ ........ .......... ........ ........ ........ ........ 27
FUNCTIONS THAT CAN BE RESET ...... ........ ........ ........ ........ ........ ........ ...... 31
TROUBLESHOOTING.. ........ ........ ........ ........ ........ ........ ........ ........ ........ ........ .... 32
DAILY MAINTENANCE .. ........ ........ ........ ........ ........ ........ ........ ........ ........ ........ .. 49

DO’S AND DON’TS ............ ........ ........ ........ ........ ........ ........ ........ ........ ........ ...... 50
INSTALLATION REQUIREMENTS
1. Copier Environment.....................................................................................52
2. Environments to Avoid .................................................................................52
3. Power Connection........................................................................................53
4. Access to Copier..........................................................................................53
GUIDE TO COMPONENTS
1. System Overview.........................................................................................54
2. Copier Exterior and Interior .........................................................................55
3. Operation Controls .......................................................................................58
SPECIFICATIONS
1. Main Cop ier, FW83 0........ ........ .......... ........ ........ ........ ........ ........ .......... ........ 62
2. Sheet Fe eder, ty pe 830........... .......... ........ ........ ........ .......... ........ ........ ........ 63
3. Roll Feeder, type 830..................................................................................63

HOW TO USE THIS BOOKLET
This manual contains detailed instructions on the operation and maintenance of
this copier. Please keep this manual in a handy place near the machine.
If you want to make a copy using the manual feed tray turn to page 3.
If you want to use the sheet feeder, turn to page 14.
If you want to use the roll feeder, turn to page 16.
If you want to copy originals that can’t be bent, turn to "Using the Rear
Table" on page 11.
If you want to add toner or paper, turn to page 21.
If you want to make more than one copy at a time, turn to page 12.
If you want to stop copying, press the Stop or Clear/Stop key. See page 9
for details.
If something goes wrong, turn to page 32 .
To get maximum versatility from the copier, all operators should carefully read
and follow the instructions in this manual.
And Remember...
Always wait for copying to finish before turning the copier off.
Insert paper and originals straight in the machine, not at an angle.
Depending on the size or type of the original, the original may skew during
repeat copying. If this happens, make copies one at a time.
For more Do’s and Don’ts, turn to page 50.

COPYING
1. Starting the Copier
About seven minutes are required from power on until the copier warms up
and copying is possible. Switch the copier on in the morning and off when the
work day is finished.
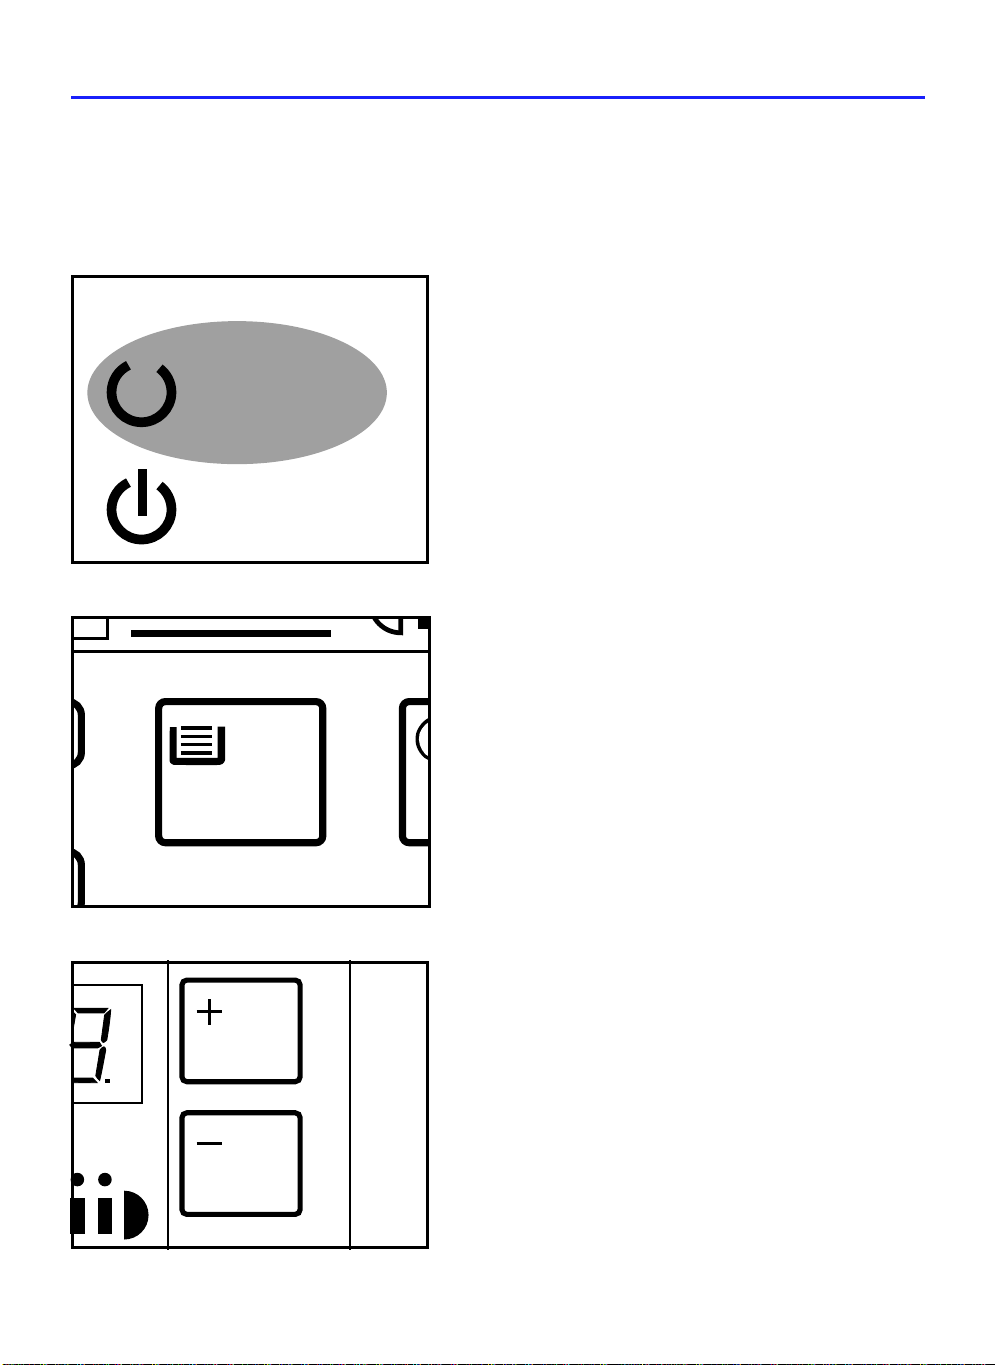
1–1. Switching on the copier
1. Turn on the main switch.
Ready
Wait
Ready
Wait
2. The Wait indicator lights.
3. After about seven minutes, the
Ready indicator lights, and copying
is possible.
1
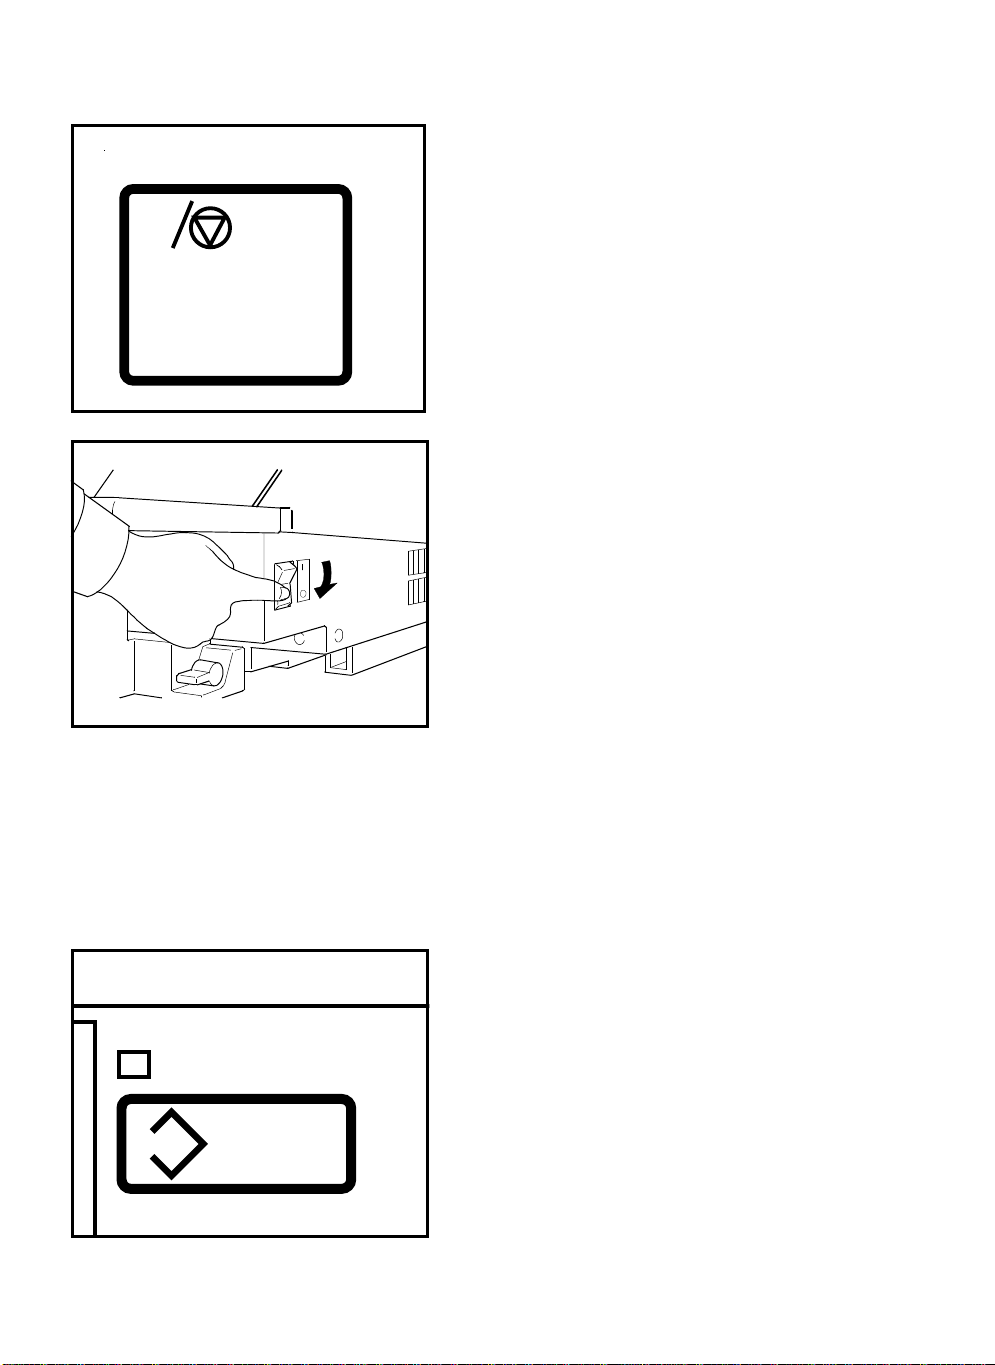
1–2. Switching off the copier
Clear/Stop
C
1. If copying is under way, wait until it
finishes or press the Clear/Stop key
to cancel copying.
• Turning off the copier during copying
may cause a paper misfeed or machine
failure.
2. Turn off the main switch.
• Leave the copier plugged in if you use
it often. Unplugging the copier disables
the anti-condensation heaters. This
might reduce machine efficiency.
1–3. Stand-by Mode
After copy operation, all indicators except the Stand-by indicator can be turned
off. This is the Stand-by mode.
Press the Stand-by/Clear Modes
key until the Stand-by/Clear Modes
key indicator lights. Only the Stand-
Stand-by
Clear Modes
C
by indicator remains on.
To return to the ready condition,
press the Stand-by/Clear Modes
key. The machine becomes ready
for copying.
2
2. Copying with Manual Feed
Manual feed refers to making copies by placing copy paper on the manual feed
table. The method explained here does not use the sheet or roll feeders
(optional equipment).
Avoid using inappropriate paper (see page 51).
1. Check that the Ready indicator is lit.
Ready
Wait
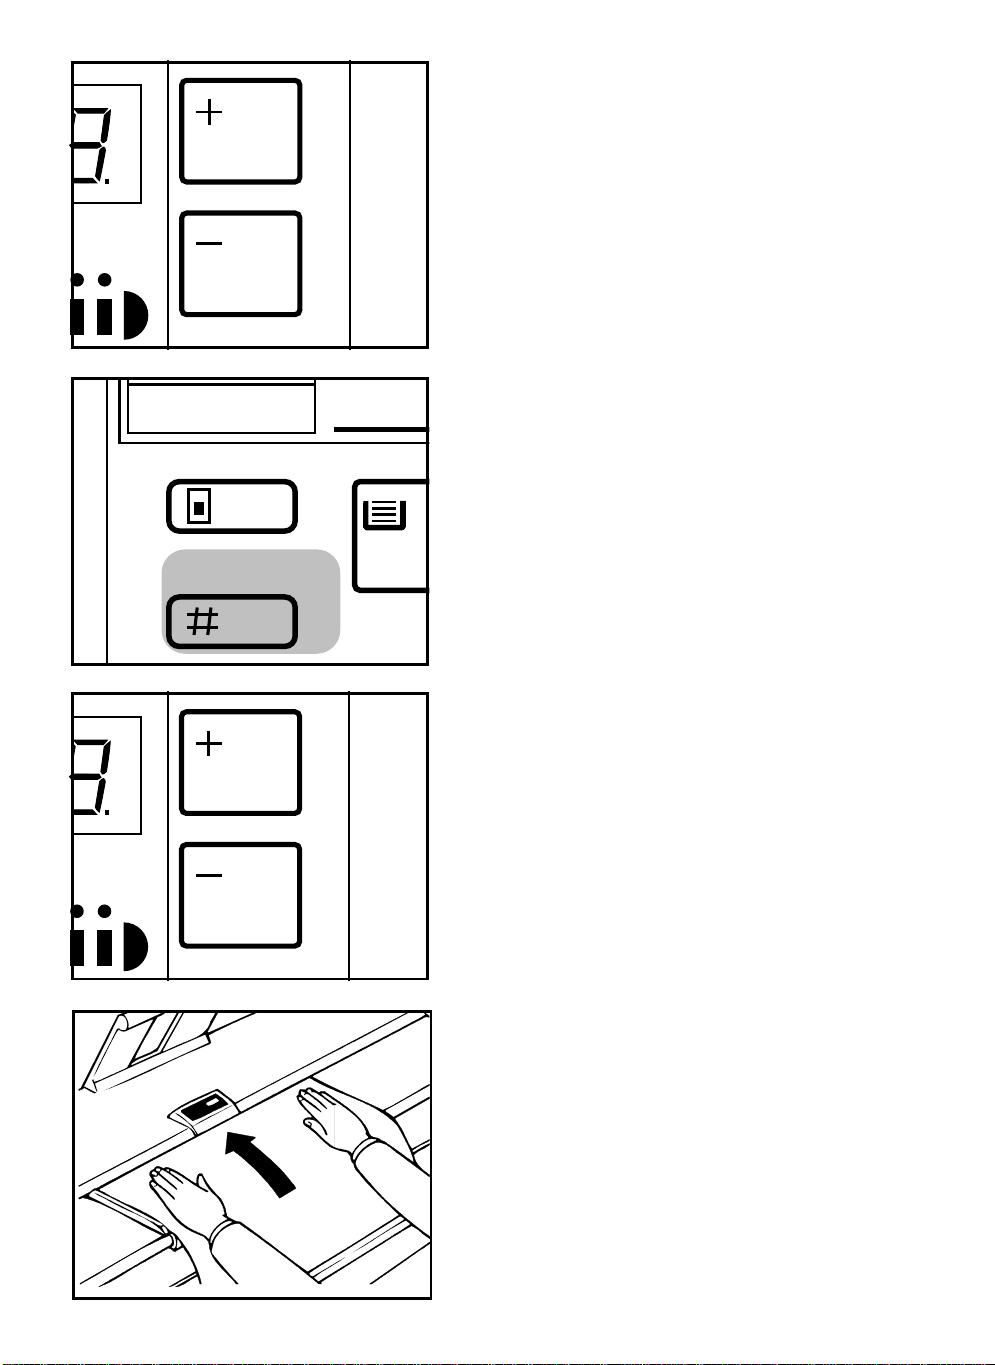
2. Press the Paper Select key to light
the Manual Feed indicator.
Paper Select
3. Press the +/– keys and specify the
number of copies.
• You can specify up to 10 copies (5 for
E and D lengthwise paper [34" x 44"/A0
and 23" x 35"/A1] ).
• If copies skew, make them one at a
time.
3
4. Check that the Insert Original indi-
cator is lit.
5. Adjust the original guide to match
the size and direction of the original.
6. Insert the original face up and
straight along the original guide.
The copier automatically feeds the
original in.
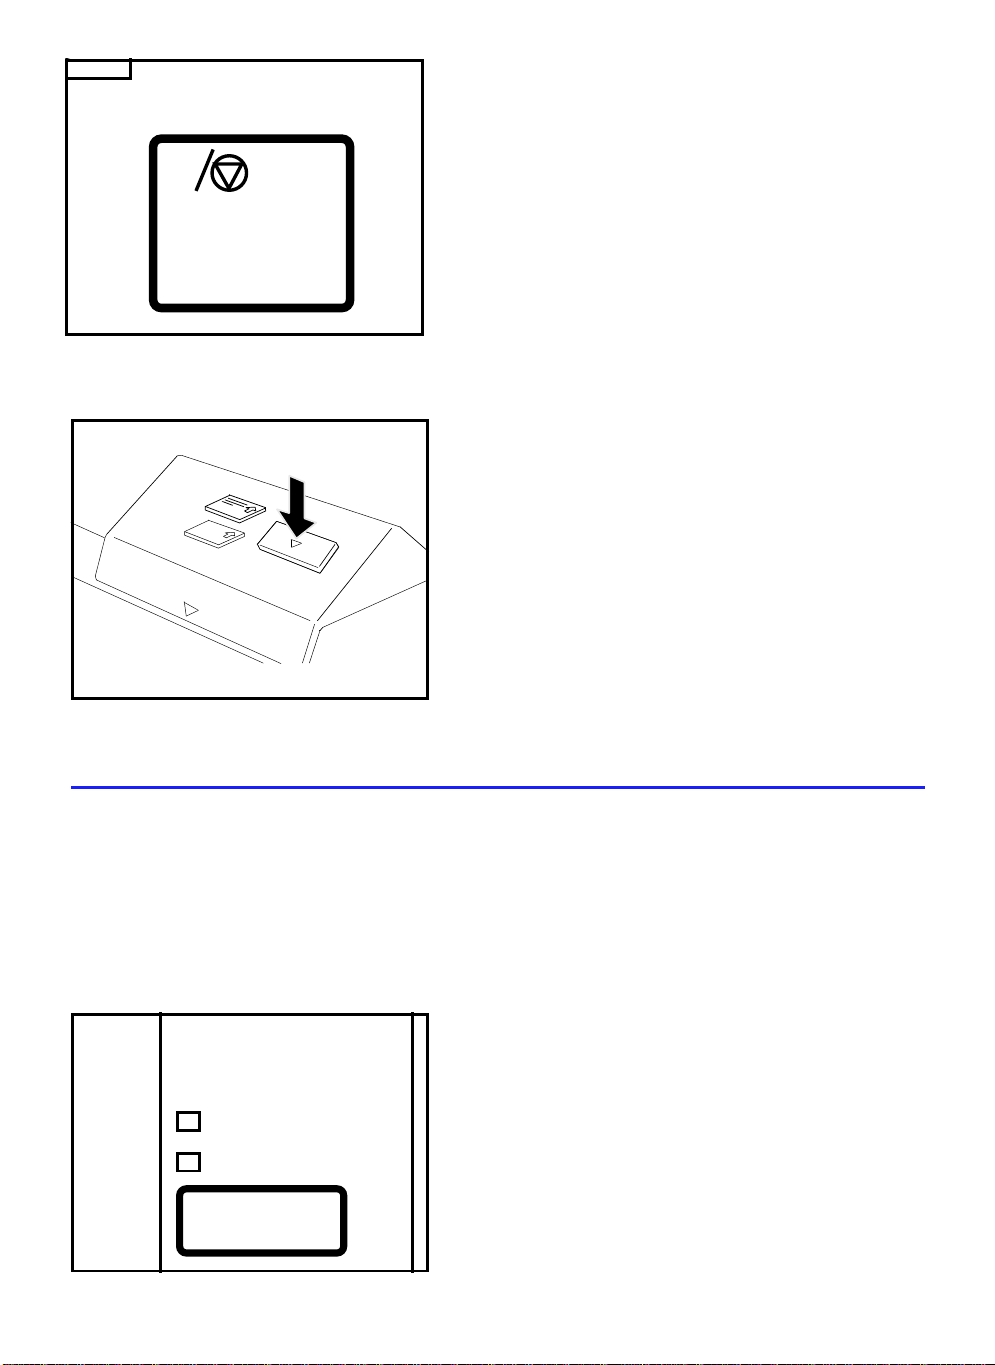
7. Check that the Insert Copy Paper
indicator is lit.
4
8. Adjust the copy paper guide to the
desired paper size and direction
(lengthwise or sideways).
9. Insert the copy paper. When the
original and the copy paper are set,
copying starts automatically.
Clear/Stop
C
To cancel copying, press the
Clear/Stop key once.
(You may also cancel copying by
pressing the Stop key on the indicator panel. However, doing so will
create a paper and original jam condition. For details, see "
Copying" .
5
)
Canceling
3. Adjusting Copy Density
The Auto Image Density function automatically adjusts the density of the copy
to keep dark backgrounds from appearing. This function is active when you
turn on the machine, or when you press the Stand-by/Clear Modes key or
Auto Image Density key. It can handle most copy jobs, but if copy density is
too dark or too light, adjust the density manually.
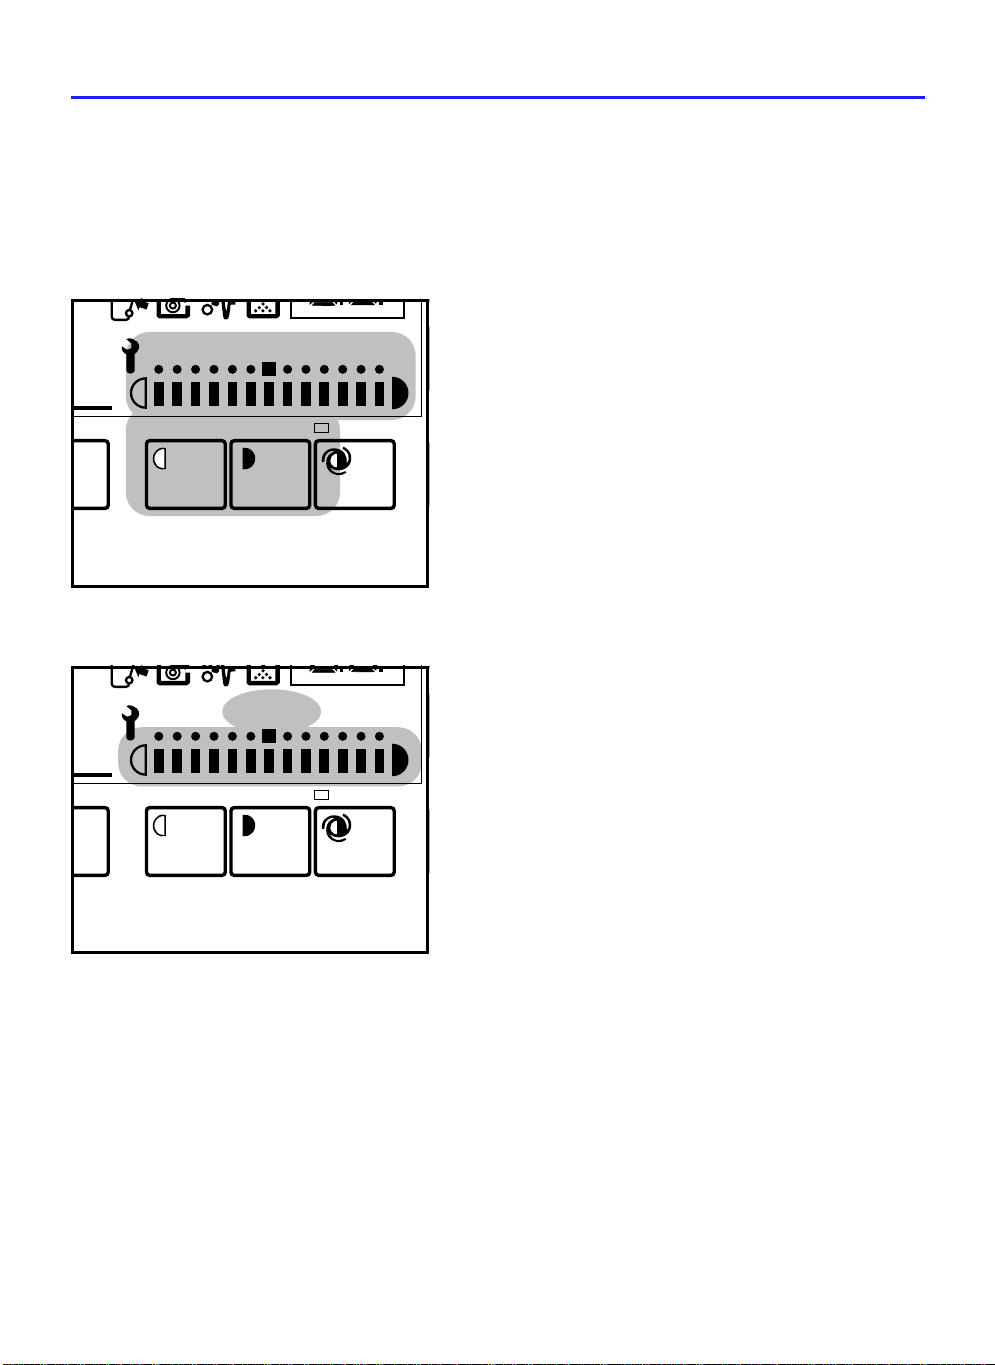
1. Press the Lighter or Darker key.
Lighter Copy
Lighter Darker Auto-DensitySelect
The Manual Image Density indica-
tor lights.
2. Adjust the density. Press the
Lighter Copy
Lighter or Darker key repeatedly
and move the Manual Image Den-
sity indicator to the desired density.
Lighter Darker Auto-DensitySelect
• There are 26 manually selectable im-
age density levels, split into two ranges
of 13 levels each.
• There are the "Normal" range (ID levels
1 – 13) and the "Lighter" range (ID levels 14 – 26). To select the "Lighter"
range, press the Lighter key until the
Lighter Copy indicator turns on. To return to the "Normal" range, press the
Darker key until the Lighter Copy indicator turns off.
.
6
4. Changing Copy Exit
p
Trailing Edge
You can change the copy exit direction to match the paper size. Use the lower
copy exit for larger copy paper. This will prevent paper from hindering copying
or from becoming crumpled.
Press the Copy Exit key on the opera-
Copy Exit
tion panel.
• Select the paper exit to match the pa-
per size. Select the upper paper exit
for paper up to D size (22" x 34", A1).
Select the lower paper exit for paper
larger than D size.
Ready
Wait
5. Changing Leading and Trailing Edge Margins
You can set a margin at the leading edge of the copy. Set the trailing edge
margin only when using the roll feeder.
Edge Erase
Set Edge
Pa
You can set margins between 0.1 inch
(2.5 mm) and 8.5 inches (215 mm), in 0.1
inch steps. Follow the procedure below.
1. Press the Edge Erase key to select
the desired margin. The indicator
lights.
7
Trailing Edge
12
2. Press the +/– keys to set the lead-
ing edge margin.
3. Press the Set Edge key.
Edge Erase
Set Edge
Paper S
4. If using the roll feeder’s synchro-cut,
press the +/– and Set Edge keys to
set the trailing edge margin.
5. Insert the original, select other
modes, and begin copying.
8
6. Clearing the Modes
If you want to clear all the modes you have manually selected, use the Standby/Clear Modes key. Pressing the Stand-by/Clear Modes key cancels the copy
density, number of copies, leading edge , and trailing edge margin settings.
If the machine is idle for two minutes,
modes are cleared automatically. This is
Stand-by
Clear Modes
called Auto Clear. For details on how to
change the two-minute delay refer to
"FUNCTIONS THAT CAN BE RESET".
C
7. Canceling Copying
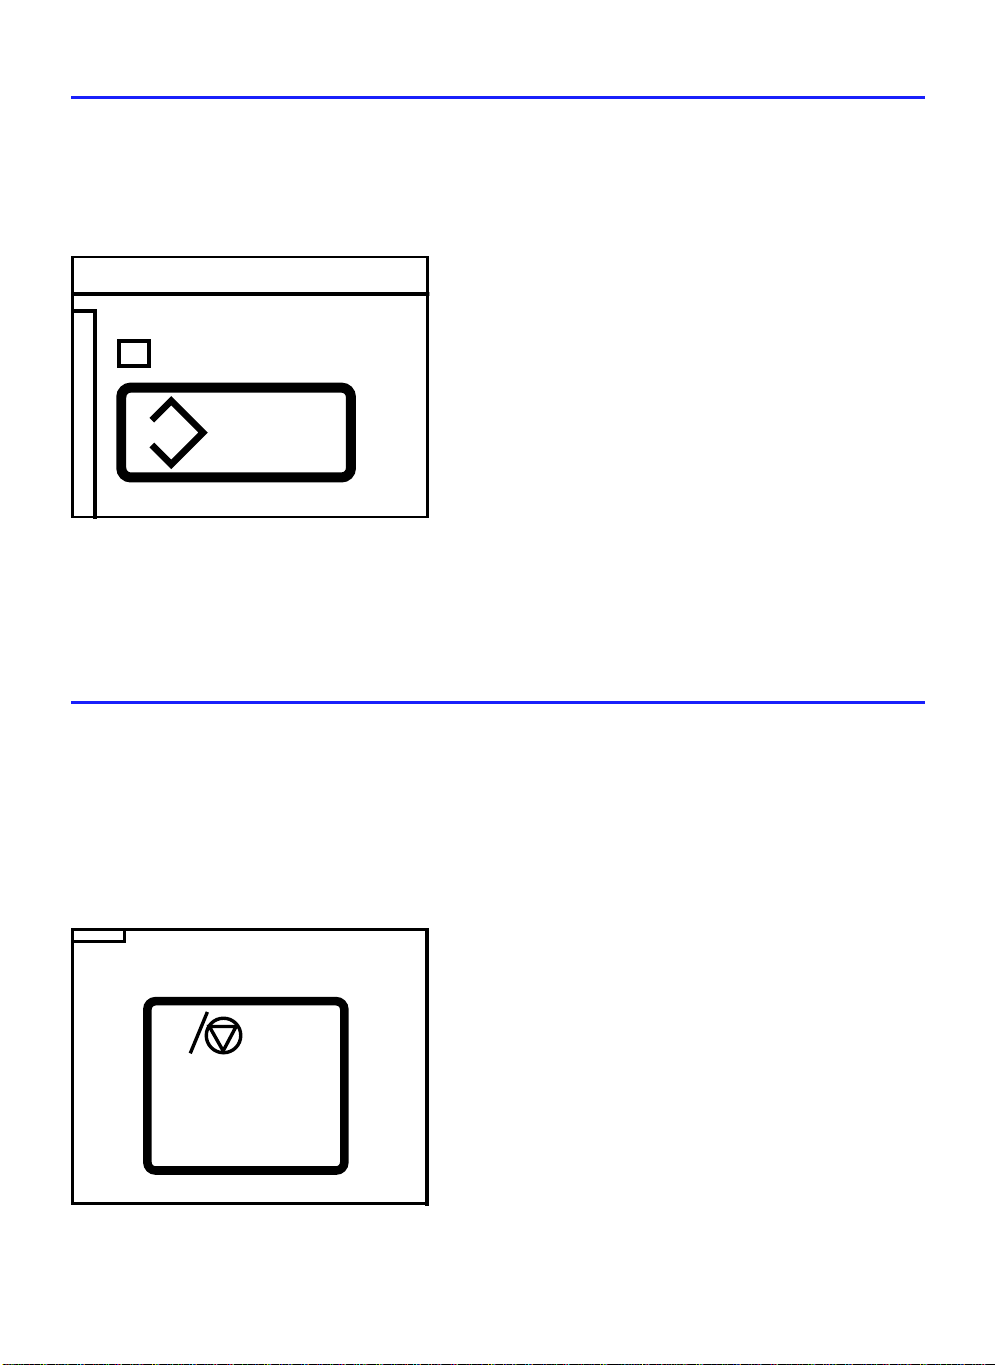
If you discover an error while copying is under way, press the Stop key or the
Clear/Stop key on the operation panel.
- If you make an error in operation -
1. Press the Clear/Stop key. After the
y
Clear/Stop
C
original and copy paper are fed out,
copying stops.
• If you press the Clear/Stop key after
setting the original (before setting the
copy paper), the original will be fed out
on the original table.
9
Clear/Stopity
C
- If the original misfeeds -
2. To reselect the number of copies,
press the Clear/Stop key again.
The Copy Counter indicator will
display 1.
To stop the machine without completing the copy cycle, press the
Stop key on the indication panel.
The original and the copy paper will
stop inside the machine and the
Original Misfeed indicator and Mis-
feed indicator will light. See "
BLESHOOTING
removing the original and copy paper.
" for instructions on
TROU-
8. Changing the Fusing Temperature
Some types of paper, such as heavy translucent paper and transparent film,
require a different fusing temperature. For these types of copy paper, leaving
the fusing temperature as it is would yield less than optimal copy quality.
The High setting is for heavy translucent paper, the Low one is for transparent
film. Standard paper requires the normal setting, with both the HIGH and LOW
indicators off.
Press the Fusing Temperature key
Fusing
Temperature
High
Low
to light the HIGH or LOW indicator,
or to turn both indicators off. The
Wait indicator lights.
• The copier takes about 1 minute to
reach HIGH temperature.
• The copier takes about 3 minutes to
reach LOW temperature.
10
9. Using The Rear Table
Use the rear table to copy originals that can’t or shouldn’t be bent, such as
cardboard or paper between 0.0075 a nd 0.04 inch thick (0.19 and 1.00 mm). T he
synchro cut and repeat copy functions can’t be used with the rear table. Follow
the procedure outlined for manual feed, page 3, with these differences:
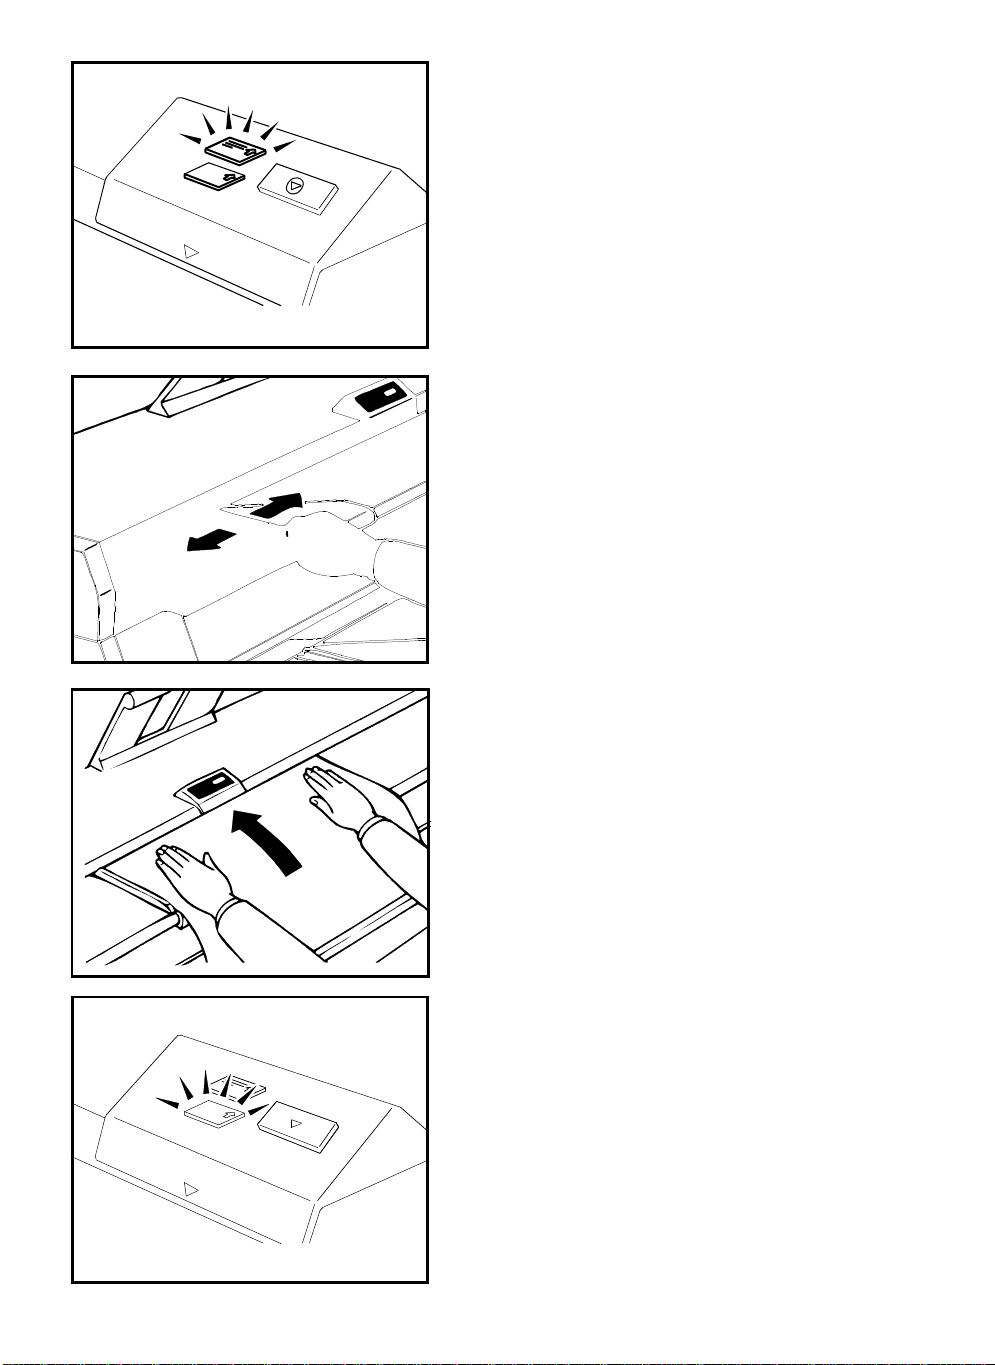
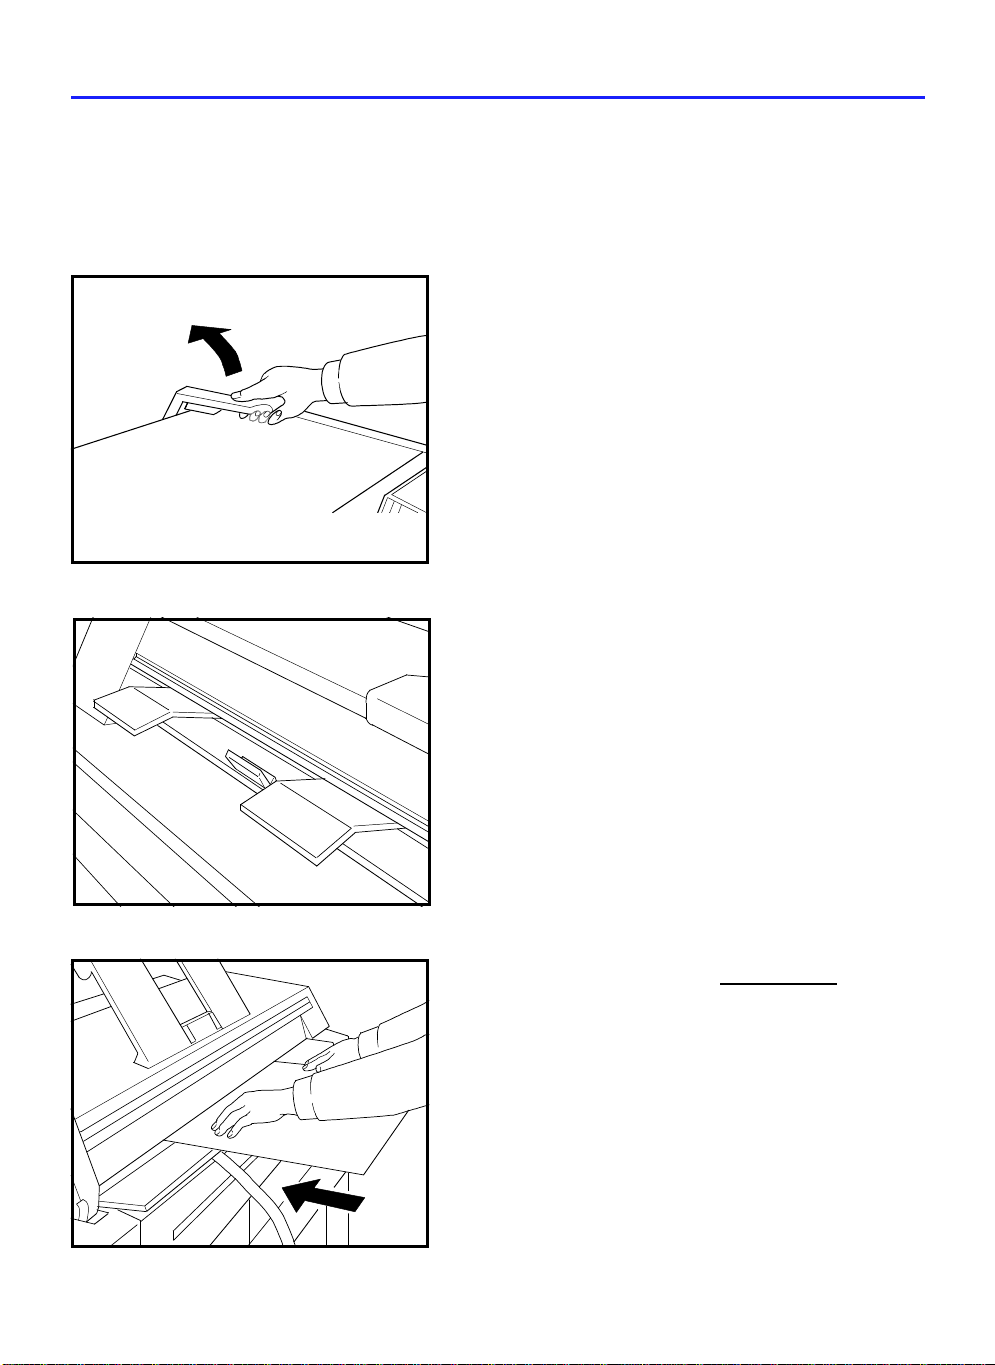
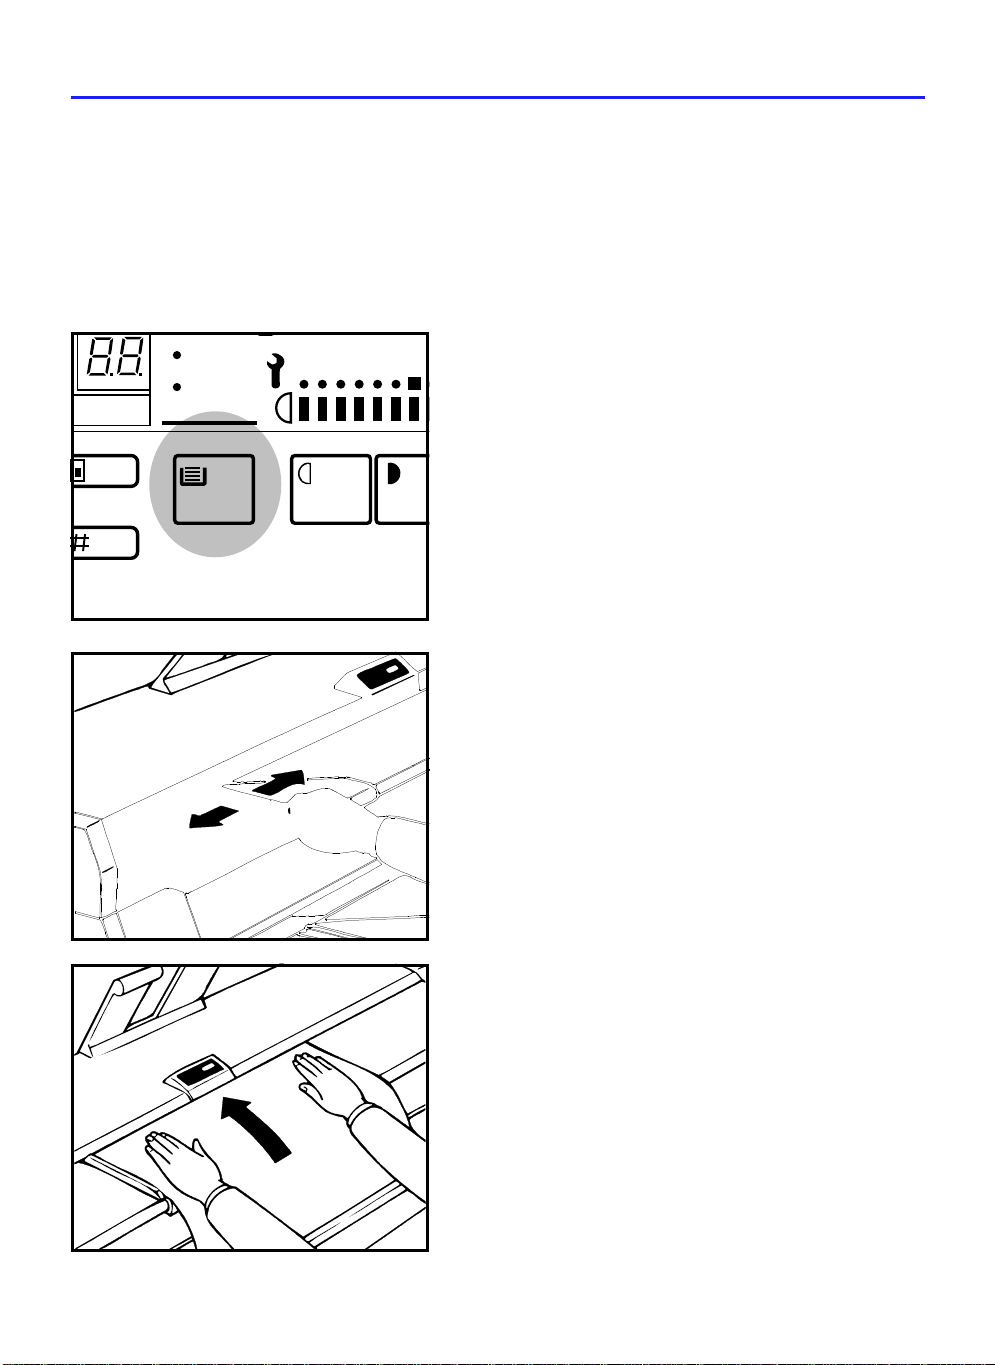
1. Lift the large lever on the right side
of the copier.
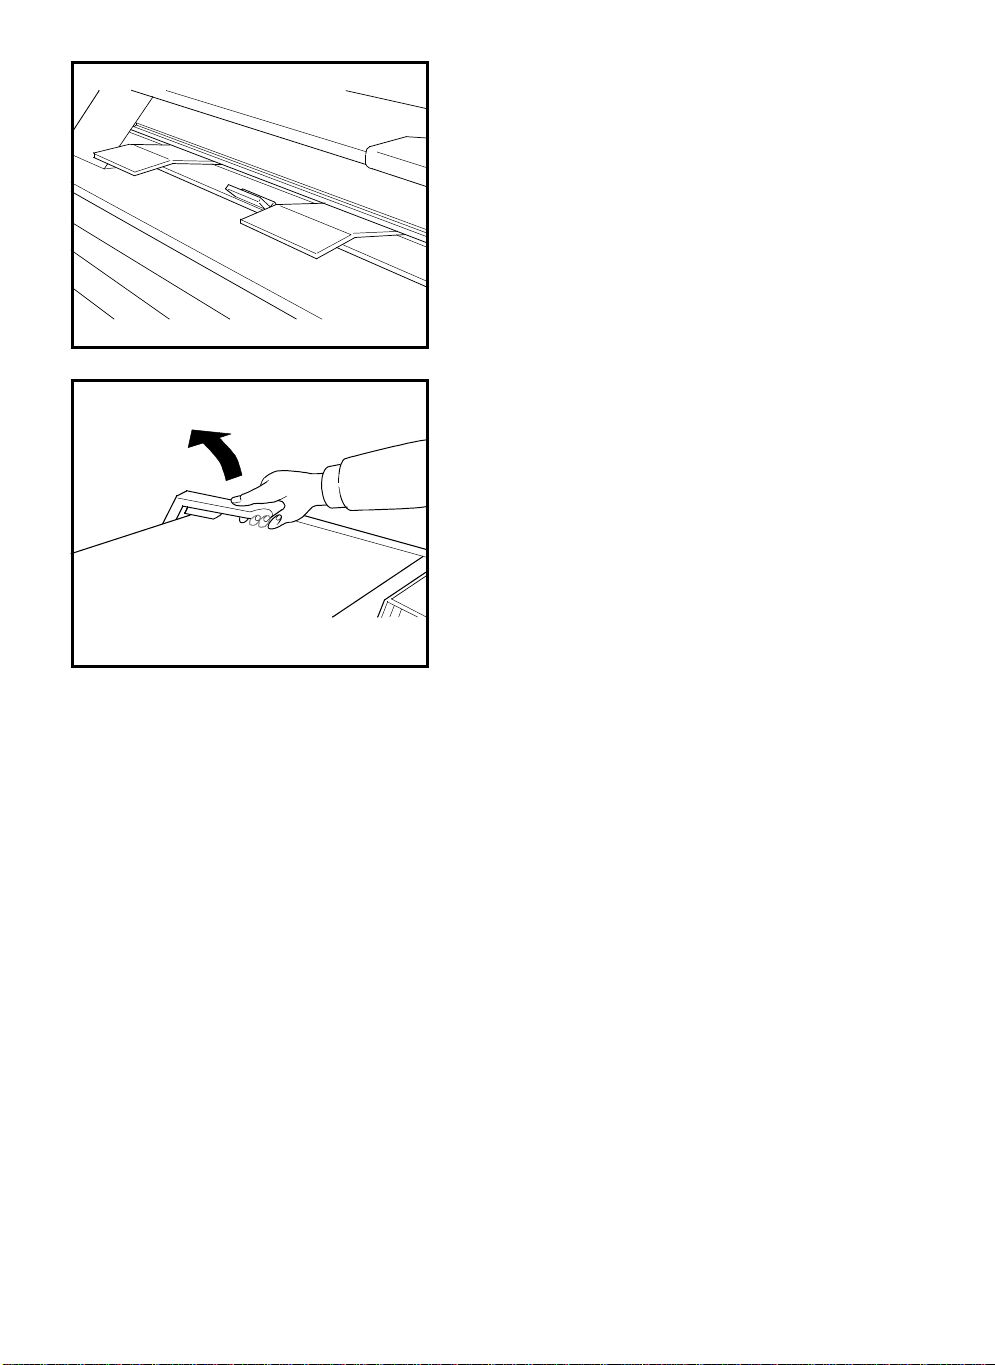
2. Reverse the original exit supports.
3. Set the original face down on the
table.
11
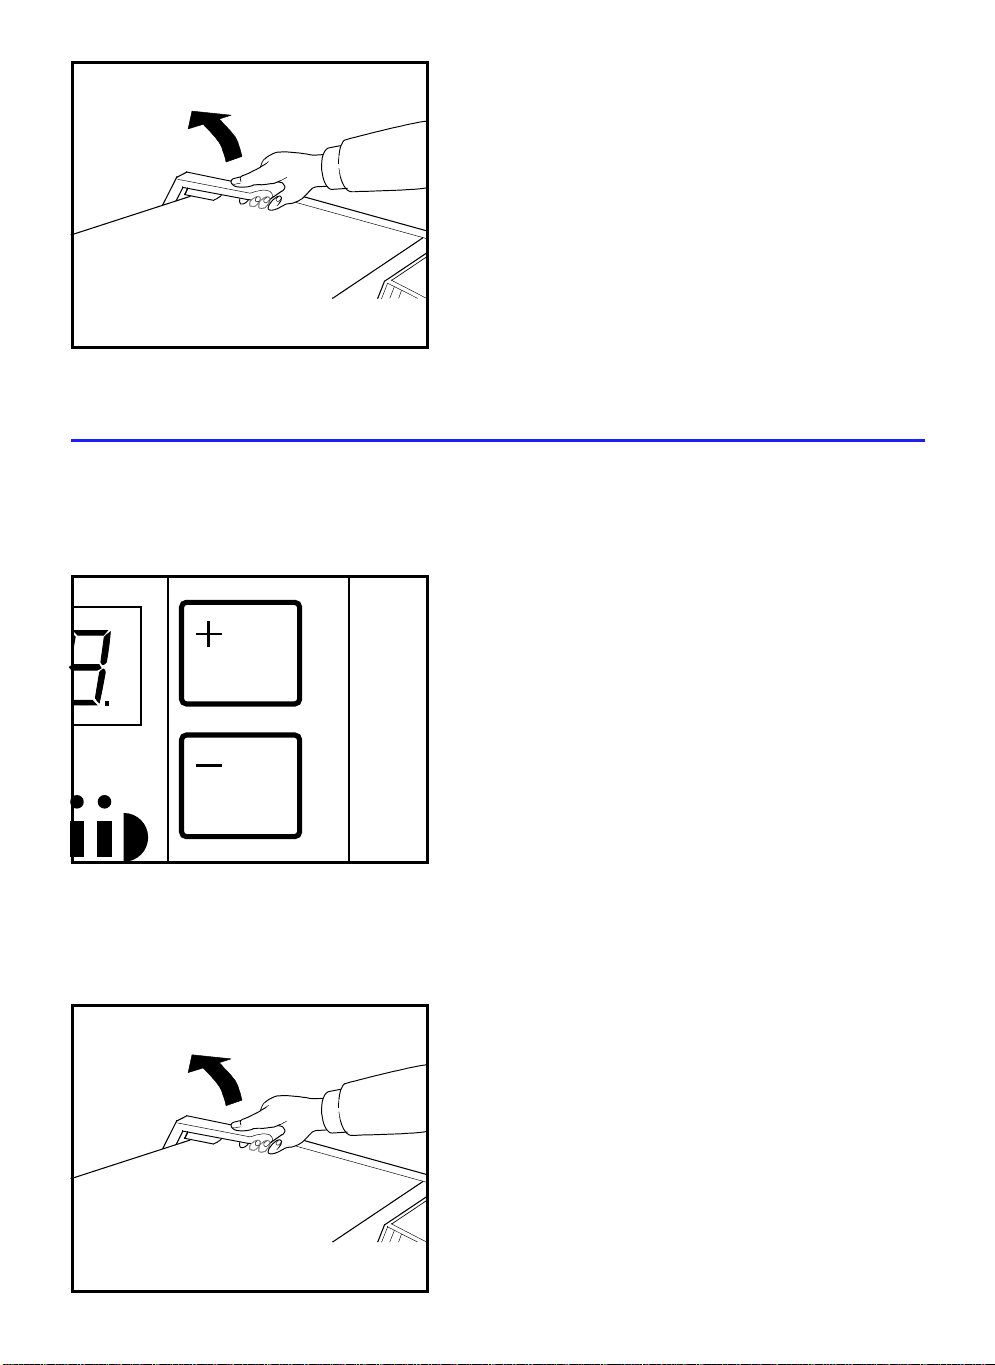
4. After copying, lower the lever, and
reset the original exit supports.
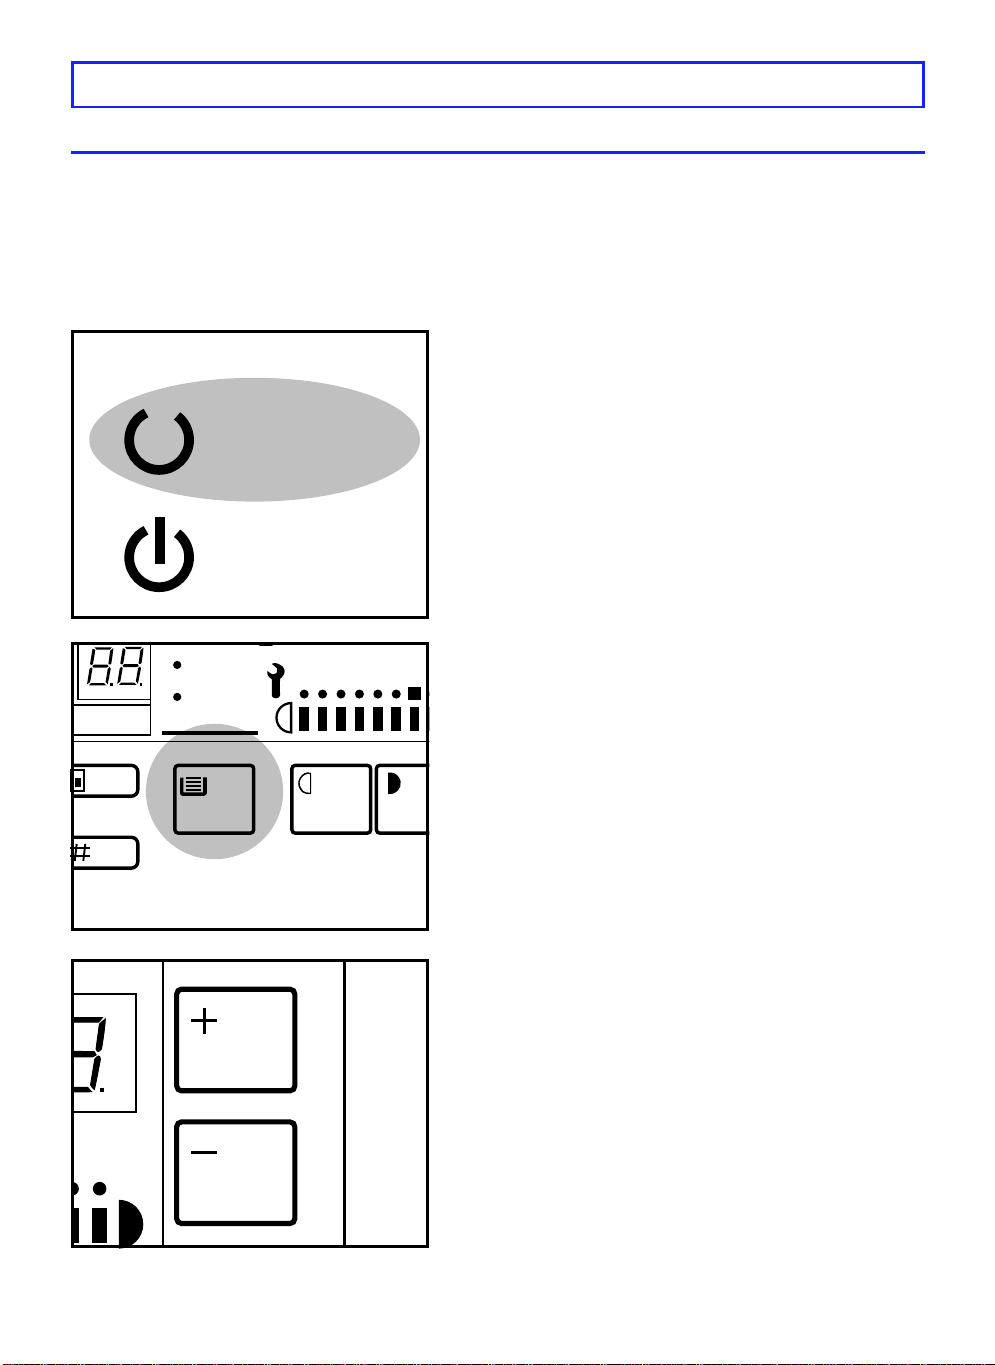
10. Repeat Copying
You can make up to 10 copies of the same original without having to reset it
on the feed table. (For 25" x 45" and 23" x 35" lengthwise paper [A0 and A1], 5
copies is the maximum.)
Enter the number of copies using the
+/– keys. Set other modes and begin
copying.
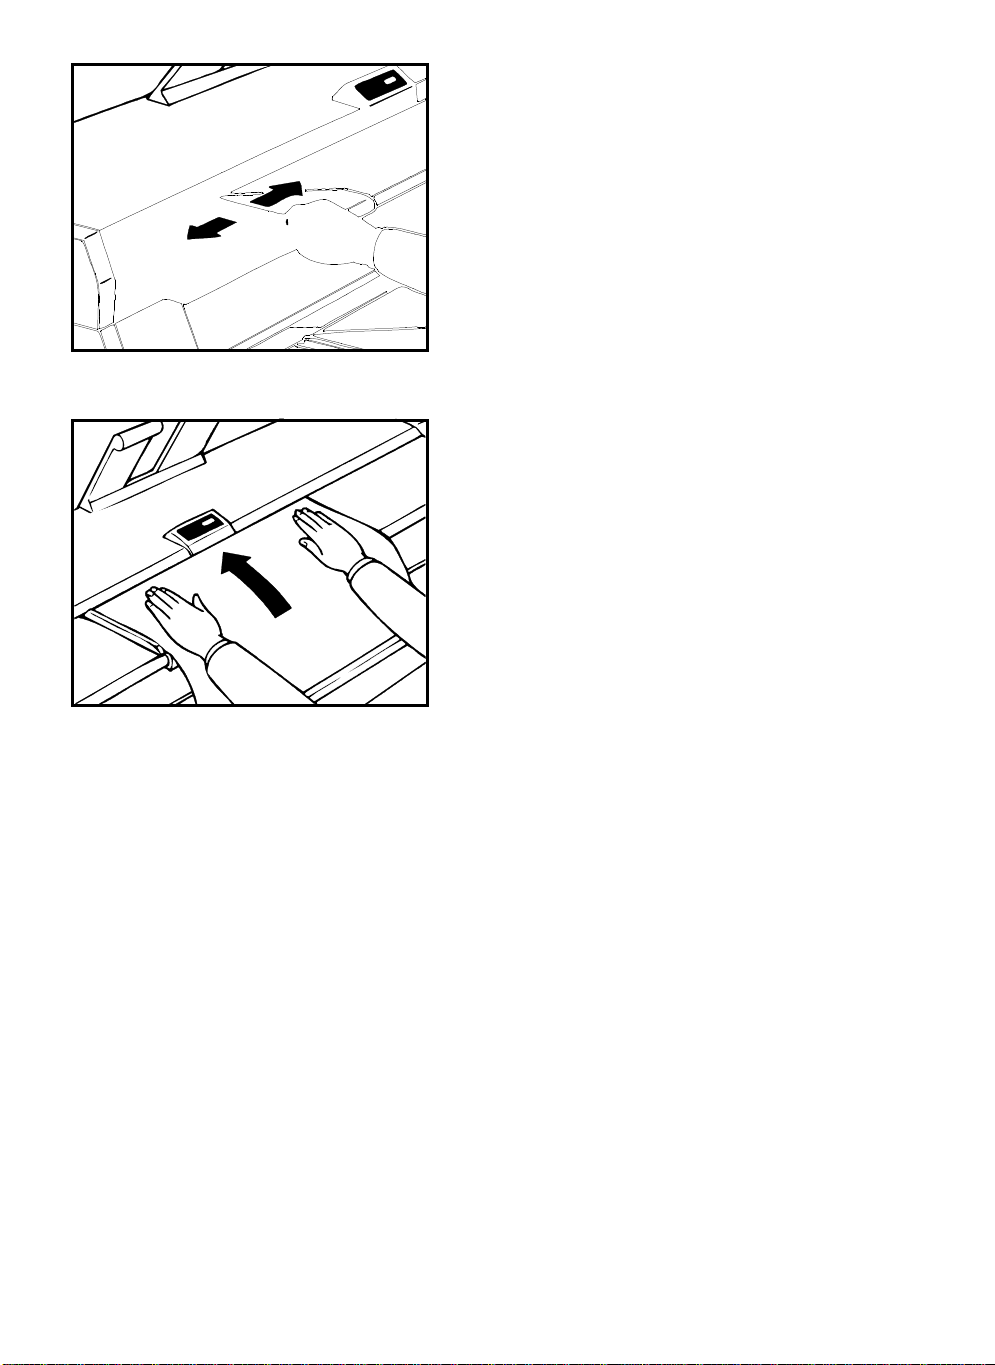
Do the following steps if copying 25" x 45" or 23" x 35" lengthwise originals (A0
or A1). Do steps 1 and 2 before copying and step 3 after copying.
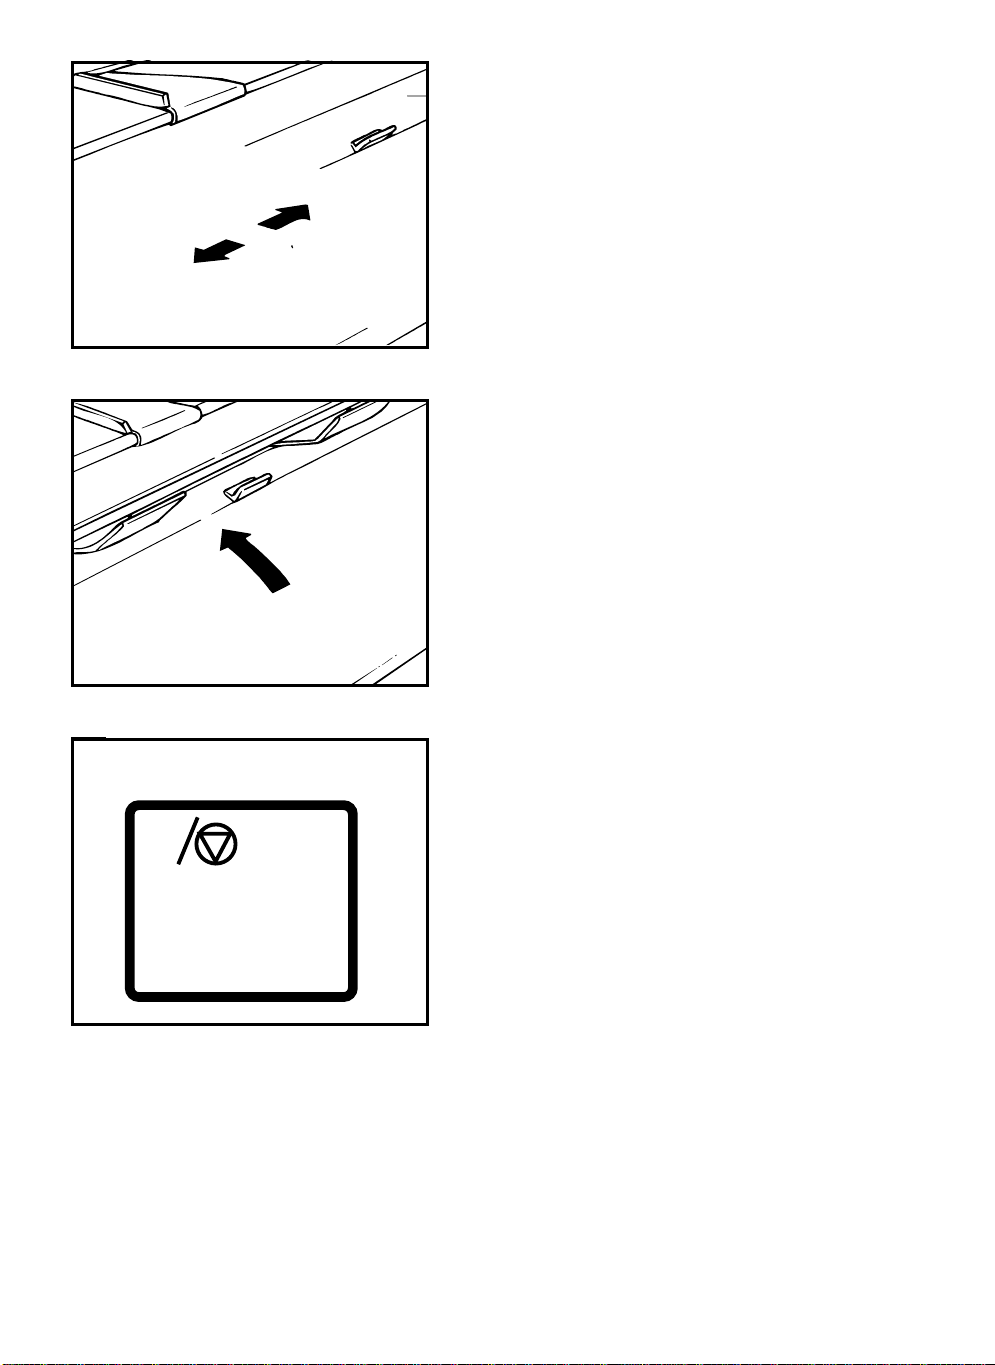
1. Lift the lever at the copier’s right to
set the rear table,
Insert the original from the front.
12
but do not use it
.
2. Reverse the original exit supports.
3. After copying, lower the lever, and
reset the original exit supports.
13
OPTIONAL FUNCTIONS
C
1. Copying with the Sheet Feeder
If you want to copy by using the sheet feeder, check that copy paper is set
inside the paper tray. If there is no paper on the paper tray (the Add Paper
indicator is lit) or if you want to change the paper size, load the desired size
paper. For details, see
Feeder".
"Setting Copy Paper on the Paper Tray of the Sheet
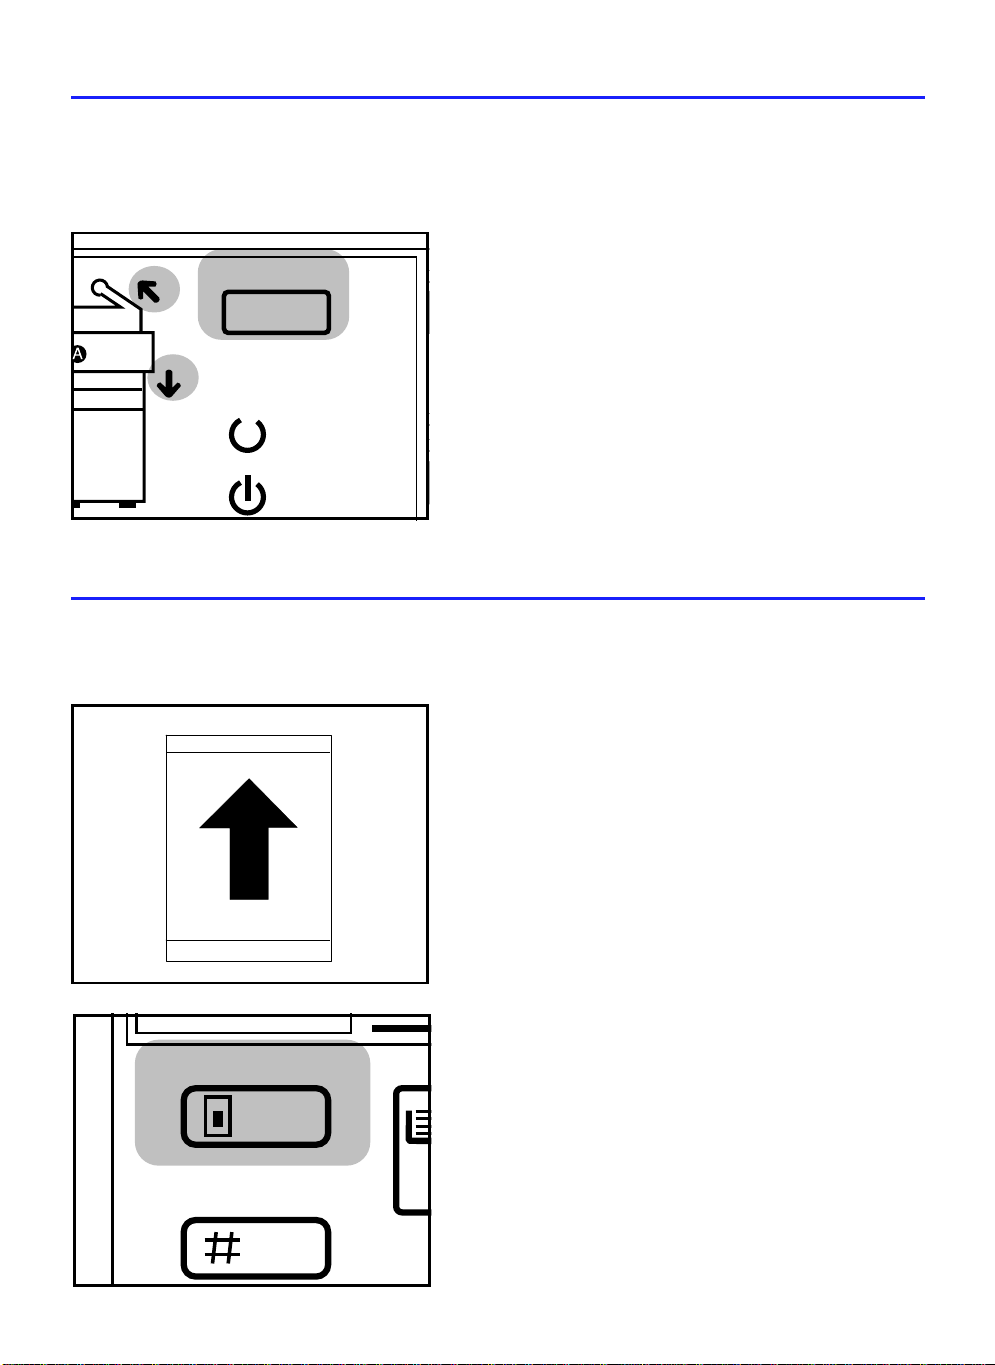
1. Check that the Ready indicator is lit.
Ready
Wait
iling Edge
ge Erase
t Edge
18"
12"
Lighter
Lighter DarkerPaper Select
2. Press the Paper Select key to light
the Auto Sheet Feed indicator.
3. Press the +/– keys and specify the
number of copies. See repeat copying, page 12.
14
4. Adjust the original guide on the
original table to match the size and
direction (lengthwise or sideways) of
the copy paper set on the paper
tray.
5. Insert the original face up along the
original guide when the Insert
Original indicator is lit. Copying will
start automatically.
15
2. Copying with the Roll Feeder
C
There are two roll feeder copy functions: synchro cutting and preset cutting.
You can also use the roll feeder to cut paper without copying.
2–1. Synchro cutting
The roll feeder feeds pape r to the copier and automatic ally cuts it to match the length
of the original. It can handle leng ths fro m 11 inch es to 12 fee t (280 mm to 36 00 mm).
iling Edge
ge Erase
t Edge
18"
12"
Lighter
Lighter DarkerPaper Select
1. Press the Paper Select key to light
the Synchro Cut indicator.
2. Set the original guide to match the
original’s width.
3. Set other modes, insert the original,
and copying will begin automatically.
16
 Loading...